Discover the Allure of Mini Chocolate Mousse Cups
Welcome, fellow culinary explorers! Today, we embark on a delightful journey into the world of mini chocolate mousse cups. These enchanting little desserts are not only indulgent but also incredibly versatile, perfect for any occasion—from lavish parties to cozy family gatherings. This recipe combines rich chocolate, airy mousse, and a buttery cookie base, creating layers of flavor and texture that will transport you straight to dessert heaven.
As we dive into crafting these delightful treats, you’ll find that they are quick to prepare, allowing you to impress your friends and family with minimal effort. Let’s explore why this recipe is a must-try, the ingredients you’ll need, and some expert tips that will elevate your dessert game!
Why You’ll Love This Recipe
- Quick & Easy: With just a handful of ingredients and a prep time of under 30 minutes (plus chill time), you can whip up these delightful mousse cups without any fuss.
- Perfect for Any Occasion: Whether it’s a birthday party, a casual family dinner, or a holiday gathering, these mini chocolate mousse cups are sure to impress your guests.
- Customizable: You can easily adjust the flavors and toppings to suit your preferences. From fruity garnishes to nutty crunches, the possibilities are endless!
- Decadent Flavor: Each bite delivers a rich chocolate experience balanced with a light, airy mousse. The combination is simply irresistible.
- Make-Ahead Friendly: Prepare these delightful cups in advance and store them in the fridge. They’ll be ready to serve when you are!
Ingredient Breakdown
To create these luscious mini chocolate mousse cups, you’ll need the following ingredients:
- 1 cup (about 10) chocolate sandwich cookies: You can use Oreos or any similar brand. For a gluten-free option, look for gluten-free chocolate cookies.
- 2 tablespoons unsalted butter, melted: This helps bind the cookie base together.
- 4 ounces semi-sweet chocolate, chopped: Opt for high-quality chocolate for the best flavor. You can use dark chocolate if you prefer a richer taste.
- 1 cup heavy cream, cold: Essential for achieving that light, airy mousse texture.
- 2 tablespoons powdered sugar: Adds a touch of sweetness to the mousse.
- 1/2 teaspoon vanilla extract (optional): For an added depth of flavor.
- Pinch of salt: Enhances the chocolate flavor.
- 1/2 cup heavy cream, cold (for topping): This makes your mousse cups even more luscious.
- 1 tablespoon powdered sugar (for topping): Sweetens the whipped cream topping.
- 1/4 teaspoon vanilla extract (for topping): Adds flavor to the whipped cream.
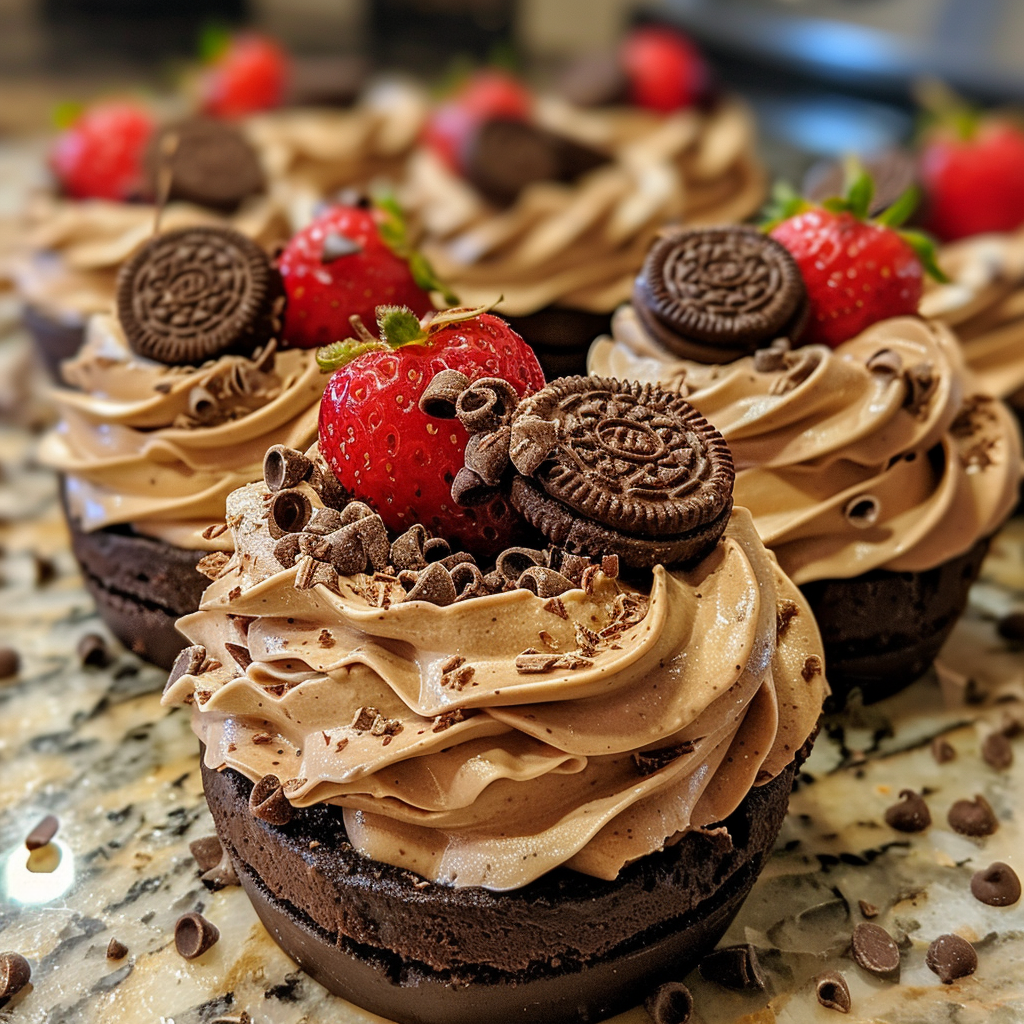
- Optional garnishes: Chocolate shavings, fresh berries, mini chocolate chips, or crushed nuts for a delightful finish.
Preparation Method
Let’s get started on crafting these exquisite mini chocolate mousse cups. Follow these simple steps:
- Crush the chocolate sandwich cookies in a food processor or place them in a zip-top bag and crush with a rolling pin until they resemble wet sand.
- Combine the crushed cookies with melted butter and mix until well combined.
- Spoon about 1 tablespoon of the cookie mixture into each mini cup and press down gently to form a base. Set aside.
- Melt the chopped chocolate in a microwave-safe bowl in 20-second bursts, stirring after each, until smooth. Allow to cool slightly for about 5 minutes.
- In a chilled mixing bowl, whip 1 cup of cold heavy cream with 2 tablespoons of powdered sugar and 1/2 teaspoon of vanilla extract until soft peaks form (about 2-3 minutes).
- Gently fold the cooled melted chocolate into the whipped cream using a spatula. Add a pinch of salt and fold until fully combined and smooth.
- Transfer the mousse to a piping bag or zip-top bag. Pipe or spoon mousse over the cookie bases in each cup, filling about 2/3 full. Smooth the tops if needed.
- In a small bowl, whip 1/2 cup of cold heavy cream with 1 tablespoon of powdered sugar and 1/4 teaspoon of vanilla extract until soft peaks form (about 1-2 minutes). Pipe or spoon this whipped cream on top of each mousse cup.
- Refrigerate the cups for at least 1 hour to set.
- Just before serving, garnish with chocolate shavings, fresh berries, mini chocolate chips, or crushed nuts as desired.
Expert Tips for Perfect Mini Chocolate Mousse Cups
- Chill Your Tools: For the best results, chill your mixing bowl and beaters before whipping the cream. This helps achieve faster and fluffier whipped cream.
- Use Quality Chocolate: The flavor of your mousse will depend heavily on the chocolate you choose. Invest in good quality chocolate for a richer taste.
- Fold Gently: When combining the whipped cream and melted chocolate, be gentle! Overmixing can deflate the airiness of the mousse.
- Let It Set: Don’t skip the chilling time! Allowing the mousse to set in the refrigerator enhances the flavors and gives it the right texture.
- Try Different Toppings: Experiment with various toppings to personalize your mousse cups. Fresh fruit, nuts, or even a drizzle of caramel can elevate your dessert.
- Make It Dairy-Free: Substitute heavy cream with coconut cream and use dairy-free chocolate for a vegan-friendly version.
- For a Unique Twist: Add a splash of your favorite liqueur to the mousse for an adult version! Baileys or Kahlua work beautifully.
- Be Mindful of Sweetness: Adjust the amount of powdered sugar based on your personal preference and the type of chocolate used.
- Prepare Ahead: These cups can be made a day in advance, making them a perfect make-ahead dessert for entertaining.
- Experiment with Cookie Bases: Try using different flavored cookies for your base, like ginger snaps or peanut butter cookies, for a unique twist!
Common Mistakes and Troubleshooting
Even the most seasoned chefs can encounter a few bumps along the way. Here are some common mistakes and how to avoid them:
- Overwhipping Cream: This can cause the cream to become grainy. Stop whipping as soon as you see soft peaks.
- Not Letting Chocolate Cool: Adding hot chocolate to whipped cream can cause it to deflate. Allow it to cool slightly before mixing.
- Filling Too High: Leave room at the top of the cups for the whipped cream topping to prevent overflowing.
- Skipping Refrigeration: If you don’t allow the mousse to chill, it won’t set properly. Always refrigerate for at least an hour.
Variations of Mini Chocolate Mousse Cups
Get creative with your mousse cups! Here are a few variations to inspire your culinary adventure:
- Fruit-Infused Mousse: Incorporate pureed strawberries or raspberries into the mousse for a fruity twist.
- Mint Chocolate: Add a few drops of peppermint extract to the mousse for a refreshing minty flavor.
- Espresso Chocolate Mousse: Mix in some espresso powder for a mocha flavor that coffee lovers will adore.
- Nutty Delight: Fold in crushed nuts such as hazelnuts or almonds for added texture and flavor.
Storage and Make-Ahead Instructions
These delightful mini chocolate mousse cups can be made ahead of time, making them the perfect dessert for entertaining. Here’s how to store them:
- Refrigerate: Store the mousse cups in an airtight container in the fridge for up to 3 days.
- Freezing: While the mousse itself can be frozen, the cookie base may become soggy upon thawing. It’s best to freeze the mousse separately and assemble before serving.
Frequently Asked Questions
- Can I make these mini chocolate mousse cups ahead of time? Yes! They can be prepared a day in advance and stored in the refrigerator until serving.
- Can I use a different type of chocolate? Absolutely! You can use dark chocolate, milk chocolate, or even white chocolate for a different flavor profile.
- How long will the mousse keep? The mousse cups can be stored in the fridge for up to 3 days.
- Can I make this recipe dairy-free? Yes! Substitute heavy cream with coconut cream and use dairy-free chocolate.
- What can I use instead of chocolate sandwich cookies? You can use any cookie you like, such as graham crackers or gluten-free cookies.
- How can I make these mini mousse cups more visually appealing? Garnish with fresh fruits, chocolate shavings, or edible flowers before serving.
- What if my mousse is too runny? Ensure your heavy cream is cold and whipped to soft peaks before folding in the chocolate.
- Can I use store-bought whipped cream? While you can, homemade whipped cream adds a fresher taste and texture to the mousse.
Nutritional Information and Dietary Adaptations
Here’s a brief overview of the nutritional aspects of this recipe. Each serving (based on 10 servings) contains:
- Calories: Approximately 180
- Fat: 12g
- Carbohydrates: 15g
- Protein: 2g
For those looking to adapt the recipe, here are a few suggestions:
- Gluten-Free: Use gluten-free chocolate cookies.
- Dairy-Free: Substitute heavy cream with coconut cream and use dairy-free chocolate.
- Lower Sugar: Adjust the amount of powdered sugar according to your taste, or use a sugar substitute.
Equipment Recommendations
To make your experience as seamless as possible, here’s a list of essential equipment you’ll need:
- Mixing Bowls: A set of various sizes will help with different mixing tasks.
- Whisk or Electric Mixer: For whipping the cream to the perfect consistency.
- Food Processor: For crushing the cookies efficiently.
- Piping Bag: For an elegant mousse presentation.
- Mini Cups: These can be purchased or you can use shot glasses or small dessert cups.
Serving Suggestions
When it comes to serving these divine mini chocolate mousse cups, presentation is key! Here are a few ideas to make them shine:
- Layered Presentation: Serve them in clear cups to showcase the beautiful layers of chocolate and cream.
- Garnish Creatively: Use a combination of toppings like fresh berries, chocolate curls, and mint leaves for a pop of color.
- Pair with Coffee: These mousse cups make a perfect dessert alongside a cup of coffee or espresso.
In conclusion, creating these mini chocolate mousse cups is not just about making dessert; it’s about crafting an experience that brings joy and connection. Each bite tells a story, inviting friends and family to gather around the table and indulge in something truly special. So grab your apron, gather your ingredients, and let’s make some memories together!
Mini Chocolate Mousse Cups
Ingredients
Crust
- 1 cup chocolate sandwich cookies, crushed (Oreos or similar)
- 2 tablespoons unsalted butter, melted
Chocolate filling
- 4 ounces semi-sweet chocolate, chopped
- 1 cup heavy cream, cold
- 2 tablespoons powdered sugar
- 1/2 teaspoon vanilla extract (optional)
- Pinch salt
Topping
- 1/2 cup heavy cream, cold (for topping)
- 1 tablespoon powdered sugar (for topping)
- 1/4 teaspoon vanilla extract (for topping)
Garnishes (optional)
- Chocolate shavings or curls Chocolate shavings or curls (optional garnish)
- Fresh berries Fresh berries (optional garnish)
- Mini chocolate chips Mini chocolate chips (optional garnish)
- Crushed nuts Crushed nuts (optional garnish)
Instructions
- Mix crushed cookies with melted butter to form a crust. Press into mini cups and set aside.
- Melt chopped chocolate until smooth; let cool slightly.
- Whip 1 cup heavy cream with powdered sugar and vanilla until soft peaks form. Fold in cooled chocolate and salt.
- Pipe or spoon mousse over cookie bases. Whip topping cream and add on top. Refrigerate for 1 hour.
- Garnish with optional toppings before serving.