Indulge in Decadence: Your Guide to No-Bake Raspberry Chocolate Mousse Cups
If you’re seeking a dessert that captures both the essence of romance and the joy of culinary exploration, then behold the No-Bake Raspberry Chocolate Mousse Cups! This delightful treat weaves together the rich flavors of chocolate with the vibrant freshness of raspberries, creating an enchanting experience that tantalizes your taste buds. Perfect for any occasion—from a cozy dinner to a grand celebration—these mousse cups are not just a dessert; they are a story waiting to be shared.
Imagine digging into a velvety mousse layered with juicy raspberries, each spoonful offering a burst of flavor that dances on your palate. With the ease of preparation and the minimal time commitment required, this recipe is perfect for anyone looking to impress without the stress. Join me on this sweet adventure as we explore the intricacies of making these delectable cups that are sure to sweep anyone off their feet!
Why You’ll Love This Recipe
- Effortless Elegance: With no baking required, you can quickly whip up these mousse cups, making them ideal for spontaneous gatherings or planned events.
- Flavor Harmony: The combination of rich chocolate mousse and tart raspberries creates a delightful balance that appeals to both chocolate lovers and fruit enthusiasts.
- Customizable Layers: Each cup can be customized with additional layers of fruit, cream, or even a hint of liqueur for a personal touch.
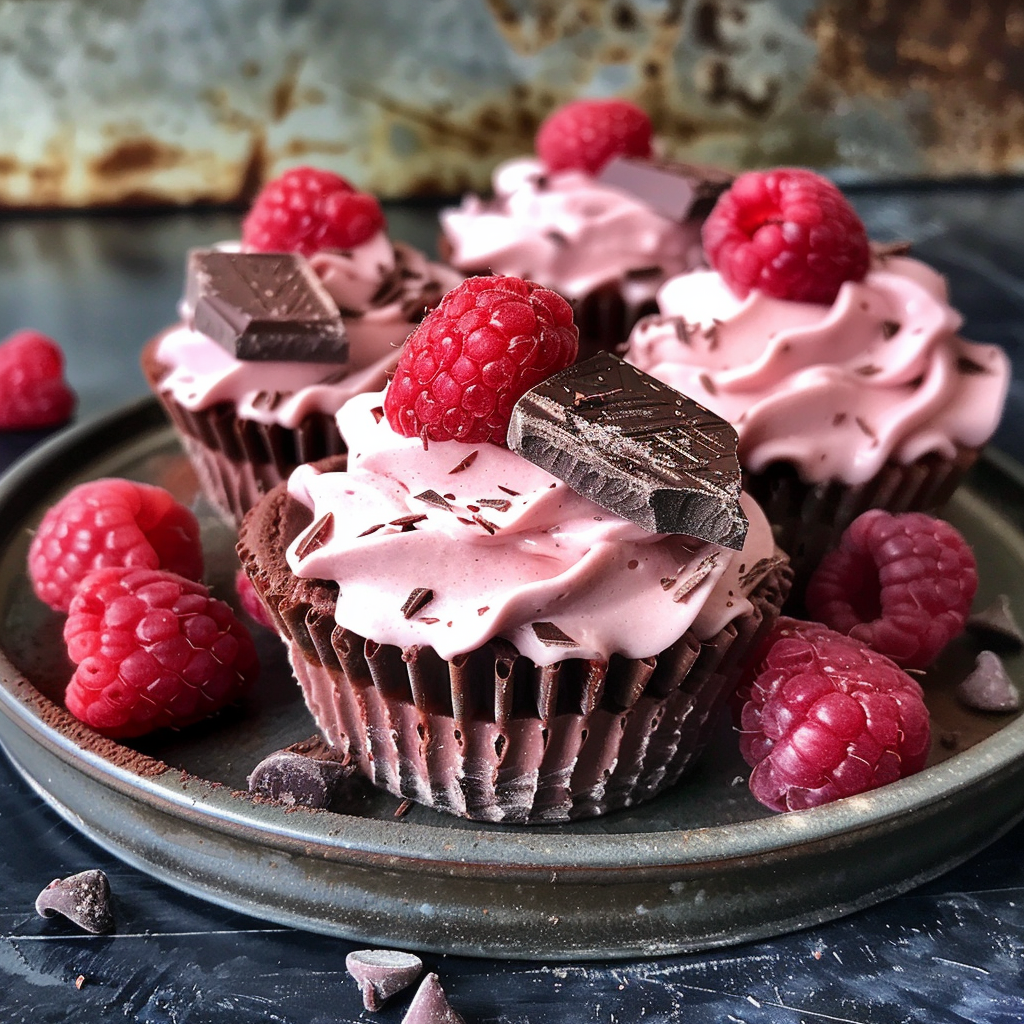
- Visual Appeal: These mousse cups serve as a stunning centerpiece for any dessert table, showcasing layers of color and texture that draw the eye.
- Make-Ahead Convenience: Prepare them in advance and let them chill in the fridge, so you can focus on enjoying your time with guests!
Ingredients Breakdown
Creating the perfect No-Bake Raspberry Chocolate Mousse Cups starts with quality ingredients. Here’s a closer look at what you’ll need:
- 1 ½ cups heavy cream, chilled: The base for your mousse, providing richness and a luxurious texture.
- 1 cup semi-sweet chocolate chips (or dark chocolate): For that deep chocolate flavor; opt for high-quality chocolate for the best results.
- 2 tbsp unsalted butter: Adds a silky smoothness to the chocolate.
- ¼ cup powdered sugar: Sweetens the mousse without adding graininess.
- 1 tsp vanilla extract: Enhances the overall flavor profile.
- ¼ tsp salt: Balances the sweetness and elevates the chocolate flavor.
- 1 cup fresh raspberries: The star of the show—choose plump, ripe berries for the best taste.
- 2 tbsp raspberry jam (optional for extra sweetness): A delightful addition that can elevate the flavor.
- Shaved chocolate or cocoa powder (for garnish): Adds a decorative touch and extra chocolate flavor.
- Extra fresh raspberries (for garnish): Because more berries are always a good idea!
- Whipped cream (for garnish): The finishing touch that lightens up the dish.
Step-by-Step Instructions
Now that you have your ingredients ready, let’s dive into the preparation process!
- 1. Melt the Chocolate: In a microwave-safe bowl, combine the chocolate chips and butter. Microwave in 30-second intervals, stirring until fully melted and smooth.
- 2. Add Flavor: Stir in the vanilla extract and salt into the melted chocolate mixture, letting it cool slightly.
- 3. Whip the Cream: In a separate bowl, whip the chilled heavy cream and powdered sugar until stiff peaks form. This will provide the mousse with its light texture.
- 4. Combine the Mixtures: Gently fold the whipped cream into the melted chocolate mixture until smooth and fluffy, taking care not to deflate the cream.
- 5. Layer the Raspberries: Spoon a layer of fresh raspberries into serving cups for a tart contrast to the sweet mousse.
- 6. Sweeten it Up: If desired, add a spoonful of raspberry jam over the berries for an extra hit of sweetness.
- 7. Assemble the Cups: Pipe or spoon the chocolate mousse over the raspberries, repeating layers if desired.
- 8. Chill to Perfection: Refrigerate for at least 1 hour to allow the mousse to set.
- 9. Garnish and Serve: Before serving, top with whipped cream, shaved chocolate, and extra raspberries for a stunning presentation.
Pro Tips for Perfect Mousse
- Quality Ingredients: Always use high-quality chocolate for the best flavor. The type of chocolate you choose will significantly impact the final taste.
- Chill Your Tools: For the best whipped cream results, chill your mixing bowl and beaters in the refrigerator beforehand.
- Be Gentle: When folding the whipped cream into the chocolate, be gentle to maintain the light and airy texture.
- Let It Set: Allow the mousse to chill adequately before serving; this helps it to firm up and develop its flavors.
- Experiment with Flavors: Feel free to add a splash of your favorite liqueur into the mousse or replace the raspberries with other berries like strawberries or blueberries.
- Storage Tips: These mousse cups can be made a day in advance and stored in the fridge, making them perfect for entertaining.
- Garnish Creatively: Use mint leaves, edible flowers, or a dusting of cocoa powder to elevate your presentation.
- Pair with Wine: Consider serving with a dessert wine or a berry-infused cocktail for a more adventurous pairing.
Common Mistakes and Troubleshooting
Even the best chefs can encounter bumps in the road. Here are some common pitfalls to avoid:
- Too Runny Mousse: If the mousse is too runny, it may not have set properly. Ensure you chill it long enough before serving.
- Deflated Cream: If your whipped cream deflates, it could be due to overmixing. Always fold gently to maintain volume.
- Chocolate Seizing: Be cautious not to overheat the chocolate to prevent it from seizing. Use lower power settings and stir frequently.
- Too Sweet: Adjust your powdered sugar according to your taste preferences; you can always add more but can’t take it out.
Variations to Explore
Feeling adventurous? Here are some delightful variations you can try:
- Mint Chocolate Mousse: Incorporate peppermint extract into the chocolate mixture for a refreshing twist.
- Berry Medley Mousse: Swap raspberries for a mix of strawberries, blueberries, and blackberries for a colorful dessert.
- Nutty Chocolate Mousse: Add finely chopped nuts into the mousse for an added crunch and flavor.
- Coconut Cream Mousse: Substitute half of the heavy cream with coconut cream for a tropical flair.
Storage and Make-Ahead Instructions
These mousse cups are perfect for meal prep! Store them in the refrigerator for up to 3 days. For best results, cover them with plastic wrap or a lid to maintain freshness. You can also prepare the mousse mixture a day in advance and layer it just before serving.
FAQs about No-Bake Raspberry Chocolate Mousse Cups
- Can I use frozen raspberries? Yes, frozen raspberries can be used; just ensure to thaw them and drain excess moisture.
- What kind of chocolate should I use? Semi-sweet or dark chocolate works best; choose one that you enjoy eating.
- Can I make it ahead of time? Absolutely! These cups are perfect for making ahead and will last for up to 3 days in the fridge.
- Is coconut milk necessary? Coconut milk is not necessary for this recipe but can be used for a tropical twist.
- How do I make it fluffier? Ensure your heavy cream is very cold when whipping to achieve the best volume and fluffiness.
- Can I use a different sweetener? Yes, you can use alternative sweeteners like honey or agave syrup, just adjust to your taste.
- What if my mousse doesn’t set? If it doesn’t set, it may need more chilling time or could require a stabilizer like gelatin.
- Can I use other fruits? Definitely! Feel free to substitute with your favorite fruits for an exciting flavor profile.
Nutritional Tips and Dietary Adaptations
This recipe can easily be adapted to fit various dietary needs:
- Gluten-Free: All ingredients are gluten-free; just ensure your chocolate is certified gluten-free.
- Dairy-Free Option: Use coconut cream and dairy-free chocolate for a vegan version.
- Lower Sugar: Reduce or substitute the powdered sugar with a natural sweetener to lower the overall sugar content.
Essential Equipment
To make this recipe, you’ll need:
- Mixing Bowls: A large bowl for whipping cream and a smaller one for melting chocolate.
- Electric Mixer: To whip the cream quickly and efficiently.
- Spatula: For gently folding ingredients together.
- Serving Cups: Choose beautiful cups or glasses to showcase your delicious creation.
Serving Suggestions
Pair your No-Bake Raspberry Chocolate Mousse Cups with a refreshing beverage like sparkling water or a glass of dessert wine. They also serve beautifully alongside coffee or tea, making them an ideal end to any meal. Consider adding a side of shortbread cookies or a fruit tart for a delightful dessert platter that guests will adore!
As you embark on this culinary journey, remember that each mousse cup is not just a dessert—it’s an invitation to connect, share stories, and celebrate life’s sweet moments. So go ahead, make these No-Bake Raspberry Chocolate Mousse Cups, and let the flavors transport you to a world of romance and adventure!
Marry Me No-Bake Raspberry Chocolate Mousse Cups
Ingredients
Dairy
- 1 ½ cups heavy cream, chilled
- 1 cup semi-sweet chocolate chips (or dark chocolate)
- 2 tbsp unsalted butter
- ¼ cup powdered sugar
- 1 tsp vanilla extract
- ¼ tsp salt
Fruits
- 1 cup fresh raspberries
- 2 tbsp raspberry jam (optional for extra sweetness)
Garnishes
- to taste Shaved chocolate or cocoa powder (for garnish)
- to taste Extra fresh raspberries (for garnish)
- to taste Whipped cream (for garnish)
Instructions
- Microwave chocolate and butter until smooth, then cool slightly.
- Whip heavy cream and powdered sugar until stiff peaks form.
- Fold whipped cream into melted chocolate, then layer with raspberries and jam in cups.
- Refrigerate for 1 hour, then garnish with whipped cream, chocolate shavings, and raspberries before serving.