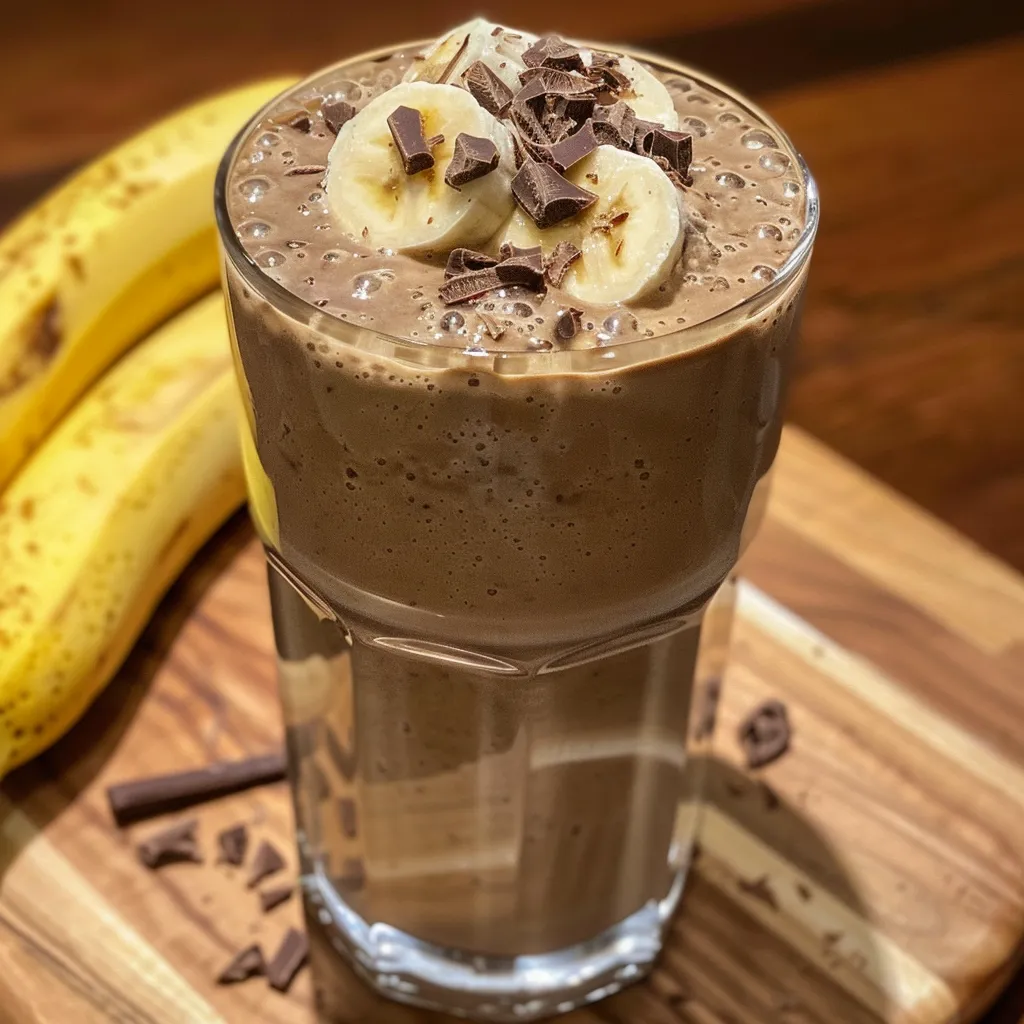
Embark on a Flavorful Journey with a Nutella Banana Milkshake
Welcome, fellow culinary explorers! Today, we’re diving into a delightful adventure that captures the essence of sweetness and joy—a Nutella Banana Milkshake. This creamy concoction brings together perfectly ripe bananas and rich Nutella, blending into a dreamy drink that feels like a warm hug on a sunny day. Whether you’re craving a refreshing treat or looking to impress your friends, this milkshake is an easy and delicious way to savor life’s simple pleasures.
Join me as we explore the magic behind this recipe, filled with tips, tricks, and a few surprises along the way. Let’s unlock the secrets of flavor and texture, and create a milkshake that’s not just a drink, but a moment of pure bliss.
Why You’ll Love This Recipe
- Quick and Easy: With minimal ingredients and steps, you can whip this up in under 10 minutes, making it perfect for any occasion.
- Rich and Creamy: The combination of Nutella and ripe bananas creates a luscious texture that you’ll crave again and again.
- Endless Customization: Whether you want to add a scoop of ice cream or a splash of espresso, the possibilities are as vast as your imagination.
- Perfect for Sharing: This recipe serves multiple people—ideal for gatherings, parties, or simply indulging with loved ones.
- Kid-Friendly: With a sweet flavor and fun presentation, kids will love helping to make and enjoy this milkshake!
Ingredients: The Heart of the Milkshake
Here’s what you’ll need to create this delightful milkshake:
- 2 ripe bananas: Nature’s candy, these add natural sweetness and creaminess. Choose bananas that are well-ripened for the best flavor.
- 3 tablespoons of Nutella (about 90g): This hazelnut spread is the star of the show, bringing rich flavor and a touch of indulgence.
- 300ml of whole or semi-skimmed milk: Adjust the creaminess to your liking; whole milk offers a richer texture, while semi-skimmed is lighter.
- 2 scoops of vanilla ice cream (optional): For a decadent twist, add ice cream for extra creaminess and sweetness.
- Ice cubes: Adjust according to your desired thickness—more ice for a frosty treat, less for a smoother shake.
- Whipped cream and chocolate shavings (optional): Top it off for a beautiful presentation and added sweetness.
Step-by-Step Instructions

Ready to create your masterpiece? Follow these simple steps:
- Peel the bananas and slice them into rounds.
- In a blender, combine the bananas, Nutella, and milk.
- Add ice cubes and the vanilla ice cream, if using.
- Blend until you achieve a smooth and creamy consistency.
- Taste and adjust the sweetness—add more Nutella or milk as desired.
- Pour into a large glass and decorate with whipped cream and chocolate shavings if desired.
- Enjoy immediately with a straw or spoon!
Pro Tips for Milkshake Perfection
- Frozen Bananas: For an extra creamy texture, freeze the bananas ahead of time.
- Nutella Swirl: Drizzle some Nutella inside the glass before pouring in the milkshake for a stunning visual effect.
- Flavor Additions: Feel free to add a splash of vanilla extract or a sprinkle of cinnamon for an additional flavor dimension.
- Thick vs. Thin: Adjust the amount of milk and ice to get your desired consistency; less milk for a thicker shake, more for a thinner one.
- Experiment with Toppings: Try adding crushed nuts, mini marshmallows, or caramel sauce for a unique twist.
Common Mistakes and Troubleshooting
Even the best chefs make mistakes! Here are some tips to avoid common pitfalls:
- Bananas Too Green: Ensure your bananas are ripe—green bananas will lack the necessary sweetness and flavor.
- Over-blending: Blend just until smooth. Over-blending can lead to a less desirable texture.
- Not Adjusting Sweetness: Always taste your shake before serving to ensure it meets your sweetness preference.
- Skipping Ice: If you want a cold, frosty shake, don’t forget the ice cubes! They help achieve that perfect chill.
Variations to Explore
Feel free to mix things up! Here are some fun variations:
- Peanut Butter Banana Milkshake: Add 2 tablespoons of peanut butter for a nutty twist.
- Chocolate Banana Milkshake: Use chocolate ice cream instead of vanilla for a richer flavor.
- Mocha Nutella Milkshake: Blend in a shot of espresso for a caffeinated kick.
- Berry Banana Milkshake: Toss in a handful of berries for a fruity flavor explosion.
Storage and Make-Ahead Instructions
This milkshake is best enjoyed fresh, but if you have leftovers, here’s how to store them:
- Refrigeration: Store in an airtight container in the fridge for up to 24 hours, but be aware it may separate.
- Freezing: Pour into ice cube trays to freeze for a quick treat later. Blend the frozen cubes with fresh milk for a quick revival!
- Make-Ahead: Prepare the ingredients (bananas, Nutella, and milk) in advance, then blend when you’re ready to enjoy.
Frequently Asked Questions (FAQs)
Got questions? Here are some common queries about our Nutella Banana Milkshake:
- Can I use almond milk instead of regular milk? Yes! Almond milk or any milk alternative works wonderfully.
- How can I make it vegan? Use plant-based ice cream and milk, and skip any dairy toppings.
- Is it possible to make it sugar-free? Look for sugar-free Nutella or a homemade hazelnut spread.
- How do I thicken my milkshake? Add more ice or use frozen bananas for a thicker consistency.
- Can I add protein powder? Absolutely! Add a scoop for a protein boost.
- What’s the best way to serve this milkshake? Serve it in chilled glasses with festive straws for a fun presentation.
- Can I make this ahead of time? It’s best served fresh, but you can prep the ingredients in advance.
- What are some good toppings? Whipped cream, chocolate shavings, nuts, or even sprinkles work beautifully!
Nutritional Insights and Dietary Adaptations
This milkshake can be a delightful treat, but it’s important to enjoy it mindfully. Here are some nutritional considerations:
- Caloric Content: A serving contains around 300-400 calories, depending on the ingredients used.
- Protein Boost: For added protein, consider using Greek yogurt instead of ice cream.
- Fiber Source: Bananas are a great source of dietary fiber, promoting digestive health.
- Low Sugar Options: Use sugar-free alternatives to keep the sweetness without the added sugar.
Essential Equipment and Tools
To make this delicious milkshake, you’ll need:
- High-Powered Blender: A good blender is essential for a smooth and creamy milkshake.
- Measuring Cups and Spoons: Accurate measurements help achieve the perfect balance of flavors.
- Large Glasses: Serve in fun, large glasses to enhance the experience.
- Straws or Spoons: Don’t forget the straws for sipping and spoons for savoring!
Serving Suggestions
This Nutella Banana Milkshake pairs wonderfully with various snacks and treats:
- Chocolate Chip Cookies: A classic pairing that complements the flavors beautifully.
- Fruit Platter: Fresh fruits enhance the wholesome aspect of your milkshake.
- Mini Pancakes: Serve alongside mini pancakes for a delightful breakfast treat.
- Brownies: Indulge in something rich and chocolaty to enhance the decadence of the milkshake.
Conclusion: Sip, Savor, and Share
As we wrap up our culinary journey through the world of the Nutella Banana Milkshake, I hope you’re feeling inspired to blend up your own version of this sweet indulgence. Remember, cooking is about exploration and connection—each sip tells a story, and every ingredient connects us to cultures around the globe. So gather your ingredients, invite your friends, and dive into a moment of pure joy. Here’s to sweet memories and delicious adventures ahead!
Milk Shake Nutella Banane
Ingredients
Fruits and Dairy
- 2 pieces bananas bien mûres (ripe bananas)
- 3 tablespoons Nutella (about 90g)
- 300 ml lait entier ou demi écrémé
- 2 scoops glace vanille (optional for creaminess)
- as needed to taste glaçons (according to desired consistency)
- optional chantilly et copeaux de chocolat (for decoration)
Instructions
- Peler les bananes et les couper en rondelles.
- Mettre dans un blender les bananes, le Nutella et le lait, puis mixer.
- Ajouter les glaçons et la glace si désiré, puis mixer jusqu'à lisse.
- Goûter et ajuster avec plus de Nutella ou lait si nécessaire.
- Verser dans un verre, décorer avec chantilly et copeaux de chocolat si souhaité, puis servir immédiatement.