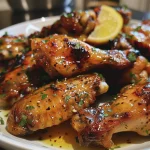
Embark on a Culinary Journey with Baked Teriyaki Chicken
Welcome, fellow food adventurer! Today, we’re setting off on a delightful culinary exploration of Japan with an incredible recipe for Baked Teriyaki Chicken. This dish is more than just a meal; it’s an experience that brings the rich flavors of teriyaki sauce and tender chicken breasts right to your table. As we dive into this recipe, prepare to savor every bite of this comforting dish that’s perfect for family dinners or gatherings with friends.
In this article, you’ll discover not only how to create the best-ever baked teriyaki chicken but also tips, variations, and serving suggestions that will elevate your cooking game. So grab your apron and let’s get started!
Why You’ll Love This Recipe
There are countless reasons to fall in love with baked teriyaki chicken, but here are just a few:
- Flavor Explosion: The rich combination of homemade teriyaki sauce and perfectly baked chicken creates a symphony of flavors that will tantalize your taste buds.
- Ease of Preparation: With simple ingredients and straightforward steps, this recipe is perfect for both novice cooks and seasoned chefs looking for a quick dinner option.
- Healthier Alternative: Baking the chicken instead of frying keeps the meal healthier while locking in moisture and flavor.
- Versatile Dish: This recipe can easily be adapted to suit various dietary preferences and can be served with a variety of sides, making it great for any occasion.
- Meal Prep Friendly: Baked teriyaki chicken stores well, allowing you to prepare it ahead of time for busy weeknights.
Ingredients Breakdown
Let’s gather our ingredients for the best-ever baked teriyaki chicken:
- 4 boneless skinless chicken breasts (pounded to an even thickness of less than 1 inch)
- 1 ⅓ cup low sodium soy sauce (divided)
- ½ cup water
- ½ cup rice vinegar
- 1 cup sugar
- 1 teaspoon ground ginger
- ¼ teaspoon crushed red pepper flakes
- 2 teaspoons minced garlic
- 3 tablespoons corn starch
- ½ teaspoon sesame seeds (for garnish)
- Chopped green onions and steamed rice (for serving)
If you’re looking to mix things up, consider these substitutions:
- Chicken Thighs: For a richer flavor, substitute chicken breasts with thighs or tenders.
- Honey: Replace sugar with honey for a natural sweetener.
- Gluten-Free Soy Sauce: Use a gluten-free soy sauce option if you need a gluten-free dish.
- Vegetables: Add bell peppers or broccoli for added nutrition and flavor.
Pro Tips for Perfect Baked Teriyaki Chicken
To ensure your chicken turns out perfectly every time, here are some expert insights:
- Marinate Longer: Let the chicken marinate for at least 30 minutes, or up to 24 hours for maximum flavor.
- Use a Baking Dish: A shallow baking dish allows the chicken to cook evenly and soak up all that delicious teriyaki sauce.
- Monitor the Temperature: Use a meat thermometer to ensure your chicken reaches an internal temperature of 165°F.
- Let it Rest: Allow the chicken to rest for a few minutes before slicing to retain its juiciness.
- Save the Sauce: Drizzle any leftover teriyaki sauce over your veggies or rice for added flavor.
- Garnish Generously: Don’t skimp on the sesame seeds and green onions—they add a lovely crunch and freshness.
- Use Fresh Ingredients: Fresh garlic and ginger will enhance the overall flavor of your teriyaki chicken.
- Bake with Care: Cover the chicken with foil for the first half of baking to keep it moist, then uncover for the last 15 minutes to achieve a nice glaze.
Common Mistakes and Troubleshooting
Even the best chefs can run into a few hiccups! Here are some common mistakes and how to avoid them:
- Overcooking: Keep an eye on your chicken to avoid dryness. Use a thermometer!
- Underseasoning: Don’t hesitate to taste your marinade and adjust the seasoning before marinating.
- Too Much Sugar: If your sauce is too sweet, balance it with a splash more soy sauce or vinegar.
- Insufficient Marinating: Don’t rush this step; marinating is key to flavor.
Variations to Try
Once you’ve mastered the basic recipe, feel free to experiment with these fun variations:
- Pineapple Teriyaki Chicken: Add chunks of pineapple to the marinade for a sweet twist.
- Spicy Teriyaki Chicken: Increase the heat with more crushed red pepper or a splash of sriracha.
- Lemon-Ginger Teriyaki: Incorporate fresh lemon juice and zest for a citrusy kick.
- Vegetarian Option: Substitute chicken with tofu or portobello mushrooms for a plant-based delight.
Storage and Make-Ahead Instructions
Planning ahead? Here’s how to store and prepare your baked teriyaki chicken:
- Refrigerate: Store leftovers in an airtight container in the fridge for up to 4 days.
- Freeze: For longer storage, freeze cooked chicken for up to 3 months. Thaw in the fridge before reheating.
- Make-Ahead: Prepare the chicken and marinade a day in advance, then bake right before serving.
Frequently Asked Questions
Here are some common questions about baked teriyaki chicken:
- Can I use frozen chicken? Yes, but be sure to thaw it completely before marinating.
- What can I serve with teriyaki chicken? It pairs wonderfully with steamed rice, stir-fried vegetables, or a fresh salad.
- How do I make it gluten-free? Use gluten-free soy sauce and make sure all other ingredients are gluten-free.
- Can I grill the chicken instead? Absolutely! Grill for a smoky flavor while basting with teriyaki sauce.
- What if I don’t have rice vinegar? You can substitute with apple cider vinegar or white vinegar.
- How do I know when the chicken is done? The internal temperature should reach 165°F for safe consumption.
- Can I double the recipe? Yes, just ensure there’s enough space in your baking dish for even cooking.
- Can I use store-bought teriyaki sauce? Yes, but homemade sauce tends to have a fresher taste and fewer preservatives.
Nutritional Tips and Dietary Adaptations
This baked teriyaki chicken can be adjusted for various dietary needs:
- Low-Calorie Version: Use skinless chicken breasts and reduce sugar in the marinade.
- Keto-Friendly: Substitute sugar with a low-carb sweetener like erythritol.
- Paleo Option: Use coconut aminos instead of soy sauce and honey instead of sugar.
Equipment Recommendations
Before you start cooking, make sure you have the right tools:
- Mixing Bowl: For marinating the chicken and mixing the teriyaki sauce.
- Meat Thermometer: To ensure your chicken is perfectly cooked.
- Baking Dish: A glass or ceramic dish works best for even cooking.
- Whisk: For blending the sauce ingredients smoothly.
Serving Suggestions
Complete your meal with these delicious serving suggestions:
- Steamed Jasmine Rice: The perfect base to soak up that teriyaki sauce.
- Stir-Fried Vegetables: Brighten your plate with colorful veggies like bell peppers and broccoli.
- Asian Slaw: A refreshing side that complements the rich flavors of the chicken.
- Edamame: A protein-packed snack to serve as an appetizer.
As we conclude our culinary adventure through the heart of Japan, I hope you feel inspired to create this delightful baked teriyaki chicken in your own kitchen. Remember, every dish tells a story, and with each bite, you’re not just enjoying a meal but also experiencing a connection to culture and flavor. Happy cooking!
Best Ever Baked Teriyaki Chicken
Ingredients
Protein
- 4 pieces boneless skinless chicken breasts (pounded to even thickness (less than 1 inch))
- 1.33 cups low sodium soy sauce (divided)
- 0.5 cup water
- 0.5 cup rice vinegar
- 1 cup sugar
- 1 teaspoon ground ginger
- 0.25 teaspoon crushed red pepper flakes
- 2 teaspoons minced garlic
- 3 tablespoons corn starch
- 0.5 teaspoon sesame seeds
For Serving
- to taste chopped green onions (for garnish)
- for serving steamed rice
Instructions
- Mix soy sauce, water, rice vinegar, sugar, ginger, red pepper flakes, and garlic to make the sauce.
- Pound chicken breasts to even thickness and bake at 375°F (190°C) for 25-30 minutes.
- Combine cornstarch with a small amount of water to create a slurry, then add to the sauce and simmer until thickened.
- Pour sauce over baked chicken, sprinkle with sesame seeds and chopped green onions, and serve with steamed rice.