Embark on a Flavorful Journey with Diabetic-Friendly Berry Yogurt Snack Cups
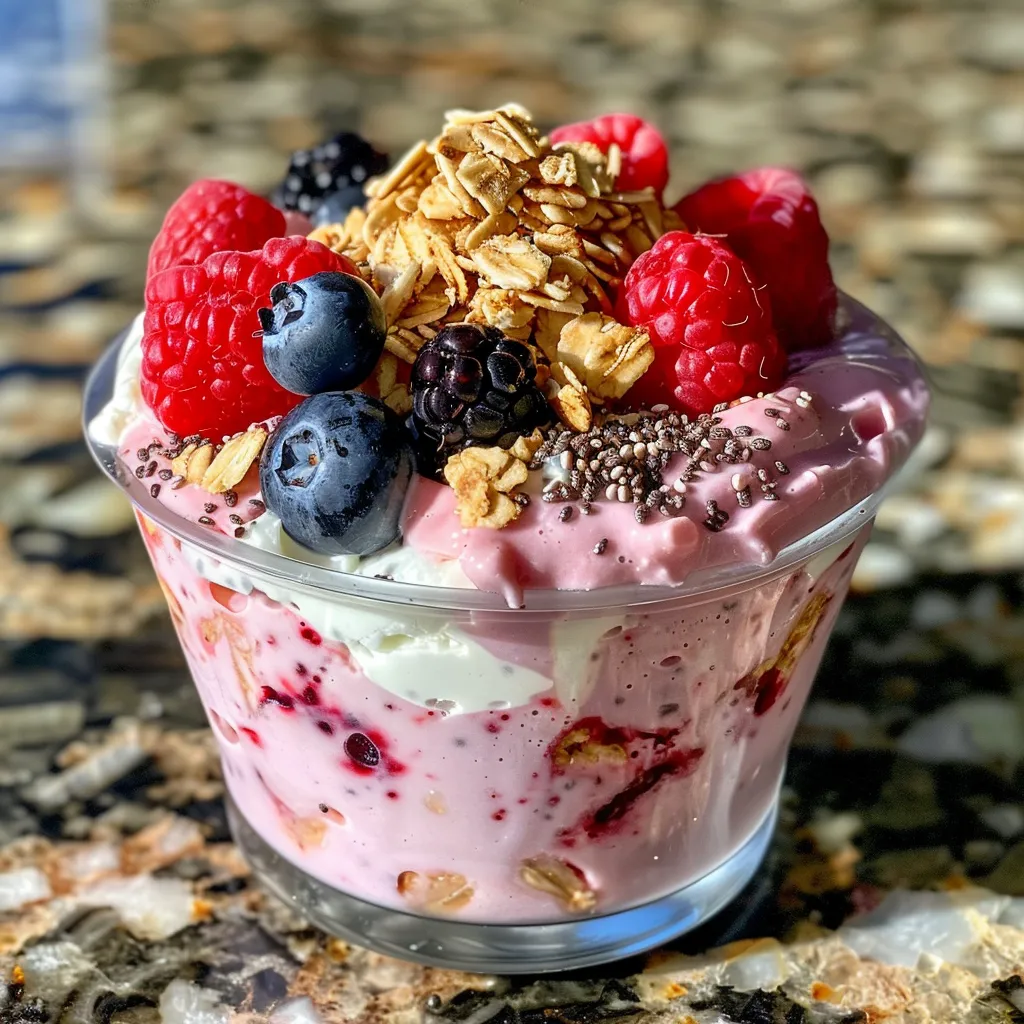
Welcome to a delightful exploration of flavors with our Diabetic-Friendly Berry Yogurt Snack Cups. These vibrant, scrumptious treats are not just a feast for your taste buds—they also serve as a healthy, grab-and-go option for those seeking a nutritious snack. Bursting with fresh berries, protein-rich Greek yogurt, and a satisfying crunch from granola, this recipe is a perfect blend of health and indulgence. Whether you’re rushing out the door or enjoying a quiet moment at home, these yogurt snack cups will transport you to a world of flavor and nourishment.
In this comprehensive guide, we’ll dive deep into the ingredients, benefits, and variations of this recipe, ensuring you have all the tools you need to make these delicious snack cups a staple in your kitchen. Let’s get started!
Why You’ll Love This Recipe
There are countless reasons to fall in love with these berry yogurt snack cups. Here are just a few:
- Quick and Easy Preparation: Whip up these snack cups in less than 15 minutes, making them perfect for busy mornings or spontaneous gatherings.
- Customizable Ingredients: Tailor the recipe to your taste with various fruits, sweeteners, and toppings—endless possibilities await!
- Health-Conscious Option: With low sugar content and nutritious ingredients, these cups cater to health-conscious individuals and those managing diabetes.
- Rich in Protein: Thanks to the Greek yogurt, each cup is packed with protein, keeping you full and energized.
- Eye-Catching Presentation: Layered with colorful berries and crunchy granola, these cups are as visually appealing as they are delicious.
Ingredient Breakdown
Let’s take a closer look at the ingredients for our Diabetic-Friendly Berry Yogurt Snack Cups and explore some substitutions:
- Plain Greek Yogurt: Use sugar-free or low-sugar varieties for the healthiest option. You can also substitute with plant-based yogurt for a dairy-free version.
- Mixed Berries: Fresh or frozen, berries like strawberries, blueberries, and raspberries add natural sweetness and vibrant color. You can also switch them out for seasonal fruits like peaches or mango.
- Chia Seeds: These tiny powerhouses are full of nutrients and add a delightful texture. If you’re not a fan, feel free to omit them.
- Vanilla Extract: A splash of vanilla enhances the flavor profile. For a twist, consider using almond extract.
- Granola: Opt for low-sugar granola to maintain the healthy aspect. Alternatively, you can use nuts or seeds for a gluten-free option.
Step-by-Step Instructions for Perfect Snack Cups
Follow these simple steps to create your own Diabetic-Friendly Berry Yogurt Snack Cups:
- Prepare Your Berries: Rinse fresh berries gently and pat dry. For larger fruits like strawberries, slice them into bite-sized pieces. If using frozen berries, ensure they are fully thawed.
- Mix Yogurt and Flavorings: In a mixing bowl, combine the plain Greek yogurt, chia seeds, and vanilla extract.
- Sweeten to Taste: If you prefer a sweeter yogurt, add 1-2 packets of your favorite sugar substitute and mix until well combined.
- Add Berries: Gently fold the prepared berries into the yogurt mixture, ensuring even distribution without mashing them.
- Portion into Cups: Divide the mixture evenly into small snack cups, jars, or bowls for easy serving.
- Add Granola Topping: If desired, sprinkle low-sugar granola over the top for added crunch.
- Serve or Chill: Enjoy immediately or refrigerate for at least 30 minutes for a cooler snack.
Expert Tips for Perfect Berry Yogurt Snack Cups
Here are some expert insights to ensure your snack cups are a hit:
- Use Fresh Ingredients: The quality of your ingredients determines the flavor. Select ripe, fresh berries for the best taste.
- Experiment with Textures: Mix in nuts, seeds, or coconut flakes for varied textures and flavors.
- Adjust Sweetness Gradually: Start with a small amount of sweetener and adjust to your taste, as different berries have varying sweetness levels.
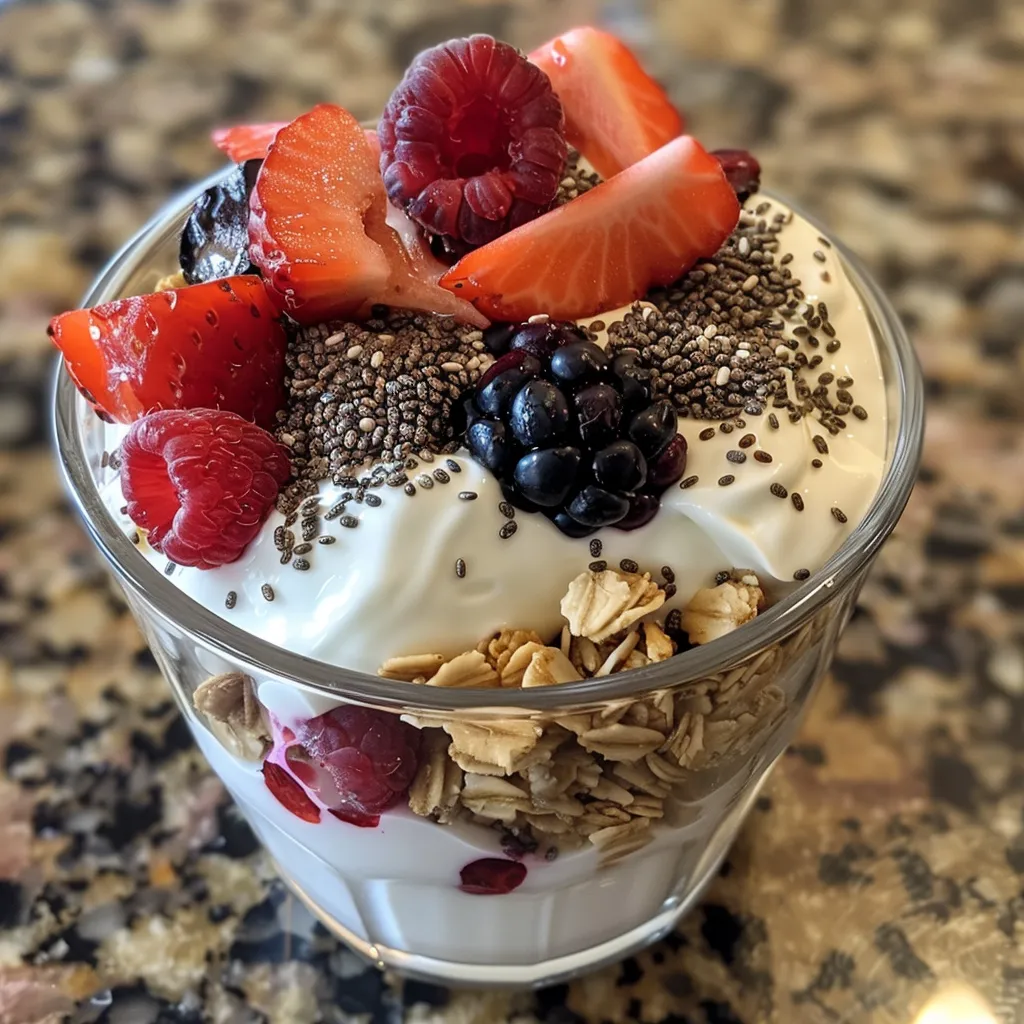
- Layer for Impact: For a beautiful presentation, layer the yogurt and berries in clear cups, showcasing the vibrant colors.
- Make Ahead for Convenience: Prepare your cups a day in advance, making them perfect for busy mornings.
- Don’t Skip the Chia: Chia seeds not only add texture but also increase the nutritional value with added fiber.
- Mix and Match Fruits: Don’t hesitate to use different fruits based on what’s in season or available.
- Store Properly: Keep any leftovers in an airtight container in the fridge for up to 2 days.
Common Mistakes and How to Avoid Them
While making your berry yogurt snack cups, here are some pitfalls to watch out for:
- Overmixing the Berries: Gently fold berries into the yogurt to maintain their shape and texture.
- Using Too Much Sweetener: Start with a little and taste as you go to avoid overpowering the natural flavors.
- Not Chilling Long Enough: Allowing the cups to chill enhances the flavors and texture.
- Ignoring Nutritional Value: Always check the sugar content of your yogurt and granola to keep it diabetic-friendly.
Delicious Variations to Try
Mix things up with these fun variations of your Diabetic-Friendly Berry Yogurt Snack Cups:
- Tropical Delight: Replace mixed berries with diced mango, pineapple, and coconut flakes for a tropical twist.
- Nutty Overload: Add chopped almonds or walnuts for extra protein and crunch.
- Chocolate Chip Surprise: Stir in a few dark chocolate chips for a sweet treat without excess sugar.
- Spiced Up Yogurt: Add a pinch of cinnamon or nutmeg to the yogurt for a warm, comforting flavor.
Storage and Make-Ahead Instructions
These berry yogurt snack cups are perfect for meal prep! Here’s how to store them:
- Refrigerate: Store in airtight containers in the refrigerator for up to 2 days.
- Freeze for Later: For longer storage, freeze the yogurt mixture in individual portions. Thaw overnight in the refrigerator before consuming.
- Make Ahead: Prepare the yogurt mixture and store it separately from the granola, adding it just before serving to keep it crunchy.
Frequently Asked Questions
Here are some common questions about our Diabetic-Friendly Berry Yogurt Snack Cups:
- Can I use non-dairy yogurt? Yes, plant-based yogurts are a great alternative and can be used in place of Greek yogurt.
- How can I make these cups more filling? Add a tablespoon of nut butter or a sprinkle of nuts to boost the protein and fiber content.
- Are these snack cups suitable for kids? Absolutely! They’re a fun and healthy option for children.
- What sweeteners are best for this recipe? Sugar substitutes like stevia or erythritol are great options for a diabetic-friendly snack.
- Can I use frozen berries? Yes, just ensure they’re thawed before mixing them into the yogurt.
- How do I make these cups more visually appealing? Layer the ingredients in clear cups for a beautiful presentation.
- What can I serve with these snack cups? Pair them with a slice of whole-grain toast or a handful of nuts for a balanced snack.
- How long do these snack cups last? They can be stored in the fridge for up to 2 days, but are best enjoyed fresh.
Nutritional Tips and Dietary Adaptations
Making healthy choices is easier with our Diabetic-Friendly Berry Yogurt Snack Cups. Here are some tips:
- Balance Your Meal: Pair these cups with a source of healthy fats, such as nuts or seeds, for balanced nutrition.
- Opt for Organic Fruits: Whenever possible, choose organic berries to reduce pesticide exposure and enjoy better flavor.
- Monitor Portion Sizes: While these are healthy snacks, keep portion sizes in mind to maintain balanced blood sugar levels.
Equipment Recommendations
To prepare your snack cups, you’ll need:
- Mixing Bowl: A medium-sized bowl for combining ingredients.
- Measuring Cups and Spoons: For precise ingredient measurements.
- Spatula or Spoon: For folding ingredients together without damaging the berries.
- Snack Cups or Jars: Attractive containers for serving your delicious creation.
Serving Suggestions
These berry yogurt snack cups are versatile and can be enjoyed in several ways:
- As a Breakfast Option: Start your day with a burst of flavor and nutrition.
- On-the-Go Snack: Pack them in a cooler for road trips or busy days.
- Post-Workout Fuel: Enjoy as a recovery snack after exercising.
- Party Treats: Serve them at gatherings for a healthy dessert alternative.
In conclusion, these Diabetic-Friendly Berry Yogurt Snack Cups are a delicious and healthy way to satisfy your sweet tooth while staying mindful of your dietary needs. With endless variations and quick preparation, they can easily become a staple in your kitchen. So grab your ingredients, mix up a batch, and embark on a flavor journey that celebrates health and happiness!
Diabetic-Friendly Berry Yogurt Snack Cups Healthy Grab-and-Go Treats
Ingredients
Yogurt and flavorings
- 1 cup plain Greek yogurt (sugar-free or low-sugar)
- 0.5 cup mixed berries (fresh or frozen, thawed)
- 1 tablespoon chia seeds
- 1 teaspoon vanilla extract
- 1-2 packets sugar substitute (optional, to taste)
- 0.25 cup low-sugar granola (optional, for topping)
Instructions
- Prepare berries: rinse fresh berries or thaw frozen berries; cut large berries into smaller pieces.
- Mix yogurt, chia seeds, and vanilla extract in a bowl.
- If desired, add sugar substitute to the yogurt mixture and stir well.
- Gently fold in the berries into the yogurt mixture.
- Divide the mixture evenly into two cups or jars.
- Optional: sprinkle granola on top before serving or refrigerate for 30 minutes.