
![['Close-up view of a creamy apple ice cream scoop with chunks of apple visible.', 'Side angle of apple ice cream in a bowl, showing its smooth texture and apple pieces.', 'Rich and creamy apple ice cream with a sprinkle of cinnamon on top.', 'Luscious apple ice cream with a vibrant color, highlighting its fresh ingredients.']](https://worldrecipesguide.com/wp-content/uploads/2026/07/apple-ice-cream_1_U1-1.webp "Chilling Adventures: A Scoop of Apple Ice Cream from Orchard to Bowl")
Welcome to my culinary journey, where the magic of autumn comes alive in a delightful scoop of homemade Apple Ice Cream. This creamy treat captures the essence of crisp, juicy apples and the warmth of spices, making it the perfect dessert to celebrate the harvest season. Are you ready to embark on this delicious adventure? Let’s dive into the world of flavors and textures that this Apple Ice Cream offers!
Why You’ll Love This Recipe
This Apple Ice Cream recipe is not just about cooling off on a hot day; it encapsulates the spirit of fall in every bite. Here are five compelling reasons to whip up a batch:
- Seasonal Delight: This recipe uses fresh, flavorful apples, making it a perfect tribute to autumn. Each scoop is packed with flavor reminiscent of apple picking in the orchard.
- Easy to Make: With simple ingredients and straightforward steps, this homemade ice cream is beginner-friendly. You don’t need to be a culinary expert to impress your family and friends!
- Versatile Flavor: You can easily customize this ice cream with various spices or mix-ins. Whether you prefer a hint of bourbon or a swirl of caramel, the possibilities are endless.
- Healthier Option: By making ice cream at home, you have control over the ingredients, allowing you to reduce sugars and opt for healthier add-ins.
- Perfect for Any Occasion: Whether it’s a cozy family gathering or a festive celebration, this ice cream is sure to be a hit, bringing smiles and joy to all who indulge.
Key Ingredients You’ll Need
Let’s break down the ingredients that make this Apple Ice Cream unique and delicious. Here’s what you’ll need:

★ Recommended Kitchen Tool
Cake Decorating Set
Make this recipe even easier with a quality Cake Decorating Set — a must-have kitchen staple!
- Chopped Apples: About 2 medium apples, peeled and chopped. Honeycrisp or Granny Smith varieties work beautifully for their flavor and texture.
- Lemon Juice: A squeeze of fresh lemon juice helps preserve the apples’ vibrant color and enhances their flavor.
- Maple Syrup: This adds a lovely sweetness and depth to the ice cream base.
- All-Purpose Flour: Just a teaspoon helps stabilize the apple mixture, giving it a smoother texture.
- Ground Cinnamon & Apple Pie Spice: These spices infuse the ice cream with a warm, cozy flavor profile that’s quintessentially autumn.
- Whole Milk & Heavy Cream: These dairy components create a rich, creamy base, ensuring the ice cream is luscious and satisfying.
- Bourbon (optional): A touch of bourbon not only adds flavor but also helps keep the ice cream smoother by lowering its freezing point.
Before You Start, Remember to Do This
Preparation is key to a successful ice cream-making experience. Before you begin, keep these tips in mind:
- Chill the Ice Cream Maker: Ensure your ice cream maker’s bowl is pre-frozen according to the manufacturer’s instructions. This step is crucial for achieving the perfect texture.
- Measure Ingredients Accurately: Precision in measuring your ingredients will yield the best results for flavor and consistency.
- Prepare Your Workspace: Gather all your ingredients and tools before starting. This will streamline the process and make it more enjoyable.
How to Make Apple Ice Cream
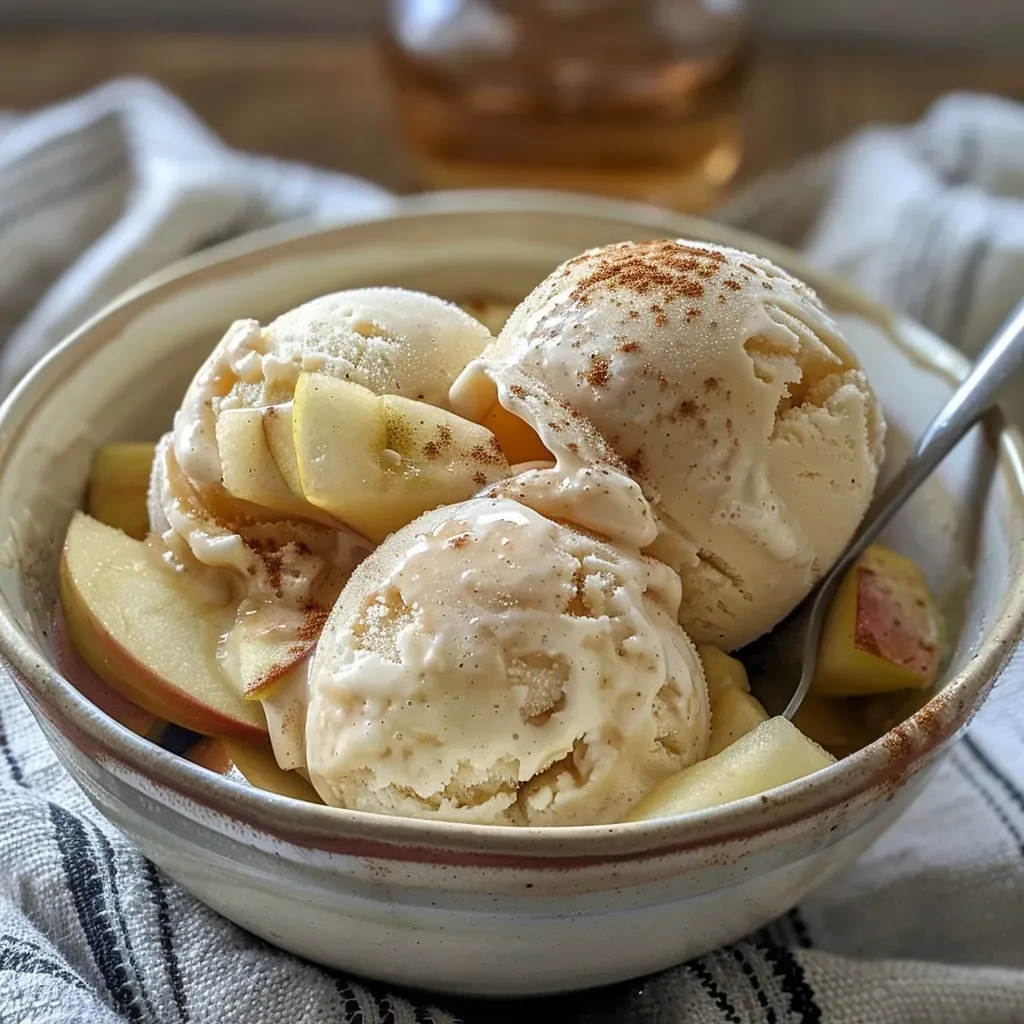
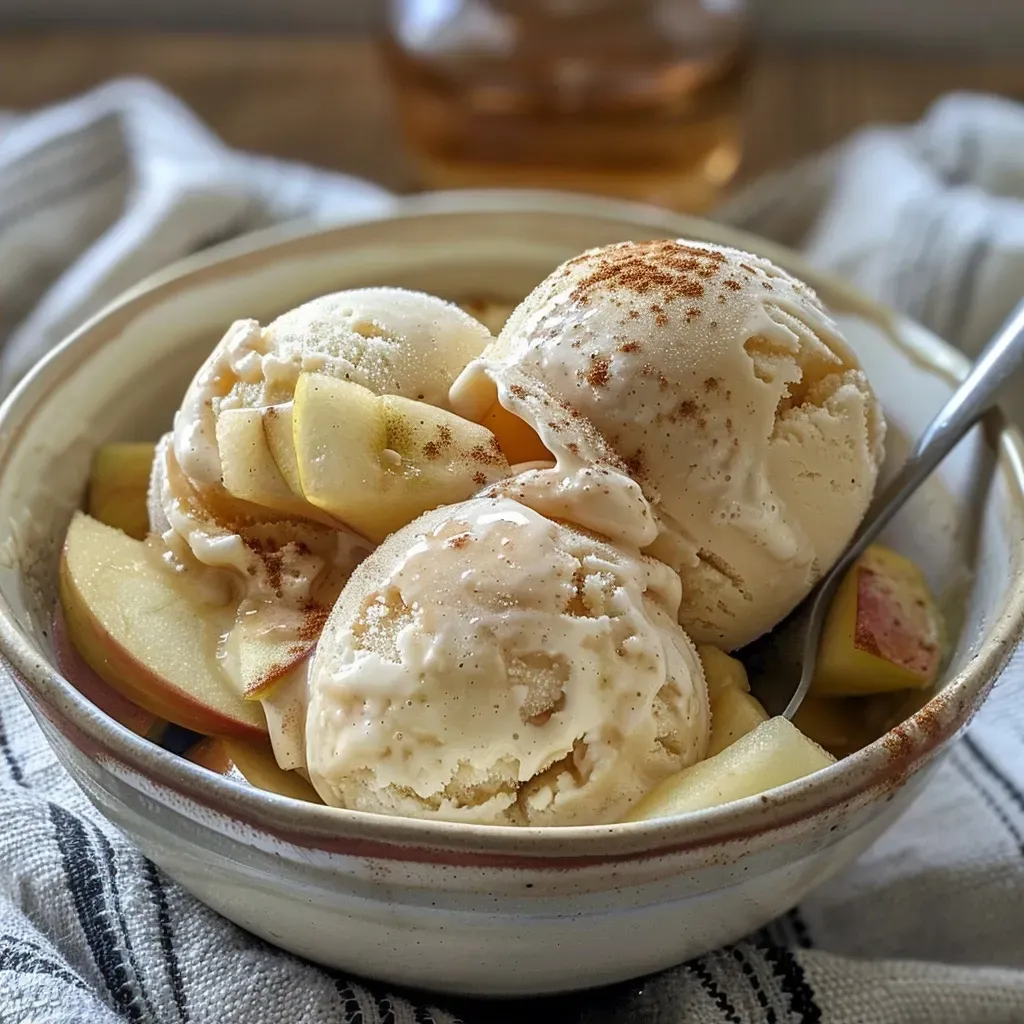
Now that everything is ready, let’s dive into the steps to create your homemade Apple Ice Cream:
- Prep the Apples: In a medium bowl, combine the chopped apples with lemon juice, maple syrup, cinnamon, and apple pie spice. Let this mixture sit for about 10 minutes to allow the flavors to meld.
- Cook the Apple Mixture: In a saucepan over medium heat, add the apple mixture. Cook for about 5 minutes, stirring occasionally, until the apples are slightly softened. Remove from heat and let cool.
- Prepare the Ice Cream Base: In a large mixing bowl, whisk together whole milk, granulated sugar, light brown sugar, salt, and vanilla extract until the sugars dissolve. Stir in the heavy cream.
- Combine the Mixtures: Fold the cooled apple mixture into the ice cream base, ensuring even distribution of the juicy bits of apple throughout.
- Churn the Ice Cream: Pour the mixture into your pre-chilled ice cream maker and churn according to the manufacturer’s instructions, usually about 20-25 minutes.
- Freeze the Ice Cream: Transfer the churned ice cream to an airtight container. If desired, swirl in caramel or additional spices at this stage. Freeze for at least 4 hours to firm up.
Pro Tips for Perfect Ice Cream
To ensure your homemade ice cream is a hit, consider these expert insights:
- Use Fresh Ingredients: The quality of your apples and dairy will greatly influence the final flavor. Opt for organic or locally sourced options when possible.
- Experiment with Flavor: Don’t hesitate to add unique spices like nutmeg or cardamom to enhance the depth of flavor.
- Texture Matters: For a creamier texture, allow the mixture to chill in the fridge for a few hours before churning.
- Mind the Alcohol: If using bourbon, remember that it inhibits freezing. Use it sparingly to maintain the right consistency.
- Test for Sweetness: Before freezing, taste the mixture and adjust sweetness if necessary. It should be slightly sweeter than you want it to be since it will taste less sweet when frozen.
- Storage Tips: Always store ice cream in a shallow container to minimize ice crystal formation. Cover it tightly to prevent freezer burn.
- Patience is Key: For the best flavor, let the ice cream sit at room temperature for a few minutes before serving. This softens it slightly for easier scooping.
Common Mistakes and Troubleshooting
Even the best cooks make mistakes! Here are some common issues you might encounter and how to fix them:
- Ice Crystals: This can happen if the ice cream is not churned long enough or if it’s stored improperly. Ensure your ice cream maker bowl is adequately chilled and use airtight containers.
- Too Hard to Scoop: If your ice cream is rock hard, let it sit out for a few minutes before serving. This will help it soften for easier scooping.
- Flavor Too Mild: If the apple flavor is not pronounced, consider increasing the amount of spices or using a stronger apple variety next time.
- Over-Churning: Churning too long can lead to a grainy texture. Follow the recommended churning time for your specific ice cream maker.
Variations to Try
Now that you’ve mastered the classic Apple Ice Cream, here are some fun variations to keep things interesting:
- Caramel Apple Ice Cream: Swirl in homemade or store-bought caramel sauce for a rich, indulgent twist.
- Cinnamon Roll Ice Cream: Add bits of cinnamon roll dough to the base for a delightful texture and flavor combination.
- Nutty Apple Crunch: Mix in crushed pecans or walnuts for a delightful crunch that complements the creamy texture.
- Apple Cider Ice Cream: Substitute some of the milk with apple cider for an extra layer of apple goodness!
Storage and Make-Ahead Instructions
Want to enjoy this ice cream later? Here’s how to store it properly:
- Freezing: Store your Apple Ice Cream in an airtight container in the freezer. It will stay fresh for up to 2 months.
- Make-Ahead Tips: You can prepare the apple mixture a day in advance and store it in the fridge until you’re ready to combine it with the ice cream base.
Frequently Asked Questions
Here are some common questions about making Apple Ice Cream:
- Can I make this recipe without an ice cream maker? Yes! For a no-churn version, pour the mixture into a freezer-safe container and stir every 30 minutes until it reaches your desired consistency.
- What type of apples work best? Honeycrisp and Granny Smith apples are ideal due to their balance of sweetness and tartness.
- Can I omit the alcohol? Absolutely! The bourbon is optional and can be left out without compromising the recipe.
- How do I make it lactose-free? Substitute whole milk and heavy cream with lactose-free alternatives like almond or coconut milk.
- What can I add to enhance flavor? Consider adding a touch of vanilla extract, nutmeg, or even ginger for a unique twist!
- How do I fix grainy ice cream? If your ice cream turns out grainy, it may have been over-churned or improperly stored. Ensure proper churning times and airtight storage.
- Can I use frozen apples? Yes, you can use frozen apples, but make sure to thaw and drain excess moisture before adding them to the mixture.
- How long does it take to churn the ice cream? Typically, it takes about 20-25 minutes, but follow your ice cream maker’s instructions for the best results.
Nutrition Tips and Dietary Adaptations
While indulging in homemade ice cream, it’s essential to consider nutrition. Here are some tips:
- Swap Sugars: Replace granulated sugar with coconut sugar or a sugar substitute for a healthier option.
- Reduce Fat: Use low-fat milk and cream alternatives if you’re looking to lower the fat content.
- Add Fiber: Consider mixing in oats or chia seeds to boost the fiber content of your ice cream.
Equipment Recommendations
To make your ice cream-making experience smooth and enjoyable, here are some recommended tools:
- Ice Cream Maker: A quality ice cream maker is essential. I recommend a compressor style for ease of use.
- Sharp Knife: For chopping apples efficiently and safely.
- Mixing Bowls: Have a few different sizes on hand for prepping ingredients.
- Measuring Cups and Spoons: Precision is critical in baking and ice cream making, so invest in good measuring tools.
Serving Suggestions
Ready to serve up some delightful scoops of Apple Ice Cream? Here are a few creative serving ideas:
- Top with Caramel Sauce: Drizzling warm caramel sauce over a scoop adds an indulgent touch.
- Pair with Warm Desserts: Serve alongside a slice of warm apple pie for a comforting duo.
- Add Crunch: Top with granola or crushed nuts for added texture and flavor.
- Garnish with Fresh Herbs: A sprig of mint or a sprinkle of cinnamon can elevate the presentation.
In conclusion, making your own Apple Ice Cream is not just a cooking task; it’s a joyful experience that connects you to the essence of autumn. With its rich flavors, creamy texture, and endless possibilities for customization, this recipe is bound to become a beloved staple in your kitchen. So gather your ingredients, channel your inner culinary explorer, and let’s make this delicious adventure together!
Apple Ice Cream
Ingredients
Fruit
- 1 cup chopped apples (about 2 medium apples, peeled and chopped)
- 1 squeeze fresh lemon juice
- 1 teaspoon Pure maple syrup
- 2 teaspoons All-purpose flour
- 1 tablespoon Light brown sugar
- ½ teaspoon Ground cinnamon
- ¼ teaspoon Apple Pie Spice
- 1-3 tablespoons Water, as needed
- 1 cup Whole milk
- ¼ cup Granulated sugar
- ¼ cup Light brown sugar
- 1 tablespoon Pure maple syrup
- ¼ teaspoon Ground cinnamon
- ¼ teaspoon Salt
- 2 cups Heavy whipping cream
- 1 teaspoon Pure vanilla extract
- ½ to 1 tablespoon Bourbon (optional)
Instructions
-
Pre-freeze the ice cream machine as directed by the manufacturer.

![['Close-up side view of a slice of Apple Crumb Cake topped with a cinnamon drizzle.', 'Delicious Apple Crumb Cake with a vibrant cinnamon apple drizzle and crumbly topping.', 'Juicy slice of Apple Crumb Cake showcasing a glossy apple drizzle and oat topping.', 'Side view of moist Apple Crumb Cake, featuring diced apples and a rich cinnamon glaze.']](https://worldrecipesguide.com/wp-content/uploads/2026/07/apple-crumb-cake_1_U1-1-150x150.webp)
![['Close-up of a creamy bowl of Crock Pot Sweet Potato Soup garnished with herbs.', 'Side view of a vibrant orange sweet potato soup in a rustic bowl.', 'Thick, steaming Crock Pot Sweet Potato Soup with visible chunks of sweet potato and herbs.', 'Delicious sweet potato soup captured in a comforting bowl, showcasing its creamy texture.']](https://worldrecipesguide.com/wp-content/uploads/2026/07/crock-pot-sweet-potato-soup_1_U1-1-150x150.webp)