Author

Jack

Browsing

Discover the Joy of Homemade Chicken Alfredo Pizza

Welcome to a culinary adventure that combines the rich, creamy flavors of alfredo sauce with the comforting goodness of pizza! This Chicken Alfredo Pizza recipe is not just a meal; it’s an experience that transports you to cozy Italian kitchens filled with laughter and warmth. Get ready to impress your friends and family with this delightful fusion of flavors that celebrates the beauty of cooking from scratch!

In this article, we will delve deep into the secrets of crafting the perfect chicken alfredo pizza, providing you with tips, ingredient insights, and even variations to suit every palate. Whether you’re a novice cook or a seasoned chef, this recipe will have something special for you. So, grab your apron, and let’s get started!

Why You’ll Love This Recipe

  • Creamy Indulgence: The homemade creamy alfredo sauce adds a rich, velvety texture that elevates your pizza to gourmet status.
  • Quick and Easy: With minimal prep time and straightforward steps, you can whip up this chicken alfredo pizza in no time, perfect for weeknight dinners.
  • Customizable Flavors: This recipe invites you to add your favorite toppings, making it a versatile option for everyone at the table.
  • Healthier Choice: Using fresh ingredients means you control what goes into your meal, ensuring it’s both delicious and nourishing.
  • Family-Friendly Fun: Get the whole family involved in making this pizza—it’s a wonderful way to bond and create lasting memories.

Essential Ingredients

Before we dive into the cooking process, let’s gather our ingredients. Here’s what you’ll need to create your chicken alfredo pizza:

  • 3 boneless, skinless chicken breasts (about 1 lb): Tender and juicy, these are the stars of your pizza.
  • 2 cloves fresh garlic, minced: For that aromatic kick that pairs perfectly with the creamy sauce.
  • 1 cup heavy cream: This will give our alfredo sauce its signature richness.
  • 1 cup freshly grated Parmesan cheese: Essential for flavor and creaminess.
  • 1 lb pizza dough (store-bought or homemade): The base of your delicious creation.
  • 2 cups fresh spinach leaves: Adds a pop of color and a healthy touch.
  • 2 cups shredded mozzarella cheese: The gooey cheese that pulls everything together.
  • 2 tbsp unsalted butter: For sautéing the garlic and adding depth to the sauce.
  • Salt and pepper to taste: Essential for seasoning your chicken.
  • 1 tsp Italian seasoning: For that extra burst of flavor.

How to Make Chicken Alfredo Pizza

Now that we have our ingredients, let’s transform them into a mouthwatering chicken alfredo pizza!

Step 1: Prepare the Chicken

Preheat your oven to 400°F (200°C). Season the chicken breasts with salt and pepper, then roast them in the oven for 20-25 minutes until cooked through. Once done, slice them into bite-sized pieces to get ready for layering on the pizza.

Step 2: Make the Alfredo Sauce

In a saucepan over medium heat, melt the butter and sauté the minced garlic for 1-2 minutes until fragrant. Stir in the heavy cream and let it simmer gently. Gradually mix in the freshly grated Parmesan cheese until it melts and the sauce is smooth.

Step 3: Assemble the Pizza

Roll out the pizza dough on a floured surface and place it on a greased baking sheet or pizza stone. Evenly distribute the sliced chicken over the dough, drizzle generously with the creamy alfredo sauce, then top it off with mozzarella cheese and fresh spinach.

Step 4: Bake to Perfection

Bake the pizza in the oven for 15-20 minutes until the cheese is bubbly and golden brown. The aroma will fill your kitchen, making it hard to resist!

Pro Tips for Perfecting Your Chicken Alfredo Pizza

  • Homemade Sauce: While store-bought alfredo sauce can save time, making your own elevates flavor and freshness.
  • Experiment with Cheeses: Try adding provolone or gouda for a unique twist on flavor.
  • Fresh Herbs: Garnish with fresh basil or parsley for a burst of color and freshness.
  • Don’t Overload Toppings: Too many toppings can lead to a soggy pizza; keep it simple for the best texture.
  • Let It Rest: Allow the pizza to sit for a few minutes before slicing to let the cheese set slightly.
  • Use a Pizza Stone: If you have one, it helps achieve a crispy crust.
  • Leftover Chicken: This is a great recipe to use up leftover rotisserie chicken!
  • Seasoning Matters: Taste your sauce and adjust the seasoning before assembling; perfect seasoning makes a huge difference!

Common Mistakes and Troubleshooting

Even the best chefs encounter challenges! Here are some common mistakes and how to avoid them:

  • Dry Chicken: Ensure your chicken is not overcooked during roasting. Use a meat thermometer to ensure it reaches an internal temperature of 165°F (74°C).
  • Soggy Crust: Pre-baking the crust for a few minutes before adding toppings can prevent sogginess.
  • Grainy Sauce: Stir the sauce constantly until the cheese is fully melted to avoid lumps.
  • Burnt Toppings: Check your pizza regularly towards the end of baking to prevent burning.

Delicious Variations to Try

Feel free to get creative! Here are some delightful variations on the classic chicken alfredo pizza:

  • Buffalo Chicken Alfredo Pizza: Add some spicy buffalo sauce to the chicken for a kick!
  • Vegetarian Alfredo Pizza: Replace chicken with grilled vegetables like bell peppers, mushrooms, or zucchini.
  • BBQ Chicken Alfredo Pizza: Swap out the alfredo sauce for BBQ sauce and add red onions for a sweet and savory twist.
  • Spinach and Artichoke Alfredo Pizza: Incorporate artichoke hearts into the mix for an extra layer of flavor.

Storage and Make-Ahead Instructions

If you want to prepare in advance, here’s how to store and save your chicken alfredo pizza:

  • Make-Ahead: You can roast the chicken and prepare the alfredo sauce a day ahead. Store them separately in the refrigerator.
  • Storage: Leftover pizza can be stored in an airtight container in the fridge for up to 3 days.
  • Reheating: To retain crispiness, reheat slices in the oven at 350°F (175°C) for about 10 minutes.

FAQs About Chicken Alfredo Pizza

Here are some of the most common questions about chicken alfredo pizza:

  • What is chicken alfredo pizza? Chicken alfredo pizza is a delicious fusion of traditional pizza with creamy alfredo sauce, chicken, and cheese.
  • Can I use store-bought dough for chicken alfredo pizza? Absolutely! Store-bought dough is a great time-saver if you’re short on time.
  • Can I make this recipe vegetarian? Yes! Simply omit the chicken and add your favorite vegetables.
  • What if I don’t have heavy cream? You can substitute with half-and-half or whole milk, but the sauce will be less rich.
  • Can I freeze chicken alfredo pizza? Yes! Assemble it without baking, wrap it tightly, and freeze for up to 2 months.
  • What kind of cheese works best? A combination of mozzarella and Parmesan is ideal, but feel free to add your favorites!
  • How do I prevent the crust from getting soggy? Pre-baking the crust for a few minutes can help maintain its texture.
  • Can I add other proteins? Certainly! Shrimp or sausage are both delicious alternatives.

Nutritional Tips and Dietary Adaptations

This chicken alfredo pizza can be adapted to fit various dietary needs:

  • Gluten-Free: Use a gluten-free pizza crust to make it suitable for gluten-sensitive diets.
  • Low-Carb: Consider using a cauliflower crust for a healthier, low-carb option.
  • Dairy-Free: Substitute the cheese and cream with dairy-free alternatives to make it vegan.

Equipment Recommendations

To ensure a smooth cooking process, here are some essential tools:

  • Pizza Stone or Baking Sheet: For an evenly cooked crust.
  • Sharp Knife: For slicing the chicken and pizza.
  • Meat Thermometer: To check the doneness of the chicken.
  • Mixing Bowls: For preparing the chicken and sauce.

Serving Suggestions

To complement your chicken alfredo pizza, consider these serving suggestions:

  • Side Salads: A fresh garden salad with a light vinaigrette pairs beautifully.
  • Garlic Bread: A side of garlic bread is always a hit!
  • Wine Pairing: A crisp white wine like Sauvignon Blanc enhances the creamy flavors of the pizza.

Now that you have all the secrets for crafting the perfect chicken alfredo pizza, it’s your turn to create a slice of adventure in your kitchen. Gather your loved ones, share the joy of cooking, and enjoy the delightful flavors of this homemade masterpiece. Bon appétit!

Chicken Alfredo Pizza

Prep Time 15 minutes
Cook Time 20 minutes
Total Time 35 minutes
Servings 4 servings
Calories 850
A delicious fusion of creamy Alfredo sauce, tender chicken, and fresh spinach atop a crispy pizza crust.

Ingredients

Protein

  • 3 pieces boneless, skinless chicken breasts (about 1 lb)
  • 2 cloves fresh garlic (minced)
  • 1 cup heavy cream
  • 1 cup fresh spinach leaves
  • 2 cups shredded mozzarella cheese
  • 2 tbsp unsalted butter
  • Salt and pepper to taste
  • 1 tsp Italian seasoning

Dough

  • 1 lb pizza dough (store-bought or homemade)

Instructions 

  • Preheat oven to 400°F (200°C). Season chicken and roast for 20-25 minutes, then slice.
  • Melt butter over medium heat, sauté garlic, add heavy cream, and stir in Parmesan until smooth.
  • Roll out pizza dough on a floured surface and place on a baking sheet.
  • Spread Alfredo sauce over dough, top with chicken, spinach, and mozzarella.
  • Bake for 15-20 minutes until cheese is bubbly and golden.

Notes

For a crispier crust, pre-bake the dough for 5 minutes before adding toppings.
Calories: 850kcal
Cost: $15
Course: Main Course
Cuisine: Italian-American
Keyword: Alfredo, Chicken, Pizza

Embark on a Culinary Adventure with Grilled Chicken and Broccoli Rice

Welcome, food explorers! Today, we’re diving into a delightful dish that harmonizes the juicy goodness of grilled chicken with the vibrant crunch of broccoli, all resting atop a fluffy bed of rice. This grilled chicken and broccoli rice bowl is not just a meal; it’s a passport to flavors and connections, perfect for any day of the week. Whether you’re prepping for a busy weeknight or enjoying a leisurely weekend dinner, this recipe will satisfy your taste buds and nourish your soul.

Why You’ll Love This Recipe

Here are just a few reasons why this dish deserves a spot in your culinary repertoire:

  • Quick and Easy: With simple ingredients and straightforward steps, you can whip this up in under 30 minutes.
  • Healthy and Nutritious: Packed with lean protein, fiber, and vitamins, this meal is as good for you as it is delicious.
  • Customizable: Easily swap ingredients to cater to your preferences; this dish is versatile enough to suit any palate.
  • Meal Prep Friendly: Prepare in advance for a week of satisfying lunches or dinners without the hassle.
  • Family-Friendly: Kids and adults alike will love the flavors and textures, making it a hit at the dinner table.

Ingredients for Grilled Chicken and Broccoli Rice Bowl

Let’s gather our ingredients for this delightful dish:

  • 2 chicken breasts: Lean protein that grills beautifully.
  • 3 cups broccoli florets: Fresh and vibrant, adding essential vitamins.
  • 2 cups cooked rice: Base for the bowl; consider brown rice for added fiber.
  • 2 tbsp olive oil: Healthy fat for cooking and flavor.
  • 1 tsp garlic powder: Adds depth and aroma to the chicken.
  • 2 tbsp lemon juice: Brightens the dish with a zesty kick.
  • Salt and black pepper, to taste: Essential seasoning for flavor.
  • 2 tbsp fresh parsley, chopped: For garnish and added freshness.
  • Your favorite sauce, for drizzling: Optional but recommended to elevate the dish.

**Substitutions:** If you don’t have certain ingredients on hand, feel free to get creative! You can use chicken thighs instead of breasts for a juicier option, or switch out the broccoli for asparagus or green beans. Quinoa can replace rice for a gluten-free alternative, and any dressing or sauce you love will work wonders here.

Step-by-Step Instructions

Now, let’s get cooking with these easy-to-follow steps:

  1. Pat chicken dry, brush with olive oil, and season with garlic powder, salt, and pepper.
  2. Toss broccoli with the remaining olive oil, lemon juice, salt, and pepper.
  3. Preheat grill or grill pan to medium-high heat.
  4. Grill chicken for 6–7 minutes per side until cooked through (internal temperature should reach 165°F or 74°C). Allow it to rest before slicing.
  5. Grill broccoli for about 5 minutes until crisp-tender and slightly charred.
  6. Divide cooked rice into bowls, top with sliced chicken and grilled broccoli.
  7. Drizzle with your favorite sauce and garnish with fresh parsley.

Pro Tips for Perfecting Your Bowl

To take your grilled chicken and broccoli rice bowl to the next level, keep these expert tips in mind:

  • Proper seasoning: Don’t skimp on salt and pepper; they enhance the natural flavors.
  • Rest the chicken: Allowing the chicken to rest after grilling locks in moisture—slice it just before serving.
  • Don’t overcrowd the grill: Give your chicken and broccoli space to cook evenly and develop a nice char.
  • Use a meat thermometer: This ensures your chicken is perfectly cooked every time.
  • Experiment with spices: Feel free to add your favorite spices or marinades to the chicken for extra flavor.
  • Fresh ingredients: The fresher your ingredients, the better your dish will taste.
  • Make it colorful: Add bell peppers or carrots for a burst of color and extra nutrition.
  • Pair it right: Consider serving with a side of avocado or a light salad for a complete meal.

Common Mistakes and Troubleshooting

Even the best intentions can lead to culinary mishaps. Here’s how to avoid common pitfalls:

  • Overcooking the chicken: Keep an eye on the grill and use a thermometer to check doneness.
  • Undercooking the broccoli: Aim for a bright green color and crisp-tender texture.
  • Skipping the resting step: Always let your chicken rest before slicing to maintain juiciness.
  • Using dry rice: Make sure your rice is fluffy; a little oil or butter can help.

Delicious Variations

Feeling adventurous? Here are some tasty twists on the classic grilled chicken and broccoli rice bowl:

  • Teriyaki Chicken Bowl: Marinate your chicken in teriyaki sauce for a sweet and savory twist.
  • Curry Chicken Bowl: Add curry powder to your chicken seasoning for an exotic flavor profile.
  • Southwestern Bowl: Use black beans, corn, and a chipotle dressing for a spicy kick.
  • Asian-Inspired Bowl: Toss in some sesame oil and top with sliced green onions and sesame seeds.

Storage and Make-Ahead Instructions

This grilled chicken and broccoli rice bowl is perfect for meal prep:

  • Refrigerate: Store leftovers in an airtight container in the fridge for up to 4 days.
  • Freeze: You can freeze the grilled chicken and broccoli separately for up to 3 months. Just reheat before serving.
  • Make-Ahead: Cook everything in advance and assemble just before serving to keep the rice fluffy and the chicken juicy.

Comprehensive FAQ

Got questions? Here are some frequently asked ones about this dish:

  • Can I use chicken thighs instead of breasts? Absolutely! Chicken thighs are juicier and add a different texture.
  • Can I make the sauce dairy-free? Yes, there are plenty of delicious dairy-free sauces available!
  • What rice works best for this dish? White rice, brown rice, or jasmine rice are all excellent choices.
  • How do I make this dish gluten-free? Ensure your sauces are gluten-free, and you’re good to go!
  • Can I add other vegetables? Yes! Feel free to include bell peppers, snap peas, or carrots.
  • How can I spice it up? Add chili flakes or a dash of hot sauce to bring the heat!
  • Can I grill the chicken and broccoli together? Yes, just keep an eye on the cooking times for each.
  • What’s the best type of sauce to use? A light soy sauce, teriyaki, or a homemade garlic sauce works wonderfully.

Nutrition Tips and Dietary Adaptations

This recipe is not only delicious but also healthy! Here are some tips to ensure it fits your dietary needs:

  • Low-Carb Option: Substitute rice with cauliflower rice for a low-carb alternative.
  • High-Protein Boost: Add chickpeas or edamame to increase the protein content.
  • Vegan Option: Swap chicken for grilled tofu or tempeh for a plant-based version.
  • Low-Calorie Swap: Use less olive oil or a cooking spray to reduce calories.

Essential Equipment Recommendations

To make the most of this recipe, here are some must-have kitchen tools:

  • Grill or Grill Pan: Essential for achieving that smoky, charred flavor.
  • Meat Thermometer: Ensures perfectly cooked chicken every time.
  • Sharp Knife: For easy slicing of the chicken and vegetables.
  • Cutting Board: A spacious board will make prep easier and safer.

Serving Suggestions

To elevate your meal experience, consider these serving ideas:

  • Garnish with herbs: Fresh herbs like cilantro or basil can brighten up the dish.
  • Serve with a side salad: A simple green salad complements the rich flavors perfectly.
  • Pair with a refreshing drink: I love a chilled iced tea or lemonade alongside this dish.
  • Offer a variety of sauces: Let your guests choose their favorite sauce for a fun twist!

Conclusion

And there you have it! A delicious, wholesome Grilled Chicken and Broccoli Rice Bowl that not only satisfies your hunger but also brings a touch of joy to your table. Remember, cooking is about exploration and connection, so embrace the flavors, share stories around the dinner table, and enjoy every bite. Bon appétit, my fellow culinary adventurers!

Grilled Chicken and Broccoli Rice Bowl

Prep Time 10 minutes
Cook Time 20 minutes
Total Time 30 minutes
Servings 4 servings
Calories 450
A healthy and flavorful rice bowl featuring grilled chicken, crisp broccoli, and fresh herbs, perfect for a quick dinner.

Ingredients

Protein

  • 2 pieces chicken breasts

Vegetables

  • 3 cups broccoli florets

Carbohydrates

  • 2 cups cooked rice

Fats & Oils

  • 2 tbsp olive oil

Spices & Seasonings

  • 1 tsp garlic powder
  • 2 tbsp lemon juice
  • Salt and black pepper, to taste Salt and black pepper (to taste)

Herbs

  • 2 tbsp fresh parsley, chopped

Sauce

  • Your favorite sauce, for drizzling favorite sauce

Instructions 

  • Pat chicken dry, brush with olive oil, and season with garlic powder, salt, and pepper.
  • Toss broccoli with olive oil, lemon juice, salt, and pepper.
  • Preheat grill to medium-high. Grill chicken 6–7 minutes per side, then rest and slice.
  • Grill broccoli for 5 minutes until crisp-tender and charred.
  • Divide rice into bowls, top with sliced chicken and broccoli, drizzle with sauce, and garnish with parsley.

Notes

For extra flavor, marinate chicken beforehand or add your favorite hot sauce.
Calories: 450kcal
Cost: $15
Course: Main Course
Cuisine: American
Keyword: broccoli, Chicken, rice

Embark on a Culinary Journey with One-Pan Garlic Herb Chicken

If you’re looking for a meal that combines convenience, flavor, and nutrition, look no further! Our One-Pan Garlic Herb Chicken is not just a recipe; it’s a culinary adventure that transports you to vibrant kitchens around the world. This dish is a delightful medley of tender chicken, crispy potatoes, and vibrant green beans, all roasted to perfection with aromatic garlic and herbs. Let’s dive into why this dish is a must-try for any home cook!

Why You’ll Love This Recipe

This one-pan meal truly shines for several reasons:

  • Easy Cleanup: With everything cooked in one pan, you save time on both cooking and cleaning, making your weeknight dinners a breeze.
  • Flavor Explosion: The combination of garlic, herbs, and a touch of paprika infuses the chicken and vegetables, creating mouthwatering flavors in every bite.
  • Healthy and Balanced: This dish packs protein from the chicken and nutrients from the vegetables, ensuring you enjoy a wholesome meal.
  • Customizable: Whether you want to switch up the veggies or try different seasonings, this recipe is versatile enough to cater to your tastes.
  • Quick Preparation: With just a few simple steps, you can have a delicious dinner on the table in under an hour.

Ingredients Breakdown

Here’s what you’ll need for the One-Pan Garlic Herb Chicken:

  • 4 boneless, skinless chicken breasts: Tender and juicy, perfect for soaking up all the flavors.
  • 1 lb baby potatoes: Halved for golden crispiness that adds heartiness.
  • 1 lb green beans: Trimmed for a bright and crunchy texture.
  • 4 tbsp olive oil: Divided for roasting, enhancing flavor and moisture.
  • 4 cloves garlic: Minced to provide a bold, aromatic base.
  • 1 tbsp fresh parsley: Chopped for a splash of color and freshness (or use 1 tsp dried).
  • 1 tsp thyme: Earthy and fragrant, adding depth to the dish.
  • 1 tsp rosemary: Robust and piney, perfect with chicken and potatoes.
  • 1 tsp paprika: Introduces a sweet, smoky note that elevates the flavor profile.
  • Salt and pepper: To taste, essential for enhancing flavors.
  • 1/2 lemon: Juice of; optional but recommended for a zesty finish.

Pro Tips for Perfect Results

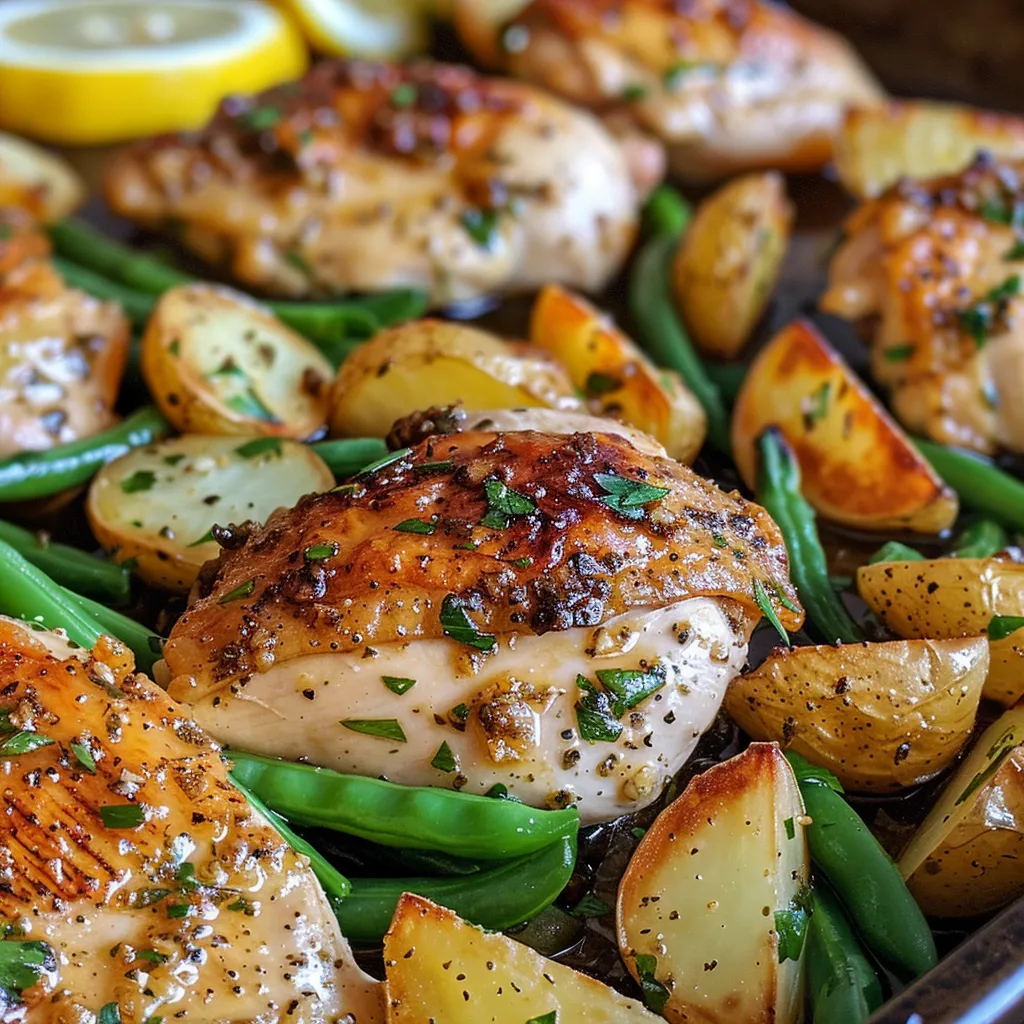
Detailed view of a savory one-pan chicken dish featuring juicy chicken, rosemary potatoes, and bright green beans.

Before you start cooking, here are some expert tips to ensure your One-Pan Garlic Herb Chicken turns out perfectly every time:

  • Marinate the Chicken: For extra flavor, marinate the chicken in the garlic herb mixture for at least 30 minutes before roasting.
  • Use a Hot Oven: Preheating your oven to 400°F (200°C) ensures that the chicken roasts quickly and retains its juices.
  • Don’t Overcrowd the Pan: If the pan is too crowded, the chicken and vegetables will steam instead of roast, so give them space!
  • Check the Chicken Temperature: Use a meat thermometer to ensure that chicken is cooked to an internal temperature of 165°F (74°C).
  • Try Different Vegetables: Feel free to swap in seasonal vegetables like carrots or zucchini for variety.
  • Make It Spicy: Add a pinch of red pepper flakes for some heat if you love spice!
  • Rest Before Serving: Allow the chicken to rest for a few minutes after roasting to let the juices redistribute.
  • Garnish for Presentation: A sprinkle of fresh parsley or a lemon wedge can elevate the dish visually.

Common Mistakes and Troubleshooting

To help you navigate the cooking process smoothly, here are some common mistakes and how to avoid them:

  • Overcooked Chicken: Keep an eye on the time and use a thermometer to check for doneness.
  • Underseasoned Vegetables: Don’t forget to season the potatoes and green beans adequately; they deserve flavor too!
  • Burnt Garlic: If you’re sautéing garlic before roasting, make sure not to burn it, as it can turn bitter.
  • Using Cold Ingredients: Bring your chicken and vegetables to room temperature before cooking for even cooking.

Variations to Try

This recipe is wonderfully versatile! Here are some fun variations:

  • Herb Chicken with Lemon: Add lemon slices on top of the chicken before roasting for a citrusy twist.
  • Spicy Garlic Herb Chicken: Mix in some cayenne pepper or hot sauce for a fiery kick.
  • Italian Herb Chicken: Swap the herbs for Italian seasoning for a different flavor profile.
  • Vegetarian Version: Substitute chicken with firm tofu or chickpeas and add more colorful veggies.

Storage and Make-Ahead Instructions

Want to make this dish in advance or store leftovers? Here’s how:

  • Refrigerate: Store leftovers in an airtight container for up to 3 days.
  • Reheat: Gently reheat in the oven at 350°F (175°C) until warmed through.
  • Freezing: You can freeze the cooked chicken and vegetables for up to 2 months. Thaw overnight in the fridge before reheating.
  • Make-Ahead: Prep the chicken and vegetables the night before, marinating them in the herb mixture, and roast just before serving.

Comprehensive FAQ

If you have questions about this recipe, here are some answers to common queries:

  • Can I use chicken thighs instead of breasts? Yes, chicken thighs add extra moisture but may require a slightly longer cooking time.
  • What can I serve with this dish? This dish pairs well with rice, crusty bread, or a fresh salad.
  • Can I use frozen vegetables? Yes, but they may release extra moisture, so adjust your cooking time accordingly.
  • What herbs can I substitute? Feel free to experiment with basil, oregano, or dill based on your preference.
  • How can I make this dish gluten-free? This recipe is naturally gluten-free, just ensure your herbs and seasonings are labeled as such.
  • Is this recipe good for meal prep? Absolutely! It’s a great option for meal prepping for the week.
  • What if I don’t have olive oil? You can substitute with avocado oil or melted coconut oil.
  • Can I cook this in a slow cooker? Yes, just adjust the cooking time and ensure to sear the chicken beforehand for added flavor.

Nutrition Tips and Dietary Adaptations

This dish is not only delicious but also nutritious! Here are some tips for making it even healthier:

  • Lean Protein: Use chicken breast for a lower-fat option, or opt for skinless turkey.
  • Increase Veggies: Add more vegetables like bell peppers or broccoli to boost fiber and vitamins.
  • Low-Sodium Options: Use low-sodium broth instead of salt for flavor without the added sodium.
  • Plant-Based Alternatives: Substitute chicken with tofu or tempeh for a plant-based meal.

Equipment Recommendations

To make this recipe seamlessly, you’ll need the following:

  • Sheet Pan: A large, sturdy sheet pan is essential for roasting all ingredients evenly.
  • Mixing Bowl: For combining your marinade and tossing the vegetables.
  • Meat Thermometer: To check the doneness of the chicken accurately.
  • Spatula: For easy flipping and tossing of the vegetables.

Serving Suggestions

When it comes to serving your One-Pan Garlic Herb Chicken, consider these delightful options:

  • Fresh Salad: A crisp garden salad with a light vinaigrette complements the rich flavors of the chicken.
  • Garlic Bread: Serve with warm garlic bread for a comforting touch.
  • Rice or Quinoa: A side of fluffy rice or quinoa can help soak up the delicious juices.
  • Yogurt Sauce: A cooling yogurt sauce with herbs can add a refreshing contrast to the warm dish.

Now that you’re armed with the knowledge and tips for making the best One-Pan Garlic Herb Chicken, it’s time to gather your ingredients and embark on this flavorful journey. Remember, every dish you create is a story waiting to be told—so enjoy the process and share it with those you love!

One-Pan Garlic Herb Chicken with Crispy Roasted Goodness

Prep Time 10 minutes
Cook Time 35 minutes
Total Time 45 minutes
Servings 4 servings
Calories 550
A flavorful and easy one-pan meal featuring juicy chicken breasts, crispy potatoes, and crunchy green beans, all roasted to perfection with aromatic herbs.

Ingredients

Protein

  • 4 pieces boneless, skinless chicken breasts (tender and juicy, perfect for soaking up all the flavors)
  • 1 lb baby potatoes (halved; golden crispiness adds heartiness)
  • 1 lb green beans (trimmed; bright and crunchy)

Oils & Seasonings

  • 4 tbsp olive oil (divided; for roasting)
  • 4 cloves garlic (minced; offers a bold, aromatic base)
  • 1 tbsp fresh parsley (chopped, or 1 tsp dried)
  • 1 tsp thyme (earthy and fragrant)
  • 1 tsp rosemary (robust, piney taste)
  • 1 tsp paprika (introduces a sweet, smoky note)
  • to taste salt salt (essential for enhancing flavors)
  • to taste pepper pepper (fresh cracked black pepper)
  • 1/2 lemon lemon (juice of; optional but recommended)

Instructions 

  • Preheat oven to 400°F (200°C). Grease a large sheet pan.
  • Mix 2 tbsp olive oil, garlic, parsley, thyme, rosemary, paprika, salt, and pepper. Coat chicken with this mixture.
  • Toss potatoes with 1 tbsp olive oil, salt, pepper, and rosemary. Arrange on one side of the pan.
  • Place chicken and potatoes in oven; roast 20 minutes. Add green beans tossed with remaining oil, garlic, salt, and pepper. Roast 15-20 minutes until done.
  • Drizzle lemon juice over the dish and garnish with extra parsley before serving.

Notes

Ensure chicken reaches an internal temperature of 165°F (74°C) for safety.
Calories: 550kcal
Cost: $15
Course: Main Course
Cuisine: American
Keyword: Chicken, herbs, roasted

Embarking on a Flavorful Journey with Chicken Enchilada Soup

Ah, the warm embrace of a hearty soup! If you’re anything like me, the mere thought of a steaming bowl of chicken enchilada soup transports you to cozy kitchens filled with tantalizing aromas and laughter. This dish is more than just a meal; it’s a celebration of flavors, culture, and connection. Bursting with a creamy texture and the boldness of enchilada sauce, this soup is a perfect companion for those chilly evenings or festive gatherings, inviting you to share stories and savor each spoonful.

In this guide, we’ll take a deep dive into the world of chicken enchilada soup, exploring its rich history, various adaptations, and all the delightful ways you can make it your own. Let’s get started!

Why You’ll Love This Recipe

This chicken enchilada soup is not just easy to make; it’s also a versatile dish that can cater to various tastes and dietary preferences. Here are just a few reasons why you’ll fall in love with this recipe:

  • Quick and Easy: With minimal prep and cook time, this soup can be ready in about 30 minutes—perfect for busy weeknights!
  • Rich, Creamy Comfort: The combination of cream cheese and cheese creates a rich, velvety texture that makes each bowl feel like a warm hug.
  • Customizable: You can easily adjust the spice levels or swap in your favorite ingredients, making it suitable for everyone at the table.
  • Meal Prep Friendly: This soup stores well, making it an ideal option for meal prepping or leftovers throughout the week.
  • Health Benefits: Packed with protein from chicken and fiber from beans and veggies, this dish nourishes as it delights.

Ingredients Breakdown

Let’s gather our ingredients! Here’s what you’ll need for this delicious chicken enchilada soup:

  • 1 tablespoon olive oil: For sautéing the onions and enhancing flavor.
  • 1 medium onion, diced: About 1 cup, adds sweetness and depth.
  • ½ teaspoon salt: To season the soup perfectly.
  • ¼ teaspoon ground black pepper: For a hint of spice.
  • 2 cloves garlic, minced: Infuses the soup with aromatic goodness.
  • 1 teaspoon ground cumin: Brings a warm, earthy flavor.
  • ½ teaspoon smoked paprika: Adds a subtle smokiness.
  • ½ teaspoon chili powder: For that classic enchilada taste.
  • 1 (10-ounce) can red enchilada sauce: The star ingredient that gives the soup its signature flavor.
  • 1 (15-ounce) can diced tomatoes: Fire-roasted for added depth, if available.
  • 1 (15-ounce) can black beans: Rinsed and drained, providing protein and fiber.
  • 1 (15-ounce) can corn: Drained or use 1½ cups frozen corn for sweetness.
  • 3 cups low-sodium chicken broth: The base of our flavorful soup.
  • 1½ pounds boneless, skinless chicken breasts: Shredded for that tender, meaty texture.
  • 4 ounces cream cheese, softened and cubed: Adds creaminess and richness.
  • 1 cup shredded cheddar or Monterey Jack cheese: For that melty, cheesy top.

Feel free to make substitutions based on your pantry and preferences! Here are a few ideas:

  • Protein Swap: Use shredded rotisserie chicken for a quicker option or swap in diced tofu for a vegetarian version.
  • Beans Variation: Black beans can be replaced with pinto beans or kidney beans.
  • Vegetable Boost: Add chopped bell peppers or zucchini for extra nutrition and flavor.

Pro Tips for the Best Chicken Enchilada Soup

Want to take your soup to the next level? Here are some pro tips:

  • Cook the Chicken Right: Ensure chicken breasts are fully submerged in the broth for even cooking. You can also sear them first for extra flavor.
  • Adjust the Spice: If you enjoy heat, toss in some diced jalapeños or a dash of hot sauce.
  • Thickening Trick: If your soup is too thin, simmer it uncovered for a few minutes to reduce the liquid.
  • Stir in the Cheese: Gradually add cheese while stirring to achieve a smooth and creamy texture without clumps.
  • Make Ahead: Prepare the soup base ahead of time and stir in the cream cheese and toppings just before serving.
  • Garnish Creatively: Fresh toppings like diced avocado, crispy tortilla strips, and a squeeze of lime elevate the flavors.
  • Freezing Tip: If you plan to freeze the soup, leave out dairy toppings and add them fresh when reheating.
  • Storage: Store leftovers in airtight containers in the fridge for up to 5 days.

Common Mistakes and Troubleshooting

Even the best chefs make mistakes! Here are some common pitfalls to avoid:

  • Overcooking the Chicken: Keep an eye on cooking time; chicken should be cooked through but still juicy.
  • Too Much Liquid: If the soup is too watery, allow it to reduce by simmering uncovered.
  • Underseasoned Soup: Always taste and adjust seasoning as needed, especially after adding cream cheese.

Delicious Variations to Try

This chicken enchilada soup is a canvas for your culinary creativity. Here are some variations to inspire your next batch:

  • Vegetarian Enchilada Soup: Replace chicken with additional beans and veggies, using vegetable broth.
  • Spicy Chicken Enchilada Soup: Add extra chili powder or diced jalapeños for a fiery kick.
  • Cheesy Chicken Enchilada Soup: Stir in more cheese varieties like pepper jack for an extra cheesy flavor.
  • Slow Cooker Version: Combine all ingredients in a slow cooker and cook on low for 6-8 hours for a hands-off approach.

Storage and Make-Ahead Instructions

Planning ahead can make mealtime a breeze! Here’s how to store and reheat your chicken enchilada soup:

  • Refrigeration: Store in airtight containers for up to 5 days. Reheat gently on the stove or microwave.
  • Freezing: Freeze portions in freezer-safe bags or containers for up to 3 months. Thaw overnight in the fridge before reheating.
  • Make-Ahead: Prepare the soup base (without cream cheese) and store it in the fridge. Add cream cheese just before serving for the freshest taste.

Frequently Asked Questions

Here are some common questions about chicken enchilada soup:

  • Can I use frozen chicken? Yes! Just add extra cooking time to ensure it’s fully cooked.
  • Is this soup gluten-free? Yes, as long as the enchilada sauce is gluten-free.
  • Can I make this soup in advance? Absolutely! It’s perfect for meal prep.
  • What toppings do you recommend? Diced avocado, fresh cilantro, lime wedges, and crispy tortilla strips are all fantastic choices.
  • Can I use ground chicken or turkey? Yes, you can substitute ground meats, but adjust cooking times as needed.
  • How can I make it spicier? Incorporate diced jalapeños, cayenne pepper, or serve with hot sauce.
  • What should I serve with this soup? Cornbread, tortilla chips, or a fresh salad pair wonderfully.
  • Is it okay to add more vegetables? Absolutely! Feel free to add any of your favorite veggies.

Nutritional Tips and Dietary Adaptations

This chicken enchilada soup can easily be adapted to fit various dietary needs:

  • Low-Carb Option: Omit the corn and beans, and use zucchini or cauliflower instead.
  • Dairy-Free Version: Substitute cream cheese with a dairy-free alternative, like cashew cream.
  • High-Protein Modification: Add more chicken or beans to boost protein content.

Essential Equipment for Great Results

To whip up this delightful chicken enchilada soup, you’ll need a few essential kitchen tools:

  • Large Pot or Dutch Oven: Essential for cooking the soup evenly.
  • Wooden Spoon: For stirring and mixing ingredients.
  • Measuring Cups and Spoons: To ensure precise measurements.
  • Shredding Forks: For easily shredding the chicken after cooking.

Serving Suggestions

Now that you have your soup ready, let’s make it a complete meal! Here are some serving suggestions:

  • Pair with Cornbread: The sweetness of cornbread complements the soup’s savory flavors perfectly.
  • Serve with Tortilla Chips: Crunchy chips add texture and make for a fun dipping experience.
  • Fresh Salad: A crisp green salad with a tangy vinaigrette balances the richness of the soup.

Conclusion: Your New Favorite Soup Awaits!

Chicken enchilada soup is more than just a recipe; it’s a delicious way to connect with friends and family, sharing warmth and stories over a comforting bowl. With its rich flavors, creamy texture, and endless adaptability, this soup is bound to become a staple in your kitchen. So grab your apron, gather your ingredients, and embark on this flavorful journey today! Remember, every spoonful is a step into the heart of culinary adventure.

Chicken Enchilada Soup That’s Creamy, Comforting, and Easy to Make

Prep Time 10 minutes
Cook Time 25 minutes
Total Time 35 minutes
Servings 4 servings
Calories 450
This creamy, flavorful soup combines tender chicken, hearty beans, and cheesy goodness for a comforting meal that's quick to prepare.

Ingredients

Main ingredients

  • 1 tablespoon olive oil
  • 1 medium onion, diced (about 1 cup)
  • ½ teaspoon salt
  • ¼ teaspoon ground black pepper
  • 2 cloves garlic, minced
  • 1 teaspoon ground cumin
  • ½ teaspoon smoked paprika
  • ½ teaspoon chili powder
  • 1 can (10-ounce) red enchilada sauce
  • 1 can (15-ounce) diced tomatoes, fire-roasted if available
  • 1 can (15-ounce) black beans, rinsed and drained
  • 1 can (15-ounce) corn, drained (or 1½ cups frozen corn)
  • 3 cups low-sodium chicken broth
  • 1.5 pounds boneless, skinless chicken breasts
  • 4 ounces cream cheese, softened and cubed
  • 1 cup shredded cheddar or Monterey Jack cheese

Optional toppings

Instructions 

  • Heat a large pot over medium heat. Add olive oil, onion, salt, and pepper. Cook 3–4 minutes until soft.
  • Stir in garlic, cumin, smoked paprika, and chili powder; cook 1 minute until fragrant.
  • Add enchilada sauce, tomatoes, beans, corn, broth, and chicken. Simmer covered for 20 minutes until chicken is cooked.
  • Remove chicken, shred with forks, and return to the soup. Stir in cream cheese and shredded cheese until melted and creamy.
  • Ladle into bowls and add toppings as desired before serving.

Notes

For extra flavor, top with fresh cilantro or diced avocado.
Calories: 450kcal
Cost: $15
Course: Main Course
Cuisine: American
Keyword: Chicken, enchilada, Soup

A Warm Embrace in a Bowl: Discovering Chicken Vegetable Noodle Soup

Welcome, fellow culinary adventurers! Today, I invite you to join me on an unforgettable journey through flavors and warmth as we explore the beloved Chicken Vegetable Noodle Soup. This easy chicken noodle soup is not just a recipe; it’s a heartwarming blend of comfort and nourishment that tells stories of home, family, and connection. Let’s dive into a dish that wraps you in its embrace, one bowl at a time.

Why You’ll Love This Recipe

There’s something magical about a bowl of Chicken Vegetable Noodle Soup that brings people together. Here are some compelling reasons why you’ll fall in love with this recipe:

  • Effortless Preparation: Using a rotisserie chicken means you can have this comforting meal on the table in under an hour, making it perfect for busy weeknights.
  • Wholesome Ingredients: Packed with tender vegetables like carrots and celery, this soup is a nutritious delight that nourishes both body and soul.
  • Rich in Flavor: The combination of garlic, thyme, and the savory rotisserie chicken creates a broth that is bursting with flavor, making every spoonful a delight.
  • Customizable: This recipe is incredibly versatile. You can easily adapt it to suit your dietary preferences or use whatever vegetables you have on hand.
  • Perfect for Any Occasion: Whether you’re feeling under the weather or hosting a family gathering, this chicken noodle soup is the ultimate comfort food that warms hearts and homes.

Ingredients You’ll Need

Before we begin our cooking adventure, let’s gather the ingredients. Here’s what you’ll need to create this delicious Chicken Vegetable Noodle Soup:

  • 1 rotisserie chicken (shredded)
  • 2 tablespoons olive oil
  • 1 large yellow onion (chopped)
  • 3 medium carrots (peeled and sliced into 1/4-inch rounds)
  • 3 stalks celery (sliced into 1/4-inch pieces)
  • 4 cloves garlic (minced)
  • 8 cups chicken broth
  • 2 bay leaves
  • 1 teaspoon dried thyme
  • 8 ounces wide egg noodles
  • 1/4 cup fresh parsley (chopped)
  • Salt (to taste)
  • Black pepper (to taste)

Feel free to experiment with substitutions! For example, you can use turkey instead of chicken or swap in zucchini for the carrots.

How to Make Chicken Vegetable Noodle Soup

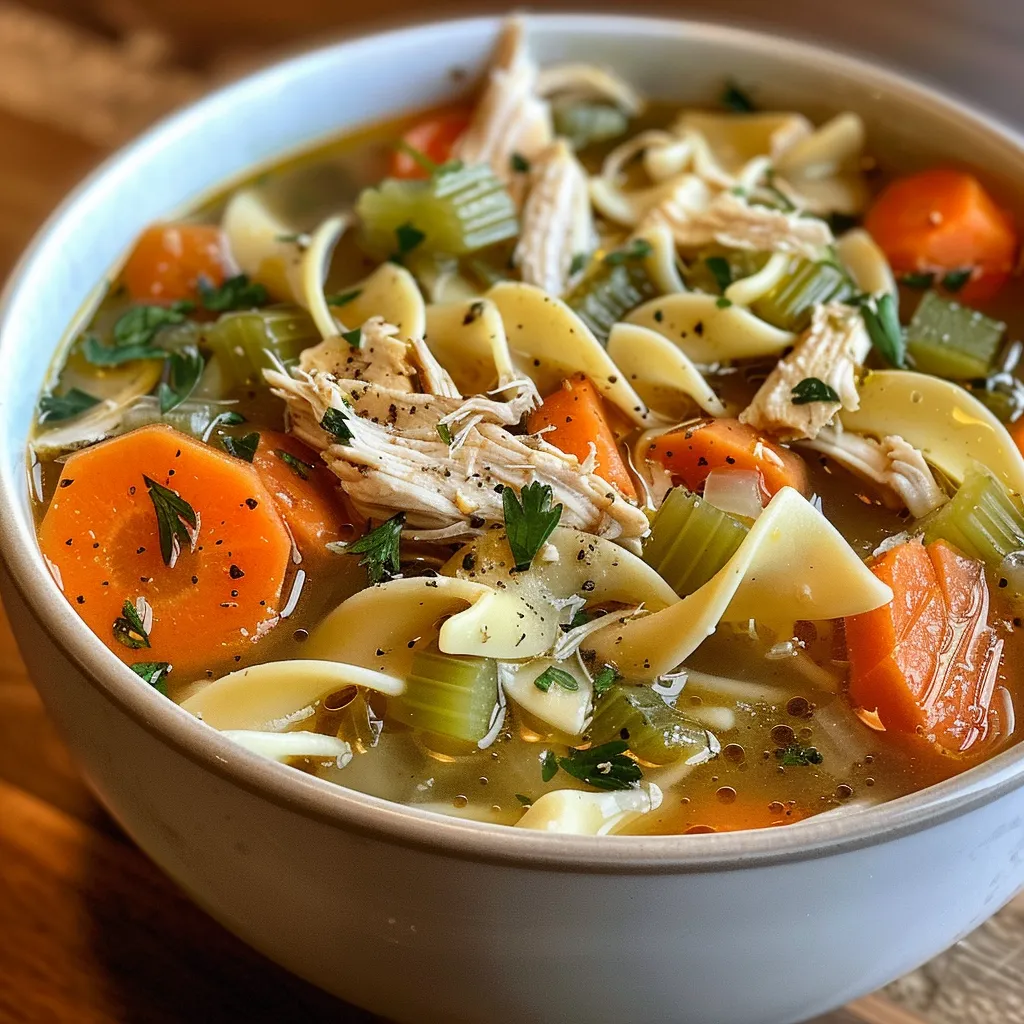
Detailed image of a bowl of Chicken Vegetable Noodle Soup, highlighting the broth, vegetables, and noodles.

Now that we have our ingredients ready, let’s embark on the cooking process. Follow these simple steps to create your own bowl of comfort:

  • Step 1: Shred the Chicken: Remove the meat from the rotisserie chicken, shred it using two forks, and set it aside. Discard the skin and bones.
  • Step 2: Sauté the Aromatics: Heat the olive oil in a large stockpot or Dutch oven over medium heat. Add the chopped onion, carrots, and celery, cooking until the vegetables are softened—about 8-10 minutes.
  • Step 3: Add Garlic: Stir in the minced garlic and sauté for an additional minute until fragrant.
  • Step 4: Build the Broth: Pour in the chicken broth, then add the bay leaves, dried thyme, and shredded chicken. Increase the heat to high and bring the soup to a boil.
  • Step 5: Cook the Noodles: Once boiling, add the egg noodles, reduce the heat to a simmer, and cook according to package directions—usually about 8-10 minutes until the noodles are tender.
  • Step 6: Final Touches: Turn off the heat and stir in the fresh parsley. Season with salt and black pepper to taste. Don’t forget to remove the bay leaves before serving!

Pro Tips for Making the Best Chicken Vegetable Noodle Soup

Ready to elevate your soup-making game? Here are some expert insights to ensure your Chicken Vegetable Noodle Soup is absolutely perfect:

  • Use High-Quality Broth: For the best flavor, use homemade chicken broth or a high-quality store-bought option. The broth is the soul of the soup!
  • Brown the Chicken: If you have time, browning the chicken pieces in the pot before adding the broth enhances the overall flavor profile.
  • Don’t Overcook the Vegetables: To maintain their texture and nutritional value, add delicate vegetables like spinach or peas in the last few minutes of cooking.
  • Adjust Seasoning: Always taste your soup before serving, and adjust the seasonings as needed. A pinch of salt or a dash of lemon juice can brighten the flavors.
  • Experiment with Herbs: Feel free to mix in other herbs like rosemary or basil for a unique twist on this classic recipe.
  • Consider Adding a Splash of Cream: For a creamier texture, stir in a little heavy cream or half-and-half just before serving.
  • Make it a Meal: Serve your soup with crusty bread or a side salad for a complete and satisfying meal.
  • Storing Leftovers: If you have leftovers, store them in an airtight container in the fridge for up to 3 days. The flavors will deepen over time!

Common Mistakes and Troubleshooting

If you’re new to making soup, you might encounter a few hiccups along the way. Here are some common mistakes to avoid:

  • Overcooking the Noodles: If you leave the noodles in too long, they can become mushy. Add them towards the end of the cooking process for the perfect texture.
  • Neglecting to Taste: Always taste your soup before serving. You might need to add more seasoning or adjust ingredients based on your preference.
  • Using Low-Quality Ingredients: Remember, good ingredients make good soup! Invest in fresh vegetables and quality broth for the best results.
  • Skipping the Herbs: Fresh herbs add depth and brightness. Don’t skip them—add parsley or thyme for that extra flavor kick!

Delicious Variations to Try

This chicken noodle soup is wonderfully adaptable! Here are four variations to consider:

  • Spicy Chicken Noodle Soup: Add a pinch of red pepper flakes or a chopped jalapeño to introduce a kick of heat.
  • Vegetarian Noodle Soup: Swap the chicken for chickpeas and use vegetable broth instead, loading up on your favorite veggies.
  • Asian-Inspired Noodle Soup: Incorporate soy sauce and ginger, and use rice noodles instead of egg noodles for a different flavor profile.
  • Creamy Chicken Noodle Soup: Stir in some heavy cream or coconut milk at the end for a rich, creamy texture.

Storage and Make-Ahead Instructions

If you want to prepare this Chicken Vegetable Noodle Soup ahead of time, here’s how to do it:

  • Make-Ahead: You can prepare the soup base (without the noodles) up to two days in advance. Store it in an airtight container in the fridge.
  • Freezing: This soup freezes well! Just leave out the noodles, as they can become mushy when reheated. Freeze the soup base for up to 3 months.
  • Reheating: When ready to serve, reheat the soup in a pot over medium heat, adding fresh noodles as needed, and adjusting seasoning.

FAQ: Your Chicken Vegetable Noodle Soup Questions Answered

  • Can I use frozen vegetables? Absolutely! Just add them to the pot when you’d normally add the fresh veggies.
  • How can I make this soup gluten-free? Use gluten-free noodles and ensure your broth is also gluten-free.
  • What can I add for more flavor? Consider adding a splash of white wine or a squeeze of lemon juice for extra brightness.
  • Can I make this soup in a slow cooker? Yes! Add all ingredients except noodles and cook on low for 6-8 hours. Add noodles during the last 30 minutes.
  • How long does this soup last in the fridge? It will stay fresh for about 3 days in an airtight container.
  • Can I use leftover turkey instead of chicken? Definitely! Leftover turkey works beautifully in this recipe.
  • How do I ensure my soup is not bland? Adjust seasoning gradually, taste often, and consider adding fresh herbs for depth.
  • Can I make it dairy-free? Yes! Simply omit any dairy and use coconut milk for creaminess if desired.

Nutritional Tips and Dietary Adaptations

This Chicken Vegetable Noodle Soup is not only delicious but can also be tailored to fit your dietary needs:

  • Low-Carb Option: Replace the egg noodles with zucchini noodles or cauliflower rice for a lower-carb version.
  • High-Protein Boost: Add extra chicken or beans for a protein-packed meal.
  • Rich in Vitamins: The variety of vegetables provides essential vitamins and minerals, making this soup a nourishing option.

Essential Equipment for Cooking

To make your cooking experience seamless, here are some must-have tools:

  • Large Stockpot: A heavy-bottomed stockpot is essential for even cooking and simmering.
  • Sharp Knife: A good quality knife makes chopping vegetables a breeze.
  • Cutting Board: A sturdy cutting board provides a safe space for prepping ingredients.
  • Measuring Cups and Spoons: Accurate measurements ensure consistent results.

Serving Suggestions

When it comes to serving Chicken Vegetable Noodle Soup, consider these delightful pairings:

  • Crusty Bread: A slice of warm, crusty bread is perfect for dipping into the savory broth.
  • Fresh Salad: Pair the soup with a light salad for a refreshing contrast.
  • Herb Garnish: A sprinkle of fresh parsley or basil on top adds a pop of color and freshness.

Conclusion

So there you have it—a comprehensive guide to creating an unforgettable Chicken Vegetable Noodle Soup that not only comforts but also connects us to our roots and each other. As you savor each spoonful, remember that cooking is not just about the ingredients; it’s about the stories we share and the memories we create. Grab your apron and let the adventure begin—your kitchen awaits!

Chicken Vegetable Noodle Soup

Prep Time 15 minutes
Cook Time 30 minutes
Total Time 45 minutes
Servings 6 servings
Calories 350
A hearty and comforting chicken noodle soup packed with fresh vegetables and herbs, perfect for a cozy meal.

Ingredients

Protein

  • 1 piece rotisserie chicken (shredded) (discard skin and bones)
  • 2 tablespoons olive oil
  • 1 large yellow onion (chopped)
  • 3 medium carrots (peeled and sliced) (about 1/4 inch slices)
  • 3 stalks celery (sliced)
  • 4 cloves garlic (minced)
  • 8 cups chicken broth
  • 2 bay leaves bay leaves
  • 1 teaspoon dried thyme
  • 8 ounces wide egg noodles
  • 1/4 cup fresh parsley (chopped)
  • to taste salt salt
  • to taste black pepper black pepper

Instructions 

  • Shred the cooked chicken, discarding skin and bones.
  • Heat olive oil in a large pot, cook onions, carrots, and celery until softened (~8-10 min).
  • Add garlic and cook for 1 min until fragrant.
  • Pour in chicken broth, add bay leaves, thyme, and shredded chicken; bring to boil.
  • Add noodles, simmer until tender (~8-10 min), then stir in parsley. Season with salt and pepper.

Notes

Adjust seasoning to taste and remove bay leaves before serving.
Calories: 350kcal
Cost: $15
Course: Soup
Cuisine: American
Keyword: Chicken, Noodles, Vegetables

Unlock the Flavors of Thailand: Your Guide to Thai Red Curry Chicken

Welcome to a culinary adventure that will take your taste buds on a journey through the vibrant flavors of Thailand! Thai Red Curry Chicken is not just a dish; it’s a celebration of Thai culture, rich heritage, and the joyful art of cooking. With its aromatic spices and fresh ingredients, this recipe is your passport to a world of culinary delight. Let’s dive into the heart of this dish and discover why it’s a must-try for every food lover.

Why You’ll Love This Recipe

This Thai Red Curry Chicken recipe is a symphony of flavors and textures that will transport you right to the bustling streets of Bangkok. Here are five reasons to fall in love with this dish:

  • Quick and Easy Preparation: In just 30 minutes, you can create a restaurant-quality meal that’s perfect for busy weeknights or special occasions.
  • Flavor Explosion: The combination of **red curry paste**, **coconut milk**, and fresh herbs creates a creamy, spicy sauce that’s utterly irresistible.
  • Customizable Ingredients: This recipe allows you to personalize your dish by adding your favorite vegetables or proteins, ensuring it’s always a hit.
  • Nutritious and Balanced: Packed with lean protein, vegetables, and healthy fats, this dish is not just delicious but also nutritious.
  • Great for Meal Prep: Make a big batch ahead of time for easy lunches or dinners throughout the week.

Essential Ingredients

To create the perfect Thai Red Curry Chicken, you’ll need the following ingredients:

  • 3-4 boneless, skinless chicken breasts (about 1 lb): Cut into bite-sized pieces for even cooking.
  • 3 tbsp red curry paste: A blend of herbs and spices that brings the dish to life.
  • 1 can (13.5 oz) full-fat coconut milk: Adds creaminess and balances the spice.
  • 1 cup fresh basil leaves: For a fresh, aromatic finish.
  • 1 cup bell peppers, sliced: Mixed colors add vibrancy and crunch.
  • 2 tbsp fish sauce: Essential for that authentic umami flavor.
  • Juice of 1 lime: Brightens up the dish and enhances the flavors.
  • 1 tsp sugar: Balances the heat from the curry paste.
  • 2 cloves garlic, minced: For depth and flavor.
  • 1 tsp ginger, minced: Adds warmth and spice.
  • 1 cup chicken broth or water: Helps create the sauce consistency.

Feel free to substitute chicken for tofu or shrimp for a vegetarian or seafood variation!

Let’s Make It Together!

Follow these simple steps to whip up this delightful Thai Red Curry Chicken:

  • Chop chicken into bite-sized pieces. Dice bell peppers and mince garlic and ginger.
  • Heat oil in a large skillet over medium heat. Sauté garlic and ginger until fragrant (about 30 seconds).
  • Add chicken pieces and cook until golden brown (5-7 minutes).
  • Stir in red curry paste until well combined. Pour in coconut milk, fish sauce, sugar, and lime juice; allow to simmer gently.
  • Add bell peppers and simmer for another 10 minutes until tender.
  • Stir in fresh basil before serving.

Pro Tips for Perfect Results

To ensure your Thai Red Curry Chicken turns out perfectly every time, here are some expert insights:

  • Use Quality Ingredients: Authentic **Thai red curry paste** makes a significant difference in flavor. Look for brands like Maesri for the best results.
  • Adjust the Heat: If you prefer a milder dish, start with less curry paste and gradually add more to taste.
  • Fresh Herbs Matter: Always use fresh basil for a vibrant flavor; dried herbs won’t provide the same aromatic punch.
  • Customize Your Veggies: Toss in broccoli, snap peas, or carrots for added nutrition and color.
  • Let It Simmer: Allow the curry to simmer for longer if you have time; this enhances the flavors as they meld together.
  • Serving Temperature: Serve hot over steamed jasmine rice or with rice noodles for a delicious meal.
  • Garnish Wisely: A sprinkle of chopped cilantro and a wedge of lime elevate the presentation and flavor.
  • Cook in Batches: If feeding a crowd, double the recipe and use two pans to cook everything evenly.

Common Mistakes and Troubleshooting

Even seasoned cooks can encounter hiccups. Here’s how to avoid common pitfalls:

  • Overcooking Chicken: Ensure you don’t overcook the chicken; it should be tender but not dry. Cook just until golden.
  • Too Thick or Thin Sauce: If your sauce is too thick, add a splash of chicken broth. If too thin, let it simmer uncovered until it thickens.
  • Too Salty: If you accidentally add too much fish sauce, balance it out with a bit more lime juice or sugar.

Variations to Explore

Want to mix things up? Here are some delicious variations of Thai Red Curry Chicken:

  • Vegetarian Version: Substitute chicken with chickpeas or tofu and use vegetable broth.
  • Seafood Delight: Add shrimp or fish for a seafood twist that’s equally delightful.
  • Green Curry: Swap out red curry paste for green curry paste for a different flavor profile.
  • Extra Creamy: Add an extra can of coconut milk for a richer, creamier sauce.

Storage and Make-Ahead Instructions

This dish is perfect for meal prep! Here’s how to store it:

  • Make Ahead: Prepare the curry up to 2 days in advance and store it in the refrigerator.
  • Freezing: This dish freezes well. Store in an airtight container for up to 3 months.
  • Reheating: When ready to eat, thaw overnight in the fridge and reheat on the stovetop or microwave until warmed through.

Frequently Asked Questions

Here’s a compilation of questions often asked about Thai Red Curry Chicken:

  • Can I use store-bought curry paste? Yes, but for the best flavor, I recommend Maesri or another high-quality brand.
  • Is this dish gluten-free? Yes, as long as you use gluten-free fish sauce.
  • Can I make this dish spicier? Absolutely! Add more red curry paste or fresh chili peppers to taste.
  • What can I serve with Thai Red Curry Chicken? It pairs beautifully with jasmine rice, rice noodles, or even quinoa.
  • How long does it last in the fridge? It’s good for up to 3 days in the refrigerator.
  • Can I use frozen chicken? Yes, just ensure it’s fully thawed before cooking for even results.
  • What’s the best way to reheat leftovers? Gently reheat on the stovetop for the best texture and flavor.
  • Can I add more vegetables? Definitely! Feel free to toss in your favorites like zucchini or green beans.

Nutrition Tips and Dietary Adaptations

Here are some tips for making this dish even healthier:

  • Lower Fat Content: Use light coconut milk instead of full-fat for fewer calories.
  • Increase Fiber: Add more vegetables to boost fiber and nutrients.
  • Protein Alternatives: Use grilled chicken breast for a leaner protein option.

Essential Equipment Recommendations

To make this recipe, you’ll need a few kitchen essentials:

  • Skillet or Wok: A large skillet or non-stick wok works best for sautéing and simmering.
  • Measuring Cups and Spoons: For precise ingredient measurements.
  • Wooden Spoon: Ideal for stirring without scratching your cookware.
  • Chopping Board: A sturdy board for chopping chicken and vegetables.

Serving Suggestions

Now that your Thai Red Curry Chicken is ready, consider these delicious serving suggestions:

  • Jasmine Rice: Serve over fluffy rice to soak up the delicious sauce.
  • Fresh Salad: A light cucumber or cabbage salad complements the dish beautifully.
  • Spring Rolls: Pair with fresh spring rolls for a complete meal experience.

Final Thoughts

Thai Red Curry Chicken is more than just a recipe; it’s a journey into the heart of Thai cuisine. With its vibrant flavors and rich history, this dish invites you to explore the culinary wonders of Thailand. Remember, cooking is about connection—whether it’s sharing a meal with family or enjoying it solo, let every bite remind you of the adventure. So grab your apron, gather your ingredients, and let’s embark on this delicious journey together!

Thai Red Curry Chicken

Prep Time 10 minutes
Cook Time 20 minutes
Total Time 30 minutes
Servings 4 servings
Calories 350
A flavorful Thai dish featuring tender chicken simmered in a spicy red curry sauce with fresh basil and bell peppers.

Ingredients

Protein

  • 3-4 pieces boneless, skinless chicken breasts (about 1 lb)
  • 3 tbsp red curry paste
  • 1 can full-fat coconut milk (13.5 oz)
  • 1 cup fresh basil leaves
  • 1 cup bell peppers, sliced (mixed colors)
  • 2 tbsp fish sauce
  • 1 piece lime (juice of 1 lime)
  • 1 tsp sugar
  • 2 cloves garlic, minced
  • 1 tsp ginger, minced
  • 1 cup chicken broth or water

Instructions 

  • Chop chicken into bite-sized pieces. Dice bell peppers and mince garlic and ginger.
  • Heat oil in a skillet. Sauté garlic and ginger until fragrant (~30 seconds).
  • Add chicken and cook until golden (~5-7 minutes). Stir in curry paste, then add coconut milk, fish sauce, sugar, and lime juice; simmer.
  • Add bell peppers and simmer for 10 minutes until tender. Stir in basil before serving.

Notes

Use fresh basil for best flavor. Adjust spice level with curry paste.
Calories: 350kcal
Cost: $15
Course: Main Course
Cuisine: Thai
Keyword: Chicken

Welcome to a Bowl of Adventure

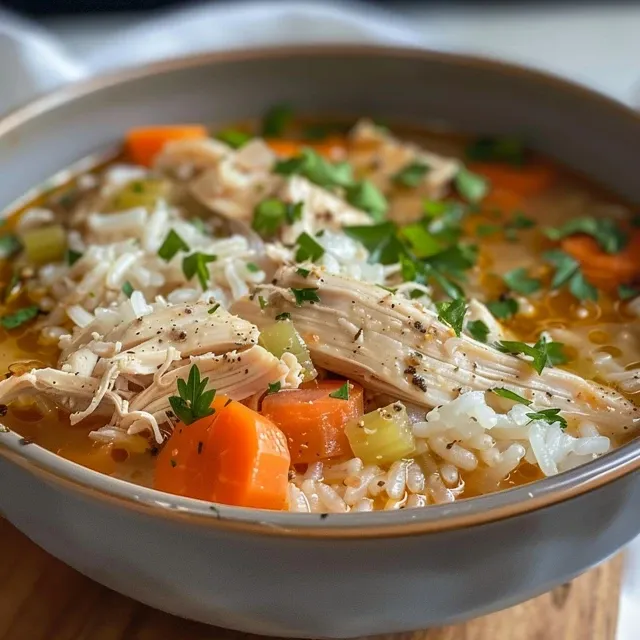
Are you ready to embark on a culinary journey that promises warmth, comfort, and a sprinkle of adventure? Today, we’re diving into the heart of home cooking with my Crispy Chicken and Rice Soup. This dish is not just a meal; it’s a heartfelt story from my explorations, blending flavors from various cultures into one cozy bowl. Perfect for chilly evenings or when you need a hug in a bowl, this soup is your ticket to comfort. Let’s discover why this crispy chicken and rice soup recipe deserves a spot in your kitchen!

Why You’ll Love This Recipe

  • Comforting and Wholesome: The combination of crispy chicken and tender rice in a savory broth creates a dish that’s as comforting as it is delicious.
  • Easy to Make: With simple steps and easily accessible ingredients, you’ll find that whipping up this soup is a breeze, making it perfect for busy weeknights.
  • Customizable: Feel free to make it your own! Switch up the veggies or spices to suit your taste or dietary needs.
  • Meal Prepping Friendly: This soup keeps well in the fridge and can be frozen, making it an excellent option for meal prep.
  • Family-Friendly: Kids and adults alike will love the rich flavors and textures, making it a hit at the dinner table!

Ingredients Breakdown

Let’s explore the ingredients that come together to create this mouthwatering symphony of flavors. Here’s what you’ll need:

  • 1 teaspoon dried basil: Provides a fragrant herbal note that elevates the soup.
  • ½ teaspoon dried parsley: Adds a subtle fresh flavor and a pop of color.
  • ½ teaspoon dried oregano: Complements the chicken beautifully with its earthy tones.
  • ½ teaspoon dried thyme: This aromatic herb brings warmth to the dish.
  • ½ teaspoon mustard powder: Enhances the depth of flavor with a mild tang.
  • ¼ teaspoon pepper: For a touch of spice that complements the other flavors.
  • 2 tablespoons butter: Adds richness and helps sauté the vegetables to perfection.
  • 1 small yellow onion, diced: The flavor base of any good soup, offering sweetness and depth.
  • ½ cup diced carrots: For sweetness and color.
  • 2 ribs celery, diced: Adds crunch and a fresh taste.
  • 3 cloves garlic, minced: Infuses the soup with aromatic goodness.
  • 5 cups chicken broth: The heart of the soup, providing moisture and flavor.
  • 1 teaspoon soy sauce: For a savory umami kick.
  • 1 teaspoon hot sauce (e.g., Frank’s): Adds a hint of heat, adjustable to your preference.
  • 1 ¼ pounds bone-in chicken breast: The star protein that brings heartiness to the soup.
  • Fresh parsley, for garnish: A final touch that brightens the dish.
  • 1 ½ cups chicken broth: Additional broth for cooking the rice, ensuring it’s flavorful.
  • ¾ cup white long grain rice, uncooked: Absorbs the broth and adds substance to the soup.

Step-by-Step Instructions

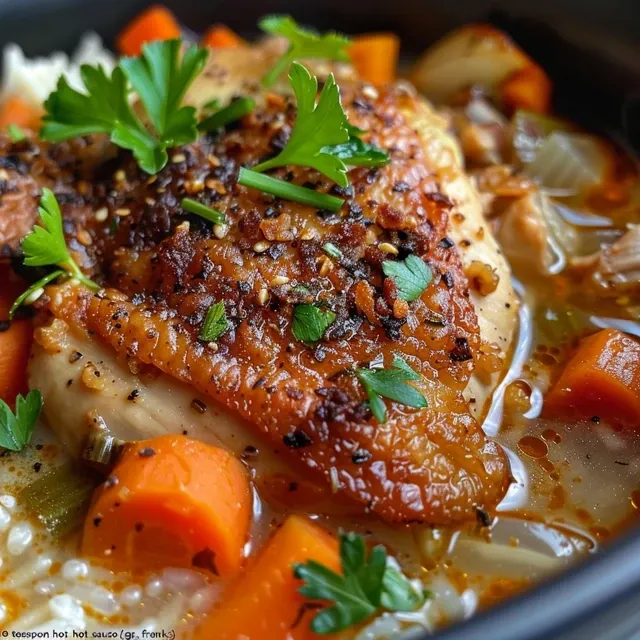
A detailed side view of chicken and rice soup, showcasing tender chicken, rice, and assorted vegetables.

Now that you have your ingredients, let’s get cooking!

  1. Melt butter in a large soup pot over medium heat. Add the diced onions, carrots, and celery, cooking for about 4 minutes until softened. Stir in minced garlic and cook for an additional minute.
  2. Add seasonings: Stir in the dried basil, parsley, oregano, thyme, mustard powder, and pepper. Then, add soy sauce, hot sauce, bone-in chicken, and 5 cups of chicken broth. Bring to a gentle simmer.
  3. Cook the chicken: Cover the pot partially and let the chicken cook slowly for about 20 minutes until fully cooked. Remove the chicken, shred it, and discard the bones before returning the shredded chicken to the pot.
  4. Cook the rice: In a medium saucepan, bring 1 ½ cups of chicken broth to a boil. Add the uncooked rice, cover tightly, reduce heat to low, and simmer for 15 minutes. Let it sit covered for another 10 minutes.
  5. Assemble and serve: Taste the soup and add salt if desired. Spoon cooked rice into bowls, ladle hot soup over it, garnish with fresh parsley, and serve immediately or mix the rice directly into the soup if you expect leftovers.

Pro Tips for the Best Results

  • Use bone-in chicken: For a richer flavor, using bones adds depth to the broth as it simmers.
  • Don’t rush the simmer: Allowing the chicken to cook slowly ensures it remains juicy and tender.
  • Adjust the spice level: Tailor the amount of hot sauce to suit your family’s taste preferences.
  • Make it creamy: For a richer texture, add a splash of cream or a dollop of sour cream just before serving.
  • Bulk it up: Feel free to add other vegetables like peas or corn for added nutrition and color.
  • Store properly: Keep the soup in airtight containers to maintain freshness; it lasts up to 5 days in the fridge.
  • Reheat gently: When reheating, do it slowly over low heat to prevent the chicken from drying out.
  • Embrace leftovers: This soup freezes well; just ensure to store the rice separately if you plan to freeze it.

Common Mistakes and Troubleshooting

Even the best chefs can make a mistake! Here are some common pitfalls and how to avoid them:

  • Overcooking the chicken: Keep an eye on the cooking time; overcooked chicken can become dry.
  • Under-seasoning: Always taste your broth before serving, adding salt or spices as needed.
  • Watery soup: If your soup is too thin, simmer it uncovered for a few extra minutes to concentrate the flavors.
  • Rice mushiness: Follow the rice cooking instructions precisely to prevent it from becoming too soft.

Delicious Variations

Make this soup your own! Here are a few variations to inspire you:

  • Creamy Chicken and Rice Soup: Stir in a splash of heavy cream for a velvety texture.
  • Vegetarian Version: Swap chicken for chickpeas and use vegetable broth for a hearty plant-based option.
  • Spicy Chicken and Rice Soup: Add diced jalapeños or cayenne pepper for a fiery kick!
  • Thai-Inspired Soup: Incorporate coconut milk, lime juice, and fresh cilantro for a tropical twist.

Storage and Make-Ahead Instructions

This soup is perfect for meal prepping! Here’s how to store it:

  • Refrigeration: Store in airtight containers for up to 5 days in the fridge.
  • Freezing: Freeze the soup without the rice for up to 3 months. When ready to eat, reheat and add freshly cooked rice.
  • Make-ahead option: Prepare the base of the soup and add rice just before serving for optimal texture.

Frequently Asked Questions

Here are some common questions about this crispy chicken and rice soup:

  • Can I use leftover chicken?: Absolutely! Shredded rotisserie chicken works perfectly.
  • What type of rice is best?: Long-grain white rice is ideal, but jasmine or basmati can also work.
  • Can I add other vegetables?: Yes, feel free to include your favorites like peas, spinach, or bell peppers.
  • How do I make it gluten-free?: Use gluten-free soy sauce or omit it altogether.
  • Can I make this in a slow cooker?: Yes! Combine all ingredients in a slow cooker and cook on low for 6-8 hours.
  • How do I store leftovers?: Store in airtight containers in the fridge or freeze for later use.
  • Is this soup suitable for kids?: Yes, it’s mild and can be adjusted to be less spicy.
  • Can I make it vegetarian?: Yes, substitute chicken with chickpeas and use vegetable broth.

Nutrition Tips and Dietary Adaptations

To make this soup fit your dietary needs:

  • Low-carb option: Substitute rice with cauliflower rice or zucchini noodles.
  • High-protein boost: Add extra chicken or beans for more protein.
  • Vegan adaptation: Use plant-based chicken alternatives and vegetable broth.
  • Fiber-rich addition: Toss in some lentils or beans for added fiber and nutrients.

Equipment Recommendations

Here’s what you’ll need to create this masterpiece:

  • Large soup pot: Essential for simmering all your ingredients together.
  • Medium saucepan: Perfect for cooking the rice separately.
  • Soup ladle: Makes serving a breeze!
  • Cutting board and knife: For prepping your vegetables efficiently.

Serving Suggestions

To elevate your crispy chicken and rice soup experience, consider these serving ideas:

  • Fresh bread: Pair with crusty bread or rolls for a satisfying meal.
  • Salad side: Serve alongside a light green salad for a refreshing contrast.
  • Garnish options: Sprinkle with fresh herbs or a squeeze of lemon before serving for brightness.
  • Hot sauce: Offer hot sauce at the table for those who crave extra heat.

In conclusion, this Crispy Chicken and Rice Soup recipe is more than just a dish—it’s a journey, an experience, and a story waiting to be shared. Whether you’re cooking for yourself or gathering loved ones around the table, this soup is sure to create moments of warmth and connection. So grab your apron, gather your ingredients, and let the adventure begin!

Crispy Chicken and Rice Soup Recipe

Prep Time 10 minutes
Cook Time 35 minutes
Total Time 45 minutes
Servings 4 servings
Calories 450
A comforting and hearty soup combining tender shredded chicken, flavorful herbs, and rice, perfect for a satisfying meal.

Ingredients

Spices and herbs

  • 1 teaspoon dried basil
  • 0.5 teaspoon dried parsley
  • 0.5 teaspoon dried oregano
  • 0.5 teaspoon dried thyme
  • 0.5 teaspoon mustard powder
  • 0.25 teaspoon pepper
  • 2 tablespoons butter
  • 1 small yellow onion, diced
  • 0.5 cup diced carrots
  • 2 ribs celery, diced
  • 3 cloves garlic, minced
  • 5 cups chicken broth
  • 1 teaspoon soy sauce
  • 1 teaspoon hot sauce (e.g., Frank's)
  • 1.25 pounds bone-in chicken breast

Fresh parsley, for garnish

  • 1.5 cups chicken broth
  • 0.75 cup white long grain rice, uncooked ((or 2 ¼ cups cooked rice))

Instructions 

  • Melt butter in a large pot, cook diced vegetables for 4 minutes, then add garlic and cook 1 minute.
  • Add herbs, soy sauce, hot sauce, chicken, and 5 cups broth; simmer for 20 minutes. Shred chicken and return to soup.
  • Cook rice in 1.5 cups broth for 15 minutes, then let sit covered for 10 minutes.
  • Taste and adjust salt if needed. Serve soup over rice, garnished with parsley.

Notes

For extra flavor, use homemade chicken broth and fresh herbs.
Calories: 450kcal
Cost: $15
Course: Soup
Cuisine: American
Keyword: Chicken, Comfort Food, rice

A Culinary Adventure Awaits: Unraveling the Joys of Garlic Chicken Lo Mein

Welcome to a delightful culinary journey where we explore the vibrant world of Garlic Chicken Lo Mein. This dish is not just a meal; it’s a celebration of flavors, culture, and the joy of sharing food with loved ones. With tender chicken, colorful vegetables, and a garlicky sauce that dances on your taste buds, this recipe is a must-try for anyone looking to bring a taste of adventure to their dinner table. Get ready to embark on a journey that will inspire you to create, share, and indulge!

Why You’ll Love This Recipe

If you’re still on the fence about trying this recipe, let me share five compelling reasons to dive in:

  • Quick and Easy: With just 30 minutes from start to finish, this dish is perfect for busy weeknights.
  • Flavor Explosion: The combination of garlic, soy sauce, and sesame oil creates a rich, savory sauce that elevates the dish to new heights.
  • Customizable: Feel free to mix and match your favorite vegetables or proteins, making it a versatile option for any palate.
  • Healthy Choice: Packed with protein and fiber, this meal is not only delicious but also nutritious.
  • Perfect for Sharing: Whether it’s a family dinner or a gathering with friends, Garlic Chicken Lo Mein is sure to impress and satisfy.

Ingredients Breakdown

Now, let’s gather our ingredients! Here’s what you’ll need, along with some optional substitutions for those who might have dietary restrictions:

  • 1 lb boneless, skinless chicken breasts: Cut into bite-sized pieces. You can substitute with tofu or shrimp for a different protein option.
  • 8 oz lo mein noodles: These can be swapped for rice noodles or whole wheat noodles for a healthier twist.
  • 4 cloves fresh garlic: Minced; the star of our dish! You can use garlic powder in a pinch, but fresh is best.
  • 1 cup bell peppers: Sliced (any color); feel free to add more colorful veggies like snap peas or broccoli!
  • 1 cup carrots: Thinly sliced; adding zucchini or bok choy can enhance the dish.
  • 3 tbsp low-sodium soy sauce: For a gluten-free option, try tamari or coconut aminos.
  • 1 tbsp sesame oil: Adds depth to the flavor; you can replace it with olive oil if needed.
  • 1 tsp cornstarch: Mixed with 2 tsp water; this helps thicken the sauce.

Step-by-Step Guide to Perfection

Juicy Garlic Chicken Lo Mein with vibrant bell peppers and carrots.

Ready to bring this dish to life? Here’s how to create your Garlic Chicken Lo Mein:

  1. Prepare your ingredients: Chop chicken and slice vegetables.
  2. Cook the noodles: Boil salted water, add lo mein noodles, and cook until al dente (3-5 minutes). Drain and set aside.
  3. Sauté the chicken: Heat oil in a large skillet over medium-high heat. Cook chicken until golden brown (5-7 minutes).
  4. Add garlic and veggies: Stir in minced garlic, bell peppers, and carrots; cook for another minute until fragrant.
  5. Make the sauce: Whisk soy sauce, sesame oil, and cornstarch mixture in a bowl. Pour over chicken and veggies.
  6. Combine everything: Toss in cooked lo mein noodles until evenly coated and heated through (1-2 minutes).

Pro Tips for the Best Garlic Chicken Lo Mein

Here are some expert insights to elevate your cooking game:

  • Perfect Texture: Make sure not to overcook the noodles; they should be al dente to hold up in the stir-fry.
  • Flavor Infusion: Allow the garlic to sauté until fragrant, but be careful not to burn it, as it can turn bitter.
  • High Heat Cooking: Stir-fry quickly over high heat to lock in flavors and maintain the crunch of the vegetables.
  • Rest the Chicken: Let the chicken sit for a few minutes after cooking to retain its juices.
  • Balance the Sauce: Adjust the soy sauce and sesame oil according to your taste preference—add a dash of chili oil for heat!
  • Presentation Matters: Garnish with chopped green onions or sesame seeds for a pop of color and flavor.
  • Meal Prep Friendly: Make a larger batch for leftovers; they store beautifully!
  • Experiment: Don’t hesitate to try different proteins or veggies based on what’s in season or what you have on hand.

Common Mistakes and Troubleshooting

Even seasoned cooks can make mistakes. Here are some common pitfalls and how to avoid them:

  • Overcooking the Chicken: This can lead to dry, tough meat. Use a meat thermometer to check for doneness (165°F).
  • Too Much Sauce: If your lo mein is too watery, increase the heat and stir continuously to allow excess moisture to evaporate.
  • Sticking Noodles: Make sure to toss the noodles with oil immediately after draining to prevent them from clumping.
  • Flavor Deficiency: Always taste and adjust seasoning as needed; sometimes a pinch of salt or more soy sauce is all it needs.

Delicious Variations to Try

Spice things up with these variations of the classic Garlic Chicken Lo Mein:

  • Vegetable Lo Mein: Omit the chicken and load up on your favorite vegetables for a vibrant vegan dish.
  • Spicy Garlic Chicken Lo Mein: Add sliced jalapeños or a splash of sriracha for a fiery kick.
  • Coconut Curry Lo Mein: Incorporate coconut milk and curry paste for a tropical twist.
  • Beef or Pork Lo Mein: Substitute the chicken with thinly sliced beef or pork for a heartier version.

Storage and Make-Ahead Instructions

If you’re planning ahead, here’s how to properly store your Garlic Chicken Lo Mein:

  • Refrigerate: Store in an airtight container in the refrigerator for up to 3-4 days.
  • Freezing: For longer storage, freeze in portions for up to 2 months. Thaw overnight in the fridge before reheating.
  • Reheating: To reheat, add a splash of water or broth to restore moisture and heat in a skillet over low heat.

Frequently Asked Questions

Here are the answers to some common questions about Garlic Chicken Lo Mein:

  • Can I use other types of noodles? Absolutely! Rice noodles or even spaghetti can work in a pinch.
  • Is this dish gluten-free? Yes, if you use gluten-free noodles and tamari instead of soy sauce.
  • Can I make this recipe vegetarian? Yes! Substitute chicken with tofu or mushrooms.
  • How can I add more protein? You can add scrambled eggs or cooked shrimp to boost protein content.
  • What vegetables can I use? Feel free to add bok choy, snap peas, or even baby corn for added flavor and nutrients.
  • Can I prepare this in advance? Yes, you can prep the ingredients and store them separately until you’re ready to cook.
  • What’s the best way to serve it? Serve it hot, garnished with green onions, sesame seeds, or cilantro for freshness.
  • How can I increase the flavor? Consider marinating the chicken in garlic and soy sauce for an extra flavor boost.

Nutritional Insights and Dietary Adaptations

This dish can cater to various dietary needs:

  • Low-Carb: Swap lo mein noodles for zucchini noodles or cauliflower rice.
  • Dairy-Free: This recipe is inherently dairy-free, making it suitable for those with lactose intolerance.
  • High-Protein: Add more chicken or use chickpeas for a plant-based protein boost.

Essential Equipment You’ll Need

To create your Garlic Chicken Lo Mein, here are some tools that will make your cooking experience smoother:

  • Large Skillet: A non-stick skillet is ideal for stir-frying without sticking.
  • Cooking Utensils: A spatula or tongs for tossing ingredients together.
  • Cutting Board: For prepping your ingredients safely and efficiently.
  • Measuring Cups and Spoons: Accurate measurements are key to achieving the best flavor balance.

Serving Suggestions

Garlic Chicken Lo Mein is versatile and pairs well with a variety of dishes:

  • Spring Rolls: Serve with crispy vegetable spring rolls for a delightful appetizer.
  • Egg Drop Soup: A warm bowl of egg drop soup makes for a comforting combination.
  • Steamed Broccoli: Add steamed broccoli on the side for extra greens and nutrients.

Conclusion

There you have it! A comprehensive guide to making the perfect Garlic Chicken Lo Mein that not only tantalizes your taste buds but also serves as a gateway to culinary exploration. I hope this recipe inspires you to gather around the table, share stories, and enjoy meals that connect us all. Bon appétit, and happy cooking!

Garlic Chicken Lo Mein

Prep Time 10 minutes
Cook Time 10 minutes
Total Time 20 minutes
Servings 4 servings
Calories 450
A quick and flavorful Asian-inspired dish featuring tender chicken, fresh vegetables, and savory noodles.

Ingredients

Protein

  • 1 lb boneless, skinless chicken breasts (cut into bite-sized pieces)

Carbohydrates

  • 8 oz lo mein noodles

Vegetables

  • 1 cup bell peppers (sliced (any color))
  • 1 cup carrots (thinly sliced)

Flavorings & Sauces

  • 4 cloves fresh garlic (minced)
  • 3 tbsp low-sodium soy sauce
  • 1 tbsp sesame oil
  • 1 tsp cornstarch (mixed with 2 tsp water)

Instructions 

  • Chop chicken and slice vegetables.
  • Boil salted water, cook noodles until al dente (3-5 min), drain.
  • Heat oil, cook chicken until golden (5-7 min).
  • Add garlic and vegetables; cook 1 min until fragrant.
  • Mix soy sauce, sesame oil, cornstarch; pour over chicken and veggies.
  • Toss in noodles, heat through 1-2 min, serve.

Notes

For extra flavor, add chopped green onions or sesame seeds before serving.
Calories: 450kcal
Cost: $15
Course: Main Course
Cuisine: Asian
Keyword: Chicken, Noodles

Discover the Magic of Creamy Pesto Chicken in a Pressure Cooker

Welcome, fellow culinary explorers! Today, we embark on a delightful journey to create a dish that brings the vibrant flavors of Italy right to your kitchen: **Creamy Pesto Chicken**. This recipe is not just about cooking; it’s about savoring every bite and experiencing the stories behind the ingredients. Using a pressure cooker, we’ll achieve tender chicken breasts enveloped in a luscious creamy pesto sauce that’s as rich in flavor as it is in cultural significance. So, fasten your aprons, and let’s dive into this culinary adventure!

Why You’ll Love This Recipe

Here are five fantastic benefits you’ll discover when you whip up this creamy pesto chicken:

  • Quick Cooking: The pressure cooker dramatically reduces cooking time while ensuring your chicken remains juicy and tender. Perfect for busy weeknights!
  • Flavor Explosion: The harmony of garlic, fresh basil, and cream creates a sauce that’s both comforting and invigorating, elevating your meal from ordinary to extraordinary.
  • Versatile Dish: Whether served over pasta, rice, or with crusty bread, this dish adapts beautifully to your dining preferences.
  • Make-Ahead Friendly: Prepare it in advance and store leftovers for an effortless meal later in the week, making dinner planning a breeze!
  • Family Approved: With its creamy texture and vibrant flavors, this dish is a guaranteed crowd-pleaser, even among picky eaters.

Ingredient Breakdown

Let’s gather our ingredients! Below is the complete list you’ll need, along with some handy substitutions to customize your dish:

  • Chicken Breasts: 2 x 250g, sliced thinly. You can substitute with chicken thighs for a richer flavor.
  • Plain Flour: 35g, for coating the chicken. Cornstarch can be used for a gluten-free option.
  • Seasonings: 1 tsp salt, 1 tsp garlic powder, and 1/2 tsp black pepper. Feel free to add Italian herbs for extra flavor.
  • Olive Oil & Butter: 1 tbsp each, for sautéing. You can use ghee or plant-based butter for a dairy-free version.
  • Shallots: 2, finely diced. Onions work well if shallots aren’t available.
  • Double or Heavy Cream: 160ml, for that luscious sauce. Coconut cream is a great alternative for a dairy-free option.
  • Chicken Stock: 80ml to enhance the flavor profile. Vegetable stock can be used for a vegetarian twist.
  • Freshly Grated Parmesan: 20g, for topping. Nutritional yeast can provide a cheesy flavor for dairy-free diets.
  • Cherry Tomatoes: 200g, halved. Any fresh tomatoes will work, or you can use sun-dried tomatoes for a different flavor.
  • Pesto: 1/2 cup, homemade or store-bought. Making your own allows you to control the flavors!

Step-by-Step Instructions

Now that we have our ingredients, let’s journey through the cooking process:

  1. **Prepare the Chicken**: Season flour with salt, garlic powder, and black pepper. Dredge the chicken pieces in the seasoned flour.
  2. **Sauté**: In your pressure cooker, heat olive oil and butter on the sauté mode. Add chicken and brown on all sides for about 3-4 minutes.
  3. **Add Shallots**: Toss in the finely diced shallots and cook until fragrant, about 2 minutes.
  4. **Creamy Sauce**: Pour in the heavy cream and chicken stock, stirring to combine. Scrape any browned bits from the bottom to enhance flavor.
  5. **Incorporate Pesto**: Stir in the pesto, ensuring the chicken is well-coated.
  6. **Pressure Cook**: Close the lid, set the valve to sealing, and cook on high pressure for 8 minutes. Allow a natural release for 5 minutes, then quick release any remaining pressure.
  7. **Finish with Tomatoes**: Open the lid and gently fold in the halved cherry tomatoes and grated parmesan.
  8. **Serve**: Plate your creamy pesto chicken over pasta, rice, or fresh greens, and enjoy!

Pro Tips for Perfect Creamy Pesto Chicken

To ensure your dish is a hit, here are some expert insights:

  • Don’t Overcrowd the Pot: Brown your chicken in batches if necessary to achieve that golden color.
  • Adjust Thickness: If you prefer a thicker sauce, let it simmer on sauté mode after cooking until it reaches your desired consistency.
  • Experiment with Flavors: Add a splash of white wine for a sophisticated twist or infuse with lemon zest for brightness.
  • Fresh Herbs: Garnish with fresh basil or parsley right before serving for a pop of color and freshness.
  • Leftover Love: This dish makes fantastic leftovers! Just reheat gently to avoid overcooking the chicken.
  • Make it Spicy: If you like a kick, add red pepper flakes to the sauce for an extra layer of flavor.
  • Use a Meat Thermometer: Ensure your chicken is cooked through (165°F) for food safety.
  • Cooking Time Adjustments: If using chicken thighs, increase the pressure cooking time by 2-3 minutes.

Common Mistakes and Troubleshooting

Even the best chefs make mistakes! Here’s how to avoid common pitfalls:

  • Flour Coating: Skipping the flour can lead to a watery sauce. Coating the chicken helps create that luscious texture.
  • Overcooking: Keep an eye on cooking times, as pressure cookers can vary. Use a timer and check for doneness!
  • Flavor Balance: If your dish tastes flat, a squeeze of fresh lemon juice can brighten flavors significantly.

Variations to Inspire Your Culinary Adventure

Feeling creative? Here are some delicious variations you can try:

  • Pesto Chicken Pasta: Toss cooked pasta into the sauce for a comforting one-pot meal.
  • Vegetable Medley: Add seasonal vegetables like spinach, zucchini, or bell peppers for added nutrition.
  • Cheesy Pesto Chicken Bake: Transfer to a baking dish, top with mozzarella, and broil until bubbly for a delightful finish.
  • Greek Inspired: Substitute pesto with a mix of Greek yogurt, garlic, and fresh dill for a tangy twist.

Storage and Make-Ahead Instructions

This dish is perfect for meal prep! Here’s how to store and reheat your creamy pesto chicken:

  • Refrigeration: Store leftovers in an airtight container for up to 3-4 days.
  • Freezing: Freeze in portions for up to 2 months. Thaw overnight in the refrigerator before reheating.
  • Reheating: Gently reheat on the stovetop or in the microwave, adding a splash of cream or broth if needed to revive the sauce.

Frequently Asked Questions

Here are some common questions about creamy pesto chicken:

  • Can I use frozen chicken? Yes, but increase the cooking time by a few minutes.
  • What can I substitute for pesto? You can make a homemade version using basil, garlic, nuts, and olive oil.
  • Is this recipe gluten-free? Yes, by using cornstarch instead of flour.
  • Can I make this vegetarian? Absolutely! Use tofu or chickpeas instead of chicken.
  • How do I know if my chicken is done? Use a meat thermometer to check that it has reached 165°F.
  • What sides pair well with this dish? Serve with crusty bread, a fresh salad, or steamed vegetables.
  • Can I double the recipe? Yes, just ensure your pressure cooker has enough capacity.
  • How long does it take to cook? The actual cooking time is about 8 minutes, but include the time for the pressure to build and release.

Nutritional Tips and Dietary Adaptations

This creamy pesto chicken is not just delicious; it can also be adapted to fit various dietary needs:

  • Low-Carb: Serve it with zoodles (zucchini noodles) or cauliflower rice for a low-carb alternative.
  • Vegetarian/Vegan: Substitute chicken with plant-based proteins and use coconut cream for a vegan version.
  • Dairy-Free: Use almond milk cream and nutritional yeast instead of cheese for a dairy-free option.

Essential Equipment Recommendations

Here’s what you’ll need to successfully make creamy pesto chicken:

  • Pressure Cooker: An electric pressure cooker like the Instant Pot is ideal for this recipe.
  • Cutting Board and Knife: For easy preparation of ingredients.
  • Measuring Cups and Spoons: Accuracy is key when it comes to cooking!
  • Wooden Spoon: Perfect for stirring and scraping the bottom of the pot.

Serving Suggestions

Finally, let’s talk about how to present your dish:

  • Garnish: Fresh basil or parsley adds a pop of color and freshness.
  • Accompaniments: Serve with garlic bread, a crisp salad, or your favorite grains.
  • Presentation: Serve in a beautiful bowl or on a rustic plate to enhance the dining experience.

And there you have it! A comprehensive guide to crafting a stunning **Creamy Pesto Chicken** dish that’s sure to impress your family and friends. Remember, cooking is not just about the food; it’s about the stories we share and the connections we create. Happy cooking, and may your culinary adventures continue to inspire you!

Creamy Pesto Chicken in the Pressure Cooker

Prep Time 10 minutes
Cook Time 15 minutes
Total Time 25 minutes
Servings 4 servings
Calories 550
A quick and flavorful dish featuring tender chicken breasts cooked in a creamy pesto sauce with cherry tomatoes.

Ingredients

Protein

  • 500 g Chicken Breasts (sliced thin)

Baking & Coatings

  • 35 g Plain Flour (for coating the chicken)

Seasonings

  • 1 tsp Salt
  • 1 tsp Garlic Powder
  • 0.5 tsp Black Pepper

Cooking Fats

  • 1 tbsp Olive Oil
  • 1 tbsp Butter

Vegetables

  • 2 shallots Shallots (finely diced)

Dairy & Broth

  • 160 ml Double or Heavy Cream
  • 80 ml Chicken Stock
  • 20 g Freshly Grated Parmesan
  • 200 g Cherry Tomatoes (halved)
  • 0.5 cup Pesto

Instructions 

  • Season and coat the chicken slices with flour.
  • Sauté shallots in olive oil and butter until translucent.
  • Add chicken and cook until browned.
  • Stir in cream, chicken stock, Parmesan, cherry tomatoes, and pesto. Simmer until heated through.
  • Serve hot, garnished with extra Parmesan if desired.

Notes

For a lighter version, use half the cream or a dairy-free alternative.
Calories: 550kcal
Cost: $15
Course: Main Course
Cuisine: Italian
Keyword: Chicken

Embarking on a Flavorful Journey with Southwest Chicken Wraps

Welcome, fellow food explorers! Today, we’re diving into the vibrant world of Southwest Chicken Wraps, where every ingredient whispers tales of flavor and culture. These wraps aren’t just meals; they are a passport to a culinary adventure that melds the zest of the Southwest with heartwarming comfort. Perfect for lunch or dinner, they’re versatile, packed with protein, and oh-so-satisfying. So, grab your apron and join me in crafting these delicious wraps that promise to awaken your taste buds and fill your kitchen with tantalizing aromas.

Why You’ll Love This Recipe

Here are some compelling reasons to get excited about these Southwest Chicken Wraps:

  • Quick to Prepare: In about 30 minutes, you can whip up these wraps, making them ideal for busy weeknights or quick lunches.
  • Flavor Explosion: The combination of zesty lime, creamy chipotle sauce, and fresh veggies creates a vibrant taste experience.
  • Customizable: Personalize your wraps by swapping in your favorite vegetables or proteins for a unique twist every time.
  • Meal Prep Friendly: These wraps are perfect for meal prepping, allowing you to enjoy a quick, nutritious meal throughout the week.
  • Family-Friendly: With flavors that appeal to all ages, they make a fantastic option for family dinners or gatherings.

Essential Ingredients for Your Southwest Chicken Wraps

Let’s gather our ingredients! Here’s what you’ll need to create these scrumptious wraps:

  • 0.75 lb boneless skinless chicken breasts: The star protein that keeps things hearty.
  • ¼ cup lime juice: Adds a bright, zesty kick.
  • 4 large tortillas: Choose whole wheat or gluten-free for a healthier option.
  • 1 cup uncooked rice: A filling base that soaks up all the delicious flavors.
  • 1 small red bell pepper: Sweet and crunchy for added texture.
  • ¾ cup corn kernels: Adds sweetness and color.
  • 1 cup black beans: A hearty source of protein and fiber.
  • ¼ cup cotija cheese: For a salty bite that complements the other flavors.
  • ⅓ cup sour cream: Creamy goodness that balances the spice.

Pro Tips for Perfect Southwest Chicken Wraps

Succulent Southwest Chicken Wrap displaying layers of ingredients and textures.

Before we dive into the cooking process, here are some tips to ensure your wraps turn out perfectly every time:

  • Marinate Well: Let the chicken sit in the marinade for at least 15 minutes to absorb maximum flavor.
  • Cook Chicken Thoroughly: Ensure the chicken is cooked to an internal temperature of 165°F for safety.
  • Warm Tortillas: Slightly warming your tortillas makes them more pliable and easier to roll.
  • Less is More: Don’t overstuff your wraps; this will help in rolling them neatly.
  • Experiment with Spices: Adjust the seasoning to your taste; add more chipotle for heat or cumin for earthiness.
  • Use Fresh Ingredients: Fresh veggies not only taste better but also add essential nutrients.
  • Consider Serving Styles: Serve with a side of salsa or guacamole for an extra flavor burst.
  • Make it a Salad: If you’re looking for a lighter option, serve all the ingredients over a bed of greens instead of in a wrap.

Step-by-Step Instructions to Make Southwest Chicken Wraps

Now that we have our ingredients and tips, let’s get cooking!

  1. Marinate the Chicken: In a large bowl, mix the chicken with lime juice, olive oil, spices, and chipotle pepper. Let it marinate for at least 15 minutes.
  2. Cook the Rice: Prepare rice according to package instructions, setting it aside once cooked.
  3. Sauté the Chicken: In a skillet over medium heat, sauté the marinated chicken until fully cooked, about 12-15 minutes.
  4. Cook the Vegetables: In the same skillet, add sliced bell peppers and onions, cooking for about 8 minutes. Add minced garlic in the last minute to avoid burning.
  5. Assemble the Wraps: On each tortilla, layer rice, chicken, sautéed vegetables, black beans, corn, cotija cheese, and drizzle with sour cream.
  6. Roll and Serve: Roll the tortillas tightly, slice in half, and serve with additional sauce if desired.

Common Mistakes and Troubleshooting

Even the best chefs can make mistakes! Here’s how to avoid common pitfalls:

  • Dry Chicken: Ensure you don’t overcook the chicken; use a meat thermometer for precision.
  • Too Much Filling: Overstuffing can lead to messy wraps. Stick to a balanced amount!
  • Cold Tortillas: Cold tortillas will crack. Warm them up briefly before assembly.
  • Flavor Imbalance: Taste as you go! Adjust seasoning if needed before serving.

Delicious Variations to Try

Want to mix things up? Here are some exciting variations on the classic Southwest Chicken Wrap:

  • Southwest Veggie Wrap: Substitute chicken with grilled zucchini, mushrooms, and peppers for a vegetarian option.
  • BBQ Chicken Wrap: Swap lime juice for BBQ sauce, giving a sweet and smoky flavor.
  • Spicy Chipotle Wrap: Add extra chipotle sauce for a fiery twist that spice lovers will adore.
  • Southwest Breakfast Wrap: Include scrambled eggs and breakfast sausage for a hearty morning meal.

Storage and Make-Ahead Instructions

Looking to prepare your wraps in advance? Here’s how to store and reheat them effectively:

  • Refrigeration: Store assembled wraps in an airtight container in the fridge for up to 3 days.
  • Freezing: If you want to freeze, wrap each individual wrap in plastic wrap and store in a freezer bag for up to 2 months.
  • Reheating: To reheat, thaw overnight in the fridge if frozen, then microwave or pan-fry until warmed through.

Comprehensive FAQ about Southwest Chicken Wraps

Here are some frequently asked questions to help you get the most out of your Southwest Chicken Wrap experience:

  • Can I use other meats? Absolutely! Feel free to use beef, turkey, or even tofu for a plant-based option.
  • What can I substitute for sour cream? Greek yogurt is an excellent substitute that adds creaminess and protein.
  • How do I make these wraps gluten-free? Use gluten-free tortillas and ensure all other ingredients are gluten-free.
  • Can I add more vegetables? Yes! Feel free to enhance your wraps with spinach, avocado, or jalapeños for extra flavor.
  • How spicy are these wraps? The spice level can be adjusted based on the amount of chipotle used; start with less if you’re sensitive to heat.
  • What sides pair well? Serve with a side of salsa, guacamole, or a fresh salad for a complete meal.
  • Is this recipe kid-friendly? Yes! The flavors are mild enough for children, but you can adjust the spice to their liking.
  • Can I meal prep these wraps? Definitely! They store well in the fridge or freezer, making them perfect for meal prepping.

Nutritional Insights and Dietary Adaptations

These Southwest Chicken Wraps are not only delicious but also nutritious! Here’s what you need to know:

  • Protein-Packed: Each wrap provides a healthy dose of protein, making it filling and satisfying.
  • Fiber-Rich: With black beans and corn, these wraps offer dietary fiber that promotes digestive health.
  • Low-Calorie Option: If you’re watching your calories, consider using lettuce wraps instead of tortillas for a lighter meal.
  • Vegan Adaptations: Replace chicken with chickpeas or lentils and opt for vegan sour cream to make these wraps plant-based.

Essential Equipment for Making Southwest Chicken Wraps

Here’s a quick list of tools that will make your cooking experience smoother:

  • Cutting Board: For chopping veggies and preparing ingredients.
  • Skillet: A non-stick skillet is perfect for sautéing chicken and vegetables.
  • Measuring Cups and Spoons: Essential for accurate ingredient measurements.
  • Mixing Bowls: For marinating the chicken and mixing ingredients.

Serving Suggestions to Elevate Your Wrap Experience

To truly make your Southwest Chicken Wraps shine, consider these serving suggestions:

  • Garnish with Fresh Herbs: A sprinkle of cilantro or parsley adds freshness and color.
  • Offer Dipping Sauces: Provide a variety of sauces like salsa, guacamole, or extra chipotle crema.
  • Accompany with a Side Salad: A refreshing salad can complement the richness of the wraps.
  • Serve with Chips: Crunchy tortilla chips are a fun side that pairs well with the wraps.

Now that you’re armed with all the knowledge, tips, and tricks to create the ultimate Southwest Chicken Wrap, it’s time to roll up your sleeves and get cooking! Remember, food is an adventure, and each bite is a step into a new culture and flavor. Enjoy your culinary journey!

Southwest Chicken Wrap

Prep Time 20 minutes
Cook Time 20 minutes
Total Time 40 minutes
Servings 4 servings
Calories 650
A flavorful and easy-to-make wrap combining grilled chicken, rice, and vibrant Southwest-inspired ingredients.

Ingredients

Protein

  • 0.75 lb boneless skinless chicken breasts
  • ¼ cup lime juice

Grains

  • 1 cup uncooked rice

Vegetables

  • 1 small red bell pepper
  • ¾ cup corn kernels
  • 1 cup black beans

Dairy & Cheese

  • ¼ cup cotija cheese
  • cup sour cream

Instructions 

  • Marinate chicken with lime juice and spices; let sit for 15 minutes.
  • Cook rice according to package instructions.
  • Sauté chicken until cooked, then cook bell peppers and corn in the same skillet.
  • Assemble wraps with rice, chicken, veggies, beans, cheese, and sour cream.
  • Roll wraps tightly and serve.

Notes

You can add hot sauce or extra lime for more flavor.
Calories: 650kcal
Cost: $15
Course: Main Course
Cuisine: Southwest
Keyword: Chicken