Author

Jack

Browsing

Welcome to the Flavorful World of Roasted Chicken

When it comes to comfort food, few dishes can compete with the allure of a perfectly roasted chicken. This culinary classic transcends borders and cultures, offering a delightful way to gather friends and family around the table. In this article, we will explore how to roast a chicken in the oven, diving deep into techniques, tips, and variations that will elevate your cooking game. You’ll discover the magic behind achieving that coveted crispy skin and juicy meat that keeps everyone coming back for seconds.

Why You’ll Love This Recipe

Roasted chicken is not just a dish; it’s an experience that brings people together. Here are some compelling reasons why you’ll adore this recipe:

  • Ultimate Comfort Food: Nothing beats the aroma of chicken roasting in the oven, filling your home with warmth and nostalgia.
  • Easy to Prepare: With minimal prep time, this recipe allows you to focus on other dishes or simply enjoy quality time with loved ones.
  • Versatile Flavors: From classic herbs to bold spices, you can customize the flavor profile to suit your palate.
  • Perfect for Any Occasion: Whether it’s a cozy family dinner or a festive gathering, roasted chicken fits seamlessly into any culinary setting.
  • Healthier Option: Roasting retains nutrients while allowing you to control the ingredients, making it a wholesome choice.

Ingredient Breakdown

Let’s gather our ingredients for this delightful dish. Here’s what you’ll need:

  • Whole Chicken: A 3-5 pound chicken is ideal for roasting. Look for fresh, free-range options if possible.
  • Olive Oil: This adds moisture and helps achieve that golden, crispy skin. You can substitute with melted butter for a richer flavor.
  • Salt and Pepper: Essential for seasoning. Don’t skimp on these; they bring out the chicken’s natural flavors.
  • Herbs: Fresh rosemary, thyme, or sage work wonderfully. Dried herbs can also be used in a pinch.
  • Lemon: A halved lemon inside the cavity adds brightness and moisture as it roasts.
  • Garlic: Whole garlic cloves, unpeeled, infuse the chicken with aromatic flavor.

If you have dietary restrictions, feel free to substitute any ingredient to suit your needs. For example, use a plant-based oil for a vegan-friendly alternative.

Pro Tips for Roasting Chicken
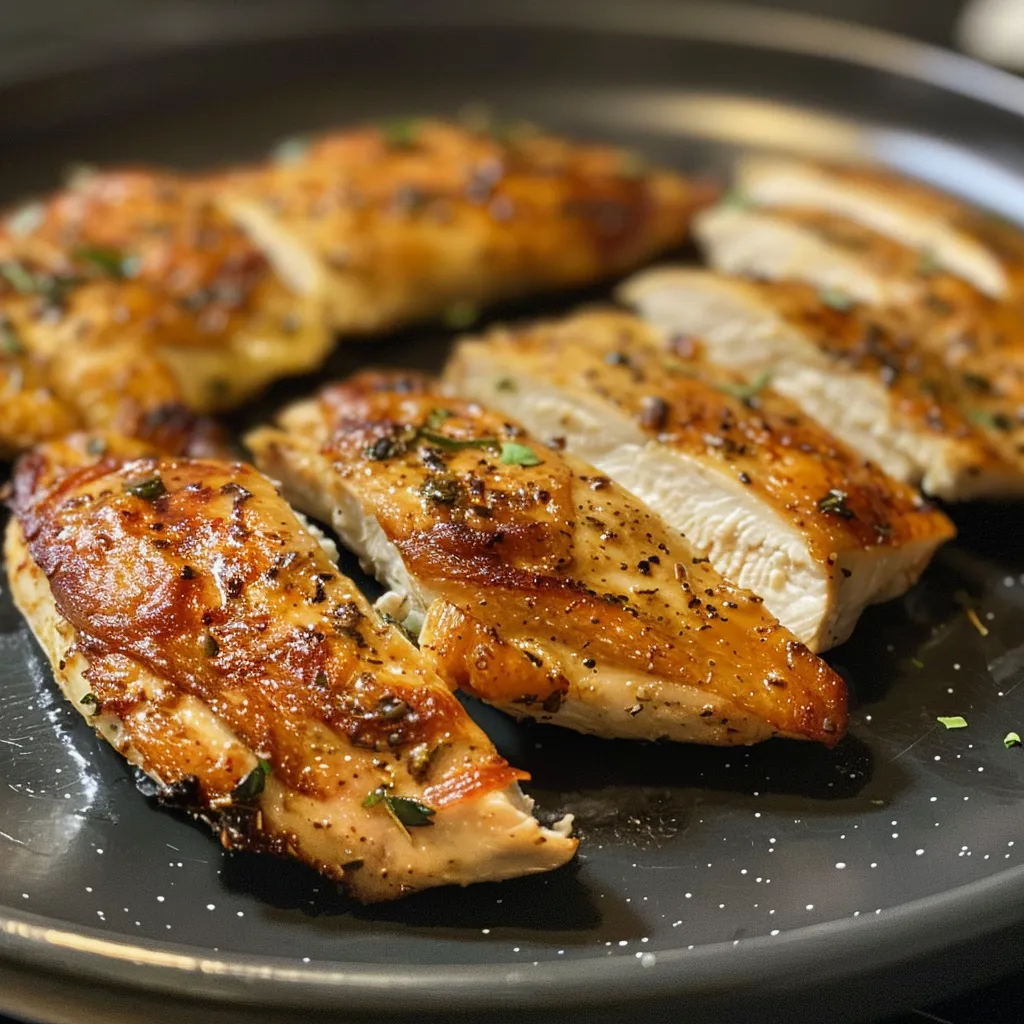
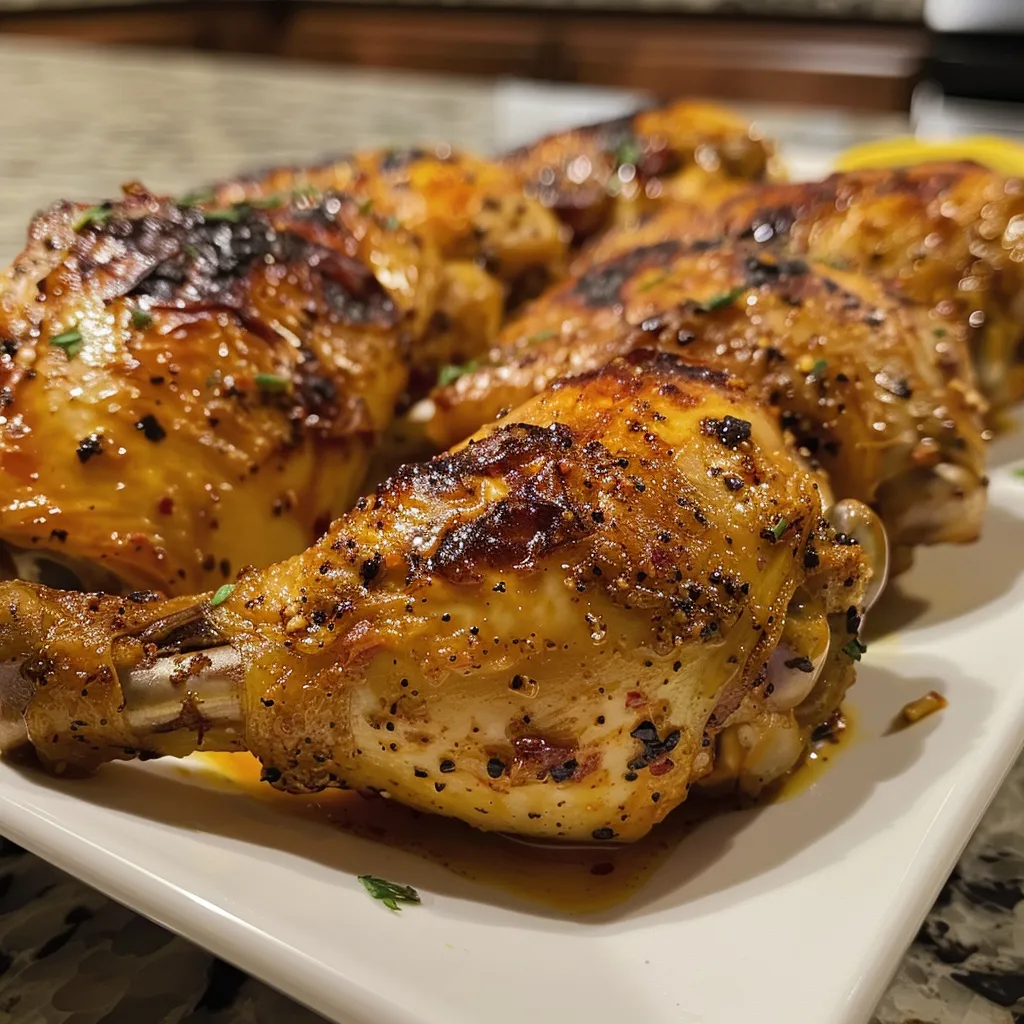
Close-up view highlighting the

To ensure your roasted chicken is always a hit, keep these expert tips in mind:

  • Pat Dry: Always dry the chicken with paper towels before seasoning. This helps the skin crisp up beautifully.
  • Season Generously: Don’t just sprinkle salt and pepper—rub it under the skin for maximum flavor.
  • Let It Rest: After roasting, let the chicken rest for 15-20 minutes. This allows the juices to redistribute for a moist result.
  • Use a Thermometer: Check the internal temperature with a meat thermometer—165°F is your target for safety.
  • Save the Drippings: Use the leftover drippings to make a flavorful gravy or sauce.
  • Experiment with Flavors: Try different marinades or spice blends to make each roast unique.

Common Mistakes and Troubleshooting

Even seasoned cooks can run into issues while roasting chicken. Here’s how to troubleshoot common problems:

  • Dry Meat: If your chicken comes out dry, it may have been overcooked or not enough fat was used. Ensure you check the temperature early.
  • Soggy Skin: This can happen if the chicken is not dried properly before roasting or if it’s cooked at too low a temperature.
  • Uneven Cooking: Make sure your chicken is at room temperature before roasting to ensure even cooking.

Variations on Roasted Chicken

Here are a few exciting variations to try with your roasted chicken:

  • Herb-Butter Chicken: Mix softened butter with minced herbs and rub it under the skin for extra flavor.
  • Spicy Roasted Chicken: Add chili powder and cayenne for a kick, or marinate the chicken in a spicy sauce.
  • Asian-Inspired: Use soy sauce, ginger, and sesame oil for a unique flavor profile.
  • Stuffed Chicken: Stuff the cavity with your favorite stuffing mix or vegetables for added flavor and texture.

Storage and Make-Ahead Instructions

Cooking for a crowd? Here’s how to prepare ahead and store leftover chicken:

  • Refrigeration: Store leftover chicken in an airtight container for up to 3-4 days.
  • Freezing: You can freeze cooked chicken for up to 4 months. Make sure to wrap it tightly to prevent freezer burn.
  • Make-Ahead: You can marinate the chicken the night before and store it in the fridge until you’re ready to roast.

Frequently Asked Questions

Here are some common questions about roasting chicken:

  • How long does it take to roast a chicken? Generally, plan for about 20 minutes per pound at 375°F.
  • Can I roast a frozen chicken? It’s best to thaw your chicken before roasting for even cooking.
  • What should I serve with roasted chicken? Pair it with roasted vegetables, mashed potatoes, or a fresh salad.
  • How can I tell if my chicken is done? Use a meat thermometer; the internal temperature should reach 165°F.
  • Is it necessary to truss the chicken? Trussing helps with even cooking but is not strictly necessary.
  • Can I use a different cooking method? Absolutely! You can grill, slow-cook, or even pressure-cook chicken for delicious results.
  • How do I get crispy skin? Dry the chicken well and roast at a high temperature to achieve that crispy finish.
  • What to do with leftovers? Use leftover chicken in salads, sandwiches, or soups for a quick meal.

Nutrition Tips and Dietary Adaptations

This roasted chicken recipe can easily accommodate various dietary preferences:

  • Low-Carb: Enjoy as is without sides or pair with low-carb vegetables.
  • Gluten-Free: This recipe is naturally gluten-free; just ensure your seasoning and sauces are also gluten-free.
  • Paleo-Friendly: Stick to herbs, spices, and natural oils for a compliant meal.

Equipment Recommendations

Here’s what you’ll need to successfully roast your chicken:

  • Roasting Pan: A sturdy pan to catch the drippings and provide even heat.
  • Meat Thermometer: Essential for ensuring your chicken is cooked perfectly.
  • Basting Brush: For applying oil or butter to the chicken during roasting.

Serving Suggestions

When it’s time to serve, make it an event! Here are some ideas:

  • Garnish with Fresh Herbs: Add a sprinkle of freshly chopped parsley or thyme for a pop of color and flavor.
  • Serve with Pan Sauce: Use the drippings to create a quick sauce that enhances the chicken’s flavor.
  • Pair with Wine: A crisp white wine or a light red can complement the meal beautifully.

As you embark on your roasted chicken journey, remember that cooking is all about exploration and connection. Each dish tells a story, and with every roast, you’re not just cooking—you’re creating memories. So fire up that oven, gather your ingredients, and let the aroma of roasted chicken fill your home with love and warmth. Happy cooking!

About Us

Prep Time 5 minutes
Total Time 5 minutes
Servings 1 plate
Calories 50
This unique recipe highlights the essential social media platforms that connect us all. Perfect for digital marketing or branding presentations.

Ingredients

Social Media Platforms

  • 1 piece Facebook (Main social media platform)
  • 1 piece Pinterest (Image sharing platform)
  • 1 piece LinkedIn (Professional networking site)

Instructions 

  • Combine Facebook, Pinterest, and LinkedIn to create a comprehensive social media profile.
  • Highlight the unique features of each platform.
  • Share the profile with your audience to increase engagement.
Notes

Use this recipe to boost your online presence effectively.
Calories: 50kcal
Cost: $10
Course: Introduction
Cuisine: Digital
Keyword: Social Media

Embark on a Flavorful Journey: The Art of Roasting a Whole Chicken

Roasting a whole chicken is like unlocking a treasure chest of flavors—juicy, succulent meat with crispy skin that envelops your senses. This dish is a classic across cultures, and mastering it not only enhances your culinary skills but also deepens your connection to global traditions. In this guide, we’ll dive into every aspect of roasting a whole chicken, ensuring that your culinary journey is as rewarding as the meal itself.

Why You’ll Love This Recipe

There’s something magical about serving a perfectly roasted whole chicken. Here are five reasons to embrace this dish:

  • Flavor Explosion: The combination of herbs, spices, and the natural juices creates an explosion of flavors that dances on your palate.
  • Impressive Presentation: A beautifully roasted whole chicken makes for an eye-catching centerpiece at any dinner table.
  • Versatile Leftovers: Use leftover chicken for salads, sandwiches, or soups, making it a meal that keeps on giving.
  • Simple Process: Despite its impressive results, roasting a chicken is surprisingly easy—perfect for novice cooks and seasoned chefs alike.
  • Cultural Connection: Each recipe you try reflects a piece of culinary culture, connecting you to traditions from around the globe.

Essential Ingredients for the Perfect Roast

Understanding the components of a great roast chicken is vital. Here’s a detailed breakdown of what you’ll need:

  • Whole chicken: Choose one that weighs between 4-5 lbs for the best results.
  • Olive oil: 2 tablespoons help create a golden, crispy skin.
  • Salt: 1 tablespoon, or to taste—this enhances the chicken’s natural flavors.
  • Fresh herbs: Rosemary, thyme, or parsley add aromatic depth and freshness.
  • Lemon: A sliced lemon adds brightness and moisture, infusing the chicken with citrusy flavor.
  • Garlic: 4 cloves, smashed, elevate the dish with a robust, savory kick.

Tools You’ll Need

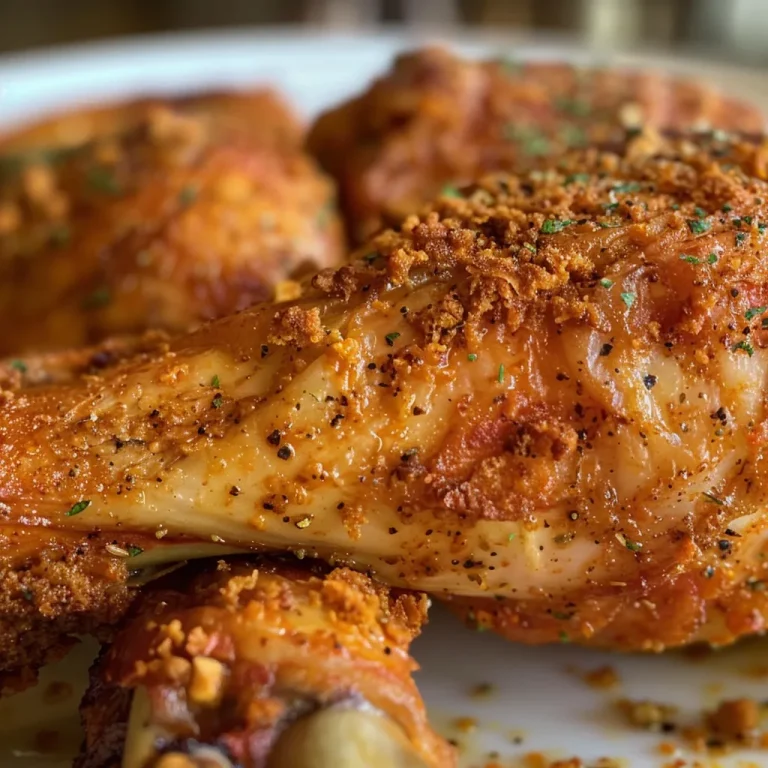
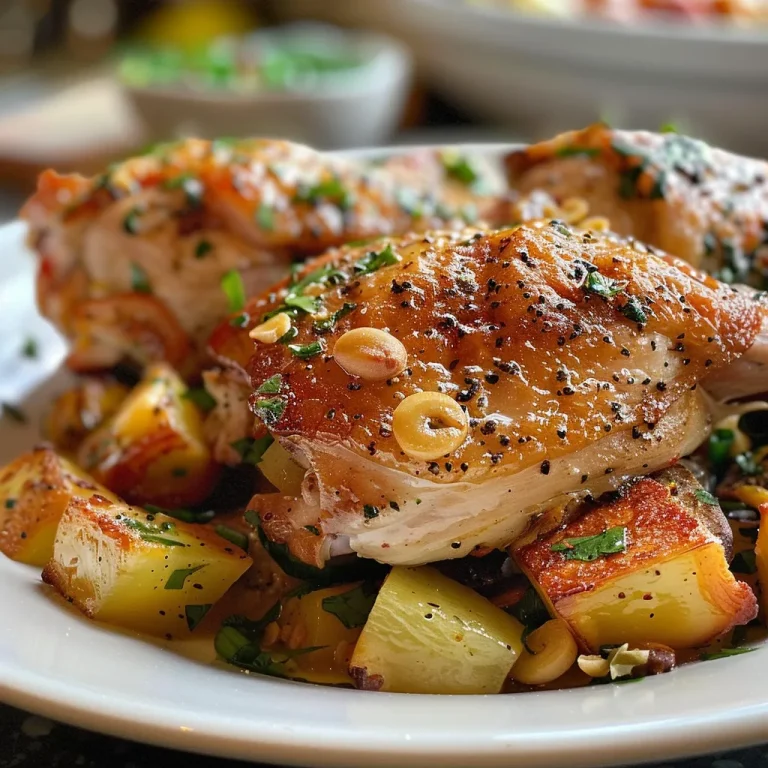
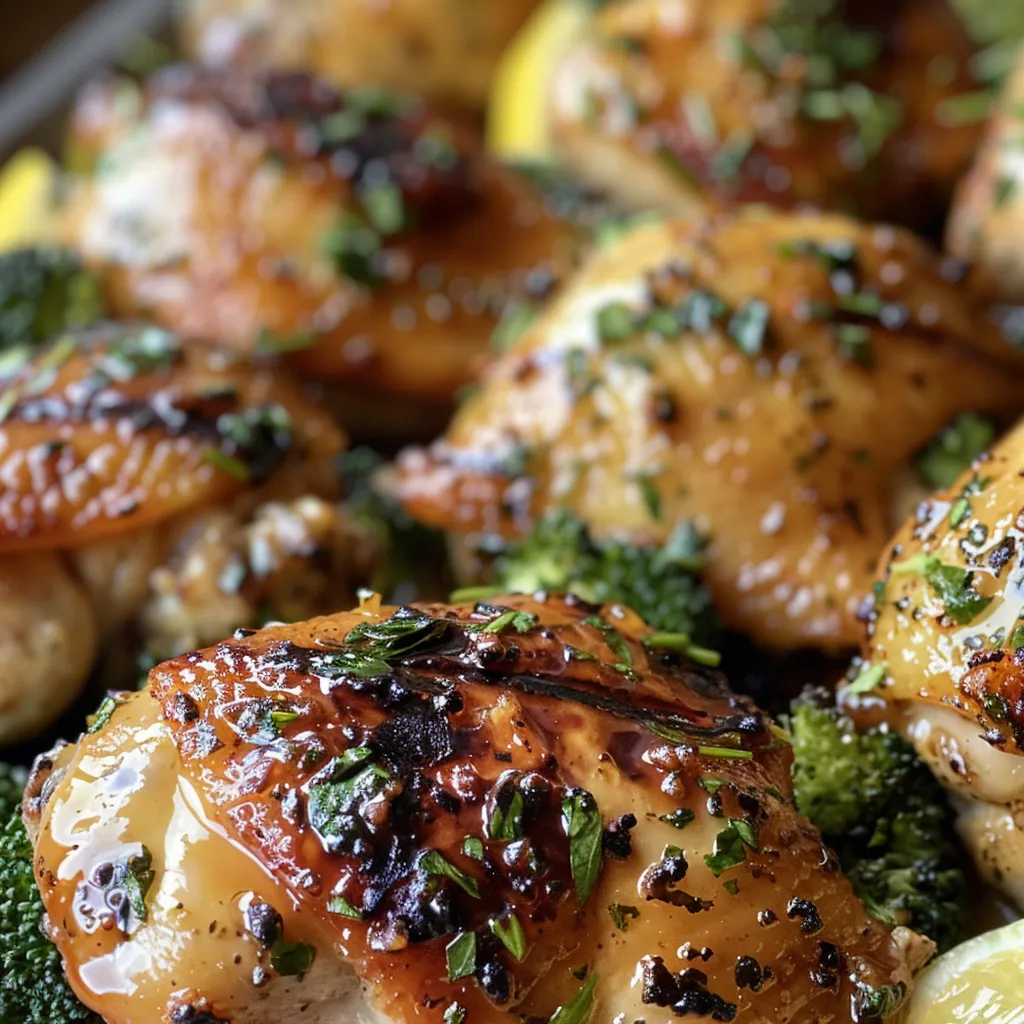
Appetizing close-up of tender chicken served with sides.

Having the right tools makes the roasting process smoother:

  • Roasting pan: A sturdy pan with high sides to catch drippings.
  • Meat thermometer: Essential for checking doneness—aim for 165°F in the thickest part of the meat.
  • Basting brush: Use this to apply oils and juices for even cooking.
  • Carving knife: A sharp knife makes slicing through the crispy skin effortless.

Step-by-Step Preparation for Roasting

Follow this detailed guide to achieve the perfect roast:

Step 1: Preparing the Chicken

Start by patting the chicken dry with paper towels. This step is crucial for achieving crispy skin.

Step 2: Seasoning the Chicken

Rub the chicken all over with olive oil, then generously sprinkle salt. Don’t forget to season the cavity—this is where a lot of flavor hides!

Step 3: Prepping the Oven

Preheat your oven to 425°F (220°C). A hot oven is key to a perfectly roasted chicken.

Step 4: Roasting the Chicken

Place the chicken breast-side up in the roasting pan. Add smashed garlic and lemon slices around the chicken. Roast for about 1.5 hours, basting occasionally.

Step 5: Checking for Doneness

Insert a meat thermometer into the thickest part of the thigh—it should read 165°F. If it’s not there yet, continue roasting and check every 10 minutes.

Serving Suggestions

Once your chicken is beautifully roasted, it’s time to serve! Here are some delightful ideas:

  • Side Dishes: Pair with roasted vegetables, creamy mashed potatoes, or a fresh garden salad.
  • Sauces and Gravies: Serve with homemade gravy made from the drippings for an added flavor boost.
  • Herb Butter: A dollop of herb-infused butter on top of the chicken adds richness.
  • Fresh Bread: Serve with warm, crusty bread to soak up all those delicious juices.

Pro Tips for Roasting Success

Here are some expert insights to elevate your roasting game:

  • Resting time: Allow the chicken to rest for at least 15 minutes after roasting. This helps the juices redistribute and makes for a juicier experience.
  • Room temperature: Let your chicken sit at room temperature for 30 minutes before roasting. This ensures even cooking.
  • Flavor infusion: Consider placing fresh herbs or aromatics inside the cavity for additional flavor.
  • Basting: Baste the chicken every 30 minutes for maximum moisture and flavor.
  • Don’t rush: If the chicken isn’t fully cooked, resist the urge to carve it. Let it cook longer if needed.
  • Experiment: Try different herb blends, spices, or even citrus fruits to find your favorite flavor profile.
  • Cooking method: For a smoky flavor, try roasting on a grill or using a rotisserie.
  • Use the drippings: Don’t discard the drippings! They make a fantastic base for gravy or sauces.

Common Mistakes to Avoid

Even the best chefs can have off days. Here are some common pitfalls and how to troubleshoot:

  • Overcooking: Keep an eye on the thermometer to prevent dry, overcooked chicken.
  • Underseasoning: Don’t skimp on salt—season generously to enhance the chicken’s natural flavor.
  • Ignoring resting time: Cutting into the chicken too soon will result in lost juices. Patience is key!
  • Not using a roasting rack: A rack allows for even cooking and crispier skin.

Variations on the Classic Roast

Don’t hesitate to mix things up! Here are some delicious variations you can try:

  • Herb-Crusted Chicken: Add a mixture of fresh herbs and breadcrumbs to the skin for a crunchy texture.
  • Spicy Mexican Roast: Rub with chili powder, cumin, and lime for a zesty twist.
  • Garlic & Herb Butter: Mix softened butter with minced garlic and herbs, then spread under the skin for an extra layer of flavor.
  • Citrus Infusion: Use oranges, limes, or even grapefruit for a refreshing citrus flavor.

Storage and Make-Ahead Instructions

Roasted chicken is great for meal prep. Here’s how to store and reheat:

  • Refrigeration: Store leftover chicken in an airtight container for up to 4 days.
  • Freezing: Freeze leftover meat in portions for up to 3 months. Thaw in the fridge before reheating.
  • Reheating: Warm in the oven at 350°F (175°C) until heated through to retain moisture.

Nutritional Tips and Dietary Adaptations

Making healthy choices while enjoying your roast chicken is easy:

  • Skinless Options: For a lower-fat option, remove the skin before eating.
  • Gluten-Free: This recipe is naturally gluten-free, making it suitable for those with dietary restrictions.
  • Low-Sodium: Reduce the amount of salt or use a salt substitute to cater to a low-sodium diet.

Comprehensive FAQ: Your Questions Answered

Here are some frequently asked questions about roasting a whole chicken:

  • What is the best temperature to roast a chicken? The optimal temperature is 425°F (220°C) for a crispy skin.
  • How long does it take to roast a chicken? Generally, it takes about 1.5 hours for a 4-5 lb chicken.
  • Can I roast a chicken from frozen? It’s best to thaw the chicken before roasting for even cooking.
  • What should I do with leftover chicken? Leftover chicken can be used in salads, soups, or sandwiches.
  • Can I use a convection oven? Yes, a convection oven can reduce cooking time and enhance browning.
  • How do I know when the chicken is done? Use a meat thermometer; it should read 165°F (74°C) in the thickest part of the thigh.
  • What sides pair well with roast chicken? Roasted vegetables, mashed potatoes, and fresh salads are excellent choices.
  • Can I marinate the chicken? Absolutely! A marinade can add incredible flavor—just ensure it’s done for a few hours or overnight.

Equipment Recommendations

Investing in quality kitchen tools will enhance your roasting experience:

  • Cast Iron Skillet: Ideal for even heat distribution and browning.
  • Digital Meat Thermometer: Essential for achieving perfect doneness.
  • Heavy-duty Roasting Pan: Choose one that can withstand high temperatures and is easy to clean.

Conclusion: Your Culinary Adventure Awaits!

Roasting a whole chicken offers not just a meal, but a celebration of flavors, cultures, and connections. As you embark on this culinary adventure, remember that each roast carries with it a story waiting to be shared. Whether it’s a family gathering or a cozy dinner for one, the joy of cooking and sharing food remains the same. So, gather your ingredients, fire up the oven, and let’s make magic happen in the kitchen!

Browse By

Prep Time 10 minutes
Cook Time 20 minutes
Total Time 30 minutes
Servings 4 people
Calories 250
Explore a variety of recipes categorized by meal type and ingredients to suit any occasion.

Ingredients

Categories

  • 1 unit Home
  • 1 unit RECIPESBreakfastLunchDinnerDessertsSeafood
  • 1 unit Breakfast
  • 1 unit Lunch
  • 1 unit Dinner
  • 1 unit Desserts
  • 1 unit Seafood
  • 1 unit IngredientsChickenBeefSaladsSoup
  • 1 unit Chicken
  • 1 unit Beef
  • 1 unit Salads
  • 1 unit Soup
  • 1 unit In the KitchenAirfryer Recipes
  • 1 unit Airfryer Recipes
  • 1 unit New Year’s Day Recipes
  • 1 unit Valentine’s Day Recipes
  • 1 unit St. Patrick’s Day Recipes
  • 1 unit Easter Recipes
  • 1 unit Mother’s Day Recipes
  • 1 unit Juneteenth Recipes
  • 1 unit Independence Day Recipes
  • 1 unit Halloween Recipes
  • 1 unit Thanksgiving Recipes
  • 1 unit Christmas Recipes
  • 1 unit About Us
  • 1 unit Contact Us

Instructions 

  • Gather all ingredients and prepare your cooking area.
  • Select the appropriate category and ingredients for your meal.
  • Follow the specific cooking instructions for your chosen recipe.
  • Serve and enjoy your meal.

Notes

Use fresh ingredients for the best flavor.
Calories: 250kcal
Cost: $15
Course: Breakfast, Desserts, Dinner, lunch
Cuisine: Various
Keyword: beef, Chicken, Home, RECIPES, Salads, Seafood, Soup

Embark on a Culinary Journey with Honey Garlic Chicken Wings

Welcome, fellow food adventurers! Today, we’re diving into an irresistible dish that marries sweet and savory like no other—honey garlic chicken wings. These wings are not just a treat for your taste buds; they are a passport to global flavors, evoking memories of bustling street markets and family gatherings. Whether you’re hosting a game night or simply craving a comforting meal, this recipe is your ticket to culinary bliss. Let’s explore why you will absolutely love this honey garlic chicken recipe!

Why You’ll Love This Recipe

  • Easy Preparation: With minimal ingredients and straightforward steps, these honey garlic chicken wings can be whipped up quickly, making them perfect for busy weeknights or impromptu gatherings.
  • Flavor Explosion: The combination of honey, garlic, and soy sauce creates a sweet and savory glaze that clings to the wings, resulting in an absolutely delicious dish that will leave your friends and family asking for seconds.
  • Versatile Serving Options: Whether served as an appetizer, a main dish, or part of a potluck spread, these wings are incredibly versatile, fitting seamlessly into any meal.
  • Healthier Alternative: By using an air fryer or Instant Pot, you can enjoy all the flavor of traditional fried wings with significantly less oil, making them a healthier option.
  • Perfect for Sharing: These honey garlic chicken wings are great for social gatherings, allowing everyone to share in the deliciousness while bonding over great food.

What You Will Need

To make these honey garlic chicken wings, you will need the following ingredients. Feel free to think creatively with substitutions or additions!

  • Chicken Wings: 2 pounds of chicken wings, trimmed and ready for cooking.
  • Honey: 1/2 cup of honey, which adds sweetness and a beautiful glaze.
  • Garlic: 4-5 cloves of minced garlic for that aromatic punch.
  • Soy Sauce: 1/4 cup of low-sodium soy sauce to balance the sweetness.
  • Ground Ginger: 1 teaspoon for an extra layer of flavor.
  • Sesame Seeds: Optional for garnishing, providing a delightful crunch.
  • Green Onions: Sliced for garnish, adding freshness and color.

How to Make Honey Garlic Chicken Wings

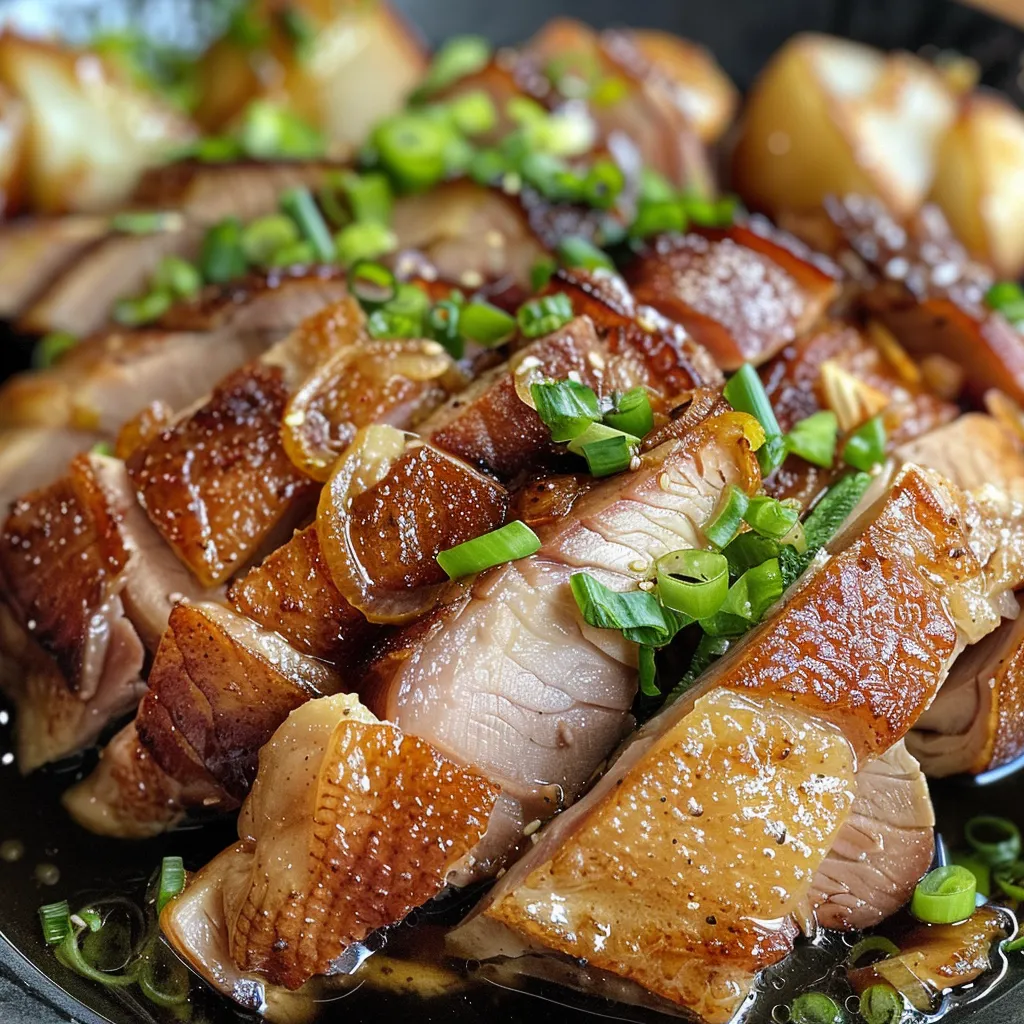
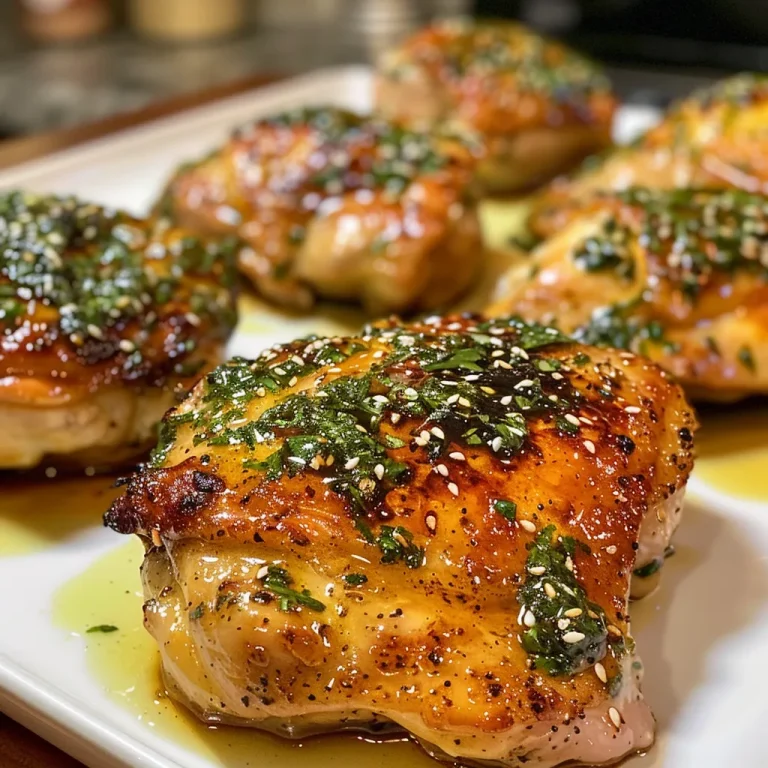
Close-up shot of homemade comfort food, emphasizing freshness and appetizing presentation.

Now that we have our ingredients ready, let’s get cooking! This section will guide you through each step of the process.

  1. Preparation: If you’re using an air fryer, preheat it to 375°F (190°C). For the Instant Pot, set it to sauté mode.
  2. Make the Marinade: In a bowl, combine honey, minced garlic, soy sauce, and ground ginger. Mix well until fully blended.
  3. Marinate the Wings: Place the chicken wings in a large zip-top bag or bowl and pour the marinade over them. Seal the bag or cover the bowl and refrigerate for at least 30 minutes, or up to 24 hours for deeper flavor.
  4. Cooking in the Air Fryer: Arrange the marinated wings in the air fryer basket in a single layer. Cook for 25-30 minutes, flipping halfway through, until the wings are crispy and cooked through.
  5. Cooking in the Instant Pot: Pour 1 cup of water into the Instant Pot. Place a trivet in the pot and arrange the wings on top. Seal the lid and cook on high pressure for 10 minutes. Quick release the pressure, then broil the wings in the oven for 5-7 minutes for a crispy finish.
  6. Garnish and Serve: Once cooked, transfer the wings to a serving platter. Drizzle with any remaining marinade, and sprinkle with sesame seeds and sliced green onions. Serve hot and enjoy!

Expert Tips for Perfect Wings

  • Pat Dry: Dry the chicken wings with paper towels before marinating. This helps achieve that crispy texture when cooked.
  • Use Fresh Garlic: Fresh garlic gives the best flavor. Avoid using garlic powder in this recipe for the authentic taste.
  • Don’t Overcrowd: If using an air fryer, cook the wings in batches to ensure even cooking and crispiness.
  • Adjust Sweetness: Feel free to adjust the amount of honey based on your preference for sweetness. You can also use maple syrup for a unique twist.
  • Broil for Extra Crispiness: If you prefer extra crispy wings, broil them for a few minutes after air frying or pressure cooking.
  • Make Ahead: Marinate the wings the night before for an even richer flavor.
  • Use a Meat Thermometer: Ensure your wings reach an internal temperature of 165°F (74°C) for safe consumption.
  • Consider Using Chicken Thighs: For a juicier option, try using chicken thighs instead of wings! Just adjust the cooking time accordingly.

Common Mistakes and Troubleshooting

Even the best chefs encounter a few bumps along the way. Here are some common mistakes to watch out for:

  • Wings Not Crispy: If your wings are not getting crispy, ensure they are dry before cooking and avoid overcrowding in the air fryer or Instant Pot.
  • Overcooked Wings: Keep an eye on cooking times. Overcooked wings can become dry and tough, so use a meat thermometer to check for doneness.
  • Too Sweet: If the wings turn out too sweet, balance with a splash of vinegar or lime juice to cut through the sweetness.

Variations to Try

Looking to switch things up? Here are some variations to keep your honey garlic chicken wings exciting!

  • Spicy Honey Garlic Wings: Add 1-2 teaspoons of red pepper flakes or sriracha to the marinade for a spicy kick.
  • Lemon Garlic Wings: Substitute half the honey with fresh lemon juice for a citrusy twist.
  • Barbecue Honey Wings: Mix in your favorite barbecue sauce with the honey for a smoky flavor.
  • Asian-Inspired Wings: Add sesame oil and chopped scallions to the marinade for an Asian flair.

Storage and Make-Ahead Instructions

Want to prepare ahead of time? Here’s how to store and reheat your wings:

  • Storage: Store leftover wings in an airtight container in the refrigerator for up to 3 days.
  • Freezing: You can freeze uncooked marinated chicken wings for up to 3 months. Thaw them overnight in the refrigerator before cooking.
  • Reheating: Reheat in the air fryer at 375°F (190°C) for about 5-7 minutes until warmed through.

Frequently Asked Questions

1. Can I use frozen chicken wings?

Yes! Just thaw them overnight in the refrigerator before marinating and cooking.

2. Can I bake these wings instead?

Absolutely! Bake at 425°F (220°C) for about 30-35 minutes, flipping halfway through.

3. What dipping sauces pair well with these wings?

Try ranch dressing, blue cheese dressing, or a spicy aioli for dipping!

4. Can I use boneless chicken instead?

Yes, boneless chicken thighs or breasts work well. Adjust cooking times accordingly.

5. How do I make the glaze thicker?

Simmer the marinade on the stovetop for a few minutes until it reduces and thickens before drizzling over the wings.

6. What sides go well with honey garlic chicken wings?

Serve with coleslaw, sweet potato fries, or a fresh garden salad for a complete meal.

7. Can I make these wings in advance?

Yes, you can marinate the wings a day in advance and cook them when you’re ready to serve.

8. How can I make these gluten-free?

Use gluten-free soy sauce or tamari in the marinade to make this recipe gluten-free.

Nutritional Tips and Dietary Adaptations

For those who are health-conscious, here are some tips:

  • Use Skinless Wings: Opt for skinless chicken wings to reduce fat content.
  • Substitute Sweeteners: Use stevia or agave syrup as a lower-calorie alternative to honey.
  • Pair with Veggies: Serve with a side of fresh vegetables or a salad to balance the meal.

Equipment Recommendations

To achieve the best results with this recipe, consider the following kitchen appliances:

  • Air Fryer: Perfect for achieving that crispy finish without deep frying.
  • Instant Pot: Great for quick and convenient cooking, especially for tenderizing meat.
  • Mixing Bowls: Essential for marinating and mixing your ingredients.
  • Baking Sheet: Used for broiling in the oven if you prefer that method.

Serving Suggestions

Present your honey garlic chicken wings in style! Here are some serving ideas:

  • Garnish: Top with fresh chopped cilantro or parsley for a pop of color.
  • Accompaniments: Serve with crunchy vegetable sticks and a selection of dipping sauces.
  • Platter Presentation: Arrange wings on a large platter with lemon wedges and fresh herbs for an appealing display.

As we wrap up this culinary adventure, remember that food is not just about sustenance—it’s about the stories we share and the memories we create. This honey garlic chicken wings recipe is more than a meal; it’s an experience that brings people together. So gather your loved ones, share this delightful dish, and let the flavors transport you around the world!

Home

Prep Time 10 minutes
Cook Time 30 minutes
Total Time 40 minutes
Servings 4 people
Calories 250
A versatile recipe that can be prepared using an Instant Pot, Slow Cooker, or Air Fryer, making meal prep flexible and convenient.

Ingredients

Appliances

  • 1 unit Instant Pot
  • 1 unit Slow Cooker
  • 1 unit Air Fryer

Instructions 

  • Choose your preferred appliance and prepare the ingredients accordingly.
  • Follow the specific cooking instructions for each appliance to cook the dish.
  • Ensure the dish is cooked through and ready to serve.

Notes

This recipe offers flexibility with multiple appliances, making it easy to prepare a delicious meal with what you have on hand.
Calories: 250kcal
Cost: $15
Course: Main Course
Cuisine: American
Keyword: Versatile

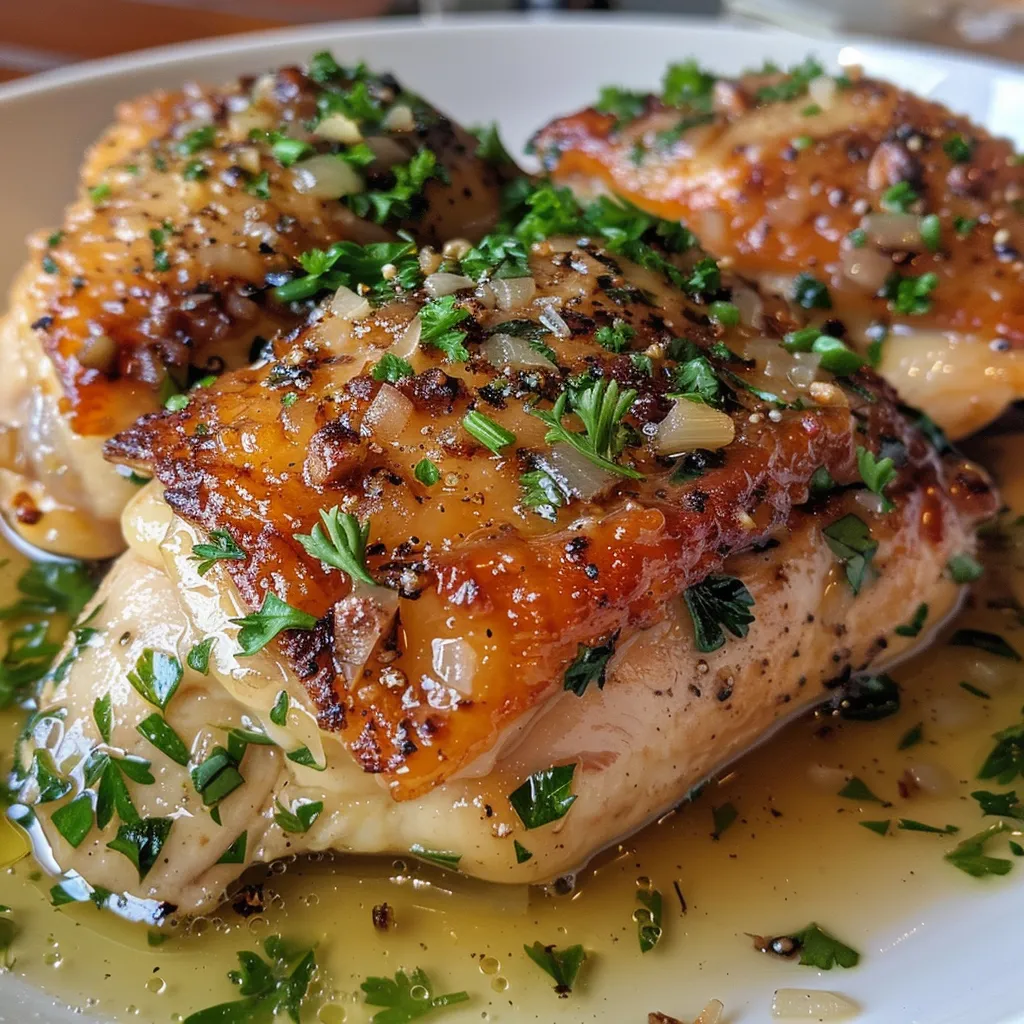
Embark on a Flavorful Adventure with Lemon Chicken

Welcome to a culinary journey that celebrates the vibrant flavors of lemon chicken! This dish, with its tantalizing lemon butter sauce, not only offers a delightful taste experience but also embodies the joy of cooking and sharing meals with loved ones. Imagine sitting around a table, laughter filling the air as you serve up succulent chicken breast, perfectly infused with the zesty brightness of lemon. Whether you’re a seasoned chef or just starting out, this lemon chicken recipe is your ticket to a culinary adventure, inviting you to explore the rich tapestry of flavors from around the world.

Why You’ll Love This Recipe

  • Quick & Easy: This lemon chicken comes together in under 30 minutes, making it perfect for busy weeknights or last-minute dinners.
  • Flavor Explosion: The combination of fresh lemon juice and a rich butter sauce creates a flavor profile that is both bright and comforting.
  • Versatile Dish: You can serve it with a variety of sides, from rice to vegetables, making it adaptable to any meal.
  • Healthy & Nutritious: Chicken breast is a lean protein, and with fresh ingredients, this meal is wholesome and satisfying.
  • Impressive Presentation: The vibrant colors and aroma make it a stunning centerpiece for gatherings, impressing family and friends alike.

Ingredient Breakdown

Let’s dive into the components that make this dish shine. Each ingredient has been carefully selected to ensure the best flavor and texture.

  • Chicken Breast: Boneless, skinless chicken breast is ideal for tenderness. You can substitute with thighs for a richer taste.
  • Lemon Juice: Freshly squeezed lemon juice is crucial for the best flavor. Bottled lemon juice lacks the brightness of fresh.
  • Butter: Unsalted butter allows you to control the saltiness of the dish. For a healthier option, you can use olive oil.
  • Garlic: Fresh garlic cloves bring aromatic depth. Garlic powder can be a substitute if fresh isn’t available.
  • Italian Seasoning: This blend adds an herby touch. Feel free to use your favorite herbs or a homemade mix.
  • Salt & Pepper: Essential for seasoning, adjust to your taste.
  • Optional Garnish: Fresh parsley or lemon slices can add a lovely finishing touch.

Pro Tips for Perfect Lemon Chicken

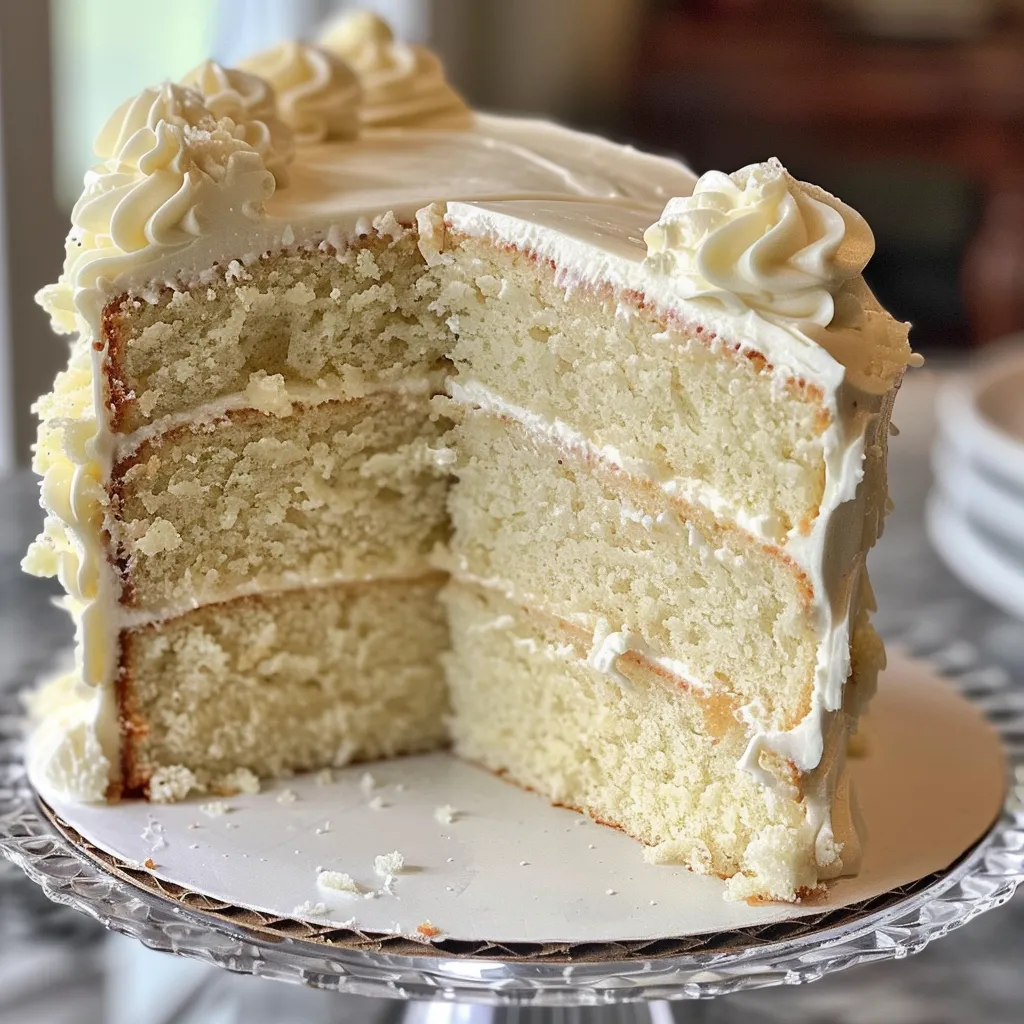
A colorful dessert display featuring layers of cake topped with frosting and fruit.
  • Marinate for Extra Flavor: If time allows, marinate the chicken in lemon juice, garlic, and herbs for at least 30 minutes to intensify the flavors.
  • Don’t Overcook: Chicken breast can dry out quickly. Cook until just done, and let it rest for juiciness.
  • Adjust Sauce to Taste: If you prefer a creamier sauce, add a splash of heavy cream to the butter sauce.
  • Experiment with Flavors: Try adding capers or olives for a Mediterranean twist.
  • Use a Meat Thermometer: For perfect doneness, aim for an internal temperature of 165°F (75°C).
  • Let It Rest: Allow cooked chicken to rest before slicing to retain juices.
  • Pairing Suggestions: This dish pairs beautifully with steamed asparagus or a light salad.
  • Make It a Meal: Serve with quinoa or couscous for a complete, satisfying dinner.

Avoid Common Mistakes

Even the best chefs can run into issues. Here are some common pitfalls and how to avoid them:

  • Dry Chicken: Cooking chicken for too long can dry it out. Keep an eye on the cooking time.
  • Too Sour: Using too much lemon juice can overpower the dish. Start with a small amount and adjust to taste.
  • Not Enough Sauce: If you love sauce, double the butter and lemon juice for a more generous serving.
  • Skipping the Resting Period: Cutting chicken immediately after cooking leads to loss of juices. Patience pays off!

Variations to Explore

Feel free to customize this recipe to suit your palate. Here are some delicious variations:

  • Lemon Herb Chicken: Add fresh herbs like thyme or rosemary for an aromatic twist.
  • Spicy Lemon Chicken: Incorporate red pepper flakes for a bit of heat.
  • Honey Lemon Chicken: Drizzle honey over the chicken before roasting for a sweet and tangy flavor.
  • Garlic Lemon Chicken: Increase the garlic for a more robust flavor, perfect for garlic lovers.

Storage and Make-Ahead Instructions

This lemon chicken can be prepared in advance and stored for future meals:

  • Refrigeration: Store leftovers in an airtight container in the fridge for up to 3 days.
  • Freezing: Freeze cooked chicken for up to 3 months. Thaw in the fridge before reheating.
  • Make-Ahead: You can marinate the chicken a day before and store it in the fridge, allowing the flavors to develop.

Comprehensive FAQ

  • Can I use chicken thighs instead of breasts? Yes, thighs will add more flavor and moisture.
  • Can I make the sauce without butter? Olive oil can be used as a healthier alternative.
  • What can I serve with lemon chicken? It pairs well with rice, quinoa, or a fresh salad.
  • Can I reheat the chicken? Yes, but do so gently to avoid drying it out.
  • How can I make this dish gluten-free? All ingredients listed are naturally gluten-free, just ensure your seasoning blends are also gluten-free.
  • Can I add vegetables to the dish? Yes! Sauté vegetables like bell peppers or zucchini alongside the chicken for a complete meal.
  • Is this recipe suitable for meal prep? Absolutely, it’s perfect for meal prep due to its versatility and ease of storage.
  • How long does it take to cook? The chicken cooks in about 15-20 minutes, depending on thickness.

Nutritional Tips and Dietary Adaptations

This lemon chicken recipe is not only delicious but also healthy. Here are some tips for dietary adaptations:

  • Low-Carb Option: Serve with steamed vegetables instead of rice for a low-carb meal.
  • Gluten-Free: All ingredients are gluten-free, making this a safe option.
  • Dairy-Free: Substitute butter with olive oil for a dairy-free version.
  • Paleo-Friendly: Use coconut oil instead of butter and serve with non-starchy vegetables.

Essential Equipment Recommendations

Having the right tools can make all the difference in your cooking experience:

  • Non-Stick Skillet: For easy cooking and cleanup.
  • Meat Thermometer: Ensures perfect doneness every time.
  • Sharp Knife: For slicing the chicken and preparing ingredients.
  • Cutting Board: A solid board for safe and efficient preparation.

Serving Suggestions

When it comes to serving, presentation is key:

  • Garnish: Fresh parsley or basil adds a pop of color.
  • Side Dishes: Serve with lemon rice, roasted vegetables, or a simple green salad.
  • Wine Pairing: A crisp white wine, like Sauvignon Blanc, complements the dish beautifully.

Conclusion

There you have it—a comprehensive guide to mastering the art of lemon chicken! This recipe is more than just a meal; it’s an opportunity to connect with loved ones, explore new flavors, and enjoy the simple pleasures of cooking. Whether you’re preparing it for a family dinner or an intimate gathering, lemon chicken is sure to impress and satisfy. So grab your apron, gather your ingredients, and embark on this flavorful adventure. Happy cooking!

Classic Sourdough Bread

Prep Time 4 hours
Cook Time 30 minutes
Total Time 4 hours 30 minutes
Servings 8 slices
Calories 250
A delicious homemade sourdough bread with a crispy crust and chewy interior, perfect for any meal.

Ingredients

Dough

  • 500 grams bread flour (preferably bread flour)
  • 350 ml water (lukewarm)
  • 100 grams active sourdough starter (fed and bubbly)
  • 10 grams salt

Instructions 

  • Mix flour, water, sourdough starter, and salt until a shaggy dough forms.
  • Let the dough rest covered for 4 hours, performing a stretch and fold every 30 minutes.
  • Shape the dough into a round and let it proof for 2 hours.
  • Preheat oven to 230°C (450°F) with a Dutch oven inside.
  • Score the dough, place it in the hot Dutch oven, and bake covered for 30 minutes, then uncovered for 15 minutes.

Notes

Use a banneton basket for shaping if available for a better crust.
Calories: 250kcal
Cost: $15
Course: Bread Recipes
Cuisine: American Recipes
Keyword: Sourdough

Welcome to the World of Flavor: A Culinary Adventure

Are you ready to elevate your culinary skills and discover the secrets behind one of the most beloved desserts? In this article, we’ll explore the classic white cake recipe that has graced countless celebrations. This cake is not just a dessert; it’s a canvas for your creativity, a symbol of joy, and a delightful experience for your taste buds. Join me on this exciting journey as we dive into the magic of this fluffy, flavorful cake that truly whispers of celebration!

Why You’ll Love This Classic White Cake Recipe

This white cake recipe is a celebration of simplicity and flavor. Here are some compelling reasons why you’ll adore it:

  • Delightfully Fluffy Texture: The perfect balance of ingredients creates a light and airy cake that melts in your mouth.
  • Easy to Make: With just a few simple steps, you can whip up this cake, making it perfect for both novice bakers and experienced chefs.
  • Versatile Frosting Options: Pair it with a variety of frostings such as vanilla buttercream, cream cheese, or even a chocolate ganache to suit any occasion.
  • Customizable Flavors: This basic white cake serves as a base for endless flavor variations, allowing you to experiment with different extracts and fillings.
  • Perfect for Any Occasion: Whether it’s a birthday, wedding, or a simple gathering, this cake is a hit that fits every celebration.

Ingredients You’ll Need for the Classic White Cake

Before we jump into the baking process, let’s gather our ingredients. Here’s what you’ll need:

  • 1 box white cake mix: The foundation of our cake, providing a quick and easy base.
  • 3 large egg whites: For a light texture and beautiful white color.
  • 1 cup water: Adds moisture to the batter.
  • ½ cup vegetable oil: Ensures a tender crumb.
  • 1 tsp vanilla extract: For that essential flavor kick.

Step-by-Step Instructions to Bake Your Cake

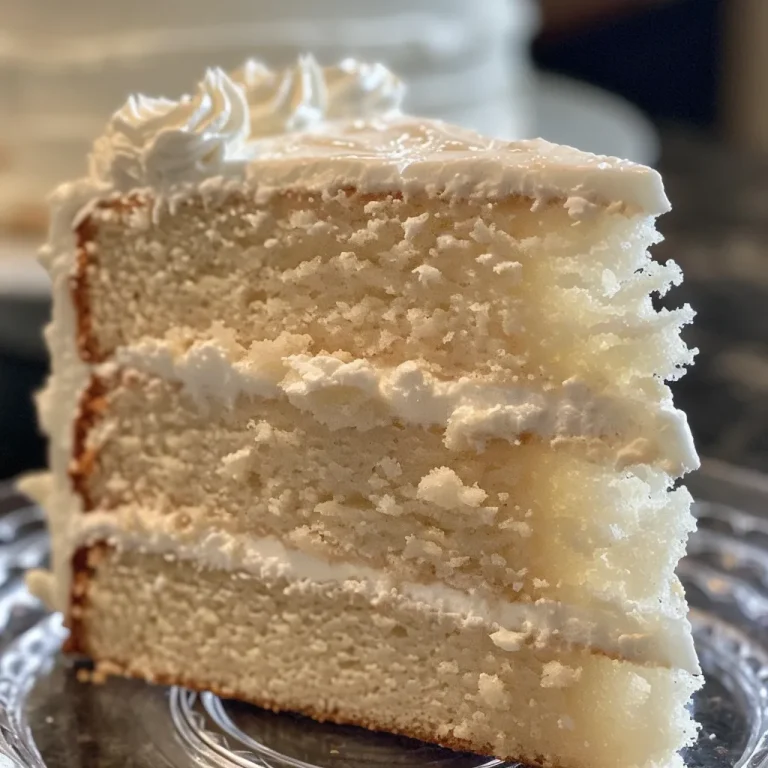
Delicious classic white cake with a glossy finish, viewed from the side.

Let’s get baking! Follow these simple steps to create your masterpiece:

  1. Preheat Your Oven: Set your oven to 350°F (175°C). Grease and flour two 9-inch round cake pans to prevent sticking.
  2. Mix the Batter: In a large bowl, combine the cake mix, egg whites, water, vegetable oil, and vanilla extract. Mix until smooth and well combined.
  3. Pour Into Pans: Divide the batter evenly between the prepared pans, ensuring each pan has the same amount for even baking.
  4. Bake to Perfection: Place the pans in the preheated oven and bake for 25–30 minutes, or until a toothpick inserted in the center comes out clean.
  5. Cool Completely: Once baked, remove the cakes from the oven and let them cool in the pans for about 10 minutes. Then, turn them out onto wire racks to cool completely before frosting.

Pro Tips for the Perfect White Cake

To ensure your cake turns out just right, consider these expert insights:

  • Use Room Temperature Ingredients: Having your eggs and water at room temperature helps the batter blend more smoothly.
  • Don’t Overmix: Mix just until combined to avoid a dense texture. A few lumps are okay!
  • Check Oven Temperature: An oven thermometer can help ensure your oven is accurately calibrated for perfect baking.
  • Cool Cakes Completely: Make sure your cakes are completely cool before frosting to prevent melting.
  • Level Your Cakes: If your cakes have domed tops, trim them flat for a more professional finish when stacking.
  • Experiment with Extracts: Feel free to swap vanilla for almond or lemon extract for a unique twist on flavor.
  • Store Properly: Wrap unfrosted cakes tightly in plastic wrap to keep them fresh.
  • Frosting Variations: Try adding fruit purees or flavored syrups to your frosting for added flair.

Common Mistakes and Troubleshooting

Even the most seasoned bakers can run into a few bumps along the way. Here are some common pitfalls to avoid:

  • Dry Cake: This can occur from overbaking or not adding enough moisture. Always keep an eye on bake times!
  • Dense Texture: Overmixing the batter or using cold ingredients can lead to a heavy cake.
  • Uneven Layers: Ensure your oven is preheated and your pans are evenly filled to achieve uniform layers.
  • Frosting Slippage: If your frosting melts off the cake, it may be too warm or the cake didn’t cool completely.

Flavor Variations to Try

This white cake recipe is incredibly versatile! Here are some delightful variations to consider:

  • Lemon-Infused White Cake: Add zest from one lemon and a tablespoon of lemon juice for a fresh twist.
  • Almond-Scented Cake: Substitute half of the vanilla extract with almond extract for a nutty flavor.
  • Coconut Cream Cake: Mix in shredded coconut and replace some water with coconut milk.
  • Chocolate Marble Cake: Swirl in chocolate batter to create a beautiful marbled effect.

Storage and Make-Ahead Instructions

Planning ahead can make your baking experience even smoother! Here’s how to store and prep your white cake:

  • Room Temperature Storage: Store the unfrosted cake at room temperature, wrapped tightly in plastic, for up to 3 days.
  • Refrigerated Storage: Frosted cakes can be stored in the refrigerator for up to a week.
  • Freezing Cakes: You can freeze unfrosted cake layers for up to 3 months. Just ensure they are well-wrapped to prevent freezer burn.
  • Make-Ahead Tips: Bake and freeze the cake layers in advance, and frost when you’re ready to serve.

Frequently Asked Questions

Here are some common questions and answers about making the perfect white cake:

  • Can I use whole eggs instead of egg whites? Yes, but your cake will have a yellow tint, and the texture may be denser.
  • What can I use instead of vegetable oil? Melted butter or coconut oil can be substituted for a richer flavor.
  • How do I know when my cake is done? Insert a toothpick in the center; it should come out clean or with a few crumbs.
  • Can I double the recipe? Yes, just ensure you have enough oven space and appropriate bakeware.
  • What frosting pairs best with white cake? Vanilla buttercream, cream cheese frosting, or chocolate ganache are excellent choices!
  • Can I use cake flour instead of all-purpose flour? Yes, cake flour will yield an even lighter cake.
  • How can I add color to my white cake? Use food coloring in your batter or frosting to create a festive look.
  • Is white cake suitable for allergies? Check for any specific allergies and consider gluten-free cake mix options if needed.

Nutritional Tips and Dietary Adaptations

This classic white cake can be adapted to suit various dietary needs:

  • Gluten-Free Option: Use a gluten-free cake mix to accommodate gluten sensitivities.
  • Lower Sugar Alternative: Consider using a reduced-sugar cake mix for a healthier option.
  • Dairy-Free Twist: Substitute water with almond or coconut milk and use a dairy-free frosting.
  • Reduce Calories: Use less oil or a sugar substitute to create a lighter version of the cake.

Essential Equipment for Baking

Having the right tools can make all the difference! Here’s a quick list of essential equipment:

  • Mixing Bowls: A set of various sizes for mixing and combining ingredients.
  • Measuring Cups and Spoons: Accurate measurements are crucial for baking success.
  • Electric Mixer: A stand or hand mixer to make mixing quick and easy.
  • Baking Pans: Two 9-inch round cake pans for that classic layered look.
  • Cooling Rack: Allows your cakes to cool evenly without getting soggy.

Serving Suggestions: How to Present Your Cake

Presenting your cake beautifully can elevate any occasion. Here are some serving suggestions:

  • Layered Presentation: Stack the cooled layers with frosting in between for a stunning layered cake.
  • Fresh Fruit Garnish: Top with seasonal fruits like berries or citrus slices for a pop of color.
  • Elegant Cake Stand: Present your cake on a decorative stand to make it the centerpiece of your event.
  • Edible Flowers: Garnish with edible flowers for a beautiful, whimsical touch.

Conclusion: A Celebration of Flavor Awaits

Now that you have all the tools, tips, and tricks to create the perfect classic white cake, it’s time to get baking! Remember, every slice tells a story filled with passion, creativity, and joy. Whether you’re celebrating a special occasion or simply indulging in a sweet treat, this cake is sure to bring smiles to faces and warmth to hearts. So gather your ingredients, preheat that oven, and embark on your delicious adventure. Happy baking!

Classic White Cake from Cake Mix

Prep Time 10 minutes
Cook Time 30 minutes
Total Time 40 minutes
Servings 12 pieces
Calories 250
This classic white cake is quick to prepare and perfect for any celebration. Moist, fluffy, and easy to customize with your favorite frosting.

Ingredients

Cake Mix

  • 1 box white cake mix
  • 3 large egg whites egg whites
  • 1 cup water
  • ½ cup vegetable oil
  • 1 tsp vanilla extract

Instructions 

  • Preheat oven to 350°F (175°C). Grease and flour two 9-inch round pans.
  • Mix cake mix, egg whites, water, oil, and vanilla until smooth.
  • Pour batter into prepared pans.
  • Bake for 25–30 minutes until a toothpick comes out clean.
  • Cool completely and frost as desired.

Notes

For a richer flavor, add a splash of almond extract or substitute water with milk.
Calories: 250kcal
Cost: $15
Course: Dessert
Cuisine: American
Keyword: cake

Embark on a Flavorful Journey with Air Fryer Chicken Thighs

Welcome to a culinary adventure that takes you straight to the heart of global spice markets! In this article, we’re diving deep into the world of Air Fryer Boneless Skinless Chicken Thighs. With their juicy interior and crispy exterior, these chicken thighs are not just a meal—they’re a passport to explore flavors from around the world. Whether you’re a seasoned chef or new to the kitchen, this recipe will guide you to create a dish that’s both quick and mouthwatering.

Why You’ll Love This Recipe

  • Quick and Easy: This recipe is perfect for busy weeknights, allowing you to have a flavorful meal ready in under 30 minutes.
  • Versatile Flavor: Customize the marinade to suit your taste, whether you prefer savory, spicy, or sweet flavors.
  • Healthier Cooking: The air fryer uses significantly less oil than traditional frying methods, making this dish a healthier choice.
  • Perfect Texture: Achieve crispy chicken thighs without the guilt of deep frying—just tender meat with a delicious crust.
  • Meal Prep Friendly: These chicken thighs can be made ahead and stored, making them an ideal option for meal prep.

Ingredients Breakdown

Gather the following ingredients for your Air Fryer Boneless Skinless Chicken Thighs:

  • 2 lb boneless skinless chicken thighs: The star of the dish, these thighs are juicy and full of flavor.
  • 2 tbsp olive oil: Helps the spices adhere and adds a rich flavor.
  • 1 tsp kosher salt: Essential for enhancing the chicken’s natural flavors.
  • 0.5 tsp black pepper: Adds a subtle heat.
  • 1 tsp garlic powder: Infuses the chicken with aromatic flavor.
  • 1 tsp smoked paprika: Gives the chicken a smoky depth and beautiful color.
  • 0.5 tsp onion powder: Complements the garlic and adds sweetness.
  • 1 tsp brown sugar (or honey): Balances the spices with a hint of sweetness.
  • 0.25 cup BBQ sauce (optional): For glazing, adds a tangy finish.
  • 0.5 tsp chili powder (optional): For those who enjoy a little heat.
  • 1 tsp lemon zest (optional): Brightens up the dish with citrus notes.

If you need substitutions, feel free to swap out spices based on your pantry. For instance, use honey instead of brown sugar for a different sweetness, or add herbs like thyme or rosemary for an aromatic twist.

Pro Tips for Perfect Chicken Thighs

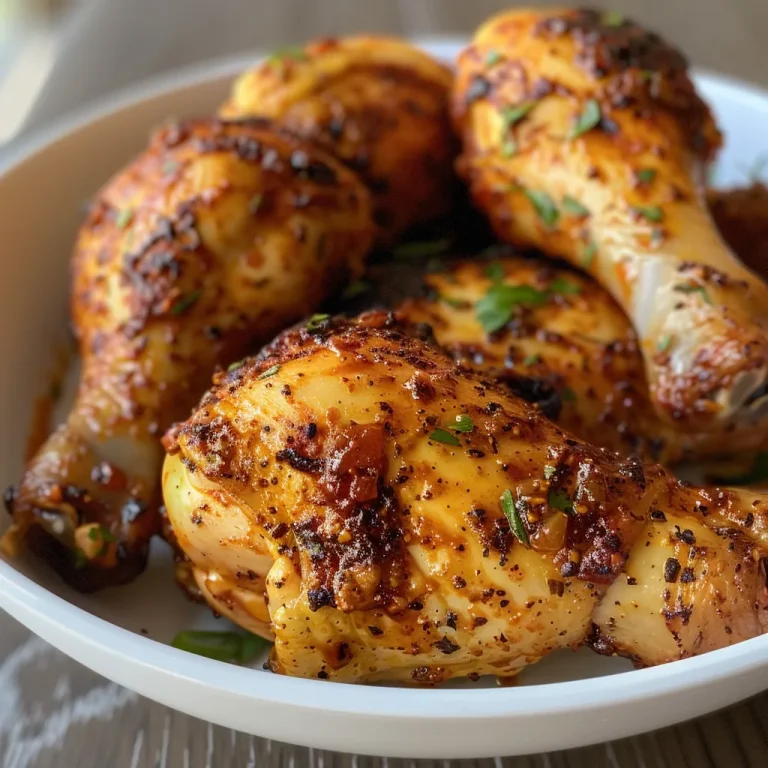
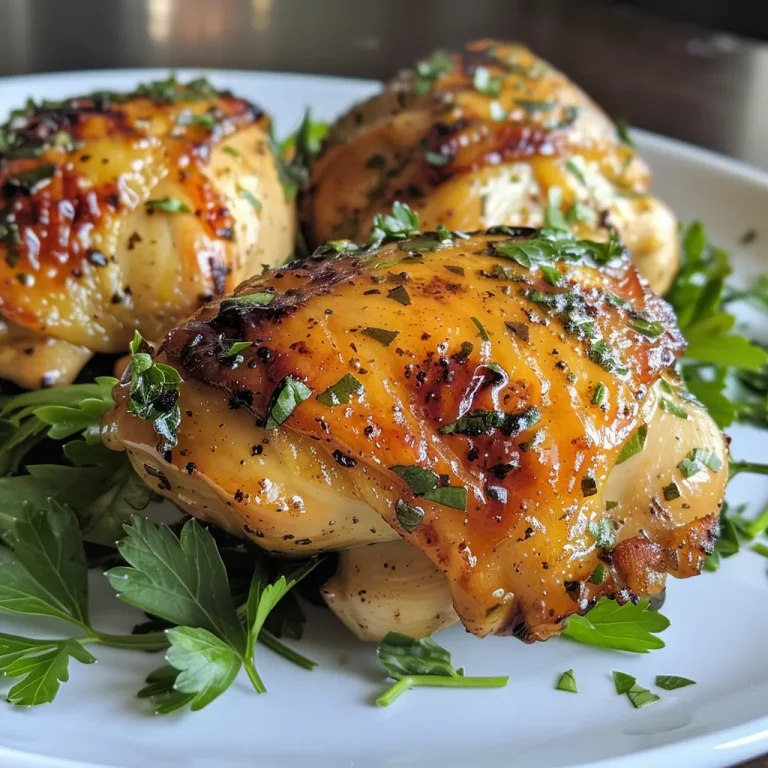
A plate of perfectly cooked chicken thighs, glistening with BBQ sauce, emphasizing their moistness.

To ensure your chicken thighs turn out perfect every time, consider these expert insights:

  • Pat Dry: Ensure your chicken is dry before marinating to achieve that crispy texture.
  • Marinate Wisely: Let the chicken marinate for at least 15 minutes for maximum flavor, but ideally for a few hours.
  • Don’t Overcrowd: Cook in batches in the air fryer to ensure even cooking and crispy results.
  • Use a Meat Thermometer: Check that the internal temperature reaches 165°F (74°C) for safety.
  • Experiment with Marinades: Try different herbs and spices to create a variety of flavors.
  • Rest Before Serving: Let the chicken rest for 5 minutes after cooking to retain juices.
  • Brush with Sauce: If using BBQ sauce, brush it on in the last few minutes of cooking to prevent burning.
  • Store Properly: Keep any leftovers in an airtight container for up to 3 days.

Common Mistakes and Troubleshooting

Even the best chefs make mistakes! Here are some common pitfalls and how to avoid them:

  • Too Much Oil: Using too much oil can lead to greasy chicken. Stick to the recommended amount.
  • Skipping the Marinade: Don’t skip marinating; it’s crucial for flavor.
  • Overcooking: Keep an eye on cooking times; air fryers can vary in temperature.
  • Not Preheating: Preheating the air fryer ensures even cooking and crispiness.

Flavor Variations to Keep Things Interesting

Spice up your culinary repertoire by trying these delicious variations:

  • Mediterranean Vibes: Use olive oil, lemon juice, oregano, and feta for a fresh twist.
  • Smoky BBQ Style: Add smoked paprika and your favorite BBQ sauce for a finger-licking experience.
  • Asian-Inspired Twist: Incorporate soy sauce, ginger, and sesame oil for an umami-packed flavor.
  • Herb and Citrus: Mix fresh herbs like thyme and rosemary with citrus zest for a fragrant dish.

Storage and Make-Ahead Instructions

Planning ahead? Here’s how to store and reheat:

  • Refrigeration: Store cooked chicken thighs in an airtight container for up to 3 days.
  • Freezing: Freeze uncooked marinated chicken in a freezer-safe bag for up to 3 months.
  • Reheating: Reheat in the air fryer at 350°F (175°C) for 5-7 minutes to restore crispiness.

Comprehensive FAQ

Got questions? We’ve got answers! Here are some frequently asked questions:

  • Can I use bone-in chicken thighs? Yes, but adjust cooking time as bone-in pieces will take longer.
  • What can I serve with air fryer chicken thighs? Pair with rice, salad, or roasted vegetables for a complete meal.
  • Can I make this recipe gluten-free? Absolutely! Just ensure all your sauces and seasonings are gluten-free.
  • How do I know when the chicken is done? Use a meat thermometer to check for an internal temperature of 165°F (74°C).
  • Can I marinate overnight? Yes, overnight marinating can enhance the flavors even more!
  • Is this recipe suitable for kids? Definitely! Just adjust the spice levels to suit their taste.
  • Can I cook vegetables in the air fryer with the chicken? Yes, but ensure they have similar cooking times to avoid overcooking.
  • What if I don’t have an air fryer? You can bake these thighs in the oven at 400°F (204°C) for about 25-30 minutes.

Nutrition Tips and Dietary Adaptations

Eating healthy doesn’t mean compromising on flavor. Here are some tips:

  • Lean Protein: Chicken thighs provide a good source of protein; opt for skinless to reduce fat.
  • Low-carb Option: Serve with a side of steamed vegetables for a low-carb meal.
  • Whole30 Compliant: Use compliant sauces and seasonings to adhere to Whole30 guidelines.
  • Low-Sodium Adaptation: Reduce or eliminate added salt and use fresh herbs instead.

Equipment Recommendations

Here’s what you’ll need to make this delicious dish:

  • Air Fryer: The key appliance for achieving that crispy finish.
  • Mixing Bowl: For marinating and mixing ingredients.
  • Tongs: Perfect for flipping the chicken thighs during cooking.
  • Meat Thermometer: Ensure your chicken is safely cooked.

Serving Suggestions

Now that your chicken thighs are perfectly cooked, here are some delightful ideas for serving:

  • With Rice: Serve over fluffy jasmine or brown rice to soak up the flavors.
  • With Salad: Pair with a refreshing green salad for a light meal.
  • As Tacos: Shred the chicken and serve in corn tortillas with fresh toppings.
  • As a Sandwich: Layer on toasted bread with your favorite condiments for a quick lunch.

In conclusion, this Air Fryer Boneless Skinless Chicken Thighs Recipe is not just about cooking—it’s about connecting with flavors and cultures from around the world. So grab your air fryer, gather your ingredients, and let your culinary journey begin! Remember, every dish tells a story, and this one is waiting to unfold in your kitchen.

Air Fryer Boneless Skinless Chicken Thighs

Prep Time 10 minutes
Cook Time 15 minutes
Total Time 25 minutes
Servings 4 pieces
Calories 250
Juicy, flavorful chicken thighs cooked to perfection in the air fryer with a simple marinade and optional glaze.

Ingredients

Main Ingredients

  • 2 lb boneless skinless chicken thighs
  • 2 tbsp olive oil
  • 1 tsp kosher salt
  • 0.5 tsp black pepper
  • 1 tsp garlic powder
  • 1 tsp smoked paprika
  • 0.5 tsp onion powder
  • 1 tsp brown sugar (or honey)
  • 0.25 cup BBQ sauce (optional, for glazing)
  • 0.5 tsp chili powder (optional for heat)
  • 1 tsp lemon zest (optional for citrus twist)

Instructions 

  • Pat chicken thighs dry with paper towels.
  • Mix olive oil, salt, pepper, garlic powder, smoked paprika, onion powder, and brown sugar or honey to create the marinade. Coat chicken and rest for 10–15 minutes.
  • Preheat air fryer to 400°F (204°C). Place chicken in a single layer in the basket.
  • Air fry for 6–8 minutes, flip, then cook another 4–6 minutes. Brush with BBQ sauce during the last 2 minutes if using.
  • Ensure internal temperature reaches 165°F (74°C) before serving.

Notes

For extra flavor, marinate longer or add your favorite herbs.
Calories: 250kcal
Cost: $15
Course: Main Course
Cuisine: American
Keyword: air fryer, Chicken, easy

Embark on a Culinary Adventure with Oven-Baked Chicken Thighs

Welcome, fellow food lovers! Today, we’re diving into the heart of comfort food with a recipe for oven-baked chicken thighs that’s not just delicious but also tells a story of flavors and cultures. Imagine sinking your teeth into juicy, tender chicken, perfectly seasoned, and baked to golden perfection. It’s a dish that brings warmth to the table and joy to the heart. So, grab your apron and let’s begin this culinary adventure!

Why You’ll Love This Recipe

There’s something about oven-baked chicken thighs that makes them a family favorite! Here’s why this recipe will become a staple in your kitchen:

  • Flavorful and juicy: The thighs are inherently rich in flavor, and baking them allows the natural juices to create a succulent bite.
  • Easy to prepare: With minimal prep time, this recipe fits perfectly into a busy lifestyle.
  • Versatile: You can customize the spices and marinades to suit your taste or dietary needs.
  • Healthier alternative: Baking reduces the need for excess oil, making it a healthier choice than frying.
  • Great for meal prep: Cook a batch, and you’ll have leftovers for salads, wraps, or sandwiches throughout the week!

Ingredient Breakdown

Let’s take a closer look at what you’ll need to create this mouthwatering dish:

  • Chicken Thighs: Bone-in, skin-on thighs are recommended for maximum flavor, but boneless skinless thighs can also work well.
  • Spice Mix: A combination of garlic powder, onion powder, paprika, salt, and pepper creates a robust flavor base.
  • Olive Oil: A drizzle of olive oil helps to crisp the skin and enhance the flavor.
  • Fresh Herbs: Optional, but adding rosemary or thyme can elevate the dish even further.

Pro Tips for Perfectly Baked Chicken Thighs

Close-up of grilled chicken thighs and baked salmon garnished with herbs.

To ensure your chicken turns out perfectly every time, consider these expert insights:

  • Pat dry: Always pat the chicken thighs dry before seasoning to achieve a crispy skin.
  • Room temperature: Let the chicken sit at room temperature for about 30 minutes before baking for even cooking.
  • High heat: Bake at a higher temperature (around 425°F) for crispy skin and juicy meat.
  • Resting time: Let the chicken rest for 10 minutes after baking to allow juices to redistribute.
  • Internal temperature: Use a meat thermometer to ensure the internal temperature reaches 165°F.
  • Experiment with marinades: Try adding soy sauce, lemon juice, or yogurt for a different flavor profile.
  • Don’t overcrowd the pan: Ensure there’s space between each thigh to allow for proper roasting.

Common Mistakes and Troubleshooting

Even the best of us can run into hiccups while cooking. Here are some common issues and how to avoid them:

  • Rubbery chicken: This often results from overcooking. Always keep an eye on the internal temperature.
  • Soggy skin: Make sure the thighs are dry before seasoning and that they aren’t crowded in the baking dish.
  • Underseasoned chicken: Don’t be shy with your spices—season generously for the best flavor.
  • Uneven cooking: If your oven has hot spots, rotate the pan halfway through cooking for even results.

Delicious Variations to Try

Once you master the basic recipe, consider these fun variations:

  • Spicy Honey Garlic: Mix honey with garlic and chili flakes for a sweet and spicy glaze.
  • Italian Herb Medley: Use a mix of Italian herbs like oregano, basil, and parsley for a Mediterranean twist.
  • BBQ Glaze: Brush with your favorite barbecue sauce during the last few minutes of baking for a smoky flavor.
  • Teriyaki Chicken Thighs: Marinate in a teriyaki sauce for an Asian-inspired dish.

Storage and Make-Ahead Instructions

This recipe is perfect for meal prepping! Here’s how to store and reheat:

  • Refrigeration: Store cooked chicken thighs in an airtight container for up to 4 days.
  • Freezing: Freeze cooked chicken thighs for up to 3 months. Thaw overnight in the refrigerator before reheating.
  • Reheating: Reheat in the oven at 350°F until warmed through, about 15-20 minutes.

Frequently Asked Questions

Here are some common questions to help you on your cooking journey:

  • Can I use chicken breasts instead? Yes, but be aware that chicken breasts can dry out more easily than thighs.
  • What sides go well with this dish? Try serving with roasted vegetables, mashed potatoes, or a fresh salad.
  • Can I marinate overnight? Absolutely! Marinating overnight enhances flavor and tenderness.
  • How do I know when the chicken is done? Use a meat thermometer to check for an internal temperature of 165°F.
  • What if I don’t have fresh herbs? Dried herbs can be substituted, just use about 1/3 of the amount.
  • Is this recipe gluten-free? Yes, this recipe is naturally gluten-free as long as your spices are gluten-free.
  • Can I grill these thighs instead? Yes! Simply grill over medium heat until cooked through.
  • What’s the best way to serve leftovers? Shred the chicken and use it in salads, tacos, or sandwiches for a quick meal.

Nutrition Tips and Dietary Adaptations

This recipe can easily be adapted for various dietary needs:

  • Low-carb: Serve with steamed vegetables instead of grains.
  • Gluten-free: Ensure all spices and marinades are gluten-free.
  • Low-fat: Use skinless, boneless thighs and reduce the amount of oil used.

Essential Equipment Recommendations

To make this recipe a breeze, here are some kitchen essentials:

  • Baking Sheet: A sturdy, rimmed baking sheet is great for catching any drippings.
  • Instant-Read Thermometer: This tool ensures your chicken is cooked to perfection.
  • Mixing Bowls: For marinating and combining spices.

Serving Suggestions

Make your meal complete with these serving ideas:

  • Garnish: A sprinkle of fresh herbs or a squeeze of lemon juice can brighten up the dish.
  • Pairings: Serve with rice, quinoa, or a hearty whole-grain bread to soak up the juices.
  • Salad: A crisp green salad with a tangy dressing complements the rich flavors of the chicken.

Conclusion

Cooking is a journey, and with this oven-baked chicken thighs recipe, you’re not just preparing a meal; you’re creating a story filled with rich flavors and cherished moments. So, gather your loved ones around the table, share this delicious dish, and let the flavors transport you to new culinary adventures. Happy cooking, my friends!

Munchkin Time

Prep Time 15 minutes
Cook Time 30 minutes
Total Time 45 minutes
Servings 4 people
Calories 550
A delicious collection of quick and flavorful chicken and meat recipes perfect for any meal.

Ingredients

Main Ingredients

  • 4 pieces Best Oven Baked Chicken Thighs
  • 4 pieces Grilled Chicken Thighs with Garlic Lemon Marinade
  • 1 pound Best Swedish Meatballs and Gravy
  • 2 pieces Honey Soy Chicken Thighs (Video)
  • 2 fillets Baked Salmon with Lemon
  • 1 pound Grilled Ribeye Steak with Chimichurri Sauce
  • 1 cup Greek Chicken Quinoa Bowl
  • 2 pieces How to Cook Ribeye Steak in the Oven (Video)
  • 2 pieces Easy 30-Minute Chicken Chimichanga Recipe
  • 4 pieces 30-min Oven Baked Boneless Skinless Chicken Thighs (Video)
  • 1 cup Creamy Oven Baked Chicken Thighs
  • 1 cup Grilled Greek Chicken Gyros
  • 4 pieces Baked Honey Garlic Chicken Thighs
  • 2 pieces Smash Chicken Burger (Video)
  • 1 cup Best Hawaiian BBQ Chicken Recipe (VIDEO)
  • 1 cup Super Easy Turkey Brine Recipe

Instructions 

  • Prepare the chicken or meat as desired, seasoning well.
  • Cook in the oven or grill until fully cooked and juices run clear.
  • Let rest for a few minutes before serving.
  • Serve with your favorite sides and enjoy!

Notes

Use fresh herbs and quality ingredients for best flavor.
Calories: 550kcal
Cost: $15
Course: Main Course
Cuisine: Various
Keyword: baked, Chicken, Meat

The Ultimate Guide to Homemade Chicken Breakfast Sausage

Welcome to a flavorful journey where breakfast meets creativity! In this guide, we’re diving deep into the delicious world of homemade chicken breakfast sausage. If you’ve ever wondered how to make your own breakfast sausage at home, you’re in for a treat. This recipe is not just about cooking; it’s about embracing the joy of creating something wholesome and tasty from scratch. With a blend of fresh herbs, spices, and a touch of sweetness from maple syrup, these chicken breakfast sausages promise to awaken your taste buds and elevate your morning routine. Let’s embark on this culinary adventure together!

Why You’ll Love This Recipe

  • Healthier Alternative: Using ground chicken gives you a leaner option compared to traditional pork sausage, making it a great choice for a healthier breakfast.
  • Customizable Flavors: You can adjust the spices and ingredients to suit your personal taste, making each batch uniquely yours.
  • Easy to Make: This recipe is straightforward, requiring minimal equipment and just a few simple steps, perfect for any cooking skill level.
  • Meal Prep Friendly: Make a large batch ahead of time, freeze them, and simply reheat for a quick breakfast option during busy mornings.
  • Deliciously Versatile: Serve these chicken breakfast sausages in a variety of ways—on their own, in a breakfast sandwich, or as part of a hearty breakfast platter!

Ingredients You’ll Need

To create your own homemade chicken breakfast sausage, you’ll need the following ingredients:

  • 1 pound Ground chicken (Thigh meat preferred for juiciness)
  • 2 tablespoons Olive oil (Plus extra for cooking)
  • 1 tablespoon Maple syrup (For caramelization)
  • 1 teaspoon Salt (Adjust to taste)
  • ½ teaspoon Black pepper (Freshly ground for best flavor)
  • 1 teaspoon Fennel (Adds classic sausage aroma)
  • ½ teaspoon Red pepper flakes (Optional for heat)
  • 1 teaspoon Smoked paprika (Adds depth and smokiness)
  • ½ teaspoon Ground nutmeg (Traditional sausage seasoning)
  • 2 cloves Garlic (Minced)
  • 1 teaspoon Apple cider vinegar (For brightness)
  • 2 tablespoons Fresh sage leaves (Chopped finely)
  • 1 tablespoon Fresh thyme (Chopped finely)
  • 1 tablespoon Fresh rosemary (Chopped finely)
  • 1 tablespoon Fresh parsley (Optional for garnish)

Ingredient Breakdown & Substitutions

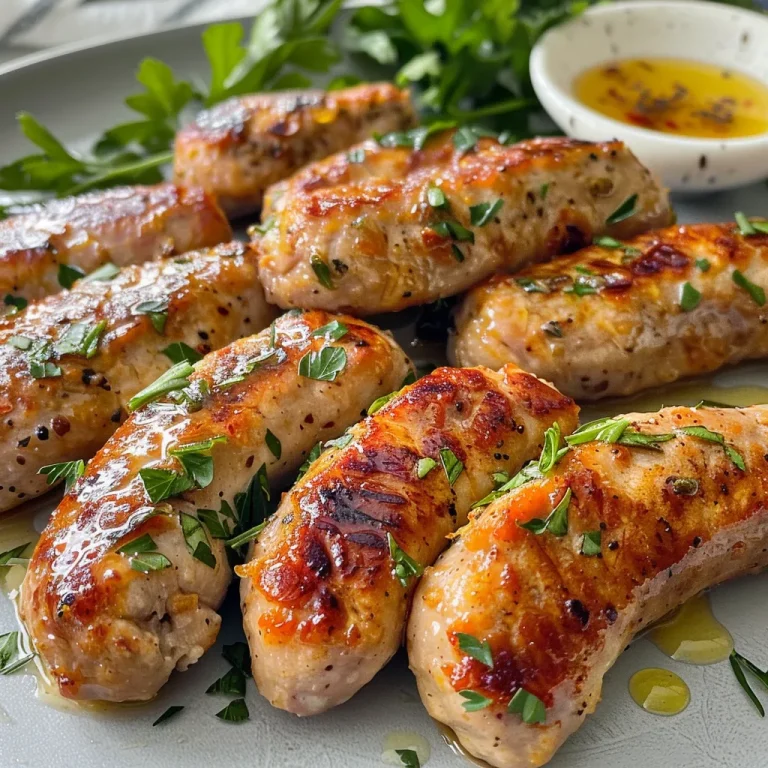
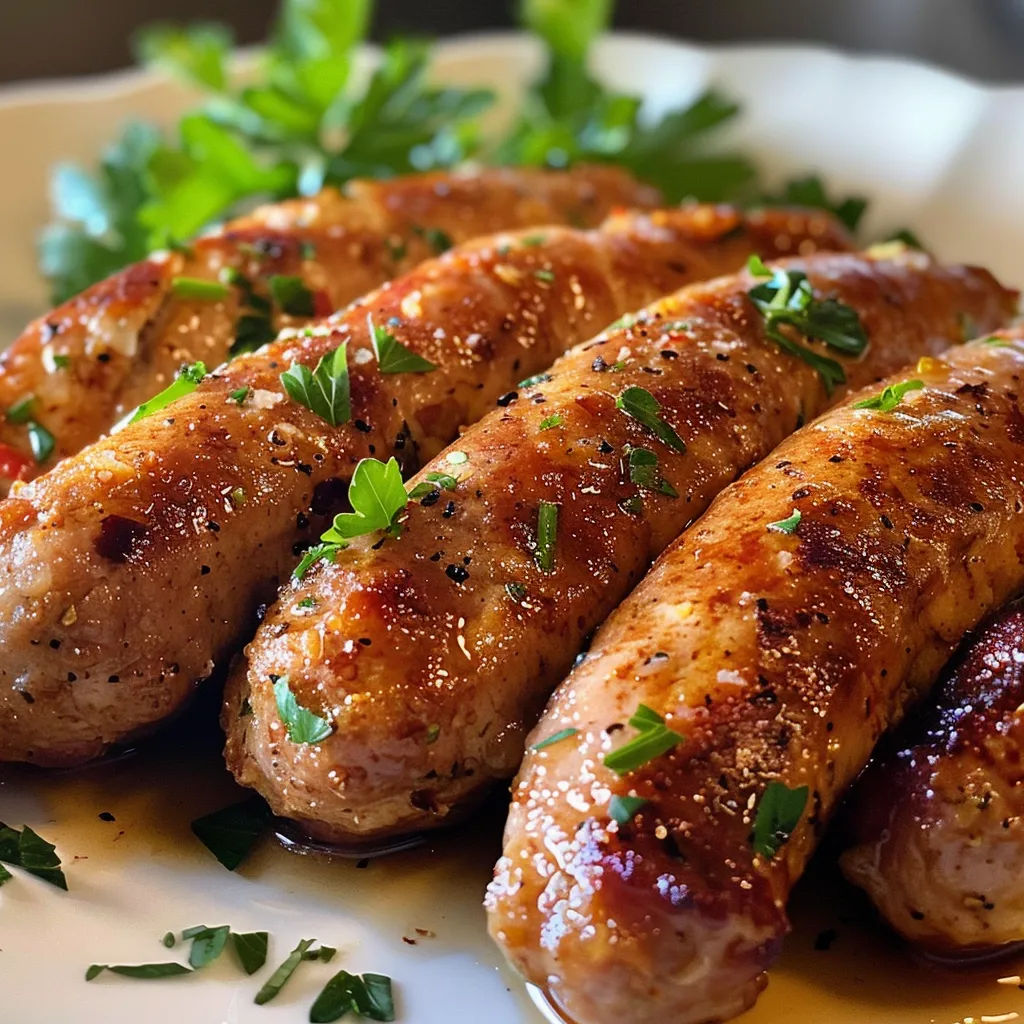
Detailed shot of sizzling chicken breakfast sausage, showcasing its spices and shine.

Understanding your ingredients can enhance your cooking experience and make it easier to adapt recipes. Here’s a detailed breakdown of the key ingredients and potential substitutions:

  • Ground Chicken: While ground chicken is the star here, you can substitute it with ground turkey or even a mix of ground turkey and pork for a different flavor profile.
  • Maple Syrup: If you prefer a sugar alternative, honey or agave syrup can be used for a similar sweetness.
  • Herbs: Don’t have sage, thyme, or rosemary on hand? Try using Italian seasoning or Herbes de Provence for a different herbaceous flavor.
  • Spices: If you like more heat, increase the red pepper flakes or add cayenne pepper. For a smokier flavor, choose smoked paprika over regular paprika.

How To Make Chicken Breakfast Sausages

Creating these chicken breakfast sausages is a fun and rewarding process! Follow these simple steps:

  1. In a large mixing bowl, combine ground chicken, olive oil, maple syrup, salt, pepper, fennel seeds, red pepper flakes, smoked paprika, and nutmeg.
  2. Add minced garlic, apple cider vinegar, sage, thyme, rosemary, and parsley to the mixture.
  3. Gently mix the ingredients until just combined, being careful not to overwork the meat.
  4. Let the mixture rest for 15 minutes to allow flavors to meld.
  5. Form the mixture into 12 equal-sized patties, about 2 ounces each, making a small indentation in the center of each patty.
  6. Heat a cast iron skillet over medium-high heat and add a thin layer of olive oil.
  7. Place the patties in the skillet, ensuring they are not overcrowded. Cook for 4–5 minutes on the first side until golden brown.
  8. Flip the patties and cook for another 3–4 minutes, or until the internal temperature reaches 165°F.
  9. Transfer cooked patties to a plate lined with paper towels to absorb any excess oil.

Pro Tips for Perfect Chicken Breakfast Sausage

Enhance your sausage-making skills with these expert insights:

  • Don’t Overmix: Overworking the meat can lead to tough sausages. Mix until just combined for the best texture.
  • Chill Your Mixture: Keeping your sausage mixture cool before cooking can help maintain a nice texture. Refrigerate for 30 minutes if possible.
  • Test Cook a Small Patty: Before cooking all the patties, test one to ensure seasoning is just right. Adjust if necessary!
  • Use Fresh Herbs: Fresh herbs provide vibrant flavor. If using dried herbs, reduce the quantity as they are more concentrated.
  • Patty Indents: Making an indentation in the center of each patty helps them cook evenly and prevents puffing up.
  • Cook in Batches: To achieve a nice sear, avoid overcrowding the skillet. Cook in batches if needed.
  • Internal Temperature Check: Always use a meat thermometer to ensure the sausage reaches a safe internal temperature of 165°F.
  • Experiment with Flavors: Feel free to adjust spices and herbs based on what you have on hand or your flavor preferences!

Common Mistakes & Troubleshooting

Even the most seasoned cooks can run into issues. Here are some common mistakes and how to avoid them:

  • Dry Sausages: Using lean cuts of chicken or not adding enough fat can lead to a dry result. Opt for thigh meat or add a little olive oil.
  • Too Salty: Always start with less salt. You can add more, but you can’t take it out once it’s mixed in!
  • Flavorless Patties: Make sure to season thoroughly. Taste testing a small patty can help avoid this mistake.
  • Undercooked Sausages: Use a meat thermometer to ensure even cooking and safety.

Delicious Variations

Looking for new ways to enjoy your chicken breakfast sausage? Here are some tasty variations:

  • Maple Bacon Chicken Sausage: Add finely chopped cooked bacon and a bit more maple syrup for a sweet and savory twist.
  • Spicy Italian Chicken Sausage: Incorporate crushed red pepper flakes and Italian seasoning for a zesty kick.
  • Herbed Lemon Chicken Sausage: Add lemon zest and more fresh herbs like dill for a refreshing flavor.
  • Apple & Sage Chicken Sausage: Mix in finely chopped apples and additional sage for a subtly sweet and savory combination.

Storage & Make-Ahead Instructions

Want to prep your chicken breakfast sausage in advance? Here’s how:

  • Refrigerate: Store uncooked patties in an airtight container in the fridge for up to 2 days.
  • Freeze: Place uncooked patties on a baking sheet to freeze individually before transferring to a freezer-safe bag. They can last up to 3 months.
  • Reheat: To reheat cooked sausages, warm them in a skillet over medium heat until heated through, or bake at 350°F for about 10 minutes.

Frequently Asked Questions

Here are some common questions about making chicken breakfast sausage:

  • Can I use skinless chicken breasts? Yes, but be aware that this will result in drier sausages. Thigh meat is preferred for juiciness.
  • How do I know when the sausages are done? Use a meat thermometer to check the internal temperature. It should be 165°F.
  • Can I bake these sausages? Yes! Bake them on a lined baking sheet at 375°F for about 25-30 minutes, flipping halfway through.
  • What can I serve these sausages with? They pair wonderfully with eggs, avocado toast, or as part of a breakfast burrito.
  • How long do leftovers last? Cooked sausages can be stored in the fridge for up to 4 days.
  • Can I make these sausage patties larger? Absolutely! Just keep in mind that larger patties will need a longer cooking time.
  • What if I don’t have fresh herbs? You can use dried herbs, but use about a third of the amount, as dried herbs are more potent.
  • Can I add cheese to the mixture? Yes! Shredded cheese can add a delicious flavor, but be cautious of the extra moisture.

Nutrition Tips & Dietary Adaptations

For those conscious about nutrition, here are some tips:

  • Low Carb Option: Serve with a side of sautéed vegetables instead of bread for a low-carb breakfast.
  • Dairy-Free: This recipe is naturally dairy-free; just ensure any accompaniments align with your dietary needs.
  • Keto-Friendly: Pair with avocado or spinach to keep your meal low in carbs while still satisfying.

Equipment Recommendations

To make your cooking experience seamless, consider using the following equipment:

  • Mixing Bowl: A large mixing bowl is essential for combining your sausage ingredients.
  • Cast Iron Skillet: Ideal for achieving a nice sear and even cooking.
  • Meat Thermometer: Ensures your sausages reach the safe internal temperature.
  • Food Processor: If you prefer a finer texture, a food processor can help blend the herbs and spices evenly.

Serving Suggestions

Once your chicken breakfast sausages are cooked, the fun doesn’t stop there! Here are some creative serving ideas:

  • Breakfast Sandwich: Layer sausages on a toasted English muffin with a fried egg and avocado for a hearty breakfast sandwich.
  • Breakfast Bowl: Serve over quinoa or brown rice with sautéed vegetables and a fried egg for a nourishing breakfast bowl.
  • With Pancakes: Pair with pancakes or waffles drizzled with maple syrup for a sweet and savory combo.
  • In a Breakfast Burrito: Wrap sausages with scrambled eggs, cheese, and salsa in a tortilla for a portable breakfast option.

As we wrap up this flavorful adventure, I hope you feel inspired to take your breakfast game to the next level with these homemade chicken breakfast sausages. Remember, cooking is all about exploration and discovery, so don’t shy away from experimenting with flavors and ingredients. Enjoy every bite, and let’s make breakfast a moment to savor!

Homemade Chicken Breakfast Sausage

Prep Time 15 minutes
Cook Time 10 minutes
Total Time 25 minutes
Servings 6 patties
Calories 250
Enjoy a flavorful and juicy homemade chicken sausage perfect for breakfast or any meal. Made with fresh herbs and spices, it's a healthier alternative to store-bought options.

Ingredients

Main ingredients

  • 1 pound Ground chicken (Thigh meat preferred for juiciness)
  • 2 tablespoons Olive oil (Plus extra for cooking)
  • 1 tablespoon Maple syrup (For caramelization)
  • 1 teaspoon Salt (Adjust to taste)
  • ½ teaspoon Black pepper (Freshly ground for best flavor)
  • 1 teaspoon Fennel (Adds classic sausage aroma)
  • ½ teaspoon Red pepper flakes (Optional for heat)
  • 1 teaspoon Smoked paprika (Adds depth and smokiness)
  • ½ teaspoon Ground nutmeg (Traditional sausage seasoning)
  • 2 cloves Garlic (Minced)
  • 1 teaspoon Apple cider vinegar (For brightness)
  • 2 tablespoons Fresh sage leaves (Chopped finely)
  • 1 tablespoon Fresh thyme (Chopped finely)
  • 1 tablespoon Fresh rosemary (Chopped finely)
  • 1 tablespoon Fresh parsley (Optional for garnish)

Instructions 

  • Combine ground chicken, olive oil, maple syrup, salt, pepper, fennel, red pepper flakes, smoked paprika, and nutmeg in a bowl.
  • Add garlic, vinegar, sage, thyme, rosemary, and parsley; mix gently until just combined.
  • Rest mixture for 15 minutes, then form into 12 patties, about 2 oz each.
  • Heat a skillet with olive oil over medium-high heat; cook patties 4-5 minutes per side until golden and cooked through.
  • Transfer to paper towels to drain; serve warm.

Notes

Ensure not to overmix the meat to keep the sausage tender and juicy.
Calories: 250kcal
Cost: $15
Course: Breakfast
Cuisine: American
Keyword: Chicken, Sausage

Embark on a Flavorful Adventure with Baked Chicken Wings

Welcome to a culinary journey where each bite of these baked chicken wings transports you to the vibrant streets of flavor. This recipe not only promises a crispy exterior but also a juicy interior, making it the perfect addition for gatherings or cozy nights in. With rich flavors and a simple preparation process, you’ll soon discover why these wings are a crowd favorite. Let’s dive into the world of delicious options that await!

Why You’ll Love This Recipe

  • Irresistible Flavor: The combination of spices and butter in this recipe enhances the natural taste of the chicken, making every bite a delight.
  • Healthier Alternative: Baked instead of fried, these chicken wings offer a guilt-free indulgence without sacrificing flavor.
  • Quick and Easy: With a total preparation and cook time of under an hour, you can whip these up easily for any occasion.
  • Customizable: Adjust the spices and sauces to suit your taste, making these wings perfect for every palate.
  • Perfect for Any Occasion: Whether it’s game day, a family gathering, or a cozy dinner, these wings are sure to impress your guests.

Ingredients for Your Baked Chicken Wings

Gather the following ingredients to create your delicious wings:

  • 3 tablespoons unsalted butter: This fat adds richness and flavor, helping to create a crispy texture.
  • ⅓ cup all-purpose flour: A light coating that aids in achieving that coveted crispy skin.
  • 2 tablespoons ground paprika: This spice not only adds color but also a subtle smokiness.
  • 1 teaspoon garlic powder: A must-have for enhancing flavor.
  • 1 teaspoon kosher salt: Essential for bringing out the natural flavors of the chicken.
  • 1 teaspoon ground black pepper: For a hint of heat and depth.
  • 10-12 chicken wingettes: Whichever variety you choose, ensure they are thawed if previously frozen.

Pro Tips for Perfect Baked Wings

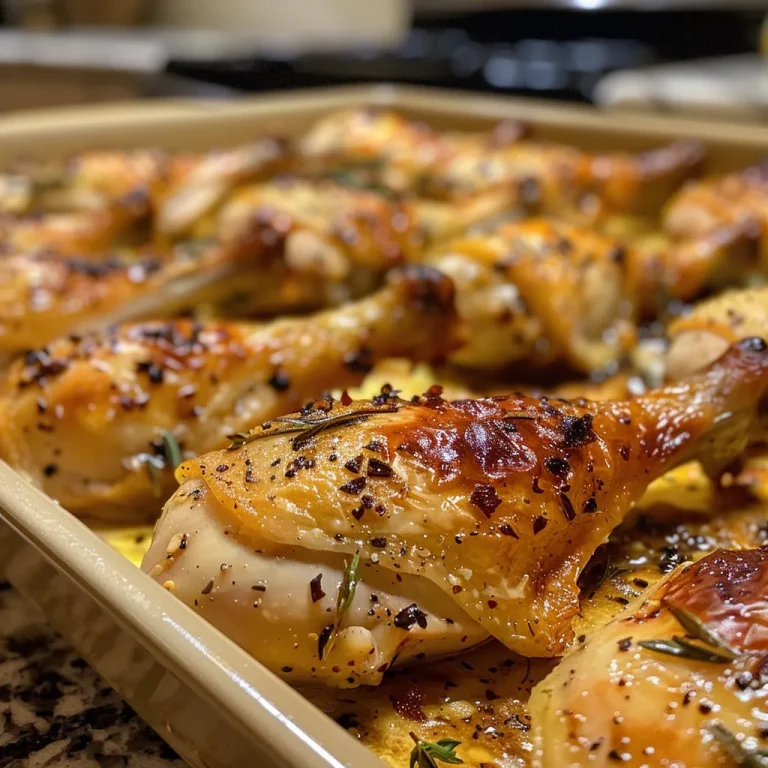
Appetizing baked chicken wings showcasing a shiny glaze and spices.
  • Dry the Chicken: Pat your wings dry with paper towels before seasoning. This helps achieve a crispier skin.
  • Use Baking Powder: Coating the wings in baking powder pulls moisture away, resulting in a crunchy texture.
  • Space Them Out: Arrange wings on the baking sheet without overcrowding, allowing heat to circulate for even cooking.
  • Flip Halfway: Turn the wings mid-way through baking to ensure both sides get equally crispy.
  • Monitor the Time: Keep an eye on the wings towards the end of baking to avoid burning.
  • Experiment with Sauces: Don’t hesitate to try different sauces post-baking, from buffalo to teriyaki.
  • Rest Before Serving: Allow wings to rest for a few minutes after baking to enhance juiciness.
  • Garnish for Presentation: A sprinkle of fresh parsley or chives can elevate the visual appeal.

Common Mistakes and Troubleshooting

Even seasoned chefs can encounter issues. Here are some common mistakes and how to avoid them:

  • Wings Not Crisping: Ensure they are thoroughly dried and not overcrowded on the baking sheet.
  • Flavor Lacking: Don’t skimp on the seasoning; make sure every wing is evenly coated.
  • Overcooked or Undercooked: Use a meat thermometer to check doneness (165°F is the safe internal temperature).

Flavor Variations to Try

Let’s explore some delicious variations that can transform your baked chicken wings:

  • Buffalo Style: Toss the wings in your favorite buffalo sauce right after baking for a spicy kick.
  • Honey Garlic: Mix honey and minced garlic for a sweet and savory glaze.
  • Lemon Pepper: Sprinkle lemon zest and cracked black pepper for a refreshing twist.
  • Asian-inspired: Coat in soy sauce, ginger, and sesame oil for an umami-filled experience.

How to Store and Make Ahead

If you find yourself with leftovers, here’s how to store and reheat:

  • Refrigeration: Store leftover wings in an airtight container for up to 3 days.
  • Freezing: For longer storage, freeze wings in a single layer, then transfer to a freezer bag for up to 3 months.
  • Reheating: Reheat in the oven at 350°F until heated through for best texture.

Frequently Asked Questions

  • Can I use frozen wings? Yes, but be sure to thaw them completely before cooking.
  • What’s the best baking temperature? 425°F is ideal for achieving crispy wings.
  • How can I make them spicier? Add cayenne pepper to the seasoning mix or toss in a spicy sauce.
  • Can I use other cuts of chicken? While wingettes are ideal, thighs and drumsticks can also work with adjusted cooking times.
  • Is it safe to eat chicken wings with sauce? Yes, but ensure the wings are fully cooked before saucing.
  • How long should I bake them? About 45 minutes total, flipping halfway through.
  • What should I serve with baked wings? Consider celery sticks, carrot sticks, or a fresh salad for a refreshing contrast.
  • Can I marinate the wings? Yes, marinating can enhance the flavor; just remember to dry them before coating.

Nutritional Tips and Dietary Adaptations

For those watching their diet, consider these adaptations:

  • Low-carb option: Skip the flour and use almond flour for a keto-friendly version.
  • Gluten-free: Use a gluten-free flour blend to keep the recipe celiac-friendly.
  • Low-fat: Reduce the amount of butter or use a cooking spray for a lighter version.

Essential Equipment for Perfect Wings

To achieve the best results, here’s what you’ll need:

  • Baking sheet: A sturdy, rimmed baking sheet ensures even cooking and prevents spills.
  • Parchment paper or foil: These make for easy cleanup and prevent sticking.
  • Meat thermometer: Essential for checking the internal temperature of your chicken.
  • Mixing bowls: For efficiently coating your wings with spices and flour.

Serving Suggestions to Wow Your Guests

Finally, here are some ideas for serving your wings:

  • Pair with Dips: Offer a selection of dips like blue cheese, ranch, or spicy mustard.
  • Accompany with Sides: Serve alongside crispy fries or a light salad for a balanced meal.
  • Garnish Creatively: Fresh herbs, sliced chilies, or lemon wedges can enhance presentation.

In conclusion, these baked chicken wings are more than just a dish; they’re an experience meant to be shared. As you embark on this culinary adventure, allow your taste buds to explore the rich and diverse world of flavors. So gather your ingredients, invite your friends, and let the wings take center stage at your next gathering!

Baked Chicken Wings Recipe

Prep Time 10 minutes
Cook Time 45 minutes
Total Time 55 minutes
Servings 4 servings
Calories 250
Enjoy crispy, flavorful baked chicken wings with simple ingredients and easy steps for a delicious appetizer or main course.

Ingredients

Dried ingredients

  • 3 tablespoons unsalted butter (⅜ stick)
  • cup all-purpose flour
  • 2 tablespoons ground paprika
  • 1 teaspoon garlic powder
  • 1 teaspoon kosher salt
  • 1 teaspoon ground black pepper
  • 10-12 pieces chicken wingettes (tips removed; thawed if frozen)

Instructions 

  • Preheat oven to 425°F. Line a baking sheet with foil and dot with butter.
  • Mix flour, paprika, garlic powder, salt, and pepper in a bowl.
  • Coat wings in flour mixture and place on baking sheet with butter pieces.
  • Bake for 30 minutes, then flip wings and bake for 15 more minutes.
  • Serve hot with dipping sauce and optional parsley.

Notes

For extra crispiness, broil for 2-3 minutes at the end.
Calories: 250kcal
Cost: $15
Course: Appetizer
Cuisine: American
Keyword: chicken wings

As the holiday season approaches, our kitchens transform into havens of warmth and joy, filled with the enticing aromas of festive dishes. One recipe that embodies this spirit is the Christmas Beef Soup—a delightful concoction that not only nourishes the body but also warms the heart. This bowl of comfort symbolizes togetherness, making it an essential centerpiece for family gatherings and celebrations. Join me as we dive deep into this recipe, exploring its rich flavors, versatile adaptations, and expert tips to elevate your cooking experience.

Why You’ll Love This Recipe

This Christmas Beef Soup is more than just a meal; it’s an experience. Here are five reasons why this recipe will become a cherished addition to your holiday traditions:

  • Comforting flavors: The combination of tender beef, aromatic vegetables, and flavorful herbs creates a symphony of tastes that evoke nostalgia and warmth.
  • Easy to prepare: With straightforward steps and simple ingredients, this recipe is perfect for both novice cooks and seasoned chefs looking for a no-fuss option.
  • Customizable ingredients: Feel free to swap out vegetables or adjust seasonings to suit your family’s preferences, making this soup uniquely yours.
  • Perfect for leftovers: This soup tastes even better the next day as the flavors meld, making it an ideal option for meal prepping or using up holiday leftovers.
  • Festive presentation: Serve it in a beautiful bowl, topped with fresh herbs or a dollop of sour cream, and watch it become the star of your holiday table.

Ingredient Breakdown and Substitutions

To create the perfect Christmas Beef Soup, you’ll need to gather the following ingredients. Each component plays a crucial role in building layers of flavor:

  • Beef chuck roast: This cut is perfect for slow cooking, yielding tender, flavorful meat. You can substitute with brisket or stew meat if needed.
  • Carrots and celery: These aromatic vegetables add sweetness and depth. Feel free to use parsnips or bell peppers as alternatives.
  • Onion: A classic base flavor; yellow onions work best, but shallots or leeks can also be delightful.
  • Garlic: Adds a punch of flavor. If you’re not a fan, you can reduce the amount or omit it.
  • Beef broth: Enhances the soup’s rich flavor. For a lighter version, use chicken broth or vegetable stock.
  • Herbs and spices: Thyme and bay leaves are traditional, but feel free to experiment with rosemary or dill for unique flavors.
  • Salt and pepper: Essential for seasoning; adjust to taste.

Pro Tips for the Best Christmas Beef Soup

To ensure your Christmas Beef Soup is nothing short of spectacular, follow these expert insights:

  • Sear the beef: Browning the beef before adding it to the soup enhances its flavor and gives the dish a rich, robust taste.
  • Low and slow: Allow the soup to simmer for at least 1.5-2 hours; this slow cooking process melds the flavors beautifully.
  • Skim the fat: As the soup simmers, skim off any excess fat that rises to the surface for a cleaner, healthier soup.
  • Fresh herbs: Adding fresh herbs towards the end of cooking brightens the soup and adds a burst of freshness.
  • Adjust thickness: If you prefer a thicker soup, blend a portion of it and then stir it back in.
  • Make it spicy: Add a pinch of red pepper flakes or a splash of hot sauce for a kick of heat.
  • Garnish wisely: Top with fresh parsley or a sprinkle of Parmesan for added flavor and visual appeal.
  • Serve with bread: Pair your soup with crusty bread or rolls for a complete meal experience.

Common Mistakes and Troubleshooting

Side perspective of a hearty Christmas beef soup, illustrating its inviting appearance.

Even the most experienced cooks can face challenges. Here are some common pitfalls and how to avoid them:

  • Overcooking the beef: Keep an eye on cooking time; while beef needs to be tender, overcooking can lead to dry meat.
  • Under-seasoning: Taste regularly and adjust seasoning as you go to ensure a well-balanced flavor.
  • Not enough liquid: If your soup is too thick, gradually add more broth or water until it reaches your desired consistency.
  • Ignoring the garnishes: Don’t skip the final touches—garnishes elevate presentation and flavor!

Variations to Try

Get creative with your Christmas Beef Soup by trying these delicious variations:

  • Vegetable Beef Soup: Add a variety of vegetables such as potatoes, green beans, or corn for a heartier dish.
  • Spicy Beef Soup: Incorporate jalapeños or chili powder for an extra kick.
  • Asian-inspired Beef Soup: Use soy sauce, ginger, and bok choy for a unique twist.
  • Herbed Beef Soup: Experiment with fresh herbs like basil, cilantro, or mint for a refreshing flavor.

Storage and Make-Ahead Instructions

This soup is perfect for making ahead of time. Here’s how to store and reheat it:

  • Refrigerate: Store in an airtight container for up to 3-4 days. Reheat on the stove over medium heat until warmed through.
  • Freeze: Freeze in individual portions for up to 3 months. Thaw overnight in the fridge before reheating.
  • Make-ahead tip: You can prepare the soup base a day in advance and add fresh herbs right before serving.

Comprehensive FAQ

Got questions? Here are answers to some common queries about Christmas Beef Soup:

  • Can I use ground beef instead of chunks? Yes, but adjust cooking time as ground beef cooks faster.
  • What can I use instead of beef broth? Chicken broth or vegetable stock works well as alternatives.
  • Can I add pasta or rice to the soup? Absolutely! Add cooked pasta or rice just before serving to avoid overcooking.
  • How do I make it gluten-free? Ensure that all ingredients, including broth, are labeled gluten-free.
  • Can I use a slow cooker for this recipe? Yes, sear the beef first, then combine all ingredients in a slow cooker and cook on low for 6-8 hours.
  • How do I know when the beef is done? It should be fork-tender when fully cooked.
  • Can I substitute the beef for another protein? Yes, chicken or turkey can be used as a lighter option.
  • What’s the best way to reheat the soup? Gently reheat on the stove or in the microwave until heated through.

Nutrition Tips and Dietary Adaptations

This Christmas Beef Soup can be adapted to fit various dietary needs:

  • Low-carb option: Skip the potatoes and use cauliflower florets instead for a lower-carb version.
  • High-protein boost: Add lentils or beans for an extra protein punch.
  • Dairy-free adaptation: Omit any cream or dairy-based garnishes for a dairy-free dish.

Equipment Recommendations

To make your cooking experience smoother, consider these essential tools:

  • Heavy-bottomed pot: Ideal for slow simmering without burning.
  • Sharp knife: A good chef’s knife is crucial for chopping vegetables efficiently.
  • Wooden spoon: Perfect for stirring and scraping the bottom of the pot.
  • Meat thermometer: Ensure your beef is cooked to the perfect temperature for tenderness.

Serving Suggestions

When it comes to serving your Christmas Beef Soup, presentation matters. Here are some delightful ways to serve:

  • In festive bowls: Use seasonal dishes to create a warm, inviting atmosphere.
  • With crusty bread: Offer slices of warm, crusty bread or rolls for dipping.
  • Garnished with fresh herbs: A sprinkle of parsley or chives adds color and flavor.
  • Accompanied by a salad: A light salad pairs beautifully to balance the richness of the soup.

Conclusion

Your journey to creating the perfect Christmas Beef Soup is not just about the recipe; it’s about the memories you’ll make while sharing this delightful dish with loved ones. As you gather around the table this holiday season, let the warmth of this soup encapsulate the joy of togetherness, making every spoonful a reminder of the love that fills your home. So roll up your sleeves, gather your ingredients, and embark on this culinary adventure. Cheers to good food and great company—happy holidays!

Therecipemom

Prep Time 15 minutes
Cook Time 1 hour
Total Time 1 hour 15 minutes
Servings 4 people
Calories 350
A hearty beef soup perfect for Christmas celebrations, combining rich flavors and comforting warmth.

Ingredients

Dish TypeSoup

  • 1 lb Beef (cut into chunks)
  • 4 cups Beef broth
  • 2 carrots Carrots (sliced)
  • 1 onion Onion (chopped)
  • 2 cloves Garlic (minced)
  • 1 tbsp Olive oil
  • to taste Salt and pepper

Instructions 

  • Heat olive oil in a large pot over medium heat.
  • Sauté chopped onion and minced garlic until fragrant.
  • Add beef chunks and cook until browned.
  • Pour in beef broth, add sliced carrots, salt, and pepper. Bring to a boil.
  • Reduce heat and simmer for 1 hour until beef is tender.

Notes

For extra flavor, add herbs like thyme or bay leaves during simmering.
Calories: 350kcal
Cost: $15
Course: Soup
Cuisine: Christmas
Keyword: beef