Author

Jack

Browsing

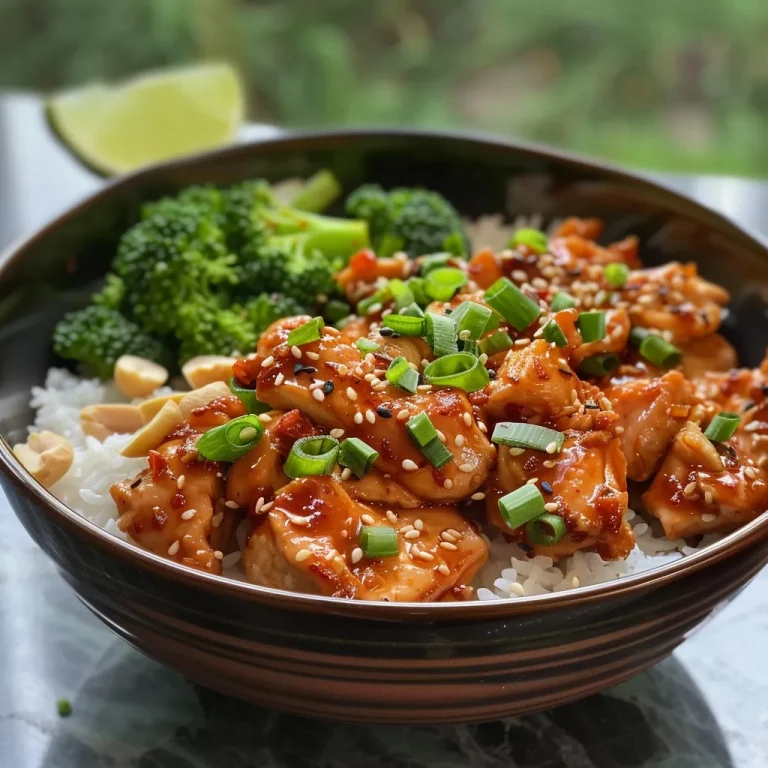
Embark on a Culinary Adventure with Spicy Korean Chicken

Welcome, fellow food explorers! Today, we’re diving into the vibrant and mouthwatering world of Korean cuisine with a dish that promises to tantalize your taste buds in just 30 minutes. This Easy 30 Minute Spicy Korean Chicken recipe is not just a meal; it’s a flavorful journey that brings the essence of Korea right to your dinner table. Imagine succulent chicken marinated in a rich, savory sauce, bursting with the perfect balance of heat and sweetness. Are you ready? Let’s get cooking!

Why You’ll Love This Recipe

This recipe is a must-try for several reasons:

  • Quick Preparation: Ready in just 30 minutes, this dish is perfect for busy weeknights.
  • Flavor Explosion: The combination of Sriracha, honey, and ginger creates a captivating flavor profile that tantalizes the palate.
  • Versatile Ingredients: Most ingredients are pantry staples, making it easy to whip up on a whim.
  • Healthy Option: Packed with lean chicken and served with steamed vegetables, it’s a nutritious choice.
  • Customizable: Adjust the spice level to suit your taste, making it suitable for everyone.

Ingredient Breakdown

Let’s take a closer look at the ingredients you’ll need:

  • 500 g chicken breast fillets: Cut into strips for quick cooking. Feel free to substitute with thighs for extra juiciness.
  • 45 ml vegetable oil: Essential for frying; can be replaced with sesame oil for a nutty flavor.
  • 30 ml Sriracha: This adds the signature heat. For a milder version, use sweet chili sauce.
  • 1-2 g cornstarch: Mixed with cold water to thicken the sauce. You can substitute with arrowroot powder.
  • 2 tbsp soy sauce: Adds depth; opt for low-sodium if you’re watching your salt intake.
  • 1 tbsp honey: Balances the spice; maple syrup works as a vegan alternative.
  • 2.5 cm piece ginger: Peeled and minced, infusing warmth and flavor.
  • 3 cloves garlic: Peeled and minced, for aromatic richness.
  • 1 tsp chili powder: Adds an extra kick; adjust to your heat preference.
  • Steamed rice: The perfect base for this flavorful chicken.
  • Steamed tenderstem broccoli: Adds color and nutrition; feel free to substitute with any green vegetable.
  • Dry roasted peanuts: Chopped for crunch; omit for nut-free diets.
  • Lime wedges: A squeeze of lime adds brightness.
  • Green onions: Sliced for garnish, providing freshness and a pop of color.

Pro Tips for Perfect Spicy Korean Chicken
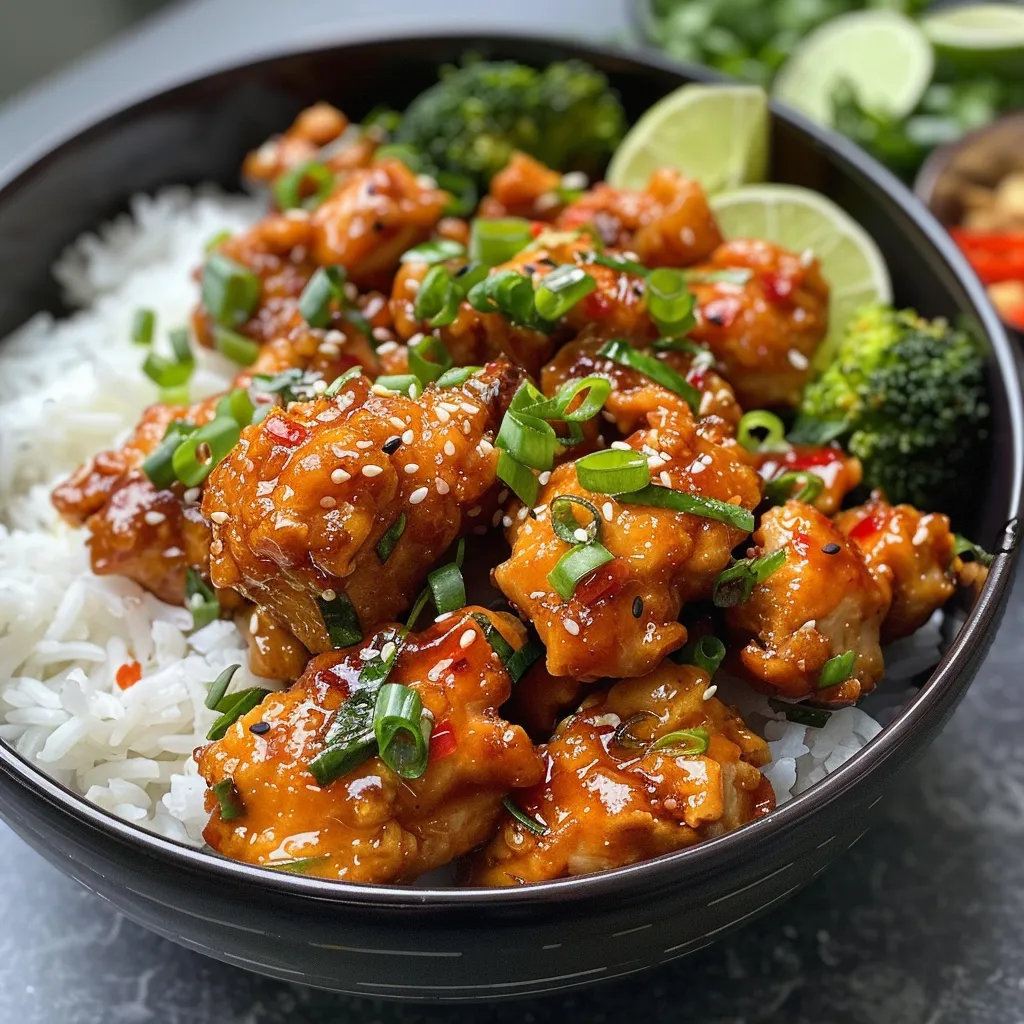
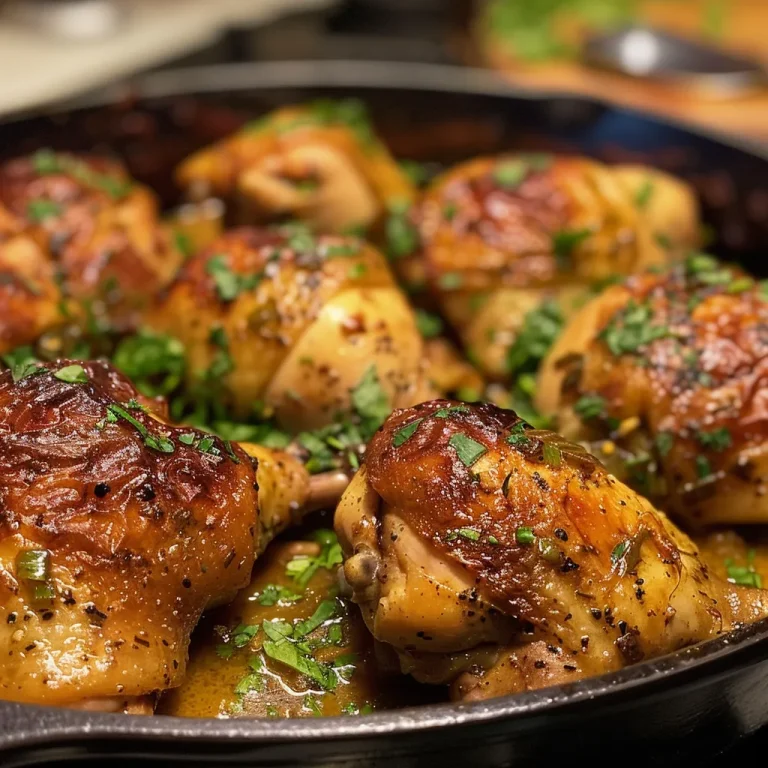
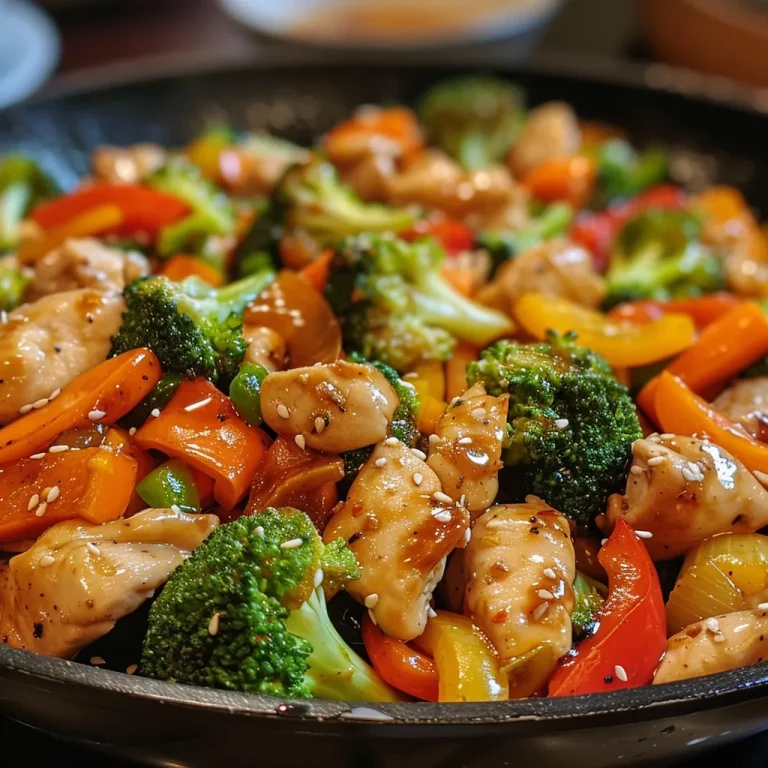
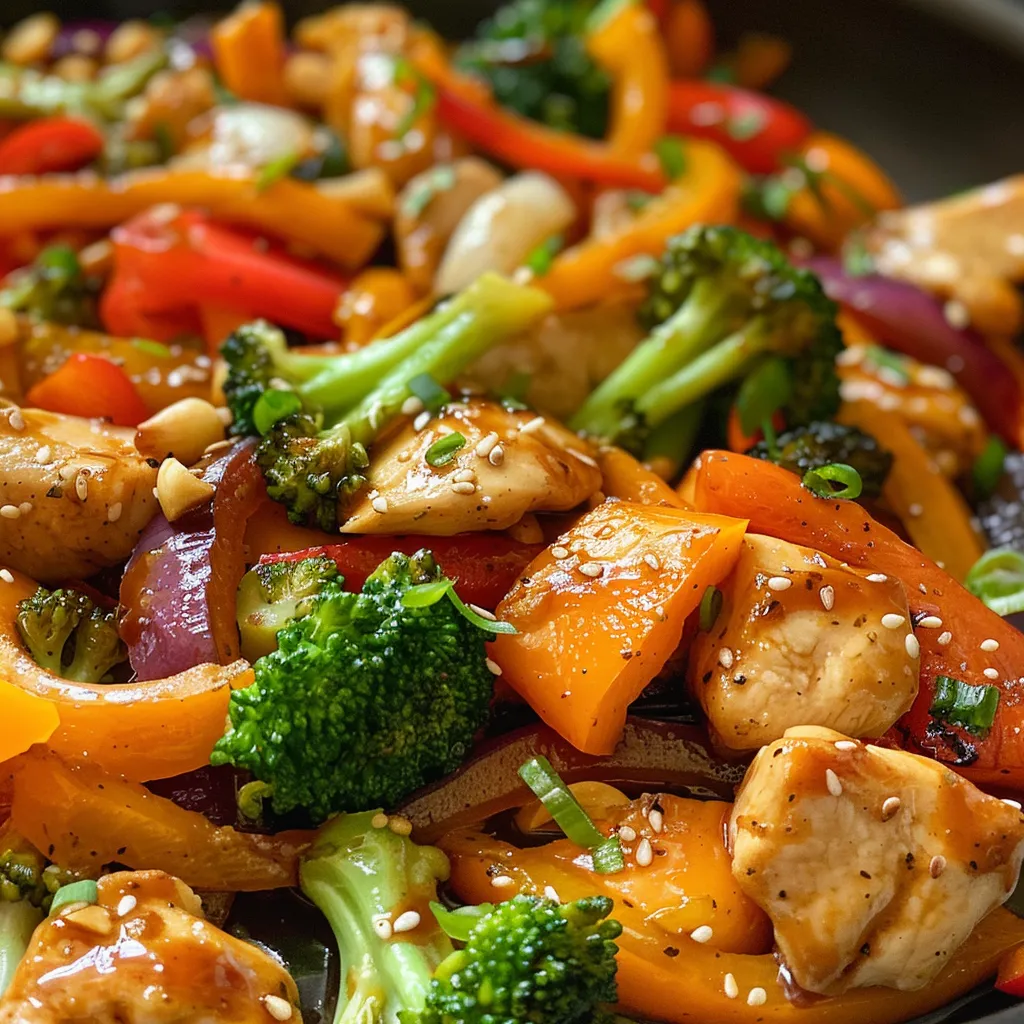
A side view of spicy chicken dish showcasing its rich sauce and fresh garnishes.

To ensure your dish turns out perfectly, consider these expert insights:

  • Marinate Longer: For deeper flavor, marinate the chicken for at least 1 hour or overnight.
  • Don’t Overcrowd the Pan: Cook in batches to achieve a nice sear on the chicken.
  • Use a Meat Thermometer: Ensure chicken is cooked to an internal temperature of 75°C (165°F).
  • Adjust Spice Level: Start with less Sriracha and gradually add more to your taste.
  • Serve Immediately: Enjoy it fresh for the best texture and flavor.
  • Garnish Wisely: Don’t skip the peanuts and green onions; they add great texture and brightness.
  • Make It a Meal: Serve with steamed rice and veggies for a complete dinner.
  • Experiment with Sauces: Try adding a splash of sesame oil or a dash of rice vinegar for a unique twist.

Common Mistakes and Troubleshooting

Here are some common pitfalls to avoid:

  • Not Marinating: Skipping the marination process can lead to bland chicken. Take the time to let it soak up those flavors!
  • High Heat Cooking: Cooking on too high heat can burn the sauce. Use medium heat to allow for even cooking.
  • Using Dried Spices: Fresh garlic and ginger provide a more vibrant flavor than dried versions.
  • Skipping the Cornstarch: This is crucial for achieving that glossy sauce. Don’t omit it!

Variations to Try

Feeling adventurous? Here are some variations to elevate your spicy Korean chicken experience:

  • Sweet and Spicy: Add a tablespoon of brown sugar to the marinade for a sweeter flavor.
  • Vegetarian Version: Substitute chicken with tofu or tempeh, and follow the same preparation.
  • Korean BBQ Style: Grill the chicken instead of pan-frying for a smoky flavor.
  • One-Pan Meal: Toss in assorted vegetables like bell peppers and carrots during cooking for a complete meal.

Storage and Make-Ahead Instructions

If you have leftovers (if they last that long!), here’s how to store them:

  • Refrigeration: Store in an airtight container for up to 3 days. Reheat in a skillet over medium heat.
  • Freezing: Place in freezer-safe bags or containers for up to 2 months. Thaw in the fridge before reheating.
  • Make-Ahead: Marinate the chicken a day in advance and cook it when you’re ready to eat.

Comprehensive FAQ

Here are some frequently asked questions about this dish:

  • Can I use frozen chicken? Yes, just ensure it’s fully thawed before marinating.
  • What can I substitute for Sriracha? Use any hot sauce or chili paste that you prefer.
  • Can I double the recipe? Absolutely! Just make sure to cook in batches if necessary.
  • Is this recipe gluten-free? Yes, if you use tamari instead of soy sauce.
  • What side dishes pair well? Serve with steamed rice, kimchi, or a simple salad.
  • How can I make this dish less spicy? Reduce the amount of Sriracha and chili powder.
  • Can I add vegetables? Yes! Bell peppers, carrots, and snap peas work great.
  • How can I increase the sauce? Simply double the marinade ingredients while keeping the chicken amount the same.

Nutritional Tips and Dietary Adaptations

For those watching their diet, here are some considerations:

  • Protein Content: Chicken is a great source of lean protein, perfect for muscle repair.
  • Low-Carb Option: Serve over cauliflower rice instead of regular rice to reduce carbs.
  • Added Fiber: Include a variety of vegetables to boost fiber intake.
  • Healthy Fats: The use of peanuts adds beneficial fats, great for satiety.

Equipment Recommendations

Before you start cooking, make sure you have the right tools:

  • Cast Iron Skillet: Perfect for achieving a nice sear on the chicken.
  • Meat Thermometer: Essential for ensuring your chicken is cooked through.
  • Mixing Bowls: Useful for marinating and mixing your sauce.
  • Spatula: Ideal for flipping the chicken without breaking it apart.

Serving Suggestions

When it comes to serving this delicious dish, here are some ideas:

  • Garnish: Top with chopped peanuts and sliced green onions for added texture.
  • Accompaniment: Serve with lime wedges for a refreshing zing.
  • Plate it Pretty: Arrange the chicken over a bed of rice, surrounded by colorful broccoli.

Now that you’re armed with all this knowledge, it’s time to bring the flavors of Korea into your kitchen. This Spicy Korean Chicken recipe is more than just food; it’s a connection to a culture, a celebration of flavors, and an invitation to share stories over a delicious meal. Happy cooking and bon appétit!

Easy 30 Minute Spicy Korean Chicken

Prep Time 10 minutes
Cook Time 20 minutes
Total Time 30 minutes
Servings 4 people
Calories 450
A quick and flavorful Korean-inspired chicken dish perfect for a weeknight dinner. Ready in just 30 minutes with bold, spicy, and savory flavors.

Ingredients

Protein

  • 500 g chicken breast fillets (cut into strips)
  • 45 ml vegetable oil (divided)
  • 30 ml Sriracha
  • 1 g cornstarch (½ teaspoon)
  • 2 tbsp soy sauce
  • 1 tbsp honey
  • 2.5 cm ginger (peeled and minced)
  • 3 cloves garlic (peeled and minced)
  • 1 tsp chili powder

Sides

  • Steamed rice
  • Steamed tenderstem broccoli
  • Dry roasted peanuts (chopped)
  • Lime wedges
  • Green onions (sliced)

Instructions 

  • Heat 2 tablespoons of vegetable oil in a large skillet over medium-high heat.
  • Add chicken strips and cook until browned, about 5-7 minutes.
  • Stir in minced ginger, garlic, chili powder, and Sriracha; cook for 2 minutes.
  • Add soy sauce, honey, and cornstarch; cook until sauce thickens, about 3-4 minutes.
  • Serve over steamed rice with broccoli, chopped peanuts, lime wedges, and sliced green onions.
Notes

Adjust spice level by adding more or less Sriracha.
Calories: 450kcal
Cost: $12
Course: Main Course
Cuisine: Korean
Keyword: Chicken

Embark on a Culinary Adventure with Flavorful Chicken Recipes

Welcome to a world where every bite tells a story and every recipe is a passport to a rich tapestry of cultures and flavors. Today, we’re diving into a selection of mouth-watering chicken recipes that not only bring comfort but also connect us to the essence of home cooking. From **Cranberry Orange Glazed Chicken** to **Soy Garlic Chicken Thighs**, these dishes are perfect for gathering friends and family around the table. Each recipe is crafted not just to satisfy hunger but to create lasting memories. Let’s explore the delightful journey of flavors!

Why You’ll Love These Recipes

Here are just a few reasons why you’ll adore these chicken dishes:

  • Comforting flavors: Each recipe combines familiar ingredients with unique twists, ensuring a comforting yet exciting meal.
  • Easy preparation: These recipes are designed for home cooks of all levels, so you can whip them up with ease.
  • Versatile options: Whether you’re cooking for a crowd or just for yourself, these recipes can be adjusted to fit your needs.
  • Health-conscious choices: Many of these dishes focus on wholesome ingredients, making it easier to enjoy delicious meals without compromising on health.
  • Family-friendly: These recipes are not just for adults; even kids will enjoy the vibrant flavors and textures!

Ingredients Breakdown and Substitutions

Let’s take a closer look at the essential ingredients for our featured chicken recipes:

  • Chicken Thighs: Tender and juicy, chicken thighs are ideal for marinating and air frying. You can also use chicken breasts if you prefer.
  • Cranberry Sauce: Adds a sweet-tart flavor. Substitute with orange marmalade or apple sauce for different taste profiles.
  • Garlic: Fresh garlic is a must for flavor. If unavailable, garlic powder can work in a pinch, but fresh is best!
  • Soy Sauce: Essential for that umami flavor. Consider using tamari for a gluten-free option.
  • Olive Oil: Used for marinating and cooking. You can replace it with avocado oil or sesame oil for a distinct flavor.

Step-by-Step Instructions

Colorful spread of family dinner recipes captured in detail.

Now that we have our ingredients ready, let’s jump into the cooking process. Here’s a general guide for preparing our chicken dishes:

  • Marinate the Chicken: Combine your marinade ingredients in a bowl, add the chicken thighs, and let it soak for at least 30 minutes (or up to overnight in the fridge for deeper flavor).
  • Prepare the Air Fryer: Preheat your air fryer to 375°F (190°C) for optimal crispiness.
  • Air Fry the Chicken: Place the marinated chicken in the air fryer basket, ensuring they are not overcrowded. Cook for about 25-30 minutes until the internal temperature reaches 165°F (75°C) and the skin is golden brown.
  • Rest and Serve: Allow the chicken to rest for a few minutes before serving. This helps retain moisture.

Cooking Tips and Tricks

To elevate your chicken dishes, consider these expert tips:

  • Achieving Crispy Skin: For that perfect crispy skin, pat the chicken dry before marinating and ensure the air fryer isn’t overcrowded.
  • Marinating Time: The longer you marinate, the more flavorful your chicken will be. Aim for at least 2 hours if you can!
  • Basting: During the last few minutes of cooking, baste the chicken with extra marinade for added flavor.
  • Temperature Check: Always use a meat thermometer to ensure your chicken is cooked through without being dry.
  • Flavor Variations: Experiment with herbs like rosemary or thyme in your marinade for a fresh twist.

Common Mistakes and Troubleshooting

Even seasoned cooks can stumble upon a few hiccups. Here are some common mistakes and how to avoid them:

  • Overcrowding the Air Fryer: This can lead to uneven cooking. Cook in batches if necessary.
  • Skipping the Marinade: Don’t skip this step! Marinating is key to juicy and flavorful chicken.
  • Not Preheating: Failing to preheat the air fryer can result in longer cooking times and less crispy skin.
  • Ignoring Resting Time: Cutting into the chicken too soon will cause juices to run out, leading to dry meat.

Variations to Explore

The beauty of cooking is in its adaptability. Here are some delicious variations to try:

  • Honey Soy Glazed Chicken: Replace the cranberry sauce with honey for a sweet and savory dish.
  • Spicy Garlic Chicken: Add red pepper flakes to the marinade for a spicy kick.
  • Herbed Lemon Chicken: Incorporate lemon zest and fresh herbs for a refreshing flavor.
  • BBQ Chicken Thighs: Swap the marinade for your favorite BBQ sauce for a smoky, tangy experience.

Storage and Make-Ahead Instructions

Planning ahead can make mealtime a breeze. Here’s how to store and prep your chicken dishes:

  • Refrigeration: Store cooked chicken in an airtight container in the fridge for up to 4 days.
  • Freezing: For longer storage, freeze the cooked chicken in a freezer-safe container for up to 3 months.
  • Make-Ahead: You can marinate chicken the night before and store it in the fridge until you’re ready to cook.

Frequently Asked Questions (FAQ)

Here are some common questions about cooking chicken dishes:

  • Can I use chicken breasts instead of thighs? Yes, just adjust the cooking time as breasts typically cook faster.
  • What is the best way to ensure chicken is juicy? Marinate it well and avoid overcooking.
  • How can I make chicken less greasy? Trim excess fat before cooking and use a lighter marinade.
  • What sides pair well with these chicken dishes? Serve with steamed vegetables, rice, or a fresh salad for a balanced meal.
  • Can I cook these recipes in the oven? Absolutely! Bake in a preheated oven at 400°F (200°C) for about 30-35 minutes.
  • How do I know when the chicken is fully cooked? Use a meat thermometer; it should read 165°F (75°C).
  • Can I marinate chicken for too long? Yes, marinating for more than 24 hours can make the texture mushy.
  • Are these recipes suitable for meal prep? Yes! They store well and can be reheated easily.

Nutrition Tips and Dietary Adaptations

For those mindful of their health, here are some nutrition tips:

  • Lean Protein: Chicken thighs are a great source of protein and can be enjoyed as part of a balanced diet.
  • Low-Carb Alternatives: Pair with cauliflower rice or zoodles for a low-carb meal.
  • Gluten-Free Options: Use tamari instead of soy sauce to keep it gluten-free.
  • Dairy-Free Adaptations: All recipes are naturally dairy-free, making them suitable for lactose intolerant individuals.

Essential Equipment Recommendations

To perfectly execute these recipes, here’s what you’ll need:

  • Air Fryer: A reliable air fryer is key for achieving that crispy skin and juicy meat.
  • Meat Thermometer: Essential for checking doneness without cutting into the meat.
  • Mixing Bowls: Use these for marinating and mixing ingredients.
  • Cutting Board: A sturdy board ensures safe and easy preparation.

Serving Suggestions

To create a complete meal, consider these serving ideas:

  • Fresh Salads: A light salad can balance out the richness of the chicken.
  • Rice Dishes: Serve with jasmine or brown rice to soak up the flavors.
  • Roasted Vegetables: A mix of seasonal vegetables adds color and nutrition.

In conclusion, cooking is a delightful journey that allows us to explore flavors, connect with cultures, and create memories around the dinner table. With these chicken recipes, you’re not just preparing a meal; you’re crafting experiences that endure long after the last bite. So grab your apron, gather your loved ones, and let’s celebrate the joy of cooking together!

Home

Prep Time 20 minutes
Cook Time 40 minutes
Total Time 1 hour
Servings 4 people
Calories 850
A collection of flavorful and easy-to-make recipes perfect for any occasion, from hearty soups to delightful desserts.

Ingredients

Protein

  • 2 cups Cranberry Orange Glazed Chicken
  • 1.5 cups French Onion Beef (for casserole)
  • 1 lb Lemon Chicken (boneless, skinless)

Soup Ingredients

  • 1 cup Autumn Wild Rice Soup
  • 1 cup Low Carb Chicken Tortilla Soup

Desserts

  • 1 loaf Carrot Cake Banana Bread
  • 1 batch Chai Spice Snickerdoodle Blondies
  • 1 cup Satisfying Apple Pie Overnight Oats
  • 4 cups No Bake Pumpkin Cheesecake Cups
  • 1 cup Protein Cottage Cheese Chocolate Mousse
  • 1 batch Cinnamon Roll Pancakes

Instructions 

  • Prepare each dish according to its specific method, focusing on flavor and presentation.

Notes

Feel free to customize ingredients to suit your taste and dietary needs.
Calories: 850kcal
Cost: $15
Course: Dessert, Main Course, Soup
Cuisine: American
Keyword: beef, Chicken, dessert, Soup

Embark on a Global Culinary Adventure: Discover Cooking Classes Around the World

Are you ready to dive into the world of culinary exploration? This definitive guide will take you on a journey to discover some of the most unique cooking classes around the globe, enriching your palate and expanding your culinary skills. From the rustic kitchens of Tuscany to the vibrant street food stalls of Thailand, you’ll learn to embrace the art of cooking through hands-on experiences that connect you with local traditions and ingredients.

In this article, we’ll explore five extraordinary cooking classes that not only teach you how to cook authentic dishes but also immerse you in the culture and stories behind them. You can expect to learn the secrets of the region’s cuisine, meet local chefs, and enjoy a feast of flavors that will inspire your culinary adventures at home.

1. Discover the Art of Rustic Italian Cooking in Tuscany

Italy is renowned for its rich culinary heritage, and there’s no better place to experience this than in the heart of Tuscany. Here, you can join a cooking class that takes you through the art of making traditional Italian dishes using fresh, local ingredients.

  • Hands-on experience: You’ll be guided by passionate local chefs who share their family recipes and cooking secrets.
  • Farm-to-table philosophy: Learn about the importance of seasonal ingredients and how to source them from local markets.
  • Menu highlights: Expect to prepare dishes like handmade pasta, rich sauces, and classic desserts such as tiramisu.
  • Cultural immersion: Enjoy meals in authentic settings, surrounded by the breathtaking Tuscan countryside.
  • Wine pairing: Classes often include a wine tasting component, allowing you to pair regional wines with your culinary creations.

2. Spice Up Your Life: A Culinary Journey through India’s Rich Traditions

India’s cuisine is as diverse as its culture, with each region offering its own unique flavors and cooking techniques. Enrolling in a cooking class in India allows you to explore the vibrant spices and culinary traditions that define this incredible country.

  • Exploration of spices: Learn about the spices that form the backbone of Indian cooking, and how to use them to create authentic flavors.
  • Regional specialties: Classes often focus on specific regional dishes, allowing you to experience the culinary diversity within India.
  • Market visits: Some classes include a trip to local markets to source fresh ingredients, giving you insight into the vibrant food culture.
  • Cooking techniques: Master various cooking techniques including tandoor cooking, curries, and chutneys.
  • Shared meals: Enjoy the dishes you’ve prepared in a communal setting, enhancing the experience of connection and community.

3. Experience the Simplicity and Charm of French Home Cooking in Provence

A vibrant plate of chicken recipes, highlighting the freshness and appeal of home-cooked comfort food.

Provence is the epitome of culinary elegance, where rustic ingredients come together to create sophisticated dishes. A cooking class in this sun-soaked region allows you to embrace the art of French cooking.

  • Farm-fresh ingredients: Classes often emphasize the use of fresh produce and herbs from local markets and gardens.
  • Classic techniques: Learn traditional French cooking methods, from sauces to pastry-making.
  • Menu diversity: Prepare a variety of dishes, focusing on seasonal ingredients and traditional recipes.
  • Wine and cheese pairings: Discover the art of pairing regional wines and cheeses with your culinary creations.
  • Scenic locations: Classes are often held in picturesque settings, enhancing the overall experience.

4. Spice Up Your Journey: A Culinary Tour of Thailand’s Street Food Paradise

Thailand is famous for its vibrant street food culture. Joining a cooking class here provides a unique opportunity to learn how to recreate these delicious dishes at home.

  • Street food focus: Classes often center around popular street food dishes, such as pad thai, green curry, and som tam.
  • Market exploration: Experience the hustle and bustle of local markets, where you’ll source ingredients used in your cooking.
  • Culinary techniques: Master the art of stir-frying, balancing flavors, and using fresh herbs.
  • Hands-on cooking: Engage in interactive cooking sessions that emphasize teamwork and creativity.
  • Community dining: Enjoy the meals you’ve prepared with fellow participants, fostering a sense of camaraderie.

5. Embark on a Culinary Journey in Peru: From Mountains to the Sea

Peruvian cuisine is a melting pot of flavors and influences, making it one of the most exciting culinary destinations in the world. A cooking class in Peru allows you to explore the varied landscapes and culinary traditions of this diverse country.

  • Diverse menu options: Learn to prepare dishes from different regions, including ceviche, lomo saltado, and aji de gallina.
  • Ingredient exploration: Discover unique Peruvian ingredients, such as quinoa, potatoes, and a variety of peppers.
  • Cooking techniques: Gain insights into both ancient and modern cooking techniques that define Peruvian cuisine.
  • Local culture: Engage with local chefs who share their culinary heritage and the stories behind each dish.
  • Scenic settings: Classes are often held in stunning locations, offering breathtaking views while you cook.

Conclusion: Your Culinary Journey Awaits

No matter which cooking class you choose, each experience promises to enrich your culinary skills while connecting you with the culture and traditions of the region. As you embark on this flavorful journey, remember that cooking is not just about the food itself, but also the stories and connections that come with it.

Frequently Asked Questions (FAQs)

As you prepare for your culinary adventure, here are some commonly asked questions that can help you make the most of your cooking class experience.

  • What should I pack for a cooking class? Bring comfortable clothing, a notepad for recipes, and a camera to capture the memories!
  • What if I don’t speak the language? Many cooking classes offer translations or bilingual instructors to ensure everyone can participate.
  • Are cooking classes suitable for beginners? Absolutely! Most classes cater to various skill levels, from novices to experienced cooks.
  • How do I choose the right cooking class? Consider your interests in cuisine, cooking style, and the cultural experiences offered.
  • Can I take home what I cook? Many classes allow you to take leftovers, but check in advance.
  • What are some must-try dishes in each region? Research local specialties beforehand to maximize your culinary adventure.
  • Are cooking classes available for special diets? Many classes can accommodate dietary restrictions; just inform the instructors in advance.
  • How long do cooking classes typically last? Classes can range from a few hours to a full day, so choose according to your schedule.

Enhancing Your Culinary Skills: Tips for Success

To make the most of your cooking class experience, here are some expert tips:

  • Be open-minded: Embrace new flavors and cooking techniques, even if they seem unfamiliar at first.
  • Engage with instructors: Don’t hesitate to ask questions; chefs love sharing their knowledge and passion.
  • Practice at home: Recreate what you’ve learned after class to cement your new skills.
  • Share your experiences: Discuss your culinary journey with friends and family to inspire them.
  • Document your recipes: Keep a culinary journal to record new recipes and tips you gather along the way.

In conclusion, cooking classes are a gateway to not just mastering the culinary arts but also connecting with cultures around the globe. So grab your apron, pack your bags, and get ready to taste the world!

Browse By

Prep Time 10 minutes
Cook Time 20 minutes
Total Time 30 minutes
Servings 4 people
Calories 600
Explore a variety of recipes categorized by meal and ingredient to inspire your next cooking adventure.

Ingredients

Home

  • 1 cup RECIPESBreakfastLunchDinnerDessertsSeafood

Breakfast

  • 1 cup Lunch

Dinner

  • 1 cup Desserts

Seafood

  • 1 cup IngredientsChickenBeefSaladsSoup

Chicken

  • 200 g Chicken (boneless, skinless)

Beef

  • 150 g Beef (lean ground)

Salads

  • 1 cup Salads

Soup

  • 1 cup Soup

In the KitchenAirfryer Recipes

  • 1 piece Airfryer Recipes

New Year’s Day Recipes

  • 1 piece New Year’s Day Recipes

Valentine’s Day Recipes

  • 1 piece Valentine’s Day Recipes

St. Patrick’s Day Recipes

  • 1 piece St. Patrick’s Day Recipes

Easter Recipes

  • 1 piece Easter Recipes

Mother’s Day Recipes

  • 1 piece Mother’s Day Recipes

Juneteenth Recipes

  • 1 piece Juneteenth Recipes

Independence Day Recipes

  • 1 piece Independence Day Recipes

Halloween Recipes

  • 1 piece Halloween Recipes

Thanksgiving Recipes

  • 1 piece Thanksgiving Recipes

Christmas Recipes

  • 1 piece Christmas Recipes

Instructions 

  • Gather all ingredients and prepare your cooking station.
  • Cook chicken and beef as desired, then prepare salads and seafood dishes.
  • Use airfryer for quick recipes if applicable.
  • Arrange dishes according to the occasion or preference.
  • Serve and enjoy your diverse meal selection.

Notes

Feel free to customize ingredients based on availability and taste.
Calories: 600kcal
Cost: $15
Course: Breakfast, Desserts, Dinner, lunch
Cuisine: Various
Keyword: beef, Chicken, Seafood

A Culinary Journey: The Magic of Homemade Rotisserie Chicken

Welcome, my friends! Today, we embark on a culinary adventure that takes us beyond the ordinary into the world of homemade rotisserie chicken. This dish is not just about cooking; it’s about creating an experience that fills your home with mouthwatering aromas and brings loved ones together around the dinner table. With just a few simple ingredients and techniques, you can create a succulent, juicy chicken that rivals any store-bought version. Let’s dive into the vibrant flavors and textures that make this dish a family favorite!

Why You’ll Love This Recipe

This homemade rotisserie chicken is more than just a meal; it’s a celebration of flavor, convenience, and creativity. Here are five reasons this recipe will become your go-to dinner:

  • Unmatched Flavor: Infusing your chicken with a blend of spices creates a depth of flavor that is simply irresistible.
  • Healthier Option: Control the ingredients and avoid preservatives found in store-bought rotisserie chickens.
  • Versatile Dish: Enjoy it as a main course, in salads, or as a filling for sandwiches—the possibilities are endless!
  • Impressive Presentation: Serve a beautifully roasted chicken that looks as good as it tastes, impressing family and friends alike.
  • Easy Meal Prep: Cook once, enjoy multiple meals! Leftovers can be transformed into new dishes.

Gather Your Ingredients

Before we start cooking, let’s gather everything we need. Here’s a detailed breakdown of the ingredients for your homemade rotisserie chicken, along with some substitution ideas:

  • Whole Chicken: A 4-5 pound whole chicken is ideal. If you prefer, you can use chicken pieces, just adjust the cooking time accordingly.
  • Spice Rub: Combine salt, pepper, paprika, garlic powder, and onion powder. For a twist, try adding cumin or smoked paprika for a smoky flavor.
  • Olive Oil: This helps the spices adhere to the chicken and promotes browning. Feel free to use melted butter for a richer flavor.
  • Lemon: Fresh lemon juice not only enhances flavor but also keeps the chicken moist. Substitute with lime if preferred.
  • Fresh Herbs: Rosemary, thyme, or parsley add a fragrant touch. Dried herbs can also be used if fresh isn’t available.

Pro Tips for Rotisserie Perfection

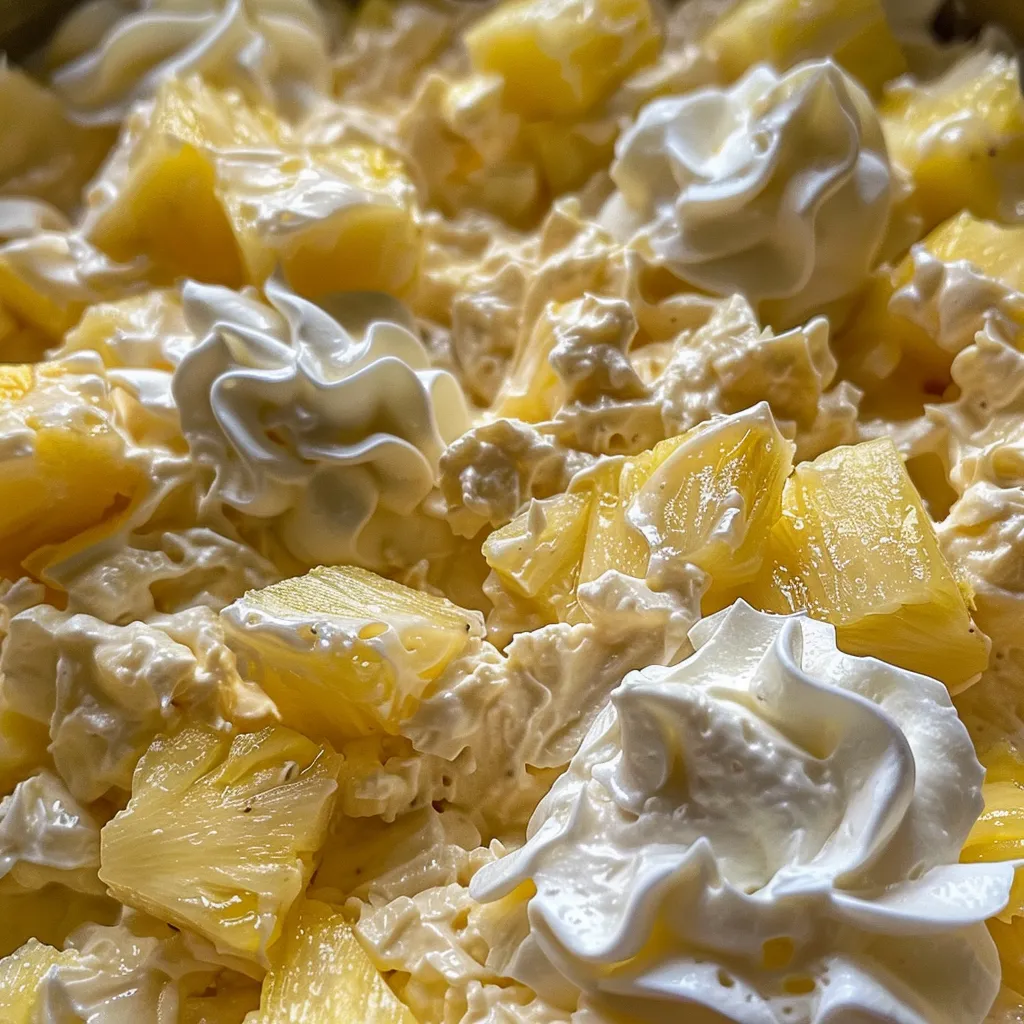
Close-up of a delicious Pineapple Fluff Salad, highlighting its creamy consistency and vibrant colors.

To ensure your chicken turns out perfectly every time, consider these expert insights:

  • Brining: Soaking your chicken in a saltwater solution for a few hours (or overnight) can enhance moisture and flavor.
  • Room Temperature: Let your chicken sit at room temperature for about 30 minutes before cooking to ensure even cooking.
  • Truss the Chicken: Tying the legs together helps the chicken cook more uniformly and keeps the juices locked in.
  • Use a Meat Thermometer: Cook until the internal temperature reaches 165°F (75°C) to guarantee safety and juiciness.
  • Let It Rest: Allow the chicken to rest for at least 15 minutes after cooking. This lets the juices redistribute for a moist final product.
  • Baste Regularly: If using an oven, baste the chicken with its juices every 30 minutes to enhance flavor and maintain moisture.
  • Flavor Variations: Experiment with different spice blends, like Cajun or Italian, to create your own signature rotisserie chicken.
  • Gravy or Sauce: Use the drippings to make a quick gravy—just add some flour and chicken broth!

Common Mistakes and Troubleshooting

Even the best chefs make mistakes! Here are some common pitfalls and how to avoid them:

  • Overcooking: Always monitor the internal temperature to prevent dryness.
  • Skin Not Crispy: Make sure the skin is dry before applying oil and seasonings for that perfect crispy finish.
  • Flavorless Chicken: Don’t skimp on seasoning! Rub spices generously under the skin for maximum flavor.
  • Uneven Cooking: If using a grill, rotate the chicken halfway through cooking to ensure even browning.

Variations of Homemade Rotisserie Chicken

Here are some exciting variations to inspire your culinary creativity:

  • Herb and Garlic: Add minced garlic and a medley of fresh herbs for an aromatic twist.
  • Honey Mustard Glaze: Brush a mixture of honey and Dijon mustard on the chicken for a sweet and tangy flavor.
  • Spicy Chipotle: Incorporate chipotle powder or a spicy marinade for those who crave heat.
  • Asian-Inspired: Use soy sauce, ginger, and sesame oil for a unique flavor profile.

Storage and Make-Ahead Instructions

Planning ahead? Here’s how to store your homemade rotisserie chicken for maximum freshness:

  • Refrigeration: Store leftover chicken in an airtight container in the fridge for up to 4 days.
  • Freezing: For longer storage, freeze cooked chicken in individual portions. It can last for up to 4 months.
  • Reheating: To reheat, place in a preheated oven at 350°F (175°C) until warmed through, to prevent drying out.

Frequently Asked Questions

Let’s address some common questions about making homemade rotisserie chicken:

  • Can I use a different cooking method? Yes, you can roast in the oven, use a slow cooker, or grill the chicken.
  • What should I serve with rotisserie chicken? Great sides include roasted vegetables, mashed potatoes, or a fresh salad.
  • How can I ensure my chicken is juicy? Brining and letting the chicken rest post-cooking are key to juicy meat.
  • Can I cook a frozen chicken? It’s best to thaw your chicken first for even cooking.
  • What are the best spices for rotisserie chicken? A mix of paprika, garlic powder, and herbs works wonderfully!
  • Is homemade rotisserie chicken healthier? Yes, you control the ingredients, making it a healthier option than store-bought varieties.
  • How long does it take to cook a whole chicken? Typically, it takes about 1.5 hours at 375°F (190°C) for a 4-5 pound chicken.
  • Can I grill my rotisserie chicken? Absolutely! Just ensure you manage the heat for even cooking.

Nutritional Tips and Dietary Adaptations

For those mindful of nutrition, here are some tips to make your rotisserie chicken even healthier:

  • Skinless Chicken: Removing the skin before cooking reduces fat content significantly.
  • Gluten-Free: This recipe is naturally gluten-free; just ensure your spices are gluten-free as well.
  • Paleo-Friendly: Stick to whole ingredients and avoid added sugars in your spice rub.
  • Keto Diet: This dish fits perfectly into a low-carb diet—enjoy the flavors without the carbs!

Equipment Recommendations

To get started, here’s a list of essential tools for making your perfect rotisserie chicken:

  • Roasting Pan: A sturdy roasting pan with a rack allows for even cooking and easy cleanup.
  • Meat Thermometer: Essential for checking doneness and ensuring juicy meat.
  • Kitchen Twine: For trussing your chicken to promote even cooking.
  • Sharp Knife: A good knife is crucial for carving your beautifully cooked chicken.

Serving Suggestions

Ready to serve your masterpiece? Here are some delicious ideas:

  • Serve with Sides: Pair your chicken with roasted vegetables, garlic mashed potatoes, or a refreshing garden salad.
  • Make It a Sandwich: Shred leftover chicken and make a flavorful sandwich with your favorite toppings.
  • Add to Salads: Toss chunks of chicken onto a fresh salad for a protein-packed lunch.

In conclusion, my friends, making homemade rotisserie chicken is not just about the cooking—it’s about creating memories, sharing flavors, and enjoying the journey. With this guide, you have all the tools you need to craft a delightful dish that will leave your family asking for seconds. So grab your apron, unleash your inner chef, and let’s make some magic happen in the kitchen!

The Ultimate Pineapple Fluff Salad

Prep Time 10 minutes
Total Time 10 minutes
Servings 8 servings
Calories 150
A creamy, sweet, and tangy pineapple fluff salad that's perfect for any gathering or dessert table.

Ingredients

Dairy & Sweeteners

  • 1 cup whipped topping (thawed)
  • 1 cup canned crushed pineapple (drained)
  • 1/2 cup powdered sugar

Flavorings

  • 1 teaspoon vanilla extract

Optional Garnish

  • as needed maraschino cherries or chopped nuts (for topping)

Instructions 

  • In a large bowl, combine the whipped topping, crushed pineapple, powdered sugar, and vanilla extract.
  • Mix until smooth and well blended.
  • Chill in the refrigerator for at least 1 hour before serving.
  • Garnish with maraschino cherries or chopped nuts if desired.

Notes

This salad is best served chilled and can be made a day ahead for extra flavor.
Calories: 150kcal
Cost: $8
Course: Dessert
Keyword: Pineapple

Discover the Joy of Southern Fried Chicken Tenders

Welcome to a world where crispy textures meet rich Southern traditions! Today, we’re diving deep into the heart of comfort food with a beloved classic—Southern Fried Chicken Tenders. This dish is not just about satisfying your hunger; it’s a celebration of culture, family, and flavors that tell a story. Let’s embark on this culinary journey together, where every bite transports you to a Southern kitchen filled with warmth and laughter.

Why You’ll Love This Recipe

  • Easy to Prepare: With just a few simple ingredients, you can make a delicious meal that impresses family and friends.
  • Perfect for Any Occasion: Whether it’s a casual dinner or a festive gathering, these chicken tenders are a hit!
  • Customizable Flavors: Adjust the spices and sauces to suit your taste, making this recipe a versatile favorite.
  • Kid-Friendly: These crispy tenders are sure to please even the pickiest eaters, making mealtime a breeze.
  • Great for Leftovers: Cooked tenders can be stored and enjoyed later, giving you a delicious option for quick lunches or snacks.

Essential Ingredients Breakdown

Let’s gather the ingredients for our classic Southern Fried Chicken Tenders. Each component plays a vital role in achieving that perfect crunch and flavor.

  • Chicken Tenderloins (about 1 pound): These are the star of the show! Choose fresh for the best texture, but frozen can work if fully thawed.
  • Buttermilk (1 cup): This rich dairy product not only keeps the chicken juicy but also helps the flour coating adhere better. If you’re out of buttermilk, you can make a quick substitute by mixing milk with a splash of vinegar.
  • All-Purpose Flour (1 cup): The flour is the foundation for our crunchy exterior. Make sure it’s well-seasoned for maximum flavor!
  • Paprika (1 teaspoon): Adds a subtle smokiness and vibrant color to the coating.
  • Salt (1 teaspoon): Essential for bringing out the flavors in the chicken and the coating.
  • Ground Black Pepper (1/2 teaspoon): A touch of spice to elevate your tenders.
  • Vegetable Oil: For frying, it’s best to use an oil with a high smoke point to achieve that golden brown finish.

Step-by-Step Instructions

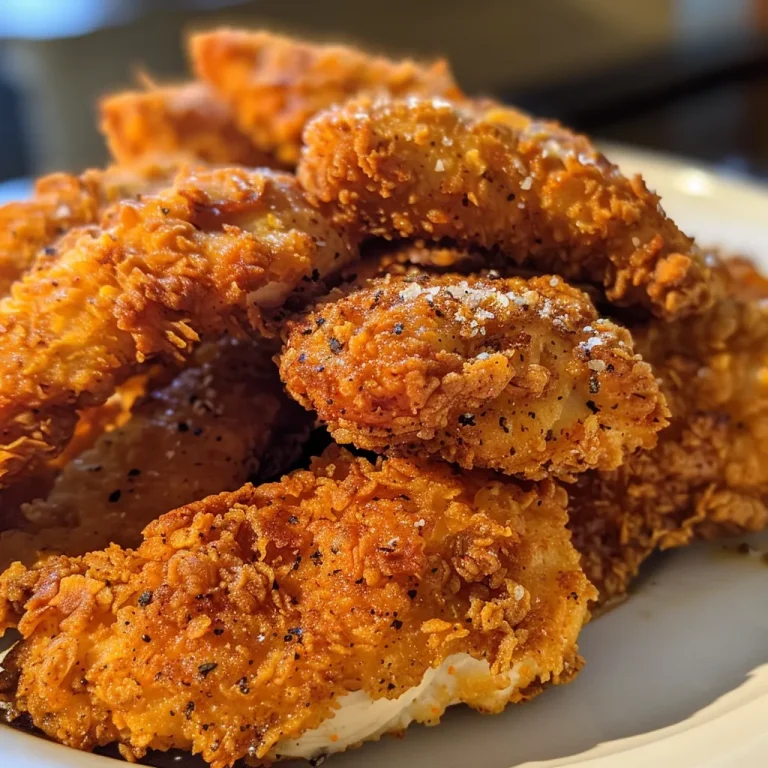
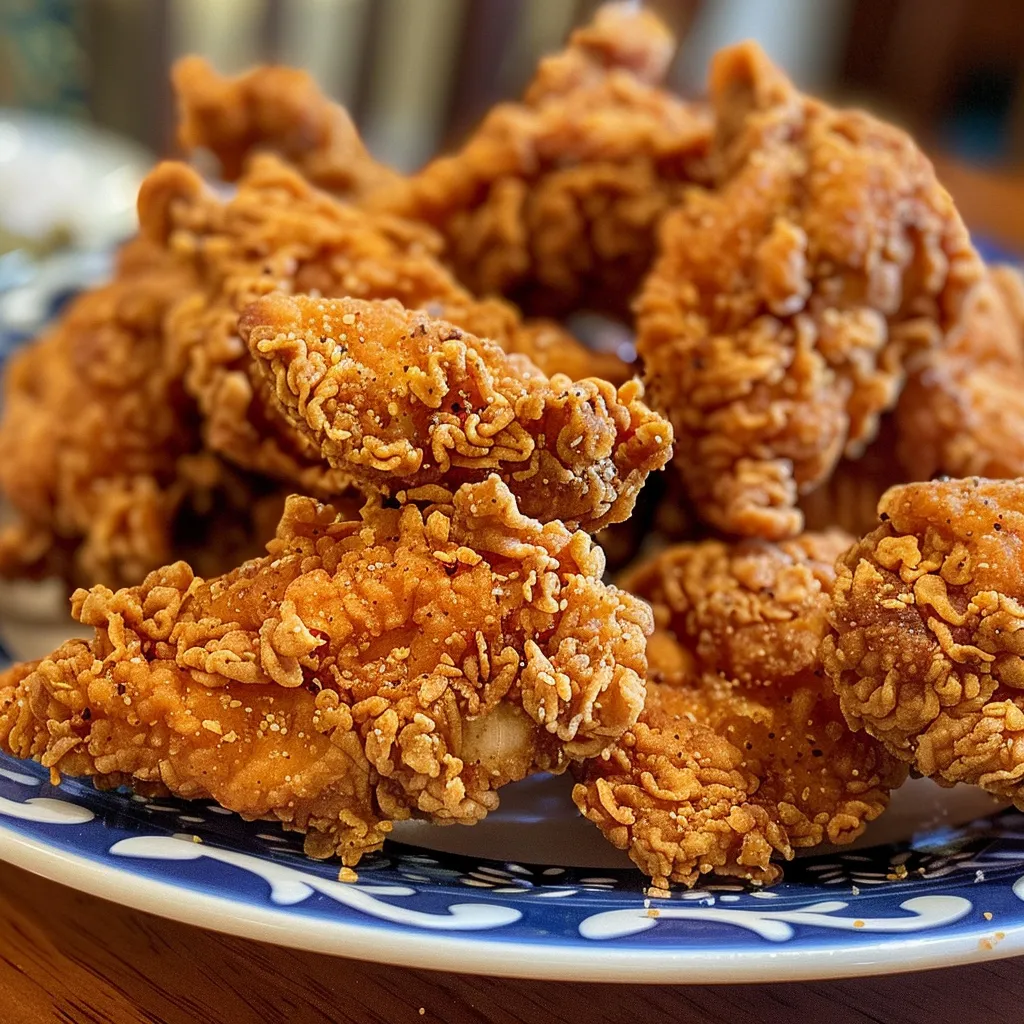
Southern fried chicken tenders with a crispy crust, ready to be served.

Now that we have our ingredients, let’s get cooking! Follow these simple steps to create your Southern Fried Chicken Tenders.

  1. In a bowl, allow the chicken tenderloins to soak in buttermilk for not less than 30 minutes and not longer than 1 hour. Keep in the refrigerator while marinating. This step is crucial for tender, flavorful chicken.
  2. In another bowl, combine the flour, paprika, salt, and pepper. This flour mixture is what will give your tenders that irresistible crispy coating.
  3. To fry, pour 2 inches of vegetable oil into a heavy skillet and heat to 350°F (175°C). Use a thermometer for accuracy, as the right temperature ensures perfect frying.
  4. Coat each marinated chicken tenderloin entirely in the flour mixture, ensuring an even layer. Shake off any excess flour before frying.
  5. Fry the tenders in batches until they are golden brown, about 6-8 minutes, flipping halfway through. Ensure they achieve an internal temperature of 165°F (74°C) for safe eating. Drain the tenders on paper towels to remove excess oil.

Pro Tips for Perfect Fried Chicken Tenders

  • Marinate Longer: If time allows, marinating the chicken for up to 2 hours enhances flavor and tenderness.
  • Double Frying: For extra crispiness, fry the tenders twice. Let them rest between fries for the best results.
  • Use a Cast Iron Skillet: This helps maintain a consistent temperature for even cooking.
  • Don’t Overcrowd the Pan: Fry in batches to avoid dropping the oil temperature, which can lead to soggy tenders.
  • Rest Before Serving: Allow the tenders to rest for a few minutes after frying to maintain their juiciness.
  • Experiment with Seasoning: Add garlic powder, cayenne pepper, or herbs to the flour mixture for a flavor twist.
  • Try Different Dipping Sauces: Serve with honey mustard, barbecue sauce, or ranch for a fun and flavorful experience.
  • Storage Tips: Store leftovers in an airtight container in the refrigerator for up to 3 days. Reheat in the oven for best crispiness.

Common Mistakes and Troubleshooting

While making Southern Fried Chicken Tenders is straightforward, there are a few common pitfalls to watch out for:

  • Flour Not Sticking: Ensure the chicken is well-coated in buttermilk and the flour mixture for the best adhesion.
  • Oil Too Hot or Too Cold: Use a thermometer to monitor the oil temperature. Too hot leads to burnt outsides, while too cool results in greasy tenders.
  • Overcooking: Keep an eye on cooking time; chicken tenders cook quickly and can dry out if left too long.

Variations to Try

Feeling adventurous? Here are some fun variations on the classic recipe:

  • Spicy Fried Chicken Tenders: Add cayenne pepper to the flour mixture for an extra kick!
  • Honey Garlic Chicken Tenders: Toss fried tenders in a mixture of honey and minced garlic for a sweet and savory twist.
  • Parmesan Crusted Chicken Tenders: Mix grated parmesan cheese into the flour for a cheesy, crispy coating.
  • Baked Chicken Tenders: For a healthier option, coat the tenders and bake at 400°F (200°C) until golden and cooked through, about 15-20 minutes.

Storage and Make-Ahead Instructions

If you’re planning ahead, here’s how to store and reheat your chicken tenders:

  • Refrigeration: Store cooked tenders in a sealed container in the fridge for up to 3 days.
  • Freezing: Place cooled tenders in a freezer-safe bag and freeze for up to 2 months. Thaw in the refrigerator before reheating.
  • Reheating: To restore crispiness, reheat in the oven at 375°F (190°C) for about 10-15 minutes.

Frequently Asked Questions

  • Can I use chicken breasts instead of tenderloins? Yes, but adjust cooking time as breasts may take longer to cook through.
  • What can I substitute for buttermilk? Milk with vinegar or yogurt can be a great substitute.
  • How do I know when the oil is hot enough? Use a thermometer or drop a small piece of bread in; it should sizzle and brown in about 60 seconds.
  • Can I make these gluten-free? Absolutely! Use a gluten-free flour blend to achieve similar results.
  • How do I make the tenders more flavorful? Experiment with different spices and marinades to find your perfect flavor profile.
  • Is it okay to fry in batches? Yes, frying in batches helps maintain oil temperature and ensures even cooking.
  • What dipping sauces pair well with chicken tenders? Classic choices include ranch, honey mustard, or a spicy aioli.
  • Can I bake these instead of frying? Yes, baking is a healthier alternative—just ensure they are well-coated and spaced on the baking sheet.

Nutrition Tips and Dietary Adaptations

This recipe is not only delicious but can also be adapted for various dietary needs:

  • Low-Carb Version: Substitute the flour with almond flour or crushed pork rinds for a lower-carb option.
  • Vegetarian Alternative: Use tofu or eggplant slices for a vegetarian-friendly version of fried tenders.
  • Heart-Healthy Choice: Opt for air-frying instead of deep-frying to reduce fat content.

Equipment Recommendations

Here’s what you’ll need to make this recipe successful:

  • Heavy Skillet or Dutch Oven: Ideal for frying, providing even heat distribution.
  • Thermometer: To accurately gauge oil temperature for perfect frying.
  • Mixing Bowls: For marinating and mixing your flour mixture.
  • Slotted Spoon: To safely remove tenders from hot oil without excess grease.

Serving Suggestions

Serve your Southern Fried Chicken Tenders hot and fresh with any of these delightful pairings:

  • Classic Coleslaw: The crunch and tang complement the rich flavors of the chicken.
  • Biscuits: Fluffy, buttery biscuits are a Southern staple that pairs perfectly with fried chicken.
  • Fries: Crispy fries or sweet potato fries make for a hearty side dish.
  • Dipping Sauces: Offer a variety of sauces like honey mustard, ranch, and barbecue for added fun!

In conclusion, making Southern Fried Chicken Tenders is a delightful culinary adventure that brings people together. With just a handful of ingredients and a few simple steps, you can create a dish that is crispy, juicy, and utterly satisfying. So gather your loved ones, share some stories, and enjoy the wonderful world of flavor that these tenders bring to your table. Remember, every bite is a connection to a rich tradition, inviting you to savor the taste of home. Happy cooking!

Classic Southern Fried Chicken Tenders

Prep Time 40 minutes
Cook Time 8 minutes
Total Time 48 minutes
Servings 4 servings
Calories 250
Enjoy crispy, golden chicken tenders with a flavorful coating, perfect for a comforting meal.

Ingredients

Protein

  • 1 pound Chicken tenderloins
  • 1 cup Buttermilk

Dry Mix

  • 1 cup All-purpose flour
  • 1 teaspoon Paprika
  • 1 teaspoon Salt
  • 0.5 teaspoon Ground black pepper

Frying Oil

  • for frying Vegetable oil (enough for 2 inches in skillet)

Instructions 

  • Marinate chicken in buttermilk for 30-60 minutes in the refrigerator.
  • Mix flour, paprika, salt, and pepper in a bowl.
  • Heat oil in skillet to 350°F (175°C).
  • Coat chicken in flour mixture and fry until golden, 6-8 minutes, until internal temp reaches 165°F (74°C). Drain on paper towels.

Notes

Ensure oil is at proper temperature for crispy tenders.
Calories: 250kcal
Cost: $15
Course: Main Course
Cuisine: Southern
Keyword: Chicken

Embarking on a Flavorful Journey with Chicken Thighs and Rice

Welcome, culinary adventurers! Today, we’re diving into a dish that not only tantalizes the taste buds but also brings warmth and connection to the dinner table—our Chicken Thighs and Rice recipe. This comfort food classic marries tender chicken with aromatic rice, creating a symphony of flavors that beckons you to savor every bite. Whether you’re cooking for family or friends, this dish is perfect for sharing stories, laughter, and love.

In this article, you’ll discover everything you need to know about preparing this mouthwatering meal. From ingredient breakdowns to expert tips, we’ll explore the nuances of flavor, texture, and presentation. Let’s transform your kitchen into a bustling culinary haven!

Why You’ll Love This Recipe

Here are five enticing reasons that will make you fall in love with this Chicken Thighs and Rice dish:

  • One-Pan Wonder: Simplify your cooking and clean-up with this one-pan meal that combines chicken and rice seamlessly.
  • Flavorful Harmony: The rich seasoning of the chicken perfectly complements the aromatic rice, creating a balanced and satisfying dish.
  • Comforting and Satisfying: This dish is not just a meal; it’s a warm hug on a plate, perfect for cozy nights in.
  • Adaptable Ingredients: Use whatever you have on hand—this recipe allows for substitutions and variations to suit your taste and pantry.
  • Shareable Delight: Perfect for gatherings, this recipe encourages sharing and storytelling around the dinner table.

Ingredients: A Flavorful Breakdown

To make this delightful Chicken Thighs and Rice, gather the following ingredients:

  • 8 boneless chicken thighs (skin-on or skinless): Choose your preference for a juicier or leaner option.
  • Salt: To taste, essential for enhancing flavor.
  • Black pepper: Freshly cracked for added warmth.
  • 1 teaspoon paprika: For a smoky kick.
  • 1 tablespoon olive oil: For searing the chicken and adding richness.
  • 1 tablespoon unsalted butter: For depth of flavor when sautéing.
  • 1 yellow or white onion, diced: A base for aromatic flavor.
  • 3 cloves garlic, minced (or 1 teaspoon garlic powder): Essential for its fragrant and savory qualities.
  • 1 ½ cups long-grain white rice: The heart of the dish, absorbing all those delicious flavors.
  • 3 cups chicken broth: For cooking the rice and infusing flavor.
  • 1 teaspoon onion powder: For additional depth.
  • 2 tablespoons fresh parsley, minced (plus more for garnish): Adds freshness and color.

Feel free to substitute ingredients according to your dietary preferences or what you have available:

  • Chicken Breasts: If you prefer, you can use chicken breasts instead of thighs for a leaner option.
  • Vegetable Broth: Swap chicken broth for vegetable broth to make it vegetarian-friendly.
  • Brown Rice: For a healthier alternative, use brown rice; just adjust the cooking time accordingly.
  • Seasonal Vegetables: Stir in your favorite veggies like peas or bell peppers for added nutrition and flavor.

Cooking Directions: Step-by-Step

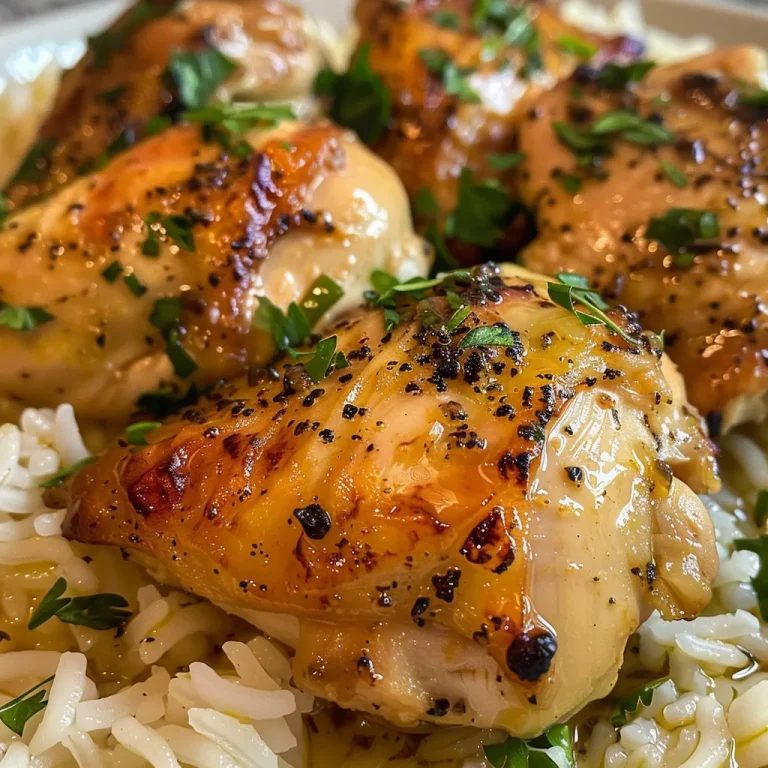
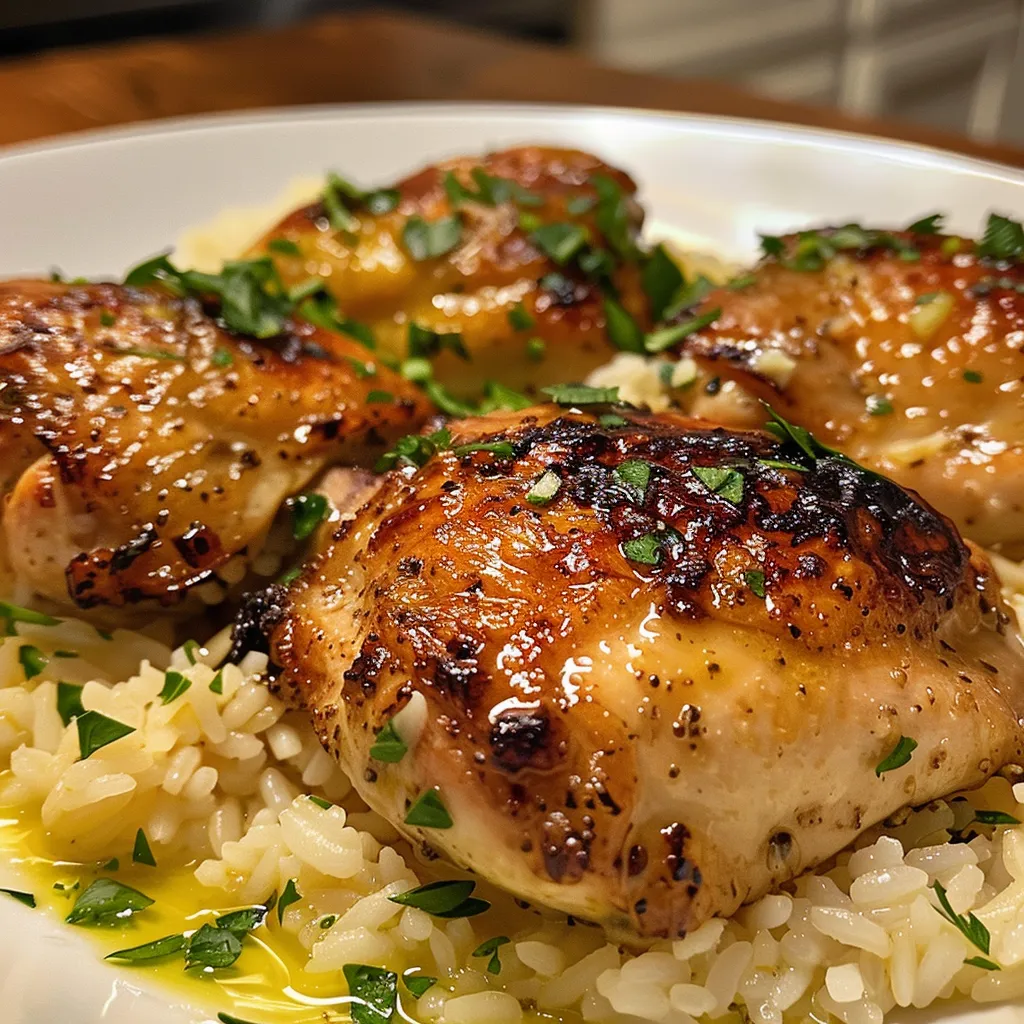
Tender chicken thighs with herbs and spices, paired with white rice in the background.

Now that you have your ingredients ready, let’s dive into the cooking process:

  1. Pat the chicken thighs dry and season with salt, pepper, and paprika on both sides.
  2. Heat the olive oil in a deep skillet or Dutch oven over medium-high heat. Sear the chicken for 4–5 minutes per side until golden brown. Remove the chicken and cover with foil to keep warm.
  3. In the same pan, add the butter and sauté the diced onion until softened, about 3 minutes. Stir in the minced garlic and cook for an additional 30 seconds.
  4. Add the rice to the pan and toast it for 1 minute, stirring constantly to infuse it with flavor.
  5. Pour in the chicken broth, scraping up any browned bits from the pan. Stir in the onion powder, garlic powder, and minced parsley.
  6. Return the chicken to the pan, nestling it into the rice. Bring the mixture to a boil, then reduce the heat to low, cover, and simmer for 20–25 minutes or until the rice is tender and the chicken is fully cooked.
  7. Once cooked, remove from heat and let it rest for 5 minutes. Garnish with extra parsley before serving.

Pro Tips for Culinary Success

To elevate your Chicken Thighs and Rice dish to new heights, consider these expert insights:

  • Use a Meat Thermometer: Ensure the chicken reaches an internal temperature of 165°F (75°C) for safe consumption.
  • Let it Rest: Allowing the dish to rest before serving helps to lock in flavors and juices.
  • Customize Seasonings: Feel free to adjust spices according to your taste preferences; add cayenne for heat or lemon zest for brightness.
  • Use Fresh Herbs: Fresh herbs like thyme or oregano can elevate the dish with vibrant flavors.
  • Consider a Crispy Topping: Broil the dish for a few minutes after cooking for a delightful crispy layer on top.
  • Pair with a Salad: A crisp green salad makes for a refreshing side to balance the rich flavors of the dish.
  • Experiment with Cooking Liquids: Try adding a splash of white wine to the broth for a depth of flavor.
  • Don’t Skip the Browning: Searing the chicken creates a beautiful crust and enhances flavor.

Common Mistakes and Troubleshooting

Even seasoned cooks can run into challenges. Here’s how to avoid common pitfalls:

  • Overcooking the Rice: Keep an eye on the rice; if overcooked, it can become mushy. Adjust simmering time as needed.
  • Undercooked Chicken: Always check the internal temperature to avoid serving undercooked chicken.
  • Skimping on Seasoning: Don’t be shy with the salt and spices; they are essential for flavor.
  • Not Letting it Rest: Skipping the resting period can lead to dry chicken and less flavorful rice.

Delicious Variations to Explore

This dish is wonderfully versatile! Here are some tasty variations to try:

  • Spanish-Style Chicken and Rice: Add diced tomatoes, bell peppers, and saffron for a Spanish twist.
  • Indian-Inspired Chicken Biryani: Incorporate curry spices like cumin and coriander, and add raisins for sweetness.
  • Mexican Chicken and Rice: Mix in black beans, corn, and taco seasoning for a south-of-the-border flair.
  • Herb and Lemon Chicken Rice: Brighten the dish with fresh lemon juice and herbs like dill or basil.

Storage and Make-Ahead Instructions

This Chicken Thighs and Rice dish can be made ahead of time and stored for later enjoyment:

  • Refrigeration: Store leftovers in an airtight container for up to 3 days.
  • Freezing: Freeze in portions for up to 3 months. Thaw in the refrigerator before reheating.
  • Reheating: Reheat gently on the stovetop with a splash of chicken broth to prevent drying out.

Frequently Asked Questions

Got questions? Here are some common inquiries and their answers:

  • Can I use bone-in chicken thighs? Yes, bone-in thighs add more flavor; just increase the cooking time by about 10 minutes.
  • Can I add vegetables to the dish? Absolutely! Feel free to stir in peas, carrots, or bell peppers during the cooking process.
  • What if my rice is still undercooked? If the rice isn’t tender, add a bit more broth and continue cooking until it’s done.
  • Can I substitute chicken breasts? Yes, chicken breasts can be used, but adjust cooking time as they cook faster than thighs.
  • Is it possible to make this dish vegetarian? Yes! Substitute the chicken with chickpeas and use vegetable broth.
  • What should I serve with this dish? A light salad or steamed vegetables work beautifully as a side.
  • Can I make this recipe in a slow cooker? Yes! Brown the chicken first, then transfer to a slow cooker with the rice and broth and cook on low for 4-6 hours.
  • How can I make this dish spicier? Add red pepper flakes or diced jalapeños to the recipe for a kick of heat.

Nutritional Tips and Dietary Adaptations

For those mindful of their dietary choices, here are some tips:

  • Low-Carb Option: Substitute rice with cauliflower rice for a low-carb version.
  • Gluten-Free: Ensure all ingredients, including broth, are labeled gluten-free.
  • Low Sodium: Use low-sodium chicken broth and limit added salt for a heart-healthier option.

Essential Equipment for Success

Before you start cooking, gather these essential tools:

  • Deep Skillet or Dutch Oven: Ideal for searing and simmering all in one pot.
  • Meat Thermometer: To ensure your chicken is cooked perfectly every time.
  • Cutting Board and Sharp Knife: For prepping your ingredients with ease.

Serving Suggestions: Elevate Your Meal

Serving is just as important as cooking! Here are some ideas to elevate your presentation:

  • Garnish with Fresh Herbs: A sprinkle of parsley or cilantro adds freshness and color.
  • Serve with a Side Salad: A simple green salad can balance the richness of the chicken and rice.
  • Pair with Crusty Bread: A warm baguette or rustic bread is perfect for soaking up any delicious juices.

Conclusion: Your Culinary Adventure Awaits!

There you have it, a comprehensive guide to creating a delicious Chicken Thighs and Rice dish that’s sure to impress! As you gather around the table, remember that food is the ultimate connector, bringing people together to share stories and create memories. So, roll up your sleeves, embrace the adventure, and let your kitchen be filled with the aroma of this heartwarming meal. Happy cooking, friends!

Chicken Thighs and Rice

Prep Time 10 minutes
Cook Time 30 minutes
Total Time 40 minutes
Servings 4 servings
Calories 550
A flavorful one-pan dish featuring tender chicken thighs cooked with aromatic rice and herbs, perfect for a satisfying meal.

Ingredients

Protein

  • 8 pieces boneless chicken thighs (skin-on or skinless)
  • 1 teaspoon salt (to taste)
  • 1 teaspoon black pepper (to taste)
  • 1 teaspoon paprika
  • 1 tablespoon olive oil
  • 1 tablespoon unsalted butter
  • 1 piece yellow or white onion (diced)
  • 3 cloves garlic (minced (or 1 teaspoon garlic powder))
  • 1.5 cups long-grain white rice
  • 3 cups chicken broth
  • 1 teaspoon onion powder
  • 1 teaspoon garlic powder
  • 2 tablespoons fresh parsley (minced (plus more for garnish))

Instructions 

  • Pat chicken dry and season with salt, pepper, and paprika.
  • Heat oil, sear chicken 4–5 mins per side, then cover with foil.
  • Melt butter, sauté onion until soft, add garlic, cook 30 sec.
  • Add rice, toast 1 min, then pour in broth, add seasonings, and parsley.
  • Return chicken, bring to boil, reduce heat, cover, simmer 20–25 mins.
  • Rest 5 mins, garnish with parsley, then serve.

Notes

Ensure chicken is fully cooked before serving.
Calories: 550kcal
Cost: $15
Course: Main Course
Cuisine: American
Keyword: Chicken, rice

Embark on a Culinary Journey: The Rich Tapestry of Global Comfort Foods

Welcome, fellow food adventurers! Today, we’re diving deep into the heart of comfort foods that transcend borders, connecting us to the stories, cultures, and flavors from kitchens around the globe. Food is not just sustenance; it is a passport to understanding different cultures and their unique tastes. Join me as we explore the comforting embrace of these dishes, each carrying its own tale and a sprinkle of love.

Why You’ll Love This Recipe

Comfort food can be a warm hug on a cold day or a nostalgic reminder of home. Here’s why you’ll fall in love with these dishes:

  • Brings People Together: Sharing a bowl of comfort food allows us to gather around the table, fostering connection and conversation.
  • Cross-Cultural Exploration: Each recipe offers a glimpse into the culinary traditions of different countries, enriching our understanding of diverse cultures.
  • Customizable Flavors: Whether you prefer spicy, savory, or sweet, these recipes can be tailored to suit your palate.
  • Easy to Prepare: Most comfort foods require minimal preparation, making them accessible for even the busiest of cooks.
  • Wholesome Nourishment: Packed with nutrients and hearty ingredients, these meals nourish both the body and soul.

Ingredients Breakdown and Substitutions

Let’s explore the essential ingredients that form the backbone of these delightful dishes, along with suggestions for substitutions if you’re missing something:

  • Grains: Rice, pasta, or quinoa serve as excellent bases. Substitutions include cauliflower rice for a low-carb option.
  • Proteins: Chicken, beef, or legumes can provide heartiness. Consider chickpeas or lentils for a vegetarian twist.
  • Vegetables: Onions, carrots, and bell peppers add flavor. Feel free to swap in seasonal vegetables like zucchini or squash.
  • Herbs and Spices: Fresh herbs like parsley or cilantro elevate the dish. Dried herbs can be used if fresh isn’t available.
  • Broths and Sauces: Chicken or vegetable broth enriches flavors. Use low-sodium options if you’re watching your salt intake.

Pro Tips for Perfecting Your Comfort Food

Captivating shot of a chicken meal, highlighting its crispy exterior and hearty ingredients.

Elevate your dishes with these expert insights:

  • Layer Flavors: Sauté aromatics like garlic and onions first to build a solid flavor foundation.
  • Don’t Rush: Allow flavors to meld by letting your dish simmer longer than the recipe suggests.
  • Taste as You Go: Adjust seasoning at each stage to ensure the perfect balance of flavors.
  • Make It Personal: Add your favorite spices or ingredients to make each dish your own.
  • Use Quality Ingredients: Fresh, high-quality ingredients can make a significant difference in flavor.
  • Invest in Good Cookware: Heavy-bottomed pots and pans distribute heat evenly, preventing burns.
  • Embrace Leftovers: Many comfort foods taste even better the next day, so make extra!
  • Garnish with Care: A sprinkle of fresh herbs or a dash of chili flakes can brighten up your dish.

Common Mistakes and Troubleshooting

Even the most seasoned cooks can make mistakes. Here’s how to avoid common pitfalls:

  • Overcooking Vegetables: Aim for tender but still vibrant veggies; they should retain some crunch.
  • Skipping the Seasoning: Season at every step, not just at the end, for a well-rounded taste.
  • Not Letting It Rest: Allowing dishes like stews and casseroles to rest allows flavors to deepen.
  • Using Cold Ingredients: Bring ingredients like meat and dairy to room temperature for even cooking.

Variations to Explore

Comfort foods can be infinitely adaptable. Here are some enticing variations to try:

  • Spicy Chicken Noodle Soup: Add jalapeños or sriracha for a kick.
  • Vegetarian Chili: Substitute meat with mushrooms and beans for a hearty plant-based option.
  • Mac & Cheese with a Twist: Incorporate butternut squash or truffle oil for a gourmet touch.
  • Coconut Curry Lentils: Use coconut milk and curry spices for a tropical twist on lentils.

Storage and Make-Ahead Instructions

Planning ahead can save time and stress. Here’s how to properly store your comfort food:

  • Refrigeration: Store cooled dishes in airtight containers for up to 3-4 days.
  • Freezing: Many comfort foods freeze well; ensure they’re properly sealed to prevent freezer burn.
  • Reheating: Gently reheat on the stove or in the oven, adding a splash of broth or water to maintain moisture.

Comprehensive FAQ

Got questions? Here are answers to some common queries:

  • Can I make these dishes vegetarian? Absolutely! Many comfort foods can easily be adapted by substituting meat with plant-based proteins.
  • How do I enhance the flavor? Taste as you go and don’t shy away from herbs, spices, and umami-rich ingredients like soy sauce or miso.
  • What is the best way to serve comfort food? Present it family-style in a large bowl or dish, encouraging everyone to share and enjoy together!
  • Are there gluten-free options? Yes! There are many gluten-free grains and flours available to create delicious comfort foods.
  • How can I reduce calories? Opt for lighter cooking methods like steaming or grilling, and increase vegetable content to bulk up meals.
  • Can I make these meals in advance? Yes, many comfort foods taste even better the next day, making them perfect for meal prep!
  • What if I don’t have a specific ingredient? Don’t worry! Many ingredients can be substituted based on what you have on hand.
  • How can I make this dish spicier? Add red pepper flakes, hot sauce, or fresh chilies to give your comfort food a kick!

Nutritional Tips and Dietary Adaptations

Comfort food can also be healthy! Here are some adaptations:

  • Use Whole Grains: Opt for brown rice or whole wheat pasta for added fiber and nutrients.
  • Add Vegetables: Increase the volume and nutrient density of your meal by incorporating a variety of colorful vegetables.
  • Control Portion Sizes: Enjoy your favorite comfort foods in moderation to maintain a balanced diet.
  • Experiment with Healthy Fats: Use olive oil or avocado instead of butter for cooking and dressing.

Essential Equipment Recommendations

Having the right tools can elevate your cooking experience. Here’s what I recommend:

  • Heavy-Duty Pots and Pans: Invest in a good set for even heating and durability.
  • Sharp Knives: A sharp knife makes prep work easier and safer.
  • Measuring Cups and Spoons: Precision matters, especially in baking and complex dishes.
  • Slow Cooker/Instant Pot: These tools are perfect for making hearty stews and soups with minimal effort.

Serving Suggestions for a Memorable Experience

Presentation can elevate your meal. Consider these serving ideas:

  • Garnish: A sprinkle of fresh herbs or a drizzle of sauce can make a dish pop.
  • Accompaniments: Serve with crusty bread, a fresh salad, or a side of seasonal vegetables.
  • Family Style: Set the table with shared platters to encourage communal dining and connection.

Conclusion: Food as a Journey

As we wrap up our exploration of comfort foods that span continents, let’s remember that food is more than just a meal; it’s a cultural journey that connects us. Every dish tells a story, and with each bite, we embrace a piece of the world. So, gather your loved ones, share a bowl, and savor the flavors that bring us together. Until next time, happy cooking and adventurous tasting!

Browse By

Prep Time 10 minutes
Cook Time 20 minutes
Total Time 30 minutes
Servings 4 servings
Calories 250
Explore a variety of recipes categorized by meal, ingredient, and occasion to inspire your cooking.

Ingredients

Home

  • 1 cup RECIPESBreakfastLunchDinnerDessertsSeafood

Breakfast

  • 1 cup RECIPESBreakfastLunchDinnerDessertsSeafood

Lunch

  • 1 cup RECIPESBreakfastLunchDinnerDessertsSeafood

Dinner

  • 1 cup RECIPESBreakfastLunchDinnerDessertsSeafood

Desserts

  • 1 cup RECIPESBreakfastLunchDinnerDessertsSeafood

Seafood

  • 1 cup RECIPESBreakfastLunchDinnerDessertsSeafood

IngredientsChickenBeefSaladsSoup

  • 1 lb Chicken
  • 1 lb Beef
  • 2 cups Salads
  • 4 cups Soup

In the KitchenAirfryer Recipes

  • 1 piece Airfryer Recipes

New Year’s Day Recipes

  • 1 piece New Year’s Day Recipes

Valentine’s Day Recipes

  • 1 piece Valentine’s Day Recipes

St. Patrick’s Day Recipes

  • 1 piece St. Patrick’s Day Recipes

Easter Recipes

  • 1 piece Easter Recipes

Mother’s Day Recipes

  • 1 piece Mother’s Day Recipes

Juneteenth Recipes

  • 1 piece Juneteenth Recipes

Independence Day Recipes

  • 1 piece Independence Day Recipes

Halloween Recipes

  • 1 piece Halloween Recipes

Thanksgiving Recipes

  • 1 piece Thanksgiving Recipes

Christmas Recipes

  • 1 piece Christmas Recipes

Instructions 

  • Combine all ingredients in a bowl.
  • Mix thoroughly until well blended.
  • Serve immediately or refrigerate for later.

Notes

Use fresh ingredients for best flavor.
Calories: 250kcal
Cost: $15
Course: Breakfast, Desserts, Dinner, lunch, Seafood
Keyword: beef, Chicken, Salads, Soup

A Culinary Journey Through a Timeless Recipe

Welcome to a flavorful adventure that will not only tantalize your taste buds but also deepen your understanding of a cherished culinary tradition. Today, we’ll explore the art of making homemade chicken sausage—a dish that brings together rich flavors and vibrant cultural stories from around the world. If you’re ready to embark on this journey, let’s dive into the world of gourmet cooking, where every bite is a passport to a new destination.

Why You’ll Love This Recipe

This homemade chicken sausage recipe is more than just a meal; it’s an experience filled with benefits that will make you fall in love with cooking all over again. Here’s why:

  • Healthier Option: Making your own chicken sausage allows you to control the ingredients, ensuring a healthier and fresher product than store-bought versions.
  • Custom Flavor Profiles: You can experiment with spices and herbs to create unique flavors that suit your palate, making this recipe versatile and exciting.
  • Creative Cooking Experience: The process of crafting your own sausage is a fun culinary challenge that enhances your cooking skills.
  • Cost-Effective: Homemade sausage can save you money in the long run, especially when buying chicken in bulk.
  • Family Bonding: This recipe is a great opportunity to involve family members in the kitchen, turning cooking into a shared adventure.

Ingredients Breakdown

To create the perfect chicken sausage, you’ll need a few essential ingredients. Here’s a detailed breakdown, including substitutions for your convenience:

  • Ground Chicken: The base of our sausage. You can substitute with turkey or lean pork if desired.
  • Seasonings: A mix of salt, black pepper, garlic powder, and your favorite herbs. Experiment with fresh herbs like rosemary or thyme for a different flavor.
  • Fat: Chicken thigh offers great flavor and moisture; however, you can use olive oil or even bacon fat for richness.
  • Binders: Bread crumbs or cooked rice help to hold the sausage together. Gluten-free bread crumbs are a great alternative!
  • Optional Add-ins: Cheese, sun-dried tomatoes, or nuts can elevate the flavor profile even further.

Step-by-Step Instructions

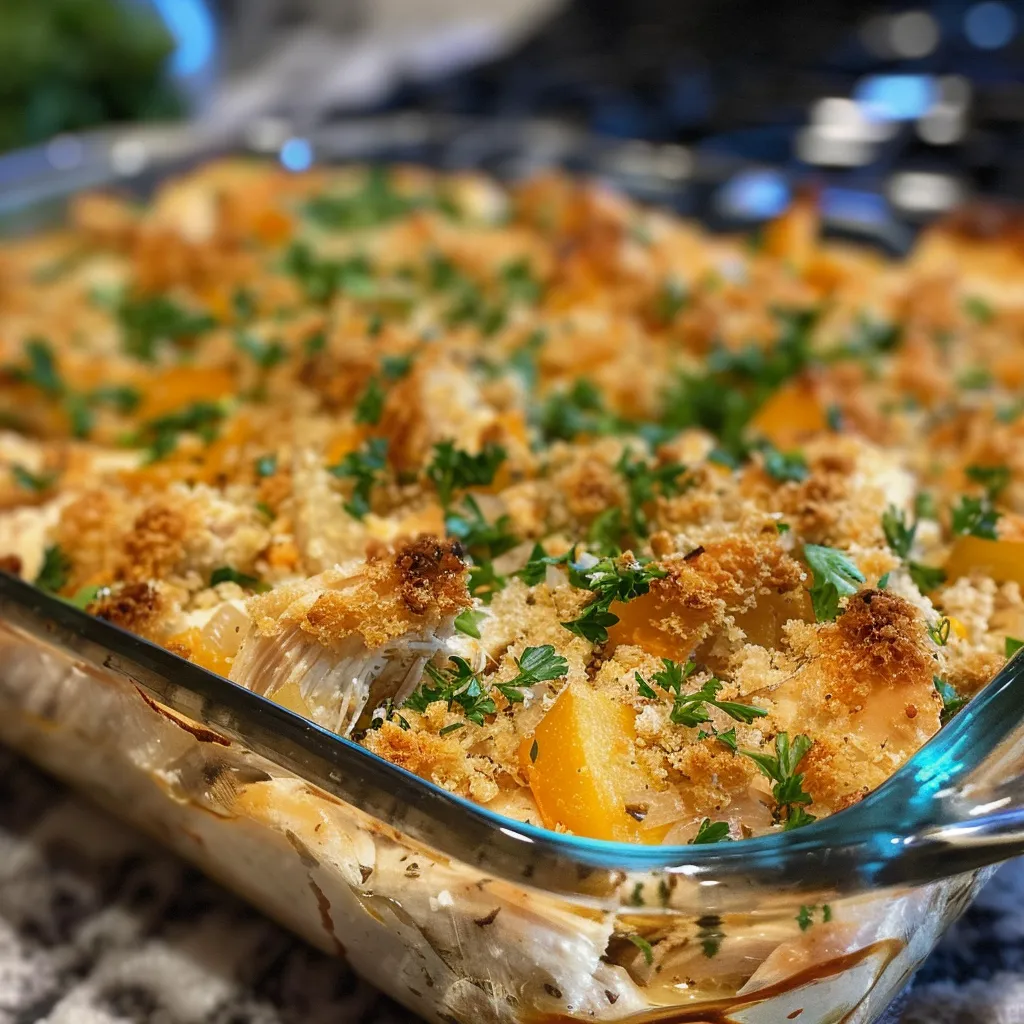
Comforting chicken casserole filled with tender chicken and vibrant vegetables, ready to serve.

Ready to create your homemade chicken sausage? Follow these simple steps, and you’ll be on your way to a delicious culinary creation:

  • Prepare the Ingredients: Gather all your ingredients and finely chop any herbs or add-ins.
  • Mix the Seasonings: In a large bowl, combine ground chicken with seasonings, fat, and binders. Mix thoroughly but don’t overwork the meat.
  • Test the Flavor: Cook a small patty to taste the mixture and adjust seasonings as needed.
  • Shape the Sausages: Form the mixture into patties or stuff into casings if you prefer links.
  • Cook the Sausages: Grill, pan-fry, or bake the sausages until they reach an internal temperature of 165°F (74°C).

Pro Tips for Perfect Sausage

Enhance your sausage-making experience with these expert insights:

  • Keep It Cold: Ensure all ingredients are cold, which helps maintain the texture and prevents the fat from melting.
  • Experiment with Spices: Don’t be afraid to try unique spice blends like Cajun or Mediterranean to customize your sausage.
  • Use a Meat Grinder: If you have one, grinding your own chicken will give you better texture and flavor control.
  • Stuffing Techniques: If using casings, wet them to make stuffing easier and avoid breakage.
  • Cook in Batches: Make extra sausages for freezing, so you always have a delicious meal ready to go.
  • Resting Time: Allow the sausages to rest for a few minutes after cooking to enhance juiciness.
  • Storage Tips: Store uncooked sausages in an airtight container in the refrigerator for up to 2 days or freeze for up to 3 months.
  • Label Your Creations: Always label your containers with the date and contents for easy identification.

Common Mistakes and Troubleshooting

Even the best chefs run into hiccups. Here are some common issues and how to fix them:

  • Overmixing: This can lead to a dense sausage. Mix just until combined.
  • Dry Sausage: Ensure there’s enough fat content in your mixture; adjust by adding olive oil or chicken fat.
  • Flavorless Sausage: Always taste-test a small patty before cooking the entire batch to adjust seasonings.

Variations to Try

Once you’ve mastered the basic recipe, here are some fun variations to explore:

  • Herbed Chicken Sausage: Add fresh herbs like basil, parsley, and oregano for a fresh twist.
  • Spicy Italian Style: Incorporate red pepper flakes and fennel seeds for a zesty flavor.
  • Apple and Sage Sausage: Mix in diced apples and sage for a sweet and savory combination perfect for fall.
  • Smoky BBQ Sausage: Add smoked paprika and a hint of brown sugar for a BBQ-inspired version.

Storage and Make-Ahead Instructions

Planning ahead is key in culinary adventures. Here’s how to store and make your chicken sausage ahead of time:

  • Refrigeration: Store uncooked sausages in the fridge for up to 48 hours.
  • Freezing: Wrap individual sausages in plastic wrap and place them in a freezer bag for up to 3 months.
  • Thawing: Thaw overnight in the refrigerator before cooking for the best texture.

Frequently Asked Questions

Here’s a section to clarify any lingering questions you might have:

  • Can I use chicken breast instead of thigh? Yes, but it may result in a drier sausage.
  • What’s the best way to cook these sausages? They can be grilled, baked, or pan-fried—choose your favorite method!
  • How can I tell when my sausage is done? Use a meat thermometer to ensure an internal temperature of 165°F (74°C).
  • Can I make these sausages gluten-free? Absolutely! Substitute bread crumbs with gluten-free options.
  • What are the best serving suggestions? Serve with sautéed vegetables, in a sandwich, or sliced over pasta.
  • How long can I store cooked sausages? Cooked sausage can be stored in the refrigerator for up to 3 days.
  • Can I add cheese? Yes! Cheese can be mixed in for added flavor and richness.
  • Is it necessary to use casings? No, you can simply make patties if you prefer!

Nutritional Tips and Dietary Adaptations

For those watching their nutrition, here are some helpful tips:

  • Lean Cuts: Choose lean cuts of chicken to reduce fat content.
  • Portion Control: Serve smaller portions to maintain a balanced diet.
  • Low Sodium Options: Adjust salt levels to fit low-sodium dietary needs.
  • Plant-Based Alternatives: Consider using ground turkey or plant-based proteins for a vegetarian option.

Equipment Recommendations

To make your sausage-making experience smoother, here’s a list of useful tools:

  • Food Processor: Perfect for mixing ingredients and ensuring an even blend.
  • Meat Grinder: Ideal for grinding your chicken fresh for the best flavor.
  • Sausage Stuffer: If you’re making links, this tool is essential.
  • Thermometer: A must-have for checking the internal temperature.

Serving Suggestions

Now that your chicken sausage is ready, here are some delicious ways to serve it:

  • On a Roll: Serve in a bun with your favorite toppings for a delicious sausage sandwich.
  • With Sides: Pair with roasted vegetables or a fresh salad for a complete meal.
  • Breakfast Style: Serve alongside eggs for a hearty breakfast option.

In conclusion, making homemade chicken sausage is not just about the food; it’s about the journey and the stories we share around it. As you savor each bite, remember that every meal is an opportunity to connect with different cultures and experiences. So, gather your ingredients, invite your loved ones, and let the culinary adventure begin!

Classic Spaghetti Carbonara

Prep Time 10 minutes
Cook Time 15 minutes
Total Time 25 minutes
Servings 4 servings
Calories 550
A quick and creamy Italian pasta dish made with eggs, cheese, pancetta, and pepper.

Ingredients

Pasta

  • 400 grams spaghetti
  • 150 grams pancetta (diced)
  • 3 large eggs
  • 50 grams Parmesan cheese (grated)
  • 1 tsp black pepper (freshly ground)

Other

  • Salt (to taste)

Instructions 

  • Cook spaghetti in boiling salted water until al dente, then drain.
  • Cook pancetta in a skillet until crispy.
  • Whisk eggs and Parmesan in a bowl.
  • Combine hot pasta with pancetta, then remove from heat and stir in egg mixture.
  • Season with black pepper and salt, then serve immediately.

Notes

Use freshly grated Parmesan for best flavor.
Calories: 550kcal
Cost: $12
Course: Main Course
Cuisine: Italian
Keyword: Pasta

Discover the Mediterranean Magic of Lemon-Infused Chicken Breasts

Welcome, fellow food adventurers! Today, we’re diving into a dish that captures the essence of Mediterranean flavor with a zing of lemon and the succulent tenderness of chicken. Ina Garten’s lemon-infused chicken breasts are not just a meal; they are a passport to culinary delight, transforming your dinner table into a vibrant feast that evokes images of sun-soaked coasts and bustling markets. This recipe is shockingly easy to prepare, yet it’s packed with rich flavors that will leave your taste buds dancing with joy. Let’s embark on this flavorful journey together!

Why You’ll Love This Recipe

Before we roll up our sleeves and start cooking, let’s highlight why this recipe deserves a prime spot in your collection:

  • Bold flavors: The combination of lemon, garlic, and herbs creates a symphony of taste that elevates the chicken to new heights.
  • Quick and easy: This dish can be prepared in under an hour, making it perfect for busy weeknights or last-minute gatherings.
  • Healthy and nutritious: Packed with protein and flavorful ingredients, it’s a delicious option for health-conscious eaters.
  • Versatile serving options: Pair it with salads, grains, or roasted vegetables for a complete meal that suits any occasion.
  • Impressive presentation: The vibrant colors of the dish make it visually stunning, sure to impress your family and friends.

Ingredients Breakdown

Here’s what you’ll need to create this Mediterranean masterpiece:

  • 4 boneless, skinless chicken breasts: The star of the show! Opt for fresh, high-quality chicken for the best flavor.
  • Kosher salt and black pepper: Essential for seasoning and enhancing the natural flavors of the chicken.
  • 3 tablespoons olive oil: Adds richness and helps to achieve a beautiful golden crust.
  • 2 tablespoons lemon juice: Provides a tangy brightness that cuts through the richness of the chicken.
  • 2 teaspoons lemon zest: Intensifies the lemon flavor, adding aromatic oils that are simply irresistible.
  • 3 garlic cloves, minced: Infuses the dish with a warm, savory depth that complements the lemon.
  • 1 teaspoon Dijon mustard: Adds a subtle kick and helps to emulsify the marinade.
  • 1 teaspoon fresh thyme (or ½ teaspoon dried): This herb brings an earthy flavor that balances the acidity of the lemon.
  • 1 teaspoon fresh rosemary (or ½ teaspoon dried): Another aromatic herb that adds a woodsy note to the dish.

Expert Tips for Perfect Lemon Chicken

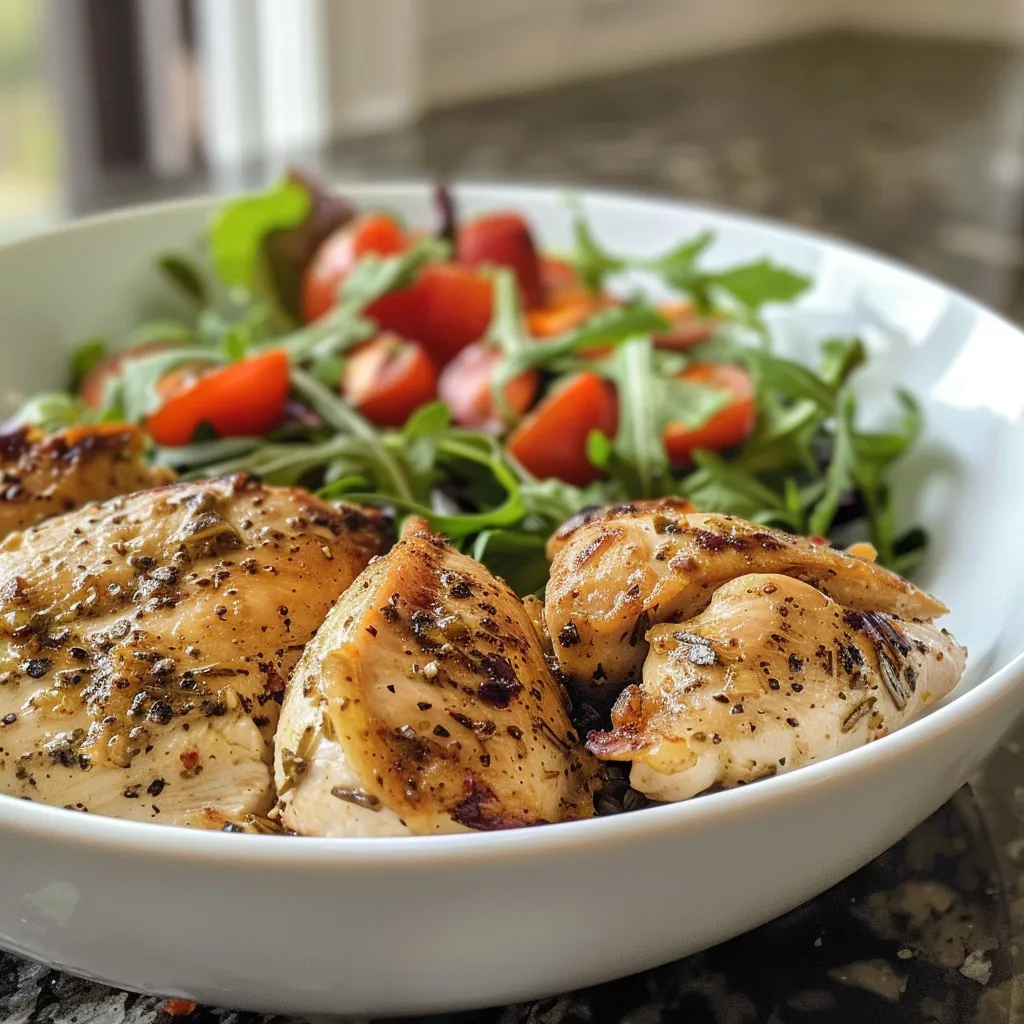
Sliced chicken breasts showcasing a golden-brown crust and herbs.

Want to take your chicken to the next level? Here are some pro tips:

  • Marinate for flavor: For the best taste, allow the chicken to marinate in the lemon mixture for at least 30 minutes, or up to 4 hours.
  • Use a meat thermometer: Ensure your chicken is perfectly cooked by checking that it reaches an internal temperature of 165°F (75°C).
  • Let it rest: After cooking, let the chicken rest for 5-10 minutes before slicing to retain its juices.
  • Experiment with herbs: Feel free to mix in other herbs like oregano or parsley for different flavor profiles.
  • Pan sauce magic: After cooking the chicken, deglaze the pan with white wine or chicken broth to make a quick pan sauce.
  • High-heat cooking: For a crispy texture, cook the chicken in a hot oven (around 425°F or 220°C) for best results.
  • Stovetop option: If you prefer, you can also cook the chicken in a skillet over medium heat until golden brown.
  • Pair wisely: Serve with Mediterranean sides such as tabbouleh, couscous, or a fresh Greek salad to complement the flavors.

Avoid Common Mistakes

Even the best chefs can stumble! Here are some common pitfalls and how to avoid them:

  • Overcooking: Keep an eye on your chicken; overcooking can lead to dry, tough meat.
  • Skipping the resting period: Don’t rush into slicing the chicken; letting it rest is key to juicy results.
  • Ignoring seasoning: Make sure to season your chicken well with salt and pepper to enhance its flavor.
  • Using cold chicken: For even cooking, let your chicken sit at room temperature for about 15 minutes before cooking.
  • Not checking for doneness: Always use a thermometer to ensure safety and optimal texture.

Delicious Variations

Feel like switching things up? Here are some tasty variations to consider:

  • Spicy Lemon Chicken: Add red pepper flakes to the marinade for a spicy kick.
  • Herb-Crusted Chicken: Coat the chicken with breadcrumbs mixed with fresh herbs for a crispy exterior.
  • Grilled Lemon Chicken: Marinate and grill the chicken for a smoky flavor that’s perfect for summer.
  • Honey-Lemon Chicken: Add a tablespoon of honey to the marinade for a sweet twist.

Storage and Make-Ahead Instructions

Planning to enjoy this dish later? Here’s how to store it:

  • Refrigeration: Store leftovers in an airtight container in the fridge for up to 3 days.
  • Freezing: For longer storage, freeze the cooked chicken for up to 3 months. Thaw in the fridge before reheating.
  • Make-ahead: Marinate the chicken the night before for enhanced flavor and easy cooking the next day.

FAQs: Your Questions Answered

Here are some common questions that might be on your mind:

  • Can I use bone-in chicken? Yes, bone-in chicken will add more flavor but may require longer cooking times.
  • What should I serve with this chicken? Pair it with rice, quinoa, or a fresh salad to complete your meal.
  • Can I make this recipe ahead of time? Absolutely! Marinate the chicken ahead and store it in the fridge until you’re ready to cook.
  • How do I know when the chicken is done? Use a meat thermometer to check for an internal temperature of 165°F (75°C).
  • Can I use other citrus fruits? Yes! Oranges or limes can also provide a unique twist to the flavor.
  • Is this recipe gluten-free? Yes, all ingredients used are gluten-free, making it suitable for gluten-sensitive diets.
  • What can I substitute for Dijon mustard? You can use yellow mustard or omit it altogether if you prefer.
  • How do I reheat leftovers? Gently reheat in the oven or microwave, ensuring not to overcook the chicken.

Nutritional Insights and Dietary Adaptations

This lemon-infused chicken is not only delicious but also nutritious. Here are some insights:

  • Protein-packed: Each serving provides a hearty dose of protein, essential for muscle repair and growth.
  • Low-carb option: This dish is naturally low in carbohydrates, ideal for keto and paleo diets.
  • Heart-healthy fats: The olive oil used is rich in monounsaturated fats, which are beneficial for heart health.
  • Rich in vitamins: Lemon juice and zest provide vitamin C, essential for immune function and skin health.

Essential Equipment Recommendations

To make the most of this recipe, here are some recommended tools:

  • Oven-safe skillet: Perfect for searing and transferring to the oven.
  • Meat thermometer: Essential for ensuring perfectly cooked chicken.
  • Cutting board and sharp knife: For easy prep and slicing.
  • Mixing bowls: For marinating and mixing ingredients.

Serving Suggestions

Finally, let’s talk about how to serve this delightful chicken:

  • Garnish with fresh herbs: Sprinkle fresh parsley or basil on top for a burst of color and flavor.
  • Pair with a refreshing side salad: A simple arugula salad with lemon vinaigrette complements the chicken perfectly.
  • Serve with grains: Consider a side of couscous or quinoa to soak up the delicious juices.
  • Wine pairing: A chilled Sauvignon Blanc or a light-bodied red like Pinot Noir can enhance the meal.

So there you have it, adventurers! A comprehensive guide to crafting the ultimate lemon-infused chicken breasts that will whisk you away to the Mediterranean. With this recipe, you’re not just cooking; you’re creating an experience filled with flavor and joy. Enjoy your culinary journey, and remember—every recipe is a story waiting to be told!

Ina Garten Boneless Skinless Chicken Breasts Recipe

Prep Time 10 minutes
Cook Time 15 minutes
Total Time 25 minutes
Servings 4 servings
Calories 250
This flavorful chicken breast recipe features a simple lemon and herb marinade, perfect for a quick and elegant meal.

Ingredients

Main

  • 4 pieces boneless, skinless chicken breasts
  • 1 tsp Kosher salt
  • 1 tsp black pepper
  • 3 tbsp olive oil
  • 2 tbsp lemon juice
  • 2 tsp lemon zest
  • 3 cloves garlic, minced
  • 1 tsp Dijon mustard
  • 1 tsp fresh thyme ((or ½ tsp dried))
  • 1 tsp fresh rosemary ((or ½ tsp dried))

Instructions 

  • Mix lemon juice, lemon zest, garlic, Dijon mustard, herbs, salt, pepper, and olive oil to create a marinade.
  • Marinate chicken breasts in the mixture for at least 30 minutes.
  • Preheat a skillet over medium heat and cook chicken for 6-7 minutes per side until cooked through.
  • Remove from heat and let rest for a few minutes before serving.

Notes

For extra flavor, garnish with additional herbs or lemon slices.
Calories: 250kcal
Cost: $15
Course: Main Course
Cuisine: American
Keyword: Chicken, herbs, lemon

Embark on a Flavorful Journey with Chicken Stir Fry

Welcome to a vibrant world of culinary delights! Today, we’re diving into the enticing realm of chicken stir fry with vegetables, a dish that beautifully marries quick cooking with bold flavors. This recipe is not just about tossing ingredients in a pan; it’s about celebrating the rich tapestry of cultures and traditions that each ingredient represents. Get ready to awaken your taste buds and bring a burst of color to your dinner table!

With this chicken stir fry, you’ll discover how a simple collection of fresh ingredients can transform into a dazzling meal in no time. Whether you’re a busy professional or a culinary enthusiast, this dish is the perfect solution for a healthy and satisfying dinner. Let’s explore why this recipe is worth your time!

Why You’ll Love This Recipe

  • Quick & Easy Preparation: This chicken stir fry can be on your table in under 30 minutes, making it a perfect choice for those busy weeknights.
  • Colorful & Nutritious: Packed with vibrant vegetables like bell peppers and broccoli, this dish not only looks good but also provides essential nutrients.
  • Customizable: You can easily adapt this recipe to your taste preferences or dietary needs by swapping ingredients or adjusting flavors.
  • One-Pan Wonder: Minimal cleanup required! All the magic happens in one skillet or wok, making cooking and cleanup a breeze.
  • Explosive Flavor Profile: The combination of soy sauce, garlic, and sesame oil creates a savory sauce that elevates the dish to another level.

Ingredients for Chicken Stir Fry with Vegetables

Let’s gather our ingredients! Here’s what you’ll need to create a delicious chicken stir fry:

  • 1 pound boneless, skinless chicken breasts
  • 2 cups broccoli florets
  • 1 cup bell peppers (mixed colors for visual appeal)
  • 1 cup carrots (thinly sliced)
  • 3 cloves fresh garlic (minced)
  • 3 tablespoons low-sodium soy sauce
  • 1 tablespoon sesame oil
  • 1 tablespoon honey or sugar
  • Salt and pepper to taste

How to Make Chicken Stir Fry

Delicious looking chicken stir fry with broccoli, carrots, and bell peppers on a white plate.

Now that we have our ingredients ready, let’s dive into the cooking process!

  • Prepare the Chicken: Slice the chicken into bite-sized pieces and season lightly with salt and pepper.
  • Heat the Pan: Heat a large skillet or wok over medium-high heat with a splash of oil until shimmering.
  • Cook the Chicken: Add the chicken pieces to the hot pan and stir-fry for about 5-7 minutes until golden brown.
  • Add Vegetables: Toss in the broccoli, bell peppers, and carrots. Stir-fry for an additional 3-4 minutes until they are tender-crisp.
  • Make the Sauce: In a bowl, whisk together the soy sauce, sesame oil, honey (or sugar), and minced garlic.
  • Combine: Pour the sauce over the chicken and vegetables, stirring well to coat. Simmer for another minute before serving.

Pro Tips for the Best Chicken Stir Fry

To take your chicken stir fry to new heights, consider these expert insights:

  • High Heat is Key: Cooking on high heat helps achieve that coveted stir-fried flavor while keeping vegetables crisp.
  • Fresh Ingredients: Use the freshest ingredients possible for vibrant flavor and color.
  • Prep Ahead: Chop your vegetables and chicken ahead of time to make the cooking process even quicker.
  • Don’t Overcrowd the Pan: Cook in batches if necessary to ensure even cooking and browning.
  • Experiment with Sauces: Try adding oyster sauce or hoisin sauce for a different flavor twist.
  • Garnish for Appeal: Top with sliced green onions or sesame seeds for a finishing touch.
  • Serve with Rice or Noodles: Pair your stir fry with steamed rice or noodles to create a complete meal.
  • Adjust to Taste: Feel free to tweak the sauce ingredients to suit your taste preferences.

Common Mistakes and Troubleshooting

Even the best chefs make mistakes! Here’s how to avoid common pitfalls:

  • Overcooking Vegetables: Keep an eye on your vegetables; they should be tender-crisp, not mushy.
  • Under-seasoning: Don’t be shy with the seasoning; taste as you go!
  • Not Enough Sauce: Ensure you have enough sauce to coat all ingredients without drowning them.
  • Not Preheating the Pan: Make sure your pan is hot before adding ingredients to get that delicious sear.

Variations of Chicken Stir Fry

Feeling adventurous? Here are some exciting variations to explore:

  • Spicy Chicken Stir Fry: Add red pepper flakes or sriracha for a fiery kick.
  • Teriyaki Chicken Stir Fry: Substitute soy sauce with teriyaki sauce for a sweet flavor.
  • Vegetarian Option: Replace chicken with tofu or tempeh for a plant-based delight.
  • Asian Noodle Stir Fry: Incorporate cooked noodles into the stir fry for a heartier meal.

Storing & Make-Ahead Instructions

This chicken stir fry is not only quick to make but also convenient to store:

  • Storing: Keep leftovers in an airtight container in the refrigerator for up to 3 days.
  • Reheating: Reheat in a skillet over medium heat, adding a splash of water or broth to prevent drying out.
  • Make-Ahead: You can chop vegetables and marinate chicken a day ahead for quick cooking.

Frequently Asked Questions

Here are some common questions regarding chicken stir fry:

  • Can I use frozen vegetables? Yes! Frozen vegetables can be used but may require slight adjustments in cooking time.
  • What’s the best chicken for stir fry? Boneless, skinless chicken breasts or thighs work best for tender results.
  • How can I make it healthier? Use less oil, add more vegetables, or substitute chicken with plant-based protein.
  • Can I prepare this dish ahead of time? Yes! Pre-cut the ingredients and store them in the fridge for quick cooking later.
  • What should I serve with chicken stir fry? Serve over steamed rice, quinoa, or alongside noodles for a complete meal.
  • Is it okay to add more sauce? Absolutely! Adjust the sauce according to your taste for a more flavorful dish.
  • How do I know when the chicken is cooked? The chicken should reach an internal temperature of 165°F and be no longer pink inside.
  • Can I use other proteins? Yes! This recipe is versatile and works well with shrimp, beef, or pork.

Nutritional Tips and Dietary Adaptations

This chicken stir fry can be adapted for various dietary needs:

  • Low-Carb Option: Serve over cauliflower rice instead of regular rice.
  • Gluten-Free: Use tamari or gluten-free soy sauce to make it gluten-free.
  • Paleo-Friendly: Substitute honey with coconut sugar or omit sweeteners entirely.

Essential Equipment

Here’s what you’ll need to create this delightful dish:

  • Wok or Large Skillet: A sturdy pan is essential for high-heat cooking.
  • Sharp Knife: For precise cutting of chicken and vegetables.
  • Cutting Board: A clean surface for chopping ingredients.
  • Measuring Cups and Spoons: Essential for accurately measuring ingredients.

Serving Suggestions

To elevate your chicken stir fry on the dinner table, consider these serving ideas:

  • Garnish: Top with sesame seeds and green onions for added flavor and crunch.
  • Accompaniments: Serve with spring rolls or a side salad for a delightful meal.
  • Presentation: Use a colorful plate to showcase the vibrant colors of your stir fry.

Conclusion: A Culinary Adventure Awaits!

As we wrap up this culinary exploration, I hope you feel inspired to create your own vibrant chicken stir fry with vegetables. This dish is not just a meal; it’s a celebration of flavors, cultures, and connections. So gather your ingredients, invite your loved ones to the dinner table, and enjoy the rich tapestry of tastes that this recipe offers. Remember, cooking is an adventure—embrace it with open arms and curious taste buds!

Chicken Stir Fry with Vegetables

Prep Time 10 minutes
Cook Time 15 minutes
Total Time 25 minutes
Servings 4 servings
Calories 350
A quick and flavorful chicken stir fry loaded with colorful vegetables, perfect for a healthy weeknight dinner.

Ingredients

Protein

  • 1 pound boneless, skinless chicken breasts

Vegetables

  • 2 cups broccoli florets
  • 1 cup bell peppers (mixed colors)
  • 1 cup carrots (thinly sliced)

Aromatics & Sauces

  • 3 cloves fresh garlic (minced)
  • 3 tablespoons low-sodium soy sauce
  • 1 tablespoon sesame oil
  • 1 tablespoon honey or sugar

Seasoning

  • to taste Salt and pepper

Instructions 

  • Slice chicken and chop vegetables.
  • Heat oil in a skillet; cook chicken until golden, season with salt and pepper.
  • Add vegetables; stir-fry until tender-crisp.
  • Mix soy sauce, sesame oil, honey, and garlic; pour over stir-fry.
  • Stir well and cook for another minute before serving.

Notes

For extra flavor, garnish with sesame seeds or chopped green onions.
Calories: 350kcal
Cost: $15
Course: Main Course
Cuisine: Asian
Keyword: Chicken, Vegetables