Author

Jack

Browsing

Explore the Delightful Layers of Caramel Apple Trifle

Welcome, fellow food adventurers! Today, we embark on a sweet journey through the enchanting world of the **Caramel Apple Trifle**. This delightful dessert is not just a treat for your taste buds; it’s a celebration of flavors and memories, merging classic ingredients like **pound cake**, creamy vanilla pudding, and luscious apple pie filling. You’re in for a treat as I share the secrets behind crafting the perfect trifle that’ll impress at any gathering. So grab your apron, and let’s dive into this delicious adventure!

Why You’ll Love This Recipe

  • Quick to Prepare: In just 20 minutes, you can whip up this stunning dessert, making it perfect for last-minute gatherings or cozy family dinners.
  • Layers of Flavor: Each spoonful combines sweet apple pie filling, creamy pudding, crunchy pecans, and rich caramel, offering a delightful mix of textures and tastes.
  • Versatile Dessert: This trifle can be enjoyed year-round, but it shines brightest during fall celebrations, making it a favorite for Thanksgiving or Halloween parties.
  • Impressive Presentation: Serve this dessert in a beautiful trifle bowl to create a stunning centerpiece that will wow your guests.
  • Make-Ahead Friendly: Prepare it in advance, allowing the flavors to meld beautifully while saving you time on the day of your event.

Ingredient Breakdown

Let’s take a closer look at the ingredients that make this **Caramel Apple Trifle** so special:

  • Frozen Pound Cake: 2 (10.75-ounce) classic pound cakes, preferably **Sara Lee**. This forms the base of your trifle, providing a soft and flavorful canvas.
  • Creamy Vanilla Pudding: 4 cups of **cold whole milk** and 2 boxes (3.4-ounce) of instant vanilla pudding mix (like **Jello**) are whisked together to create a luscious layer of pudding.
  • Apple Pie Filling: 2 cans (21-ounce) of **apple pie filling** (I recommend **Great Value**) add a sweet and fruity layer that complements the caramel beautifully.
  • Whipped Topping: 1 container (8-ounce) of thawed **whipped topping** provides a light and airy finish to your trifle.
  • Caramel Sauce: 1 jar (12.25-ounce) of **caramel sundae topping** (like **Smucker’s**) for drizzling over the layers, adding richness and sweetness.
  • Pecans: 1 cup of chopped pecans (divided) for a crunchy texture that contrasts beautifully with the creaminess of the pudding and whipped topping.

Pro Tips for the Perfect Trifle
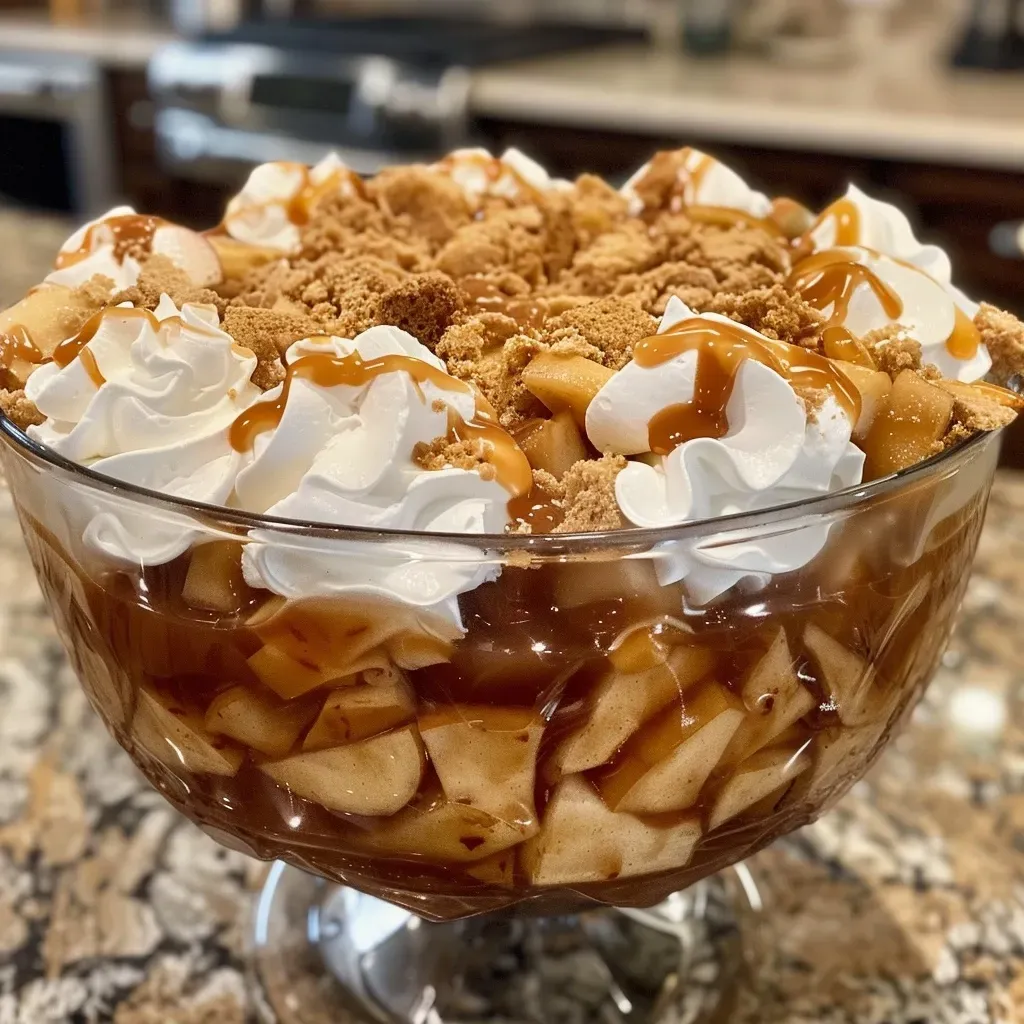
Close-up view of a layered Caramel Apple Trifle with apples, caramel, and pecans.

To ensure your **Caramel Apple Trifle** turns out flawlessly, here are some expert insights:


Meal Prep Container Set

★ Recommended Kitchen Tool

Meal Prep Container Set

Make this recipe even easier with a quality Meal Prep Container Set — a must-have kitchen staple!


🛒 See Deals on Amazon →

As an Amazon Associate, we earn from qualifying purchases.
  • Chill Before Serving: Allow the trifle to chill for at least 3 hours. This not only enhances the flavors but also allows the layers to set beautifully.
  • Use Quality Ingredients: Opt for high-quality pudding and caramel sauce to elevate the overall flavor of your trifle.
  • Layer with Care: When layering, try to create a balance of ingredients in each layer for a consistent flavor experience.
  • Garnish Creatively: Just before serving, consider adding a sprinkle of cinnamon or a few apple slices on top for added flair.
  • Experiment with Flavors: Don’t hesitate to try flavored puddings or add spices like cinnamon or nutmeg for a unique twist.
  • Make it Gluten-Free: Use gluten-free pound cake and check your pudding and caramel for gluten-containing ingredients.
  • Don’t Overmix: When preparing the pudding, mix just until combined to avoid a grainy texture.
  • Add Extra Layers: If you have leftover ingredients, feel free to create additional layers in your trifle, enhancing both flavor and visual appeal.

Common Mistakes and Troubleshooting

Even the best chefs can encounter hiccups! Here are some common mistakes and how to avoid them:

  • Too Watery Pudding: If your pudding is too watery, ensure you’re using the correct ratios of milk and pudding mix and allow it to set properly before layering.
  • Soft Layers: If your layers are collapsing, you may need to let your trifle chill longer to firm up.
  • Overwhelming Caramel: Drizzle caramel sparingly between layers to avoid overpowering the other flavors; a little goes a long way!
  • Not Enough Crunch: If you find your trifle lacks texture, consider adding more nuts or even crushed cookies for added crunch.

Variations to Try

If you’re feeling adventurous, here are some exciting variations of the **Caramel Apple Trifle** to inspire you:

  • Chocolate Caramel Apple Trifle: Substitute chocolate pudding for vanilla and layer with chocolate cake for a rich twist.
  • Pumpkin Spice Trifle: Incorporate pumpkin puree into the pudding and add pumpkin spice for a fall-inspired treat.
  • Peanut Butter Caramel Apple Trifle: Layer in some peanut butter between the pudding and apple filling for a nutty flavor boost.
  • Mini Trifles: Create individual servings in mason jars for a portable dessert option that’s perfect for parties.

Storage and Make-Ahead Instructions

This trifle is not only delicious but also practical for meal prep:

  • Refrigeration: Store leftovers in an airtight container in the refrigerator for up to 3 days.
  • Make-Ahead: You can prepare the trifle up to a day in advance. Just hold off on adding the whipped topping until just before serving for optimal freshness.

Comprehensive FAQ

Here are some frequently asked questions about the **Caramel Apple Trifle**:

  • Can I use fresh apples instead of pie filling? Absolutely! Just sauté fresh apples with a bit of sugar and cinnamon until tender.
  • Can I make this trifle gluten-free? Yes, use gluten-free pound cake and ensure your pudding and caramel are gluten-free.
  • How long does the trifle last? Stored in the fridge, it should last about 3 days, but it’s best enjoyed fresh.
  • Can I freeze the trifle? Freezing is not recommended as the texture of the whipped topping may change upon thawing.
  • What can I use instead of pecans? Feel free to substitute with walnuts, almonds, or even granola for a different texture.
  • Is it necessary to chill the trifle? Yes, chilling allows the flavors to meld and the layers to firm up.
  • Can I use different flavored puddings? Certainly! Experiment with different flavors for unique taste profiles.
  • What’s a good serving size? This recipe serves about 8-10 people, but feel free to adjust based on your gathering size.

Nutrition Tips and Dietary Adaptations

For those mindful of their dietary choices, here are some tips:

  • Lower Sugar Option: Use sugar-free pudding mix and a low-sugar caramel sauce for a lighter dessert.
  • Vegan Adaptation: Substitute pound cake with a vegan version, use almond milk, and replace whipped topping with coconut cream.
  • Protein Boost: Add a layer of Greek yogurt for added protein and creaminess.

Equipment Recommendations

Here’s what you’ll need to create your masterpiece:

  • Trifle Bowl: A clear glass bowl not only showcases the beautiful layers but also adds an elegant touch to your presentation.
  • Hand Mixer: To quickly whip up your pudding to the perfect consistency.
  • Measuring Cups and Spoons: Essential for accurate ingredient measurements to ensure perfect results.
  • Spatula: A flexible spatula will help you layer ingredients smoothly without damaging the delicate layers.

Serving Suggestions

To elevate your trifle experience, consider these creative serving ideas:

  • Garnish with Fresh Fruits: Top with sliced apples or a sprinkle of cinnamon for a fresh touch.
  • Serve with Coffee: Pair with a warm cup of coffee or spiced cider for a comforting dessert experience.
  • Individual Portions: Serve in small cups or jars for a fun, personalized touch that’s easy to grab and enjoy.

As we wrap up this delightful exploration of the **Caramel Apple Trifle**, I hope you feel inspired to create this layered masterpiece in your kitchen. Remember, cooking is about joy, creativity, and sharing experiences with loved ones. So gather your ingredients, invite your friends, and embark on this culinary adventure together. Happy cooking, and may your trifle be as sweet as the memories you make while enjoying it!

Caramel Apple Trifle

Prep Time 20 minutes
Cook Time 10 minutes
Total Time 30 minutes
Servings 8 servings
Calories 450
A delicious layered dessert combining pound cake, vanilla pudding, apple pie filling, caramel, and whipped topping for a sweet treat.

Ingredients

Cake

  • 2 pieces frozen pound cakes (10.75-ounce or 304-gram each)
  • 4 cups cold whole milk
  • 2 boxes instant vanilla pudding mix (3.4-ounce or 96-gram each)
  • 2 cans apple pie filling (21-ounce or 595-gram each)
  • 1 container thawed whipped topping (8-ounce or 226-gram)
  • 1 jar caramel sundae topping (12.25-ounce or 347-gram)
  • 0.5 cup chopped pecans (divided in half)

Instructions 

  • Cube the pound cakes into bite-sized pieces.
  • Mix milk and pudding mix until thickened.
  • Layer cake cubes, pudding, apple filling, caramel, and pecans in a trifle bowl. Repeat layers.
  • Chill for 3 hours, then top with whipped topping, remaining caramel, and pecans before serving.

Notes

Ensure to chill the trifle for at least 3 hours for best flavor and texture.
Calories: 450kcal
Cost: $15
Course: Dessert
Keyword: Apple, caramel, pound cake

Embrace the Cozy Vibes with Salted Caramel Chai Latte

Imagine a chilly evening, the warmth of your kitchen wrapping around you like a soft blanket, as you prepare a drink that’s equal parts comfort and adventure. That’s the magic of the Salted Caramel Chai Latte. This recipe blends aromatic spices with rich caramel, creating a warm hug in a mug that transports you to distant lands. Whether you’re sitting through a two-hour lecture or unwinding after a long day, this drink is your perfect companion.

Why You’ll Love This Recipe

This Salted Caramel Chai Latte is not just another beverage; it’s an experience. Here’s why you’ll find yourself reaching for this recipe time and time again:

  • Rich & Flavorful: The combination of spices and salted caramel creates a deep, complex flavor profile that excites the palate.
  • Customizable: Easily adjust the sweetness or spice levels to suit your taste, making it a drink that’s uniquely yours.
  • Perfect for Sharing: This recipe makes enough to serve four, making it a wonderful drink to share with friends and family.
  • Quick to Prepare: With just a few steps, you can whip up a delicious drink in under 30 minutes, perfect for those busy days.
  • Healthier Indulgence: Using natural ingredients and spices means you can enjoy this treat without the guilt.

The Ingredients Breakdown

Let’s dive into what makes this Salted Caramel Chai Latte so special. Below is a list of ingredients you’ll need, along with some substitutions if you’re missing anything:


Meal Prep Container Set

★ Recommended Kitchen Tool

Meal Prep Container Set

Make this recipe even easier with a quality Meal Prep Container Set — a must-have kitchen staple!


🛒 View on Amazon →

As an Amazon Associate, we earn from qualifying purchases.
  • 4 bags black tea: Use your favorite brand; Assam or English Breakfast works beautifully.
  • 3-inch piece fresh ginger: Fresh ginger adds warmth and spice; ground ginger can be a substitute, but fresh is best.
  • 1 cinnamon stick: For that cozy, warm flavor. You can use 1/2 teaspoon ground cinnamon as an alternative.
  • 1 tsp whole black peppercorns: A pinch of heat enhances the chai’s flavor; you can omit if you prefer a milder drink.
  • 10 whole cloves: These provide aromatic depth. Ground cloves can be used in a pinch.
  • 6 whole cardamom pods: Lightly crushed to release their essential oils. Ground cardamom is a substitute, but the whole pods infuse better flavor.
  • 1 whole star anise: Adds a sweet licorice flavor that pairs perfectly with caramel.
  • 1/3 cup salted caramel: Store-bought or homemade, it’s the star of this recipe! Adjust to taste.
  • 1/4 cup white sugar: Sweeten to your liking; honey or maple syrup can be alternatives.
  • 2 cups whole milk: For creaminess; almond milk or oat milk can be great non-dairy substitutes.
  • Whipped cream for serving: Optional, but highly recommended for that decadent touch.

Pro Tips for the Perfect Chai Latte

Close-up view of a salted caramel chai latte in a clear glass, drizzled with caramel.

To ensure your Salted Caramel Chai Latte is nothing short of extraordinary, keep these tips in mind:

  • Steep Time: Allowing the tea to steep for 10 minutes extracts maximum flavor. Don’t rush this step!
  • Sugar Adjustments: Start with less sugar; you can always add more, but it’s hard to take it out once it’s in.
  • Milk Frothing: Froth the milk just until it’s barely bubbling to achieve that creamy texture without curdling.
  • Strain Well: Use a fine-mesh strainer to remove spices, ensuring a smooth finish.
  • Experiment: Feel free to add a pinch of nutmeg or vanilla extract for an extra flavor dimension.
  • Keep it Warm: If serving for guests, keep the chai syrup warm on the stove until ready to serve.
  • Presentation: Drizzle extra salted caramel on top of the whipped cream for a stunning finish that looks as good as it tastes.
  • Storage: The chai syrup can be stored in the refrigerator for up to a week—simply reheat before serving.

Avoiding Common Mistakes

Even the most seasoned chefs can stumble, so here are some common pitfalls to avoid when making your Salted Caramel Chai Latte:

  • Over-boiling tea: Boiling the tea leaves can lead to bitterness. Always bring the water to a boil before steeping.
  • Skipping spices: Each spice contributes to the flavor; don’t omit any unless absolutely necessary.
  • Too much caramel: While it’s tempting to add more, too much can overpower the spices. Stick to the recommended amount.
  • Not straining thoroughly: Leaving bits of spices can affect the texture. Ensure you strain well.

Delicious Variations to Try

Why stick to just one version? Here are four delightful variations of the Salted Caramel Chai Latte to keep things interesting:

  • Iced Salted Caramel Chai Latte: Prepare the chai syrup as usual, let it cool, and serve over ice with cold milk.
  • Vanilla Chai Latte: Add a splash of vanilla extract to the chai syrup for an aromatic twist.
  • Spicy Chai Latte: Increase the amount of black pepper and add a pinch of cayenne for a spicy kick.
  • Coconut Chai Latte: Substitute whole milk with coconut milk for a tropical flavor and creamy texture.

How to Store and Make-Ahead

Planning ahead? Here’s how to store your Salted Caramel Chai Latte:

  • Chai Syrup: Store in an airtight jar in the fridge for up to a week. Reheat gently when ready to serve.
  • Milk Preparation: Froth milk fresh for each serving for the best texture and flavor.

FAQs About Salted Caramel Chai Latte

Got questions? Here are some frequently asked questions about this delicious drink:

  • Can I use decaffeinated tea? Yes! Decaf black tea is a great option if you want to enjoy this drink later in the day.
  • How do I make it vegan? Substitute dairy milk with almond or oat milk, and use vegan caramel sauce.
  • Can I make this drink in a larger batch? Absolutely! Just multiply the ingredients by the number of servings you need.
  • What’s the best way to froth milk? A milk frother works best, but you can also shake it in a jar or whisk it vigorously.
  • How long does the chai syrup last? It can be stored in the fridge for up to a week.
  • Can I adjust the spice levels? Yes! Feel free to increase or decrease the amount of spices according to your preference.
  • Is there a sugar-free option? You can use sugar substitutes like stevia or monk fruit sweetener.
  • What if I don’t have all the spices? You can still make a delicious chai latte with whatever spices you have on hand; just adjust the flavor to your liking.

Nutrition Tips and Dietary Adaptations

This Salted Caramel Chai Latte can fit into various dietary needs:

  • Low-Calorie Option: Use less sugar or a sugar substitute to reduce calories.
  • Dairy-Free: Use plant-based milk like almond, soy, or oat milk.
  • Gluten-Free: This recipe is naturally gluten-free, just ensure your caramel is also gluten-free.

Equipment You’ll Need

Here’s a quick list of equipment that will make your chai latte experience seamless:

  • Small saucepan: For simmering your chai syrup.
  • Fine-mesh strainer: To ensure a smooth drink by filtering out spices.
  • Milk frother: To achieve that creamy, frothy milk.
  • Heatproof bowl: For steeping the tea safely.

Serving Suggestions

Presentation is key! Here are some serving ideas to elevate your Salted Caramel Chai Latte:

  • Garnish: Top with whipped cream and a drizzle of additional salted caramel for a wow factor.
  • Pair with: Serve alongside graham crackers or homemade cookies for a delightful treat.
  • Seasonal Touch: Sprinkle a pinch of nutmeg or cinnamon on top for seasonal flair.

Final Thoughts

The Salted Caramel Chai Latte is more than just a drink; it’s a warm embrace, a moment of calm amidst the chaos of life. Whether you’re sharing it with loved ones or savoring it alone, each sip tells a story of connection and comfort. So, gather your ingredients, embrace your adventurous spirit, and let the flavors transport you to a cozy café in a distant land. Cheers to the enchanting experience that only a well-crafted chai latte can bring!

Salted Caramel Chai Latte

Prep Time 15 minutes
Cook Time 15 minutes
Total Time 30 minutes
Servings 4 cups
Calories 250
A warm, spiced chai latte infused with salted caramel for a cozy and indulgent treat.

Ingredients

Tea and Spices

  • 4 bags black tea
  • 3 inch fresh ginger, peeled and diced
  • 1 stick cinnamon stick
  • 1 tsp whole black peppercorns
  • 10 whole cloves
  • 6 pods whole cardamom pods, lightly crushed
  • 1 whole star anise
  • 1/3 cup salted caramel, plus more for drizzling
  • 1/4 cup white sugar
  • 2 cups whole milk
  • whipped cream for serving

Instructions 

  • Steep tea bags and spices in boiling water for 10 minutes, then strain.
  • Combine brewed tea, caramel, and sugar in a saucepan; simmer for 10 minutes.
  • Heat milk until just bubbling, froth, then divide syrup into glasses and add milk.
  • Top with whipped cream and drizzle caramel before serving.

Notes

Adjust sweetness and spice levels to taste.
Calories: 250kcal
Cost: $15
Course: Beverage
Cuisine: fusion
Keyword: caramel, chai, tea

Embark on a Culinary Adventure with Sweet Potato Chorizo Hash

Welcome to a delicious culinary journey where the vibrant flavors of sweet potatoes and chorizo come together to create a dish that is as satisfying as it is nutritious. This Sweet Potato Chorizo Hash is not just a meal; it’s a passport to flavor, culture, and connection. It’s perfect for brunch, dinner, or whenever your taste buds crave something hearty and delicious. Let’s dive into why you’ll absolutely love this recipe!

Why You’ll Love This Recipe

Here are five compelling reasons why this Sweet Potato Chorizo Hash will become a staple in your kitchen:

  • Flavor Explosion: The combination of sweet potatoes and spicy chorizo creates a mouthwatering contrast that will tantalize your taste buds.
  • Versatile Meal: This dish is perfect for breakfast, brunch, or dinner. Pair it with eggs for a hearty start to your day or top it with fresh avocado for a delightful dinner.
  • Nutritious Ingredients: Packed with vitamins and minerals, sweet potatoes are a great source of fiber, while chorizo adds protein and bold flavors.
  • Easy to Make: With straightforward ingredients and simple steps, this recipe is beginner-friendly, making it a perfect choice for busy weeknights.
  • Customizable: Add your favorite toppings or try different variations to suit your taste preferences and dietary needs.

Ingredient Breakdown

Let’s explore the ingredients that make this dish a delightful experience:


Cake Decorating Set

★ Recommended Kitchen Tool

Cake Decorating Set

Make this recipe even easier with a quality Cake Decorating Set — a must-have kitchen staple!


🛒 View on Amazon →

As an Amazon Associate, we earn from qualifying purchases.
  • 1 large white onion: Diced for a sweet and savory base.
  • 2 tablespoons olive oil: Essential for sautéing the onions and spices.
  • Spices: A mix of paprika, cayenne pepper, chili powder, and cumin adds depth and warmth.
  • 1 4-oz can Diced green chiles: For an extra kick of flavor.
  • 8 ounces chorizo: The star of the dish, adding rich, spicy flavor.
  • 4 cups sweet potatoes: Diced into bite-sized pieces, providing sweetness and texture.
  • 4-5 large eggs: Cracked into the hash for a hearty finish.
  • Toppings: Pico de gallo, jalapeños, fresh cilantro, avocado crema, sliced avocados, and lime wedges for freshness.

Pro Tips for Perfection

Close-up view of Sweet Potato Chorizo Hash, featuring diced sweet potatoes, chorizo, and eggs.

Enhance your cooking experience with these expert insights:

  • Consistent Cutting: Cut sweet potatoes into uniform pieces for even cooking.
  • Preheat the Skillet: A hot skillet ensures your chorizo gets a nice sear, enhancing flavor.
  • Steam for Softness: Adding water to steam the sweet potatoes helps achieve a tender texture.
  • Watch the Eggs: Cook the eggs until the whites are set but the yolks remain runny for the best flavor.
  • Make-Ahead: Prepare the hash in advance and reheat for a quick meal option.
  • Use Fresh Ingredients: Fresh produce and high-quality chorizo make all the difference in flavor.
  • Experiment with Spices: Feel free to adjust the spices according to your heat preference.
  • Serve Immediately: Enjoy the dish right after cooking for the best taste and texture.

Common Mistakes and Troubleshooting

Here are some pitfalls to avoid while making your Sweet Potato Chorizo Hash:

  • Undercooking Sweet Potatoes: Ensure they are tender by checking them with a fork. If they’re still firm, cover and cook a bit longer.
  • Overcooking Chorizo: Avoid letting the chorizo dry out—cook it just until browned to keep it juicy.
  • Skipping the Steaming: Don’t skip adding water for steaming the sweet potatoes—they need that moisture to soften.
  • Too Much Spice: Adjust the cayenne and chili powder levels if you’re sensitive to heat.

Delicious Variations

Feel free to personalize your Sweet Potato Chorizo Hash with these variations:

  • Vegetarian Option: Substitute chorizo with plant-based sausage or mushrooms for a meatless version.
  • Sweet Potato Alternatives: Try using regular potatoes or butternut squash for a different flavor profile.
  • Cheesy Twist: Add shredded cheese on top during the last few minutes of cooking for a creamy finish.
  • Herb-Infused: Incorporate fresh herbs like thyme or rosemary for an aromatic touch.

Storage and Make-Ahead Instructions

This dish can be easily stored and reheated:

  • Refrigeration: Store leftovers in an airtight container in the fridge for up to 3 days.
  • Freezing: Freeze portions in freezer-safe containers for up to a month. Reheat in the oven or skillet.
  • Make-Ahead: Prepare the sweet potato and chorizo mixture a day in advance, then simply cook the eggs fresh when you’re ready to eat.

Frequently Asked Questions

Here are some common queries about Sweet Potato Chorizo Hash:

  • Can I use different types of potatoes? Absolutely! Any potato variety will work, though cooking times may vary.
  • How do I reheat leftovers? Reheat in a skillet over medium heat or in the microwave until warmed through.
  • Is this recipe gluten-free? Yes, as long as your chorizo is gluten-free, this dish is suitable for gluten-free diets.
  • Can I make this dish spicy? Definitely! Increase the cayenne and add jalapeños for extra heat.
  • What can I serve with this dish? Pair it with a side salad, crusty bread, or enjoy it solo!
  • Are there any good toppings? Yes! Try toppings like avocado, sour cream, or hot sauce for added flavor.
  • How can I adapt this for meal prep? Cook the hash in batches and divide into meal prep containers for easy lunches.
  • Can I use sweet potato puree? It’s best to use diced sweet potatoes for texture, but puree could work in a pinch.

Nutrition Tips and Dietary Adaptations

This Sweet Potato Chorizo Hash can be tailored to fit various dietary needs:

  • Whole30 Friendly: Make sure to choose compliant chorizo and avoid any non-approved toppings.
  • Paleo Adaptation: Stick to whole, unprocessed ingredients for a paleo-friendly meal.
  • Low-Carb Option: Substitute sweet potatoes with cauliflower for a low-carb alternative.

Essential Equipment Recommendations

Here’s what you’ll need to whip up this delicious hash:

  • Cast Iron Skillet: Ideal for even heat distribution and perfect for browning.
  • Sharp Knife: A good knife is essential for chopping ingredients efficiently.
  • Cutting Board: A stable surface for all your chopping needs.
  • Spatula: For flipping and mixing the hash without damaging your skillet.

Serving Suggestions

How to elevate your Sweet Potato Chorizo Hash:

  • Garnish with Fresh Herbs: Fresh cilantro or parsley adds a burst of color and flavor.
  • Pair with a Side Salad: A light green salad balances the richness of the hash.
  • Top with Fried Eggs: Add a fried egg on top for a brunch-worthy presentation.
  • Serve with Hot Sauce: For spice lovers, a drizzle of your favorite hot sauce can take this dish to the next level.

And there you have it! This Sweet Potato Chorizo Hash is more than just a meal; it’s a celebration of flavors and cultures. So gather your ingredients, turn up the heat, and enjoy a dish that is sure to delight. Remember, cooking is about exploring, connecting, and having fun. Happy cooking!

Sweet Potato Chorizo Hash

Prep Time 10 minutes
Cook Time 20 minutes
Total Time 30 minutes
Servings 4 servings
Calories 450
A flavorful and hearty breakfast hash combining sweet potatoes, chorizo, and spices, topped with eggs and fresh toppings.

Ingredients

Vegetables and spices

  • 1 large white onion (diced)
  • 2 tablespoons olive oil
  • 0.5 teaspoon paprika
  • 0.5 teaspoon cayenne pepper
  • 0.5 teaspoon chili powder
  • 0.25 teaspoon cumin
  • 4 oz Diced green chiles
  • 8 ounces chorizo
  • 4 cups sweet potatoes (diced)

Eggs and toppings

  • 4-5 large eggs
  • Pico de Gallo Pico de Gallo
  • Jalapeños sliced Jalapeños
  • Fresh cilantro minced Fresh cilantro
  • Avocado Crema recipe below Avocado Crema
  • Avocados sliced Avocados
  • Lime wedges Lime wedges
  • 1 medium Avocado
  • 2 tablespoons Lime juice
  • 1 tablespoon Avocado mayonnaise
  • to taste sea salt sea salt
  • Water if needed Water

Instructions 

  • Heat a skillet with oil, sauté onions and spices until translucent.
  • Add green chiles and chorizo, cook until browned.
  • Add sweet potatoes, water, cover to steam for 10 minutes, then stir.
  • Make the crema by blending ingredients until smooth, adding water if needed.
  • Create divots in the hash, crack eggs into them, cover, and cook until whites are set.

Notes

For extra flavor, garnish with fresh cilantro and sliced jalapeños.
Calories: 450kcal
Cost: $15
Course: Breakfast
Cuisine: American
Keyword: Chorizo, Sweet Potato

Embark on a Culinary Journey with Roasted Red Pepper Pasta

Welcome to a vibrant adventure in the kitchen! Today, we’re diving into the delightful world of Roasted Red Pepper Pasta, a dish that captures the essence of the Mediterranean. With its creamy sauce and the bold flavor of roasted red peppers, this recipe isn’t just about nourishment—it’s about connection and culture. Are you ready to savor the taste of the sun-soaked shores? Let’s get cooking!

Why You’ll Love This Recipe

This dish is more than just a meal; it’s an experience. Here are five reasons why you’ll fall head over heels for this Roasted Red Pepper Pasta:

  • Rich Flavor Profile: The combination of roasted red peppers, garlic, and cream creates a luxurious sauce that’s both savory and slightly sweet.
  • Quick and Easy: Ready in under 30 minutes, this recipe is perfect for a weeknight dinner or impressing guests without the stress.
  • Versatile Dish: Pair it with your favorite pasta, and feel free to customize with proteins like chicken or shrimp for a heartier meal.
  • Healthy Ingredients: Packed with fresh vegetables and wholesome ingredients, it offers a nutritious yet indulgent option for your table.
  • Make Ahead Friendly: Prepare the sauce in advance and store it for a quick meal anytime, making your cooking experience smoother.

Ingredient Breakdown

Let’s explore the ingredients that make this dish sing. Here’s what you’ll need:


Rotary Cheese Grater

★ Recommended Kitchen Tool

Rotary Cheese Grater

Make this recipe even easier with a quality Rotary Cheese Grater — a must-have kitchen staple!


🛒 Check Price on Amazon →

As an Amazon Associate, we earn from qualifying purchases.
  • 16 ounces rigatoni or penne pasta: Choose your favorite pasta shape for a delightful texture that holds the sauce well.
  • 2 large red bell peppers: The star of the dish! Roasting them brings out their natural sweetness.
  • 2 tablespoons olive oil: Adds richness and depth to the sautéed onions and garlic.
  • 1 medium onion, diced: Provides a savory base for the sauce.
  • 4 cloves garlic, minced: Infuses the dish with aromatic flavor.
  • 1/2 cup heavy cream: Creates a creamy texture that balances the roasted flavors.
  • 1/2 cup grated parmesan cheese: For that umami kick and a touch of saltiness.
  • 1/4 cup chopped fresh basil: Adds a fresh, herbal note that brightens the dish.
  • 1/2 teaspoon red pepper flakes: A hint of heat to elevate the flavor.
  • Salt and pepper to taste: Essential for seasoning and enhancing all the flavors.

Substitutions and Variations

Don’t have all the ingredients? Here are some substitutions and variations to consider:

  • Pasta Alternatives: Gluten-free pasta or whole wheat options work beautifully if you’re looking for a healthier or gluten-free dish.
  • Vegetable Variations: Incorporate sautéed spinach or kale for added nutrients and color.
  • Protein Additions: Toss in grilled chicken, shrimp, or even chickpeas for a protein boost.
  • Vegan Option: Replace heavy cream with coconut milk and use nutritional yeast instead of parmesan for a dairy-free version.

How to Make Roasted Red Pepper Pasta

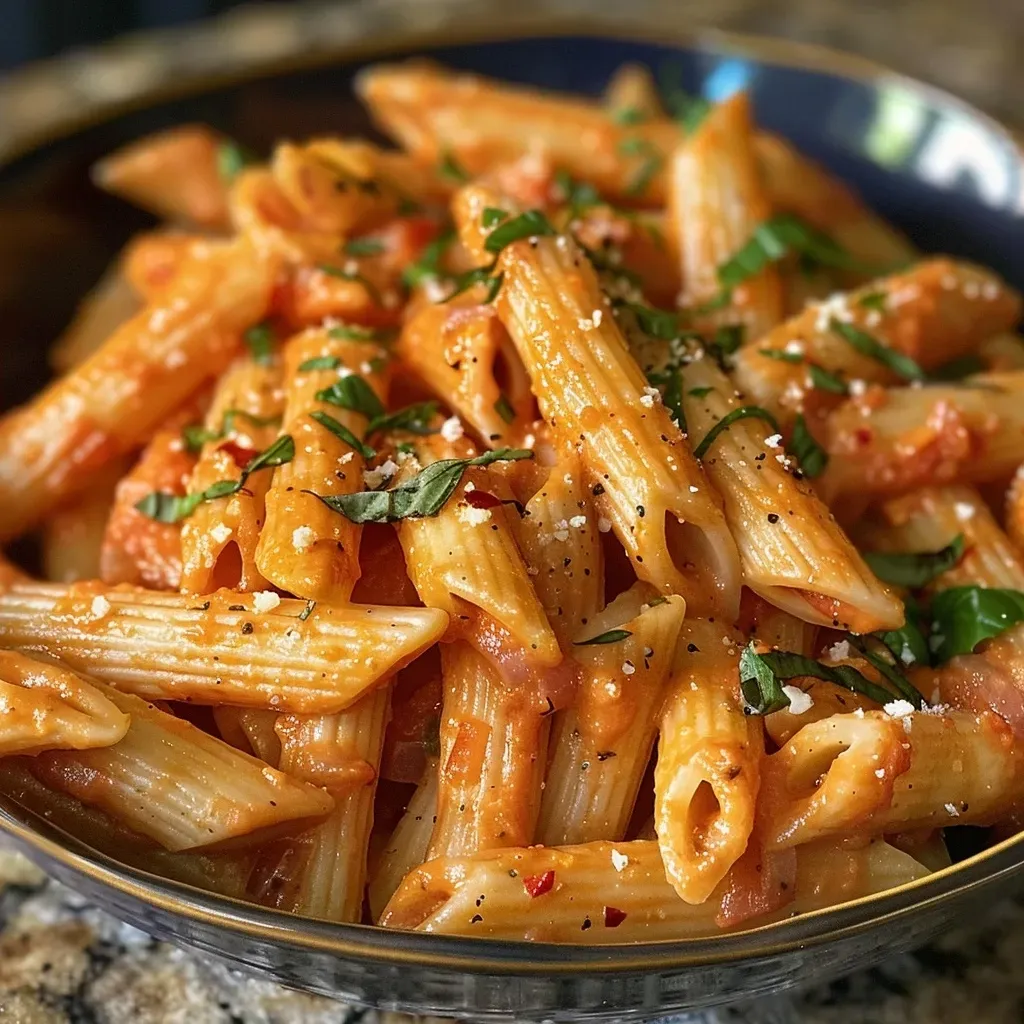
A close-up side view of creamy Roasted Red Pepper Pasta topped with fresh basil.

Ready to bring this dish to life? Follow these simple steps to create a restaurant-quality meal at home:

  1. Preheat your oven to 450 degrees Fahrenheit. Place the whole red peppers on a baking sheet and roast for 25-30 minutes, turning occasionally until the skins are charred.
  2. Transfer the roasted peppers to a bowl, cover, and let steam for 10 minutes. Then, peel off the skins, remove the seeds, and roughly chop.
  3. Meanwhile, bring a large pot of salted water to a boil and cook the pasta until al dente according to package directions. Reserve 1 cup of pasta water before draining.
  4. In a large skillet over medium heat, heat the olive oil and sauté the diced onion until softened, about 5 minutes. Stir in the minced garlic and cook until fragrant, about 1 minute.
  5. Transfer the sautéed onion and garlic to a blender with the roasted red peppers and puree until smooth.
  6. Pour the red pepper sauce back into the skillet. Stir in the heavy cream, 1/2 cup of the reserved pasta water, red pepper flakes, and season with salt and pepper. Simmer for 5 minutes until slightly thickened.
  7. Add the cooked pasta and parmesan to the skillet and toss to coat. Adjust the consistency with more pasta water as needed.
  8. Serve hot, garnished with fresh basil and extra Parmesan if desired.

Pro Tips for Perfecting Your Pasta

Here are some expert insights to ensure your roasted red pepper pasta turns out perfectly every time:

  • Roasting Tips: For an even more intense flavor, try adding a sprinkle of salt before roasting the peppers.
  • Blending Technique: Allow the roasted peppers to cool slightly before blending to avoid steam buildup.
  • Texture Check: If you prefer a chunkier sauce, pulse the mixture in the blender instead of pureeing it completely.
  • Adjusting Consistency: Always reserve extra pasta water; it’s the secret to a creamy, cohesive sauce that clings to the pasta.
  • Flavor Depth: Experiment with adding a splash of lemon juice or balsamic vinegar to the sauce for a tangy twist.
  • Ingredient Quality: Using high-quality olive oil and fresh parmesan will significantly enhance the flavor of the dish.
  • Fresh Herbs: Add fresh herbs just before serving to maintain their vibrant flavor and color.
  • Serving Temperature: Serve immediately for the best taste and texture; reheated pasta can lose its creaminess.

Common Mistakes and Troubleshooting

Even seasoned cooks can run into hiccups. Here are some common mistakes and how to avoid them:

  • Overcooked Pasta: Always follow the package instructions for cooking time. Al dente is key for perfect texture.
  • Too Thick Sauce: If the sauce is too thick, gradually add more reserved pasta water until you reach the desired consistency.
  • Undercooked Vegetables: Ensure the onion and garlic are cooked until they’re soft and aromatic to develop depth in flavor.
  • Too Much Heat: If the dish becomes too spicy, add a splash of cream or a pinch of sugar to balance the flavors.

Storage and Make-Ahead Instructions

This dish is perfect for meal prep! Here’s how to store and reheat:

  • Storing: Allow the pasta to cool completely, then transfer it to an airtight container. It can be stored in the refrigerator for up to 4 days.
  • Freezing: For longer storage, freeze the pasta in portions. It can be kept in the freezer for up to 3 months.
  • Reheating: To reheat, add a splash of water or cream to the pasta and warm it gently in a skillet over low heat, stirring frequently.
  • Make-Ahead Sauce: The roasted red pepper sauce can be made in advance and stored in the fridge for up to a week or frozen for up to 3 months.

Frequently Asked Questions (FAQs)

If you have questions about this recipe, you’re not alone! Here are some common queries:

  • Can I use other types of pasta? Absolutely! Any pasta shape you prefer will work, just adjust cooking times as necessary.
  • What can I substitute for cream? You can use half-and-half or cashew cream for a dairy-free option.
  • Is this dish spicy? It has a mild kick from the red pepper flakes, but you can adjust the amount to suit your taste.
  • Can I add protein to this dish? Yes! Grilled chicken, shrimp, or even chickpeas make great additions for a protein boost.
  • How do I store leftovers? Store in an airtight container in the fridge for up to 4 days or freeze for up to 3 months.
  • Can I make this dish vegan? Yes! Use coconut milk instead of cream and nutritional yeast instead of parmesan.
  • What other vegetables can I add? Spinach, zucchini, or mushrooms are excellent additions for extra flavor and nutrition.
  • How can I enhance the flavor? A splash of lemon juice or balsamic vinegar can brighten the dish significantly.

Nutritional Tips and Dietary Adaptations

Want to make this dish more nutritious? Here are some tips:

  • Whole Grain Pasta: Opt for whole grain or legume-based pasta to increase fiber content.
  • Add Greens: Stir in fresh greens like spinach or kale for added vitamins and minerals.
  • Reduce Cream: Use less cream or substitute with a lighter option like Greek yogurt for a healthier twist.
  • Portion Control: Serve with a side salad to help balance your meal and add more vegetables.

Equipment Recommendations

Here’s what you’ll need to create this dish:

  • High-Quality Blender: For achieving a smooth sauce, a powerful blender makes a significant difference.
  • Large Pot: A sturdy pot for boiling pasta is essential for even cooking.
  • Skillet: A large skillet is perfect for sautéing and mixing the sauce with pasta.
  • Baking Sheet: Use a rimmed baking sheet for roasting the peppers without mess.

Serving Suggestions

When it comes to serving your Roasted Red Pepper Pasta, consider these delightful accompaniments:

  • Crusty Bread: Pair with warm, crusty bread for dipping in the delicious sauce.
  • Side Salad: A fresh salad with a tangy vinaigrette complements the richness of the pasta beautifully.
  • Wine Pairing: A light white wine, like Pinot Grigio, enhances the flavors of the dish.
  • Garnishes: Top with extra parmesan, fresh basil, or even a drizzle of balsamic glaze for added flair.

Now that you have all the tools and tips, it’s time to create your own masterpiece! Enjoy the journey and the delicious flavors that come with it. Happy cooking, amigos!

Roasted Red Pepper Pasta

Prep Time 15 minutes
Cook Time 30 minutes
Total Time 45 minutes
Servings 4 servings
Calories 550
A vibrant and creamy pasta dish featuring roasted red peppers, garlic, and basil for a flavorful meal.

Ingredients

Pasta

  • 16 ounces rigatoni or penne pasta

Red Bell Peppers

  • 2 large red bell peppers (whole)

Olive Oil

  • 2 tablespoons olive oil

Onion

  • 1 medium medium onion (diced)

Garlic

  • 4 cloves garlic (minced)

Heavy Cream

  • 1/2 cup heavy cream

Parmesan Cheese

  • 1/2 cup grated parmesan cheese

Fresh Basil

  • 1/4 cup chopped fresh basil

Red Pepper Flakes

  • 1/2 teaspoon red pepper flakes

Salt and Pepper

  • salt and pepper to taste

Instructions 

  • Roast peppers at 450°F for 25-30 mins, then steam, peel, seed, and chop.
  • Cook pasta in salted water until al dente; reserve 1 cup pasta water.
  • Sauté onion in olive oil until soft, then add garlic and cook 1 min.
  • Blend roasted peppers with onion and garlic until smooth.
  • Simmer sauce with cream, red pepper flakes, salt, and pepper for 5 mins.
  • Add pasta and cheese, toss, and serve garnished with basil.

Notes

For a creamier sauce, add more pasta water as needed.
Calories: 550kcal
Cost: $15
Course: Main Course
Cuisine: Italian
Keyword: Pasta

Embark on a Flavorful Journey with the Maple Bourbon Espresso Martini

Welcome to a delightful exploration of the Maple Bourbon Espresso Martini, a cocktail that marries the rich, bold flavors of coffee with the warm sweetness of maple syrup and the smoothness of bourbon. This drink is more than just a refreshment; it’s a story waiting to be shared, a bridge connecting cultures through taste. Whether you’re hosting friends or enjoying a quiet evening, this cocktail invites you to savor every sip. Let’s dive into the experience of crafting this extraordinary drink!

Why You’ll Love This Recipe

The Maple Bourbon Espresso Martini is not just another cocktail; it’s an adventure in a glass. Here are five compelling reasons to whip up this drink:

  • Rich Flavor Profile: The harmonious blend of espresso and bourbon creates a depth of flavor that’s both invigorating and comforting.
  • Perfect for Any Occasion: Whether it’s a festive gathering or a cozy night in, this cocktail fits right in.
  • Easy to Customize: Adjust the sweetness with maple syrup or alter the base spirit to match your preference.
  • Visually Stunning: The cocktail’s rich brown hue topped with frothy foam is a showstopper.
  • Great Conversation Starter: Serve this drink and watch your guests’ eyes light up with curiosity and delight!

Ingredients Breakdown

Let’s gather our ingredients for the Maple Bourbon Espresso Martini.


Meal Prep Container Set

★ Recommended Kitchen Tool

Meal Prep Container Set

Make this recipe even easier with a quality Meal Prep Container Set — a must-have kitchen staple!


🛒 See Deals on Amazon →

As an Amazon Associate, we earn from qualifying purchases.
  • 2 oz bourbon: Choose a high-quality bourbon for a smoother finish. Brands like Maker’s Mark or Buffalo Trace work beautifully.
  • 1.5 oz fresh espresso (or cold brew): Freshly brewed espresso gives the best flavor, but cold brew is a great alternative for a milder taste.
  • 1 oz Lebowski’s Kool-Luah Coffee Liqueur: This coffee liqueur enhances the coffee flavor while adding a touch of sweetness.
  • .75 oz maple syrup: Use pure maple syrup for the best flavor—it’s a delightful complement to the bourbon.
  • Pinch of sea salt: This enhances the overall flavor profile, balancing the sweetness.
  • Dash of cinnamon powder: A hint of spice adds warmth and depth to the cocktail.

Instructions to Craft the Perfect Cocktail

Close-up view of a Maple Bourbon Espresso Martini in a stylish glass with a frothy top.

Now that we have our ingredients, let’s bring them together!

  1. Brew your fresh espresso, cold brew, or extra strong brewed coffee and let it cool for a couple of minutes.
  2. Pour your espresso, bourbon, Kool-Luah coffee liqueur, maple syrup, cinnamon, and sea salt into a shaker tin.
  3. Add ice and vigorously shake for 30-40 seconds to achieve a thick layer of foam on top.
  4. Strain your cocktail into a coupe glass. For an even better foam, double strain the cocktail.
  5. Garnish with three espresso beans, serve immediately, and enjoy your Maple Bourbon Espresso Martini using the best Lebowski’s Kool-Luah coffee liqueur!

Expert Pro Tips for Success

To elevate your Maple Bourbon Espresso Martini, consider these expert tips:

  • Use Fresh Espresso: For the richest flavor, always opt for freshly brewed espresso.
  • Chill Your Glass: Pre-chill your glass for a more enjoyable drinking experience.
  • Adjust Sweetness: Feel free to modify the amount of maple syrup based on your taste preference.
  • Experiment with Coffee Types: Try different coffee beans for unique flavor profiles.
  • Shake Vigorously: A good shake is crucial for achieving the desired foam on top.
  • Double Strain for Perfection: Double straining ensures a smoother drink without any coffee grounds.
  • Explore Garnishes: Consider adding a sprinkle of cocoa powder or nutmeg for an extra touch.
  • Pair with Snacks: Serve with chocolate desserts or savory finger foods to complement the drink.

Common Mistakes and Troubleshooting

Even the best cocktail makers make mistakes. Here are some common pitfalls and how to avoid them:

  • Over-shaking: Too much shaking can dilute the drink. Aim for 30-40 seconds.
  • Using Cold Ingredients: Ensure your coffee is cooled but not cold to maintain the right temperature balance.
  • Skipping the Salt: A pinch of sea salt enhances the flavors; don’t leave it out!
  • Inaccurate Measurements: Use a jigger for precise measurements to achieve consistency in flavor.

Delicious Variations of the Maple Bourbon Espresso Martini

This cocktail is versatile! Here are some variations to try:

  • Maple Bourbon White Russian: Swap the espresso for milk or cream for a creamy twist.
  • Spiced Maple Espresso Martini: Add a splash of spiced rum for a warming effect.
  • Vegan Version: Use a vegan coffee liqueur and maple syrup to maintain the flavor profile.
  • Chocolate Maple Espresso Martini: Incorporate chocolate liqueur for a decadent touch.

Storage and Make-Ahead Instructions

The Maple Bourbon Espresso Martini is best enjoyed fresh, but if you want to prepare ahead:

  • Make the Mix Ahead: Combine the bourbon, coffee liqueur, maple syrup, cinnamon, and salt. Store in the fridge for up to 24 hours.
  • Fresh Espresso: Brew espresso right before serving for optimal flavor.
  • Pre-chill Glasses: Store your cocktail glasses in the freezer for a frosty aesthetic.

Frequently Asked Questions

Here are some common questions to help you master the Maple Bourbon Espresso Martini:

  • Can I use decaf coffee? Yes! Decaf works perfectly for those sensitive to caffeine.
  • What bourbon should I use? Any good-quality bourbon will do, but choose one that you enjoy sipping.
  • How do I achieve the best foam? Shake vigorously and double strain to get that lovely foam layer.
  • Can I make this cocktail in larger batches? Absolutely! Just multiply the ingredients and mix in a larger shaker.
  • Is there a non-alcoholic version? You can create a mocktail using coffee, maple syrup, and a splash of soda.
  • What snacks pair well with this cocktail? Chocolate desserts, nuts, or savory bites complement the flavors well.
  • How can I adjust the sweetness? Simply reduce or increase the maple syrup to your liking.
  • Can I use flavored coffee liqueur? Yes! Flavored liqueurs can add a twist to your cocktail.

Nutritional Tips and Dietary Adaptations

If you’re mindful of dietary preferences, consider these adaptations:

  • Low-Calorie Version: Use a sugar-free maple syrup alternative.
  • Dairy-Free: This cocktail is naturally dairy-free!
  • Sugar-Free Option: Opt for a sugar-free coffee liqueur and adjust the syrup.

Essential Equipment for Crafting Cocktails

To make the perfect Maple Bourbon Espresso Martini, you will need:

  • Cocktail shaker: A sturdy shaker is essential for mixing.
  • Jigger: For accurate measurements to ensure balance in flavors.
  • Strainer: A fine mesh strainer helps achieve a smooth pour.
  • Coupe glass: Perfect for showcasing your cocktail.

Serving Suggestions for Enjoyment

Enhance your cocktail experience with these serving ideas:

  • Serve with Dessert: Pair with chocolate cake or tiramisu for a decadent treat.
  • Garnish Creatively: Use cinnamon sticks or chocolate shavings for added flair.
  • Host a Tasting Night: Create a tasting menu featuring different coffee cocktails.

Conclusion: Cheers to New Adventures!

The Maple Bourbon Espresso Martini is more than just a cocktail; it’s an invitation to explore the rich tapestry of flavors that unite us all. With its bold coffee taste balanced by the sweetness of maple syrup and the warmth of bourbon, this drink embodies the spirit of adventure and connection. So gather your friends, shake up this delightful concoction, and let the stories unfold with each sip. Cheers to new culinary journeys!

Maple Bourbon Espresso Martini

Prep Time 5 minutes
Total Time 5 minutes
Servings 1 glass
Calories 210
A rich and flavorful cocktail combining bourbon, espresso, and maple syrup for a perfect evening treat.

Ingredients

Beverages

  • 2 oz bourbon
  • 1.5 oz fresh espresso (or cold brew)
  • 1 oz Lebowski’s Kool-Luah Coffee Liqueur
  • 0.75 oz maple syrup
  • pinch sea salt
  • dash cinnamon powder

Instructions 

  • Brew espresso or cold brew and let cool.
  • Pour espresso, bourbon, coffee liqueur, maple syrup, cinnamon, and sea salt into a shaker.
  • Add ice and shake vigorously for 30-40 seconds.
  • Strain into a coupe glass and garnish with espresso beans.

Notes

For a richer foam, double strain the cocktail.
Calories: 210kcal
Cost: $15
Course: Cocktail
Keyword: Bourbon, Espresso, maple

Unlock the Magic of Breakfast with Praline Pecan French Toast Casserole

Every morning deserves a touch of magic, and there’s no better way to bring that enchantment to your breakfast table than with a delightful Praline Pecan French Toast Casserole. This dish doesn’t just fill your stomach; it fills your heart with warm memories and sweet flavors. Whether you’re hosting a holiday brunch or simply treating yourself on a lazy Sunday, this casserole transforms simple ingredients into a luxurious experience. Let’s dive into the world of flavors and discover why this recipe will become a cherished staple in your kitchen.

Why You’ll Love This Recipe

This recipe is more than just a delicious breakfast; it’s a celebration of flavors and textures that will make you smile. Here are some reasons to fall in love with it:

  • Effortless Preparation: You can prepare this dish the night before, allowing the flavors to meld beautifully while you sleep.
  • Rich, Decadent Flavors: The combination of rich cream, eggs, and sweet praline topping creates a taste sensation that’s hard to resist.
  • Customizable: This recipe is versatile; you can easily swap ingredients to fit your taste or dietary needs.
  • Perfect for Gatherings: It serves a crowd, making it ideal for family brunches or holiday celebrations.
  • Leftover Friendly: Any leftovers can be enjoyed the next day, either warmed up or cold, making it a practical choice.

Ingredients to Create Your Masterpiece

To make the perfect Praline Pecan French Toast Casserole, gather the following ingredients:


Cake Decorating Set

★ Recommended Kitchen Tool

Cake Decorating Set

Make this recipe even easier with a quality Cake Decorating Set — a must-have kitchen staple!


🛒 Shop This Tool →

As an Amazon Associate, we earn from qualifying purchases.
  • 1 large challah, brioche, or French bread: Cut into 1-inch cubes. This base is essential for achieving that fluffy yet firm texture.
  • 2 cups heavy cream: Provides a rich custard that envelops the bread.
  • 1 cup whole milk: Balances the richness of the cream.
  • 8 large eggs: The backbone of the custard, adding structure and richness.
  • 1/4 cup granulated sugar: Sweetens the custard mixture.
  • 1 Tbsp pure vanilla extract: Adds a fragrant depth to the flavor.
  • 1 tsp ground cinnamon: A warm spice that enhances the dish’s sweetness.
  • 1/4 tsp salt: Balances the sweetness and enhances overall flavor.
  • 1/4 tsp nutmeg: A hint of nutmeg adds depth and warmth.
  • For the praline topping:
  • 1 cup butter (softened): Creates a luscious topping that melts into the casserole.
  • 1 cup packed light brown sugar: Gives a caramel-like sweetness that pairs perfectly with pecans.
  • 2 Tbsp light corn syrup, maple syrup, or honey: Adds moisture and sweetness.
  • 1 tsp ground cinnamon: To season the topping.
  • 1 cup roughly chopped pecans: Adds crunch and nuttiness; feel free to use more if desired.

Step-by-Step Preparation

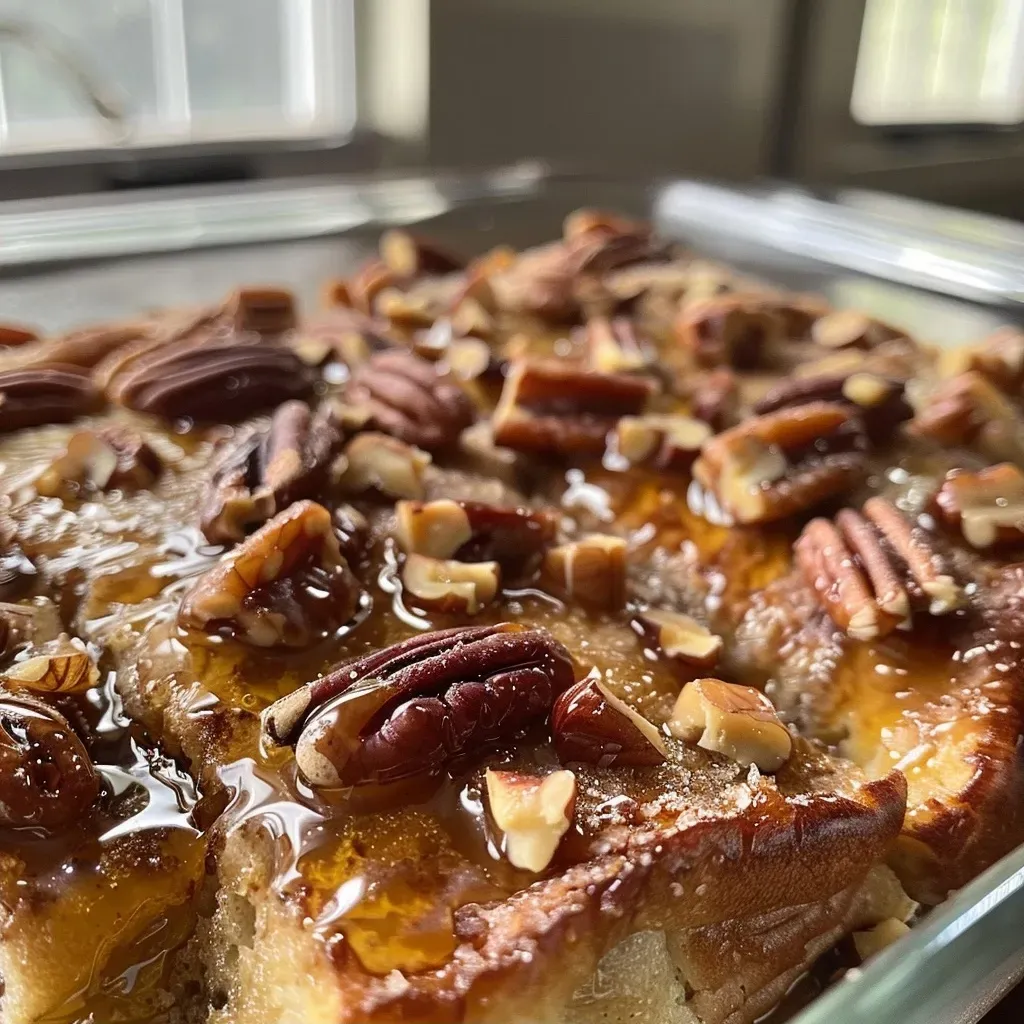
Close-up view of Praline Pecan French Toast Casserole with golden-brown edges and pecan topping.

Creating this Praline Pecan French Toast Casserole is a joyous journey. Follow these steps:

  1. Prepare the Bread: Cube the bread slices and spread them in a single layer on a baking pan. Allow them to sit out for several hours or overnight to dry out. Alternatively, you can toast them under the broiler for a few minutes.
  2. Make the Custard: In a large mixing bowl, whisk together the heavy cream, milk, eggs, granulated sugar, vanilla extract, ground cinnamon, salt, and nutmeg until fully combined.
  3. Assemble the Casserole: Spray a 13×9-inch baking dish with nonstick cooking spray. Arrange the dried bread cubes in the dish and pour the egg custard evenly over them, gently pressing down with the back of a spoon to ensure all the bread is soaked.
  4. Create the Praline Topping: In a separate bowl, mix together the softened butter, brown sugar, corn syrup, and cinnamon. Add the chopped pecans and mix until evenly distributed. Crumble this mixture evenly over the bread and custard layer.
  5. Chill Overnight: Cover the dish with plastic wrap and refrigerate overnight to allow the flavors to meld.
  6. Bake to Perfection: Preheat your oven to 350°F (175°C). Remove the casserole from the fridge 20 minutes before baking. Uncover and bake for 50-55 minutes. Check at 30 minutes and cover with foil if the top is browning too quickly. The casserole is done when puffed and golden brown.
  7. Serve with Love: Let it sit for 5 minutes before slicing into squares. Serve as is or dust with powdered sugar and drizzle with maple syrup, fresh fruit, or whipped cream for an extra touch of indulgence.

Expert Tips for Success

To ensure that your Praline Pecan French Toast Casserole is a hit, consider these expert tips:

  • Use Day-Old Bread: Stale bread absorbs the custard better without falling apart.
  • Experiment with Flavors: Feel free to add chocolate chips, dried fruits, or different nuts for a unique twist.
  • Don’t Rush the Chilling: Allowing the casserole to chill overnight is key for the best texture and flavor.
  • Check Doneness Closely: Ovens can vary; use a toothpick to test the center for doneness.
  • Personalize Your Toppings: Customize with seasonal fruits or flavored syrups for extra flair.
  • Serve Warm: This dish is best enjoyed warm from the oven, paired with your favorite breakfast beverages.
  • Store Properly: If you have leftovers, store them in an airtight container in the fridge for up to three days.
  • Reheat Gently: Warm leftovers in the oven for a few minutes to restore their texture.

Common Mistakes and Troubleshooting

Even the best chefs can have off days. Here are some common pitfalls and how to avoid them:

  • Too Soggy: Ensure the bread is dried out before soaking it in the custard.
  • Overbaking: Keep an eye on the casserole during the last 10-15 minutes to avoid burning.
  • Not Enough Flavor: Make sure to use high-quality vanilla extract and fresh spices for the best flavor.

Variations to Explore

Let your creativity shine with these delicious variations:

  • Berry Bliss: Add mixed berries to the custard for a fruity twist.
  • Chocolate Lover’s: Incorporate chocolate chips into the bread mixture for a sweet surprise.
  • Nutty Banana: Layer sliced bananas between the bread cubes and the custard.
  • Pumpkin Spice: Substitute some cream with pumpkin puree and add pumpkin spice for a seasonal favorite.

Storage and Make-Ahead Instructions

Planning ahead? Here’s how to store and enjoy your delectable casserole:

  • Make-Ahead: Prepare the casserole a day in advance, cover it tightly, and refrigerate overnight.
  • Leftover Storage: Store any leftovers in an airtight container in the refrigerator for up to three days.
  • Reheating: Reheat individual portions in the microwave or the entire casserole in the oven at 350°F until warmed through.

Frequently Asked Questions

If you have questions, we’ve got answers! Here are some common inquiries:

  • Can I use gluten-free bread? Yes! Gluten-free bread works well in this recipe.
  • How do I make it dairy-free? Substitute the cream and milk with almond milk and coconut cream.
  • Can I freeze the casserole? Yes! Assemble the casserole, cover it tightly, and freeze. Bake from frozen, adding extra time.
  • Can I add nuts to the custard? Absolutely! Nuts can add a delightful crunch throughout the dish.
  • What if I don’t have challah? Brioche or any sturdy bread will work as a substitute.
  • How long should I bake it? Bake for 50-55 minutes or until golden brown and puffed.
  • Can I make a smaller portion? Yes! Halve the recipe and use a smaller baking dish.
  • What’s the best way to serve it? Serve warm with a dusting of powdered sugar and a drizzle of syrup.

Nutritional Tips and Dietary Adaptations

While this casserole is indulgent, there are ways to make it a bit lighter:

  • Substitute Ingredients: Use low-fat cream and milk, or egg substitutes to reduce calories.
  • Increase Fiber: Use whole grain bread for added fiber and nutrients.
  • Monitor Portion Sizes: Enjoy a smaller portion to savor the flavors while keeping calories in check.

Essential Equipment for Your Kitchen

Having the right tools makes all the difference:

  • 13×9-inch Baking Dish: Essential for baking your casserole evenly.
  • Mixing Bowls: Use various sizes for combining ingredients.
  • Whisk: A sturdy whisk helps you mix the custard smoothly.
  • Measuring Cups and Spoons: Accurate measurements are key to success in baking.

Serving Suggestions for a Stunning Presentation

Make your breakfast table shine with these serving ideas:

  • Garnish with Fresh Fruits: Add seasonal fruits like berries or bananas for a pop of color.
  • Pair with Whipped Cream: A dollop of whipped cream elevates your dish.
  • Offer Maple Syrup on the Side: Let guests drizzle their own syrup for customization.

In conclusion, the Praline Pecan French Toast Casserole is more than just a meal; it’s an experience. It invites you to savor every bite, share stories, and create memories with loved ones. This dish is a beautiful reminder that food is not just about sustenance, but about connection, culture, and joy. So go ahead, embrace the adventure of flavors, and let your kitchen be the heart of your home.

Praline Pecan French Toast Casserole

Prep Time 20 minutes
Cook Time 55 minutes
Total Time 1 hour 15 minutes
Servings 8 slices
Calories 550
A decadent overnight casserole combining rich bread, custard, and praline pecan topping, perfect for brunch or special occasions.

Ingredients

Bread

  • 1 large challah, brioche or french bread (1 inch cubes)
  • 2 cups heavy cream
  • 1 cup whole milk
  • 8 large eggs
  • 1/4 cup granulated sugar
  • 1 Tbsp pure vanilla extract
  • 1 tsp ground cinnamon
  • 1/4 tsp salt
  • 1/4 tsp nutmeg

Praline pecan topping

  • 1 cup butter (softened)
  • 1 cup packed light brown sugar
  • 2 Tbsp light corn syrup, maple syrup or honey
  • 1 tsp ground cinnamon
  • 1 cup roughly chopped pecans ((may use more, if desired))

Instructions 

  • Cube bread and dry out overnight or toast briefly under the broiler.
  • Whisk together cream, milk, eggs, sugar, vanilla, cinnamon, salt, and nutmeg until smooth.
  • Arrange bread in a greased dish, pour custard over, press gently, cover, and chill overnight.
  • Mix butter, brown sugar, syrup, cinnamon, and pecans for topping. Crumble over casserole, then bake at 350°F for 50-55 minutes.
  • Let stand 5 minutes, then serve with powdered sugar, maple syrup, and fresh fruit if desired.

Notes

For best results, prepare the night before to allow flavors to meld.
Calories: 550kcal
Cost: $15
Course: Breakfast, Brunch
Cuisine: American
Keyword: French Toast, overnight, Pecan

Welcome to the Heart of Italian Comfort: Classic Minestrone with a Gluten-Free Twist

Ah, minestrone soup! A dish that encapsulates the essence of Italian cuisine, bringing together vibrant vegetables, hearty beans, and comforting flavors in a single bowl. This recipe for Classic Minestrone Soup with Gluten-Free Noodles promises not only to warm your soul but also to transport you to the bustling streets of Italy, where every spoonful tells a story of tradition and love. In this article, we’ll explore the rich history of minestrone, share tips for crafting the perfect bowl, and offer unique twists to make this soup your own. Ready to dive in?

Why You’ll Love This Classic Minestrone Recipe

This minestrone is not just a meal; it’s an experience. Here are five reasons why you’ll adore this recipe:

  • Flavorful and Nutritious: Packed with vegetables, beans, and gluten-free noodles, this soup is a nutritional powerhouse, ensuring you get your daily dose of vitamins and minerals.
  • Customizable: Feel free to improvise with whatever veggies or beans you have on hand. This recipe encourages creativity!
  • Quick and Easy: With a cooking time of about 40 minutes, you can whip up a comforting bowl of soup even on a busy weeknight.
  • Gluten-Free Options: Using gluten-free noodles ensures that everyone can enjoy this dish, making it perfect for gatherings.
  • Leftovers Galore: This soup stores beautifully, allowing you to enjoy the rich flavors for days to come.

Ingredient Breakdown: What You’ll Need

Let’s take a closer look at the ingredients for this delectable minestrone soup, along with some substitutions to suit your taste:


Digital Kitchen Scale

★ Recommended Kitchen Tool

Digital Kitchen Scale

Make this recipe even easier with a quality Digital Kitchen Scale — a must-have kitchen staple!


🛒 See Deals on Amazon →

As an Amazon Associate, we earn from qualifying purchases.
  • Olive Oil: 3 tablespoons. Use high-quality extra virgin for the best flavor.
  • Onion: 1 medium yellow onion, finely diced. Sweet onions can also be a good choice.
  • Carrots: 3 large, peeled and diced. Substitute with parsnips for a sweeter flavor.
  • Celery: 3 stalks, diced. You can use fennel for a unique twist.
  • Leek: Use the white and green parts, thinly sliced. If unavailable, add more onion.
  • Garlic: 5 cloves, chopped. Garlic powder can be an alternative (1 teaspoon).
  • Salt: 1 teaspoon kosher salt. Adjust according to taste.
  • Zucchini: 1 medium, diced. Yellow squash works just as well.
  • Tomato Paste: 3 tablespoons. For a fresher taste, substitute with crushed tomatoes.
  • Dried Oregano: 2 teaspoons. Fresh oregano can enhance flavor.
  • Poultry Seasoning: 1 teaspoon. This adds depth; feel free to use Italian seasoning instead.
  • Chili Flakes: A pinch (optional). For a bit of heat, don’t skip this!
  • Black Pepper: 1/4 teaspoon or to taste. Freshly cracked black pepper is best.
  • Fire Roasted Tomatoes: 1 14-ounce can. Regular diced tomatoes can be substituted.
  • Broth: 6 cups vegetable or chicken broth. Homemade broth enhances flavor.
  • Kale: 1 bunch lacinato kale, chopped. Spinach or Swiss chard are great alternatives.
  • Kidney Beans: 1 14-ounce can, drained and rinsed. Cannellini beans also work.
  • Fresh Parsley: 2 tablespoons, chopped, for garnish.
  • Gluten-Free Elbow Macaroni: 6 ounces. Try chickpea or brown rice pasta for a protein boost.
  • Parmesan Cheese: Fresh grated, for serving (or dairy-free parmesan).

Let’s Cook: Step-by-Step Instructions

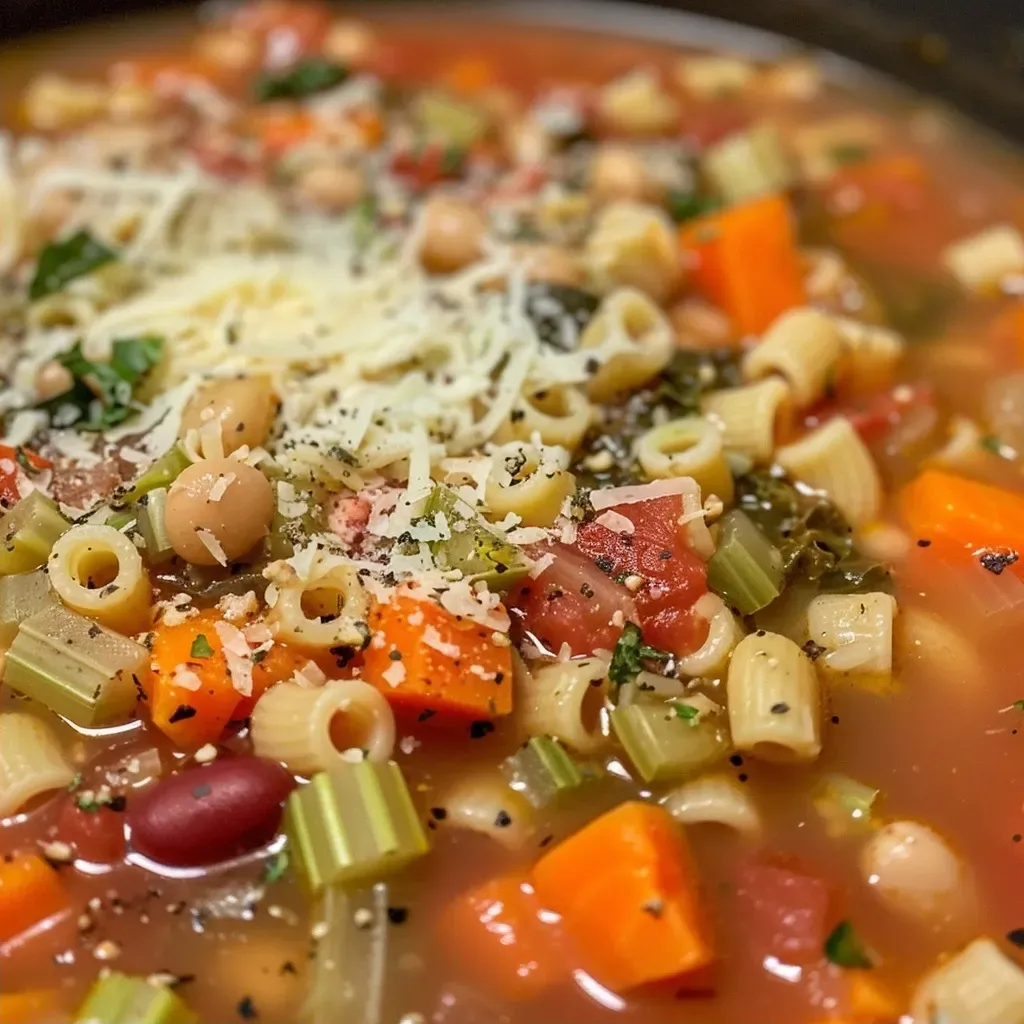
Close-up of a bowl filled with Classic Minestrone Soup featuring vibrant vegetables and gluten-free noodles.

Now that we have our ingredients ready, let’s dive into the cooking process!

  1. Heat 3 tablespoons of olive oil over medium heat in a large soup pot. Add onions, carrots, celery, leek, garlic, and 1 teaspoon of kosher salt. Sauté for 12-14 minutes, stirring occasionally until onions are translucent and veggies start caramelizing.
  2. Add zucchini, tomato paste, dried oregano, poultry seasoning, chili flakes (if using), and black pepper. Sauté for another 3-4 minutes until the tomato paste darkens slightly and the zucchini begins to soften.
  3. Pour in the fire-roasted tomatoes and broth, bringing the mixture to a boil. Once boiling, reduce to a simmer and cook uncovered on low for 15-20 minutes, until zucchini is tender and the soup is slightly reduced.
  4. While the soup simmers, cook the gluten-free pasta according to package instructions. Drain and set aside.
  5. Add kidney beans, kale, and parsley to the soup. Return to a simmer and cook for another 4-5 minutes until the greens are wilted but still vibrant green. Season to taste with additional salt and pepper.
  6. If serving all the soup at once, add the pasta directly to the soup. Otherwise, place the desired amount of pasta in a bowl and ladle the hot soup over the top. This method helps prevent the pasta from becoming mushy in leftovers.
  7. Top with freshly grated parmesan or dairy-free parmesan and fresh herbs if desired. Now, dig in and enjoy a taste of Italy!

Pro Tips for the Perfect Minestrone

To elevate your minestrone experience, consider these expert insights:

  • Layer Your Flavors: Sautéing the vegetables slowly builds a rich flavor base. Don’t rush this step!
  • Use Seasonal Vegetables: Embrace what’s in season for the freshest taste—think green beans in summer or root vegetables in winter.
  • Don’t Skip the Beans: They add protein and texture, making the soup hearty and filling.
  • Adjust Consistency: If you prefer a thicker soup, blend a portion of it and return it to the pot.
  • Experiment with Herbs: Fresh herbs like basil or thyme can add a beautiful aroma and taste.
  • Make it Ahead: Minestrone soup tastes even better the next day as the flavors meld together. Store in the fridge for up to 4 days.
  • Freezing Friendly: Portion out the soup without pasta and freeze for up to 3 months. Add freshly cooked pasta when reheating.
  • Garnish Wisely: A sprinkle of fresh herbs or a drizzle of olive oil before serving can elevate the dish.

Common Mistakes and Troubleshooting

Even the best chefs can make mistakes. Here are some common pitfalls and how to avoid them:

  • Overcooking the Vegetables: Keep an eye on your sautéing; you want them tender but not mushy.
  • Too Much Salt: Always taste as you go. You can always add more, but it’s hard to fix if you overdo it.
  • Skipping the Soffritto: This aromatic base is essential for depth; don’t skip this step!
  • Not Using Enough Broth: For a soup that’s too thick, add more broth gradually until you reach your desired consistency.
  • Forgetting the Beans: Beans are a critical component of minestrone; ensure to include them for heartiness!

Delicious Variations to Try

Feeling adventurous? Here are some variations to keep your minestrone exciting:

  • Vegan Twist: Omit the chicken broth and cheese for a fully plant-based version.
  • Protein-Packed: Add cooked ground turkey or sausage for a meaty option.
  • Spicy Kick: Incorporate diced jalapeños or a splash of hot sauce for heat.
  • Herbed Delight: Use fresh herbs like dill, thyme, or rosemary to enhance the flavor profile.

Storage and Make-Ahead Instructions

Planning for leftovers? Here’s how to store and reheat your minestrone:

  • Refrigerator: Store cooled soup in an airtight container for up to 4 days.
  • Freezer: Portion out the soup into freezer-safe containers without pasta, for up to 3 months.
  • Reheating: Thaw overnight in the fridge, then reheat on the stove over medium heat. Add fresh pasta just before serving.

Frequently Asked Questions

To help you navigate the world of minestrone, here are some common questions answered:

  • Can I use frozen vegetables? Absolutely! Frozen veggies can save prep time and work well in soups.
  • Is minestrone soup gluten-free? Yes, as long as you use gluten-free pasta and broth.
  • What beans can I use? Cannellini, chickpeas, or black beans are excellent in minestrone.
  • How do I make it spicier? Add crushed red pepper or hot sauce to taste.
  • Can I add meat to this recipe? Yes, cooked sausage or shredded chicken can be a great addition.
  • What should I serve with minestrone? Fresh crusty bread or a simple salad pairs beautifully with this soup.
  • How do I store leftovers? Keep them in the fridge in an airtight container for up to 4 days or freeze for later.
  • Is minestrone soup healthy? Yes, it’s packed with vegetables and can be low in calories, depending on the ingredients.

Nutritional Tips and Dietary Adaptations

This minestrone is naturally low in calories and high in fiber. Here are some tips for dietary adaptations:

  • Low-Calorie Option: Use less oil and add more broth for a lighter version.
  • Protein Boost: Add more beans or some lean protein like chicken or turkey.
  • Heart-Healthy: Use low-sodium broth and limit added salt.
  • Vegetarian/Vegan: Ensure to substitute with plant-based broth and skip the cheese.

Essential Equipment for Making Minestrone

To make your cooking process seamless, here’s what you’ll need:

  • Large Soup Pot: A heavy-bottomed pot for even cooking.
  • Wooden Spoon: For stirring and sautéing without scratching your pot.
  • Measuring Cups and Spoons: For precise ingredient measurements.
  • Cutting Board and Knife: Essential for chopping veggies.
  • Can Opener: For those canned beans and tomatoes.

Serving Suggestions

Now that your minestrone is ready, here are some delightful ways to serve it:

  • With Fresh Herbs: Garnish with parsley or basil for a fresh touch.
  • Crusty Bread: Serve with slices of crusty bread for dipping.
  • Parmesan Shavings: Top with shavings of parmesan cheese for added richness.
  • Side Salad: A simple green salad complements the flavors beautifully.

Conclusion: Your Culinary Adventure Awaits!

As you savor your bowl of Classic Minestrone Soup with Gluten-Free Noodles, remember that cooking is about exploration, tradition, and connection. Each ingredient tells a story, and each spoonful brings you closer to the heart of Italy. So gather your loved ones, share this recipe, and let the warmth of this soup fill your home. Here’s to culinary adventures that inspire and connect us through the universal language of food!

Classic Minestrone Soup with Gluten-Free Noodles

Prep Time 15 minutes
Cook Time 35 minutes
Total Time 50 minutes
Servings 6 servings
Calories 350
A hearty and wholesome minestrone soup featuring gluten-free noodles, packed with vegetables and flavorful seasonings.

Ingredients

olive oil

  • 3 tablespoons olive oil

vegetables

  • 1 medium yellow onion, finely diced
  • 3 large carrots, peeled and diced
  • 3 stalks celery, diced
  • 1 leek leek, sliced
  • 5 cloves garlic, chopped
  • 1 teaspoon kosher salt
  • 1 medium zucchini, diced
  • 3 tablespoons tomato paste
  • 2 teaspoons dried oregano
  • 1 teaspoon poultry seasoning or all-purpose seasoning
  • Pinch optional chili flakes
  • 1/4 teaspoon black pepper (or to taste)
  • 1 14 ounce can diced fire roasted tomatoes
  • 6 cups vegetable or chicken broth

greens

  • 1 bunch lacinato kale, washed and chopped
  • 1 14 ounce can kidney beans, drained and rinsed
  • 2 tablespoons chopped fresh parsley

pasta

  • 6 ounces gluten free elbow macaroni

fresh herbs and parmesan cheese or dairy free parmesan to serve

Instructions 

  • Heat olive oil in a large pot, sauté onions, carrots, celery, leek, garlic, and salt for 12-14 minutes until translucent and caramelized.
  • Add zucchini, tomato paste, oregano, poultry seasoning, chili flakes, and black pepper; cook 3-4 minutes until zucchini softens and paste darkens.
  • Pour in tomatoes and broth, bring to a boil, then simmer 15-20 minutes until zucchini is tender.
  • Cook pasta separately according to package, drain, and set aside.
  • Add kidney beans, kale, and parsley to the soup, simmer 4-5 minutes until greens wilt. Season with salt and pepper.
  • Serve soup with pasta added or in bowls with pasta, topped with herbs and parmesan if desired.

Notes

To prevent pasta from over-softening in leftovers, add it to individual bowls when serving.
Calories: 350kcal
Cost: $15
Course: Soup
Cuisine: Italian
Keyword: Vegetables

Embark on a Culinary Journey with Slow Cooker Pot Roast

Welcome to a delightful culinary adventure! If you’ve ever craved a dish that embodies warmth, comfort, and a touch of nostalgia, look no further than the classic slow cooker pot roast. This dish is not just a meal; it’s a heartfelt story simmering in a pot, waiting to be shared at your dinner table. With tender meat, vibrant vegetables, and an aromatic broth, the flavors meld together beautifully, creating a feast that transports you to cozy family gatherings and joyful celebrations. In this definitive guide, we’ll explore everything you need to know to master the art of pot roasting, ensuring that your meal is not just delicious but also memorable.

Why You’ll Love This Recipe

  • Effortless cooking: Simply toss your ingredients into the slow cooker and let it do the magic while you focus on other tasks.
  • Flavor-packed: The long cooking process allows the meat to soak up the rich flavors of the broth and seasonings.
  • Meal prep friendly: Prepare this dish in advance and enjoy the convenience of a ready-made meal after a long day.
  • Versatile: Customize the recipe with your favorite vegetables and spices to suit your taste.
  • Family-approved: This classic comfort food is a hit with both kids and adults, making it perfect for family dinners.

Ingredient Breakdown

To create a mouthwatering slow cooker pot roast, you’ll need the following ingredients:

  • 3-4 pound chuck roast: This cut is known for its rich flavor and tenderness when cooked low and slow.
  • 2 pounds potatoes (russet or Yukon gold, cut into large chunks): These hearty vegetables absorb flavors beautifully and provide a satisfying base.
  • 1 pound carrots (cut into 2-inch pieces): Sweet and colorful, carrots add a delightful crunch and natural sweetness.
  • 2 medium onions (quartered): Onions infuse the dish with a depth of flavor as they caramelize during cooking.
  • 4 cloves garlic (minced): Garlic adds a punch of flavor that elevates the overall taste of the pot roast.
  • 2 cups beef broth: This forms the base of your cooking liquid, providing moisture and richness.
  • 2 tablespoons tomato paste: The tomato paste enhances the color and flavor profile of the gravy.
  • 1 tablespoon Worcestershire sauce: This tangy sauce deepens the savory notes in the dish.
  • 2 teaspoons dried thyme: Thyme adds a fragrant herbal note that complements the meat beautifully.
  • 2 teaspoons dried rosemary: Rosemary’s pine-like flavor pairs well with the richness of the roast.
  • 2 bay leaves: These leaves add a subtle depth of flavor; just remember to remove them before serving.
  • Salt and pepper to taste: Essential for enhancing the overall flavor of your dish.
  • 2 tablespoons olive oil (optional, for searing the meat): Searing locks in juices and creates a beautiful crust.
  • 2 tablespoons cornstarch (optional, for thickening): If you prefer a thicker gravy, cornstarch will do the trick.

Steps to Create Your Pot Roast

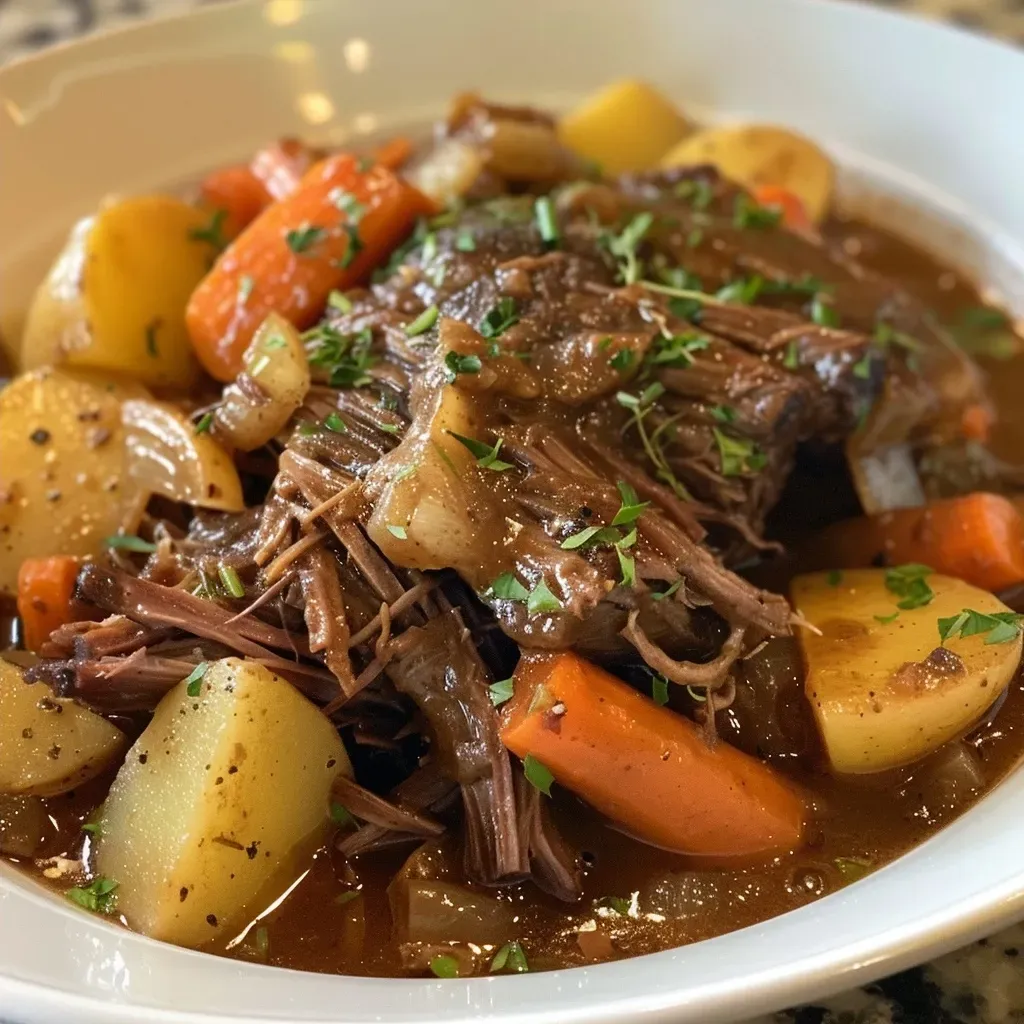
Juicy slow cooker pot roast surrounded by colorful vegetables on a rustic plate.

Now that you have your ingredients ready, let’s dive into the step-by-step process:


Meal Prep Container Set

★ Recommended Kitchen Tool

Meal Prep Container Set

Make this recipe even easier with a quality Meal Prep Container Set — a must-have kitchen staple!


🛒 View on Amazon →

As an Amazon Associate, we earn from qualifying purchases.
  1. Season the chuck roast generously with salt and pepper on all sides.
  2. (Optional) Heat olive oil in a large skillet over medium-high heat. Sear the roast on all sides until browned, about 3-4 minutes per side.
  3. Place chopped onions, minced garlic, and bay leaves at the bottom of the slow cooker.
  4. Add the seared (or raw) roast on top of the onions.
  5. Arrange the potato and carrot chunks around the roast.
  6. In a bowl, whisk together beef broth, tomato paste, Worcestershire sauce, thyme, and rosemary. Pour this mixture over the meat and vegetables.
  7. Cover and cook on low for 8-10 hours or on high for 4-6 hours, until the meat is tender and easily falls apart with a fork.
  8. Once done, remove the bay leaves and discard.
  9. (Optional) To thicken the gravy, mix cornstarch with 1/4 cup cold water. Stir this slurry into the liquid in the slow cooker and cook on high for an additional 15-20 minutes until the gravy thickens.
  10. Let the roast rest for 10-15 minutes before serving.
  11. Serve hot, with the vegetables and gravy alongside your favorite sides.

Pro Tips for Perfection

  • Choosing the right cut: A well-marbled chuck roast yields the most tender and flavorful results.
  • Searing the meat: Even if you’re short on time, searing enhances flavor, so whenever possible, give it a quick sear.
  • Layering matters: Place onions and garlic at the bottom to prevent burning and create a flavor base.
  • Don’t rush it: Allow the roast to cook low and slow for the best tenderness and flavor infusion.
  • Resting is key: Letting the meat rest before slicing helps retain juices.
  • Adjust seasoning: Always taste the sauce before serving; adjust salt and pepper as needed.
  • Experiment with herbs: Feel free to mix and match herbs based on your preferences or what you have on hand.
  • Make it a one-pot meal: Add additional vegetables like parsnips or turnips for a complete meal in one pot.
  • Save the leftovers: Use leftover pot roast in sandwiches, tacos, or salads for a second delicious meal.
  • Thicken wisely: If using cornstarch, remember to whisk it into cold water first to prevent lumps.

Common Mistakes and Troubleshooting

  • Too much liquid: If your pot roast is too watery, reduce the amount of broth next time.
  • Undercooked meat: Ensure you allow enough cooking time, especially if using larger cuts.
  • Overcooked vegetables: Add heartier vegetables like potatoes and carrots first, and delicate ones towards the end of cooking.
  • Flavorless gravy: Always taste and adjust the seasonings in your broth before serving.

Flavor Variations to Explore

  • Italian-style: Add crushed tomatoes, Italian herbs, and a splash of balsamic vinegar for a Mediterranean twist.
  • Mexican-inspired: Spice things up with chili powder, cumin, and diced tomatoes with green chilies.
  • Wine-braised: Replace half the broth with a robust red wine for an extra depth of flavor.
  • Sweet and savory: Include a few tablespoons of brown sugar or maple syrup for a hint of sweetness.

Storage and Make-Ahead Instructions

If you want to prepare your pot roast in advance, here’s how to do it:

  • Make-ahead: You can prep the ingredients the night before and store them in the fridge. Just add them to the slow cooker in the morning.
  • Storage: Leftover pot roast can be stored in an airtight container in the refrigerator for up to 3 days.
  • Freezing: You can freeze cooked pot roast for up to 3 months. Thaw in the refrigerator before reheating.
  • Reheating: Gently reheat in the microwave or on the stovetop with a bit of broth to prevent drying out.

FAQ About Slow Cooker Pot Roast

  • Can I use a different cut of meat? Yes! While chuck roast is ideal, you can also use brisket or round roast.
  • What if my pot roast is tough? This usually means it needs more cooking time; ensure it’s fork-tender before serving.
  • Can I add other vegetables? Absolutely! Feel free to add parsnips, sweet potatoes, or even peas for variety.
  • Is it safe to leave the slow cooker on overnight? Yes! Just ensure your slow cooker is set to low for a long cook and is in good working order.
  • How do I make gravy from the drippings? After removing the meat, whisk in cornstarch mixed with water into the drippings and heat until thickened.
  • Can I cook this recipe on high? Yes, but adjust the cooking time to 4-6 hours on high instead of 8-10 hours on low.
  • What sides pair well with pot roast? Classic sides include mashed potatoes, green beans, or a fresh garden salad.
  • Can I make this recipe in advance? Yes! You can prepare and assemble everything a day before, refrigerate, and then cook it the next day.

Nutritional Tips and Dietary Adaptations

The beauty of pot roast is its adaptability. Here are some tips to cater to various dietary needs:

  • Low-carb option: Substitute potatoes with cauliflower or celery root for a lower-carb dish.
  • Gluten-free: Ensure all broth and sauces are labeled gluten-free, including Worcestershire sauce.
  • Lower sodium: Opt for low-sodium broth and adjust seasonings to manage salt intake.
  • Vegetarian version: Substitute the meat with hearty mushrooms and vegetable broth for a meat-free delight.

Equipment Recommendations

To achieve the best results, consider using the following kitchen equipment:

  • Slow cooker: A programmable slow cooker allows you to set cooking times and temperatures easily.
  • Large skillet: For searing the meat before slow cooking, a large non-stick or cast-iron skillet works best.
  • Chef’s knife: A sharp knife makes prepping your ingredients quick and safe.
  • Cutting board: A stable surface is essential for chopping vegetables efficiently.
  • Whisk: Use a whisk for mixing sauces and gravies smoothly.

Serving Suggestions

When it comes to serving your slow cooker pot roast, consider these delightful options:

  • Classic pairing: Serve with creamy mashed potatoes and steamed green beans for a comforting meal.
  • Sandwich style: Shred leftover pot roast and serve on crusty rolls with horseradish sauce.
  • Salad topping: Use slices of pot roast on top of a fresh garden salad for a hearty lunch.
  • With gravy: Drizzle the rich gravy over the roast and vegetables for an added layer of flavor.

As you gather around the table to enjoy your slow cooker pot roast, remember that this dish is more than just food; it’s a celebration of flavors, memories, and togetherness. Each bite transports you to a place of comfort and joy, reminding you that food is indeed a passport to culture and connection. So, grab your apron, turn on your slow cooker, and embark on this delicious journey with your loved ones!

Slow Cooker Pot Roast with Vegetables

Prep Time 20 minutes
Cook Time 8 hours
Total Time 8 hours 20 minutes
Servings 6 servings
Calories 650
A hearty and flavorful slow cooker pot roast with tender meat and savory vegetables, perfect for a comforting meal.

Ingredients

Meat

  • 3-4 pounds chuck roast

Vegetables

  • 2 pounds potatoes (russet or Yukon gold, cut into large chunks)
  • 1 pound carrots (cut into 2-inch pieces)
  • 2 medium onions (quartered)
  • 4 cloves garlic (minced)

Broth and Sauces

  • 2 cups beef broth
  • 2 tablespoons tomato paste
  • 1 tablespoon Worcestershire sauce
  • 2 teaspoons dried thyme
  • 2 teaspoons dried rosemary
  • 2 bay leaves bay leaves

Seasonings

  • to taste Salt and pepper

Optional ingredients

  • 2 tablespoons olive oil (if searing the meat)
  • 2 tablespoons cornstarch (optional, for thickening)

Instructions 

  • Season the chuck roast with salt and pepper.
  • (Optional) Sear the roast in olive oil until browned, about 3-4 minutes per side.
  • Place onions, garlic, and bay leaves in the slow cooker. Add the roast on top.
  • Arrange potatoes and carrots around the meat. Mix broth, tomato paste, Worcestershire, thyme, and rosemary; pour over.
  • Cover and cook on low for 8-10 hours or high for 4-6 hours until tender. Remove bay leaves.
  • Optional: Thicken gravy with cornstarch slurry and cook for 15-20 minutes. Rest the roast 10-15 minutes before serving.

Notes

For extra flavor, sear the meat before slow cooking. Adjust seasoning to taste.
Calories: 650kcal
Cost: $20
Course: Main Course
Cuisine: American
Keyword: Pot Roast

Welcome to the World of Pumpkin Cheesecake Cookies

As autumn paints the world in warm hues, it’s time to embrace the rich, comforting flavors that define the season. One delightful way to celebrate is by baking Pumpkin Cheesecake Cookies. These cookies are not just a treat; they are a reminder of cozy evenings, family gatherings, and the sweet aroma of cinnamon and nutmeg wafting through the air. In this comprehensive guide, we will explore every aspect of making these cookies, from the ingredients to the baking tips that will ensure your cookies are the star of any gathering.

Why You’ll Love This Recipe

This recipe for Pumpkin Cheesecake Cookies offers a symphony of flavors and textures that will make you fall in love with autumn all over again. Here are just a few reasons to dive in:

  • Unique Flavor Combination: The fusion of creamy cheesecake and spiced pumpkin creates a taste sensation that’s both rich and comforting, making these cookies a perfect fall treat.
  • Perfect Texture: These cookies are crispy on the edges while remaining soft and chewy in the center, providing a delightful mouthfeel with every bite.
  • Easy to Make: With straightforward steps and readily available ingredients, this recipe is perfect for bakers of all skill levels.
  • Versatile Treat: Whether you enjoy them with a cup of coffee, as a dessert after dinner, or as a sweet snack, these cookies fit every occasion.
  • Great for Sharing: Bake a batch for family, friends, or coworkers, and watch their faces light up with joy as they take a bite!

Ingredients for Pumpkin Cheesecake Cookies

Ready to gather your ingredients? Here’s what you’ll need to create these delectable cookies, along with some handy substitutions if you’re missing anything.


Silicone Baking Cups Set

★ Recommended Kitchen Tool

Silicone Baking Cups Set

Make this recipe even easier with a quality Silicone Baking Cups Set — a must-have kitchen staple!


🛒 See Deals on Amazon →

As an Amazon Associate, we earn from qualifying purchases.
  • 6 oz (170 g) cream cheese: Cold, for the cheesecake filling. If you’re looking for a lighter option, consider using a low-fat cream cheese.
  • 3 tbsp (38 g) granulated white sugar: This adds sweetness to the cheesecake filling.
  • 1/2 tsp vanilla: Pure vanilla extract enhances the flavor profile; artificial vanilla can be used in a pinch but doesn’t provide the same depth.
  • 1/4 cup (50 g) granulated white sugar: For the cookie dough; you can substitute this with coconut sugar for a healthier alternative.
  • 1/2 tsp pumpkin pie spice: A blend of spices that gives your cookies that quintessential fall flavor. If you don’t have it, a mix of cinnamon, nutmeg, and ginger will work.
  • 1/2 cup (122 g) canned pumpkin puree: Make sure to use 100% pumpkin puree, not pumpkin pie filling, for the best results.
  • 1 3/4 cups (219 g) all-purpose flour: Spooned and leveled. For a gluten-free version, almond flour or a gluten-free blend can be used.
  • 1 tbsp pumpkin pie spice: More for the cookie dough to amplify the pumpkin flavor.
  • 1/2 tsp baking powder: Helps the cookies rise and become fluffy.
  • 1/2 tsp baking soda: Works with the acidic elements in the dough to provide lift.
  • 1/2 tsp salt: Balances the sweetness.
  • 3/4 cup (168 g) unsalted butter: Softened to room temperature for easy creaming. You can use vegan butter as a dairy-free option.
  • 1 cup (220 g) light brown sugar: Adds moisture and a hint of caramel flavor to the cookies.
  • 2 egg yolks: At room temperature to help bind the dough.
  • 2 tsp vanilla: Adds depth to the cookie flavor.

Step-by-Step Instructions

A close-up side view of freshly baked Pumpkin Cheesecake Cookies on a wooden table.

Follow these easy steps to create your Pumpkin Cheesecake Cookies:

Step 1: Prepare the Cheesecake Filling

In a mixing bowl, beat the cold cream cheese with 3 tablespoons of granulated sugar and 1/2 teaspoon of vanilla until smooth and creamy. Divide this mixture into small balls and freeze them for about 30 minutes. This will help maintain their shape when baked.

Step 2: Make the Pumpkin Cookie Dough

In a large bowl, cream together the softened unsalted butter and 1/4 cup of granulated sugar along with the light brown sugar until light and fluffy. Add the egg yolks and 2 teaspoons of vanilla, mixing until well combined. Then, add the pumpkin puree and mix until smooth.

Step 3: Combine Dry Ingredients

In a separate bowl, whisk together the all-purpose flour, baking powder, baking soda, salt, and the pumpkin pie spice. Gradually add the dry ingredients to the wet mixture, stirring until just combined. Be careful not to overmix!

Step 4: Fill and Shape the Cookies

Preheat your oven to 350°F (175°C). Take the frozen cheesecake filling balls and wrap a portion of the cookie dough around each ball. Roll them into a smooth ball and place them on a baking sheet lined with parchment paper, leaving enough space between each cookie.

Step 5: Bake the Cookies

Bake the cookies in your preheated oven for 12-15 minutes or until the edges are lightly golden. Allow them to cool on the baking sheet for a few minutes before transferring them to a wire rack to cool completely.

Pro Tips for Perfect Pumpkin Cheesecake Cookies

Want to take your cookie-making skills to the next level? Here are some expert insights:

  • Check Your Ingredients: Ensure that your cream cheese is softened to room temperature for easy mixing. Cold cream cheese will lead to lumps in your cheesecake filling.
  • Don’t Skip the Chilling: Freezing the cheesecake filling is crucial for maintaining its shape during baking. If it’s too warm, it will melt into the cookies.
  • Use Fresh Spices: Freshly ground spices can elevate the flavor of your cookies immensely. Consider using whole spices and grinding them yourself for the best taste.
  • Mix Wisely: Be careful not to overmix your cookie dough once you add the flour; this can lead to tough cookies.
  • Cool Properly: Allow cookies to cool on the baking sheet for a few minutes before moving them. This helps them to set and prevents breakage.
  • Experiment with Toppings: A sprinkle of cinnamon sugar on top before baking can add an extra layer of flavor.
  • Make Ahead: You can prepare the dough and filling in advance, storing them separately in the fridge for up to 2 days.
  • Storage Tips: Store baked cookies in an airtight container at room temperature for up to a week, or freeze for longer storage.

Common Mistakes and Troubleshooting

Even the best bakers can hit a snag. Here’s how to troubleshoot common issues:

  • Cookies Spread Too Much: This can happen if the butter is too warm. Ensure your butter is softened, not melted, when you start.
  • Cheesecake Filling is Runny: Make sure to freeze the filling balls adequately before wrapping them in dough, and that the cream cheese is well-blended with no lumps.
  • Cookies Are Too Dense: Overmixing the dough or adding too much flour can lead to dense cookies. Measure carefully and mix gently.
  • Flavor is Lacking: Always taste your batter and adjust spices if needed. Fresh spices can significantly enhance flavor.

Variations on the Classic Recipe

Feeling adventurous? Here are some unique twists on the classic Pumpkin Cheesecake Cookies:

  • Chocolate Chip Pumpkin Cheesecake Cookies: Fold in semi-sweet chocolate chips into the cookie dough for a rich contrast.
  • Pecan Topping: Add chopped pecans to the cookie dough or sprinkle them on top before baking for a delightful crunch.
  • Cranberry Swirl: Mix in dried cranberries for a tart flavor that complements the sweetness of the cookies.
  • Vegan Version: Substitute cream cheese with a vegan alternative and use flax eggs in place of the yolks for a plant-based treat.

Storage and Make-Ahead Instructions

These cookies can be enjoyed fresh from the oven or saved for later. Here’s how to store and prepare them in advance:

  • Storing Baked Cookies: Keep cooled cookies in an airtight container at room temperature for up to a week or freeze for up to 3 months.
  • Make-Ahead Dough: Prepare the cookie dough and cheesecake filling in advance, store them separately in the fridge, and bake fresh cookies when you’re ready.
  • Freezing Cookie Dough: Roll the cookie dough into balls and freeze them on a baking sheet. Once frozen, transfer to a zip-top bag and store for up to 3 months. Bake directly from the freezer, adding a few extra minutes to the bake time.

Frequently Asked Questions

Got questions? Here are answers to some common queries:

  • Can I use pumpkin pie filling instead of pumpkin puree? No, pumpkin pie filling contains added sugars and spices that will alter the flavor and texture of your cookies.
  • How do I know when my cookies are done? The edges should be lightly golden, and the centers should look set but slightly soft.
  • Can I add nuts to the cookie dough? Absolutely! Chopped walnuts or pecans can add a delicious crunch.
  • What’s the best way to soften cream cheese? Leave it at room temperature for about 30 minutes, or microwave it for 10-15 seconds in short bursts.
  • How should I store leftover cookies? Keep them in an airtight container at room temperature or refrigerate them if you prefer them chilled.
  • Can I make these cookies gluten-free? Yes! Substitute all-purpose flour with a gluten-free flour blend.
  • How long do these cookies last? They can last up to a week at room temperature and up to three months in the freezer.
  • Can I make these ahead of time? Yes! Prepare the dough and filling in advance and bake them fresh when you’re ready.

Nutrition Tips and Dietary Adaptations

Here are some tips for making these cookies fit various dietary needs:

  • Lower Sugar Option: Reduce the sugar content by using a sugar substitute or by decreasing the overall sugar amount by up to 1/3.
  • Dairy-Free Version: Use dairy-free cream cheese and butter alternatives to cater to lactose intolerance.
  • Whole Wheat Flour: Swap out all-purpose flour for whole wheat flour for added nutrition and fiber.

Recommended Equipment

To make your baking experience smoother, consider these essential tools:

  • Mixing Bowls: A set of various sizes for mixing ingredients.
  • Electric Mixer: Helps in achieving a smooth, creamy cheesecake filling.
  • Parchment Paper: For easy cleanup and preventing cookies from sticking.
  • Baking Sheets: Preferably insulated for even baking.
  • Wire Rack: For cooling cookies properly.

Serving Suggestions

These cookies can be enjoyed in so many ways:

  • With Coffee or Tea: Enjoy a cookie with your morning coffee or afternoon tea for a delightful pairing.
  • As a Dessert Platter: Arrange them on a platter with other fall-themed treats like apple cider donuts or caramel apples.
  • With Ice Cream: Serve warm cookies with a scoop of vanilla or pumpkin ice cream for an indulgent dessert.

Conclusion

As we wrap up this culinary adventure, I hope you feel inspired to bake your own batch of Pumpkin Cheesecake Cookies. With their rich flavors and delightful textures, they are sure to become a staple in your autumn baking repertoire. Remember, cooking is about sharing joy and creating connections, so gather your loved ones, share these cookies, and savor the moments together. Happy baking!

Pumpkin Cheesecake Cookies

Prep Time 15 minutes
Cook Time 12 minutes
Total Time 27 minutes
Servings 24 cookies
Calories 150
Delight in these soft, spiced cookies combining pumpkin and cream cheese for a perfect fall treat.

Ingredients

Dough

  • 6 oz cream cheese, cold
  • 3 tbsp granulated white sugar
  • 1/2 tsp vanilla
  • 1/4 cup granulated white sugar
  • 1/2 tsp pumpkin pie spice
  • 1/2 cup canned pumpkin puree (Libby’s)
  • 1 3/4 cups all-purpose flour, spooned and leveled
  • 1 tbsp pumpkin pie spice
  • 1/2 tsp baking powder
  • 1/2 tsp baking soda
  • 1/2 tsp salt
  • 3/4 cup unsalted butter, softened
  • 1 cup light brown sugar
  • 2 egg yolks at room temperature
  • 2 tsp vanilla

Instructions 

  • Preheat oven to 350°F (175°C). Cream together cream cheese, butter, and sugars.
  • Add egg yolks and vanilla; mix well. Stir in pumpkin puree and dry ingredients.
  • Drop spoonfuls onto baking sheet and bake for 12 minutes.

Notes

Chill dough before baking for best results.
Calories: 150kcal
Cost: $12
Course: Dessert
Cuisine: American
Keyword: pumpkin

Dive into the essence of fall with this delightful Apple Cider Slushie recipe. Experience the crisp flavors of apple cider blended with warming spices, perfect for any autumn gathering or a refreshing treat on a sunny day. Celebrate the season with each sip!

Why You’ll Love This Recipe

This Apple Cider Slushie is not just a drink; it’s a celebration of autumn in a glass! Here’s why you’ll fall in love with it:

  • Quick and Easy: With just two steps, you can whip up this refreshing slushie in minutes.
  • Perfect for All Ages: This drink is a hit with kids and adults alike, making it a great addition to any gathering.
  • Customizable Flavors: Adjust the spices and ingredients to suit your taste buds, creating a unique slushie every time.
  • Healthy Refreshment: Made with natural apple cider, this drink is a healthier choice compared to sugary sodas.
  • Seasonal Delight: This slushie captures the spirit of autumn, enhancing your seasonal celebrations.

Ingredients Breakdown

Here’s what you’ll need to make this delicious Apple Cider Slushie:


Professional Chef Knife Set

★ Recommended Kitchen Tool

Professional Chef Knife Set

Make this recipe even easier with a quality Professional Chef Knife Set — a must-have kitchen staple!


🛒 See Deals on Amazon →

As an Amazon Associate, we earn from qualifying purchases.
  • 3 cups ice: Essential for achieving that slushy texture; crushed ice works too!
  • 2 cups apple cider: Look for fresh, unfiltered cider for the best flavor.
  • 1/2 teaspoon ground cinnamon: Adds warmth and spice, reminiscent of cozy autumn evenings.
  • 1/4 teaspoon ground cloves: Provides a depth of flavor that complements the apple cider.
  • 1/8 teaspoon ground nutmeg: Just a pinch will elevate the taste profile.
  • Cinnamon stick for garnish: Optional, but it looks beautiful and adds a little extra flavor.

**Substitutions:** If you’re out of apple cider, you can substitute with pear cider or even a sparkling apple juice. For a sweeter slushie, add a splash of maple syrup or honey.

How to Make an Apple Cider Slushie

Ready to dive into the slushie-making process? It couldn’t be simpler:

  • Throw everything into the blender and blend until smooth.
  • Serve and enjoy your refreshing drink!

Pro Tips for Perfect Slushies

Close-up of a refreshing apple cider slushie with ice and cinnamon.

To elevate your slushie game, consider these expert insights:

  • Use Frozen Cider: Freeze some apple cider in ice cube trays for an extra burst of flavor.
  • Texture Matters: Blend until smooth but don’t overdo it; you want some icy texture!
  • Chill Your Glasses: Pre-chill your serving glasses for an extra frosty experience.
  • Experiment with Spices: Try adding a pinch of ginger or a splash of vanilla for a unique twist.
  • Make it Adult-Friendly: Add a splash of rum or whiskey for a spiced cocktail version.
  • Presentation Counts: Garnish with fresh apple slices or a whipped cream topping for a festive look.
  • Batch It Up: Double the recipe for parties—this drink is a crowd-pleaser!
  • Mind the Ice: Adjust the amount of ice based on your desired slushiness level.
  • Storage Tips: If you have leftovers, store them in an airtight container in the freezer, but note they may need re-blending before serving.
  • Fresh Ingredients: Always use fresh spices for the brightest flavor.

Avoiding Common Mistakes

Even the simplest recipes can encounter hiccups. Here’s how to troubleshoot:

  • Too Watery? If your slushie is too watery, add more ice and blend again.
  • Not Sweet Enough? Sweeten it up with a splash of honey or agave syrup.
  • Too Thick? Add a small amount of extra apple cider to thin it out.
  • Not Cold Enough? Ensure your ingredients are chilled, and use ice cubes from frozen cider for optimal coldness.

Creative Variations

Mix it up with these fun variations:

  • Spiced Pumpkin Cider Slushie: Add a couple of tablespoons of pumpkin puree and pumpkin spice.
  • Berry Cider Slushie: Blend in frozen mixed berries for a fruity twist.
  • Caramel Apple Cider Slushie: Drizzle caramel sauce in the blender for a sweet treat.
  • Sparkling Apple Slushie: Replace apple cider with sparkling apple juice for a fizzy option.

Storage and Make-Ahead Instructions

You can prepare your Apple Cider Slushie ahead of time:

  • Blend the ingredients and freeze them in an airtight container.
  • When ready to serve, let it sit at room temperature for a few minutes before re-blending.

Comprehensive FAQ

Got questions? We’ve got answers:

  • Can I use store-bought cider? Yes, but fresh cider gives the best flavor!
  • How long can I store the slushie? Up to 3 days in the freezer, but re-blend for best texture.
  • What’s the best way to serve this slushie? In chilled glasses, garnished with apple slices and cinnamon sticks.
  • Can I make this slushie vegan? Absolutely! It’s naturally vegan-friendly.
  • Is there a non-alcoholic option? Yes, this recipe is already non-alcoholic!
  • Can I make a larger batch? Yes, just multiply the ingredients as needed.
  • What type of blender works best? A high-speed blender will give you the smoothest texture.
  • What other spices can I add? Try adding star anise or allspice for a unique flavor.

Nutrition Tips and Dietary Adaptations

This slushie can fit into various dietary preferences:

  • Lower Sugar: Use unsweetened apple cider and skip added sweeteners.
  • Gluten-Free: This recipe is naturally gluten-free.
  • Low-Calorie: Substitute some ice with frozen fruit to cut down on calories.

Equipment Recommendations

To make your slushie experience seamless, consider these tools:

  • High-Speed Blender: For the best texture.
  • Ice Cube Trays: For freezing cider or fruit.
  • Measuring Cups: To ensure accurate ingredient amounts.

Serving Suggestions

Pair your Apple Cider Slushie with these tasty treats:

  • Apple Pie: A classic fall dessert that complements the drink.
  • Cheese Platter: A mix of sharp cheddar and brie pairs beautifully with the spices.
  • Spiced Nuts: A crunchy, salty snack that balances the sweetness of the slushie.

Now that you’re armed with all the tips, tricks, and variations, it’s time to embrace the flavors of autumn with your homemade Apple Cider Slushie. Cheers to refreshing sips and cozy gatherings!

Apple Cider Slushie

Prep Time 5 minutes
Total Time 5 minutes
Servings 4 cups
Calories 150
A refreshing and spicy frozen treat perfect for warm days or cozy evenings. Enjoy the crisp flavors of apple cider blended into a cool, cinnamon-spiced slushie.

Ingredients

Ice and Spices

  • 3 cups ice
  • 2 cups apple cider
  • 1/2 teaspoon ground cinnamon
  • 1/4 teaspoon ground cloves
  • 1/8 teaspoon ground nutmeg
  • 1 stick cinnamon stick (for garnish if you like)

Instructions 

  • Combine all ingredients in a blender and blend until smooth.
  • Pour into glasses, garnish with a cinnamon stick if desired, and serve immediately.

Notes

For a sweeter slushie, add a touch of honey or maple syrup.
Calories: 150kcal
Cost: $8
Course: Dessert
Cuisine: American
Keyword: Apple Cider