Author

Jack

Browsing

Discover the Joy of Banana Baked Oatmeal

Welcome to a delicious journey where breakfast meets comfort! If you’re on the hunt for a heartwarming, healthy breakfast option, look no further than Banana Baked Oatmeal. This delightful dish is not just a meal; it’s an experience that will make your mornings brighter and more flavorful. With rich flavors and wholesome ingredients, this recipe is designed to inspire you to start your day with love and adventure.

Why You’ll Love This Recipe

Banana Baked Oatmeal isn’t just another breakfast option; it’s a delightful blend of taste, nutrition, and convenience. Here are five reasons why this dish will become your new morning ritual:

  • Wholesome Ingredients: Packed with rolled oats, bananas, and almond milk, this recipe is a nutritious way to kickstart your day.
  • Quick and Easy: In just a few simple steps, you can have a delicious breakfast ready for the whole family.
  • Customizable: Feel free to tweak the ingredients to suit your taste preferences or dietary needs.
  • Perfect for Meal Prep: Make a batch ahead of time and enjoy it throughout the week as a healthy breakfast or snack.
  • Family-Friendly: Even picky eaters will love the sweet flavor of bananas and the creamy texture of peanut butter!

Essential Ingredients for Banana Baked Oatmeal

This recipe features a handful of simple yet nutritious ingredients. Let’s take a closer look at what you’ll need:


Belgian Waffle Maker

★ Recommended Kitchen Tool

Belgian Waffle Maker

Make this recipe even easier with a quality Belgian Waffle Maker — a must-have kitchen staple!


🛒 View on Amazon →

As an Amazon Associate, we earn from qualifying purchases.
  • 2 cups rolled oats: The foundation of your baked oatmeal, providing fiber and texture.
  • 1 teaspoon cinnamon: Adds warmth and a hint of sweetness.
  • 1 teaspoon baking powder: Helps the oatmeal rise and become fluffy.
  • ¼ teaspoon salt: Balances the sweetness and enhances flavor.
  • 2 overripe bananas: Naturally sweetens the dish and adds moisture.
  • 1 ½ cups almond milk: A dairy-free option that keeps the recipe light and creamy.
  • ¼ cup creamy peanut butter: Adds richness and a dose of protein.
  • 2 tablespoons maple syrup: An optional touch of sweetness to complement the bananas.
  • 1 tablespoon ground flaxseed: A nutritious addition that provides omega-3 fatty acids.
  • 1 teaspoon vanilla extract: Enhances overall flavor.

How to Make Banana Baked Oatmeal

Close-up of a baked oatmeal dish topped with banana slices.

Ready to dive in? Follow these simple steps to create your delicious Banana Baked Oatmeal:

  1. Preheat the oven to 375° F. In an 8×11 inch baking dish, combine the rolled oats, cinnamon, baking powder, and salt.
  2. In a large mixing bowl, mash the overripe bananas, then mix in the almond milk, peanut butter, maple syrup (if using), flaxseed, and vanilla extract. Let the mixture sit for 5 minutes to allow the flaxseed to set.
  3. Pour the wet ingredients over the oat mixture and stir until well combined.
  4. Bake uncovered in the preheated oven for 30-35 minutes, or until the top is golden and the mixture is set. Allow it to cool for 5 minutes.
  5. Serve warm, drizzled with extra peanut butter and topped with banana slices, if desired.

Pro Tips for Perfect Banana Baked Oatmeal

To ensure your Banana Baked Oatmeal turns out perfectly every time, keep these expert tips in mind:

  • Banana Quality: Use overripe bananas for the best sweetness and flavor.
  • Mix thoroughly: Ensure all ingredients are well combined for even baking.
  • Check doneness: Bake until set; the top should be golden and spring back when lightly pressed.
  • Variations: Don’t hesitate to add chocolate chips or nuts for extra texture and flavor.
  • Serving temperature: Enjoy it warm, but it can also be served cold or reheated.
  • Storage: Store leftovers in the fridge for up to 5 days.
  • Freezing: Freeze portions for quick breakfasts on busy mornings.
  • Serving size: This recipe can easily be doubled or halved depending on your needs.

Common Mistakes and Troubleshooting

Even the best chefs make mistakes! Here are some common pitfalls and how to avoid them:

  • Too dry: If your oatmeal turns out dry, try adding more almond milk or bananas next time.
  • Not sweet enough: Adjust sweetness by adding more maple syrup or using riper bananas.
  • Undercooked center: Ensure even mixing and check the baking time; ovens may vary.

Delicious Variations to Try

Get adventurous with these creative twists on the classic recipe:

  • Chocolate Lovers: Add dark chocolate chips for a decadent dessert-like breakfast.
  • Nutty Delight: Mix in chopped walnuts or almonds for added crunch and healthy fats.
  • Berry Blast: Incorporate fresh or frozen berries for a fruity twist.
  • Coconut Craze: Add shredded coconut for a tropical flavor.

Storage and Make-Ahead Instructions

This Banana Baked Oatmeal is perfect for meal prep. Here’s how to store and make it ahead of time:

  • Refrigerate: Store in an airtight container in the fridge for up to 5 days.
  • Freeze: Cut into squares and freeze individually for quick breakfasts.
  • Reheat: Microwave individual portions for 30-60 seconds or bake in the oven until warmed through.

Nutritional Tips and Dietary Adaptations

This recipe is naturally vegan and can be adapted to fit various dietary needs:

  • Gluten-free: Ensure your oats are certified gluten-free.
  • Low sugar: Omit the maple syrup or use a sugar substitute.
  • Protein-packed: Add a scoop of protein powder or Greek yogurt on top when serving.

Equipment Recommendations

To make your baking experience smooth and enjoyable, consider using the following equipment:

  • Mixing bowls: A set of various sizes will help you mix ingredients easily.
  • Measuring cups and spoons: Precision is key for the perfect outcome.
  • Baking dish: An 8×11 inch dish is ideal for this recipe.
  • Spatula: Perfect for mixing and serving your delicious oatmeal.

Serving Suggestions

Make your breakfast experience even more delightful by serving your Banana Baked Oatmeal with:

  • Fresh fruit: Sliced bananas, berries, or even apples.
  • Nut butter: Drizzle with extra peanut butter or almond butter for richness.
  • Yogurt: A dollop of Greek yogurt adds creaminess and protein.
  • Honey or maple syrup: For an extra touch of sweetness, drizzle on top before serving.

Frequently Asked Questions (FAQ)

Here are some common questions about Banana Baked Oatmeal:

  • Can I use quick oats instead of rolled oats? Yes, but the texture may be different—quick oats will yield a softer result.
  • Is it possible to make this recipe gluten-free? Absolutely! Just use certified gluten-free oats.
  • Can I substitute almond milk? Yes, you can use any milk of your choice, including soy, oat, or dairy milk.
  • How long does it take to bake? Typically, it takes 30-35 minutes at 375°F.
  • Can I add protein powder to this recipe? Yes! Incorporate a scoop of your favorite protein powder for an extra boost.
  • What is the best way to reheat leftovers? The microwave works best, or you can bake it in the oven at 350°F until warmed through.
  • Can I make this recipe vegan? Yes, this recipe is naturally vegan as it uses almond milk and no animal products.
  • How should I store leftovers? Keep it in an airtight container in the fridge for up to 5 days or freeze for longer storage.

Embrace the joy of Banana Baked Oatmeal and let every bite transport you to a cozy morning filled with warmth and flavor. This recipe is not just about food; it’s about sharing moments and making memories. So gather your ingredients, preheat that oven, and let’s create something delicious together!

Banana Baked Oatmeal Recipe

Prep Time 10 minutes
Cook Time 35 minutes
Total Time 45 minutes
Servings 4 servings
Calories 250
A delicious and healthy baked oatmeal featuring ripe bananas and peanut butter, perfect for a nutritious breakfast.

Ingredients

Dried ingredients

  • 2 cups rolled oats
  • 1 teaspoon cinnamon
  • 1 teaspoon baking powder
  • ¼ teaspoon salt

Wet ingredients

  • 2 pieces over ripe bananas
  • 1.5 cups almond milk
  • ¼ cup creamy peanut butter
  • 2 tablespoons maple syrup
  • 1 tablespoon ground flaxseed
  • 1 teaspoon vanilla extract

Instructions 

  • Preheat oven to 375°F (190°C). Combine oats, cinnamon, baking powder, and salt in a baking dish.
  • In a bowl, mash bananas and mix with almond milk, peanut butter, maple syrup, flaxseed, and vanilla. Let sit for 5 minutes.
  • Pour wet mixture over dry ingredients and stir to combine.
  • Bake uncovered for 30-35 minutes until golden and set. Cool for 5 minutes before serving.
  • Serve with optional peanut butter drizzle and banana slices.

Notes

For extra flavor, top with fresh fruit or nuts.
Calories: 250kcal
Cost: $10
Course: Breakfast
Cuisine: American
Keyword: Oats

Unveiling the Magic of the Bling Bling Pear Bellini

Welcome, culinary adventurers! Today, we’re diving into a delightful drink that captures the essence of autumn and the warmth of celebration: the Bling Bling Pear Bellini. This cocktail, a harmonious blend of ripe pears and bubbly Prosecco, is not just a drink; it’s a passport to a world of flavors and connections. The crispness of the pears combined with the effervescence of Prosecco makes each sip a joyous experience, perfect for gatherings or a cozy evening at home.

In this article, we will explore the intricate details of this recipe, from the essential ingredients to expert tips that guarantee your Bellini will shine at any occasion. Whether you’re planning an Autumn Cocktail Party, celebrating a New Year, or simply indulging in a refreshing drink, this Pear Bellini will surely impress.

Why You’ll Love This Recipe

  • Elegant Presentation: The Bling Bling Pear Bellini is not only delicious but also visually stunning, making it a perfect centerpiece for your table.
  • Seasonal Flavors: Featuring ripe pears and warm spices, this cocktail embodies the essence of fall, bringing comfort and warmth to your gatherings.
  • Easy to Make: With simple ingredients and straightforward steps, even novice mixologists can create this drink effortlessly.
  • Versatile Pairing: This cocktail complements a variety of dishes, from savory appetizers to sweet desserts, making it a versatile addition to any meal.
  • Customizable: The recipe allows for a range of adaptations and variations to suit your personal taste and dietary needs.

Ingredients Breakdown

Let’s take a closer look at the ingredients needed to create the perfect Bling Bling Pear Bellini. This recipe serves 6, making it ideal for sharing among friends and family.


Digital Kitchen Scale

★ Recommended Kitchen Tool

Digital Kitchen Scale

Make this recipe even easier with a quality Digital Kitchen Scale — a must-have kitchen staple!


🛒 Shop This Tool →

As an Amazon Associate, we earn from qualifying purchases.
  • 2 ripe Pears: Choose sweet, juicy pears such as Bartlett or Anjou for the best flavor.
  • 2 cups Prosecco: A sparkling wine that adds effervescence; feel free to substitute with another sparkling wine if desired.
  • 1 cup Pear Juice: Freshly squeezed pear juice is preferred for a vibrant taste, but store-bought juice can work in a pinch.
  • 1/4 teaspoon Ground Cinnamon: Adds warmth and depth to the flavor profile.
  • 1/4 teaspoon Ground Ginger: Infuses a subtle spice that enhances the overall experience.
  • 1/4 teaspoon Ground Nutmeg: Complements the other spices, bringing a cozy aroma.
  • 1 Tablespoon Honey: A natural sweetener that balances the flavors; adjust to taste.
  • Sliced Pears and Cinnamon Sticks, for garnish: Elevates the presentation and adds a hint of flavor.

Step-by-Step Instructions

Close-up shot of a Bling Bling Pear Bellini with pear slices and a cinnamon stick garnish.

Creating your Bling Bling Pear Bellini is a breeze. Follow these simple steps, and you’ll have a sparkling cocktail ready to impress.

  • Peel and core the pears, then chop them into small pieces.
  • In a blender, combine the chopped pears, pear juice, cinnamon, ginger, nutmeg, and honey. Blend until smooth puree and well combined.
  • Fill each champagne glass halfway with the pear mixture.
  • Top each glass with cold Prosecco, allowing it to settle before adding more.
  • Garnish each glass with a slice of pear and a cinnamon stick.

Pro Tips for a Perfect Bellini

To elevate your Bellini experience, consider these expert insights:

  • Chill your ingredients: Ensure your Prosecco and glasses are well-chilled for the best serving temperature.
  • Use fresh ingredients: Fresh pears and homemade pear juice enhance the flavor significantly.
  • Blend smoothly: Ensure your pear mixture is blended until completely smooth for a luxurious texture.
  • Experiment with spices: Adjust the spices based on your preference; a pinch of cloves can add an interesting twist.
  • Make it a mocktail: For a non-alcoholic version, substitute Prosecco with sparkling water or a non-alcoholic sparkling wine.
  • Serve immediately: For best taste and texture, serve the Bellinis right after preparation.
  • Garnish creatively: Use edible flowers or mint leaves for a colorful twist.
  • Pair wisely: This cocktail pairs wonderfully with cheese platters, charcuterie, or light desserts.

Common Mistakes and Troubleshooting

Even the most seasoned chefs can run into hiccups. Here are some common mistakes to avoid:

  • Over-blending: Blending too long can make the mixture too watery; blend until just smooth.
  • Using flat Prosecco: Always use freshly opened Prosecco for maximum fizz.
  • Skipping garnish: Garnishes not only enhance appeal but also add a touch of flavor.
  • Not adjusting sweetness: Taste before serving and adjust honey as necessary.

Variations to Try

Feeling adventurous? Here are some delightful variations you can explore:

  • Spiced Pear Bellini: Add a dash of cardamom for an exotic twist.
  • Berry Pear Bellini: Blend in some raspberries or strawberries for a fruity explosion.
  • Maple Pear Bellini: Substitute honey with maple syrup for a different sweetness.
  • Ginger Pear Bellini: Use fresh ginger instead of ground for a sharper kick.

Storage and Make-Ahead Instructions

This cocktail is best enjoyed fresh, but you can prepare components in advance:

  • Pear mixture: Prepare and store the pear mixture in the refrigerator for up to 24 hours.
  • Prosecco: Keep your Prosecco chilled, but mix only when ready to serve to maintain fizz.

Frequently Asked Questions

Here are some commonly asked questions about the Bling Bling Pear Bellini:

  • Can I use other fruits? Yes! You can experiment with other fruits like peaches or plums.
  • Is this drink suitable for kids? Absolutely! Just omit the Prosecco for a delicious non-alcoholic beverage.
  • What if I don’t have pear juice? You can substitute with apple juice or any other mild fruit juice.
  • How do I make it less sweet? Adjust the amount of honey or use unsweetened pear juice.
  • Can I prepare this in bulk? Yes, just multiply the ingredients and store the pear mixture separately.
  • What glass should I use? Champagne flutes or coupe glasses work wonderfully for serving.
  • How long does it take to make? The entire process takes about 15-20 minutes.
  • Can I use sparkling cider instead? Yes, sparkling cider is a great non-alcoholic alternative.

Nutritional Tips and Dietary Adaptations

This cocktail can be adapted to fit various dietary needs:

  • Low-calorie option: Use sugar-free pear juice and limit honey.
  • Vegan-friendly: Ensure honey is replaced with agave syrup or maple syrup.
  • Gluten-free: Prosecco is gluten-free, making this cocktail suitable for gluten-sensitive individuals.

Equipment Recommendations

To create your Bling Bling Pear Bellini, you will need:

  • Blender: A high-speed blender ensures a smooth mixture.
  • Champagne glasses: For serving your elegant cocktail.
  • Measuring cups: To ensure accuracy in your ingredients.

Serving Suggestions

Enhance your cocktail experience with these serving suggestions:

  • Accompany with appetizers: Serve alongside cheese platters or savory pastries for a delightful pairing.
  • Pair with desserts: This cocktail complements light desserts like tarts or fruit salads beautifully.
  • Create a cocktail bar: Set up a DIY Bellini bar where guests can mix their own cocktails with various fruits and juices.

In conclusion, the Bling Bling Pear Bellini is more than just a cocktail; it’s an experience filled with rich flavors and the spirit of celebration. Whether you’re entertaining friends or enjoying a quiet evening, this drink brings a touch of elegance and adventure to your table. So gather your ingredients, embrace your inner mixologist, and let each glass with sparkling joy transport you to a world of delightful flavors. Cheers to new experiences and connections through the art of food!

Bling Bling Pear Bellini

Prep Time 10 minutes
Total Time 10 minutes
Servings 4 glasses
Calories 150
A sparkling and fruity cocktail perfect for celebrations, combining fresh pears and aromatic spices with bubbly Prosecco.

Ingredients

Fruits and Spices

  • 2 pieces Pears (ripe)
  • 1 cup Pear Juice
  • 1/4 teaspoon Ground Cinnamon
  • 1/4 teaspoon Ground Ginger
  • 1/4 teaspoon Ground Nutmeg
  • 1 tablespoon Honey
  • for garnish Sliced Pears and Cinnamon Sticks (for garnish)

Instructions 

  • Peel, core, and chop the pears.
  • Blend pears, pear juice, cinnamon, ginger, nutmeg, and honey until smooth.
  • Pour the pear mixture into glasses halfway.
  • Top with Prosecco and let it settle.
  • Garnish with pear slices and cinnamon sticks.

Notes

Chill the Prosecco before serving for best sparkle.
Calories: 150kcal
Cost: $15
Course: Drink
Cuisine: fusion
Keyword: Pear, Sparkling

Discover the Joy of Butternut Squash Ravioli Lasagna

Winter evenings call for warmth and comfort, and there’s nothing quite like a Butternut Squash Ravioli Lasagna to transform a chilly night into a cozy culinary adventure. With just four key ingredients, this dish combines creamy flavors and hearty textures, making it perfect for busy weeknights or special gatherings. Let’s dive into why this dish not only tastes amazing but also enriches your kitchen experience.

Why You’ll Love This Recipe

  • Quick and Easy: With minimal prep and cooking time, you can have this delightful dish ready in under an hour.
  • Comforting and Delicious: The blend of butternut squash and creamy alfredo sauce creates a dish that’s rich in flavor and satisfying.
  • Versatile Ingredients: Use frozen or fresh ravioli, and feel free to adjust the ingredients according to your taste preferences.
  • Perfect for Meal Prep: Make it ahead of time and store it in the fridge for a quick dinner solution.
  • Great for Gatherings: This lasagna is sure to impress guests, making it an ideal centerpiece for dinner parties.

Ingredient Breakdown

Understanding your ingredients is key to culinary success. Here’s what you’ll need for this Butternut Squash Ravioli Lasagna, along with some helpful substitutions:

  • Nonstick Cooking Spray: Prevents sticking; you can also use olive oil for greasing.
  • Olive Oil: Adds flavor to the dish; substitute with avocado oil if preferred.
  • Butternut Squash: Either fresh or pre-cubed frozen works well. You can replace it with sweet potatoes for a different twist.
  • Kosher Salt: Enhances flavors; sea salt can be used as an alternative.
  • Alfredo Sauce: A 24-ounce jar of your favorite brand brings creaminess to the dish; homemade versions are also great.
  • Water: Used to thin the sauce slightly; you can use vegetable broth for added flavor.
  • Fresh Butternut Squash Ravioli: Look for brands like Buitoni or Rana. Spinach or cheese ravioli can be a delightful substitution.
  • Shredded Italian Cheese Blend: A mix of mozzarella, parmesan, and provolone works best; feel free to use just mozzarella if desired.

Pro Tips for Perfect Lasagna

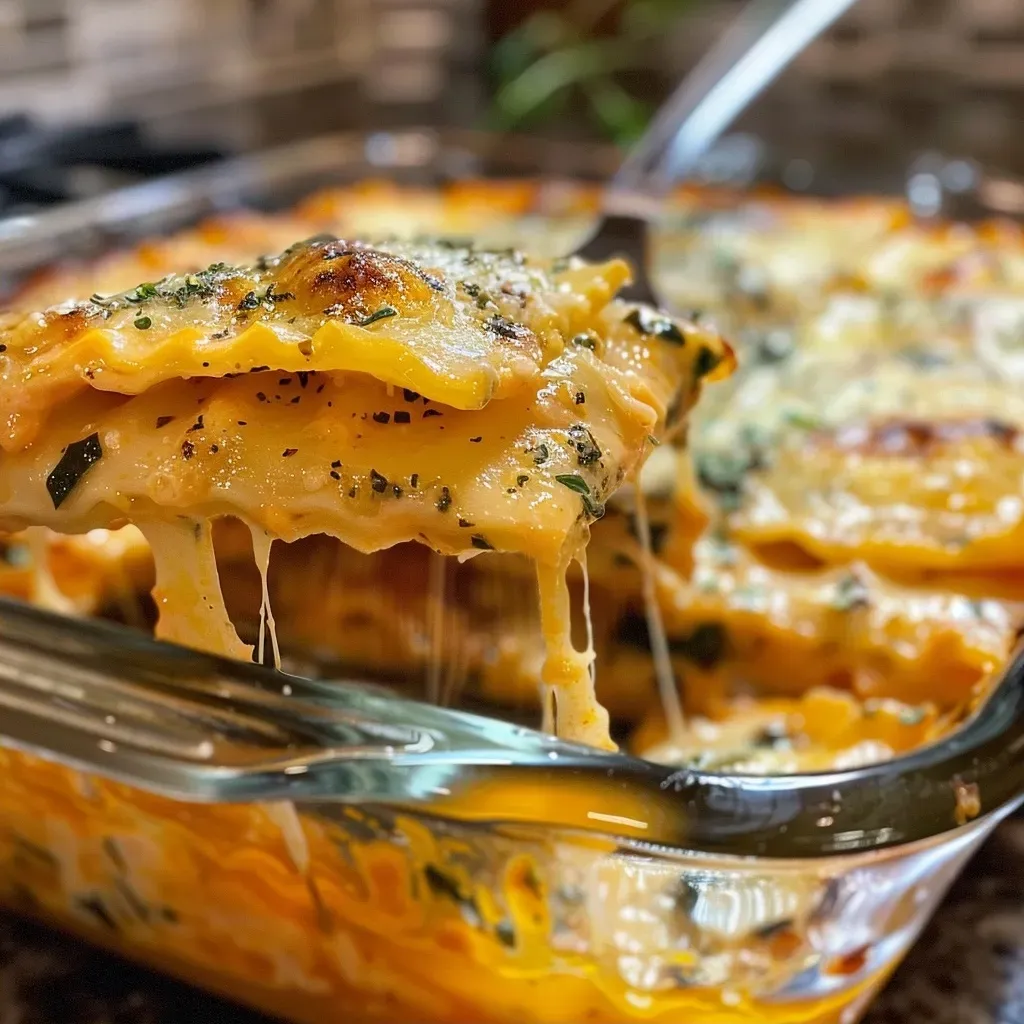
Close-up of a gooey slice of ravioli lasagna, showing layers of pasta and sauce.

Here are some expert insights to ensure your lasagna comes out perfectly every time:


Pasta Pot with Strainer Lid

★ Recommended Kitchen Tool

Pasta Pot with Strainer Lid

Make this recipe even easier with a quality Pasta Pot with Strainer Lid — a must-have kitchen staple!


🛒 Check Price on Amazon →

As an Amazon Associate, we earn from qualifying purchases.
  • Layering Technique: Always start with sauce at the bottom to prevent the ravioli from sticking.
  • Texture Matters: Cook the butternut squash until fork-tender for an optimal mouthfeel.
  • Save Time: Use store-bought sauces and pre-cooked ravioli to speed up the process.
  • Make Ahead: Assemble the lasagna, cover tightly, and refrigerate for up to three days before baking.
  • Cheese Tips: Add extra cheese on top for a gooey, melty finish. Try mixing in some grated parmesan for added flavor.
  • Resting Time: Let the lasagna cool for a few minutes after baking; this helps with easier slicing.
  • Personal Touch: Don’t hesitate to add herbs like thyme or basil to the sauce for a fresh twist.
  • Freezing Options: This lasagna freezes well; bake it directly from frozen, adding extra time to the baking process.

Common Mistakes and Troubleshooting

Even the best chefs make mistakes! Here are some common pitfalls and how to avoid them:

  • Overcooking the Squash: Always monitor cooking times closely to avoid mushiness.
  • Too Much Sauce: Ensure you have the right balance; too much sauce can make it soggy.
  • Skipping the Resting Period: Resist the urge to slice immediately after baking; this can cause the layers to collapse.
  • Using Cold Ravioli: If using frozen ravioli, there’s no need to thaw; just layer them directly.

Delicious Variations

Looking for a twist? Here are some variations to keep your meals exciting:

  • Vegetarian Delight: Swap meat ravioli for a cheese or spinach variety.
  • Spicy Kick: Add crushed red pepper flakes to the sauce for some heat.
  • Herb-Infused: Mix in fresh herbs like basil or parsley for added flavor and color.
  • Protein Boost: Incorporate cooked chicken or sausage for a heartier option.

Storage and Make-Ahead Instructions

Want to prepare in advance? Here’s how to store and reheat your lasagna:

  • Refrigeration: Store in an airtight container for up to 4 days.
  • Freezing: Wrap tightly in foil for up to 3 months. Bake without thawing, adding time as needed.
  • Reheating: Warm in the oven at 350°F until heated through, about 25-30 minutes.

Frequently Asked Questions

Got questions? We’ve got answers! Here are some common inquiries about this recipe:

  • Can I use frozen ravioli? Yes, there’s no need to thaw them before layering.
  • How can I make it gluten-free? Use gluten-free ravioli and a gluten-free alfredo sauce.
  • Can I add more vegetables? Absolutely! Spinach, mushrooms, or zucchini are great additions.
  • What if I don’t have alfredo sauce? You can make a simple white sauce using butter, flour, milk, and cheese.
  • Is it okay to use homemade ravioli? Yes, homemade ravioli adds a personal touch to the dish.
  • How do I know when it’s done baking? Look for a bubbly sauce and golden cheese topping.
  • Can leftovers be reheated? Yes, just be sure to store them properly and reheat thoroughly.
  • What to serve with lasagna? A fresh salad or garlic bread complements this dish perfectly!

Nutritional Information and Dietary Adaptations

This dish can be adjusted to fit various dietary needs:

  • Low-Carb Option: Substitute ravioli with zucchini noodles or eggplant slices.
  • Vegan Adaptation: Use vegan ravioli and a plant-based alfredo sauce.
  • Nut-Free: Ensure your cheese blend is nut-free to accommodate allergies.

Essential Equipment

Here’s what you’ll need to create this delicious lasagna:

  • Baking Dish: A 9×13-inch baking dish is perfect for this recipe.
  • Skillet: For sautéing the butternut squash.
  • Mixing Spoon: Essential for combining your ingredients.
  • Measuring Cups and Spoons: Accurate measurements make all the difference.

Serving Suggestions

To elevate your meal, consider these serving ideas:

  • Fresh Herbs: Garnish with freshly chopped basil or parsley for a pop of color.
  • Parmesan Cheese: A sprinkle of grated parmesan on top enhances the flavor.
  • Side Salad: Pair with a crisp salad to balance the richness of the lasagna.
  • Garlic Bread: Serve with warm garlic bread for a comforting addition.

Conclusion

Creating a Butternut Squash Ravioli Lasagna is more than just preparing a meal; it’s about weaving together flavors and experiences that warm the heart. Whether you’re cooking for family or friends, this dish promises to deliver smiles and satisfaction. So, grab your apron, gather your ingredients, and embark on a delicious journey that celebrates the magic of food and connection. Enjoy every bite!

This 4-Ingredient Ravioli Lasagna Is a Winter Weeknight Win

Prep Time 10 minutes
Cook Time 45 minutes
Total Time 55 minutes
Servings 4 servings
Calories 450
A quick and cozy winter dish combining ravioli, butternut squash, and creamy alfredo sauce in a lasagna-style bake.

Ingredients

Group 1

  • 1 tablespoon olive oil
  • 1 tablespoon nonstick cooking spray
  • 1 package cubed butternut squash (13-ounce package)
  • 1/2 teaspoon kosher salt
  • 1 jar alfredo sauce (24-ounce jar)
  • 1/4 cup water
  • 2 packages fresh butternut squash ravioli (10-ounce packages)
  • 1 cup shredded Italian cheese blend

Instructions 

  • Spray a 9×13-inch baking dish with nonstick spray.
  • Cook squash in a skillet with olive oil and salt until tender, about 8 minutes.
  • Mix alfredo sauce with cooked squash; add water to jar, shake, and add to sauce.
  • Layer 1/3 of sauce, half of ravioli, remaining sauce, and cheese in dish. Repeat layers and top with cheese.
  • Cover with foil and bake 30 minutes, then uncover and bake 10-15 minutes until bubbly and browned.

Notes

For extra flavor, sprinkle with fresh herbs before serving.
Calories: 450kcal
Cost: $15
Course: Main Course
Cuisine: American
Keyword: Lasagna, Ravioli, Winter

Welcome to the World of German Soft Pretzels

There’s a certain magic that happens when you pull a warm, golden-brown pretzel from the oven. With its glossy crust and soft, warm interior, the German soft pretzel is not just a snack; it’s an experience that transports you straight to the bustling streets of Munich. Whether you’re enjoying it at a soccer game, a beer garden, or right in your own kitchen, the aroma and taste of freshly baked pretzels are undeniably inviting. In this comprehensive guide, we will dive deep into the art of making German soft pretzels, ensuring you can recreate this beloved classic at home with confidence and flair.

Why You’ll Love This Recipe

  • Simple Ingredients: This pretzel recipe requires everyday ingredients that are easy to find, making it accessible for any home cook.
  • Authentic Flavor: With the right techniques and a classic baking soda bath, you’ll achieve that authentic German flavor that’s both chewy and delicious.
  • Customizable: You can easily tweak the recipe to include different flavors, toppings, or dips, allowing for endless creativity in your kitchen.
  • Fun Activity: Making pretzels can be a fun and engaging activity for family and friends, perfect for gatherings or special occasions.
  • Storage and Reheating Tips: Learn how to store your pretzels properly and reheat them to maintain that freshly baked taste.

Ingredients Breakdown

Before you begin your pretzel-making journey, let’s take a closer look at the ingredients you’ll need. Understanding each component will help you appreciate the role it plays in creating that perfect German soft pretzel.

  • Bread Flour: 5 cups of bread flour provide the structure and chewiness essential for authentic pretzels. If you don’t have bread flour, you can substitute it with all-purpose flour but expect a softer texture.
  • Brown Sugar: One tablespoon adds a hint of sweetness and helps to achieve a beautiful golden color during baking.
  • Salt: Two teaspoons of salt enhance the overall flavor of the pretzels. Always use coarse pretzel salt or flaky sea salt for topping.
  • Instant Yeast: One teaspoon of instant yeast gives the dough its rise and airy texture without the need for long fermentation times.
  • Lukewarm Water: 1 ⅓ cups of lukewarm water helps activate the yeast. The water should feel warm to the touch but not hot.
  • Unsalted Butter: Two tablespoons of softened butter adds richness and enhances the flavor of the dough.
  • Boiling Water and Baking Soda: The key to that characteristic crust! Boiling your pretzels in a bath of water that contains two tablespoons of baking soda creates the classic texture and flavor.

How to Make German Soft Pretzels

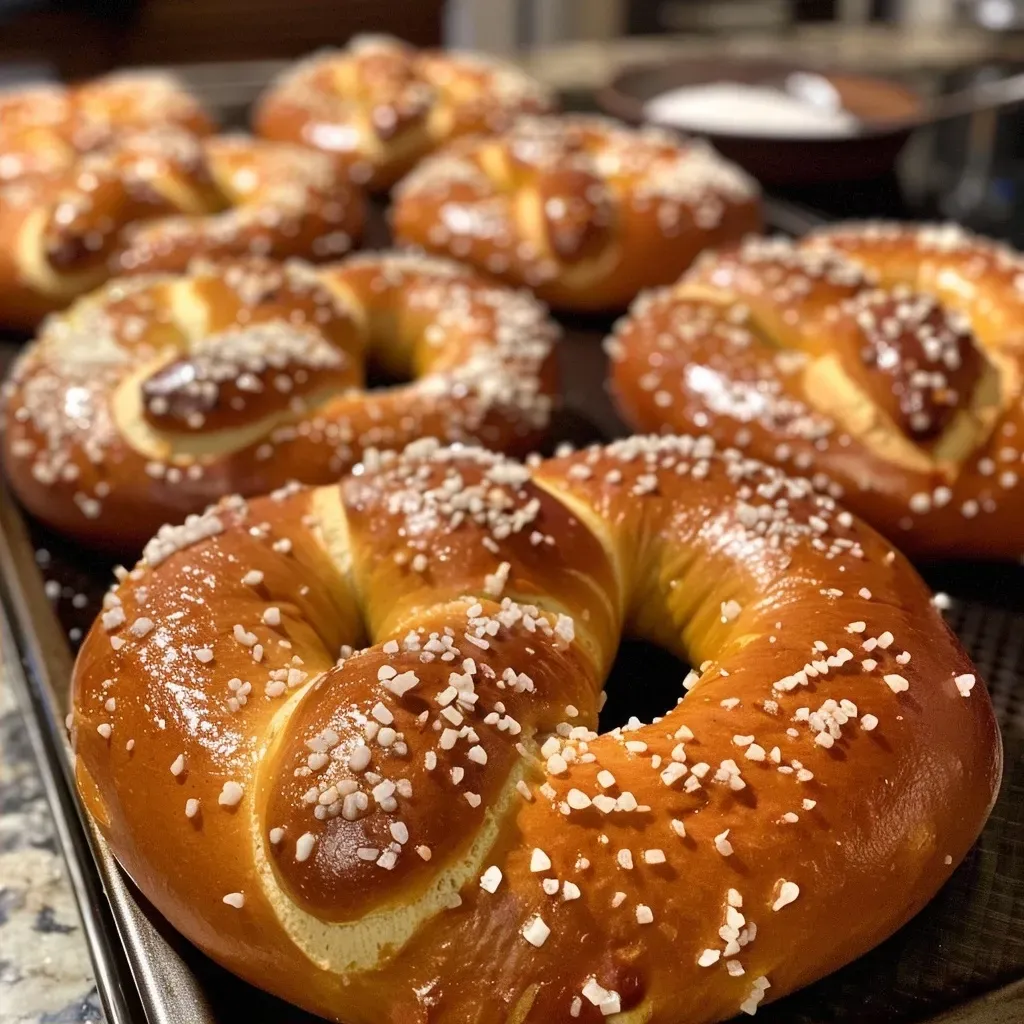
Close-up view of golden brown German soft pretzels with a shiny crust.

Now that you have all the ingredients, it’s time to roll up your sleeves and dive into the pretzel-making process.


Professional Chef Knife Set

★ Recommended Kitchen Tool

Professional Chef Knife Set

Make this recipe even easier with a quality Professional Chef Knife Set — a must-have kitchen staple!


🛒 Check Price on Amazon →

As an Amazon Associate, we earn from qualifying purchases.
  1. Create the Dough: In a stand mixer, combine the bread flour, brown sugar, salt, instant yeast, and lukewarm water. Mix with a fork until a shaggy dough forms.
  2. Knead the Dough: Attach the dough hook and mix on low speed while gradually adding the room-temperature butter. Once combined, increase the speed and knead for about 5 minutes until the dough is smooth.
  3. Rest the Dough: Cover the dough with a damp cloth or plastic wrap and let it rest for 30 minutes. This allows the gluten to relax.
  4. Shape the Pretzels: Turn the dough onto a lightly oiled surface and divide it into 10 equal pieces. Roll each piece into a 20-inch long rope, tapering the ends. Shape into pretzels by twisting the ends together and folding them down over the middle.
  5. Let Them Rise: Place the shaped pretzels on a lightly oiled tray, cover them with oiled plastic wrap, and let them rest at room temperature for 30 minutes. Then transfer them to the refrigerator for at least 1 hour.
  6. Prepare for Baking: Preheat your oven to 450°F (232°C) and line two baking sheets with parchment paper.
  7. Boil the Pretzels: In a large pot, bring 6 cups of water to a boil and add 2 tablespoons of baking soda. Carefully add the pretzels, three at a time, and boil for 1 minute without flipping.
  8. Transfer to Baking Sheets: Use a slotted spoon to remove the pretzels and place them on the prepared baking sheets. Sprinkle with pretzel salt before baking.
  9. Bake: Bake for about 15 minutes or until golden brown. Remove from the oven and let cool before serving.

Pro Tips for Perfect Pretzels

  • Use Bread Flour: Always opt for bread flour for the best texture. It has a higher protein content, which improves the chewiness of your pretzels.
  • Monitor Water Temperature: Ensure your lukewarm water is at the right temperature (around 110°F) to activate the yeast without killing it.
  • Don’t Skip the Baking Soda Bath: This step is crucial for achieving the classic flavor and texture of German pretzels.
  • Experiment with Toppings: Try different toppings such as cheese, garlic powder, or even cinnamon sugar after baking for a fun twist.
  • Shape with Care: Make sure to shape your pretzels tightly to prevent them from unraveling during boiling.
  • Watch Baking Time: Keep an eye on your pretzels while baking; every oven is different, and you want them perfectly golden.
  • Cool Before Serving: Allow pretzels to cool slightly before serving, as they continue to cook a bit after being removed from the oven.
  • Store Properly: Store leftover pretzels in an airtight container at room temperature for up to two days, or freeze them for longer storage.

Common Mistakes and Troubleshooting

Even the best chefs can encounter challenges when making pretzels. Here’s how to troubleshoot common problems you might face:

  • Too Tough or Chewy: This could be due to over-kneading the dough. Ensure you knead just until smooth.
  • Flat Pretzels: If your pretzels flatten out, it may be due to not allowing enough resting time or not using bread flour.
  • Too Salty: Make sure to measure your salt accurately, as too much can overpower the flavor.
  • Pretzels Don’t Brown Properly: If your pretzels are pale after baking, check your oven temperature; it may not be hot enough.

Variations of German Soft Pretzels

Feeling adventurous? Here are some delightful variations to try:

  • Cheese-Stuffed Pretzels: Roll cheese into the center of the dough before shaping for a gooey surprise.
  • Sweet Cinnamon Pretzels: After baking, brush with melted butter and sprinkle with cinnamon sugar for a delightful dessert treat.
  • Herb and Garlic Pretzels: Incorporate dried herbs and garlic powder into your dough for a savory flavor profile.
  • Chocolate-Dipped Pretzels: Dip cooled pretzels in melted chocolate for a sweet and salty treat that’s perfect for parties.

Storage and Make-Ahead Instructions

To keep your pretzels fresh and delicious, follow these storage tips:

  • Room Temperature: Store pretzels in an airtight container at room temperature for up to 2 days.
  • Freezing: Freeze pretzels in a single layer on a baking sheet, then transfer to a freezer bag for up to 3 months. Reheat in the oven for best results.
  • Make-Ahead: You can prepare the dough a day in advance and let it rise in the refrigerator overnight. Shape and boil the next day.

FAQ: Your Pretzel Questions Answered

  • Can I make pretzels without lye?: Yes! This recipe uses a baking soda bath, which is a common substitute for lye in home pretzel-making.
  • How do I know if my dough is ready?: The dough should be smooth and elastic. It should spring back when pressed with a finger.
  • What can I serve with pretzels?: Pretzels pair wonderfully with mustard, cheese dips, or even chocolate for a sweet twist.
  • Can I use all-purpose flour instead of bread flour?: Yes, but the texture may differ slightly. Bread flour will yield a chewier pretzel.
  • How do I achieve a shiny crust?: The baking soda bath contributes to a shiny crust, so don’t skip this step!
  • What is the best way to reheat pretzels?: Reheat in the oven at 350°F for 5-10 minutes for the best texture.
  • Can I add toppings before baking?: Yes, sprinkle your preferred toppings right before baking for added flavor.
  • Is there a gluten-free version of pretzels?: You can use a gluten-free flour blend, but results may vary. Look for recipes specifically designed for gluten-free pretzels.

Nutrition Tips and Dietary Adaptations

For those watching their nutrition, here are some tips to adapt this recipe:

  • Whole Wheat Flour: Substitute half of the bread flour with whole wheat flour for added fiber.
  • Reduce Sugar: Cut back on sugar if you prefer less sweetness, especially for savory variations.
  • Low-Sodium Options: Use low-sodium salt to reduce sodium intake while still enjoying the flavor.
  • Dairy-Free Version: Substitute the butter with a plant-based alternative for a dairy-free pretzel.

Essential Equipment for Pretzel Making

Having the right tools can make a big difference in your pretzel-making experience. Here are some essentials:

  • Stand Mixer: A stand mixer with a dough hook makes kneading easier and more efficient.
  • Baking Sheets: Use heavy-duty baking sheets to ensure even baking.
  • Parchment Paper: Line your baking sheets with parchment for easy cleanup and to prevent sticking.
  • Slotted Spoon: A slotted spoon is essential for transferring pretzels in and out of the boiling water bath.

Serving Suggestions

Once your pretzels are perfectly baked, it’s time to enjoy them! Here are some serving ideas:

  • Traditional Mustard: Serve with a selection of mustards for dipping, from spicy brown to sweet honey mustard.
  • Cheese Sauce: A gooey cheese dip pairs beautifully with pretzels, making for a delectable snack.
  • Beer Pairing: Enjoy your pretzels with a cold beer, enhancing the experience with the classic German pairing.
  • Sweet Dip: For sweet pretzels, try serving with a chocolate sauce or caramel dip.

Conclusion: Your Pretzel Adventure Awaits!

Making German soft pretzels is not just about the end product; it’s about the journey, the flavors, and the stories you create along the way. With this comprehensive guide, you are now equipped to embark on your own pretzel adventure. So gather your ingredients, invite some friends or family, and let the magic of baking transport you to the heart of Germany. Happy baking!

German Soft Pretzels Recipe

Prep Time 45 minutes
Cook Time 15 minutes
Total Time 1 hour
Servings 10 pieces
Calories 250
Enjoy homemade soft pretzels with a chewy interior and crispy exterior, perfect for snacking or sharing.

Ingredients

Dough

  • 5 cups bread flour
  • 1 tbsp brown sugar
  • 2 tsp salt
  • 1 tsp instant yeast
  • 1 ⅓ cups lukewarm water
  • 2 tbsp unsalted butter (at room temperature)

Topping

  • pretzel salt or flaky sea salt pretzel salt or flaky sea salt

Baking Soda Bath

  • 6 cups boiling water
  • 2 tbsp baking soda

Instructions 

  • Mix flour, sugar, salt, yeast, and water until shaggy dough forms. Knead with butter, then let rest for 30 minutes.
  • Divide dough into 10 pieces, roll into 20-inch sausages, shape into pretzels, and chill for 1 hour.
  • Preheat oven to 450°F (230°C). Boil water with baking soda, then dip pretzels for 1 minute each, transfer to baking sheets.
  • Sprinkle pretzels with salt and bake for 15 minutes until golden and cooked through.

Notes

Use oil instead of flour on the countertop to prevent sticking.
Calories: 250kcal
Cost: $15
Course: Snack
Cuisine: German
Keyword: Pretzels

Embark on a Cozy Culinary Journey

Welcome to a delightful adventure in baking, where we’re setting out to create **gluten-free gingerbread whoopie pies** that evoke the warmth and charm of winter markets. With each bite, you’ll experience the perfect blend of spices and a creamy, **dairy-free cream cheese filling** that’s both satisfying and indulgent. Not only are these whoopie pies a treat for the taste buds, but they also embody the spirit of comfort and connection through food. So grab your apron and let’s dive into this **joyful baking experience**!

Why You’ll Love This Recipe

These **gingerbread whoopie pies** are sure to become a favorite for many reasons:

  • Easy to Make: With straightforward steps, even novice bakers can whip up these delightful treats.
  • Gluten-Free Delight: Made with almond and coconut flour, these whoopie pies cater to gluten-free diets without sacrificing flavor.
  • Perfect for Any Occasion: Whether for holiday gatherings or cozy evenings at home, these treats are versatile and festive.
  • Customizable Filling: The **dairy-free cream cheese filling** can be adjusted to suit your preferences, making it a versatile recipe.
  • Family-Friendly Fun: Get the kids involved! Baking together creates lasting memories and delicious results.

Ingredient Breakdown and Substitutions

Let’s take a closer look at the key ingredients that make these whoopie pies so special:


Professional Chef Knife Set

★ Recommended Kitchen Tool

Professional Chef Knife Set

Make this recipe even easier with a quality Professional Chef Knife Set — a must-have kitchen staple!


🛒 See Deals on Amazon →

As an Amazon Associate, we earn from qualifying purchases.
  • Almond Flour: Provides a nutty flavor and gluten-free base. Substitute with **hazelnut flour** for a different taste.
  • Coconut Flour: Adds moisture and density. If unavailable, you can use **additional almond flour**, but adjust the liquid accordingly.
  • Spices: Ground cinnamon, ginger, and cloves give that beloved gingerbread flavor. Fresh spices enhance the taste! Consider adding a pinch of nutmeg for extra warmth.
  • Unsulphured Blackstrap Molasses: This ingredient adds depth and richness. If you prefer a lighter flavor, try using **honey or maple syrup**.
  • Dairy-Free Cream Cheese: This filling can be made with almond or cashew cream for a nut-free option.

Pro Tips for Perfect Whoopie Pies

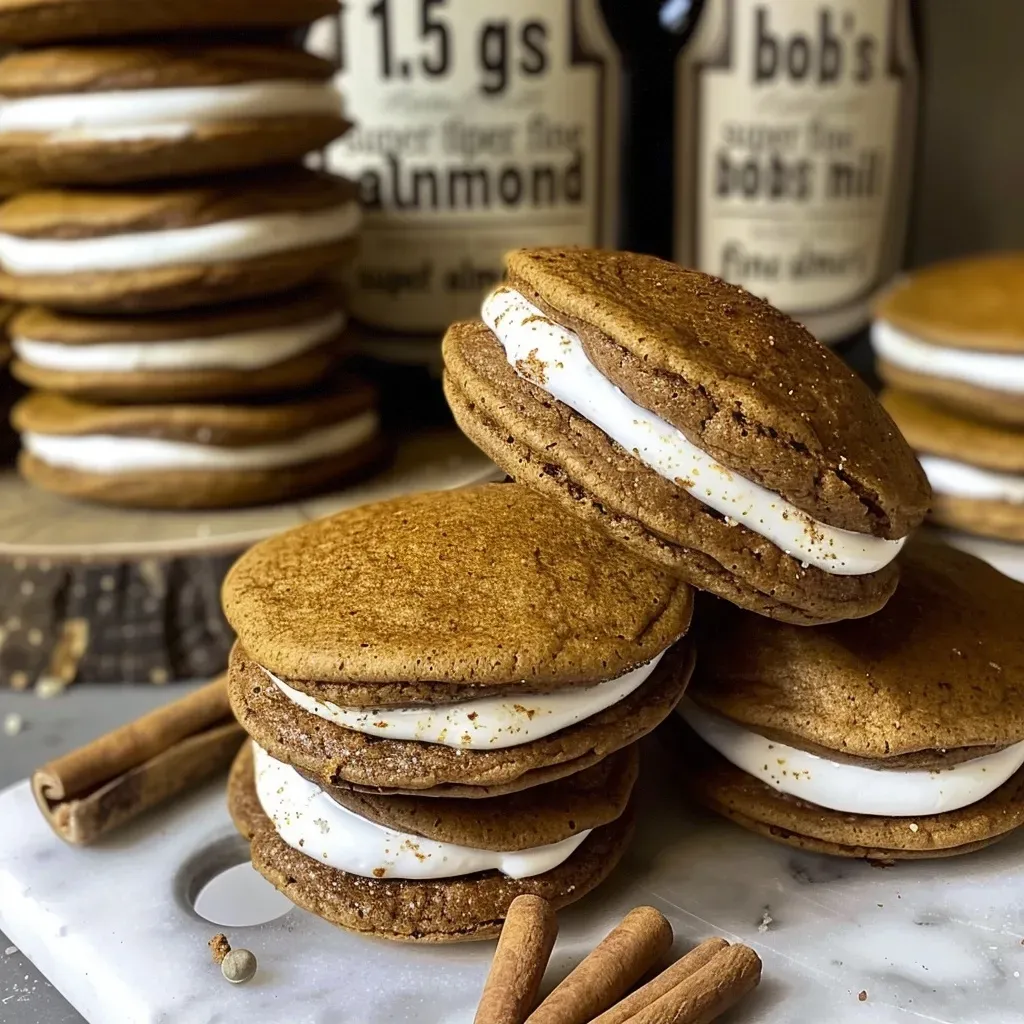
Close-up of two soft gluten-free gingerbread whoopie pies filled with cream.

Here are some expert insights to ensure your **gingerbread whoopie pies** turn out perfectly:

  • Chill the Dough: Allowing the dough to chill helps maintain shape while baking, leading to perfectly round cookies.
  • Measure Accurately: Use a kitchen scale for the best results. Weight ensures precision, especially with gluten-free flours.
  • Use Parchment Paper: Line your baking sheet to prevent sticking and make cleanup a breeze.
  • Don’t Overbake: Keep an eye on the cookies; they should be soft to the touch when you take them out.
  • Experiment with Fillings: Try adding spices or citrus zest to the filling for a unique twist.
  • Store Properly: Keep your whoopie pies in an airtight container to maintain freshness.
  • Make Ahead: The cookie bases can be frozen, allowing you to assemble them fresh whenever you wish.
  • Serve Warm: For an extra treat, serve the whoopie pies slightly warmed, enhancing the flavors.

Common Mistakes and Troubleshooting

Here are some common pitfalls and how to avoid them:

  • Too Dry: If the dough is too dry, consider adding a bit more liquid (water or dairy-free milk).
  • Filling Too Runny: If your filling is too drippy, add more tapioca starch to thicken it up.
  • Uneven Cookies: Use a cookie scoop for even sizing to ensure consistent baking.
  • Flavors Not Strong Enough: Adjust spices according to your taste; fresh ground spices can elevate the flavor significantly.

Variations to Try

Get creative with these variations to make your **gingerbread whoopie pies** unique:

  • Chocolate Gingerbread: Add cocoa powder for a chocolatey twist.
  • Pumpkin Spice: Incorporate pumpkin puree and pumpkin spice for a fall-inspired version.
  • Coconut Cream Filling: Replace cream cheese with whipped coconut cream for a tropical touch.
  • Nut-Free Option: Use sunflower seed butter instead of almond butter to make it nut-free.

Storage and Make-Ahead Instructions

To keep your whoopie pies fresh:

  • Room Temperature: Store in an airtight container for up to 3 days.
  • Refrigerate: For longer storage, place in the fridge where they’ll last up to a week.
  • Freeze: Freeze the assembled whoopie pies for up to 2 months. Thaw them in the fridge overnight before serving.

Frequently Asked Questions

Here’s a collection of common questions about our **gingerbread whoopie pies**:

  • Can I make these whoopie pies vegan? Yes! Substitute the egg with a flax egg (1 tablespoon flaxseed meal + 3 tablespoons water).
  • How do I make the filling thicker? Add more tapioca starch until the desired thickness is reached.
  • Can I use regular flour? Yes, but the recipe will no longer be gluten-free.
  • What can I use instead of molasses? Honey or maple syrup can be used, but the flavor will differ.
  • How long do they last? These whoopie pies can last up to a week in the fridge or 2 months in the freezer.
  • Can I add chocolate chips? Definitely! Fold in some dairy-free chocolate chips for extra sweetness.
  • What’s the best way to store the filling? Store it in a separate container in the fridge for up to a week.
  • Can these be made mini? Absolutely! Just reduce the baking time for smaller cookies.

Nutritional Tips and Dietary Adaptations

For a healthier twist, consider these adaptations:

  • Reduce Sugar: Cut down the coconut sugar or substitute with a sugar alternative like erythritol.
  • Increase Fiber: Add chia seeds or flaxseeds to the dough for added nutrition.
  • Low-Carb Version: Use a low-carb flour blend instead of almond and coconut flour.

Equipment Recommendations

To make your baking process smoother, here are some tools that can help:

  • Stand Mixer: An essential for mixing the filling quickly and efficiently.
  • Baking Sheets: High-quality, non-stick sheets ensure even baking.
  • Cookie Scoop: For uniform cookie sizes, a scoop is a baker’s best friend.
  • Parchment Paper: This will help prevent sticking and make cleanup easy.

Serving Suggestions

These whoopie pies are delightful on their own, but here are some serving ideas:

  • Dust with Powdered Sugar: For a pretty presentation, dust them with powdered sugar before serving.
  • Pair with Hot Beverages: Serve alongside hot cocoa or chai tea for a cozy pairing.
  • Garnish with Fresh Mint: A sprig of mint adds a refreshing touch to your dessert plate.

Now that you’re armed with all the tips, tricks, and insights, it’s time to roll up your sleeves and bake a batch of these **soft and moist gluten-free gingerbread whoopie pies**! Each pie is not just a dessert, but a little piece of joy, a story of culture, and a warm hug on a plate. Enjoy your baking adventure and share the love with those around you! Happy cooking!

Soft & Moist Gluten Free Gingerbread Whoopie Pies (Dairy Free)

Prep Time 20 minutes
Cook Time 8 minutes
Total Time 28 minutes
Servings 12 pieces
Calories 180
Enjoy these soft, moist, and dairy-free gingerbread whoopie pies with a flavorful filling, perfect for holiday treats or cozy gatherings.

Ingredients

dry ingredients

  • 1.5 cups Bob’s Red Mill Super Fine almond flour
  • 0.25 cup coconut flour
  • 1 tsp ground cinnamon
  • 1 tsp ground ginger
  • 0.5 tsp ground cloves
  • 0.5 tsp finely grated fresh ginger
  • 0.25 tsp salt
  • 1.5 tsp baking soda

wet ingredients

  • 1 egg egg, room temperature
  • 2 TBSP avocado oil
  • 1 tsp vanilla
  • 1/4 cup almond butter
  • 2 TBSP unsulphured blackstrap molasses
  • 1/3 cup coconut sugar

filling

  • 1 cup dairy-free cream cheese
  • 1/2 cup tapioca starch
  • 2 TBSP maple syrup
  • 1 tsp vanilla extract

Instructions 

  • Preheat oven to 350°F (175°C) and line a baking sheet with parchment.
  • Mix dry ingredients in a bowl. In another bowl, combine wet ingredients. Combine both to form dough and chill for 20 minutes.
  • Scoop dough onto baking sheet, flatten slightly, and bake for 8 minutes. Cool completely before filling.
  • Prepare filling by blending cream cheese, tapioca starch, maple syrup, vanilla, and sea salt until smooth. Chill if too runny.
  • Pair cookies, pipe filling onto one, top with another, and press gently to form whoopie pies.

Notes

Chill the dough for easier handling and ensure cookies are fully cooled before filling.
Calories: 180kcal
Cost: $15
Course: Dessert
Cuisine: American
Keyword: Dairy-Free, Gingerbread, gluten-free

The Allure of the Pecan Bourbon Old Fashioned

Welcome, fellow culinary adventurers! Today, we’re diving into a delightful twist on a classic cocktail that transcends the ordinary: the Pecan Bourbon Old Fashioned. This drink is more than just a refreshing sip; it’s a celebration of flavors that connect us to the rich culinary traditions of the South, where pecans reign supreme. As you embark on this journey, prepare to explore the intricate balance of sweetness from brown sugar, the nutty depth of pecan bitters, and the smooth warmth of bourbon. Each sip tells a story, inviting you into a world where every ingredient has a purpose and every flavor evokes a memory. Let’s raise a glass to the adventure that awaits!

Why You’ll Love This Recipe

This Pecan Bourbon Old Fashioned is not just a drink; it’s an experience. Here’s why you’ll want to mix one up tonight:

  • Rich Flavor Profile: The combination of pecan liqueur and bitters creates a unique taste that elevates the traditional Old Fashioned into something extraordinary.
  • Versatile and Customizable: Easily adjust sweetness or bitterness levels to match your personal preference or mood.
  • Perfect for Any Occasion: Whether it’s a casual get-together or a fancy dinner party, this cocktail fits right in.
  • Easy to Make: With just a few simple ingredients and steps, you’ll impress friends and family without spending hours in the kitchen.
  • A Touch of Adventure: Experience the magic of pecans, often overlooked in cocktails, and discover a new favorite drink!

Ingredients: A Flavorful Breakdown

Let’s gather our ingredients for the Pecan Bourbon Old Fashioned. Here’s what you’ll need:


Digital Kitchen Scale

★ Recommended Kitchen Tool

Digital Kitchen Scale

Make this recipe even easier with a quality Digital Kitchen Scale — a must-have kitchen staple!


🛒 Shop This Tool →

As an Amazon Associate, we earn from qualifying purchases.
  • 2 teaspoons light brown sugar: Adds a rich sweetness that complements the bourbon.
  • 2-3 drops pecan bitters: Infuses the cocktail with nutty undertones and aromatic complexity.
  • 2 ounces bourbon: Choose a high-quality bourbon like Four Roses for a smooth finish.
  • 1 teaspoon water: Helps dissolve the sugar and meld the flavors together.
  • ½ ounce pecan liqueur: This is the star ingredient that brings a unique twist to the classic recipe.
  • 1 large ice cube: Ideal for slow dilution, keeping your drink perfectly chilled.
  • 1 strip orange peel: For garnish, adding a citrusy aroma and visual appeal.
  • 1 candied pecan (optional): An indulgent finishing touch that enhances the drink’s presentation.

Pro Tips for the Perfect Cocktail

Close-up side view of a Pecan Bourbon Old Fashioned cocktail with a large ice cube and orange peel.

To ensure your Pecan Bourbon Old Fashioned is nothing short of spectacular, consider these expert tips:

  • Use Quality Ingredients: The bourbon and liqueur you choose will significantly impact the final flavor. Invest in reputable brands.
  • Be Patient with Sugar: Stir until the sugar is fully dissolved to prevent graininess in your drink.
  • Experiment with Bitters: Don’t hesitate to try different types of bitters for a unique spin on the flavor.
  • Chill Your Glass: Pre-chill your rocks glass to enhance the overall drinking experience.
  • Garnish Wisely: Use fresh orange peel and a candied pecan to add both visual flair and additional flavors.
  • Mind the Ice: A large ice cube is crucial for maintaining temperature without excessive dilution.
  • Adjust to Taste: Feel free to tweak the sweetness or bitterness based on your personal preference.
  • Serve with a Story: Share the tale behind the drink’s creation or your own adventures with pecans!

Common Mistakes and Troubleshooting

Here are some common pitfalls to avoid while crafting your Pecan Bourbon Old Fashioned:

  • Using Too Much Sugar: Start with the recommended amount and adjust as needed; you don’t want it overly sweet.
  • Skipping the Bitters: These are essential for balancing the cocktail; don’t skip this step!
  • Poor Mixing Technique: Stirring should be gentle and thorough to blend the ingredients properly.
  • Too Much Ice: Avoid overcrowding your glass, as it can dilute the drink too quickly.
  • Ignoring the Garnish: A good garnish not only enhances flavor but also elevates the presentation.

Variations on the Classic

While the Pecan Bourbon Old Fashioned is delightful on its own, here are some variations to keep your cocktail game fresh:

  • Pecan Pie Old Fashioned: Add a splash of pecan pie syrup for a dessert cocktail experience.
  • Maple Pecan Old Fashioned: Substitute maple syrup for brown sugar for a unique twist.
  • Spiced Pecan Old Fashioned: Infuse your bourbon with cinnamon or nutmeg for a cozy seasonal drink.
  • Fruit-Infused Variation: Muddle fresh fruits like cherries or oranges in the glass for a fruity twist.

Storage and Make-Ahead Instructions

If you’re planning to serve multiple guests, consider these tips:

  • Batch Preparation: Mix larger quantities of the cocktail base (sugar, bitters, bourbon, and liqueur) and store it in the fridge. Just add ice and garnish when serving.
  • Ice Storage: Prepare large ice cubes ahead of time and keep them in a sealed container to prevent fridge flavors from tainting them.
  • Garnish Prep: Candied pecans can be made in advance and stored in an airtight container for quick access.

FAQ: Your Burning Questions Answered

Here are some common questions about the Pecan Bourbon Old Fashioned:

  • Can I use any type of bourbon? Yes, but a smooth bourbon like Four Roses will enhance the drink’s flavor.
  • What if I can’t find pecan bitters? You can substitute with aromatic bitters, but the flavor profile will shift slightly.
  • How do I make it less sweet? Reduce the brown sugar or use a less sweet liqueur.
  • Can I use other nuts? While this recipe focuses on pecans, experimenting with walnut bitters could yield interesting results.
  • Is this drink suitable for a crowd? Absolutely! Just batch it and serve in a punch bowl with ice on the side.
  • How do I store leftover ingredients? Keep bourbon, bitters, and liqueur in a cool, dark place; sugar should be kept in a dry area.
  • Can I make this cocktail non-alcoholic? You can create a mocktail version using non-alcoholic bourbon alternatives.
  • What’s the best garnish? Fresh orange peel and a candied pecan create a delightful finishing touch.

Nutritional Tips and Dietary Adaptations

For those mindful of dietary needs, consider the following:

  • Lower Calorie Option: Use a sugar substitute like stevia to reduce calories without sacrificing sweetness.
  • Gluten-Free: Most bourbons are gluten-free, but always check labels to ensure your specific brand is safe.
  • Vegan-Friendly: The cocktail is inherently vegan, but ensure that your liqueur and garnishes are free from animal products.

Essential Equipment for Cocktail Crafting

To make your Pecan Bourbon Old Fashioned, here’s what you’ll need:

  • Mixing Glass: Essential for properly blending your ingredients.
  • Bar Spoon: Perfect for gentle stirring.
  • Jigger: For accurate measurement of your ingredients.
  • Double Rocks Glass: Ideal for serving this classic cocktail.
  • Large Ice Cube Tray: To create the perfect slow-diluting ice cube.

Serving Suggestions

Enhance your cocktail experience with these serving ideas:

  • Pair with Cheese: Serve alongside a cheese platter featuring sharp cheddar or creamy brie.
  • Snack Time: Roasted nuts or spiced popcorn make excellent accompaniments.
  • Perfect for Gatherings: Present the cocktail with a selection of other classic drinks for a well-rounded experience.

Conclusion: Sip, Savor, and Share

As we wrap up our exploration of the Pecan Bourbon Old Fashioned, I hope you feel inspired to mix this delightful cocktail and share it with friends and family. Each sip is a journey through flavors, stories, and cultures. So, grab your ingredients, don your apron, and let’s toast to adventure and connection, one cocktail at a time!

Pecan Bourbon Old Fashioned Recipe

Prep Time 5 minutes
Total Time 5 minutes
Servings 1 glass
Calories 180
A delightful twist on the classic Old Fashioned, featuring pecan flavors and bourbon for a rich, nutty cocktail.

Ingredients

Base

  • 2 teaspoons light brown sugar
  • 2-3 drops pecan bitters
  • 2 ounces bourbon
  • 1 teaspoon water
  • ½ ounce pecan liqueur
  • 1 large ice cube
  • 1 strip orange peel
  • 1 candied pecan optional (for garnish)

Instructions 

  • Combine brown sugar, pecan bitters, water, and bourbon in a mixing glass and stir until sugar melts.
  • Stir in pecan liqueur.
  • Place a large ice cube and orange peel in a glass.
  • Pour the mixture over the ice and garnish with a candied pecan.

Notes

Adjust the amount of pecan bitters to taste for a stronger or milder flavor.
Calories: 180kcal
Cost: $15
Course: Cocktail
Cuisine: American
Keyword: Bourbon, Pecan

Embark on a Flavorful Adventure with Salted Honey Pistachio Cookies

Welcome, fellow culinary explorers! Today, we’re diving into the enchanting world of Salted Honey Pistachio Cookies. These delightful treats blend nutty pistachios, sweet honey, and a touch of sea salt, creating an irresistible flavor journey that transcends borders. If you’re ready to savor the sweetness of life, join me as we uncover the irresistible allure of these cookies! From the first bite, you’ll understand why I adore them.

Why You’ll Love This Recipe

This recipe is not just another cookie; it’s a passport to culinary delight. Here are five compelling reasons to bake these cookies:

  • Perfect Sweet and Salty Balance: The combination of sea salt and honey elevates the sweetness, creating a flavor profile that dances on your palate.
  • Chewy Texture with a Crunch: Thanks to the honey, these cookies are soft and chewy, while the pistachios provide a satisfying crunch in every bite.
  • Simple Ingredients, Big Flavor: Everyday pantry staples come together to create cookies that taste gourmet, making them ideal for any occasion.
  • Quick and Easy Preparation: With straightforward steps, you can whip up these cookies in under an hour, perfect for those spontaneous baking sessions.
  • Versatile Treats: Whether paired with coffee, served at parties, or given as gifts, these cookies fit any occasion beautifully.

Ingredients You’ll Need

Before we dive into the baking process, let’s gather our ingredients. Here’s what you need for these scrumptious Salted Honey Pistachio Cookies:


Cake Decorating Set

★ Recommended Kitchen Tool

Cake Decorating Set

Make this recipe even easier with a quality Cake Decorating Set — a must-have kitchen staple!


🛒 Shop This Tool →

As an Amazon Associate, we earn from qualifying purchases.
  • 1 cup butter: Use salted butter for enhanced flavor.
  • 1/2 cup light brown sugar: For a hint of caramel depth.
  • 1/4 cup granulated sugar: Adds structure and sweetness.
  • 1/2 cup honey: The star ingredient that brings sweetness and moisture.
  • 1 egg: Acts as a binder for the dough.
  • 1 tablespoon vanilla extract: Adds warmth and depth of flavor.
  • 1 teaspoon coarse sea salt: Enhances the sweet and nutty flavors.
  • 1 teaspoon baking soda: Helps the cookies rise.
  • 2 1/2 cups all-purpose flour: The base for our cookie dough.
  • 1 cup chopped pistachios: The nutty crunch that defines these cookies.
  • 1 cup white chocolate chips: For a rich, sweet contrast.
  • Optional – flaked sea salt for garnish: A finishing touch that elevates the presentation.

How to Make Salted Honey Pistachio Cookies

Close-up of a salted honey pistachio cookie with white chocolate chips and chopped pistachios.

Now that we have our ingredients ready, let’s roll up our sleeves and get baking! Follow these simple steps:

  1. Brown the Butter: In a medium saucepan over medium-low heat, melt the butter, stirring consistently until it turns a deep amber color (about 5 minutes). This adds a rich, nutty flavor.
  2. Cool the Butter: Remove from heat and allow the butter to cool for 20-30 minutes to prevent cooking the eggs.
  3. Preheat Your Oven: Set your oven to 350°F (175°C) and line a baking sheet with parchment paper.
  4. Mix the Sugars: In a stand mixer, combine the cooled butter with brown sugar and granulated sugar. Mix on medium speed for 1 minute.
  5. Add Wet Ingredients: Incorporate the honey, egg, vanilla, sea salt, and baking soda. Mix for an additional minute until well combined.
  6. Incorporate the Flour: Turn the mixer to low and add the flour, mixing until just incorporated.
  7. Fold in the Goodies: Gently stir in the chopped pistachios and white chocolate chips until evenly distributed.
  8. Scoop and Bake: Using a medium cookie scoop (about 2 tablespoons), drop the dough onto the prepared baking sheet, spacing them 2 inches apart. Bake for 8 minutes or until the edges are lightly golden.
  9. Cool and Garnish: Allow the cookies to cool on the baking sheet for 3-4 minutes before transferring to a wire rack. Sprinkle with flaked sea salt if desired.

Pro Tips for Success

To ensure your Salted Honey Pistachio Cookies turn out perfectly, consider these expert insights:

  • Use Fresh Ingredients: Fresh honey and quality butter make a significant difference in flavor.
  • Don’t Overmix: Mix the dough until just combined to keep the cookies tender.
  • Chill the Dough: For thicker cookies, chill the dough for 30 minutes before baking.
  • Use a Cookie Scoop: This ensures uniform sizes, promoting even baking.
  • Check for Doneness: Remove cookies when the edges are golden but the center looks slightly underbaked for a chewy texture.
  • Experiment with Flavors: Substitute honey with maple syrup or add spices like cinnamon for a unique twist.
  • Store Properly: Keep cookies in an airtight container to preserve freshness.
  • Don’t Skip the Sea Salt: A sprinkle on top before baking enhances flavors beautifully.

Variations to Try

If you’re feeling adventurous, here are some fun variations to customize your cookies:

  • Chocolate Chip Twist: Replace white chocolate chips with dark chocolate chips for a richer flavor.
  • Nutty Medley: Combine pistachios with other nuts like almonds or walnuts for added texture.
  • Fruit Fusion: Add dried cranberries or cherries for a sweet-tart contrast.
  • Spiced Delight: Incorporate a teaspoon of cinnamon or cardamom for a warm, aromatic twist.

Storage and Make-Ahead Instructions

To keep your cookies fresh and delicious:

  • Room Temperature Storage: Store cookies in an airtight container at room temperature for up to one week.
  • Refrigeration: For longer storage, you can refrigerate cookies for up to two weeks.
  • Freezing: Freeze cookie dough in balls for up to three months. Bake directly from the freezer, adding a couple of extra minutes to the baking time.
  • Make Ahead: Prepare the dough in advance and chill it in the fridge. Bake fresh cookies whenever you desire!

Common Mistakes and Troubleshooting

Here are some common pitfalls and how to avoid them:

  • Cookies Spreading Too Much: Ensure your butter is cooled adequately before mixing, and don’t skip chilling the dough.
  • Cookies Too Hard: Avoid overbaking. Remove cookies when edges are golden but the center appears soft.
  • Flavor Lacking: Use high-quality ingredients and ensure you’re adding the right amount of salt to balance the sweetness.
  • Sticking to the Baking Sheet: Always use parchment paper or silicone baking mats to prevent sticking.

Frequently Asked Questions

If you’re still curious about these delightful cookies, here are some common questions:

  • Can I use unsalted butter? Yes, just add a pinch more salt to balance the flavors.
  • How can I make these cookies gluten-free? Substitute all-purpose flour with a gluten-free blend.
  • What can I use instead of honey? Maple syrup or agave nectar can be good alternatives for sweetness.
  • How do I know when the cookies are done? The edges should be golden and the centers slightly soft.
  • Can I add more nuts? Absolutely! Feel free to increase the amount of pistachios or mix in other nuts.
  • How long do these cookies last? They stay fresh for up to one week at room temperature.
  • Can I freeze these cookies? Yes! Freeze the dough or baked cookies for later enjoyment.
  • What’s the best way to serve these cookies? Pair them with a warm beverage or enjoy them as a sweet treat on their own!

Nutritional Tips and Dietary Adaptations

For those mindful of their dietary choices, here are some tips:

  • Lower Sugar Option: Substitute half the honey with mashed bananas or applesauce for a lower sugar alternative.
  • Nut-Free Version: Omit the pistachios and replace them with oats for a chewy texture.
  • Vegan Adaptation: Substitute butter with coconut oil and use flax eggs instead of regular eggs.

Equipment Recommendations

Having the right tools makes baking a breeze. Here are my top picks for this recipe:

  • Stand Mixer: For effortless mixing and combining of ingredients.
  • Baking Sheets: Invest in heavy-duty, non-stick baking sheets for even baking.
  • Cookie Scoop: This ensures uniform cookie sizes for consistent baking.
  • Parchment Paper: For easy cleanup and to prevent sticking.

Serving Suggestions

These cookies can be enjoyed in various delightful ways:

  • With Coffee: Pair them with a hot cup of coffee or tea for a perfect afternoon treat.
  • As a Gift: Package them in a decorative box or jar for a thoughtful homemade gift.
  • At Gatherings: Serve them at parties or family gatherings, and watch them disappear!

Conclusion: A Sweet Journey Awaits

As you embark on this culinary adventure, remember that every cookie tells a story. Your Salted Honey Pistachio Cookies are not just a treat; they’re a connection to the world’s rich tapestry of flavors. Whether you savor them alone or share them with loved ones, these cookies are bound to create sweet memories. Happy baking, and may your kitchen be filled with the warm aroma of freshly baked cookies! Enjoy your sweet journey!

Salted Honey Pistachio Cookies

Prep Time 15 minutes
Cook Time 10 minutes
Total Time 25 minutes
Servings 24 cookies
Calories 150
Delight in these rich, buttery cookies infused with honey and topped with pistachios and sea salt for a perfect balance of sweet and savory.

Ingredients

Dough

  • 1 cup butter (unsalted, room temperature)
  • 1/2 cup light brown sugar
  • 1/4 cup granulated sugar
  • 1/2 cup honey
  • 1 egg egg
  • 1 tablespoon vanilla extract
  • 1 teaspoon coarse sea salt
  • 1 teaspoon baking soda
  • 2 1/2 cups all purpose flour
  • 1 cup chopped pistachios
  • 1 cup white chocolate chips
  • optional flaked sea salt for garnish

Instructions 

  • Melt butter over medium-low heat until browned, then cool for 20-30 minutes.
  • Preheat oven to 350°F (175°C). Line baking sheet with parchment.
  • Mix cooled butter with sugars, then add honey, egg, vanilla, salt, and baking soda. Combine.
  • Stir in flour, pistachios, and white chocolate chips. Drop dough onto sheet and bake for 8 minutes.
  • Cool cookies for 3-4 minutes, then transfer to wire rack. Garnish with flaked sea salt if desired.

Notes

For extra flavor, sprinkle with flaked sea salt before serving.
Calories: 150kcal
Cost: $15
Course: Dessert
Keyword: cookies, honey, pistachios

A Culinary Adventure in Every Bite: Discovering Honey Garlic Chicken Thighs

Welcome to a culinary journey where flavors mingle and stories unfold! Today, I invite you to dive into the delightful world of Honey Garlic Chicken Thighs made effortlessly in your slow cooker. This dish is not just a recipe; it’s an experience that brings together the sweetness of honey, the savory depth of garlic, and the tender succulence of chicken thighs. Whether you’re gathering family around the dinner table or serving friends on a cozy evening, this meal is sure to evoke warmth and connection.

Why You’ll Love This Recipe

There are countless reasons to fall in love with this slow-cooked masterpiece. Here are just a few:

  • Effortless Preparation: With minimal prep time, this dish is perfect for busy days when you want to come home to a comforting meal.
  • Flavor Explosion: The combination of honey, soy sauce, and fresh garlic creates a mouthwatering sauce that clings to the chicken, making every bite unforgettable.
  • Healthier Option: Using boneless, skinless chicken thighs ensures a juicy texture without compromising on health.
  • Versatile Serving Options: Serve it over rice, with steamed vegetables, or in a wrap to suit any palate.
  • Great for Meal Prep: This dish stores well, making it a fantastic option for weekly meal prep.

Ingredients for Your Honey Garlic Chicken Thighs

Before we embark on this culinary adventure, let’s gather our ingredients. Here’s what you’ll need:


Digital Meat Thermometer

★ Recommended Kitchen Tool

Digital Meat Thermometer

Make this recipe even easier with a quality Digital Meat Thermometer — a must-have kitchen staple!


🛒 Check Price on Amazon →

As an Amazon Associate, we earn from qualifying purchases.
  • 2 pounds of chicken thighs (boneless, skinless): A flavorful choice that stays moist during cooking.
  • 1/3 cup low-sodium soy sauce: For a savory depth without excessive salt.
  • 1/3 cup honey: Adds the signature sweetness that balances the savory flavors.
  • 1/3 cup ketchup: A surprising yet delicious ingredient that adds tanginess.
  • 6 cloves garlic, minced: The star of the show, infusing the dish with aromatic flavor.
  • 1/2 teaspoon apple cider vinegar: A touch of acidity to brighten the flavors.
  • 1 teaspoon grated fresh ginger: For an added layer of warmth and spice.
  • 1 pinch crushed red pepper flakes (optional): A kick for those who love a bit of heat.
  • 2 tablespoons cornstarch: To thicken the sauce at the end.
  • For serving: Chopped scallions and sesame seeds add a finishing touch, along with rice if desired.

How to Make Slow Cooker Honey Garlic Chicken Thighs

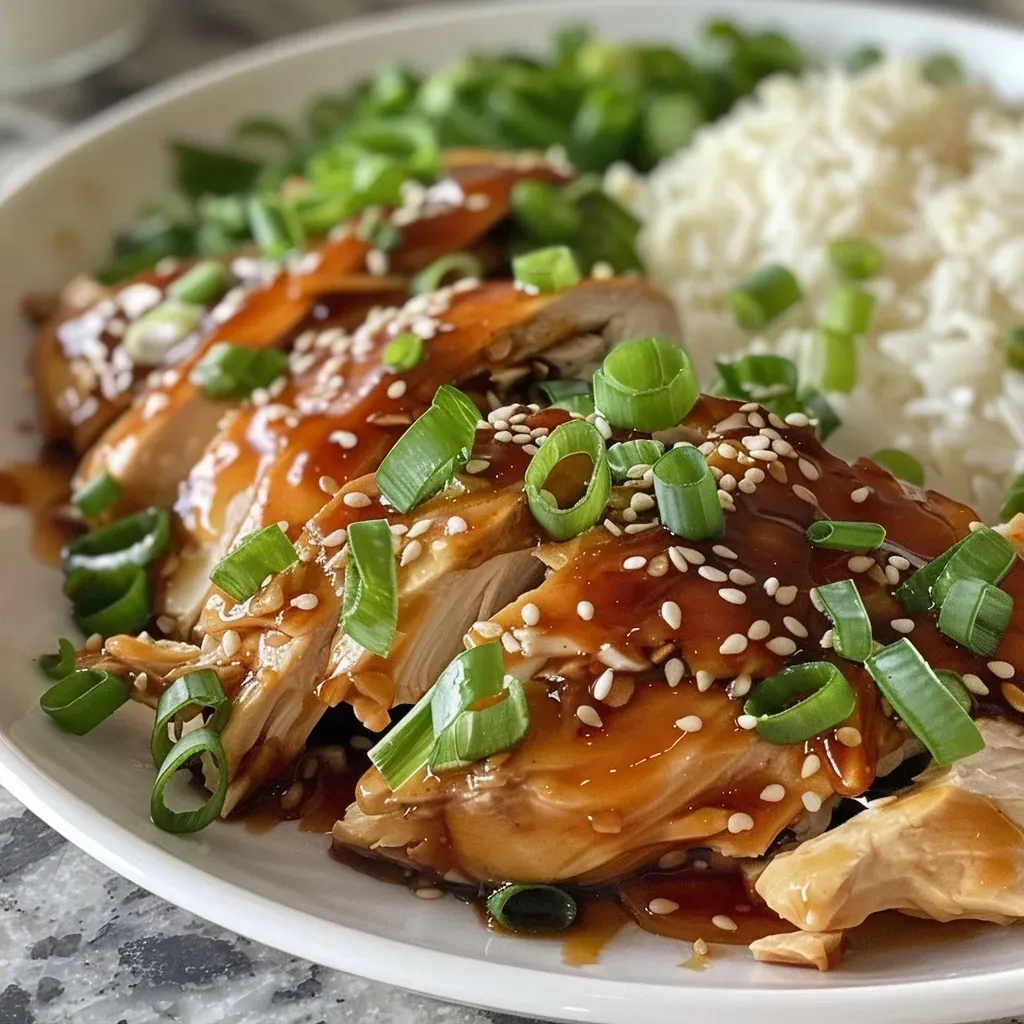
Close up of juicy honey garlic chicken thighs served with rice and garnished with scallions and sesame seeds.

Now that we have our ingredients, let’s walk through the steps to create this delicious dish:

  • Step 1: Prepare the Chicken Thighs: Place the chicken thighs in the bottom of your slow cooker, arranging them in an even layer.
  • Step 2: Make the Sauce: In a bowl, combine the soy sauce, honey, ketchup, minced garlic, apple cider vinegar, grated ginger, and the optional red pepper flakes. Whisk until well blended.
  • Step 3: Combine Chicken and Sauce: Pour the sauce over the chicken, ensuring it’s well coated.
  • Step 4: Slow Cook: Set your slow cooker to high for 3.5 hours or low for 6-8 hours. The longer the cook, the more tender the chicken will be.
  • Step 5: Thicken the Sauce: Mix the cornstarch with 2 tablespoons of cold water in a small bowl. Pour this mixture into the slow cooker, stir, and cook on high for an additional 15 minutes to thicken the sauce.
  • Step 6: Serve: You can leave the chicken whole or shred it with two forks right in the slow cooker. Serve over rice, garnished with scallions and sesame seeds for a beautiful presentation.

Pro Tips for Perfect Honey Garlic Chicken

To elevate your cooking game, consider these expert insights:

  • Marination Magic: For deeper flavor, marinate the chicken in the sauce for a few hours or overnight before cooking.
  • Temperature Check: Always use a meat thermometer to ensure the chicken reaches an internal temperature of 165°F for safety.
  • Veggie Boost: Feel free to add vegetables like bell peppers, carrots, or broccoli in the last hour of cooking for added nutrition and color.
  • Leftover Makeover: Use leftover chicken in salads, wraps, or stir-fries for quick and easy meals throughout the week.
  • Slow Cooker Sizes: Adjust the recipe quantities based on your slow cooker size. A 6-quart cooker is ideal for this recipe.
  • Garnish for Flair: Consider adding fresh herbs like cilantro or parsley for a pop of color and freshness.
  • Alternative Cooking Methods: This recipe can also be adapted for the oven. Bake at 375°F for about 45 minutes, basting occasionally.
  • Experiment with Sauces: While honey garlic is delightful, try swapping honey for maple syrup or adding orange juice for a citrus twist.

Common Mistakes and Troubleshooting

Cooking can be a learning process! Here are some common pitfalls and how to avoid them:

  • Dry Chicken: Overcooking can lead to dryness. Stick to the recommended cooking time and check for doneness.
  • Too Salty: Always opt for low-sodium soy sauce to control the saltiness of the dish.
  • Thin Sauce: If the sauce is too watery, ensure you use the cornstarch mixture and cook it long enough to thicken.
  • Flavorless Dish: Taste your sauce before adding it to the chicken. Adjust seasoning if necessary.

Variations of Honey Garlic Chicken Thighs

This recipe is incredibly adaptable. Here are some variations to keep your meals exciting:

  • Spicy Honey Garlic Chicken: Add more crushed red pepper flakes or a dash of sriracha to the sauce for a spicy kick.
  • Honey Sesame Chicken: Stir in sesame oil and top with toasted sesame seeds for a richer flavor.
  • Honey Garlic Chicken Stir-fry: After cooking, quickly sauté the chicken with vegetables in a hot pan for a stir-fry version.
  • Honey Garlic BBQ Chicken: Substitute BBQ sauce for ketchup for a smoky twist.

Storage and Make-Ahead Instructions

This dish is perfect for meal prep! Here’s how to store and reheat:

  • Refrigeration: Store leftovers in an airtight container in the refrigerator for up to 4 days.
  • Freezing: This dish freezes well. Place cooled chicken and sauce in a freezer-safe container for up to 3 months.
  • Reheating: Thaw overnight in the fridge and reheat in the microwave or on the stovetop until heated through.

Frequently Asked Questions

Let’s address some common questions about this recipe:

  • Can I use chicken breasts instead of thighs? Yes, but keep in mind that chicken breasts may dry out more easily than thighs.
  • Is it necessary to use cornstarch? It’s not mandatory, but it helps create a thicker, more luscious sauce.
  • Can I use fresh garlic instead of minced? Fresh garlic is preferred for the best flavor.
  • What sides pair well with this dish? Serve with steamed rice or quinoa and sautéed vegetables for a complete meal.
  • Can I make this recipe in advance? Absolutely! It’s a great meal prep option and tastes even better the next day!
  • What if my sauce is too sweet? Add a splash of vinegar or soy sauce to balance the sweetness.
  • Is this recipe gluten-free? Use gluten-free soy sauce or tamari for a gluten-free version.
  • What other proteins can I use? This sauce works well with pork, tofu, or even shrimp!

Nutritional Tips and Dietary Adaptations

This recipe can be adapted for various dietary needs:

  • Low-Carb Option: Serve with cauliflower rice instead of traditional rice.
  • Paleo-Friendly: Replace soy sauce with coconut aminos for a paleo-compliant dish.
  • Lower Sugar: Use less honey or a sugar substitute to reduce sugar content.

Essential Equipment for Cooking

To make this recipe a breeze, here are some kitchen essentials:

  • Slow Cooker: A reliable slow cooker is key for this recipe.
  • Meat Thermometer: To ensure your chicken is cooked perfectly.
  • Mixing Bowls: For combining your sauce ingredients.
  • Sharp Knife: To mince garlic and chop scallions.

Serving Suggestions to Elevate Your Meal

Make your meal even more special with these suggestions:

  • Fresh Herbs: Garnish with cilantro or parsley for an aromatic touch.
  • Vegetable Side Dishes: Pair with roasted broccoli or a fresh salad.
  • Rice Alternatives: Quinoa or couscous make great bases for this dish.

In conclusion, Honey Garlic Chicken Thighs are more than just a recipe; they are a gateway to exploring flavors and cultures from the comfort of your home. With every bite, you taste the love and adventure that comes with cooking. So grab your slow cooker, gather your ingredients, and let’s make some magic happen in the kitchen together. Happy cooking!

Honey Garlic Slow Cooker Chicken Thighs

Prep Time 10 minutes
Cook Time 3 hours 30 minutes
Total Time 3 hours 40 minutes
Servings 4 servings
Calories 350
Delicious tender chicken thighs cooked in a sweet and savory honey garlic sauce, perfect for an easy weeknight dinner.

Ingredients

Protein

  • 2 pounds chicken thighs (boneless skinless)

Sauce ingredients

  • 1/3 cup low-sodium soy sauce
  • 1/3 cup honey
  • 1/3 cup ketchup
  • 6 cloves garlic (minced)
  • 1/2 teaspoon apple cider vinegar
  • 1 teaspoon grated fresh ginger
  • 1 pinch crushed red pepper flakes (optional)
  • 2 tablespoons cornstarch

Instructions 

  • Add chicken thighs to the slow cooker in an even layer.
  • Whisk together soy sauce, honey, ketchup, garlic, vinegar, ginger, and red pepper flakes; pour over chicken.
  • Cook on high for 3.5 hours or low for 6-8 hours.
  • Mix cornstarch with cold water, add to slow cooker, and cook on high for 15 minutes until thickened.
  • Shred chicken if desired, serve over rice, and garnish with scallions and sesame seeds.

Notes

For extra flavor, marinate the chicken in the sauce for 30 minutes before cooking.
Calories: 350kcal
Cost: $15
Course: Main Course
Cuisine: American
Keyword: Chicken, honey, Slow Cooker

Experience the Joy of Autumn with Pumpkin Churro Bites

Welcome to a delightful culinary adventure where we celebrate the flavors of fall with these instant pot pumpkin churro bites. This recipe is not just about indulging your sweet tooth; it’s about embracing the warmth, comfort, and joy that come with the season. Imagine biting into a soft, fluffy churro infused with the rich essence of pumpkin and a hint of cinnamon. They’re easy to make and perfect for gatherings, making them an ideal treat for family and friends. Let’s dive into this journey of flavors and discover why these churro bites are destined to become a fall favorite!

Why You’ll Love This Recipe

  • Quick and Easy: With the help of your Instant Pot, these churro bites can be prepared in no time, allowing you to whip up a delicious treat even on busy days.
  • Seasonal Flavors: The harmonious blend of pumpkin puree and traditional spices makes these bites a perfect representation of autumn’s bounty.
  • Versatile Treat: Enjoy these churro bites as a dessert, snack, or even a unique breakfast item that will impress your loved ones.
  • Perfect for Sharing: With 14 delightful bites, they are ideal for gatherings, parties, or just a cozy evening at home.
  • Customizable: This recipe allows for various adaptations, ensuring that you can tweak it to suit your taste preferences or dietary needs.

Ingredients for Pumpkin Churro Bites

Before we get started, let’s take a closer look at the ingredients you’ll need to create these delectable pumpkin churro bites. Feel free to explore substitutions if you’re missing something or want to cater to dietary restrictions.

  • 1 cup canned pumpkin: Provides the rich pumpkin flavor and moisture.
  • 2 eggs: Acts as a binding agent and adds richness.
  • 1/2 cup golden brown sugar: For sweetness and a hint of caramel flavor.
  • 1/3 cup milk: Enhances the batter’s moisture; can be substituted with almond milk for a dairy-free option.
  • 1/4 cup honey: A natural sweetener that complements the other flavors; can be replaced with maple syrup.
  • 3 tablespoons vegetable oil: Keeps the churro bites moist; can use coconut oil for a different flavor.
  • 1 1/2 teaspoons pumpkin pie spice: Essential for that classic pumpkin flavor.
  • 1 teaspoon pure vanilla extract: Adds depth to the sweetness.
  • 1 teaspoon baking powder: Helps the bites rise and become fluffy.
  • 1/2 teaspoon baking soda: Works with the acid in the recipe for leavening.
  • 1/2 teaspoon salt: Balances the sweetness.
  • 1 1/2 cups all-purpose flour: The main structure of the churro bites.
  • 1/4 cup butter: Melted for coating; enhances flavor when rolled in cinnamon-sugar.
  • 1/4 cup sugar and 1 teaspoon cinnamon: For the classic churro coating, adding sweetness and spice.

How to Make Pumpkin Churro Bites

A close-up side view of golden brown Pumpkin Churro Bites, showcasing their crispy exterior and soft interior.

Let’s walk step-by-step through the process of making these delightful bites!


Meal Prep Container Set

★ Recommended Kitchen Tool

Meal Prep Container Set

Make this recipe even easier with a quality Meal Prep Container Set — a must-have kitchen staple!


🛒 See Deals on Amazon →

As an Amazon Associate, we earn from qualifying purchases.
  1. Start by spraying two sets of silicone molds and silicone lids with non-stick cooking spray and set them aside.
  2. In a medium mixing bowl, combine the pumpkin, eggs, brown sugar, milk, honey, vegetable oil, pumpkin pie spice, and vanilla extract. Whisk until smooth.
  3. In a larger mixing bowl, combine the baking powder, baking soda, salt, and all-purpose flour. Gradually add the wet ingredients to the dry ingredients and stir until just combined; do not overmix.
  4. Divide the pumpkin batter evenly between the molds, yielding a total of 14 bites.
  5. Cover both molds with silicone lids or foil. Add one cup of water to the Instant Pot, place the molds on a trivet, and insert them into the pot.
  6. Set the Instant Pot to cook on high pressure for 12 minutes, then allow for a natural pressure release for 10 minutes. After 10 minutes, release any remaining pressure and carefully remove the molds.
  7. Once cooled, turn the pumpkin bites out onto a plate.
  8. In a small bowl, combine the sugar and cinnamon. Lightly brush the pumpkin bites with melted butter, then roll them in the cinnamon-sugar mixture to coat.

Pro Tips for Perfect Pumpkin Churro Bites

  • Don’t Overmix: To keep the bites soft and tender, mix just until the ingredients are combined.
  • Use Fresh Ingredients: Ensure your baking powder and spices are fresh for the best flavor and texture.
  • Experiment with Spices: Feel free to add nutmeg or ginger for an extra layer of warmth.
  • Check Doneness: If you’re unsure, insert a toothpick into the center; it should come out clean.
  • Adjust Sweetness: Taste the batter before baking and adjust the sweetness to your preference.
  • Let Them Cool: Allow the bites to cool slightly before rolling in the cinnamon-sugar for better adherence.
  • Use Silicone Molds: They make it easy to remove the bites without sticking or breaking.
  • Store Properly: Keep any leftovers in an airtight container at room temperature for up to three days.

Common Mistakes and Troubleshooting

Here are some common issues you might encounter while making pumpkin churro bites and how to avoid them:

  • Too Dense: If your bites turn out dense, it could be due to overmixing or too much flour. Be sure to gently fold the ingredients.
  • Too Sweet: If the bites are overly sweet, consider reducing the sugar in the batter next time.
  • Sticking to Molds: Ensure that you spray the molds well with non-stick spray and allow enough cooling time.
  • Uneven Cooking: Make sure your molds are filled evenly to ensure even cooking throughout.

Variations on Pumpkin Churro Bites

Get creative with these adaptations to make your churro bites even more exciting:

  • Chocolate Chip Pumpkin Churro Bites: Incorporate mini chocolate chips into the batter for a sweet surprise.
  • Cream Cheese Filling: Add a dollop of cream cheese in the center of each mold before adding the batter for a creamy twist.
  • Gluten-Free Option: Substitute all-purpose flour with a gluten-free flour blend for a delightful gluten-free treat.
  • Spiced Sugar Coating: Mix in additional spices like cardamom or allspice into the cinnamon-sugar for a unique flavor profile.

Storage and Make-Ahead Instructions

These pumpkin churro bites can be made ahead of time and stored for later enjoyment:

  • Room Temperature: Store in an airtight container for up to three days at room temperature.
  • Refrigerator: For longer storage, keep in the fridge for up to one week.
  • Freezing: Freeze for up to three months. Before serving, thaw and reheat in the oven for a few minutes to restore their delightful texture.

Frequently Asked Questions (FAQs)

Here are some common questions about making pumpkin churro bites:

  • 1. Can I make these pumpkin churro bites gluten-free?
    Yes, simply substitute the all-purpose flour with a gluten-free flour blend.
  • 2. How do I store leftover pumpkin churro bites?
    Keep them in an airtight container at room temperature for up to three days, or refrigerate for up to a week.
  • 3. Can I use fresh pumpkin instead of canned?
    Yes, but make sure to cook and puree the pumpkin until it’s smooth before using.
  • 4. What can I use instead of honey?
    Maple syrup or agave nectar can be used as a substitute for honey.
  • 5. How do I know when they are done cooking?
    Insert a toothpick into the center; it should come out clean when they are fully cooked.
  • 6. Can I add other spices?
    Absolutely! Feel free to add nutmeg or ginger for more depth of flavor.
  • 7. What can I serve with pumpkin churro bites?
    These bites pair beautifully with whipped cream, caramel sauce, or even a warm cup of cider.
  • 8. Can I make the batter ahead of time?
    Yes, you can store the batter in the refrigerator for up to 24 hours before cooking.

Nutritional Tips and Dietary Adaptations

For those who are health-conscious or have specific dietary needs, here are some tips:

  • Lower Sugar Options: Reduce the amount of sugar or replace it with a sugar substitute.
  • Healthy Fats: Substitute vegetable oil with unsweetened applesauce or mashed banana for a healthier fat option.
  • Protein Boost: Add a scoop of protein powder to the batter for a nutritious twist.

Essential Equipment for Making Pumpkin Churro Bites

Having the right tools can make your cooking experience smoother:

  • Instant Pot: An essential tool for creating these churro bites quickly and easily.
  • Silicone Molds: Perfect for easy release and uniform shapes.
  • Mixing Bowls: Use multiple bowls for separating wet and dry ingredients.
  • Whisk and spatula: Essential for mixing and scraping down the sides of your bowls.

Serving Suggestions for Pumpkin Churro Bites

These churro bites can be enjoyed in various ways:

  • With Dipping Sauces: Serve with caramel sauce, chocolate sauce, or whipped cream for a decadent treat.
  • As a Breakfast Item: Pair them with a warm beverage for a cozy breakfast idea.
  • At Gatherings: Present them on a festive platter for a delightful autumn party treat.

In conclusion, these pumpkin churro bites are not just a recipe; they are a celebration of the flavors and warmth of the fall season. They embody the joy of sharing and the comfort of indulgence. So grab your ingredients, fire up your Instant Pot, and embark on this tasty journey that will bring your friends and family together around the table. Happy cooking!

Instant Pot Pumpkin Churro Bites

Prep Time 10 minutes
Cook Time 12 minutes
Total Time 22 minutes
Servings 14 pieces
Calories 150
Delight in these soft, spiced pumpkin bites cooked effortlessly in the Instant Pot, then coated in cinnamon sugar for a perfect fall treat.

Ingredients

wet ingredients

  • 1 cup canned pumpkin (100% pure pumpkin)
  • 2 eggs eggs
  • 1/2 cup golden brown sugar (firmly packed)
  • 1/3 cup milk
  • 1/4 cup honey
  • 3 tablespoons vegetable oil
  • 1 1/2 teaspoons pumpkin pie spice
  • 1 teaspoon pure vanilla extract
  • 1 teaspoon baking powder
  • 1/2 teaspoon baking soda
  • 1/2 teaspoon salt
  • 1 1/2 cups all-purpose flour
  • 1/4 cup butter (melted)
  • 1/4 cup sugar
  • 1 teaspoon cinnamon

Instructions 

  • Spray molds with non-stick spray and set aside.
  • Mix pumpkin, eggs, sugar, milk, honey, oil, spices, and vanilla until combined.
  • Combine dry ingredients and add wet mixture; stir until smooth.
  • Divide batter into molds, cover, and cook in Instant Pot for 12 minutes on high pressure.
  • Release pressure, remove bites, and coat with cinnamon sugar after brushing with melted butter.

Notes

Ensure to evenly divide batter for consistent bites.
Calories: 150kcal
Cost: $15
Course: Dessert
Cuisine: American
Keyword: pumpkin

Unveiling the Magic of Pumpkin Spice Caramel Corn

As the leaves start to turn and the crisp air settles in, there’s nothing quite as comforting as the warm, inviting aroma of pumpkin spice wafting through the kitchen. Today, we’re diving into the enchanting world of pumpkin spice caramel corn, a delightful treat that embodies the spirit of autumn and is sure to bring a smile to your face. This recipe combines the sweetness of caramel with the warm spices reminiscent of cozy gatherings and festive celebrations. Whether you’re planning a Halloween party or simply indulging in a seasonal snack, this caramel corn will be a hit!

Why You’ll Love This Recipe

  • Irresistible Flavor: The blend of pumpkin spice and caramel creates a unique and addictive flavor profile that’s hard to resist.
  • Easy to Make: With straightforward steps and simple ingredients, you can whip up this treat in no time.
  • Customizable: Whether you prefer nuts, seeds, or just plain popcorn, this recipe allows you to create your own version with ease.
  • Perfect for Gifting: Packaged in a cute jar, this caramel corn makes a thoughtful gift for friends and family during the fall season.
  • Great for Entertaining: Serve this at parties, movie nights, or holiday gatherings, and watch it disappear!

Ingredients Breakdown

Before we dive into the recipe, let’s take a closer look at the ingredients you’ll need. This breakdown not only covers what to use but also includes substitutions for dietary preferences.

  • 1 cup popcorn (popped plain): For a light and fluffy base, use air-popped popcorn. Avoid adding butter or salt to keep it neutral.
  • 1 cup pumpkin spiced pepitas: These roasted pumpkin seeds add crunch and a nutty flavor. You can substitute with your favorite nuts like peanuts or almonds if preferred.
  • 10 oz (2 1/2 sticks) unsalted butter: Unsalted butter gives you control over the saltiness. You can also use coconut oil for a dairy-free option.
  • 15 oz (about 2 cups) packed brown sugar: Brown sugar adds depth and moisture. Light or dark brown sugar works well.
  • 3/4 cup corn syrup: This ingredient helps prevent crystallization, ensuring your caramel is smooth and sticky.
  • 2 1/2 teaspoons kosher salt: The salt balances out the sweetness. Adjust according to taste.
  • 2-3 teaspoons pumpkin spice: A blend of cinnamon, nutmeg, ginger, and cloves that evokes the essence of fall.
  • 3/4 teaspoon baking soda: This adds lightness to the caramel and helps it expand during cooking.

Step-by-Step Procedure

A close-up view of Pumpkin Spice Caramel Corn in a decorative bowl.

Now that we have our ingredients ready, let’s jump into the procedure. Follow these steps closely to ensure your pumpkin spice caramel corn comes out perfectly!


Meal Prep Container Set

★ Recommended Kitchen Tool

Meal Prep Container Set

Make this recipe even easier with a quality Meal Prep Container Set — a must-have kitchen staple!


🛒 See Deals on Amazon →

As an Amazon Associate, we earn from qualifying purchases.
  1. Put the popcorn into two large pans, topping each with half of the pepitas or nuts. Set aside near the stove for easy access.
  2. Preheat your oven to 250°F (120°C) and place a rack in the center.
  3. In a large saucepan, melt the butter over medium heat.
  4. Once most of the butter has melted, add the brown sugar, corn syrup, salt, and pumpkin spice.
  5. Increase the heat to medium-high and bring the mixture to a rolling boil.
  6. Allow it to boil for 5 minutes, stirring frequently to avoid burning.
  7. After 5 minutes, stir in the baking soda. The mixture will become frothy—this is normal!
  8. Pour half of the caramel mixture evenly over each pan of popcorn.
  9. Stir the caramel into each pan of popcorn as evenly as possible, then place both pans in the oven.
  10. After 15-20 minutes, remove one pan at a time and gently fold the popcorn over itself, scraping the bottom to redistribute the caramel.
  11. Return the popcorn to the oven and repeat the stirring process two more times.
  12. Once evenly coated, pour the popcorn onto a large Silpat or non-stick surface to cool, breaking it up as it cools to avoid large chunks.
  13. Store airtight for up to 5 days, refreshing in a 350°F (175°C) oven for 5 minutes if it softens. Enjoy!

Pro Tips for Perfect Pumpkin Spice Caramel Corn

To elevate your caramel corn game, consider these expert tips:

  • Use fresh spices: Freshly ground spices enhance the flavor. If you can, grind your own pumpkin spice mix.
  • Don’t rush the caramel: Allow the caramel to boil for the full 5 minutes to achieve the right consistency.
  • Watch the oven: Keep an eye on the popcorn in the oven to prevent burning; stirring is key!
  • Store properly: Ensure the caramel corn is completely cool before storing to maintain crunchiness.
  • Experiment with flavors: Try adding a touch of vanilla extract or a sprinkle of sea salt on top for an extra layer of flavor.

Common Mistakes and Troubleshooting

Even the best cooks can make mistakes! Here are some common pitfalls and how to avoid them:

  • Burnt caramel: If your caramel burns, it’s likely due to cooking too long or at too high a heat. Keep your heat at medium and monitor closely.
  • Soft popcorn: If your popcorn turns soft, it may not have been baked long enough. Ensure you follow the baking instructions and store it correctly.
  • Uneven coating: Stirring is crucial! Make sure to mix thoroughly to ensure every kernel is coated.
  • Too chewy: If your caramel is too chewy, it may have been cooked too long. Aim for a rolling boil without going over the time.

Delicious Variations to Try

Looking to mix things up? Here are some tasty variations of pumpkin spice caramel corn you can try:

  • Chocolate Drizzle: After cooling, drizzle melted chocolate over the caramel corn for a sweet and rich flavor contrast.
  • Spicy Kick: Add a pinch of cayenne pepper to the caramel mixture for a surprising heat that balances the sweetness.
  • Nutty Delight: Mix in different kinds of nuts, like pecans or walnuts, for added crunch and flavor.
  • Maple Flavor: Substitute maple syrup for corn syrup for a deeper, more complex sweetness.

Storage and Make-Ahead Instructions

Planning to make this treat ahead of time? Here’s how to store and prepare your pumpkin spice caramel corn:

  • Storage: Keep your caramel corn in an airtight container at room temperature for up to 5 days to maintain its freshness.
  • Make-ahead: You can prepare this treat up to a week in advance. Just make sure it’s completely cooled before sealing it in a container.
  • Refreshing: If it loses its crunch, reheat it in a 350°F oven for about 5 minutes for that fresh taste again!

Frequently Asked Questions (FAQs)

Here are some common questions about making pumpkin spice caramel corn:

  • Can I use microwave popcorn?: Yes, but avoid flavored varieties. Use plain popcorn to control the flavor.
  • What can I substitute for corn syrup?: You can use honey or maple syrup, but be aware that it may alter the flavor slightly.
  • Is this recipe gluten-free?: Yes, as long as you use gluten-free popcorn and ensure no cross-contamination occurs.
  • Can I make this dairy-free?: Substitute coconut oil for butter and use dairy-free chocolate if drizzling.
  • How do I achieve a crunchy texture?: Properly baking and storing are key. Ensure it’s completely cool before sealing.
  • What’s the best way to break up the caramel corn?: Wait until it’s completely cool, then gently break it apart with your hands.
  • Can I add other spices?: Absolutely! Feel free to experiment with cinnamon or nutmeg to adjust the flavor to your liking.
  • How do I make it festive?: Consider adding festive sprinkles or packaging it in decorative bags for gifts!

Nutrition Tips and Dietary Adaptations

As you indulge in this delightful treat, consider these nutrition tips:

  • Portion Control: Be mindful of serving sizes to enjoy without overindulgence.
  • Nut Alternatives: For nut allergies, consider using pumpkin seeds or leaving them out entirely.
  • Lower Sugar Option: Experiment with reducing the brown sugar or using a sugar substitute for a healthier version.
  • Whole Grain Popcorn: Opt for whole grain popcorn for added fiber and nutrients.

Essential Equipment

To make the process smoother, here’s a list of essential tools you’ll need:

  • Large Saucepan: A heavy-bottomed saucepan helps distribute heat evenly and prevents scorching.
  • Oven-Safe Baking Pans: Use large sheet pans to spread the popcorn for even baking.
  • Silpat or Non-Stick Surface: This will prevent sticking and make cleanup easier.
  • Spatula: A silicone spatula is great for stirring and mixing without scratching your pans.

Serving Suggestions

Once your pumpkin spice caramel corn is ready, here are some fun ways to serve it:

  • Party Favors: Package in small bags or jars as sweet take-home treats for guests.
  • Movie Night Snack: Serve with your favorite fall-themed movies for a cozy night in.
  • Game Day Treat: Perfect for gatherings with friends—set out in a big bowl for everyone to enjoy.
  • Festive Centerpiece: Use a decorative bowl to display it as a charming centerpiece during fall gatherings.

Conclusion: A Taste of Autumn in Every Bite

As we wrap up our journey into the world of pumpkin spice caramel corn, remember this isn’t just a recipe; it’s an experience that connects us to the flavors of the season. The sweet, crunchy delight evokes memories of family, friends, and the joy of sharing good food. So gather your ingredients, invite a friend over, and enjoy the process of making this delightful treat together. Here’s to celebrating the flavors of fall and creating delicious memories one kernel at a time!

Pumpkin Spice Caramel Corn

Prep Time 10 minutes
Cook Time 1 hour
Total Time 1 hour 10 minutes
Servings 8 cups
Calories 600
A deliciously spiced caramel popcorn treat perfect for fall snacking or holiday gatherings.

Ingredients

Popcorn

  • 1 cup popcorn (popped plain) (no butter, no salt)

Pumpkin spiced pepitas or nuts

  • 1 cup pumpkin spiced pepitas (or your favorite nut)

Butter

  • 10 oz unsalted butter

Brown sugar

  • 15 oz packed brown sugar (about 2 cups)

Corn syrup

  • 3/4 cup corn syrup

Kosher salt

  • 2 1/2 teaspoons kosher salt (Morton’s)

Pumpkin spice

  • 2-3 teaspoons pumpkin spice

Baking soda

  • 3/4 teaspoon baking soda

Instructions 

  • Preheat oven to 250°F (120°C). Arrange popcorn and nuts on pans.
  • Melt butter, then stir in brown sugar, corn syrup, salt, and pumpkin spice. Bring to a boil for 5 minutes.
  • Remove from heat, stir in baking soda until bubbly, then pour over popcorn and nuts. Bake for 15-20 minutes, stirring occasionally.
  • Repeat baking and stirring steps twice more, then cool on a non-stick surface and break into pieces.
  • Store in an airtight container for up to 5 days. Reheat briefly if it softens. Enjoy!

Notes

For extra crunch, stir the popcorn halfway through baking.
Calories: 600kcal
Cost: $15
Course: Snack
Keyword: caramel, popcorn, Pumpkin Spice