Author

Jack

Browsing

Embark on a Culinary Adventure with Homemade Broccoli Cheddar Soup

Welcome, fellow food lovers! Are you ready to dive into a warm bowl of comfort that transports you straight to your favorite café? I’m Jack, your culinary companion, and today, we’re recreating the beloved Panera Broccoli Cheddar Soup right in your kitchen. This recipe is not just about following steps; it’s about embracing flavors, textures, and the joy of cooking. So grab your apron, and let’s embark on this delicious adventure together!

Why You’ll Love This Recipe

This isn’t just any soup; this is an experience! Here are five reasons why you’ll adore this homemade version of broccoli cheddar soup:

  • Comfort in a bowl: Creamy, cheesy, and packed with nutritious broccoli, this soup is the ultimate comfort food that warms both the heart and soul.
  • Quick and easy: In less than an hour, you can whip up a restaurant-quality soup that rivals any café offering.
  • Customizable flavors: Whether you like it spicy or mild, this recipe allows you to adjust seasonings and ingredients to suit your palate.
  • Budget-friendly: Save money by making this copycat Panera dish at home, using simple ingredients you likely already have!
  • Perfect for meal prep: Make a big batch to enjoy throughout the week or freeze for future meals, making it a convenient option for busy days.

Ingredient Breakdown: What You’ll Need

Before we roll up our sleeves, let’s gather our ingredients. Here’s what you’ll need to create this scrumptious soup:


Professional Chef Knife Set

★ Recommended Kitchen Tool

Professional Chef Knife Set

Make this recipe even easier with a quality Professional Chef Knife Set — a must-have kitchen staple!


🛒 Check Price on Amazon →

As an Amazon Associate, we earn from qualifying purchases.
  • 2 Tbsp. olive oil or butter: For sautéing and adding richness.
  • 1 cup matchstick or julienned carrots: Sweetness and color contrast.
  • 1 small yellow onion, diced: Aromatic base for depth of flavor.
  • 3 cups broccoli: Use 2 cups diced small and 1 cup in larger florets for texture.
  • 1 cup broccoli stems, diced small: Don’t waste those stems; they add great flavor!
  • 1 tsp. kosher salt: Essential for enhancing flavors.
  • 1 1/2 tsp. garlic, minced: A must for that aromatic kick.
  • 1/4 cup all-purpose flour: For thickening the soup.
  • 3 cups chicken broth: The flavorful liquid base.
  • 2 cups half and half, slightly warmed: For creaminess.
  • 1 Tbsp. dijon mustard: For a tangy twist.
  • 1 Tbsp. granulated sugar: Balances the flavors.
  • 1 tsp. hot sauce: Adds a little heat if you like it spicy!
  • 1/4 tsp. paprika: For a hint of smokiness.
  • 1/4 tsp. turmeric: Adds warmth and color.
  • 8 oz. sharp cheddar cheese, shredded: The star of the show!
  • 6 oz. Velveeta cheese, cut into cubes: For that extra creaminess.
  • 1 1/2 Tbsp. cornstarch + 1 1/2 Tbsp. water (optional): To thicken further if desired.

If you have dietary preferences, here are some substitutions you can make:

  • For a vegetarian option: Swap chicken broth for vegetable broth.
  • Dairy-free: Use coconut milk or almond milk instead of half and half, and substitute cheese with a dairy-free alternative.
  • Gluten-free: Replace all-purpose flour with a gluten-free flour blend.

Step-by-Step Directions for Crafting Your Soup
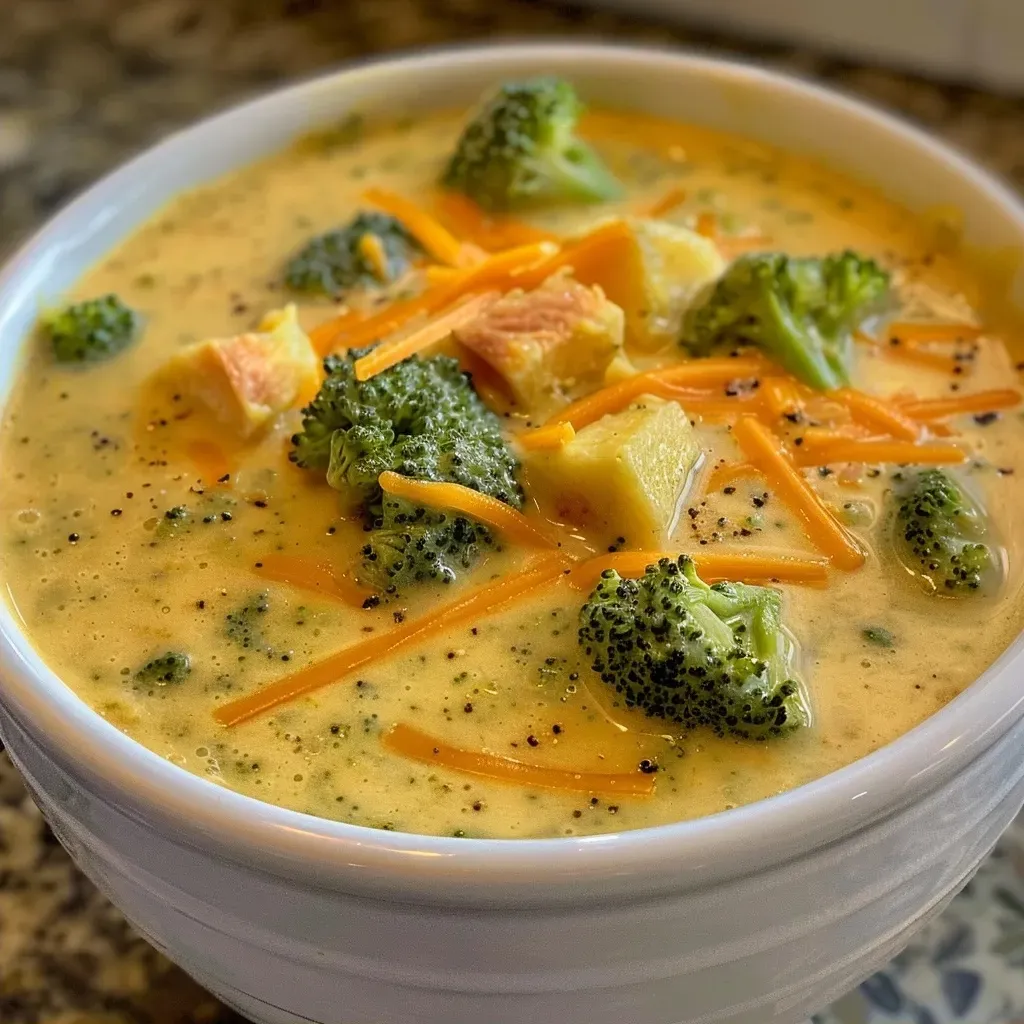
Close-up of Copycat Panera Broccoli Cheddar Soup in a bowl, featuring chunks of broccoli and cheese.

Ready to dive into the cooking process? Follow these simple steps to create your delicious broccoli cheddar soup:

  • Get the pot hot: Heat the olive oil or melt the butter in a large Dutch oven or heavy-bottomed pot over medium-low heat.
  • Saute the vegetables: Add in the carrots, onions, broccoli, and broccoli stems. Cook on medium-low for about 12-14 minutes to sweat the veggies, adding kosher salt halfway through.
  • Add garlic and flour: Stir in the minced garlic and cook until fragrant, about 1 minute. Then, stir in the flour, coating the veggies, and cook for another minute.
  • Incorporate liquids and seasonings: Gradually whisk in the broth and warmed half and half. Add the dijon mustard, sugar, hot sauce, paprika, and turmeric, stirring to combine. Bring to a boil, then reduce to a low simmer.
  • Add the cheese: Stir in both cheeses in small handfuls, allowing each addition to melt before adding more. This technique keeps the soup smooth and creamy—don’t forget to stir frequently!
  • Thicken if desired: If you want a thicker soup, whisk in the cornstarch slurry and simmer until thickened. Taste and adjust seasonings as needed.
  • Serve and enjoy: Serve hot, garnished with additional cheese and black pepper, or pour into a bread bowl for an extra special touch!

Pro Tips for the Perfect Soup

Here are some expert insights to elevate your copycat Panera broccoli cheddar soup:

  • Fresh ingredients: Always use fresh broccoli for the best flavor and texture.
  • Cheese choice: Opt for freshly grated cheese instead of pre-shredded to avoid anti-caking agents that can affect melting.
  • Control the heat: Keep the heat low when adding cheese to prevent it from becoming stringy.
  • Don’t rush the sauté: Allowing the vegetables to sweat properly builds a rich flavor base.
  • Experiment with spices: Feel free to add spices like cayenne for heat or thyme for an earthy flavor.
  • Use a blender for creaminess: If you prefer a smoother soup, blend half of the soup and then mix it back in.
  • Garnish creatively: Top with croutons, crispy bacon bits, or a drizzle of cream for added flair.
  • Adjust thickness: If you want a thinner soup, add more broth or half and half until you reach your desired consistency.

Avoiding Common Mistakes

Even the best chefs make mistakes! Here are some common pitfalls to avoid:

  • Overcooking the broccoli: This can lead to mushy vegetables and a less vibrant color. Aim for a tender-crisp texture.
  • Adding cheese too quickly: If you dump it all in at once, it may clump together rather than melt smoothly.
  • Not tasting as you go: Always taste your soup throughout the cooking process to adjust seasoning as needed.

Variations on the Classic Recipe

Let’s get adventurous! Here are four variations to consider:

  • Spicy Broccoli Cheddar Soup: Add diced jalapeños or a splash of hot sauce for a kick.
  • Loaded Broccoli Cheddar Soup: Mix in cooked bacon, ham, or sausage for a protein boost.
  • Veggie-Packed Soup: Toss in other veggies like bell peppers, corn, or cauliflower for added nutrition.
  • Herbed Broccoli Cheddar Soup: Incorporate fresh herbs like basil, parsley, or dill for a fresh twist.

Storage and Make-Ahead Instructions

Want to prepare your soup in advance? Here’s how to store it:

  • Refrigerator: Store in an airtight container for up to 5 days. Reheat on the stovetop or in the microwave.
  • Freezer: Freeze in portions for up to 3 months. Thaw in the refrigerator overnight before reheating.
  • Make-ahead tip: Prepare the soup up to the point of adding cheese. Add cheese just before serving for the best texture.

Frequently Asked Questions

Let’s answer some common questions about this broccoli cheddar soup recipe:

  • Can I use frozen broccoli?: Yes! Just make sure to thaw and drain it before adding to the soup.
  • What if I don’t have half and half?: You can substitute with whole milk or heavy cream, adjusting the richness to your preference.
  • What is the best cheddar cheese to use?: Sharp cheddar provides the most flavor, but feel free to mix it with mild cheddar for a balanced taste.
  • Can I make this dairy-free?: Absolutely! Use plant-based milk and dairy-free cheese alternatives.
  • How can I thicken the soup?: If you prefer a thicker consistency, whisk in a cornstarch slurry or let it simmer longer to reduce.
  • What should I serve with this soup?: This soup pairs wonderfully with crusty bread, a fresh salad, or a grilled cheese sandwich.
  • Can I reheat leftovers?: Yes! Gently reheat on the stovetop, stirring frequently.
  • Can I freeze the soup?: Yes, but it’s best to freeze without cheese and add it fresh when reheating.

Nutritional Tips and Dietary Adaptations

If you’re watching your nutrition, consider these adaptations:

  • Low-fat version: Use skim milk instead of half and half and reduce the amount of cheese.
  • Gluten-free option: Substitute all-purpose flour with cornstarch or a gluten-free flour blend.
  • High-protein version: Add shredded chicken or use a protein-rich broth.
  • Increase fiber: Include more vegetables like beans or peas for added nutrition.

Essential Equipment for Soup Making

Here are the tools that will help you create this delightful soup:

  • Heavy-bottomed pot or Dutch oven: Ideal for even cooking and preventing burning.
  • Wooden spoon: Perfect for stirring without scratching your pot.
  • Whisk: Essential for incorporating flour and creating a smooth consistency.
  • Measuring cups and spoons: For accurate ingredient measurements.
  • Blender (optional): If you prefer a creamy soup, a blender can help achieve that smooth texture.

Serving Suggestions

Finally, let’s talk about how to serve your masterpiece:

  • Classic bread bowl: Serve your soup in a hollowed-out bread roll for a fun presentation.
  • Garnish creatively: Top with croutons, fresh herbs, or a swirl of cream.
  • Pair with sides: Consider pairing with a crisp salad, a hearty sandwich, or roasted vegetables.

There you have it, my friends! A comprehensive guide to crafting your very own copycat Panera broccoli cheddar soup. I hope this recipe inspires you to explore the world of flavors and make every meal a delightful adventure. Don’t forget, cooking is about joy, experimentation, and sharing with those you love. Happy cooking!

Copycat Panera Broccoli Cheddar Soup

Prep Time 15 minutes
Cook Time 30 minutes
Total Time 45 minutes
Servings 4 cups
Calories 450
A creamy, cheesy broccoli soup inspired by Panera, perfect for cozy days. Made with fresh vegetables and rich cheeses, it’s easy to prepare at home.

Ingredients

Vegetables

  • 2 Tbsp olive oil or butter
  • 1 cup matchstick/julienned carrots
  • 1 small yellow onion, diced
  • 3 cups broccoli (2 cups diced very small, 1 cup florets)
  • 1 cup broccoli stems, diced small
  • 1 tsp kosher salt, plus more to taste
  • 1.5 tsp garlic, minced
  • 1/4 cup all purpose flour
  • 3 cups chicken broth
  • 2 cups half and half, slightly warmed
  • 1 Tbsp dijon mustard
  • 1 Tbsp granulated sugar
  • 1 tsp hot sauce
  • 1/4 tsp paprika
  • 1/4 tsp turmeric
  • 8 oz sharp cheddar cheese, shredded
  • 6 oz Velveeta cheese, cubed
  • 1.5 Tbsp cornstarch + water slurry (optional) (for thickening)

Instructions 

  • Heat oil or melt butter in a large pot over medium-low heat.
  • Add carrots, onions, broccoli, and stems; cook for 12-14 minutes, stirring occasionally. Add salt halfway through.
  • Add garlic; cook 1 minute. Stir in flour; cook 1 minute.
  • Gradually whisk in broth and half and half. Add mustard, sugar, hot sauce, paprika, turmeric; bring to boil, then simmer.
  • Add cheeses gradually, stirring until melted. Optional: whisk in cornstarch slurry and simmer until thickened. Adjust seasonings.

Notes

Stir frequently when adding cheese to prevent separation. For extra creaminess, blend part of the soup before serving.
Calories: 450kcal
Cost: $15
Course: Soup
Cuisine: American
Keyword: broccoli, Cheddar, cheese

Welcome to the Heart of Irish Comfort Food!

When the chill of winter settles in, there’s nothing quite as comforting as a warm bowl of slow-cooked beef and Guinness stew. This dish not only delivers rich flavors but also tells a story steeped in Irish tradition. Join me, Jack, on this culinary adventure where we explore the depths of flavor within this classic recipe, perfect for cozy evenings spent with loved ones.

Why You’ll Love This Recipe

This isn’t just any beef stew—it’s a glorious embrace of flavor and tradition. Here are five compelling reasons to dive into this recipe:

  • Rich Flavor Profile: The addition of Guinness stout transforms simple ingredients into a symphony of taste, creating a deep, malty gravy that elevates the dish to gourmet status.
  • Tender, Melt-in-Your-Mouth Beef: Slow cooking allows the beef to become fork-tender, releasing its juices into the stew for an unforgettable texture.
  • Hearty and Wholesome: Packed with vibrant vegetables like carrots and parsnips, this stew nourishes both body and soul, making it a perfect winter meal.
  • Make-Ahead Convenience: You can prepare this dish in advance, as it tastes even better the next day, making it a great option for busy schedules.
  • Versatile and Customizable: With a few simple adjustments, you can make this stew uniquely yours, incorporating seasonal vegetables or even swapping out the beef for another protein.

Ingredient Breakdown

Before we dive into cooking, let’s take a closer look at the key ingredients that make this stew shine, along with some potential substitutions.


Digital Meat Thermometer

★ Recommended Kitchen Tool

Digital Meat Thermometer

Make this recipe even easier with a quality Digital Meat Thermometer — a must-have kitchen staple!


🛒 Shop This Tool →

As an Amazon Associate, we earn from qualifying purchases.
  • Chuck Steak: This cut is ideal for stewing due to its marbling, which breaks down during cooking. If you can’t find chuck, try using brisket or round.
  • Guinness Stout: While Guinness adds a unique flavor, feel free to use any good-quality stout. For a non-alcoholic version, consider using beef broth with a splash of vinegar for tang.
  • Vegetables: Onions, carrots, and parsnips are traditional, but you can also add potatoes, turnips, or even parsnips for added depth.
  • Herbs: Fresh herbs like rosemary and thyme infuse the stew with aromatic flavors. If you don’t have fresh, dried herbs work just fine.
  • Worcestershire Sauce: This condiment adds umami richness. A splash of soy sauce or balsamic vinegar can be a good alternative.

Pro Tips for Perfecting Your Stew

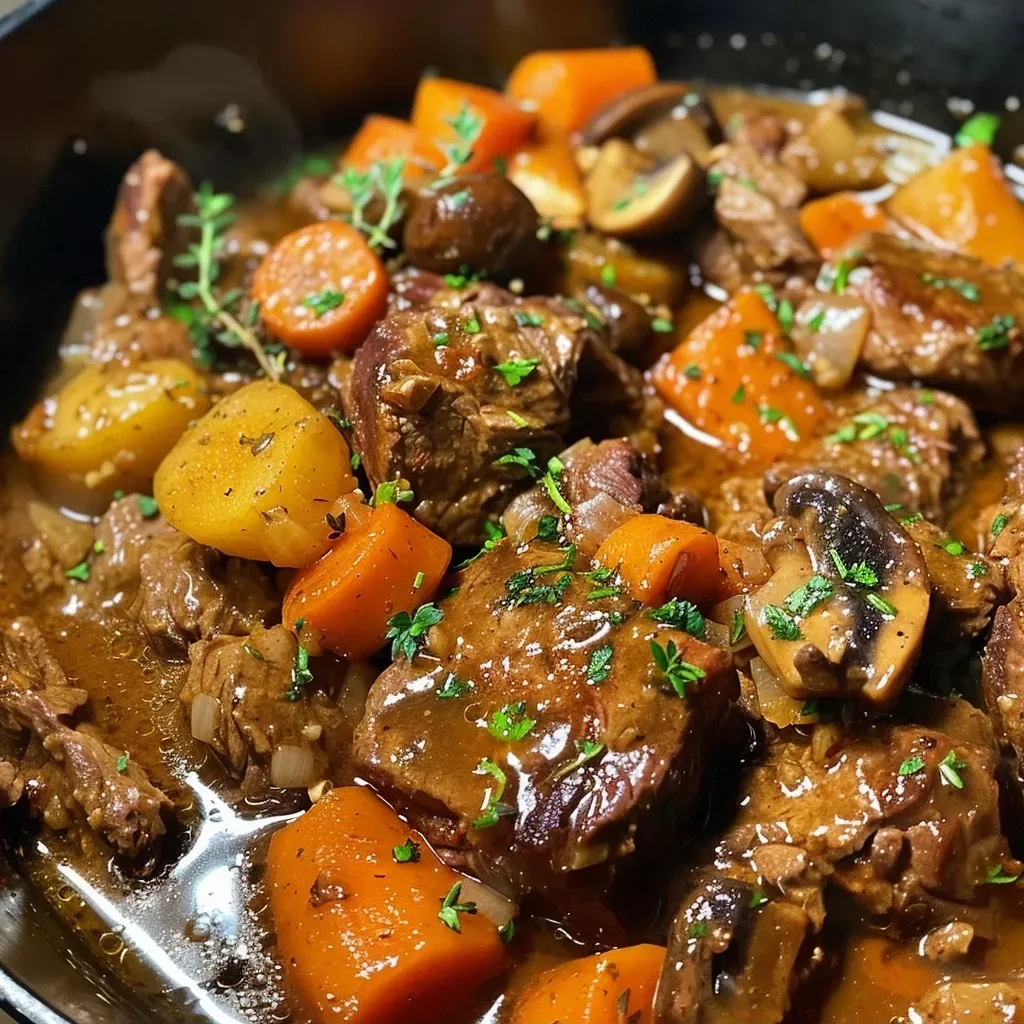
A hearty bowl of Slow Cooked Beef & Guinness Stew with chunks of meat and vegetables.

As we embark on this cooking journey, keep these expert tips in mind to ensure your stew comes out perfectly:

  • Browning the Beef: Take the time to brown the beef in batches. This step creates a rich, caramelized flavor that enhances the overall dish.
  • Don’t Rush the Cooking: Slow cooking is key. Allow the stew to simmer gently to maximize flavor infusion.
  • Add Mushrooms Late: For the best texture, add mushrooms towards the end of cooking to keep them from becoming mushy.
  • Season Gradually: Taste and adjust seasoning throughout the cooking process; this ensures the flavors develop beautifully.
  • Use Quality Stock: A good beef stock forms the base of your stew; opt for homemade or high-quality store-bought for the best results.
  • Let It Rest: After cooking, allow the stew to sit for a few minutes before serving. This helps the flavors meld together.
  • Experiment with Herbs: Feel free to experiment with dried herbs as well. Bay leaves, parsley, or even a hint of sage can add unique notes.
  • Perfect Consistency: If the stew is too thin, let it simmer uncovered for a while to reduce. If it’s too thick, add a little more stock or water.

Avoiding Common Mistakes

Even the best recipes can go awry. Here are some common pitfalls to avoid:

  • Overcrowding the Pot: When browning the beef, be careful not to overcrowd the pot, as this causes the meat to steam instead of sear.
  • Skipping the Browning Step: Never skip browning the meat—it’s essential for building flavor.
  • Neglecting to Taste: Always taste as you go. This is crucial for achieving the perfect balance of flavors.
  • Ignoring Cooking Time: Be patient! Good things come to those who wait, especially when it comes to slow cooking.

Delicious Variations to Try

One of the joys of cooking is experimentation. Here are four delightful variations to consider:

  • Vegetarian Option: Substitute the beef with hearty mushrooms, lentils, or a mix of your favorite root vegetables for a comforting vegetarian stew.
  • Spicy Twist: Add a touch of heat with diced jalapeños or a sprinkle of cayenne pepper to give your stew a warm kick.
  • Herbaceous Delight: Elevate the flavor by incorporating fresh herbs like cilantro or dill for a unique twist.
  • International Flair: Try adding spices like cumin or paprika for a cross-cultural experience. Each region has its own stew traditions that can inspire your dish.

Storage and Make-Ahead Instructions

This stew is perfect for meal prep! Here’s how to store it:

  • Refrigerating: Store in an airtight container for up to 4 days. The flavors will deepen as it sits.
  • Freezing: This stew freezes beautifully for up to 3 months. Just ensure it’s completely cooled before transferring to freezer-safe containers.
  • Reheating: To reheat, simply warm on the stovetop over low heat or in the microwave until heated through.

Frequently Asked Questions

Here are some common questions I often receive about this dish:

  • Can I use a different type of beer? Absolutely! Any good-quality stout or porter can lend a unique flavor to your stew.
  • What if I don’t have a Dutch oven? A heavy pot with a lid works just fine. Just ensure it can withstand oven temperatures.
  • Can I add other vegetables? Yes! Feel free to customize with seasonal veggies like potatoes, parsnips, or green beans.
  • How do I thicken my stew? If your stew is too thin, let it simmer uncovered to reduce, or mix a little cornstarch with water to thicken it up.
  • Is this stew gluten-free? To make it gluten-free, substitute regular flour with a gluten-free blend and ensure your stout is gluten-free.
  • How can I make it spicier? Add diced jalapeños or a pinch of red pepper flakes during cooking for an extra kick.
  • How long should I cook it? For the best results, cook for at least 3 hours in the oven, but feel free to leave it longer for deeper flavor.
  • Can I use a slow cooker? Yes! Follow the same steps but cook on low for 6-8 hours or high for 4-5 hours.

Nutritional Tips and Dietary Adaptations

This stew can be adapted to fit various dietary needs. Here are some tips:

  • Low-Carb Option: Replace starchy vegetables with low-carb options like turnips or zucchini.
  • Dairy-Free: This recipe is naturally dairy-free; just ensure any broth or stock used is also dairy-free.
  • Protein Alternatives: Swap out beef for chicken, turkey, or even plant-based proteins like tofu or tempeh.

Essential Equipment for Success

To create this delicious stew, here are some kitchen essentials:

  • Heavy-Bottomed Pot or Dutch Oven: Essential for even cooking and browning.
  • Cutting Board and Sharp Knife: For chopping vegetables and prepping ingredients.
  • Measuring Cups and Spoons: Accurate measurement ensures the right balance of flavors.
  • Wooden Spoon: Perfect for stirring and scraping up those flavorful bits from the bottom of the pot.

Serving Suggestions

This beef and Guinness stew is delightful on its own, but here are some ideas to elevate your meal:

  • Crusty Bread: Serve with slices of crusty bread for dipping into the rich gravy.
  • Fresh Salad: A light salad can balance the hearty stew.
  • Mashed Potatoes: For a comforting side, serve with creamy mashed potatoes.

Conclusion: A Culinary Journey Awaits

Cooking this Slow-Cooked Beef and Guinness Stew is not just about creating a meal; it’s about embracing the warmth of Irish culture and traditions. Each bite tells a story, and I hope this recipe inspires you to share it with your loved ones. So gather your ingredients, roll up your sleeves, and let’s embark on this culinary journey together. After all, food is a passport to culture and connection. Happy cooking!

Slow Cooked Beef & Guinness Stew

Prep Time 20 minutes
Cook Time 3 hours 30 minutes
Total Time 3 hours 50 minutes
Servings 6 servings
Calories 650
A hearty and flavorful stew featuring tender beef simmered in Guinness with vegetables and herbs, perfect for a comforting meal.

Ingredients

Dried ingredients

  • 3 tbsp plain, all purpose flour
  • 1.2 kg chuck steak, cut into large chunks
  • 3 tbsp olive oil (plus extra if needed)
  • 2 pcs brown onions, sliced
  • 4 cloves garlic, crushed
  • 3 large carrots, cut into large chunks
  • 2 pcs parsnips, cut into large chunks
  • 330 ml Guinness
  • 750 ml beef stock
  • 2 tbsp tomato paste
  • 2 tsp porcini powder
  • 3 pcs bay leaves
  • 2 sprigs rosemary
  • 3 sprigs thyme
  • 200 g mushrooms
  • 2 tbsp Worcestershire sauce
  • to taste sea salt flakes
  • to taste freshly cracked pepper

Instructions 

  • Preheat oven to 150°C/300°F. Coat beef in flour and brown in batches with oil.
  • Sauté onions until translucent, add garlic, then return beef to the pot.
  • Add vegetables, Guinness, stock, tomato paste, porcini powder, and herbs. Simmer, then bake for 3 hours.
  • Add mushrooms and bake for another 30 minutes. Season with Worcestershire, salt, and pepper before serving.

Notes

This stew tastes even better the next day, allowing flavors to meld.
Calories: 650kcal
Cost: $20
Course: Main Course
Cuisine: Irish
Keyword: beef, stew

Welcome to a Delightful Culinary Journey!

Welcome to a savory exploration of flavors with our Healthy Cheesy Chicken and Broccoli Rice Casserole. This dish is a celebration of wholesome ingredients that brings comfort to your dining table while fueling your adventurous spirit. Imagine tender chicken mingling with vibrant broccoli and brown rice, all enveloped in a creamy, cheesy delight. Whether you’re cooking for family, friends, or just indulging yourself, this casserole is a dish that nourishes the soul.

Why You’ll Love This Recipe

This casserole isn’t just about taste; it’s an experience wrapped in nutrition and convenience. Here are some reasons why this dish should be on your must-cook list:

  • Wholesome Ingredients: Packed with lean protein, fresh veggies, and fiber-rich brown rice, this dish is a nutritional powerhouse.
  • Easy Preparation: Perfect for busy weeknights, this casserole comes together with minimal effort, allowing you to enjoy cooking without the stress.
  • One-Pan Wonder: Fewer dishes mean less cleanup! Everything cooks beautifully in one pan.
  • Customizable: Feel free to switch up ingredients based on what you have on hand—this recipe is versatile!
  • Comfort Food: The creamy, cheesy texture is the ultimate comfort food experience, perfect for cozy dinners.

Ingredients Breakdown

Let’s dive deeper into the components of this broccoli rice casserole. Here’s what you’ll need:


Nonstick Grill Pan

★ Recommended Kitchen Tool

Nonstick Grill Pan

Make this recipe even easier with a quality Nonstick Grill Pan — a must-have kitchen staple!


🛒 Check Price on Amazon →

As an Amazon Associate, we earn from qualifying purchases.
  • 2 cups long grain brown rice: For a nutty flavor and chewy texture.
  • 4 cups chicken broth: This adds depth and helps the rice cook perfectly.
  • 4 cups finely chopped broccoli florets (~1 small head): Fresh, vibrant, and full of nutrients.
  • 2 green onions (chopped): For a hint of sharpness and color.
  • 1 teaspoon extra virgin olive oil: To sauté the chicken and enhance flavor.
  • 1 lb chicken breasts (cut into bite-sized pieces): The star protein of the dish.
  • Salt, pepper, garlic powder: Essential seasonings for flavor.
  • 5 teaspoons gluten-free flour (or all-purpose flour): For thickening the cheese sauce.
  • 2 cups milk (divided, any kind): Adds creaminess to the sauce.
  • 1/3 cup light sour cream: To achieve a velvety texture.
  • 8 oz shredded cheddar cheese (divided): For that cheesy goodness.
  • 1/4 teaspoon each of salt, pepper, and garlic powder: Final touches for seasoning.

Step-by-Step Instructions

Ready to bring this dish to life? Follow these simple steps:

  1. In a large pot, bring the chicken broth to a boil. Add the long grain brown rice, cover, and reduce heat to low. Cook according to package directions.
  2. When the rice has 5 minutes left, add the broccoli florets and green onions (no need to stir). Replace the lid and let everything cook until tender.
  3. Meanwhile, heat the extra virgin olive oil in a skillet over medium-high heat. Add the chicken pieces, seasoning with salt, pepper, and garlic powder. Sauté until cooked through. Remove and set aside.
  4. In a small bowl, whisk together the gluten-free flour with 1/2 cup of the milk. Pour this into the same skillet, adding the remaining 1.5 cups of milk. Stir constantly until thickened, about 7-10 minutes.
  5. Remove from heat and stir in 3/4 of the shredded cheddar cheese, sour cream, and remaining seasonings until smooth.
  6. Preheat your broiler. Combine the cooked rice and broccoli mixture with the cheese sauce and sautéed chicken in a nonstick sprayed 9×13 baking dish. Top with the remaining cheese.
  7. Broil until the cheese is melted and bubbly. Let the casserole rest for 5 minutes before serving.

Pro Tips for the Perfect Casserole

Enhance your cooking experience with these expert insights:

  • Choose the right chicken: Opt for boneless, skinless chicken breasts for easy cooking and tender results.
  • Don’t rush the cooking: Allow the rice to absorb all the broth for full flavor and optimal texture.
  • Use fresh ingredients: Fresh broccoli and green onions not only taste better but also add vibrant color.
  • Experiment with cheese: Try mixing different cheeses like mozzarella or pepper jack for unique flavors.
  • Adjust spice levels: If you like a kick, add a pinch of red pepper flakes to the cheese sauce.
  • Mix in extras: Feel free to incorporate other veggies like bell peppers or spinach for added nutrition.
  • Make it ahead: Prepare the casserole in advance, refrigerate, and bake when ready.
  • Cover with foil while baking: If the top browns too quickly, cover with foil to prevent burning.

Common Mistakes and Troubleshooting

Even the best chefs can make mistakes. Here’s how to avoid common pitfalls:

  • Overcooking the chicken: Keep an eye on the chicken while sautéing to prevent it from becoming dry.
  • Undercooking the rice: Make sure the broth is boiling before adding the rice for even cooking.
  • Too much liquid: If the casserole is too soupy, reduce the amount of milk or add more flour to thicken.
  • Not letting it rest: Allowing the dish to cool slightly after broiling helps set the flavors.

Variations to Try

Get creative with these delicious variations:

  • Mexican Flair: Add black beans, corn, and taco seasoning for a southwestern twist.
  • Vegetarian Delight: Substitute chicken with chickpeas or lentils and use vegetable broth.
  • Spicy Kick: Incorporate jalapeños or sriracha for a spicy version of the casserole.
  • Herb-Infused: Add fresh herbs like thyme or parsley for an aromatic touch.

Storage and Make-Ahead Instructions

This casserole is perfect for meal prep!

  • Refrigeration: Store leftovers in an airtight container for up to 4 days.
  • Freezing: Freeze the unbaked casserole for up to 3 months. Thaw in the fridge before baking.
  • Reheating: Warm in the oven or microwave until heated through.

Frequently Asked Questions

Got questions? We’ve got answers!

  • Can I use frozen broccoli? Yes, frozen broccoli works well—just add it directly to the rice without thawing.
  • What type of rice is best? Long grain brown rice is recommended for its texture, but you can also use white rice if you prefer.
  • Can I make this gluten-free? Absolutely! Use gluten-free flour and ensure your broth is gluten-free.
  • How can I add more flavor? Consider adding herbs or spices to the chicken before sautéing for an extra flavor boost.
  • Is this casserole kid-friendly? Yes! Its cheesy flavor and comforting texture are usually a hit with kids.
  • Can I double the recipe? Definitely! Just use a larger baking dish and adjust cooking times accordingly.
  • What goes well with this casserole? A simple side salad or steamed veggies pair beautifully.
  • How long does it take to cook? The total cooking time is approximately 40-50 minutes.

Nourishing Connections

There you have it! This Healthy Cheesy Chicken and Broccoli Rice Casserole is not just a meal; it’s a way to gather around the table with loved ones, sharing stories and laughter. As you embark on this culinary adventure, remember that every dish carries a story—one that weaves together flavors, cultures, and connections. So grab your apron, unleash your creativity, and let this casserole be the centerpiece of your next family gathering. Bon appétit!

Healthy Cheesy Chicken and Broccoli-Rice Casserole

Prep Time 15 minutes
Cook Time 30 minutes
Total Time 45 minutes
Servings 6 servings
Calories 550
A nutritious and cheesy casserole combining tender chicken, broccoli, and brown rice, perfect for a wholesome family meal.

Ingredients

Grains

  • 2 cups long grain brown rice
  • 4 cups chicken broth

Vegetables

  • 4 cups finely chopped broccoli florets (~1 small head)
  • 2 green onions green onions (chopped)

Proteins

  • 1 lb chicken breasts (cut into bite-sized pieces)

Dairy & Oils

  • 1 teaspoon teaspoon extra virgin olive oil
  • 2 cups milk (divided, any kind)
  • 1/3 cup light sour cream
  • 8 oz oz shredded cheddar cheese (divided)
  • 5 teaspoons teaspoons gluten free flour (or AP flour if not GF)
  • 1/4 teaspoon teaspoon salt
  • 1/4 teaspoon teaspoon pepper
  • 1/4 teaspoon teaspoon garlic powder

Instructions 

  • Cook rice in chicken broth until 5 minutes remain, then add broccoli and green onions, cover and finish cooking.
  • Saute chicken in olive oil with salt, pepper, and garlic powder until cooked through, then set aside.
  • Make cheese sauce by whisking flour with 1/2 cup milk, then adding remaining milk and cooking until thickened. Stir in cheese, sour cream, and seasonings.
  • Combine cooked rice, broccoli mixture, cheese sauce, and chicken. Transfer to a baking dish, top with remaining cheese, then broil until melted. Rest 5 minutes before serving.

Notes

For extra flavor, sprinkle with fresh herbs or additional cheese before broiling.
Calories: 550kcal
Cost: $15
Course: Main Course
Cuisine: American
Keyword: broccoli, Chicken, rice

Embarking on a culinary adventure, I stumbled upon a dish that not only tantalized the taste buds but also wove a story of romance and adventure: Marry Me Salmon. This recipe is more than just a meal; it’s a celebration of flavors, culture, and the connections we forge through food. With its creamy sauce, fresh ingredients, and the undeniable charm of salmon, it’s no wonder this dish has captured hearts and stomachs alike. Join me as we dive into the intricate details of this beloved recipe.

Why You’ll Love This Recipe

This Marry Me Salmon recipe is a fusion of flavors that promises to deliver an unforgettable dining experience. Here are five compelling reasons to make it:

  • Rich, Creamy Sauce: The sauce made with heavy cream and sun-dried tomatoes brings a luxurious texture that perfectly complements the salmon.
  • Quick & Easy Preparation: In under 30 minutes, you can create a restaurant-quality dish that will impress anyone at your dinner table.
  • Versatile Serving Options: Pair it with pasta or creamy mashed potatoes for a hearty meal, or serve it with a fresh salad for a lighter option.
  • Flavor Explosion: The blend of garlic, Italian seasoning, and a hint of red pepper flakes creates an explosion of flavors that dance on your palate.
  • Perfect for Any Occasion: Whether it’s a cozy dinner for two or a festive gathering, this dish suits any occasion.

Ingredient Breakdown

Understanding each ingredient in your Marry Me Salmon can elevate your cooking experience. Here’s everything you need:


Stainless Lemon Squeezer

★ Recommended Kitchen Tool

Stainless Lemon Squeezer

Make this recipe even easier with a quality Stainless Lemon Squeezer — a must-have kitchen staple!


🛒 View on Amazon →

As an Amazon Associate, we earn from qualifying purchases.
  • Salmon Fillets: Use fresh, skinless salmon fillets for a tender and flaky texture. You can opt for frozen if fresh isn’t available—just ensure it’s thoroughly thawed.
  • Heavy Cream: This is the key to the rich sauce. For a lighter option, consider using half-and-half or a non-dairy alternative like coconut cream.
  • Sun-Dried Tomatoes: They bring a sweet and tangy flavor. If you can’t find sun-dried tomatoes in oil, you can use dried ones; just hydrate them in warm water for 20 minutes.
  • Italian Seasoning: A blend of dried herbs that adds depth. Feel free to use a homemade mix of oregano, basil, and thyme.
  • Fresh Basil: Adds a vibrant touch; substitute with parsley if fresh basil isn’t available.

Pro Tips for Perfect Marry Me Salmon

Here are expert insights to ensure your dish turns out perfectly:

  • Choose the Right Salmon: Opt for center-cut fillets for even cooking and better presentation.
  • Don’t Overcook: Salmon cooks quickly; check for doneness at 12 minutes to avoid dry fish.
  • Infuse Flavor: Marinate the salmon in olive oil and seasonings for up to 30 minutes before baking for even richer flavor.
  • Adjust Spice Levels: If you prefer less heat, reduce the red pepper flakes or omit them entirely.
  • Make Ahead: Prepare the sauce in advance and store it in the fridge. Reheat gently before serving.
  • Use a Meat Thermometer: For perfect doneness, aim for an internal temperature of 145°F.
  • Presentation Matters: Serve the salmon on a bed of sauce and garnish with additional basil for a stunning presentation.
  • Experiment with Accompaniments: Try serving it with lemon wedges for a fresh zest.

Common Mistakes and Troubleshooting

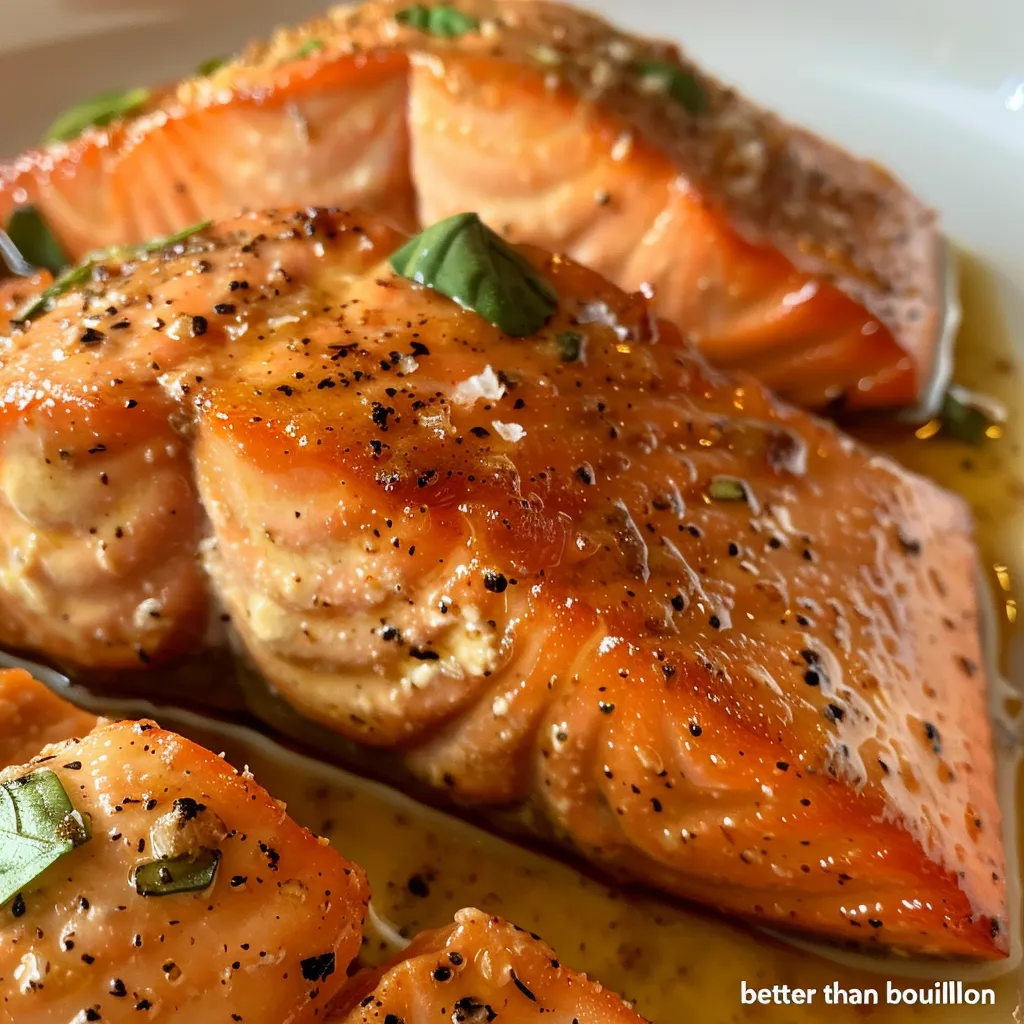
Close-up view of a deliciously cooked salmon fillet topped with creamy sauce and sun-dried tomatoes.

Even the best chefs can run into issues. Here’s how to avoid common pitfalls:

  • Overcooking the Salmon: Watch the clock and check for flakiness with a fork to avoid dry salmon.
  • Too Thick Sauce: If your sauce becomes too thick, add a splash of chicken stock or cream to loosen it up.
  • Flavorless Dish: Make sure to season adequately; taste along the way to ensure balance.
  • Sun-Dried Tomato Substitutions: Don’t have sun-dried tomatoes? Fresh tomatoes can be roasted and used as an alternative, but the flavor will differ.

Variations of Marry Me Salmon

Feeling adventurous? Here are some delightful variations to try:

  • Marry Me Salmon Pasta: Toss cooked pasta in the sauce for a creamy, comforting meal.
  • Spicy Marry Me Salmon: Add more red pepper flakes or a splash of hot sauce for a spicy kick.
  • Herb-Crusted Salmon: Incorporate fresh herbs like dill or parsley into the spice rub for a fresh twist.
  • Marry Me Salmon with Lemon Butter: Replace the cream sauce with a lemon butter sauce for a lighter, zesty dish.

Storage and Make-Ahead Instructions

If you’re planning to make this dish ahead of time, here’s how to store it:

  • Refrigeration: Store leftovers in an airtight container in the fridge for up to 3 days.
  • Freezing: For longer storage, freeze the cooked salmon in a freezer-safe container for up to 3 months.
  • Reheating: Gently reheat in the oven at 350°F until warmed through; avoid microwaving to prevent drying out.

Frequently Asked Questions

Here are some common questions about Marry Me Salmon:

  • Can I use frozen salmon?: Yes, just ensure it’s completely thawed before cooking.
  • What can I substitute for heavy cream?: You can use half-and-half or coconut cream for a lighter option.
  • How do I know when the salmon is done?: It should flake easily with a fork and reach an internal temperature of 145°F.
  • Can I add vegetables to the dish?: Absolutely! Spinach or asparagus can be sautéed and tossed into the sauce.
  • Is this dish suitable for meal prep?: Yes, it’s perfect for meal prep; just store the salmon and sauce separately.
  • What wine pairs well with Marry Me Salmon?: A crisp Sauvignon Blanc or a light Pinot Noir complements the dish beautifully.
  • Can I make this dish gluten-free?: Yes, just ensure that your chicken stock and any optional ingredients are gluten-free.
  • How spicy is this recipe?: The level of spice depends on the amount of red pepper flakes you use; adjust to your preference.

Nutrition Tips and Dietary Adaptations

To enjoy Marry Me Salmon while keeping health in mind, consider these adaptations:

  • Lower Calorie Option: Use less cream and add more veggies to lighten up the dish.
  • Protein Boost: Serve with a side of quinoa or chickpeas for added protein and fiber.
  • Dairy-Free Version: Substitute heavy cream with coconut milk for a dairy-free alternative.
  • Whole Grain Option: Serve over whole grain pasta or brown rice for a healthier carbohydrate choice.

Equipment Recommendations

To successfully create this dish, here’s what you’ll need:

  • Baking Sheet: A rimmed baking sheet is perfect for baking the salmon.
  • Large Skillet: Essential for making the sauce; choose one with a non-stick surface for easy cleanup.
  • Meat Thermometer: For ensuring your salmon is perfectly cooked every time.
  • Cutting Board and Knife: For chopping garlic and sun-dried tomatoes.

Serving Suggestions

Marry Me Salmon shines on its own, but here are some delightful pairings:

  • Garlic Bread: A crunchy, buttery side that complements the creamy sauce.
  • Seasonal Salad: A fresh salad with mixed greens, cherry tomatoes, and a light vinaigrette adds balance.
  • Roasted Vegetables: Serve with roasted asparagus or brussels sprouts for a colorful plate.
  • Wine Pairing: A glass of Chardonnay enhances the dish wonderfully.

As we wrap up this culinary journey through Marry Me Salmon, remember that food is not just about sustenance; it’s about sharing experiences and creating memories. Whether you’re preparing this dish for a special loved one or for a cozy night in, may it bring joy and connection to your table. Happy cooking!

Marry Me Salmon Recipe

Prep Time 10 minutes
Cook Time 15 minutes
Total Time 25 minutes
Servings 4 servings
Calories 650
A flavorful baked salmon served with a rich, creamy sun-dried tomato sauce, perfect for a special dinner.

Ingredients

Spice Mixture

  • 0.75 teaspoon kosher salt
  • 1 teaspoon brown sugar
  • 1 teaspoon garlic powder
  • 0.75 teaspoon Italian seasoning
  • 0.5 teaspoon freshly cracked black pepper

Salmon

  • 4 ounces salmon fillets

Sauce

  • 2 tablespoons extra-virgin olive oil
  • 3 cloves garlic, minced
  • 1 cup heavy cream
  • 0.5 cup chicken stock
  • 1 teaspoon chicken flavor “Better Than Bouillon” or bouillon cube
  • 0.75 cup freshly grated Parmesan cheese (plus more for serving)
  • 7 ounces sun-dried tomatoes, drained and roughly chopped
  • 0.75 teaspoon Italian seasoning
  • 0.5 teaspoon red pepper flakes (optional)

Fresh basil

  • 0.25 cup thinly sliced fresh basil leaves

Optional serving

  • to taste cooked pasta or mashed potatoes (for serving)

Instructions 

  • Preheat oven to 375°F (190°C). Mix salt, sugar, garlic powder, Italian seasoning, and pepper. Coat salmon with oil and spice mixture. Bake for 12-15 minutes.
  • Heat oil, cook garlic until fragrant, then add cream, stock, bouillon, Parmesan, sun-dried tomatoes, Italian seasoning, and red pepper flakes. Simmer until thickened.
  • Remove salmon skin, nestle cooked fillets into sauce, top with basil, Parmesan, and red pepper flakes. Serve over pasta or mashed potatoes.

Notes

For best flavor, use fresh basil and high-quality salmon.
Calories: 650kcal
Cost: $15
Course: Main Course
Cuisine: American
Keyword: Salmon

Unleashing Culinary Magic: Your Ultimate Guide to Sea Salt & Herb Skillet Rolls

Welcome to a flavor-packed journey as we explore the delightful world of Sea Salt & Herb Skillet Rolls. These rolls are not just another bread recipe; they are a warm embrace of home, a celebration of flavors, and a ticket to culinary exploration. With this comprehensive guide, you’ll not only learn how to make these rolls but also discover why they will become a staple in your kitchen. So, grab your apron, and let’s dive into this delectable adventure!

Why You’ll Love This Recipe

These rolls are truly special. Here are just a few reasons why they’ll win a permanent place in your heart:

  • Irresistible Flavor: Infused with a blend of fresh herbs and garlic, these rolls deliver a burst of savory goodness in every bite.
  • Soft and Fluffy Texture: Achieved through the perfect balance of yeast and kneading, the rolls are soft, airy, and inviting.
  • Versatile Pairing: Perfect for accompanying soups, salads, or just enjoying with butter, they are as adaptable as they are delicious.
  • Make-Ahead Friendly: These rolls can be prepared in advance and stored, making them a convenient option for busy days.
  • A Fun Baking Experience: Whether you’re a novice or an experienced baker, this recipe is a joy to make and share.

Ingredient Breakdown

Let’s take a closer look at the ingredients that make these skillet rolls a standout:


Digital Kitchen Scale

★ Recommended Kitchen Tool

Digital Kitchen Scale

Make this recipe even easier with a quality Digital Kitchen Scale — a must-have kitchen staple!


🛒 Check Price on Amazon →

As an Amazon Associate, we earn from qualifying purchases.
  • Whole Milk: Warmed to about 110°F (43°C), it activates the yeast for fluffy rolls.
  • Active Dry Yeast: Essential for leavening, it helps the dough rise beautifully.
  • Granulated Sugar: This adds a hint of sweetness, enhancing the overall flavor.
  • Large Egg: Provides richness and helps bind the ingredients together.
  • Unsalted Butter: Adds moisture and a rich flavor. Melted and slightly cooled, it’s a key player in creating tender rolls.
  • Salt: Enhances flavor; don’t skip it!
  • Dried Herbs (Rosemary, Basil, Parsley): These bring aromatic flavors that make the rolls truly memorable.
  • Garlic Powder: Adds depth and a touch of savory goodness.
  • Bread Flour: Offers the right amount of gluten for the perfect texture.
  • Flaky Sea Salt: For topping, it provides a delicious crunch and enhances the overall flavor.

If you’re missing any of these ingredients, here are a few substitutions:

  • Milk: You can use almond milk or any plant-based milk as a dairy-free option.
  • Herbs: Fresh herbs can be used instead of dried for a more vibrant flavor.
  • Butter: Coconut oil can be a great dairy-free alternative.
  • Flour: All-purpose flour can replace bread flour, but the texture may be slightly different.

Expert Tips for the Perfect Rolls

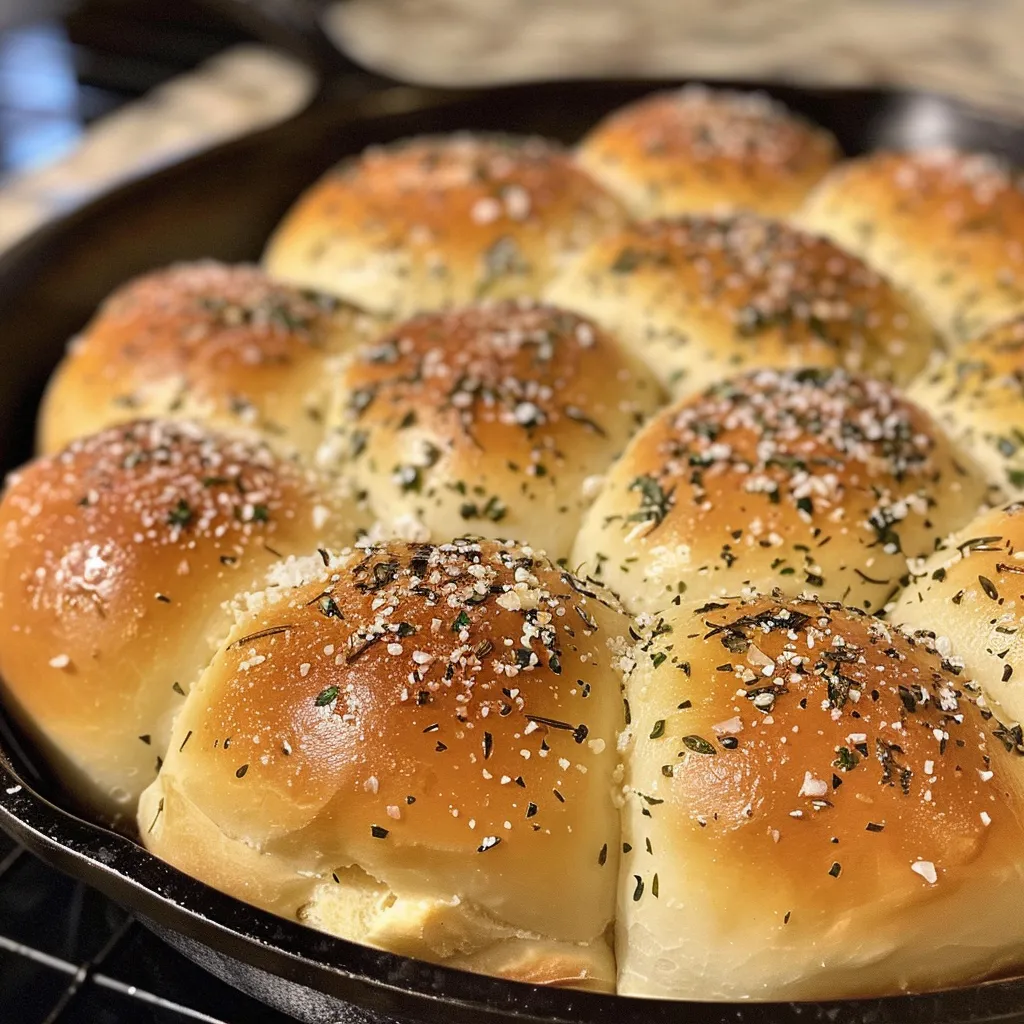
Close-up view of freshly baked Sea Salt & Herb Skillet Rolls on a rustic surface.

Mastering this recipe is all about technique. Here are some pro tips to ensure your skillet rolls come out perfectly every time:

  • Temperature is Key: Ensure your milk is warm but not hot; too hot can kill the yeast.
  • Proof Your Yeast: Always let the yeast bloom in the milk before mixing; it guarantees a good rise.
  • Don’t Over-Knead: While kneading is essential, overdoing it can lead to tough rolls. Aim for about 5 minutes.
  • Watch the Dough: It should be soft and slightly sticky but manageable. Adjust with flour as needed.
  • Warm Environment: Dough rises best in a warm spot. If your kitchen is chilly, try placing it in the oven (turned off) with the light on.
  • Shape Uniformly: When dividing the dough, try to make equal pieces for even baking.
  • Check for Doneness: Look for a golden-brown top and a hollow sound when tapped on the bottom.
  • Brush with Butter: Don’t skip the melted butter on top after baking; it adds richness and helps the salt stick.

Common Mistakes and Troubleshooting

Even the best bakers encounter hiccups. Here are some common mistakes and how to troubleshoot them:

  • Rolls Aren’t Rising: Check your yeast’s expiration date; if it’s old, it might not activate.
  • Too Dry Rolls: Make sure you didn’t add too much flour during kneading. The dough should be slightly sticky.
  • Burnt Tops: If the tops brown too quickly, cover the skillet with foil to prevent burning.
  • Dense Texture: This can happen if the dough wasn’t kneaded enough or if it was over-kneaded.

Variations to Try

Mix things up with these fun variations of the classic Sea Salt & Herb Skillet Rolls:

  • Garlic Parmesan Rolls: Add grated Parmesan cheese and fresh minced garlic for a cheesy twist.
  • Cheddar Herb Rolls: Incorporate shredded cheddar cheese and fresh herbs for a delightful flavor combo.
  • Sweet Herb Rolls: Substitute some sugar and add cinnamon for a sweet-herb blend—perfect for breakfast!
  • Stuffed Rolls: Fill the rolls with your favorite ingredients, like seasoned spinach or roasted peppers.

Storage and Make-Ahead Instructions

These rolls are great for meal prep. Here’s how to store and prepare them ahead of time:

  • Room Temperature: Store leftover rolls in an airtight container for up to 3 days.
  • Refrigeration: For longer storage, keep in the fridge for up to a week.
  • Freezing: Freeze baked rolls in a zip-lock bag for up to 3 months. Thaw at room temperature before reheating.
  • Make-Ahead: Shape the rolls and let them rise in the fridge overnight. Bake them fresh in the morning!

Frequently Asked Questions

Here are some common questions about making Sea Salt & Herb Skillet Rolls:

  • Can I use all-purpose flour instead of bread flour? Yes, but the rolls may be slightly less chewy.
  • How do I know when the rolls are done baking? They should be golden brown on top and sound hollow when tapped.
  • Can I use fresh herbs instead of dried? Absolutely! Just use three times the amount of fresh herbs compared to dried.
  • What if my dough doesn’t rise? Ensure your yeast is fresh and that the milk was at the right temperature.
  • Can I make these rolls vegan? Yes, substitute the milk with plant-based milk and use a flax egg instead of a regular egg.
  • How can I enhance the garlic flavor? Use fresh minced garlic instead of garlic powder for a more robust taste.
  • What’s the best way to serve these rolls? They are fantastic warm with butter, or served alongside soups and salads.
  • Can I double the recipe? Definitely! Just ensure you have a large enough bowl for rising.

Nutritional Tips and Dietary Adaptations

These rolls can fit various dietary needs:

  • Gluten-Free: Use a gluten-free flour blend to make these rolls gluten-free.
  • Lower Calorie: Consider reducing the butter and sugar for a lighter version.
  • Herb Benefits: Fresh herbs not only add flavor but also nutrients—rosemary is known for its antioxidant properties.

Essential Equipment Recommendations

To make your baking experience smoother, here’s a list of essential tools:

  • Stand Mixer: Great for kneading the dough quickly and efficiently.
  • Oven-Safe Skillet: A cast iron skillet works wonders for even baking.
  • Baking Sheet: Ideal for baking rolls if you choose not to use a skillet.
  • Measuring Cups and Spoons: Precision is key in baking, so have these handy!

Serving Suggestions

These rolls are versatile and pair beautifully with various dishes:

  • Soups: Serve alongside a steaming bowl of tomato basil soup or chicken noodle for a comforting meal.
  • Salads: Perfect with a fresh garden salad drizzled with vinaigrette.
  • As a Snack: Enjoy them warm with a pat of butter or a drizzle of honey for a delightful treat.
  • With Dips: Pair with hummus or olive oil for a fun appetizer at gatherings.

With each bite of these Sea Salt & Herb Skillet Rolls, you’re not just tasting a dish; you’re experiencing a story of flavors that connect cultures and hearts. So, gather your loved ones, bake a batch, and let the aroma fill your kitchen. Enjoy your adventure in baking!

Sea Salt & Herb Skillet Rolls

Prep Time 20 minutes
Cook Time 25 minutes
Total Time 45 minutes
Servings 12 pieces
Calories 200
Delicious homemade bread rolls infused with herbs and topped with flaky sea salt, perfect for sharing.

Ingredients

Dough

  • 1 cup whole milk, warmed to about 110°F (43°C)
  • 2 and 1/4 teaspoons active dry yeast (1 standard packet)*
  • 2 tablespoons granulated sugar, divided
  • 1 large egg, at room temperature
  • 1/4 cup unsalted butter, melted + slightly cooled and divided
  • 1 teaspoon salt
  • 2 teaspoons each: dried rosemary, dried basil, & dried parsley*
  • 1 teaspoon garlic powder (or 2 teaspoons minced garlic)
  • 3 cups bread flour (spooned & leveled), plus more for work surface
  • flaky sea salt or coarse sea salt for topping

Instructions 

  • Mix warm milk, yeast, and 1 tablespoon sugar; let sit 5 minutes. In a bowl, combine remaining sugar, egg, 2 tbsp butter, salt, herbs, garlic, and 1 cup flour. Mix on low, then add remaining flour and knead until soft and slightly sticky, about 5 minutes. Let dough rise in a greased bowl, covered, until doubled, about 1-2 hours. Punch down, divide into 12 pieces, shape into balls, and arrange in a greased skillet or baking sheet. Cover and let rise until puffy, about 45-60 minutes. Preheat oven to 350°F (177°C). Bake rolls for 23-27 minutes until golden. Brush with remaining butter, sprinkle with sea salt, and cool briefly before serving.

Notes

For best results, ensure dough is kneaded until smooth and passes the windowpane test.
Calories: 200kcal
Cost: $15
Course: Bread
Cuisine: American
Keyword: bread, herbs, skillet

Discover the Cozy Comfort of Caramel Pear Gingerbread Cake

Welcome to a culinary adventure that marries the warmth of gingerbread with the luscious sweetness of caramelized pears! This Caramel Pear Gingerbread Cake isn’t just any dessert; it’s a delicious journey through flavors that evoke the comfort of home and the joy of sharing meals with loved ones. Whether you’re celebrating the holidays, hosting a cozy dinner, or simply indulging in a sweet treat, this cake is your perfect companion. In this guide, we’ll explore everything from the ingredients to expert tips, ensuring your baking experience is as delightful as the cake itself!

Why You’ll Love This Recipe

This recipe stands out for several compelling reasons:

  • Easy to Make: With straightforward steps, this cake comes together in under 90 minutes, making it perfect for both novice and experienced bakers alike.
  • Seasonal Flavors: The use of fresh pears and cozy spices like ginger and cinnamon means you’ll hit all the right notes for fall and winter gatherings.
  • Impressive Presentation: The upside-down style not only tastes delicious but also looks stunning on any table, sure to impress your guests.
  • Flexible Ingredients: Most ingredients are pantry staples, and the recipe allows for easy substitutions, catering to various dietary needs.
  • Perfect for Sharing: This cake is designed to be shared, making it ideal for potlucks, family gatherings, or a sweet ending to a dinner party.

Essential Ingredients for Your Cake

Before diving into the baking process, let’s gather our ingredients:


Cake Decorating Set

★ Recommended Kitchen Tool

Cake Decorating Set

Make this recipe even easier with a quality Cake Decorating Set — a must-have kitchen staple!


🛒 View on Amazon →

As an Amazon Associate, we earn from qualifying purchases.
  • Fresh Pears: 3 medium ripe Bosc or Anjou pears, peeled, cored, and sliced thin.
  • Unsalted Butter: 6 tablespoons, divided for caramel and batter.
  • Brown Sugar: 3/4 cup packed for the caramel topping.
  • Molasses: 1/3 cup for depth of flavor.
  • All-Purpose Flour: 1 3/4 cups; gluten-free flour blends work well too.
  • Baking Soda: 1 teaspoon to help the cake rise.
  • Ground Spices: 1 teaspoon each of ginger and cinnamon, plus 1/4 teaspoon of ground cloves.
  • Salt: 1/2 teaspoon for flavor balance.
  • Eggs: 2 large, at room temperature for a fluffier texture.
  • Buttermilk: 3/4 cup or a dairy-free alternative (dairy-free milk plus 1 tablespoon lemon juice).
  • Vanilla Extract: 1 teaspoon for added warmth.
  • Nuts (Optional): A handful of chopped walnuts or pecans can be included for extra crunch.

Step-by-Step Preparation Method

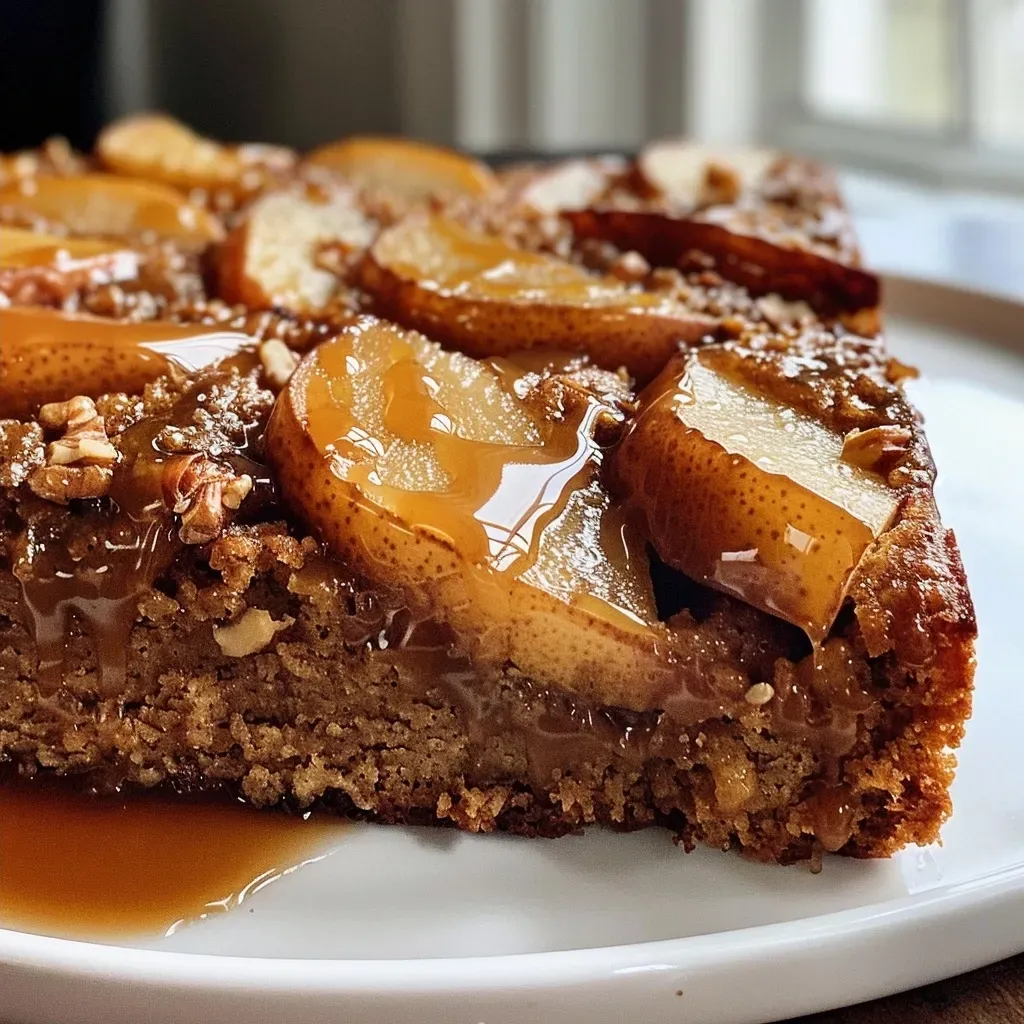
Close-up view of a caramel pear upside-down gingerbread cake, showcasing juicy pear slices on top.

Now that we have everything we need, let’s get to the fun part—baking!

  1. Prepare the caramel topping: In a 9-inch round cake pan or cast iron skillet, melt 4 tablespoons of butter over medium heat. Stir in the brown sugar and cook for 3-4 minutes, stirring constantly until smooth and bubbling but not burnt.
  2. Arrange the pears: Remove from heat and immediately arrange the pear slices in a single layer over the caramel. The caramel will thicken as it cools.
  3. Mix the dry ingredients: In a large bowl, whisk together flour, baking soda, ground ginger, cinnamon, cloves, and salt.
  4. Make the batter: In another bowl, beat the remaining 2 tablespoons of butter with molasses until creamy. Add eggs one at a time, beating well after each addition. Stir in buttermilk and vanilla extract.
  5. Combine wet and dry ingredients: Gradually add the dry ingredients to the wet, stirring gently with a spatula until just combined. Avoid overmixing to keep the cake tender.
  6. Pour and smooth: Pour the batter evenly over the arranged pears and caramel, smoothing the top.
  7. Bake: In a preheated oven at 350°F (175°C), bake for 40-45 minutes or until a toothpick inserted in the center comes out clean and edges pull away slightly from the pan.
  8. Cool and invert: Cool the cake in the pan for about 10 minutes on a wire rack. Run a knife around the edges to loosen, then carefully invert onto a serving plate.
  9. Serve: Enjoy warm or at room temperature, optionally topped with whipped cream or vanilla ice cream.

Expert Pro Tips for Success

To elevate your baking game, consider these expert tips:

  • Choose the Right Pears: Opt for firm varieties like Bosc or Anjou to ensure they hold their shape during baking.
  • Don’t Overmix: Stir just until combined to avoid a dense cake; a few lumps are okay!
  • Check Your Oven Temperature: Use an oven thermometer to ensure your oven is at the correct temperature for even baking.
  • Let It Cool: Allow the cake to cool in the pan before inverting to prevent it from breaking apart.
  • Serve with Extras: Pair with whipped cream or ice cream for an indulgent treat.
  • Experiment with Spices: Feel free to add a pinch of nutmeg or allspice for a unique twist on the flavor profile.
  • Make It Gluten-Free: Substitute with a 1:1 gluten-free flour blend for a safe option.
  • Use Fresh Ingredients: Fresh spices and quality butter can significantly enhance the flavor of your cake.

Common Mistakes and Troubleshooting

Even seasoned bakers can make mistakes. Here’s how to troubleshoot:

  • Cake Sinking in the Middle: This may occur due to underbaking or overmixing. Ensure your oven temperature is accurate and avoid mixing too much.
  • Caramel Burning: Watch the caramel closely while cooking. If it gets too dark, it will taste bitter.
  • Pears Becoming Mushy: Select firm pears and avoid overcooking them in the caramel.
  • Dense Texture: This can happen from overmixing the batter. Stir gently until just combined.

Delicious Variations to Try

Feel free to get creative with these variations:

  • Chocolate Chip Delight: Add 1/2 cup of chocolate chips to the batter for a sweet surprise.
  • Spicy Pear Gingerbread: Incorporate a teaspoon of ground nutmeg or cardamom for added warmth.
  • Vegan Version: Use flax eggs (1 tbsp ground flaxseed + 2.5 tbsp water) and a plant-based milk instead of buttermilk.
  • Citrus Twist: Add the zest of an orange or lemon to the batter for a refreshing brightness.

Storage and Make-Ahead Instructions

Planning ahead? Here’s how to store and prepare your cake:

  • At Room Temperature: Store in an airtight container for up to 3 days.
  • In the Refrigerator: Keep for up to a week; just warm it up before serving for the best flavor.
  • Freezing: Wrap the unglazed cake tightly in plastic wrap and aluminum foil, storing for up to 3 months. Thaw overnight in the fridge before enjoying.

Nutrition Tips and Dietary Adaptations

This cake not only satisfies your sweet tooth but can also be adapted to meet various dietary preferences:

  • Lower Sugar Option: Reduce sugar by 1/4 cup without compromising texture.
  • Gluten-Free Needs: Use a certified gluten-free flour blend for a delicious alternative.
  • Dairy-Free Adaptation: Substitute buttermilk with almond milk and a splash of vinegar.

Recommended Equipment

To make your baking experience smooth, here’s a list of essential equipment:

  • 9-inch Round Cake Pan: Preferably non-stick or well-greased for easy release.
  • Mixing Bowls: A set of various sizes for mixing ingredients.
  • Whisk: For blending dry ingredients and batter.
  • Spatula: Essential for folding ingredients without overmixing.
  • Oven Thermometer: Ensures accurate baking temperatures.

Frequently Asked Questions

Here are answers to some common queries:

  • Can I use canned pears instead of fresh? Yes, but drain them well and reduce the sugar slightly to avoid excess moisture.
  • What’s the best way to serve this cake? It’s delightful warm, served with whipped cream or vanilla ice cream.
  • How do I know when the cake is done? A toothpick inserted in the center should come out clean, and the edges should pull away from the pan.
  • Can I make it ahead of time? Absolutely! It keeps well and can be made a day in advance.
  • How do I store leftovers? Store covered at room temperature for up to 3 days or refrigerate for up to a week.
  • Can I freeze the cake? Yes! Wrap it tightly and freeze for up to 3 months. Thaw in the refrigerator before serving.
  • What pairs well with this cake? Try it with a scoop of vanilla ice cream or a dollop of whipped cream for a delicious contrast.
  • Can I add nuts? Yes! Chopped walnuts or pecans add a lovely crunch and flavor.

In Conclusion

Your journey into the world of Cozy Caramel Pear Gingerbread Cake is not just about baking; it’s about creating memories and sharing warmth with those you love. With its rich flavors and inviting aroma, this cake is bound to become a favorite in your home. So gather your ingredients, embrace the joy of baking, and let the delicious aroma fill your kitchen as you create this heartwarming dessert. Happy baking!

Cozy Caramel Pear Upside-Down Gingerbread Cake

Prep Time 15 minutes
Cook Time 45 minutes
Total Time 1 hour
Servings 8 pieces
Calories 350
A warm, spiced gingerbread cake topped with caramelized pears, perfect for cozy gatherings and holiday desserts.

Ingredients

Fruits

  • 3 medium Bosc or Anjou pears, peeled, cored, and sliced thin
  • 6 tablespoons unsalted butter (divided)
  • 3/4 cup packed brown sugar
  • 1/3 cup molasses
  • 1 3/4 cups all-purpose flour (or gluten-free flour blend)
  • 1 teaspoon baking soda
  • 1 teaspoon ground ginger
  • 1 teaspoon ground cinnamon
  • 1/4 teaspoon ground cloves
  • 1/2 teaspoon salt
  • 2 large eggs, room temperature
  • 3/4 cup buttermilk (or dairy-free milk plus lemon juice)
  • 1 teaspoon vanilla extract

Optional toppings

  • handful chopped walnuts or pecans (optional)

Instructions 

  • Melt 4 tablespoons of butter in a 9-inch pan, stir in brown sugar, and cook until bubbling. Arrange pear slices over the caramel.
  • Whisk dry ingredients in a bowl. Beat remaining butter with molasses, add eggs, then stir in buttermilk and vanilla.
  • Combine wet and dry ingredients gently. Pour batter over pears and bake at 350°F (175°C) for 40-45 minutes.
  • Cool for 10 minutes, then invert onto a plate. Serve warm or at room temperature with optional toppings.

Notes

Ensure pears are sliced thin for even caramelization and presentation.
Calories: 350kcal
Cost: $15
Course: Dessert
Cuisine: American
Keyword: caramel, Gingerbread, Pear

Discover the Flavorful World of Mississippi Pot Roast

If you’re on a culinary quest to uncover delicious, comforting meals, look no further than the iconic Mississippi Pot Roast. This dish is a treasure trove of rich flavors and rustic charm, ideal for family dinners or gatherings with friends. Join me, Jack, as we embark on a journey to savor the South, exploring the essence of this beloved recipe and the stories it tells. In just a few simple steps, you’ll learn how to make this dish that’s not just a meal but a connection to the heart of Southern cuisine.

Why You’ll Love This Recipe

  • Effortless Preparation: With just a handful of ingredients and a slow cooker, this recipe allows you to create a mouthwatering feast without spending hours in the kitchen.
  • Incredible Flavor: The combination of ranch dressing mix, au jus, and pepperoncini peppers infuses the beef with a depth of flavor that’s simply irresistible.
  • Perfect for Meal Prep: Cook a large batch and enjoy leftovers throughout the week, making it a practical choice for busy lifestyles.
  • Versatile Serving Options: Whether you serve it over mashed potatoes, in sandwiches, or with a side of veggies, this pot roast adapts beautifully to your preferred style.
  • Cultural Connection: Each bite tells a story of Southern hospitality and tradition, making it more than just food—it’s a slice of cultural history.

What is Mississippi Pot Roast?

Mississippi Pot Roast is a unique take on the classic pot roast, originating from the Southern United States. It’s characterized by its tender chuck roast, slow-cooked with a flavorful mix of ranch dressing and au jus seasoning, along with zesty pepperoncini peppers. This dish showcases the beauty of slow cooking, allowing the flavors to meld and the meat to become incredibly tender.

Ingredients Breakdown

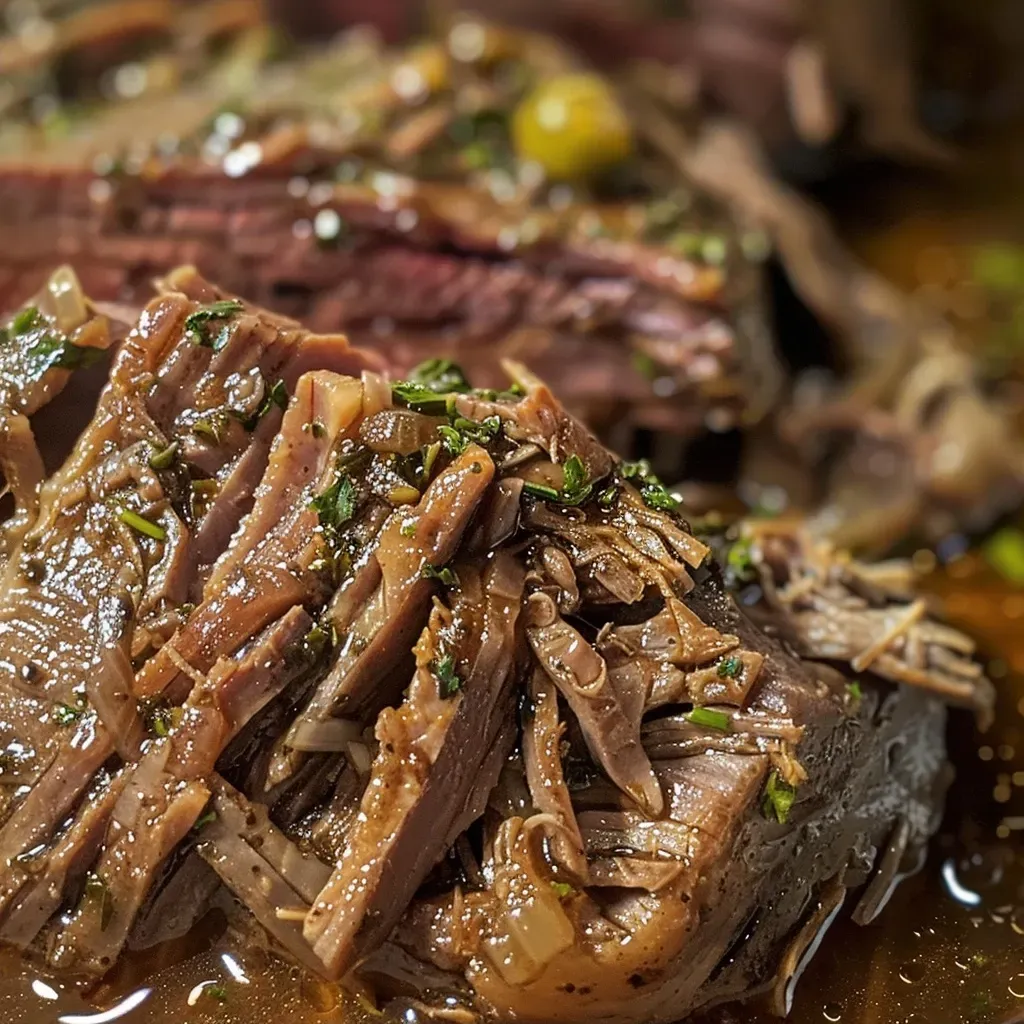
Close-up view of juicy Mississippi Pot Roast with a glossy sauce and vibrant pepperoncini.

Let’s dive into the essential ingredients that make this Mississippi Pot Roast a standout dish. Not only will we cover what you need, but I’ll also provide some handy substitutions if you’re missing an item or two.


Professional Chef Knife Set

★ Recommended Kitchen Tool

Professional Chef Knife Set

Make this recipe even easier with a quality Professional Chef Knife Set — a must-have kitchen staple!


🛒 Shop This Tool →

As an Amazon Associate, we earn from qualifying purchases.
  • Chuck Roast: The star of the show! This cut is ideal due to its marbling, which ensures a juicy, flavorful result. If you can’t find chuck roast, consider using round roast or brisket.
  • Ranch Dressing Mix: This seasoning blend adds a delightful creaminess and depth of flavor. If you prefer homemade, mix dried herbs like dill, parsley, and garlic powder as a substitute.
  • Au Jus Mix: This enhances the beefy flavor. If unavailable, you can use beef broth or stock for a similar effect.
  • Butter: Adds richness and helps tenderize the meat. If you want to lighten it up, feel free to reduce the amount or use olive oil instead.
  • Pepperoncini Peppers: These provide tang and a touch of heat. If you prefer a milder flavor, banana peppers make a great alternative.

How to Make Mississippi Pot Roast

Now that you have all your ingredients ready, let’s get cooking! Here’s a step-by-step guide to creating this delightful dish.

  1. Place the chuck roast in a slow cooker liner.
  2. Sprinkle the ranch dressing mix and au jus mix evenly over the roast.
  3. Add pats of butter on top, followed by the pepperoncini peppers.
  4. Pour in 1/2 cup (or more) of pepperoncini brine for added flavor. At this point, you can tightly close the liner and freeze for up to 3 months if you want to make it ahead!
  5. Place the liner in the slow cooker, ensuring it’s snugly fitted.
  6. Cook on LOW for 8 hours, allowing the flavors to meld beautifully.
  7. Once the roast is falling-apart tender, shred it with two forks in the sauce. Serve and enjoy!

Pro Tips for Perfect Mississippi Pot Roast

  • Don’t Rush the Cooking: Low and slow is the key to achieving tender, flavorful meat. Resist the urge to crank up the heat!
  • Use a Slow Cooker Liner: This makes cleanup a breeze and helps keep the roast moist.
  • Adjust the Spice Level: If you like it spicy, consider adding sliced jalapeños along with the pepperoncini.
  • Let It Rest: After cooking, let the roast sit for a few minutes before shredding to retain moisture.
  • Explore Variations: Try adding vegetables like carrots and potatoes for a complete meal.
  • Save the Leftovers: This dish is even better the next day! Store leftovers in an airtight container to enjoy later.
  • Pair with Sides: Complement your pot roast with classic sides like creamy mashed potatoes, coleslaw, or cornbread.
  • Don’t Skip the Brine: The brine from the pepperoncini adds a unique tang that elevates the dish.

Common Mistakes and Troubleshooting

Sometimes, even the best recipes can go awry. Here are some common pitfalls and how to avoid them:

  • Overcooking: Ensure your slow cooker is set on LOW for the correct time. If you leave it too long, the meat may become dry.
  • Not Enough Liquid: Always add the brine or additional broth to prevent the roast from drying out.
  • Skipping the Liner: Without a slow cooker liner, cleanup can be a hassle—don’t skip this step!
  • Too Much Heat: If you find it too spicy, cut back on the pepperoncini or use milder peppers.

Variations to Spice Up Your Mississippi Pot Roast

If you’re feeling adventurous, here are some fun and delicious variations to try:

  • Vegetable Medley: Add chopped carrots, potatoes, and onions to the slow cooker for a hearty one-pot meal.
  • BBQ Twist: Mix in your favorite barbecue sauce for a Southern BBQ flavor profile.
  • Italian Style: Incorporate Italian seasoning and serve with marinara sauce for an Italian-inspired pot roast.
  • Spicy Kick: Add more jalapeños or a splash of hot sauce to amp up the heat.

Storage and Make-Ahead Instructions

Planning ahead can make your life easier, especially with a dish like Mississippi Pot Roast. Here’s how to store it properly:

  • Refrigerate: Store leftovers in an airtight container in the fridge for up to 4 days.
  • Freeze: For longer storage, freeze portions in freezer-safe containers for up to 3 months.
  • Reheat: When ready to enjoy, reheat in the microwave or on the stovetop, adding a splash of broth if needed to keep it moist.

Frequently Asked Questions

  • Can I use a different cut of meat? Yes, while chuck roast is recommended for its tenderness, round roast or brisket can also work.
  • What can I serve with Mississippi Pot Roast? It pairs wonderfully with mashed potatoes, rice, or in sandwiches.
  • Can I make this in the oven? Yes, you can roast it in the oven at 325°F for about 3-4 hours, covered.
  • Is this recipe gluten-free? Yes, as long as you use gluten-free ranch and au jus mixes.
  • How spicy is it? The heat level is mild; if you prefer it spicier, adjust the amount of pepperoncini.
  • Can I add vegetables? Absolutely! Carrots and potatoes are great additions.
  • Can I make it ahead of time? Yes, you can prepare it in advance and store it in the fridge or freezer.
  • How do I know when it’s done? The roast is done when it shreds easily with a fork and is tender.

Nutritional Tips and Dietary Adaptations

While enjoying this hearty dish, keep in mind some nutritional considerations:

  • Portion Control: Enjoy in moderation, especially if you’re watching your calorie intake.
  • Lean Cuts: Opt for a leaner cut of beef for a healthier option.
  • Vegetarian Option: Substitute the beef with hearty vegetables and beans for a plant-based version.
  • Low-Sodium Alternatives: Use low-sodium ranch and au jus mixes to control salt intake.

Equipment Recommendations

To make your cooking experience seamless, here are a few essential tools you’ll need:

  • Slow Cooker: A must-have for this recipe; choose a model with a timer for added convenience.
  • Slow Cooker Liners: These make cleanup a breeze and keep your roast moist.
  • Sharp Chef’s Knife: For trimming and shredding the roast efficiently.
  • Meat Thermometer: To ensure your meat reaches the perfect internal temperature for safety.

Serving Suggestions

When it comes to serving up your Mississippi Pot Roast, the options are endless:

  • Classic Mashed Potatoes: Creamy mashed potatoes soak up the delicious sauce beautifully.
  • Sandwiches: Serve the shredded roast on crusty bread with a drizzle of the cooking juices.
  • Salad Topper: Use the roast as a protein topper for a hearty salad.
  • Rice or Quinoa: Serve it over fluffy rice or nutty quinoa for a wholesome meal.

As we wrap up this flavorful journey through the world of Mississippi Pot Roast, I hope you feel inspired to bring this dish into your kitchen. It’s more than just a recipe; it’s an invitation to explore the depths of Southern culture, one delicious bite at a time. Happy cooking, friends!

Mississippi Pot Roast

Prep Time 10 minutes
Cook Time 8 hours
Total Time 8 hours 10 minutes
Servings 6 servings
Calories 600
A flavorful and easy slow cooker dish featuring tender chuck roast with ranch and au jus flavors, topped with pepperoncini peppers.

Ingredients

Main Ingredients

  • 3 pounds chuck roast
  • 1 packet ranch dressing mix
  • 1 packet au jus mix
  • 6 tablespoons butter
  • 6-8 pepperoncini pepperoncini (pickled hot peppers)

Instructions 

  • Place the roast in a slow cooker liner and sprinkle with ranch and au jus mixes.
  • Add pats of butter and pepperoncini peppers on top of the roast.
  • Pour in 1/2 cup (120 ml) of pepperoncini brine.
  • Seal the liner and cook on LOW for 8 hours until tender.
  • Shred the beef in the sauce and serve.

Notes

This dish is perfect for a quick, flavorful dinner with minimal prep.
Calories: 600kcal
Cost: $15
Course: Main Course
Cuisine: American
Keyword: beef

Embark on a Flavorful Adventure with Chocolate Chip Zucchini Bread

Welcome to a delightful journey where the humble zucchini meets the rich decadence of chocolate! If you’ve ever thought of zucchini as merely a side vegetable, think again! This Chocolate Chip Zucchini Bread recipe takes the best of both worlds, transforming a commonly overlooked ingredient into a luscious, moist treat that’s perfect for breakfast, dessert, or a snack anytime. In this article, we’ll dive deep into the art of making this captivating dish, covering everything from ingredients to tips, variations, and beyond!

Why You’ll Love This Recipe

Here are five compelling reasons this Chocolate Chip Zucchini Bread will become a staple in your kitchen:

  • Moist and Flavorful: The combination of fresh zucchini and rich chocolate chips results in a bread that’s incredibly moist, ensuring every bite is a delicious experience.
  • Easy to Make: With straightforward steps, this recipe is perfect for bakers of all levels. You can whip it up in no time, making it a favorite for busy days.
  • Healthy Twist: Incorporating zucchini adds nutrients and moisture without overpowering the flavor, making this a guilt-free indulgence.
  • Versatile Treat: Enjoy it as breakfast, a snack, or dessert! This bread is perfect on its own or paired with a dollop of cream cheese or butter.
  • Great for Meal Prep: Bake a couple of loaves and freeze them for later, ensuring you always have a sweet treat on hand!

Ingredients Breakdown

Let’s explore the key ingredients that make this Chocolate Chip Zucchini Bread a standout:


5-Speed Electric Hand Mixer

★ Recommended Kitchen Tool

5-Speed Electric Hand Mixer

Make this recipe even easier with a quality 5-Speed Electric Hand Mixer — a must-have kitchen staple!


🛒 Shop This Tool →

As an Amazon Associate, we earn from qualifying purchases.
  • Vegetable Oil: Keeps the bread moist. Feel free to substitute with melted coconut oil or applesauce for a healthier option.
  • Brown Sugar: Adds depth and a hint of caramel flavor. You can use all granulated sugar if desired.
  • Granulated Sugar: Enhances sweetness and helps achieve that beautiful crust on the loaf.
  • Eggs: These bind the ingredients and provide richness. For a vegan option, use flax eggs (1 tablespoon ground flaxseed + 3 tablespoons water = 1 egg).
  • Vanilla Extract: A splash of vanilla brings a warm, inviting flavor to the bread.
  • Cinnamon: Adds warmth and depth. Feel free to experiment with nutmeg for a different spice profile.
  • Baking Soda & Baking Powder: These help the bread rise, making it fluffy and light.
  • Salt: Balances the flavors and enhances sweetness.
  • All-Purpose Flour: The backbone of the recipe. For gluten-free options, try a 1:1 gluten-free baking flour.
  • Shredded Zucchini: The star of the show! Use fresh zucchini for the best results. Remember to squeeze it dry to avoid excess moisture in the bread.
  • Chocolate Chips: Use semi-sweet or dark chocolate chips for a rich flavor. You can even go for milk chocolate or white chocolate for a sweeter twist!

Pro Tips for Perfect Chocolate Chip Zucchini Bread

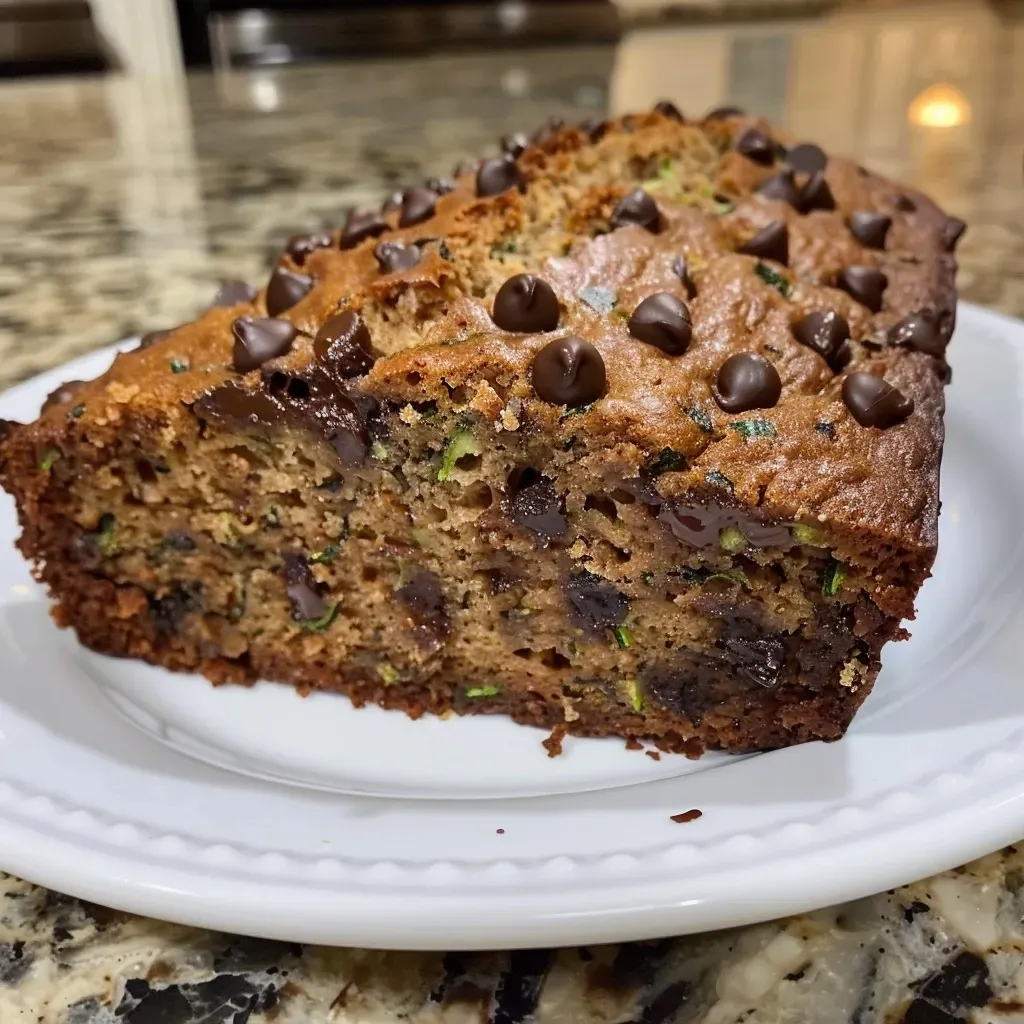
Close-up side view of a slice of chocolate chip zucchini bread with chocolate chips visible.

Here are some expert tips to elevate your baking game:

  • Choose the Right Zucchini: Smaller zucchinis tend to have a firmer texture and less water, which is ideal for baking.
  • Don’t Skimp on Chocolate: Use quality chocolate chips for the best flavor and a beautiful molten texture.
  • Mixing Matters: Combine dry and wet ingredients separately before mixing to avoid over-mixing, which can lead to dense bread.
  • Check for Doneness: Always use a toothpick to check if the bread is cooked through. It should come out clean or with a few moist crumbs.
  • Cooling is Key: Allow the bread to cool in the pan for a bit before transferring it to a wire rack. This helps maintain its shape.
  • Add Nuts or Dried Fruits: For extra texture and flavor, consider adding walnuts, pecans, or dried cranberries.
  • Experiment with Spices: Don’t hesitate to mix in a pinch of cardamom or cloves for a unique flavor twist.
  • Make it a Meal: Serve slices with yogurt or a sprinkle of granola for a wholesome breakfast or snack.

Avoid Common Mistakes

Here are some common pitfalls and how to avoid them:

  • Too Much Moisture: If your bread turns out soggy, it might be due to excess water in the zucchini. Always squeeze out the moisture after shredding.
  • Overmixing: Mixing too much can lead to tough bread. Mix just until combined.
  • Not Storing Properly: If you want to keep your bread fresh, store it in an airtight container at room temperature for up to 2 days or freeze it.
  • Underbaking: If you take the bread out too early, it won’t set properly. Always do the toothpick test!

Variations to Try

Here are some fun twists on the classic recipe:

  • Chocolate Chip and Walnut: Add a cup of chopped walnuts for a crunchy texture contrast.
  • Double Chocolate Zucchini Bread: Replace 1/2 cup of flour with cocoa powder for a rich chocolate flavor.
  • Spiced Zucchini Bread: Add pumpkin spice or ginger for a warm, seasonal flavor.
  • Coconut Zucchini Bread: Mix in shredded coconut for a tropical twist.

Storage and Make-Ahead Instructions

This Chocolate Chip Zucchini Bread can be prepared in advance and stored:

  • Room Temperature: Store in an airtight container for up to 2 days.
  • Refrigerator: Keep it in the fridge for up to a week.
  • Freezer: Wrap the cooled bread tightly in plastic wrap and foil. Freeze for up to 3 months. Thaw overnight before serving.

Frequently Asked Questions (FAQ)

1. Can I use frozen zucchini?

Yes, just ensure it’s thawed and drained well before using.

2. How do I know when the bread is done?

Insert a toothpick into the center; it should come out clean or with a few moist crumbs.

3. Can I make this bread gluten-free?

Absolutely! Substitute with a gluten-free flour blend.

4. How do I store leftover zucchini bread?

Keep it in an airtight container at room temperature or refrigerate for longer freshness.

5. Can I add other mix-ins?

Definitely! Feel free to add nuts, dried fruits, or even other types of chocolate.

6. Is this recipe adaptable for muffins?

Yes! Pour the batter into muffin tins and adjust the baking time to about 20-25 minutes.

7. What can I serve with zucchini bread?

A dollop of cream cheese or butter complements the bread beautifully.

8. How long does it take to bake?

Baking typically takes between 50-60 minutes, depending on your loaf pan size.

Nutritional Tips and Dietary Adaptations

This recipe can be tailored to fit various dietary needs:

  • Low Sugar: Reduce the sugar content or use a sugar substitute like erythritol.
  • Vegan: Substitute eggs with flax eggs and use plant-based oils.
  • Low Carb: Use almond flour and sugar alternatives for a keto-friendly version.

Essential Equipment for Baking

Here’s a list of must-have tools for this recipe:

  • Loaf Pan: A standard 9×5 inch or 8×4 inch loaf pan works best.
  • Mixing Bowls: Use large bowls for mixing dry and wet ingredients.
  • Measuring Cups and Spoons: Accurate measurements are key to baking success!
  • Grater: A box grater or food processor is essential for shredding zucchini quickly.

Serving Suggestions

For the ultimate experience, try these serving ideas:

  • With Cream Cheese: Spread some cream cheese on warm slices for a delicious contrast.
  • With Ice Cream: Serve a slice with a scoop of vanilla ice cream for a decadent dessert.
  • As a Breakfast Item: Pair it with yogurt and fresh fruits for a balanced meal.

Final Thoughts

This Chocolate Chip Zucchini Bread is not just a recipe; it’s an experience filled with flavors and memories waiting to be created. Whether you’re baking it for yourself or sharing it with loved ones, this bread is sure to bring joy and satisfaction. So grab your apron, unleash your culinary creativity, and embark on this delicious journey. Remember, every slice is more than just a treat; it’s a story to tell. Happy baking!

Chocolate Chip Zucchini Bread Recipe

Prep Time 15 minutes
Cook Time 1 hour
Total Time 1 hour 15 minutes
Servings 10 slices
Calories 250
A moist and flavorful zucchini bread loaded with chocolate chips, perfect for a quick snack or dessert.

Ingredients

Vegetables and Oils

  • 0.5 cup vegetable oil
  • 0.75 cup packed brown sugar
  • 0.25 cup granulated sugar
  • 2 large eggs
  • 1 teaspoon vanilla extract
  • 2 teaspoons cinnamon
  • 0.5 teaspoon baking soda
  • 0.5 teaspoon baking powder
  • 0.5 teaspoon salt
  • 1.5 cups all-purpose flour
  • 1.5 cups shredded zucchini
  • 1 cup chocolate chips (plus more for the top)

Instructions 

  • Preheat oven to 350°F (175°C). Grease a loaf pan.
  • Mix oil, sugars, eggs, and vanilla until smooth.
  • Stir in cinnamon, baking soda, baking powder, and salt.
  • Add flour, then zucchini and chocolate chips; fold in.
  • Pour batter into pan, sprinkle with extra chocolate chips, and bake for 50-60 minutes.
  • Cool before slicing. Store covered for up to 2 days or freeze for 3 months.

Notes

For best results, do not overmix the batter to keep the bread tender.
Calories: 250kcal
Cost: $12
Course: Dessert
Keyword: chocolate, zucchini

Embark on a Sweet Odyssey with Chocolate Hazelnut Pear Babka

Welcome to a delightful culinary journey where we explore the enchanting world of Chocolate Hazelnut Pear Babka. This recipe is not just about baking; it’s about weaving together rich traditions and flavors that tell a story of culture and connection. With its layers of soft, pillowy dough, decadent chocolate, crunchy hazelnuts, and the subtle sweetness of ripe pears, this babka is your passport to a world of taste and adventure.

Why You’ll Love This Recipe

  • Flavor Explosion: The combination of chocolate, hazelnuts, and pears creates a symphony of flavors that dance on your palate.
  • Visual Delight: The intricate twisted design of babka makes it a showstopper at any gathering.
  • Easy-to-Follow Steps: Even if you’re new to baking, our detailed instructions will guide you through every stage, making it accessible for all skill levels.
  • Perfect for Sharing: This recipe yields a generous loaf that’s perfect for sharing with friends and family over coffee or tea.
  • Versatile Treat: Enjoy it warm out of the oven, toasted for breakfast, or as a decadent dessert.

Detailed Ingredient Breakdown

Understanding the ingredients is crucial for creating the perfect Chocolate Hazelnut Babka. Here’s what you’ll need:

  • 95 g butter: Adds richness and moisture to the dough.
  • 185 ml milk (3/4 cup): Use whole milk for a creamier texture; non-dairy alternatives like almond or oat milk can also work.
  • 1 1/4 teaspoons active dried yeast: The leavening agent that makes your babka rise beautifully.
  • 1 large egg: Provides structure and richness; vegan substitutes can include flax eggs.
  • 3 tablespoons caster sugar: For sweetness; you can substitute with coconut sugar for a healthier option.
  • 3/4 teaspoon salt: Enhances flavor and controls yeast activity.
  • 335 g high-grade flour (strong flour): Essential for creating a sturdy dough; bread flour is a great choice.
  • 90 g butter (cubed): Used in the filling to achieve a luscious texture.
  • 2/3 cup caster sugar: Sweetens the filling; adjust according to your preference.
  • 85 g dark chocolate: Use high-quality chocolate for the best flavor; milk chocolate can be a sweeter alternative.
  • 1/4 cup Dutch cocoa: Adds depth and richness to the chocolate flavor.
  • 1/4 teaspoon salt: Balances sweetness in the filling.
  • 1/2 cup hazelnuts, roasted and roughly chopped: Provides crunch and a nutty flavor; feel free to use walnuts or almonds as substitutes.
  • 1 pear (unripe, I used beurre bosc), peeled and diced small: Adds moisture and a slight fruity tang.
  • 60 g caster sugar: Sweetens the pear filling; honey or maple syrup are great alternatives.
  • 1/4 cup water: Helps to dissolve the sugar and creates a syrup consistency.

Pro Tips for Perfecting Your Babka

Close-up view of a freshly baked Chocolate Hazelnut and Pear Babka with a shiny crust and visible chunks of chocolate and pear.
  • Room Temperature Ingredients: Ensure your butter and eggs are at room temperature for a smoother dough.
  • Don’t Rush the Rise: Allow ample time for the dough to rise; it should double in size.
  • Chill the Dough: If the dough becomes too sticky, refrigerate it for 30 minutes to make it easier to handle.
  • Layering Flavors: Spread the chocolate filling evenly and sprinkle the hazelnuts generously to avoid any dry bites.
  • Twisting Technique: When shaping your babka, twist the dough tightly but avoid tearing it for a beautiful swirl.
  • Bake Until Golden: Keep an eye on the oven; you want a deep golden-brown crust without burning.
  • Let It Cool: Allow the babka to cool in the pan for a few minutes before transferring to a wire rack to avoid sogginess.
  • Drizzle with Syrup: For added sweetness and shine, brush the warm babka with a simple syrup made from the leftover sugar and water.

Avoid Common Mistakes

Even the best bakers can run into issues! Here are some common mistakes and how to troubleshoot them:


Cake Decorating Set

★ Recommended Kitchen Tool

Cake Decorating Set

Make this recipe even easier with a quality Cake Decorating Set — a must-have kitchen staple!


🛒 See Deals on Amazon →

As an Amazon Associate, we earn from qualifying purchases.
  • Dough Doesn’t Rise: Check that your yeast is fresh; if it’s expired, your dough won’t rise.
  • Dense Texture: Overworking the dough can lead to a dense babka; mix just until combined.
  • Filling Leaks Out: Ensure the edges of the dough are sealed well to keep the filling inside.
  • Overbaking: If the top is browning too quickly, cover it loosely with foil midway through baking.

Delicious Variations to Try

Feel free to customize your babka with these delightful variations:

  • Nut-Free Option: Omit the hazelnuts and add more chocolate or dried fruits like cranberries.
  • Spiced Babka: Add a pinch of cinnamon or nutmeg to the filling for warm, inviting flavors.
  • Fruit Swirl: Mix in other fruits like diced apples or peaches for a fruity twist.
  • Cheesecake Filling: Substitute half of the chocolate filling with a cream cheese mixture for a richer taste.

Storage and Make-Ahead Instructions

To enjoy your babka longer, follow these storage tips:

  • Storing: Keep your babka in an airtight container at room temperature for up to 3 days. For longer freshness, refrigerate for up to a week.
  • Freezing: Wrap the cooled babka tightly in plastic wrap, then in aluminum foil. It can be frozen for up to 3 months.
  • Reheating: To revive the babka, warm it in a preheated oven at 350°F (175°C) for about 10 minutes.
  • Make-Ahead: You can prepare the dough and filling the day before; simply assemble and bake the next day.

Comprehensive FAQ

Here’s a collection of frequently asked questions to help you along your baking journey:

  • Can I make this babka ahead of time? Yes, you can prepare the dough and filling the day before and refrigerate overnight.
  • Can I use a different type of nut for the filling? Absolutely! Walnuts or pecans are great alternatives.
  • How should I store leftover babka? Store in an airtight container at room temperature for up to 3 days.
  • Why did my babka turn out dense? This could be due to over-kneading or using expired yeast.
  • Can I substitute the butter? Yes, you can use margarine or coconut oil for a dairy-free option.
  • How long does it take to bake? Generally, 30-35 minutes at 350°F (175°C) should be sufficient.
  • What can I serve with babka? It pairs wonderfully with coffee, tea, or a scoop of ice cream.
  • What is the history of babka? Babka has its roots in Eastern European Jewish communities and is traditionally made with sweet dough.

Nutrition Tips and Dietary Adaptations

If you’re looking to make your babka a bit healthier, consider these tips:

  • Whole Wheat Flour: Substitute half of the white flour with whole wheat for added fiber.
  • Reduce Sugar: Use less sugar in the filling or opt for natural sweeteners like honey.
  • Dairy-Free Option: Use plant-based milk and vegan butter to make this a vegan-friendly treat.

Essential Equipment Recommendations

Here are some must-have tools for creating your babka masterpiece:

  • Mixing Bowls: A set of various sizes for mixing your ingredients.
  • Stand Mixer: While you can mix by hand, a stand mixer makes kneading the dough easier.
  • Rolling Pin: For rolling out the dough evenly.
  • Loaf Pan: A standard 9×5 inch loaf pan works best for shaping the babka.
  • Wire Rack: For cooling the babka after baking.

Serving Suggestions

When it comes to serving your Chocolate Hazelnut Pear Babka, consider these delightful ideas:

  • Warm Slices: Serve warm with a dusting of powdered sugar for a simple yet elegant presentation.
  • Toasted: Spread a little butter or cream cheese on slices and toast them for a delicious breakfast treat.
  • Pair with Coffee: Enjoy with a cup of freshly brewed coffee or tea for the perfect afternoon snack.
  • Ice Cream Scoop: Top slices with a scoop of vanilla ice cream for an indulgent dessert.

As we conclude our culinary adventure, remember that baking is as much about the experience as it is about the final product. With this Chocolate Hazelnut Pear Babka recipe, you’re not just making a treat; you’re creating memories and sharing stories. So gather your ingredients, roll up your sleeves, and let the magic unfold in your kitchen. Happy baking!

Chocolate, Hazelnut & Pear Babka

Prep Time 30 minutes
Cook Time 40 minutes
Total Time 1 hour 10 minutes
Servings 8 slices
Calories 420
A decadent babka combining rich chocolate, toasted hazelnuts, and sweet pears for a delightful treat.

Ingredients

Dough

  • 185 ml milk (warm)
  • 1 1/4 teaspoons active dried yeast
  • 1 large egg
  • 3 tablespoons caster sugar
  • 3/4 teaspoon salt
  • 335 g high grade flour (strong flour)

Filling

  • 90 g butter (cubed)
  • 2/3 cup caster sugar
  • 85 g dark chocolate
  • 1/4 cup dutch cocoa
  • 1/2 cup hazelnuts (roasted and roughly chopped)
  • 1 pear unripe pear (beurre bosc) (peeled and diced small)
  • 60 g caster sugar
  • 1/4 cup water

Instructions 

  • Prepare the dough by warming milk, dissolving yeast, and mixing with flour, sugar, salt, egg, and butter. Knead until smooth and let rise.
  • Make the filling by melting butter, then mixing with sugar, chopped chocolate, cocoa, hazelnuts, and diced pear.
  • Roll out the dough, spread the filling evenly, then roll up and shape into a loaf. Let it rise again.
  • Bake at 180°C (350°F) for 40 minutes until golden.

Notes

Ensure the dough is well kneaded for a soft, airy babka.
Calories: 420kcal
Cost: $15
Course: Dessert
Cuisine: European
Keyword: babka, chocolate, hazelnuts, Pear

Discover the Comfort of Creamy White Chicken Chili

Welcome to a culinary adventure that promises warmth, flavor, and the joy of connection! Today, we’re diving into the world of creamy white chicken chili, a dish that not only delights the palate but also tells a story of home and comfort. This recipe is perfect for weeknight meals, gatherings, or simply when you need a cozy bowl of happiness. With its creamy texture, zesty flavors, and wholesome ingredients, it’s bound to become a family favorite.

In this comprehensive guide, we’ll explore everything from the ingredients to expert tips, variations, and storage solutions. So, grab your apron, and let’s embark on this flavorful journey together!

Why You’ll Love This Recipe

  • Comforting and creamy: The rich texture of this chili, enhanced by sour cream, makes it the perfect dish for chilly evenings.
  • Quick and easy: With a prep time of just 10 minutes and a cooking time of around 30 minutes, it’s an ideal choice for busy weeknights.
  • Versatile ingredients: Use leftover chicken or rotisserie chicken to save time, making this recipe adaptable and convenient.
  • Healthy and hearty: Packed with protein and fiber from beans and chicken, this chili is a nutritious option that satisfies.
  • Great for meal prep: Make a big batch and store it for easy lunches or dinners throughout the week.

Ingredients Breakdown

Let’s dive into the ingredients that make this creamy white chicken chili so special:


Digital Meat Thermometer

★ Recommended Kitchen Tool

Digital Meat Thermometer

Make this recipe even easier with a quality Digital Meat Thermometer — a must-have kitchen staple!


🛒 See Deals on Amazon →

As an Amazon Associate, we earn from qualifying purchases.
  • 1 tablespoon olive oil: For sautéing, it adds flavor and richness.
  • 1 small yellow onion (chopped): Provides a savory base; about ½ cup when chopped.
  • 2 garlic cloves (minced): Adds aromatic depth; feel free to use 1 ½ teaspoons of garlic powder in a pinch.
  • 2 ½ cups low-sodium chicken broth: The heart of the soup, ensuring a flavorful base.
  • 2 (4 oz) cans diced green chilies: Brings a mild heat and vibrant color.
  • 1 ½ teaspoons ground cumin: Essential for that warm, earthy flavor.
  • ¼ teaspoon cayenne pepper: Adds a kick; adjust according to your heat preference.
  • ½ teaspoon dried oregano and ½ teaspoon paprika: For herbal and smoky notes.
  • Juice of ½ small lime: Brightens the overall flavor.
  • Salt and freshly ground black pepper: To taste.
  • 2 (15 oz) cans great northern beans: Provides protein and creaminess.
  • 1 cup sour cream (or plain Greek yogurt): This is what makes it creamy!
  • 1 cup corn (frozen or fresh): Adds sweetness and texture.
  • 2 heaping cups cooked chicken (shredded): Use rotisserie or leftover chicken for convenience.
  • Garnishes: Fresh cilantro, shredded cheese, tortilla chips, green onions, and avocado for a finishing touch.

Pro Tips for Perfect Chili

Close-up view of a creamy white chicken chili bowl garnished with fresh cilantro and avocado.

As you prepare this creamy white chicken chili, keep these expert insights in mind:

  • Texture matters: For a creamier consistency, puree a portion of the beans before adding them to the pot.
  • Spice it up: If you love heat, consider adding diced jalapeños or a splash of hot sauce.
  • Cook low and slow: For enhanced flavors, simmer the chili longer if time allows.
  • Fresh herbs: Adding fresh cilantro right before serving elevates the dish with a burst of flavor.
  • Don’t skip the lime: A splash of lime juice just before serving brightens and balances the richness.
  • Freezing friendly: This chili freezes well, making it a great meal prep option.
  • Garnish generously: Don’t be shy with the toppings; they add layers of flavor and texture!
  • Adjust the broth: Add more or less chicken broth depending on your preferred thickness.

Avoiding Common Mistakes

Even seasoned cooks can encounter hiccups. Here are some common mistakes to watch out for:

  • Overcooking the chicken: If using raw chicken, ensure it’s cooked through but still tender.
  • Too little seasoning: Don’t hesitate to taste and adjust seasonings as you go.
  • Skipping the puree step: This enhances the chili’s creaminess—don’t skip it!
  • Neglecting garnishes: The right toppings make a world of difference; don’t skip them!

Delicious Variations

Feel free to get creative with your white chicken chili! Here are some tasty variations to consider:

  • Spicy White Chicken Chili: Add more cayenne or diced jalapeños for a fiery kick!
  • Cheesy White Chicken Chili: Stir in shredded cheese (like Monterey Jack) for a gooey, comforting twist.
  • Vegetarian White Chili: Replace chicken with extra beans and add more vegetables like bell peppers or zucchini.
  • Slow Cooker White Chicken Chili: Combine all ingredients in a slow cooker and cook on low for 6-8 hours for a hands-off approach.

Storage and Make-Ahead Instructions

This chili is perfect for meal prep! Here’s how to store it:

  • Refrigeration: Store in an airtight container for up to 4 days. Reheat on the stovetop or in the microwave.
  • Freezing: Freeze in portions for up to 3 months. Thaw overnight in the refrigerator before reheating.
  • Make-ahead: Prepare the chili a day in advance to allow flavors to meld even more.

Frequently Asked Questions (FAQ)

1. Can I use frozen chicken? Yes, just ensure it cooks thoroughly in the chili.

2. How can I make it dairy-free? Substitute sour cream with coconut yogurt or a dairy-free cream alternative.

3. What can I serve with white chicken chili? It pairs wonderfully with cornbread, rice, or tortilla chips!

4. Can I add more vegetables? Absolutely! Bell peppers, carrots, or spinach are great additions.

5. How spicy is this chili? It has a mild spice; adjust the cayenne to your taste.

6. Is it gluten-free? Yes, all ingredients are gluten-free! Check your broth for any additives.

7. Can I use different beans? Yes! Feel free to experiment with black beans or pinto beans.

8. What’s the best way to reheat this chili? Gently reheat on the stovetop over low heat, adding a splash of broth if needed.

Nutritional Tips and Dietary Adaptations

This creamy white chicken chili can easily fit into various dietary preferences:

  • Low-carb option: Replace beans with cauliflower to lower carbs.
  • High-protein version: Add more chicken or beans for an extra protein boost.
  • Vegetarian adaptation: Omit chicken and double the beans for a filling meal.

Recommended Equipment

To make this chili, you’ll need:

  • Large pot or Dutch oven: For even cooking and easy stirring.
  • Cutting board and knife: For prepping your ingredients.
  • Measuring cups and spoons: Ensure accurate ingredient amounts.
  • Blender or food processor: For pureeing beans if desired.

Serving Suggestions

Here are some delightful ways to serve your creamy white chicken chili:

  • Tortilla Chips: Use them for dipping or crumbling on top for added crunch.
  • Avocado Slices: Fresh avocado provides a creamy, rich contrast.
  • Shredded Cheese: A sprinkle of cheese adds flavor and visual appeal.
  • Fresh Cilantro: A sprinkle of chopped cilantro brightens up each bowl.

Conclusion

This creamy white chicken chili recipe is not just a meal; it’s a comforting hug in a bowl. With its rich flavors and heartwarming ingredients, it’s a dish that invites you to gather around the table and share stories. Whether you’re trying it for the first time or perfecting your version, may it always remind you of the joy that food brings. So, what are you waiting for? Grab your ingredients, and let’s make some chili magic happen!

Creamy White Chicken Chili Recipe

Prep Time 10 minutes
Cook Time 30 minutes
Total Time 40 minutes
Servings 6 servings
Calories 350
A hearty and creamy white chicken chili perfect for cozy meals, packed with flavorful spices and toppings.

Ingredients

olive oil

  • 1 tablespoon olive oil

vegetable

  • 1 small yellow onion (chopped (about ½ cup))

garlic

  • 2 cloves garlic cloves (finely minced (or 1 ½ teaspoons garlic powder))
  • 2.5 cups low-sodium chicken broth
  • 2 4 oz cans diced green chilies
  • 1.5 teaspoons ground cumin
  • 0.25 teaspoon cayenne pepper
  • 0.5 teaspoon dried oregano
  • 0.5 teaspoon paprika
  • 0.5 small lime (juice from)
  • to taste salt and freshly ground black pepper
  • 2 15 oz cans great northern beans (drained and rinsed)
  • 1 cup sour cream (or plain Greek yogurt)
  • 1 cup corn (frozen or fresh)
  • 2 heaping cups cooked chicken (shredded (rotisserie or left-over chicken*))

garnishes

  • fresh cilantro
  • shredded cheese
  • tortilla chips
  • green onions
  • avocado (sliced for garnish)

Instructions 

  • Heat olive oil in a large pot over medium-high heat. Sauté onion until softened, then add garlic and cook briefly.
  • Add broth, chilies, spices, lime juice, and season with salt and pepper. Simmer for 15-30 minutes.
  • Puree a portion of beans with broth, then add whole beans and corn. Cook for another 15 minutes.
  • Remove from heat, stir in sour cream and shredded chicken. Serve topped with cilantro, cheese, avocado, and chips.

Notes

For extra creaminess, puree some beans. Adjust seasoning to taste.
Calories: 350kcal
Cost: $15
Course: Main Course
Cuisine: American
Keyword: Chicken, Chili, Comfort Food