Author

Jack

Browsing

Experience the Joy of Cooking with Healthy Baked Rigatoni

Welcome to a delightful culinary adventure where comfort meets health in a dish that’s as vibrant as the Italian countryside. This Healthy Baked Rigatoni with Peppers and Sausage isn’t just a meal; it’s a heartwarming experience that brings together the rich flavors of ground turkey sausage, colorful bell peppers, and gooey low-fat mozzarella. If you’re ready to elevate your weeknight dinners, let’s dive into this recipe that promises to bring excitement to your table while keeping health in mind.

Why You’ll Love This Recipe

  • Quick and Easy: This baked rigatoni comes together in just one hour, making it perfect for busy weeknights when you want a delicious meal without spending hours in the kitchen.
  • Nutritious Comfort Food: With whole wheat rigatoni and lean turkey sausage, this dish transforms traditional comfort food into a healthy indulgence that satisfies your cravings.
  • Vibrant Flavors: The combination of sweet bell peppers and savory sausage creates a flavor explosion that makes every bite a celebration.
  • Meal Prep Friendly: This recipe is easily adaptable for meal prep, allowing you to prepare a large batch and enjoy it throughout the week.
  • Customizable Ingredients: With several ingredient alternatives, you can make this dish your own, whether you’re vegetarian or looking to add your favorite veggies.

Ingredient Breakdown

Let’s take a closer look at the ingredients that make this dish shine:

  • Ground Turkey Sausage: A leaner alternative to traditional sausage, it adds flavor without excess fat. You can substitute with chicken sausage or a plant-based sausage for a vegetarian option.
  • Whole Wheat Rigatoni: This pasta is packed with fiber and nutrients, making it a healthier choice. If you’re gluten-free, swap for gluten-free rigatoni or penne.
  • Bell Peppers: Use a mix of red, yellow, and green for a colorful presentation. Feel free to substitute with zucchini or spinach for different flavors.
  • Marinara Sauce: Choose a no-sugar-added variety for a healthier option, or make your own for an extra burst of freshness.
  • Low-Fat Mozzarella Cheese: This keeps the dish creamy while reducing calories. You can also use vegan cheese for a dairy-free version.

Pro Tips for the Perfect Bake
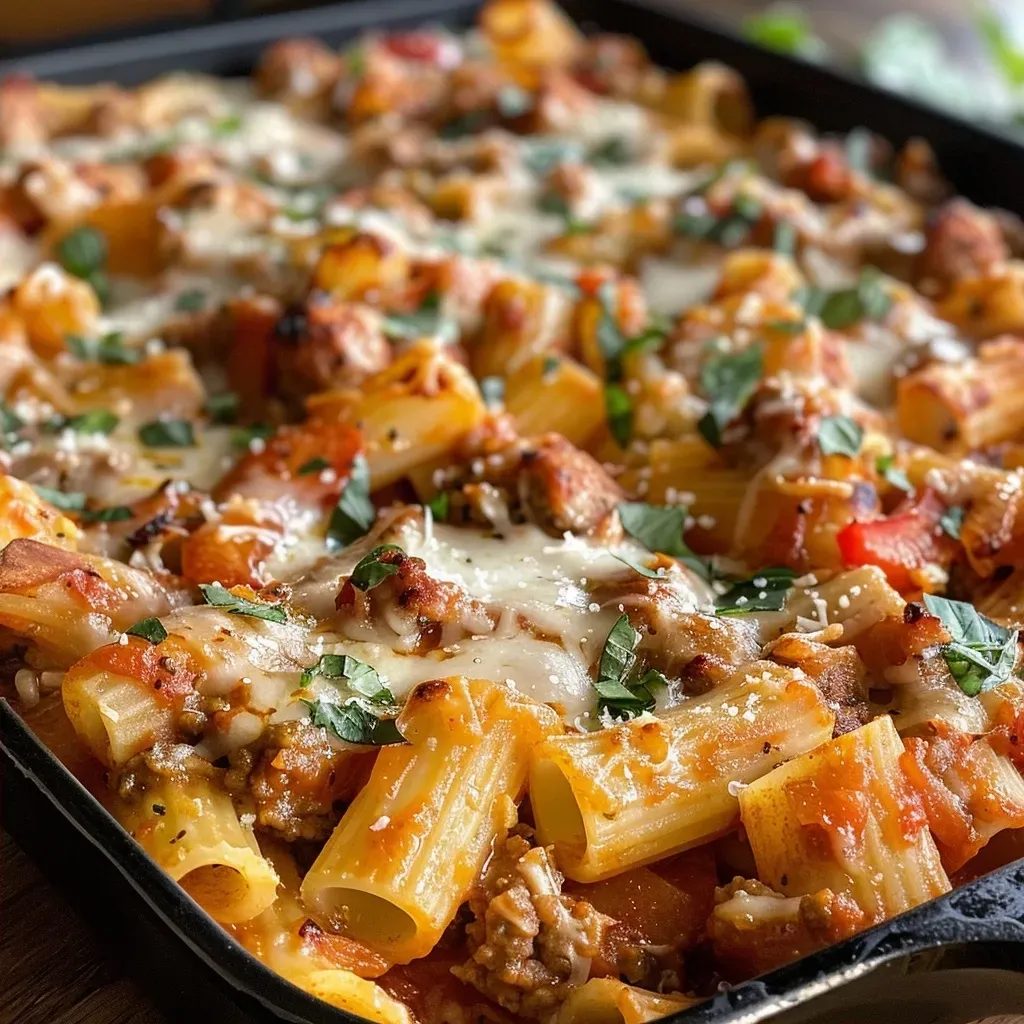
Close-up of Healthy Baked Rigatoni with golden melted cheese and vibrant peppers.

Get ready for an even more delicious experience with these expert insights:


Meal Prep Container Set

★ Recommended Kitchen Tool

Meal Prep Container Set

Make this recipe even easier with a quality Meal Prep Container Set — a must-have kitchen staple!


🛒 View on Amazon →

As an Amazon Associate, we earn from qualifying purchases.
  • Don’t Overcook the Pasta: Cook the rigatoni just shy of al dente (2 minutes less than package directions) to prevent it from becoming mushy when baked.
  • Layer Smartly: When assembling, layer the ingredients evenly to ensure every bite is packed with flavor.
  • Let It Rest: After baking, allow your rigatoni to sit for about 10 minutes. This helps the flavors meld and makes serving easier.
  • Experiment with Herbs: Add fresh basil or oregano to the sauce for an aromatic touch that enhances the dish.
  • Cheese Variations: Mix in some parmesan cheese for added depth of flavor. Just remember to adjust the salt accordingly.
  • Storage Tips: Store leftovers in an airtight container in the fridge for up to 4 days. Reheat in the oven for the best texture.
  • Make-Ahead Option: Assemble the dish up to a day in advance, cover tightly, and bake when ready to serve.
  • Freezing: This dish freezes well! Just ensure it’s completely cooled before freezing in an airtight container.

Common Mistakes and Troubleshooting

To ensure your rigatoni turns out perfect every time, watch out for these common pitfalls:

  • Overcooking the Sausage: Cook the turkey sausage just until brown; overcooking can result in dry meat.
  • Too Much Sauce: While sauce is essential, too much can make the dish watery. Stick to the recommended amounts for best results.
  • Skipping the Resting Time: Don’t rush to serve! Allowing it to rest makes a significant difference in texture.
  • Ignoring Texture: Be sure to check the peppers for tenderness before baking. They should be slightly soft, not mushy.

Delicious Variations to Try

Feel free to mix things up with these fun variations:

  • Veggie-Packed Rigatoni: Add mushrooms, spinach, or artichokes for an extra dose of veggies.
  • Spicy Kick: Incorporate red pepper flakes or diced jalapeños for a spicy twist.
  • Cheesy Delight: Swap in different cheeses like fontina or gouda for a unique flavor profile.
  • Herbed Rigatoni: Mix in fresh herbs like thyme or parsley for an aromatic lift.

Storage and Make-Ahead Instructions

To make your life easier, here’s how to store and prepare your rigatoni in advance:

  • Refrigeration: Store in an airtight container for up to 4 days. Reheat in the oven or microwave until heated through.
  • Freezing: Freeze in a freezer-safe container for up to 3 months. Thaw overnight in the fridge before reheating.
  • Make-Ahead: Assemble the dish a day ahead, cover tightly with foil, and bake it fresh when you’re ready to serve.

Frequently Asked Questions (FAQs)

Here are some common questions about this healthy baked rigatoni:

  • Can I use regular pasta instead of whole wheat? Yes, but whole wheat pasta adds more nutrients. Just adjust cooking times as necessary.
  • Is this dish suitable for freezing? Absolutely! Just ensure it’s cooled completely before freezing.
  • How do I make it vegan? Substitute turkey sausage with a plant-based alternative and use vegan cheese.
  • What can I serve with baked rigatoni? A side salad or garlic bread pairs beautifully with this dish.
  • Can I add other proteins? Yes! Chicken or beef can be used as alternatives to turkey sausage.
  • How can I make it spicier? Add red pepper flakes or diced jalapeños for a spicy kick.
  • What’s the best way to reheat leftovers? The oven is best for reheating to maintain texture, but the microwave is a quick alternative.
  • Can I use homemade marinara sauce? Definitely! Homemade marinara can elevate the flavors even more.

Nutrition Tips and Dietary Adaptations

This dish is not only delicious but can also be tailored to meet various dietary needs:

  • Low-Calorie Option: Use extra-lean turkey sausage and reduce cheese for fewer calories.
  • Gluten-Free: Substitute with gluten-free pasta alternatives for a gluten-free version.
  • Low-Carb: Swap pasta with spiralized zucchini or cauliflower for a low-carb alternative.
  • High-Protein: Add beans or lentils for an additional protein boost.

Essential Equipment Recommendations

To make your cooking experience seamless, here’s what you’ll need:

  • Large Skillet: For cooking the sausage and vegetables.
  • 9×13 Inch Casserole Dish: Perfect for baking and serving this delicious rigatoni.
  • Measuring Cups and Spoons: For precise ingredient measurement.
  • Spatula: To mix and serve the baked rigatoni easily.

Serving Suggestions

To create the perfect dining experience, consider these serving ideas:

  • Garnish with Fresh Herbs: A sprinkle of fresh basil or parsley brightens up the dish.
  • Pair with a Side Salad: A fresh arugula salad drizzled with balsamic vinaigrette complements the flavors beautifully.
  • Serve with Crusty Bread: Provide crusty Italian bread for dipping into the marinara sauce.
  • Offer a Cheese Plate: A selection of cheeses can elevate the meal and offer variety.

In conclusion, this Healthy Baked Rigatoni with Peppers and Sausage is more than just a recipe; it’s a gateway to a world of flavors, comfort, and health. With its vibrant ingredients, nutritional benefits, and customizable nature, it’s a dish that will leave your taste buds dancing and your heart full. So gather your loved ones, embark on this culinary adventure, and let the magic of cooking bring you closer together. Happy cooking!

Healthy Baked Rigatoni with Peppers and Sausage

Prep Time 10 minutes
Cook Time 30 minutes
Total Time 40 minutes
Servings 4 servings
Calories 550
A wholesome and flavorful baked pasta dish featuring turkey sausage, colorful peppers, and whole wheat rigatoni, perfect for a nutritious family meal.

Ingredients

Meat

  • 1 pound ground turkey sausage

Vegetables

  • 2 whole bell peppers bell peppers (sliced into strips)

Pasta

  • 1 pound whole wheat rigatoni (cooked)

Sauce

  • 32 ounces jarred no-sugar added marinara sauce
  • 0.5 cup water
  • 1 cup low-fat mozzarella cheese

Instructions 

  • Preheat oven to 375°F (190°C). Spray a 9×13 inch casserole dish with nonstick spray.
  • Cook turkey sausage in a skillet until browned; add peppers and cook until softened. Stir in cooked rigatoni, marinara, and water.
  • Transfer mixture to casserole dish, top with mozzarella, and bake for 20-30 minutes until cheese is golden.
  • Remove from oven, let sit for 10 minutes, then serve.

Notes

For extra flavor, add fresh herbs before serving.
Calories: 550kcal
Cost: $15
Course: Main Course
Cuisine: American
Keyword: healthy, Pasta, Sausage

Indulge in the Sweet Whimsy of Baked Caramel Apple Cheesecake Dip

Dive into the delightful world of Baked Caramel Apple Cheesecake Dip, where creamy cheesecake meets the warm flavors of caramel and apple pie filling. This recipe is a perfect blend of comfort and adventure, inviting you to savor every bite! With its creamy texture and sweet, fruity undertones, this dip is not just a treat but a celebration of flavors that brings people together.

Why You’ll Love This Recipe

There are countless reasons to fall in love with this delectable dip. Here are just a few:

  • Quick and Easy: With only a handful of ingredients, this dip comes together in no time, making it perfect for spontaneous gatherings or cozy nights in.
  • Perfect for Fall: The warm flavors of caramel and apples evoke the essence of autumn, making it a fantastic choice for seasonal celebrations.
  • Versatile Pairing: Serve it with a variety of dippers, from vanilla wafers to pretzels, ensuring there’s something for everyone to enjoy.
  • Make-Ahead Friendly: Prepare it in advance and simply bake before serving, allowing you to enjoy more time with your guests.
  • Decadently Delicious: The combination of cream cheese and caramel creates a rich, indulgent flavor that will leave everyone wanting more.

Ingredients Breakdown

Let’s take a closer look at what you’ll need to create this delicious dip:


Silicone Baking Cups Set

★ Recommended Kitchen Tool

Silicone Baking Cups Set

Make this recipe even easier with a quality Silicone Baking Cups Set — a must-have kitchen staple!


🛒 See Deals on Amazon →

As an Amazon Associate, we earn from qualifying purchases.
  • Cream Cheese: Two 8-ounce packages, softened to room temperature for easy mixing and a creamy texture.
  • Granulated Sugar: 1/2 cup to add just the right amount of sweetness.
  • Sour Cream: 1/2 cup enhances the creaminess and provides a slight tang that balances the sweetness.
  • Vanilla Extract: 1 teaspoon to elevate the flavor profile.
  • Apple Pie Filling: One can (about 1 1/2 cups) to bring the essence of apple pie into the dip.
  • Flour: 1/2 cup for the streusel topping, providing a delightful crunch.
  • Melted Butter: 3 tablespoons to bind the streusel together.
  • Brown Sugar: 1/4 cup to add depth and richness to the topping.
  • Caramel Sundae Topping: Drizzle it generously over the dip for that sweet finish.

How to Make Baked Caramel Apple Cheesecake Dip

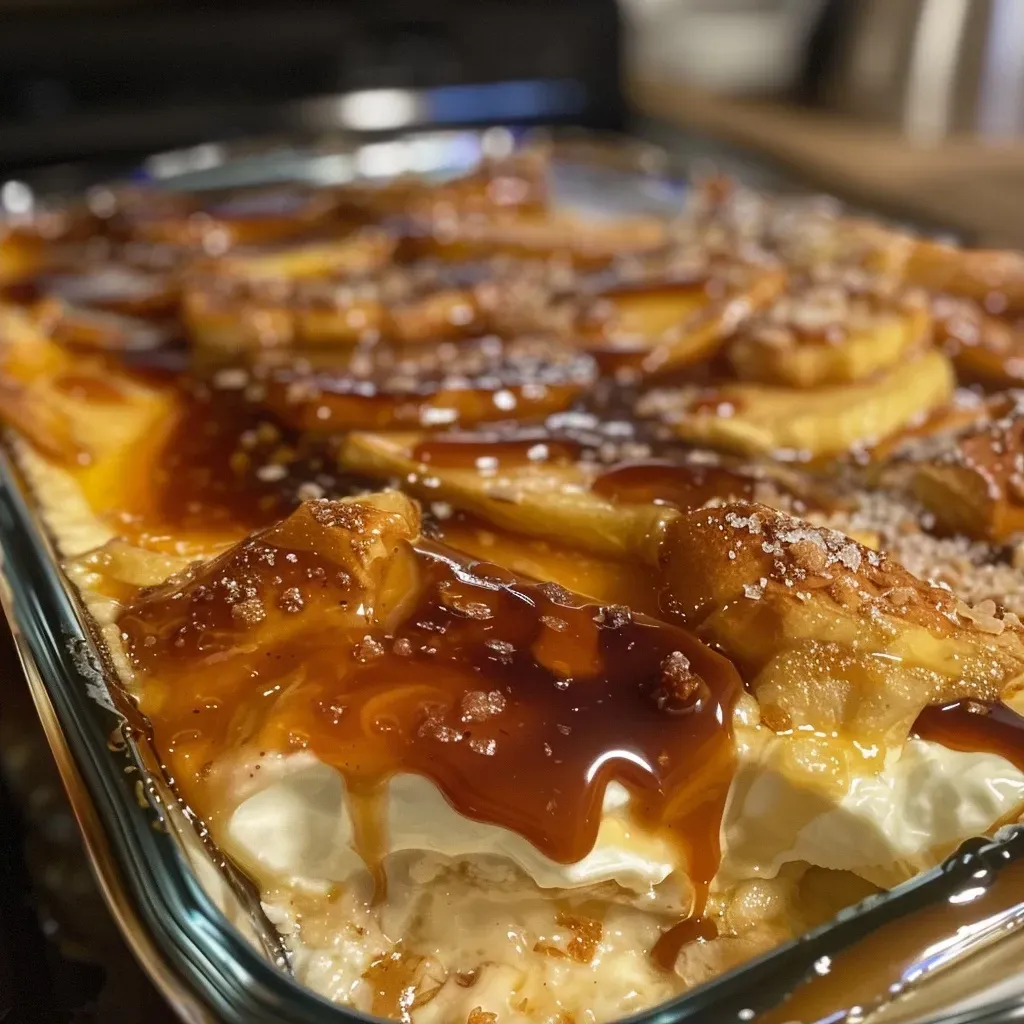
Close-up image of creamy Baked Caramel Apple Cheesecake Dip with caramel drizzle.

Follow these simple steps to create your masterpiece:

  1. Preheat your oven to 350°F (175°C).
  2. In a medium mixing bowl, combine the softened cream cheese, granulated sugar, sour cream, and vanilla extract. Beat at medium speed until the mixture is smooth and creamy.
  3. Spread the cheesecake mixture evenly into the bottom of a 10-inch pie plate.
  4. Top with apple pie filling. *Tip: If your apple pie filling has large slices, consider chopping them into smaller pieces for easier dipping.
  5. In a separate small bowl, mix the flour, melted butter, and brown sugar to create a streusel topping. Sprinkle this over the apple pie filling.
  6. Bake in the preheated oven for 25 minutes or until golden and bubbly.
  7. Once out of the oven, drizzle caramel topping over the warm dip as desired. Serve with vanilla wafers, crackers, pretzels, or your favorite dippers!

Pro Tips for Perfection

To ensure your Baked Caramel Apple Cheesecake Dip turns out perfectly every time, consider the following expert insights:

  • Room Temperature Ingredients: Make sure your cream cheese is at room temperature for a smooth blend. Cold cream cheese can lead to a lumpy dip.
  • Don’t Overmix: When combining the ingredients, mix until just combined to avoid incorporating too much air.
  • Apple Variety Matters: Use tart apples like Granny Smith for a delicious contrast to the sweet caramel.
  • Customize the Toppings: Feel free to add nuts, chocolate chips, or even a sprinkle of cinnamon for added flavor.
  • Serving Temperature: This dip is best served warm, but you can also enjoy it at room temperature.
  • Create a Dipping Station: Set up a variety of dippers to make it interactive and fun!
  • Keep an Eye on Baking Time: Ovens vary, so check your dip a few minutes before the 25-minute mark to prevent over-baking.
  • Store Leftovers Properly: If you have any leftovers, refrigerate them in an airtight container for up to 3 days.

Common Mistakes and Troubleshooting

Even the best chefs can run into hiccups, so here’s how to avoid common pitfalls:

  • Too Runny: If your dip is too runny, ensure that your cream cheese is well-mixed and that you haven’t added extra liquid ingredients.
  • Burnt Toppings: Keep an eye on the streusel; if it’s browning too quickly, cover it with aluminum foil.
  • Not Enough Sweetness: Adjust the sugar to your preference, or add a bit more caramel topping before serving.

Delicious Variations

Feeling adventurous? Try these fun variations on the classic recipe:

  • Chocolate Drizzle: Add a layer of melted chocolate on top before serving for a rich twist.
  • Nutty Delight: Mix in chopped nuts like pecans or walnuts for added crunch and flavor.
  • Spicy Kick: Incorporate a pinch of cayenne pepper or nutmeg for a surprising heat.
  • Fruit Fusion: Swap apple pie filling for mixed berry filling for a different fruity experience.

Storage and Make-Ahead Instructions

You can easily prepare this dip ahead of time:

  • Make-Ahead: Assemble the dip without baking and cover it tightly. Refrigerate for up to 24 hours. Bake just before serving.
  • Storing Leftovers: Store any leftovers in an airtight container in the refrigerator for up to 3 days. Reheat gently in the oven or microwave before serving.

Comprehensive FAQ

Here are some common questions and answers to help you perfect your dip:

  • Can I use low-fat cream cheese? Yes, but it might alter the texture slightly.
  • What can I substitute for sour cream? Greek yogurt works well as a substitute.
  • Can I freeze this dip? Freezing is not recommended due to the ingredients’ nature, which may separate upon thawing.
  • Is it gluten-free? Use gluten-free flour and confirm that your pie filling is gluten-free.
  • What dippers work best? Pretzels, graham crackers, and apple slices are great options!
  • How long will it last in the fridge? Up to 3 days when stored in an airtight container.
  • Can I make this dip vegan? Substitute cream cheese with vegan cream cheese and use maple syrup instead of sugar.
  • What’s the best way to reheat it? Reheat in a preheated oven at 350°F until warm, about 10-15 minutes.

Nutritional Tips and Dietary Adaptations

This dip can be adapted for various dietary needs:

  • Low-Sugar Option: Substitute granulated sugar with a sugar alternative like stevia.
  • Gluten-Free: Ensure all ingredients are certified gluten-free.
  • Vegan Option: Use vegan cream cheese and replace sugar with agave or maple syrup.
  • High-Protein: Add protein powder to the cream cheese mixture for a protein boost.

Recommended Equipment

To make your preparation smooth, consider having these kitchen tools on hand:

  • 10-inch Pie Plate: Perfect for baking and serving your dip.
  • Mixing Bowls: A medium bowl for mixing and a small bowl for the streusel.
  • Electric Mixer: For a quick and easy mixing experience.
  • Measuring Cups and Spoons: Essential for accurate ingredient measurements.

Serving Suggestions

Make your serving experience delightful:

  • Interactive Dipping Station: Arrange a variety of dippers like apple slices, pretzels, and graham crackers.
  • Garnish with Extras: Top with additional caramel sauce or a sprinkle of cinnamon before serving.
  • Pair with Beverages: Serve with warm cider or a sweet dessert wine to enhance the flavors.

Conclusion: Savor the Sweetness

Your culinary adventure doesn’t have to end here! This Baked Caramel Apple Cheesecake Dip is just the beginning of exploring the world of flavors and stories that food can share. Whether you’re entertaining guests or enjoying a quiet evening at home, this dip is sure to create lasting memories. Let each bite transport you to cozy kitchens, warm gatherings, and the sweet embrace of friendship. Don’t forget to share your experiences and maybe even try your hand at creating your own variations. Happy dipping!

Baked Caramel Apple Cheesecake Dip

Prep Time 10 minutes
Cook Time 25 minutes
Total Time 35 minutes
Servings 8 servings
Calories 350
A deliciously creamy dip combining cheesecake, caramel, and apple pie filling, perfect for sharing at gatherings.

Ingredients

Cream Cheese

  • 2 packages cream cheese (8 oz each, room temperature)
  • 1/2 cup granulated sugar
  • 1/2 cup sour cream
  • 1 teaspoon vanilla extract
  • 1 1/2 cups apple pie filling
  • 1/2 cup flour
  • 3 tablespoons butter (melted)
  • 1/4 cup brown sugar
  • caramel sundae topping caramel sundae topping

Instructions 

  • Preheat oven to 350°F (175°C).
  • Mix cream cheese, sugar, sour cream, and vanilla until smooth.
  • Spread into a pie plate, top with apple filling, then sprinkle streusel.
  • Bake for 25 minutes, then drizzle with caramel before serving.

Notes

Chop apple filling for easier dipping and serving.
Calories: 350kcal
Cost: $15
Course: Dessert
Cuisine: American
Keyword: Apple, caramel, cheesecake

As the leaves turn golden and the air becomes crisp, there’s no better time to indulge in the rich, warm flavors of fall. One of my favorite ways to celebrate this season is with these decadent Fudgy Pumpkin Chocolate Chip Bars. Imagine a cozy kitchen, the aroma of pumpkin and spices wafting through the air, and the anticipation of biting into a soft, fudgy bar studded with melty chocolate chips. These bars are more than just a treat; they are a delightful blend of tradition and adventure, perfect for sharing stories and creating memories around the table.

Why You’ll Love This Recipe

  • Irresistible Flavor: The combination of pumpkin, chocolate, and spices creates a symphony of flavors that is both comforting and exciting.
  • Easy to Make: With simple ingredients and straightforward steps, even novice bakers can whip up these bars with confidence.
  • Perfect for Sharing: These bars are ideal for gatherings, potlucks, or cozy nights in, ensuring everyone leaves with a smile.
  • Versatile Dessert: Serve them warm with a scoop of vanilla ice cream or enjoy them at room temperature as a delightful snack.
  • Make-Ahead Friendly: Prepare these bars ahead of time and store them for a delicious treat ready to enjoy whenever the craving strikes.

Ingredients You’ll Need

Gathering the right ingredients is the first step in crafting these delicious Pumpkin Chocolate Chip Bars. Below, you’ll find a detailed breakdown of what you need, along with potential substitutions to suit your preferences.

  • 1 cup butter (2 sticks): Provides a rich, fudgy texture. You can substitute with coconut oil for a dairy-free option.
  • 1 tablespoon pumpkin pie spice: Adds warmth and depth. Feel free to mix your own using cinnamon, nutmeg, and ginger.
  • 1 cup granulated sugar: Sweetens the bars perfectly. Brown sugar can be used for a deeper flavor.
  • 1 cup brown sugar (packed): Enhances moisture and flavor. Dark brown sugar will give a richer taste.
  • 1 (8-oz) cup pumpkin (canned, not pumpkin pie filling): Choose pure pumpkin puree for the best flavor.
  • 2 teaspoons vanilla (I like Mexican vanilla): Elevates the overall taste. Use pure vanilla extract for best results.
  • 1/2 teaspoon kosher salt: Balances the sweetness. Adjust to taste.
  • 1 large egg: Binds the ingredients together. For a vegan option, replace with 1/4 cup applesauce.
  • 2 cups all-purpose flour (spooned and leveled): The base of the bars. Whole wheat flour can be a healthier alternative.
  • 1 teaspoon baking powder: Helps the bars rise. Baking soda can also work if needed.
  • 1 cup semisweet chocolate chips: Adds a delightful chocolatey richness. Substitute with dark or milk chocolate chips.
  • 1 cup dark chocolate chips: For an extra chocolate kick, or use white chocolate for a different flavor profile.

How to Make Fudgy Pumpkin Chocolate Chip Bars

Follow these simple steps to create the most delicious and fudgy pumpkin bars:


Silicone Baking Cups Set

★ Recommended Kitchen Tool

Silicone Baking Cups Set

Make this recipe even easier with a quality Silicone Baking Cups Set — a must-have kitchen staple!


🛒 See Deals on Amazon →

As an Amazon Associate, we earn from qualifying purchases.
  1. Preheat your oven to 350 degrees F. Spray a 9×13 inch pan with nonstick spray or line it with parchment paper for easy removal.
  2. In a medium saucepan, melt 1 cup of butter over medium heat. You can use salted or unsalted butter depending on your preference.
  3. Once the butter is bubbly and hot, add in 1 tablespoon pumpkin pie spice. Toast the spices for a few seconds, then remove the pan from heat.
  4. Stir in 1 cup granulated sugar and 1 cup packed brown sugar until well combined.
  5. Mix in 1 cup pumpkin puree (not pie filling), 2 teaspoons vanilla, and 1/2 teaspoon kosher salt.
  6. Add in 1 egg and stir vigorously to incorporate. If the mixture is too hot, let it cool slightly before adding the egg to prevent curdling.
  7. In a separate bowl, combine 2 cups flour and 1 teaspoon baking powder. Gradually mix this into the wet ingredients until just combined; be careful not to overmix.
  8. Pour the batter into the prepared pan and spread it evenly. Top with 1 cup semisweet and 1 cup dark chocolate chips, folding them into the batter gently.
  9. Bake at 350 degrees F for about 25-30 minutes. They are done when a toothpick comes out clean, and the edges start to pull away from the sides of the pan.
  10. Let cool before lifting the bars out of the pan using the parchment paper. Slice and enjoy!

Pro Tips for Perfect Pumpkin Chocolate Chip Bars

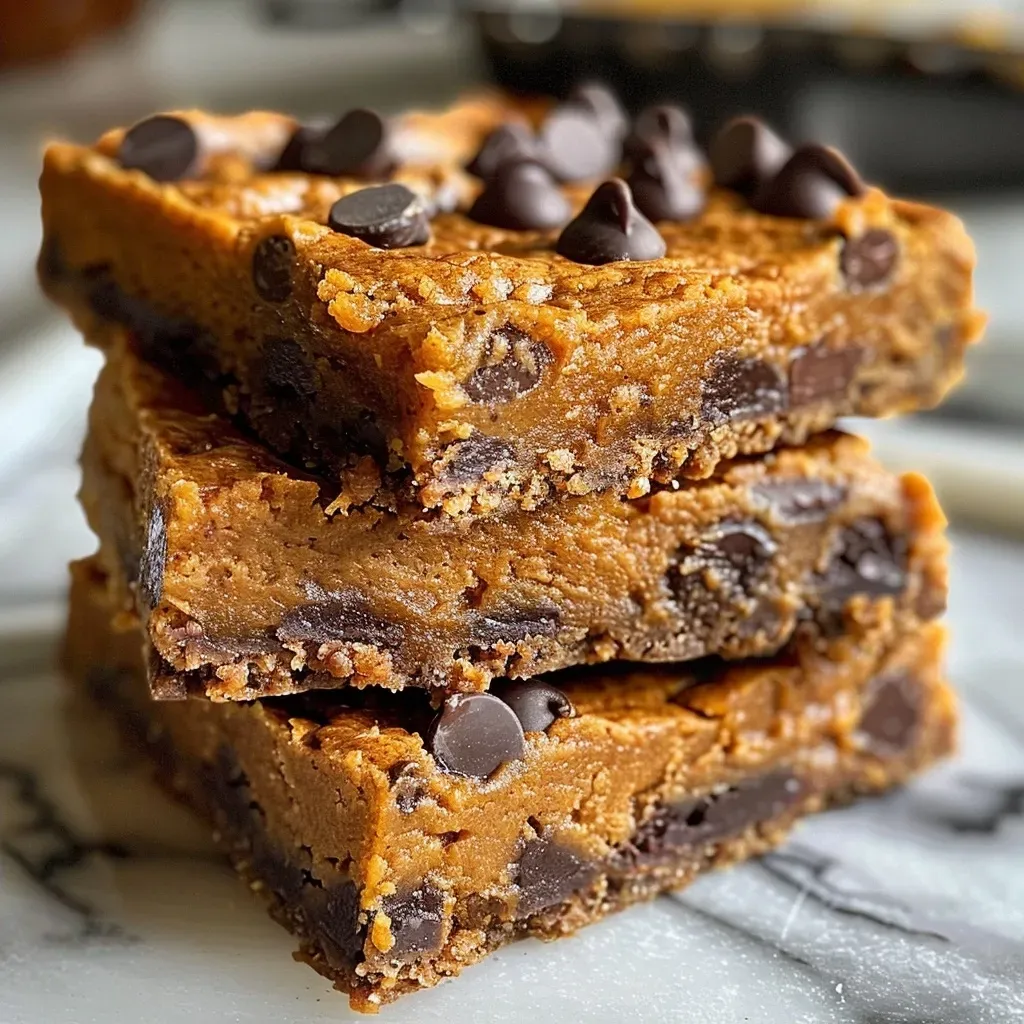
Close-up side view of fudgy pumpkin chocolate chip bars, showcasing chocolate chips and a moist texture.

Here are some expert insights to ensure your bars turn out perfectly every time:

  • Don’t overmix: Mix until just combined to keep the texture fudgy and soft.
  • Check doneness: A toothpick should come out clean, but a few moist crumbs are okay. Avoid overbaking.
  • Cool completely: Allow the bars to cool for at least 45 minutes before slicing to achieve clean edges.
  • Storage matters: Keep leftovers in an airtight container at room temperature for up to 3 days or freeze for up to 3 months.
  • Experiment with spices: Customize your spice blend to suit your taste; consider adding cardamom or ginger for a unique twist.
  • Try different add-ins: Walnuts or pecans can add a delightful crunch to your bars.
  • Serve warm: These bars are delicious fresh out of the oven or warmed up in the microwave for a few seconds.
  • Pair with ice cream: Serve a warm bar with a scoop of vanilla ice cream for an indulgent dessert.

Common Mistakes and Troubleshooting

Even the best bakers can run into issues. Here’s how to avoid common mistakes:

  • Bars falling apart: This often happens if they are undercooked or if the batter was overmixed. Follow the baking time and mixing instructions closely.
  • Too dry: Overbaking or using too much flour can lead to dry bars. Measure flour accurately and keep an eye on baking time.
  • Uneven baking: Ensure your oven is preheated, and rotate the pan halfway through the baking process for even results.

Delicious Variations

Add your own twist to these bars with these fun variations:

  • Chocolate Chip Pumpkin Blondies: Use only white chocolate chips for a sweeter, creamier flavor.
  • Nutty Pumpkin Bars: Stir in 1 cup of chopped nuts like walnuts or pecans for added texture.
  • Spiced Pumpkin Bars: Swap pumpkin pie spice for chai spice for a unique flavor profile.
  • Frosted Pumpkin Bars: Top with cream cheese frosting for an indulgent dessert.

Storage and Make-Ahead Instructions

These bars are perfect for making ahead of time:

  • Room temperature: Store in an airtight container on the counter for up to 3 days.
  • Refrigeration: Extend freshness by storing in the fridge for up to a week.
  • Freezing: Cut into slices and freeze in a ziplock bag for up to 3 months. Let thaw at room temperature before serving.

Frequently Asked Questions

Here are some common questions about making and enjoying these delicious bars:

  • Can I use fresh pumpkin instead of canned? Yes, but ensure it is properly pureed and drained for the right consistency.
  • What can I substitute for butter? Coconut oil or a dairy-free butter substitute works well.
  • Can I make these bars gluten-free? Yes, use a 1:1 gluten-free flour blend for a gluten-free version.
  • How do I know when they are done? A toothpick inserted in the center should come out clean or with a few moist crumbs.
  • Is this recipe nut-free? Yes, unless you choose to add nuts as an optional ingredient.
  • Can I double the recipe? Absolutely! Just use a larger pan and adjust baking time as needed.
  • What’s the best way to serve them? Enjoy warm with ice cream or at room temperature with a cup of coffee or tea.
  • How long do they last? They can be stored at room temperature for 3 days or frozen for up to 3 months.

Nutritional Tips and Dietary Adaptations

To make your pumpkin chocolate chip bars healthier, consider these adaptations:

  • Reduce sugar: Cut back on granulated sugar by a third for a less sweet bar.
  • Use whole wheat flour: This adds fiber and nutrients without sacrificing taste.
  • Incorporate oats: Add 1 cup of oats for an additional health boost and texture.

Equipment Recommendations

To make your baking experience smoother, here’s what I recommend:

  • 9×13 inch baking pan: Essential for baking your bars evenly.
  • Parchment paper: Makes for easy removal and cleanup.
  • Medium saucepan: Perfect for melting butter and mixing ingredients.
  • Mixing bowls: A good set of mixing bowls is necessary for combining wet and dry ingredients.
  • Whisk and spatula: To ensure proper mixing and folding of ingredients.

Serving Suggestions

Enjoy these bars in a multitude of ways:

  • With Ice Cream: A scoop of vanilla or caramel ice cream pairs perfectly with the warm bars.
  • With Coffee or Tea: Enjoy them alongside your favorite warm beverage for a cozy treat.
  • As a Snack: These bars make for a great afternoon or after-school snack.
  • At Gatherings: Perfect for potlucks, parties, or family gatherings.

In conclusion, these Fudgy Pumpkin Chocolate Chip Bars are not just a seasonal treat; they are a celebration of the flavors and warmth of autumn. With their rich taste and delightful texture, they are sure to become a favorite in your home. As you gather around the table, sharing stories and enjoying the fruits of your labor, remember that every bite is an adventure in flavor. Happy baking!

Fudgy Pumpkin Chocolate Chip Bars (Pumpkin Blondies)

Prep Time 15 minutes
Cook Time 30 minutes
Total Time 45 minutes
Servings 12 bars
Calories 250
These rich and moist pumpkin blondies are packed with chocolate chips and warm spices, perfect for a cozy treat.

Ingredients

Dairy

  • 1 cup butter (2 sticks)
  • 1 tablespoon pumpkin pie spice
  • 1 cup granulated sugar
  • 1 cup brown sugar (packed)
  • 1 cup pumpkin (canned, not pie filling) (about 240 grams)
  • 2 teaspoons vanilla (Mexican vanilla preferred)
  • 1/2 teaspoon kosher salt
  • 1 large egg
  • 2 cups all purpose flour (spooned and leveled)
  • 1 teaspoon baking powder
  • 1 cup semisweet chocolate chips
  • 1 cup dark chocolate chips

Instructions 

  • Preheat oven to 350°F (175°C). Line a 9×13 inch pan with parchment or spray with nonstick spray.
  • Melt butter in a saucepan over medium heat. Add pumpkin spice and toast briefly, then remove from heat.
  • Stir in sugars, then add pumpkin, vanilla, and salt. Mix well. Add egg and stir vigorously.
  • Mix in flour and baking powder until just combined. Fold in chocolate chips.
  • Pour batter into prepared pan, spread evenly, and sprinkle remaining chocolate chips on top. Bake for 25-30 minutes until a toothpick comes out clean.
  • Cool before slicing. Store leftovers in an airtight container for 2-3 days or freeze for up to 3 months.

Notes

Use high-quality vanilla for best flavor. Do not overmix to keep bars tender.
Calories: 250kcal
Cost: $15
Course: Dessert
Cuisine: American
Keyword: blondies, chocolate, pumpkin

Discover the Magic of Pumpkin Sheet Cake

As the leaves change and the air turns crisp, the scent of pumpkin spice fills the kitchens of home cooks everywhere. Our journey today leads us to a delightful recipe that whispers tales of autumn adventures: Pumpkin Sheet Cake with Cream Cheese Frosting. This cake is not just a dessert; it’s a celebration of the season, filled with warm spices, rich flavors, and a creamy frosting that will make your taste buds dance.

In this comprehensive guide, we’ll explore everything from the ingredients that make this cake special to expert tips that ensure your baking experience is seamless. Whether you’re an experienced baker or trying your hand at this for the first time, this recipe invites you to create something magical in your kitchen.

Why You’ll Love This Recipe

  • Easy to Make: With simple ingredients and straightforward steps, this pumpkin sheet cake is perfect for bakers of all levels.
  • Moist and Flavorful: The combination of pumpkin puree and spices creates a cake that’s moist, tender, and bursting with flavor.
  • Perfect for Any Occasion: Whether it’s a Thanksgiving feast or a cozy autumn gathering, this cake is sure to impress your guests.
  • Versatile Frosting: The cream cheese frosting adds a delightful tang that complements the sweetness of the cake perfectly.
  • Make Ahead Friendly: This cake stores well, making it an excellent choice for prep-ahead desserts.

Ingredients for Pumpkin Sheet Cake

Let’s gather our ingredients! Here’s what you’ll need to create this flavorful masterpiece:


Silicone Baking Cups Set

★ Recommended Kitchen Tool

Silicone Baking Cups Set

Make this recipe even easier with a quality Silicone Baking Cups Set — a must-have kitchen staple!


🛒 See Deals on Amazon →

As an Amazon Associate, we earn from qualifying purchases.
  • 4 large eggs: Ensure they’re at room temperature for better mixing.
  • 1 1/3 cups granulated sugar: Sweetens the cake while keeping it moist.
  • 424 g pumpkin puree: Use one can of pure pumpkin, not pumpkin pie filling, for the best flavor.
  • 1 cup cooking oil: A neutral oil like canola or vegetable oil works best.
  • 2 cups all-purpose flour: This is the base for our cake.
  • 2 tsp baking powder: Helps the cake rise and become fluffy.
  • 2 tsp ground cinnamon: Adds the quintessential autumn flavor.
  • 1 tsp baking soda: Enhances the cake’s texture.
  • 1/4 tsp salt: Balances the sweetness.
  • 3/4 cup cream cheese: For the frosting, this adds richness and flavor.
  • 3 tbsp icing sugar: Sweetens the frosting just enough.
  • 1/2 cup heavy cream: Provides a luscious texture to the frosting.
  • 1 tbsp ground cinnamon: For an extra touch of flavor in the frosting.

How to Make Pumpkin Sheet Cake with Cream Cheese Frosting

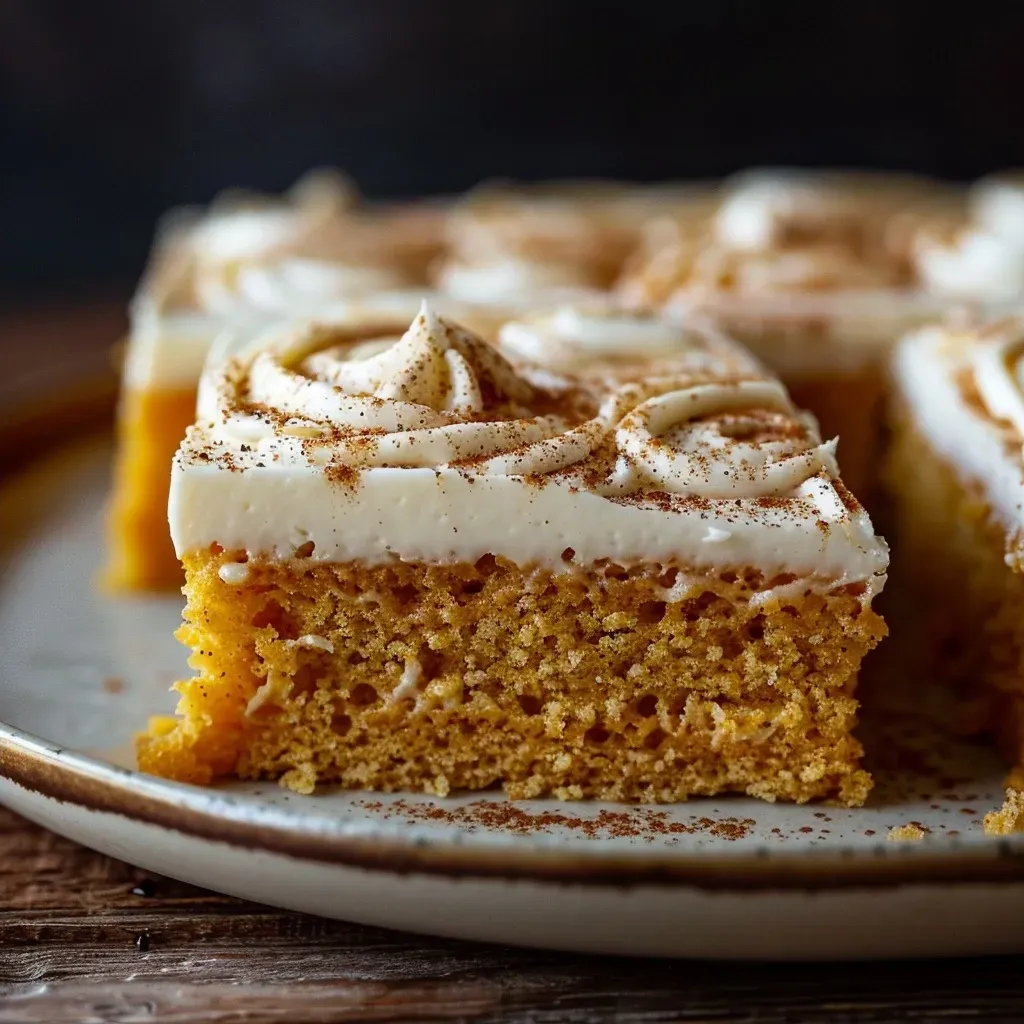
Side view of a moist pumpkin sheet cake topped with creamy frosting.

Step 1: Preheat and Prepare

Preheat your oven to 180°C (350°F). Line the bottom of a 24 cm sheet pan with parchment paper and grease the sides with butter. This ensures your cake releases easily after baking.

Step 2: Mix the Batter

In a large mixing bowl, whisk together the eggs and granulated sugar using an electric whisk until the mixture becomes fluffy and light in color. Next, add the cooking oil and pumpkin puree, whisking again until well combined.

Step 3: Combine the Dry Ingredients

In a separate bowl, combine the flour, baking powder, baking soda, ground cinnamon, and salt. Gradually add this dry mixture to the wet ingredients, whisking until just combined. Be careful not to overmix, as this can lead to a dense cake.

Step 4: Bake the Cake

Pour the batter into the prepared sheet pan and spread it evenly. Bake in the preheated oven for 45-50 minutes, or until a toothpick inserted in the center comes out clean. Allow the cake to cool completely in the pan on a wire rack.

Step 5: Make the Cream Cheese Frosting

While the cake is cooling, prepare the frosting. In a mixing bowl, beat the cream cheese until smooth. Gradually add the icing sugar, mixing until well combined. Slowly add the heavy cream and ground cinnamon, beating until the frosting is light and fluffy.

Step 6: Frost the Cake

Once the cake is completely cool, spread the cream cheese frosting generously over the top. You can decorate it with additional ground cinnamon or even a sprinkle of chopped nuts for an added crunch.

Pro Tips for Perfect Pumpkin Sheet Cake

  • Room Temperature Ingredients: Always use room temperature eggs and cream cheese for a smoother batter and frosting.
  • Don’t Overmix: Mix the batter until just combined for a light texture—overmixing can make the cake dense.
  • Check for Doneness: Use a toothpick to test the cake; it should come out clean or with a few moist crumbs.
  • Cool Completely: Ensure the cake is fully cooled before frosting to prevent the frosting from melting.
  • Customize Your Frosting: Add vanilla extract or a dash of nutmeg to the frosting for a personalized touch.
  • Use Fresh Spices: Freshly ground spices can enhance the flavor of your cake significantly.
  • Store Properly: Keep any leftovers in an airtight container in the refrigerator for up to 5 days.
  • Make It Your Own: Feel free to add chocolate chips or nuts to the batter for extra flavor and texture.

Common Mistakes and Troubleshooting

Even the best bakers can run into issues! Here are some common mistakes and how to avoid them:

  • Dense Cake: This can occur from overmixing or using cold ingredients. Always mix just until combined and ensure your ingredients are at room temperature.
  • Frosting Too Runny: If your frosting isn’t holding its shape, try chilling it for a bit. If too thick, add a splash of milk.
  • Burnt Edges: If your cake is browning too quickly, cover the edges with foil while baking.
  • Uneven Baking: Make sure your oven is preheated and avoid opening the oven door too often during baking.

Delicious Variations to Try

Feeling adventurous? Here are some fun variations to make this pumpkin sheet cake your own:

  • Chocolate Chip Pumpkin Cake: Fold in 1 cup of chocolate chips into the batter for a sweet twist.
  • Spiced Pumpkin Cake: Add a mix of spices such as nutmeg and allspice to elevate the flavor.
  • Vegan Option: Substitute eggs with flaxseed meal and use plant-based cream cheese for the frosting.
  • Pumpkin Bars: Bake in smaller pans for thick pumpkin bars, perfect for sharing at gatherings.

Storage and Make-Ahead Instructions

This pumpkin sheet cake is incredibly versatile when it comes to storage:

  • Refrigerator: Store any leftover cake in an airtight container in the fridge for up to 5 days.
  • Freezing: You can freeze the unfrosted cake for up to 3 months. Wrap it tightly in plastic wrap and foil before freezing.
  • Make Ahead: You can bake the cake a day in advance; just frost it on the day you plan to serve.

Frequently Asked Questions

  • Can I use fresh pumpkin instead of canned? Yes, just ensure it is well-pureed and not too watery.
  • How do I know when the cake is done baking? A toothpick inserted into the center should come out clean or with a few moist crumbs.
  • Can I substitute the cream cheese in the frosting? Yes! You can use mascarpone cheese or a plant-based cream cheese for a different flavor.
  • Is this cake gluten-free? You can substitute all-purpose flour with a gluten-free blend for a gluten-free version.
  • What’s the best way to serve this cake? Serve it chilled or at room temperature, garnished with a sprinkle of cinnamon.
  • How long does the frosting last? The cream cheese frosting can be kept in the fridge for up to 5 days.
  • Can I make this cake without eggs? Yes, you can use flaxseed meal or applesauce as a substitute.
  • What drinks pair well with pumpkin sheet cake? A warm spiced chai or a creamy latte complements the flavors beautifully.

Nutritional Tips and Dietary Adaptations

This pumpkin sheet cake can be adapted to suit various dietary needs without sacrificing flavor:

  • Lower Sugar: Substitute granulated sugar with coconut sugar or a sugar alternative to reduce calories.
  • Dairy-Free: Use coconut cream instead of heavy cream in the frosting and opt for dairy-free cream cheese.
  • Whole Grain Option: Substitute half of the all-purpose flour for whole wheat flour for added fiber.

Essential Equipment for Baking

Before you get started, make sure you have the following kitchen essentials:

  • 24 cm Sheet Pan: A sturdy pan ensures even baking.
  • Electric Mixer: For effortlessly mixing batter and frosting.
  • Whisk: A good whisk is essential for achieving fluffy batter.
  • Parchment Paper: Helps with easy cake removal and cleanup.

Serving Suggestions

To elevate your pumpkin sheet cake experience, consider these serving ideas:

  • Garnish: Top with a sprinkle of crushed nuts or a drizzle of caramel sauce for added texture.
  • Pair with Ice Cream: Serve warm with a scoop of vanilla or cinnamon ice cream.
  • Enjoy with Coffee: A cup of freshly brewed coffee or spiced tea complements the flavors perfectly.

Conclusion

As we wrap up our culinary adventure exploring the enchanting world of pumpkin sheet cake, I hope you feel inspired to bring this recipe into your kitchen. With its aromatic spices, creamy frosting, and heartwarming flavors, it’s more than just a dessert; it’s a way to share joy and create memories with loved ones. So grab your apron, and let’s bake something wonderful together!

Pumpkin Sheet Cake With Cream Cheese Frosting

Prep Time 15 minutes
Cook Time 45 minutes
Total Time 1 hour
Servings 12 pieces
Calories 350
A moist and flavorful pumpkin sheet cake topped with creamy cream cheese frosting, perfect for fall gatherings.

Ingredients

Eggs

  • 4 pieces eggs (room temperature)
  • 1 1/3 cups granulated sugar
  • 424 grams pumpkin puree (1 can)
  • 1 cup cooking oil
  • 2 cups all-purpose flour
  • 2 tsp baking powder
  • 2 tsp ground cinnamon
  • 1 tsp baking soda
  • 0.25 tsp salt
  • 3/4 cup Cream cheese
  • 3 tbsp icing sugar
  • 1/2 cup heavy cream
  • 1 tbsp ground cinnamon

Instructions 

  • Preheat oven to 180°C (350°F) and prepare a 24 cm sheet pan with parchment and butter.
  • Whisk eggs and sugar until fluffy, then add oil and pumpkin, mixing well.
  • Stir in flour, baking powder, baking soda, cinnamon, and salt until combined.
  • Pour batter into the pan and bake for 45-50 minutes until done. Cool completely.

Notes

Ensure the cake is fully cooled before frosting for best results.
Calories: 350kcal
Cost: $15
Course: Dessert
Cuisine: American
Keyword: pumpkin

Embark on a Flavorful Adventure with Garlic Bread Focaccia

Welcome, culinary explorers! Today, we’re diving into a delightful journey of flavor as we unveil the secrets of Garlic Bread Focaccia. This dish marries the warm, fluffy goodness of focaccia with the rich essence of garlic and olive oil, all topped with fresh herbs and cheese. Not only is this recipe a treat for your taste buds, but it also serves as a bridge connecting cultures through its delicious simplicity. Let’s get started!

Why You’ll Love This Recipe

This Garlic Bread Focaccia is not just about satisfying your cravings; it’s a whole experience! Here’s why you’ll adore making this dish:

  • Easy to Follow: With simple ingredients and straightforward steps, even novice bakers can succeed.
  • Perfectly Fluffy: Achieve a focaccia that’s fluffy on the inside with a crunchy golden crust on the outside.
  • Customizable: Personalize your focaccia with your favorite toppings and herbs.
  • Impressive Presentation: The dimples and golden-brown finish make it a showstopper at any gathering.
  • Great for Sharing: This recipe yields a generous amount, perfect for sharing with friends and family!

Ingredient Breakdown

Let’s explore the essential ingredients for this Garlic Bread Focaccia. Each component plays a vital role in creating the best flavor and texture.


Digital Kitchen Scale

★ Recommended Kitchen Tool

Digital Kitchen Scale

Make this recipe even easier with a quality Digital Kitchen Scale — a must-have kitchen staple!


🛒 View on Amazon →

As an Amazon Associate, we earn from qualifying purchases.
  • Warm Water: Activates the yeast—ensure it’s not too hot or too cold for best results.
  • Active Dry Yeast: The key ingredient for leavening; it’s what makes the dough rise.
  • Granulated Sugar: A small amount feeds the yeast, promoting a good rise.
  • All-Purpose Flour: Provides structure; you can substitute with bread flour for added chewiness.
  • Kosher Salt: Essential for flavor; avoid table salt which can be too salty.
  • Extra Virgin Olive Oil: Adds richness and depth; a drizzle on top enhances flavor.
  • Flaky Sea Salt: For finishing touches, adding texture and flavor.
  • Fresh Parsley and Parmigiano Reggiano: Adds freshness and umami, elevating the dish.
  • Salted Butter and Garlic: The magic duo for the irresistible garlic butter topping.

Pro Tips for Perfect Focaccia

Close-up view of a crispy garlic bread focaccia with herbs.

Here are some expert insights to ensure your focaccia turns out perfectly every time:

  • Use a Stand Mixer: It makes kneading easier, but hand-kneading works too—just be patient!
  • Extra Fermentation: Letting the dough sit in the fridge for 24 hours enhances flavor.
  • Hot Oven: Preheat your oven thoroughly to achieve that crispy crust.
  • Don’t Rush the Dimples: Take your time to dimple the dough; it helps with even baking.
  • Experiment with Toppings: Try olives, cheese, or roasted vegetables for variety.
  • Check for Color: Look for a deeply golden crust, which indicates proper baking.
  • Cool on a Rack: This keeps the bottom crispy rather than soggy.
  • Use Quality Olive Oil: A good olive oil makes a significant difference in flavor.
  • Brush Generously: Make sure to coat the focaccia well with garlic butter for maximum flavor.

Common Mistakes to Avoid

Even the most seasoned bakers can run into trouble. Here’s how to avoid common pitfalls:

  • Overworking the Dough: Knead just until smooth; over-kneading can lead to tough focaccia.
  • Not Enough Time to Rise: Be patient; rushing this step can yield a dense bread.
  • Skipping the Dimples: This crucial step not only enhances appearance but helps with cooking.
  • Incorrect Oven Temperature: Always preheat thoroughly; a cold oven can ruin your bread.
  • Using the Wrong Flour: Stick to the recommended types for the best results.

Delicious Variations to Try

Want to switch things up? Here are some exciting variations to explore:

  • Herb-Infused: Mix in dried Italian herbs or fresh rosemary into the dough for added flavor.
  • Cheesy Focaccia: Sprinkle your favorite cheese on top before baking for a gooey twist.
  • Spicy Option: Add red pepper flakes to the garlic butter for a kick.
  • Veggie Delight: Top with sautéed bell peppers, onions, or sun-dried tomatoes.

Storage and Make-Ahead Instructions

This focaccia is best enjoyed fresh, but you can store it properly for later use:

  • Room Temperature: Store cooled focaccia in an airtight container for up to 3 days.
  • Refrigeration: Wrap tightly and refrigerate for up to a week; reheat before serving.
  • Freezing: Freeze slices wrapped in foil for up to 2 months. Thaw at room temperature or reheat in the oven.
  • Make-Ahead: Prepare the dough a day early and let it rise in the fridge for a richer flavor.

FAQ About Garlic Bread Focaccia

Got questions? We’ve got answers! Here are some commonly asked questions:

  • Can I use instant yeast instead of active dry yeast? Yes, you can, but check the package for specific instructions.
  • How do I know when my focaccia is done? It should be a deeply golden brown on top and sound hollow when tapped.
  • Can I make this gluten-free? Yes, use a gluten-free flour blend designed for baking.
  • What can I serve with focaccia? It pairs beautifully with soups, salads, or as a base for sandwiches.
  • How do I prevent my focaccia from being too oily? Measure the olive oil accurately and avoid over-drizzling.
  • Is focaccia good for meal prep? Absolutely! It’s perfect for making ahead and enjoying throughout the week.
  • Can I add toppings before baking? Yes, but be mindful of moisture—too much can make it soggy.
  • What’s the best way to reheat focaccia? Reheat in the oven to restore its crispy texture.

Nutrition Tips and Dietary Adaptations

For those watching their dietary intake, here are some tips:

  • Whole Wheat Flour: Substitute part of the all-purpose flour with whole wheat for added fiber.
  • Low-Fat Options: Use less butter and cheese if you’re looking to reduce calories.
  • Vegan Version: Replace butter with plant-based alternatives and leave out cheese.

Essential Equipment Recommendations

To make this recipe, here’s what you’ll need:

  • Stand Mixer: For effortless kneading and mixing.
  • Baking Pan: A 9×13 metal pan works best for even baking.
  • Mixing Bowls: For combining ingredients and letting the dough rise.
  • Pastry Brush: For spreading the garlic butter evenly on the focaccia.
  • Wire Rack: To cool the focaccia without sogginess.

Serving Suggestions

Once your focaccia is ready, here are some delightful ways to serve it:

  • As an Appetizer: Serve warm with dipping oils or balsamic vinegar.
  • With Soup: Pair it with a comforting bowl of minestrone or tomato soup.
  • As a Sandwich Base: Use it to create hearty sandwiches with your favorite fillings.
  • With Cheese: Pair slices with a cheese platter for a delightful snack.

Now that you have all the secrets to crafting the perfect Garlic Bread Focaccia, it’s time to roll up your sleeves and get baking! This dish is not just a recipe but a canvas for your culinary creativity. Embrace the process, enjoy the aromas, and share this delicious creation with your loved ones. Happy baking!

Garlic Bread Focaccia

Prep Time 30 minutes
Cook Time 25 minutes
Total Time 55 minutes
Servings 8 pieces
Calories 250
A flavorful and airy focaccia bread topped with garlic, herbs, and flaky sea salt, perfect for sharing.

Ingredients

Dough

  • 2 cups warm water
  • 2 1/4 teaspoons active dry yeast
  • 1 teaspoon granulated sugar
  • 5 cups all purpose flour
  • 1 1/2 tablespoons kosher salt (make sure you are using KOSHER salt)
  • 1/4 cup extra virgin olive oil (plus extra for drizzling)

Toppings

  • flaky sea salt
  • chopped flat leaf Italian parsley (for topping)
  • freshly grated parmigiano reggiano
  • 4 tablespoons salted butter
  • 4 cloves garlic (finely chopped or pressed)

Instructions 

  • Mix warm water, yeast, and sugar; let sit 10 minutes until foamy.
  • Add flour and salt to a mixer; incorporate, then add yeast mixture. Knead 6 minutes until stretchy.
  • Transfer dough to oiled bowl, cover, and refrigerate 24 hours.
  • Stretch dough in oiled pan, let sit 15 minutes, then stretch to edges. Cover and rest 3 hours at room temperature.
  • Preheat oven to 450°F (230°C). Drizzle top with olive oil, create dimples, sprinkle flaky salt, and bake 20-25 minutes until golden.
  • Make garlic butter by sautéing garlic in butter. Pour over baked focaccia, sprinkle parsley and parmigiano, then serve.

Notes

Use kosher salt for authentic flavor and texture.
Calories: 250kcal
Cost: $15
Course: Side Dish
Cuisine: Italian
Keyword: bread

Embark on a Flavorful Journey with Buffalo Cauliflower Dip

Welcome, fellow food adventurers! Today, we’re diving into a culinary delight that captures the essence of comfort food while keeping it light and exciting: Buffalo Cauliflower Dip. This dish is your passport to a world of flavors, combining the rich creaminess of cream cheese, the tang of sour cream, and the fiery kick of hot sauce. Perfect for game day, gatherings, or even a cozy night in, this dip not only satisfies your cravings but also brings people together. Let’s explore why you’ll love this recipe, the ingredients, and everything else you need to know to make this dish truly special!

Why You’ll Love This Recipe

  • Perfect for Any Occasion: Whether it’s a party, game day, or a simple family gathering, this dip is bound to impress your guests and become the star of the event.
  • Easy to Make: With simple ingredients and straightforward steps, this recipe is perfect for both novice and seasoned cooks.
  • Healthy Twist: Made with cauliflower, this dip offers a healthier alternative to traditional creamy dips without sacrificing flavor.
  • Customizable Heat: Adjust the amount of hot sauce to suit your spice tolerance—mild or fiery, the choice is yours!
  • Great for Leftovers: This dip keeps well, making it a fantastic option for meal prep and snacking throughout the week.

Ingredients Breakdown

Before we start cooking, let’s gather our ingredients and explore some substitutions to accommodate various dietary needs:

  • 1 head of cauliflower (4 cups of florets): A nutritious base that provides bulk and texture. If you’re looking for a lower-carb option, cauliflower is a fantastic choice.
  • ¼ cup of water (60ml): This helps to steam the cauliflower, making it tender. You can use vegetable broth for added flavor.
  • 8 oz cream cheese (cubed and softened, 225g): This creamy element brings richness to the dip. For a lighter version, consider using low-fat cream cheese or a vegan alternative.
  • 1 cup sour cream (or plain yogurt, 300g): Adds a tangy flavor. Greek yogurt can be a healthier substitute, offering protein and probiotics.
  • ½ cup hot sauce: Frank’s is a popular choice, but feel free to explore different brands or homemade options for unique flavors.
  • ¼ teaspoon each of salt and pepper: Essential for seasoning. Adjust to taste based on your preference.
  • 1 cup freshly shredded Cheddar (100g): This melty cheese is the crowning glory of the dip. Swap with mozzarella or a dairy-free cheese for different flavor profiles.
  • Chives (chopped): For garnish, adding a pop of color and freshness.
  • Green onions (chopped): Another garnish option that brightens the dish.

Step-by-Step Instructions

Close-up view of creamy Buffalo Cauliflower Dip in a bowl, with vibrant orange hot sauce on top.

Now that we have everything ready, let’s get cooking!


Digital Kitchen Scale

★ Recommended Kitchen Tool

Digital Kitchen Scale

Make this recipe even easier with a quality Digital Kitchen Scale — a must-have kitchen staple!


🛒 Shop This Tool →

As an Amazon Associate, we earn from qualifying purchases.
  • Step 1: Preheat the oven to 375F / 190C.
  • Step 2: Steam the cauliflower florets with water in a skillet over medium-high heat. Cover and cook for about 7-10 minutes, stirring occasionally, until tender. Add more water as needed.
  • Step 3: Drain any excess water. Gently pull apart the cooked cauliflower with forks to create a rustic texture. Return to heat for a few minutes to evaporate moisture.
  • Step 4: Mix in the cream cheese, sour cream, hot sauce, salt, and pepper until well combined. Sprinkle the Cheddar on top.
  • Step 5: Bake in the oven for 15 minutes or until bubbling and the cheese has melted.
  • Step 6: Broil for a few minutes if you want a golden top.
  • Step 7: Serve warm, garnished with chives and green onions.

Pro Tips for the Perfect Dip

  • Perfect Texture: Make sure to drain the cauliflower well to avoid a watery dip. Pat it dry with paper towels after steaming.
  • Blend Options: For a chunkier dip, consider mashing the cauliflower by hand instead of blending.
  • Adjusting Spice: Start with less hot sauce and gradually add more to find your perfect heat level.
  • Cheese Variations: Mix different cheeses, like Pepper Jack or Gouda, for unique flavors.
  • Make-Ahead: Prepare the dip a day in advance and store it in the fridge. Bake it just before serving for the best taste.
  • Garnishing: Add a sprinkle of paprika or red pepper flakes for extra color and flavor.
  • Accompaniments: Serve with fresh veggies, tortilla chips, or pita bread for dipping.
  • Serving Temperature: This dip is best enjoyed warm, but it can also be served at room temperature.

Common Mistakes and Troubleshooting

Even the best recipes can have hiccups. Here are some common issues and how to fix them:

  • Watery Dip: If your dip turns out watery, ensure the cauliflower is sufficiently drained and dried before mixing.
  • Too Spicy: If you accidentally added too much hot sauce, balance it out with more cream cheese or sour cream.
  • Flavorless Dip: Always taste and adjust seasoning before baking. Adding more salt or spices can enhance the flavor.

Delicious Variations to Try

Feeling adventurous? Here are some variations to spice things up:

  • Buffalo Chicken Cauliflower Dip: Add shredded cooked chicken for a heartier option that combines the best of both worlds.
  • Cheesy Spinach Buffalo Dip: Mix in cooked spinach for a nutrient boost and a pop of color.
  • Roasted Garlic Buffalo Dip: Roast garlic until caramelized and blend it with the dip for a sweet, aromatic flavor.
  • Vegan Buffalo Cauliflower Dip: Substitute cream cheese and sour cream with cashew cream or tofu for a plant-based version.

Storage and Make-Ahead Instructions

This dip can be a lifesaver for meal prep! Here’s how to store it:

  • Refrigerate: Store leftovers in an airtight container in the fridge for up to 5 days.
  • Freezing: You can freeze this dip for up to 3 months. Thaw in the fridge overnight before reheating.
  • Reheating: Reheat in the oven at 350F (175C) until warmed through, about 15-20 minutes.

FAQs About Buffalo Cauliflower Dip

Let’s address some common questions you might have:

  • Can I use frozen cauliflower?: Absolutely! Just cook it according to package instructions before proceeding with the recipe.
  • How spicy is this dip?: The spice level depends on how much hot sauce you add. Start with less if you’re sensitive to heat!
  • Can I make this dip in a slow cooker?: Yes, combine all ingredients in a slow cooker and cook on low for about 2 hours, stirring occasionally.
  • What can I serve with this dip?: Veggies, chips, pretzels, or even crusty bread work great for dipping!
  • Is this dip suitable for vegetarians?: Yes! It’s meat-free and perfect for vegetarian diets.
  • Can I make this dip gluten-free?: Yes! All the ingredients are naturally gluten-free, making it a safe choice.
  • How can I make it creamier?: For a creamier texture, add more cream cheese or a splash of heavy cream.
  • What’s the best way to store leftovers?: Keep them in an airtight container in the fridge to maintain freshness.

Nutrition Tips and Dietary Adaptations

This Buffalo Cauliflower Dip is not just delicious; it can also be nutritious! Here are some tips:

  • Low-Fat Options: Use low-fat cream cheese and sour cream to cut down on calories.
  • Increased Protein: Toss in some cooked lentils or chickpeas for an additional protein boost.
  • Fiber-Rich: Serve with a variety of fresh vegetables like carrots, celery, and bell peppers for added fiber.

Essential Equipment Recommendations

To make this dip, you’ll need a few key tools:

  • Skillet: For steaming and mixing your ingredients.
  • Baking Dish: A medium-sized baking dish will work perfectly for the oven step.
  • Forks: For pulling apart the cauliflower and mixing the ingredients.
  • Measuring Cups and Spoons: Ensure accuracy in your ingredient quantities.

Serving Suggestions

Now that your Buffalo Cauliflower Dip is ready, how can you serve it? Here are some suggestions to elevate your presentation:

  • Garnish: Top with extra Cheddar, chives, and green onions for a beautiful finish.
  • Dip Options: Offer a variety of dippers like vegetable sticks, pita chips, or bagel chips.
  • Creative Platters: Arrange your dippers on a large platter with the dip in the center for a stunning display.

As we reach the end of this flavorful journey, I hope you feel inspired to create your own Buffalo Cauliflower Dip at home. Remember, cooking is about exploring and sharing, just like the stories we tell around the dinner table. So grab your ingredients, gather your friends, and embark on this tasty adventure. Happy cooking!

Buffalo Cauliflower Dip

Prep Time 10 minutes
Cook Time 25 minutes
Total Time 35 minutes
Servings 8 servings
Calories 250
A spicy, creamy dip featuring roasted cauliflower and hot sauce, perfect for sharing at gatherings.

Ingredients

Vegetables

  • 1 head cauliflower (4 cups of florets)
  • 0.25 cup water (60ml)
  • 8 oz cream cheese (cubed and softened) (225g)
  • 1 cup sour cream (or plain yogurt) (300g)
  • 0.5 cup hot sauce (Frank’s or to taste)
  • 0.25 teaspoon salt
  • 0.25 teaspoon pepper
  • 1 cup shredded Cheddar (100g)

Garnish

  • Chives (chopped)
  • Green onions (chopped)

Instructions 

  • Preheat oven to 375°F / 190°C.
  • Cook cauliflower and water in a skillet over medium-high heat for 7-10 minutes until soft.
  • Drain excess water, tear cauliflower apart, then cook for a few minutes to evaporate moisture.
  • Mix in cream cheese, sour cream, hot sauce, salt, pepper, then sprinkle with cheese.
  • Bake for 15 minutes until bubbling and cheese melts. Optional: broil briefly to brown top.
  • Serve warm, garnished with chopped chives and green onions.

Notes

For extra heat, add more hot sauce or red pepper flakes.
Calories: 250kcal
Cost: $12
Course: Appetizer
Cuisine: American
Keyword: Cauliflower

Embark on a Flavorful Journey with Vanilla Chai Protein Shake

Welcome to a delightful adventure in the world of flavors with this Vanilla Chai Protein Shake! If you’re on the hunt for a quick, nutritious breakfast or a post-workout drink that tantalizes your taste buds, you’ve landed in the right place. This shake beautifully combines the warmth of chai spices with the smoothness of vanilla, creating a drink that is as nourishing as it is delicious. In this article, we’ll explore every aspect of this recipe, share stories from my culinary travels, and equip you with all the tips you need to make it a success.

Why You’ll Love This Recipe

Let me share why this Vanilla Chai Protein Shake will become your new favorite. Here are five enticing reasons:

  • Quick and Easy: With just a handful of ingredients, you can whip up this shake in under five minutes, making it perfect for busy mornings.
  • Nutritious Boost: Packed with protein from vanilla protein powder and the health benefits of chai tea, this shake energizes you for the day ahead.
  • Flavor Explosion: The aromatic blend of spices like nutmeg and cardamom transports you to a cozy café with every sip.
  • Customizable: Easily adapt the recipe with your favorite ingredients or dietary needs, from vegan options to low-carb variations.
  • Make-Ahead Friendly: Perfect for meal prep, you can make this shake in advance and enjoy it on the go.

Ingredients: A Closer Look

Let’s dive into the ingredients that make this shake so special. Here’s what you’ll need:


Professional Chef Knife Set

★ Recommended Kitchen Tool

Professional Chef Knife Set

Make this recipe even easier with a quality Professional Chef Knife Set — a must-have kitchen staple!


🛒 Check Price on Amazon →

As an Amazon Associate, we earn from qualifying purchases.
  • 1 scoop vanilla protein powder: Choose your favorite brand for a creamy texture and sweet flavor.
  • 1/2 cup chai tea: Brewed and cooled, it adds depth and warmth.
  • 1/2 tsp ground nutmeg: This spice brings a comforting aroma and flavor.
  • 1/2 tsp ground cardamom: A key player in chai, it adds a sweet, herbal touch.
  • 1/2 cup unsweetened almond milk: For a lighter, dairy-free base.
  • 1 cup ice: To chill and thicken your shake.

Ingredient Substitutions

Close-up of a creamy vanilla chai protein shake in a glass, with ice cubes visible.

If you’re missing an ingredient or need to adapt the recipe, consider these substitutions:

  • Protein powder: Use pea protein or any plant-based powder for a vegan option.
  • Chai tea: If you can’t find chai, any spiced tea can work in a pinch.
  • Unsweetened almond milk: Substitute with oat milk, coconut milk, or regular dairy milk.
  • Ice: For a creamier shake, use frozen banana instead of ice.

How to Make This Shake: Step-by-Step

Ready to blend? Here’s how to make your Vanilla Chai Protein Shake:

  1. Add all ingredients to your blender.
  2. Blend on high for 1-2 minutes or until you reach your desired consistency.
  3. If the shake is too thick, add a little more almond milk or water to thin it out.

Pro Tips for the Perfect Shake

To elevate your shake experience, keep these expert tips in mind:

  • Use cold ingredients: Start with chilled chai tea and cold almond milk for a refreshing shake.
  • Sweetness adjustments: If you prefer a sweeter drink, add a teaspoon of honey or maple syrup.
  • Texture matters: Blend longer for a smoother texture, especially if using frozen bananas.
  • Experiment with spices: Don’t hesitate to add a pinch of cinnamon or ginger for extra warmth.
  • Chill your glass: Pre-chilling your glass enhances the overall experience.
  • Meal prep: Make a larger batch and store it in the fridge for up to 24 hours.
  • Garnish: Top with a sprinkle of cinnamon or a dollop of whipped cream for a special touch.
  • Pair it: Enjoy this shake alongside a slice of toast topped with almond butter for a balanced meal.

Common Mistakes and Troubleshooting

Even the best can make mistakes! Here are some common pitfalls and how to avoid them:

  • Too thick: If your shake is too thick, simply blend in more liquid gradually until you reach the desired consistency.
  • Too sweet: If you overdo the sweetness, balance it with more almond milk or a pinch of salt.
  • Flavor imbalance: Adjust spices according to your taste; sometimes a little more nutmeg or cardamom can make all the difference.

Variations to Try

Feeling adventurous? Here are some delicious variations of the Vanilla Chai Protein Shake to keep things exciting:

  • Chocolate Chai Shake: Add a tablespoon of cocoa powder for a chocolate twist.
  • Green Chai Shake: Mix in a handful of spinach or kale for an extra nutrient boost.
  • Frozen Berry Chai Shake: Blend in a cup of frozen mixed berries for a fruity flavor.
  • Coconut Chai Shake: Substitute almond milk with coconut milk and add shredded coconut for a tropical vibe.

Storage and Make-Ahead Instructions

Want to prepare ahead of time? Here’s how to store your shake:

  • Refrigeration: Store in an airtight container in the fridge for up to 24 hours. Shake well before serving.
  • Freezing: For longer storage, freeze the shake in an ice cube tray and blend with a little almond milk when ready to enjoy.

Frequently Asked Questions (FAQ)

Got questions? I’ve got answers! Here are some frequently asked questions about the Vanilla Chai Protein Shake:

  • Can I use a different protein powder? Yes! Any protein powder will work, but the flavor may vary.
  • Is this shake vegan? Yes, if you use plant-based protein powder and non-dairy milk.
  • How can I make it lower in calories? Use less protein powder and more ice, or skip the sweeteners.
  • Can children enjoy this shake? Absolutely! It’s a nutritious option for kids too.
  • How can I add more fiber? Add a tablespoon of chia seeds or flaxseeds before blending.
  • What if I don’t have chai tea? Any spiced tea can be a good substitute.
  • Can I make this shake without ice? Yes, but it will be thinner and less frosty.
  • How often can I enjoy this shake? It’s a great addition to your daily routine or as a post-workout recovery drink.

Nutritional Tips and Dietary Adaptations

This shake is not only delicious but can be adapted to fit various dietary needs:

  • Protein boost: Add a scoop of collagen peptides for added protein and gut health benefits.
  • Low-carb option: Replace banana with additional ice for a keto-friendly version.
  • Dairy-free: Ensure all ingredients are dairy-free, including the protein powder.
  • Nut-free: Use oat milk or another nut-free milk alternative.

Essential Equipment Recommendations

To make your shake, here’s what you’ll need:

  • High-speed blender: This is essential for achieving the perfect creamy texture.
  • Measuring cups and spoons: For precision in ingredient measurements.
  • Storage containers: Airtight containers for meal prep and storage.

Serving Suggestions

How you serve your shake can enhance the experience:

  • Glassware: Serve in a tall glass to showcase its creamy texture.
  • Garnish: A sprinkle of cinnamon on top adds visual appeal and flavor.
  • Pairing: Enjoy with a slice of whole grain toast or a fruit salad for a complete meal.

In conclusion, the Vanilla Chai Protein Shake is more than just a drink; it’s an experience that merges flavor and nourishment. Whether you’re sipping it after a workout or enjoying it as a quick breakfast, each sip tells a story of warmth and connection. So grab your blender and let the adventure begin!

Vanilla Chai Protein Shake

Prep Time 5 minutes
Total Time 5 minutes
Servings 1 shake
Calories 250
A delicious and energizing protein shake infused with warm chai spices and vanilla flavor, perfect for a quick breakfast or post-workout boost.

Ingredients

Protein Powder

  • 1 scoop vanilla protein powder

Liquid

  • 1/2 cup chai tea (prepared or brewed)
  • 1/2 tsp ground nutmeg
  • 1/2 tsp ground cardamom

Milk

  • 1/2 cup unsweetened almond milk

Ice

  • 1 cup ice

Instructions 

  • Add all ingredients to blender and blend on high for 1-2 minutes.
  • If too thick, add more milk or water and blend again.

Notes

Adjust the spice levels to taste for a more personalized flavor.
Calories: 250kcal
Cost: $8
Course: Breakfast, Snack
Cuisine: fusion
Keyword: chai, Protein, Smoothie

Discover the Comfort of Slow Cooker French Onion Chicken

Welcome to a culinary adventure that takes your taste buds on a journey to the heart of comfort food! Today, we’re diving into the delightful world of Crock Pot French Onion Chicken. This dish brings together the rich flavors of caramelized onions, tender chicken, and gooey Swiss cheese, creating a meal that feels like a warm hug on a plate. Whether you’re looking for a cozy dinner after a long day or a dish that impresses guests, this recipe is sure to satisfy. Let’s embark on this flavorful journey!

Why You’ll Love This Recipe

  • Time-Saving Convenience: This slow cooker recipe lets you set it and forget it. Just prep the ingredients, toss them in, and enjoy your day while the flavors meld beautifully.
  • Rich, Savory Flavors: The combination of slow-cooked onions and tender chicken creates a dish that’s bursting with flavor. The addition of balsamic vinegar adds a subtle sweetness that balances the savory notes perfectly.
  • Comforting and Satisfying: There’s nothing quite like the aroma of French onion soup wafting through your home. This dish brings that warmth and comfort right to your dinner table.
  • Versatile Meal Options: Serve it over mashed potatoes, rice, or even crusty bread to soak up all that delicious sauce. The possibilities are endless!
  • Healthy and Nutritious: Packed with protein from the chicken and nutrients from the onions, this dish is a wholesome choice for any meal.

Ingredients for a Flavorful Experience

Gathering the right ingredients is key to creating a delicious French onion chicken. Here’s what you’ll need:

  • 4 boneless, skinless chicken breasts: The star of the dish, these breasts soak up all the wonderful flavors.
  • 1 yellow onion (thinly sliced): The foundation of your onion flavor. Thin slices caramelize beautifully in the slow cooker.
  • 1 (1 oz) onion soup mix: A flavorful shortcut that enhances the dish’s depth.
  • 1½ cups beef broth: Adds richness and moisture to the chicken and onions.
  • ½ tsp black pepper: A pinch of spice to balance the dish.
  • ½ tsp thyme: A classic herb that complements the onions beautifully.
  • 2 tbsp balsamic vinegar: Adds a hint of sweetness and acidity.
  • 8 slices Swiss cheese: The gooey finish that makes this dish truly comforting.

Pro Tips for Perfect Crock Pot French Onion Chicken

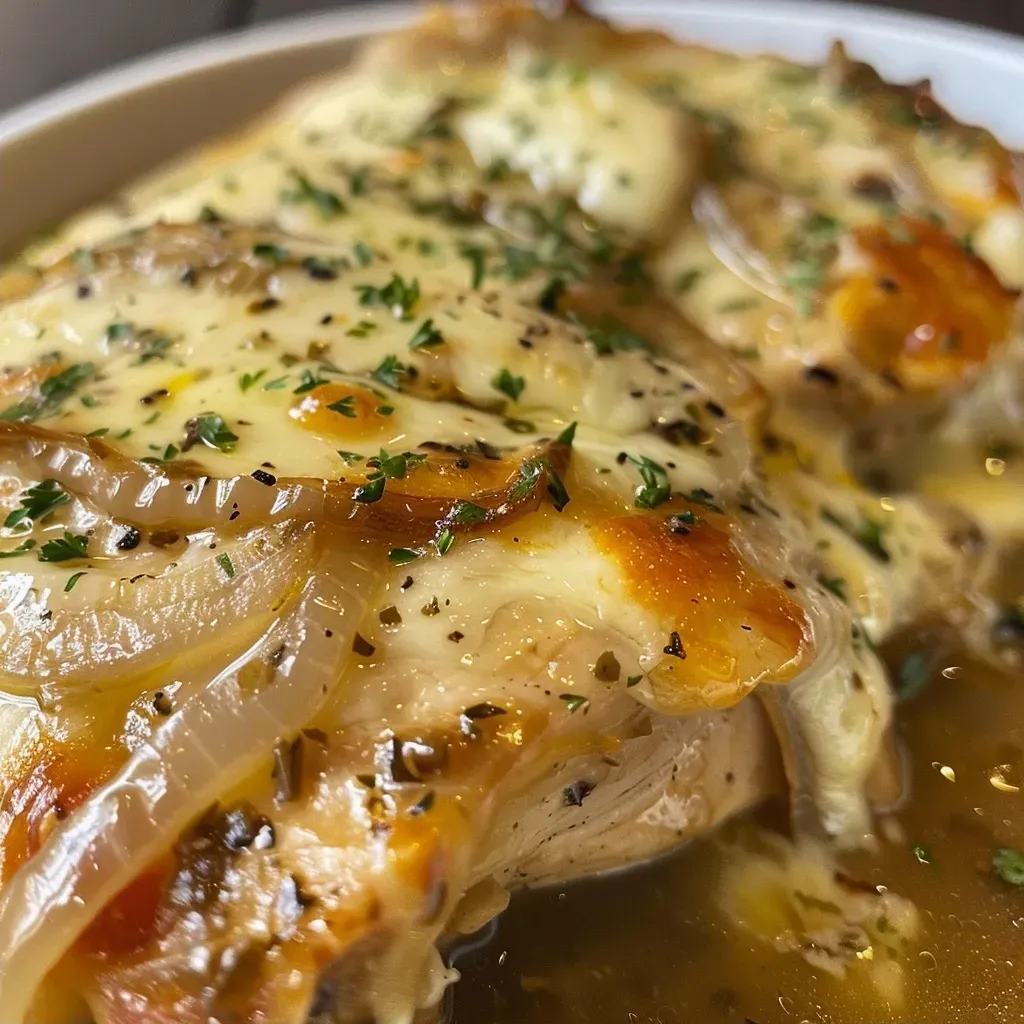
Close-up of juicy Crock Pot French Onion Chicken with melted Swiss cheese.
  • Precision in Slicing: Slice the onions as thinly as possible for even caramelization. This ensures a sweet and tender base.
  • Sear for Extra Flavor: For an added layer of flavor, consider searing the chicken breasts in a hot pan before adding them to the slow cooker.
  • Adjusting the Broth: If you prefer a thicker sauce, reduce the beef broth by half and allow the dish to cook longer.
  • Cheese Variations: Try using Gruyère or Provolone instead of Swiss for different flavor profiles.
  • Cook Time Adjustments: Cooking on low for 6-8 hours yields the most tender chicken, while high for 2-3 hours works in a pinch.
  • Layering Matters: Always layer the onions on the bottom to ensure they caramelize beautifully.
  • Garnishing: Fresh herbs like parsley or chives can elevate the presentation and add a burst of freshness.
  • Serving Temperature: Serve the dish hot with a sprinkle of cheese melted on top for the best experience.

A Common Mistakes and Troubleshooting

Even the best can have hiccups! Here are some common mistakes to avoid:


Air Fryer XL

★ Recommended Kitchen Tool

Air Fryer XL

Make this recipe even easier with a quality Air Fryer XL — a must-have kitchen staple!


🛒 View on Amazon →

As an Amazon Associate, we earn from qualifying purchases.
  • Overcrowding the Slow Cooker: Ensure there’s enough space for steam to circulate. If the pot is too full, cooking times may vary.
  • Skipping the Cheese: Don’t forget the cheese topping; it’s essential for that comforting finish!
  • Not Prepping Ingredients: Properly prep ingredients ahead of time to make the cooking process smoother.
  • Ignoring Cooking Times: Stick to the recommended cooking times for the best flavor and texture.

Delicious Variations to Try

Feeling adventurous? Here are some tasty variations you can make:

  • BBQ French Onion Chicken: Swap the beef broth with BBQ sauce for a smoky twist.
  • Herb-Infused Chicken: Add fresh herbs like rosemary or oregano for added flavor.
  • Mushroom Lover’s Delight: Incorporate sautéed mushrooms for an earthy addition.
  • Spicy Kick: Add red pepper flakes for a spicy flavor that complements the sweetness of the onions.

Storage and Make-Ahead Instructions

Planning ahead? Here’s how to store your Crock Pot French Onion Chicken:

  • Refrigerating: Store leftovers in an airtight container in the fridge for up to 3-4 days.
  • Freezing: Freeze in portions for up to 3 months. Just ensure to store in freezer-safe containers.
  • Reheating: Thaw overnight in the fridge, then reheat in a saucepan over low heat until warmed through.

Frequently Asked Questions

Here are some common questions about this delectable dish:

  • Can I use chicken thighs instead of breasts? Yes! Chicken thighs are a fantastic option for a richer flavor.
  • What can I serve with this dish? Mashed potatoes, rice, or a crusty bread are all great accompaniments.
  • How can I make this dish vegetarian? Substitute chicken with hearty vegetables like portobello mushrooms and use vegetable broth.
  • Is this dish gluten-free? Ensure the onion soup mix is gluten-free and use a gluten-free broth.
  • Can I add other vegetables? Absolutely! Carrots or bell peppers can enhance the dish.
  • What’s the best way to serve leftovers? Reheat and serve over fresh rice or mashed potatoes for a quick meal.
  • Does it need to be covered while cooking? Yes, cover the slow cooker to retain moisture and flavor.
  • How do I know when it’s done cooking? The chicken should be tender and reach an internal temperature of 165°F.

Nutritional Insights and Dietary Adaptations

This dish is not only delicious but also offers valuable nutritional benefits:

  • Protein-Rich: Chicken breasts are a great source of lean protein, essential for muscle repair and growth.
  • Vitamins and Minerals: Onions are rich in antioxidants and vitamins, contributing to overall health.
  • Low Carb Option: Serve it over cauliflower rice for a low-carb meal.
  • Dairy-Free Adaptation: Use dairy-free cheese alternatives for a lactose-free version.

Essential Equipment for Success

To create this delicious recipe, you’ll need:

  • 6-Quart Slow Cooker: A reliable slow cooker is essential for even cooking.
  • Sharp Knife: For slicing onions thinly to ensure even caramelization.
  • Measuring Cups and Spoons: For precise ingredient measurements.
  • Wooden Spoon: For mixing ingredients thoroughly.

Serving Suggestions to Elevate Your Dish

Presentation is key! Here are some ideas to make your meal irresistible:

  • Top with Fresh Herbs: A sprinkle of parsley or chives adds a pop of color and freshness.
  • Pair with a Salad: A crisp green salad provides a refreshing contrast to the rich flavors.
  • Creative Plating: Serve on a bed of mashed potatoes or rice, and spoon the onions and sauce generously over the top.
  • Cheese Garnish: Add extra melted cheese on top for an indulgent finish.

In conclusion, Crock Pot French Onion Chicken is more than just a meal; it’s an experience that brings warmth and comfort to your table. With its rich flavors and easy preparation, this dish is perfect for any occasion. So grab your ingredients, set your slow cooker, and get ready to savor the delightful flavors of this classic dish. Happy cooking!

Crock Pot French Onion Chicken

Prep Time 10 minutes
Cook Time 2 hours 30 minutes
Total Time 2 hours 40 minutes
Servings 4 servings
Calories 450
A flavorful and easy slow cooker dish featuring tender chicken breasts topped with caramelized onions and Swiss cheese.

Ingredients

Protein

  • 4 pieces boneless, skinless chicken breasts

Vegetables

  • 1 piece yellow onion (thinly sliced)

Seasonings & Sauces

  • 1 oz onion soup mix
  • 1.5 cups beef broth
  • 0.5 tsp black pepper
  • 0.5 tsp thyme
  • 2 tbsp balsamic vinegar

Cheese

  • 8 slices Swiss cheese

Instructions 

  • Layer half the onions in the slow cooker, then add chicken breasts and remaining onions.
  • Mix onion soup, beef broth, black pepper, thyme, and balsamic vinegar; pour over ingredients.
  • Cook on high for 2-3 hours or low for 5-6 hours. Add Swiss cheese 15 minutes before end.
  • Serve with mashed potatoes, topping each chicken with cooked onions.

Notes

For extra flavor, caramelize the onions beforehand.
Calories: 450kcal
Cost: $15
Course: Main Course
Cuisine: French
Keyword: Chicken, onion, Slow Cooker

Discover the Joy of Maple Pecan Roasted Acorn Squash

As the crisp autumn air settles in and leaves turn golden, there’s no better way to celebrate the season than with a comforting dish of Maple Pecan Roasted Acorn Squash. This delightful recipe combines the earthy sweetness of acorn squash with the rich, comforting flavors of maple syrup and crunchy pecans, creating a harmonious culinary experience that warms the soul. If you’re looking to elevate your fall dining or impress your guests with a stunning side dish, you’ve come to the right place!

Why You’ll Fall in Love with This Recipe

Here are just a few reasons why this Maple Pecan Roasted Acorn Squash will become a staple in your kitchen:

  • Wholesome Ingredients: Made from simple, natural ingredients, this dish is both nutritious and delicious.
  • Perfectly Balanced Flavors: The sweetness of maple syrup beautifully complements the nutty flavor of acorn squash and pecans.
  • Quick and Easy Preparation: With just a few steps, you can have a stunning dish ready in under an hour.
  • Versatile Serving Options: Perfect as a side dish for holiday meals or as a stand-alone vegetarian delight.
  • Beautiful Presentation: The vibrant colors and textures make it visually appealing on any dining table.

Ingredients You’ll Need

Before diving into the preparation, let’s gather the essentials. Here’s what you’ll need:


Silicone Baking Cups Set

★ Recommended Kitchen Tool

Silicone Baking Cups Set

Make this recipe even easier with a quality Silicone Baking Cups Set — a must-have kitchen staple!


🛒 Shop This Tool →

As an Amazon Associate, we earn from qualifying purchases.
  • 2 acorn squash: Make sure they are firm and free from blemishes.
  • 2 tablespoons butter: For a rich, creamy base.
  • 4 tablespoons maple syrup: You can substitute with brown sugar or honey if needed.
  • 1/4 cup pecans: Toasted and coarsely chopped, for that extra crunch.

Explore some substitutions to personalize your dish:

  • For a dairy-free option: Replace butter with coconut oil or vegan butter.
  • For a nut-free version: Omit the pecans or replace them with pumpkin seeds.
  • To enhance the flavor: Consider adding a pinch of cinnamon or nutmeg to the maple syrup mixture.

Step-by-Step Instructions for Perfect Roasted Squash

Close-up side view of roasted acorn squash halves garnished with pecans and drizzled with maple syrup.

Let’s bring this dish to life with these easy-to-follow steps:

1. Preheat Your Oven

Start by preheating your oven to 400°F (200°C). This is crucial for achieving that perfect roasted texture.

2. Prepare the Acorn Squash

Cut the acorn squash in half and scoop out the seeds. Place the squash halves on a baking sheet with the scooped holes facing up.

3. Add Flavorful Butter and Maple Syrup

Divide the butter and maple syrup between the holes of each squash half, ensuring they are well coated for maximum flavor.

4. Roast to Perfection

Bake in your preheated oven for about 40-50 minutes. Baste the insides with the melted butter and syrup every 15 minutes to enhance the caramelization.

5. Finishing Touch: Toasted Pecans

Once the squash is tender, sprinkle the toasted pecans on top and let them roast for an additional 5 minutes. This will create a delightful crunch.

Pro Tips for the Best Results

To ensure your Maple Pecan Roasted Acorn Squash is nothing short of spectacular, consider these expert insights:

  • Choose the right squash: Look for acorn squash that feels heavy for its size, indicating ripeness.
  • Don’t skip the basting: Regularly basting the squash helps deepen the flavors and achieve that caramelized finish.
  • Experiment with spices: Don’t hesitate to add spices like cayenne for a bit of heat or smoked paprika for a smoky undertone.
  • Use fresh pecans: Toasting your pecans right before adding them will amp up their flavor significantly.
  • Consider a maple glaze: For an added layer of sweetness, drizzle some extra maple syrup just before serving.

Common Mistakes and Troubleshooting

Even the best of us can make mistakes in the kitchen. Here are some common pitfalls and how to avoid them:

  • Squash not tender: If your squash isn’t tender after baking, it may need more time. Just keep baking and check every 5 minutes.
  • Burned pecans: Keep an eye on the pecans; they can burn quickly. Add them later in the roasting process if necessary.
  • Too much sweetness: If you find the dish too sweet, balance it with a sprinkle of salt or a squeeze of lemon juice.

Variations on Maple Pecan Roasted Acorn Squash

Feeling adventurous? Here are some delicious variations to try:

  • Maple and Cranberry Acorn Squash: Add dried cranberries for a tart contrast to the sweetness.
  • Savory Garlic and Herb Squash: Mix in minced garlic and fresh herbs before roasting for a savory twist.
  • Spicy Maple Squash: Add a hint of chili powder or cayenne to the maple syrup for a spicy kick.
  • Cheesy Pecan Squash: Top with crumbled goat cheese or feta for a creamy finish.

Storage and Make-Ahead Instructions

If you want to prepare this dish in advance, here’s how:

  • Make Ahead: You can prepare the acorn squash and drizzle the syrup and butter on top a few hours before baking. Just cover and refrigerate until ready to bake.
  • Leftovers: Store any leftover roasted squash in an airtight container in the refrigerator for up to 3 days. Reheat in the oven or microwave.
  • Freezing: You can freeze the cooked squash, but the texture may change slightly upon thawing. Store in a freezer-safe container for up to 3 months.

Frequently Asked Questions

Here’s a quick FAQ to help you navigate any uncertainties about this delicious dish:

  • Can I use butternut squash instead of acorn squash? Absolutely! Butternut squash will work beautifully in this recipe.
  • Is this dish vegan? If you substitute the butter with a non-dairy alternative, this dish can easily be made vegan.
  • What main dishes pair well with this side? Maple Pecan Roasted Acorn Squash pairs wonderfully with roasted chicken, turkey, or as part of a vegetarian feast.
  • Can I make this dish gluten-free? Yes, this recipe is naturally gluten-free; just ensure your maple syrup is pure and has no additives.
  • How can I enhance the flavor? Consider adding a pinch of nutmeg, cinnamon, or even a splash of balsamic vinegar for added depth.
  • What’s the best way to cut acorn squash? Use a sharp knife and take your time; cutting it in half lengthwise is easiest.
  • How do I know when the squash is done? The squash should be tender when pierced with a fork and caramelized around the edges.
  • Can I use different nuts? Yes! Walnuts or even sunflower seeds can be great alternatives to pecans.

Nutrition Tips and Dietary Adaptations

This dish is not only delicious but also offers various health benefits:

  • Rich in Vitamins: Acorn squash is high in vitamins A and C, promoting good vision and supporting the immune system.
  • High in Fiber: This dish provides a good amount of dietary fiber, aiding digestion and keeping you full.
  • Healthy Fats: Pecans add healthy fats to your meal, supporting heart health and providing sustained energy.

Recommended Equipment

To ensure a smooth cooking experience, consider having the following tools on hand:

  • Sharp Chef’s Knife: For easily cutting through the tough skin of the squash.
  • Baking Sheet: A sturdy baking sheet is essential for roasting the squash evenly.
  • Measuring Cups and Spoons: Accurate measurements are key to achieving the perfect flavor balance.
  • Spatula: To baste your squash and ensure even cooking.

Serving Suggestions

Now that your Maple Pecan Roasted Acorn Squash is ready, here are some serving ideas:

  • As a Side Dish: Serve alongside roasted meats, grilled fish, or as part of a vegetarian platter.
  • In Salads: Toss warm squash with greens, feta cheese, and a light vinaigrette for a hearty salad.
  • As a Breakfast Dish: Top with yogurt and granola for a wholesome breakfast or brunch option.
  • With Grain Bowls: Incorporate into grain bowls with quinoa, chickpeas, and leafy greens for a nutritious meal.

In conclusion, Maple Pecan Roasted Acorn Squash is more than just a dish; it’s a celebration of fall’s bounty and a testament to the magic of combining simple ingredients to create something extraordinary. So, gather your ingredients, invite your friends and family, and embark on this culinary adventure together! Bon appétit!

Maple Pecan Roasted Acorn Squash

Prep Time 10 minutes
Cook Time 45 minutes
Total Time 55 minutes
Servings 4 servings
Calories 250
A delicious fall-inspired dish featuring tender acorn squash topped with sweet maple syrup and toasted pecans.

Ingredients

Main

  • 2 pieces acorn squash, cut in half and scooped/seeded
  • 2 tablespoons butter
  • 4 tablespoons maple syrup (or brown sugar or honey)
  • 1/4 cup pecans, toasted and coarsely chopped (optional)

Instructions 

  • Place squash halves on a baking sheet, divide butter and syrup into the scooped holes.
  • Bake at 400°F (200°C) for 40-50 minutes, basting with the syrup mixture.
  • Sprinkle toasted pecans on top and serve with a spoon.

Notes

For extra flavor, add a pinch of cinnamon or nutmeg before baking.
Calories: 250kcal
Cost: $15
Course: Side Dish
Cuisine: American
Keyword: Acorn Squash

Dive into the Flavors of Fall with Pumpkin Churro Bites

As the leaves turn golden and the air gets crisp, there’s something magical about autumn that invites us to indulge in warm, comforting flavors. One treat that perfectly captures the essence of this season is the delicious pumpkin churro bites. Imagine crunchy, golden-brown bites dusted with cinnamon sugar, their warm pumpkin filling melting in your mouth. In this definitive guide, we’ll explore not only how to make these delectable morsels but also why they have become a fall favorite. Join me, Jack, as we embark on this culinary adventure that will awaken your senses and remind you why food is the ultimate passport to culture and connection.

Why You’ll Love This Recipe

Before we dive into the details of making these scrumptious pumpkin churro bites, let’s explore why they’ll become a staple in your fall festivities:

  • Seasonal Delight: The combination of pumpkin and spices creates a unique flavor profile that embodies the essence of autumn.
  • Easy to Make: With simple ingredients and straightforward instructions, you can whip these up in no time.
  • Versatile Treat: Perfect for gatherings, cozy nights in, or even as a sweet surprise for your loved ones.
  • Shareable Goodness: These bite-sized churros are perfect for sharing, making them a hit at parties and gatherings.
  • Customizable: Feel free to experiment with different toppings and dips, making each batch uniquely yours.

Ingredients for Pumpkin Churro Bites

Here’s what you’ll need to create these delicious bites, along with some substitution ideas:


Professional Chef Knife Set

★ Recommended Kitchen Tool

Professional Chef Knife Set

Make this recipe even easier with a quality Professional Chef Knife Set — a must-have kitchen staple!


🛒 Check Price on Amazon →

As an Amazon Associate, we earn from qualifying purchases.
  • 1 cup water: Essential for the dough base.
  • 1/2 stick butter: Adds richness; can substitute with margarine or coconut oil.
  • 2 tbsp sugar: Sweetens the dough; consider using brown sugar for deeper flavor.
  • Pinch of salt: Balances sweetness; crucial for flavor.
  • 1/2 tbsp vanilla extract: Enhances flavor; optional if you prefer a more pumpkin-forward taste.
  • 1/2 cup pumpkin purée: The heart of our recipe; you can also use butternut squash purée.
  • 1 cup all-purpose flour: For structure; can substitute gluten-free flour if needed.
  • 2 eggs: Provides moisture and binding; flax eggs can be used for a vegan option.
  • 1/3 cup sugar: For coating; mix with cinnamon for a delightful finish.
  • 1 tsp cinnamon powder: A must-have for that warm, spicy flavor.
  • 1 tsp pumpkin pie spice: Complements the pumpkin; add extra if you love a spicier bite!

How to Make Pumpkin Churro Bites: Step-by-Step Instructions

Close-up view of golden-brown Pumpkin Churro Bites dusted with sugar and cinnamon.

Ready to get cooking? Follow these steps to make your very own pumpkin churro bites:

Step 1: Prepare the Dough

In a medium saucepan, combine the water, butter, sugar, and salt. Bring to a rolling boil, stirring until the butter melts.

Step 2: Mix in the Pumpkin

Remove from heat and stir in the pumpkin purée and vanilla extract until well combined.

Step 3: Add the Flour

Gradually add the flour, stirring vigorously until the mixture forms a ball. Allow it to cool slightly.

Step 4: Incorporate the Eggs

Beat in the eggs one at a time, ensuring each is fully incorporated before adding the next. The dough should be smooth and glossy.

Step 5: Heat the Oil

In a deep pan, heat oil over medium-high heat. Test the temperature by dropping a small piece of dough; it should sizzle and rise.

Step 6: Fry the Bites

Using a spoon, drop bite-sized pieces of dough into the hot oil. Fry until golden brown, about 2-3 minutes. Remove and drain on paper towels.

Step 7: Coat in Cinnamon Sugar

While the churro bites are still warm, roll them in a mixture of sugar and cinnamon to coat them evenly.

Pro Tips for Perfect Pumpkin Churro Bites

To ensure your churro bites turn out perfectly every time, consider these expert insights:

  • Don’t Overmix the Dough: Mixing too much can lead to tough churros. Stop once everything is well combined.
  • Temperature Check: Ensure the oil is hot enough before frying; if it’s too cool, the churros will absorb too much oil.
  • Use a Candy Thermometer: Keeping the oil temperature consistent is key to crispy churros.
  • Experiment with Dips: Try chocolate, caramel, or even a cream cheese dip for an exciting twist.
  • Cool Down: Let the churros cool slightly before rolling in cinnamon sugar to prevent clumping.
  • Make Ahead: You can prepare the dough in advance and refrigerate it for up to 24 hours before frying.
  • Batch Frying: Don’t overcrowd the pan; fry in small batches to maintain oil temperature.
  • Mind the Size: Aim for uniform bite sizes for even cooking.

Common Mistakes and Troubleshooting

Even the best chefs face challenges. Here are some common issues and how to fix them:

  • Churros are soggy: This can happen if the oil isn’t hot enough. Always ensure the temperature is right.
  • Too greasy: Frying for too long or at too low a temperature can lead to greasy churros. Adjust your heat accordingly.
  • Flavor is lacking: Ensure you’re using fresh spices and quality ingredients for the best flavor.

Variations on Pumpkin Churro Bites

While the traditional recipe is delightful, there are many ways to mix things up:

  • Chocolate Pumpkin Churros: Add cocoa powder to the dough for a chocolatey twist.
  • Maple Glazed Churros: Drizzle with a maple syrup glaze instead of cinnamon sugar for a sweet finish.
  • Stuffed Churros: Fill with cream cheese or dulce de leche before frying for a decadent treat.
  • Spiced Apple Churros: Incorporate diced apples and cinnamon for a fruity variation.

Storage and Make-Ahead Instructions

If you have leftovers (though I doubt you will!), here’s how to store your churro bites:

  • Room Temperature: Keep in an airtight container for up to 2 days.
  • Refrigeration: Store in the fridge for up to 5 days; reheat in the oven for best results.
  • Freezing: Freeze uncoated churro bites for up to 3 months. Reheat from frozen in a preheated oven.

Frequently Asked Questions (FAQs)

Here are some common questions about pumpkin churro bites:

  • 1. Can I make pumpkin churro bites gluten-free? Absolutely! Substitute all-purpose flour with a 1:1 gluten-free blend.
  • 2. How do I store leftover pumpkin churro bites? Keep them in an airtight container at room temperature for up to 2 days.
  • 3. Can I use fresh pumpkin instead of canned? Yes! Just ensure it’s pureed and cooked properly.
  • 4. What’s the best dipping sauce? Chocolate and caramel sauces are both excellent choices!
  • 5. How can I make them vegan? Use flax eggs instead of regular eggs and coconut oil in place of butter.
  • 6. Can I bake these instead of frying? While frying gives the best texture, you can bake them at 375°F for about 20-25 minutes.
  • 7. What is pumpkin pie spice? It’s a blend of spices typically used in pumpkin desserts, including cinnamon, nutmeg, and ginger.
  • 8. How can I enhance the flavor? Fresh spices and high-quality vanilla extract will elevate the taste significantly!

Nutritional Tips and Dietary Adaptations

For those with dietary restrictions, here are some tips to enjoy these churro bites:

  • Lower Sugar: Reduce the amount of sugar used in the dough or coating.
  • Healthy Fats: Use avocado oil instead of traditional frying oils for a healthier option.
  • Nut-Free: This recipe is naturally nut-free, making it safe for those with nut allergies.

Equipment Recommendations

To make your culinary experience smooth, here are some tools that I recommend:

  • Deep Fryer or Heavy Pot: Essential for achieving the perfect frying temperature.
  • Candy Thermometer: To monitor the oil temperature accurately.
  • Slotted Spoon: For easy removal of churros from oil.
  • Mixing Bowls: A must for combining your ingredients efficiently.
  • Rolling Pin: Helpful if you decide to roll out dough for larger churro shapes.

Serving Suggestions

Finally, here are some ideas for serving your pumpkin churro bites:

  • With Coffee: Pair these bites with a warm cup of coffee or chai for the ultimate fall experience.
  • At Parties: Present them on a festive platter with various dipping sauces for a crowd-pleasing treat.
  • As a Dessert: Serve alongside a scoop of vanilla ice cream for a delightful contrast.

As we wrap up this culinary journey, I hope you feel inspired to make these pumpkin churro bites a part of your autumn traditions. They’re not just a recipe; they’re a celebration of the season, evoking warmth, nostalgia, and connection. So grab your apron, gather your loved ones, and let the flavors of fall ignite your senses!

Pumpkin Churro Bites

Prep Time 10 minutes
Cook Time 15 minutes
Total Time 25 minutes
Servings 8 pieces
Calories 150
Delight in these crispy, cinnamon-spiced pumpkin churro bites perfect for fall treats or festive gatherings.

Ingredients

Dough

  • 1 cup water
  • 1/2 stick butter
  • 2 tbsp sugar
  • Pinch salt
  • 1/2 tbsp vanilla extract
  • 1/2 cup pumpkin purée
  • 1 cup all purpose flour
  • 2 eggs eggs
  • 1/3 cup sugar
  • 1 tsp cinnamon powder
  • 1 tsp pumpkin pie spice

Instructions 

  • Combine water, butter, sugar, salt, vanilla, and pumpkin purée in a saucepan and bring to a boil.
  • Remove from heat and stir in flour until smooth.
  • Allow dough to cool slightly, then beat in eggs one at a time.
  • Mix sugar, cinnamon, and pumpkin pie spice; roll the dough into small bites and fry until golden.
  • Toss churro bites in cinnamon sugar mixture and serve warm.

Notes

For extra flavor, dust with additional cinnamon sugar before serving.
Calories: 150kcal
Cost: $8
Course: Dessert
Cuisine: American
Keyword: pumpkin