Author

Jack

Browsing

Experience the Magic of Skillet Honey Cornbread

Welcome to a culinary journey that embodies the warmth and sweetness of Southern hospitality! Skillet Honey Cornbread is not just a recipe; it’s an experience that brings family and friends together. Imagine taking a bite of this fluffy, golden-brown cornbread, infused with the delightful flavor of honey, straight from your oven to your table. If you’re ready to discover the joy of making this classic dish, you’ve come to the right place!

In this comprehensive guide, we will explore everything you need to know to create the perfect Skillet Honey Cornbread. From understanding the ingredients to troubleshooting common mistakes, every aspect of this recipe will be covered. So grab your apron and let’s whisk up some wonders!

Why You’ll Love This Recipe

  • Perfectly Moist and Tender: The combination of buttermilk and honey ensures that this cornbread is incredibly soft and tender, making every bite a delight.
  • Golden Crust: Baking in a hot cast-iron skillet gives the edges a satisfying crunch while keeping the center fluffy.
  • Simple and Quick: This recipe features minimal ingredients and straightforward steps, making it beginner-friendly yet impressively delicious.
  • Versatile Pairing: Whether served alongside chili, barbecued meats, or simply with a pat of butter, this cornbread is the perfect companion to various dishes.
  • Family Tradition: This honey skillet cornbread is a wonderful way to create lasting memories around the dinner table, just as families have done for generations.

Essential Ingredients for Skillet Honey Cornbread

Before diving into the steps, let’s take a closer look at the ingredients that make up this delightful cornbread. Each element plays a vital role in achieving that perfect texture and flavor.


Meal Prep Container Set

★ Recommended Kitchen Tool

Meal Prep Container Set

Make this recipe even easier with a quality Meal Prep Container Set — a must-have kitchen staple!


🛒 See Deals on Amazon →

As an Amazon Associate, we earn from qualifying purchases.
  • Unsalted Butter (3 tablespoons): This adds richness and flavor, and using unsalted allows you to control the saltiness of the dish.
  • Yellow Cornmeal (1¼ cups): The star of the dish—provides that classic cornbread flavor and texture.
  • All-Purpose Flour (1 cup): Helps bind the batter, giving it the right structure.
  • Granulated Sugar (¼ cup): Balances the savory flavors with a hint of sweetness.
  • Baking Powder (1 tablespoon) and Baking Soda (½ teaspoon): These leavening agents ensure your cornbread rises beautifully.
  • Kosher Salt (1 teaspoon): Enhances all the flavors in the cornbread.
  • Ground Cinnamon (1 teaspoon): Adds a warm, aromatic touch that pairs beautifully with honey.
  • Eggs (2): Acts as a binder and adds moisture.
  • Honey (½ cup): Infuses the cornbread with natural sweetness and a hint of floral flavor.
  • Buttermilk (1 cup): Contributes to the tender crumb and adds a slight tang that enhances the overall flavor.

If you need to make substitutions, here are some suggestions:

  • For a dairy-free option, use almond milk or oat milk mixed with a tablespoon of vinegar instead of buttermilk.
  • To make it gluten-free, substitute all-purpose flour with a gluten-free flour blend.
  • You can replace honey with maple syrup for a different flavor profile.

How to Make Skillet Honey Cornbread
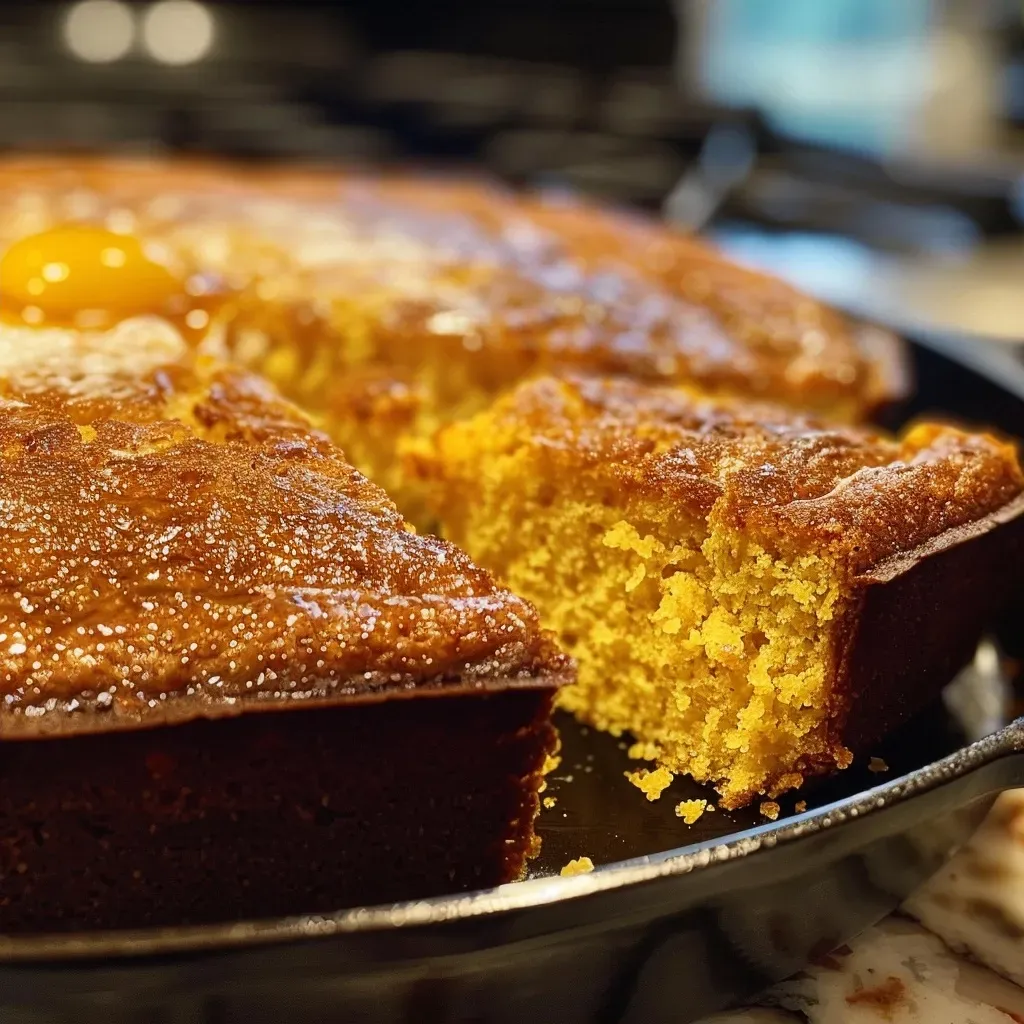
Close-up photo of golden-brown Skillet Honey Cornbread, showcasing its texture and buttery edges.

Now that we have our ingredients ready, let’s dive into the steps to create this delightful dish.

  1. Preheat Your Oven: Start by preheating your oven to 425°F (220°C). This high temperature is crucial for achieving that perfect golden crust.
  2. Melt the Butter: Add the unsalted butter to a medium cast iron skillet or a regular skillet. Place the skillet into the oven until the butter is melted. Remove from the oven and set aside.
  3. Mix the Dry Ingredients: In a medium bowl, whisk together the cornmeal, all-purpose flour, sugar, baking powder, baking soda, salt, and cinnamon until well combined. Set aside.
  4. Combine Wet Ingredients: In a large bowl, whisk together the eggs, honey, and buttermilk until fully combined.
  5. Combine Dry and Wet Ingredients: Add the flour mixture into the egg mixture, stirring just until combined. Be careful not to overmix—the batter should be a little lumpy.
  6. Pour and Bake: Pour the batter into the buttered skillet. Bake for 20-22 minutes, or until the cornbread is golden brown and a toothpick inserted into the center comes out clean.
  7. Cool and Serve: Remove from the oven and allow to cool for about 10 minutes before serving. This helps it set and makes slicing easier.

Pro Tips for Making the Best Skillet Honey Cornbread

  • Use a Hot Skillet: Preheating your skillet before pouring in the batter helps create that irresistible crust.
  • Don’t Overmix: Mixing just until combined ensures a tender texture. A few lumps are okay!
  • Experiment with Flavors: Consider adding ingredients like jalapeños for heat, or cheese for richness.
  • Let It Rest: Allowing the cornbread to cool slightly before slicing helps maintain its structure.
  • Use Fresh Ingredients: Fresh baking powder and baking soda are crucial for a good rise.
  • Don’t Skip the Honey: It’s the star of the show! Feel free to adjust the amount based on your sweetness preference.
  • Try Different Skillets: While cast iron is traditional, a non-stick skillet works well too.
  • Serve Warm: Cornbread is best enjoyed warm from the oven with butter or honey drizzled on top.

Common Mistakes and Troubleshooting

Even the best cooks can face challenges in the kitchen. Here are some common mistakes when making Skillet Honey Cornbread and how to avoid them:

  • Dry Cornbread: This usually happens if you overbake it. Keep an eye on the timer and check for doneness a couple of minutes early.
  • Dense Texture: Overmixing the batter can lead to a tough texture. Mix just until combined!
  • Uneven Cooking: If your skillet is not evenly heated, your cornbread may cook unevenly. Be sure to preheat your skillet thoroughly.

Variations to Try

Once you’ve mastered the classic Skillet Honey Cornbread, why not experiment with some delicious variations?

  • Cheddar Jalapeño Cornbread: Add 1 cup of shredded cheddar cheese and 1-2 diced jalapeños for a spicy twist.
  • Honey Butter Cornbread: Mix honey directly into softened butter for serving, enhancing the sweet flavor.
  • Sweet Potato Cornbread: Substitute half of the buttermilk with pureed sweet potato for added sweetness and nutrition.
  • Herbed Cornbread: Add fresh herbs like rosemary or thyme for a savory twist that pairs well with soups.

Storage and Make-Ahead Instructions

Skillet Honey Cornbread can be made ahead of time and stored properly:

  • Storing: Keep leftover cornbread in an airtight container at room temperature for up to 2 days, or refrigerate for up to a week.
  • Freezing: For longer storage, wrap individual slices in plastic wrap and place them in a freezer bag. It will keep well for up to 3 months.
  • Reheating: To enjoy your cornbread again, reheat in a toaster oven or microwave until warm.

Frequently Asked Questions (FAQs)

  • Can I use whole wheat flour instead of all-purpose flour? Yes, but it may change the texture and flavor slightly.
  • How can I make this cornbread vegan? Substitute the eggs with flax eggs and use a plant-based milk.
  • Is cornbread supposed to be sweet? Traditional Southern cornbread is often slightly sweet, but you can adjust the sugar to your preference.
  • What can I serve with cornbread? Cornbread pairs wonderfully with chili, barbecue, or even a hearty soup.
  • Can I make this recipe in advance? Yes, cornbread can be made ahead and stored as mentioned above.
  • What is the best way to serve cornbread? Serve warm with butter, honey, or alongside your favorite savory dishes.
  • Why is my cornbread crumbly? This could be due to insufficient moisture. Ensure you use the correct amount of buttermilk.
  • How can I enhance the flavor of my cornbread? Consider adding spices like nutmeg or experimenting with different types of sweeteners.

Nutritional Tips and Dietary Adaptations

For those looking to adapt the recipe to fit specific dietary needs:

  • Gluten-Free: Use a gluten-free flour blend to make this recipe suitable for gluten-sensitive individuals.
  • Dairy-Free: Substitute buttermilk with a non-dairy milk option mixed with vinegar.
  • Lower Sugar: Reduce the granulated sugar and honey for a less sweet cornbread without compromising texture.
  • Increased Fiber: Use whole grain cornmeal or add ground flaxseed for additional nutrients.

Recommended Equipment

To make this recipe, you will need:

  • Cast Iron Skillet: Ideal for even cooking and creating that crispy crust.
  • Mixing Bowls: A set of mixing bowls for combining your ingredients is essential.
  • Whisk: A whisk helps ensure your wet ingredients are well blended.
  • Measuring Cups and Spoons: Accurate measurements are crucial for baking success.

Serving Suggestions

Once your Skillet Honey Cornbread is ready, consider these serving ideas:

  • Classic Butter: Serve warm with a generous pat of butter melting on top.
  • Honey Drizzle: Drizzle extra honey over the cornbread for added sweetness.
  • Pair with Chili: A slice of cornbread is the perfect accompaniment to a bowl of hearty chili.
  • As a Side Dish: Serve alongside grilled meats or vegetables for a balanced meal.

Bringing It All Together

As you embark on your culinary adventure with Skillet Honey Cornbread, remember that it’s more than just a recipe; it’s a way to connect with those you love. Each bite tells a story of warmth, sweetness, and togetherness. So gather your ingredients, embrace the process, and enjoy the delightful journey of making this beloved Southern dish. Happy cooking! 🌽🍯

Skillet Honey Cornbread

Prep Time 10 minutes
Cook Time 20 minutes
Total Time 30 minutes
Servings 8 pieces
Calories 250
A warm, sweet cornbread baked in a skillet, perfect for comforting meals or gatherings.

Ingredients

Dairy

  • 3 tablespoons unsalted butter
  • 1 ¼ cup yellow cornmeal
  • 1 cup all-purpose flour
  • ¼ cup granulated sugar
  • 1 tablespoon baking powder
  • ½ teaspoon baking soda
  • 1 teaspoon kosher salt
  • 1 teaspoon ground cinnamon
  • 2 eggs
  • ½ cup honey
  • 1 cup buttermilk

Instructions 

  • Preheat oven to 425°F. Melt butter in a skillet and set aside.
  • Mix dry ingredients in a bowl. Whisk eggs, honey, and buttermilk in another bowl.
  • Combine wet and dry ingredients just until blended. Pour batter into skillet.
  • Bake for 20-22 minutes until golden and set. Cool for 10 minutes before serving.

Notes

For extra flavor, add a touch of honey on top before serving.
Calories: 250kcal
Cost: $10
Course: Side Dish
Cuisine: American
Keyword: cornbread

Embark on a Flavor Journey with a Pumpkin Chai Smoothie Bowl

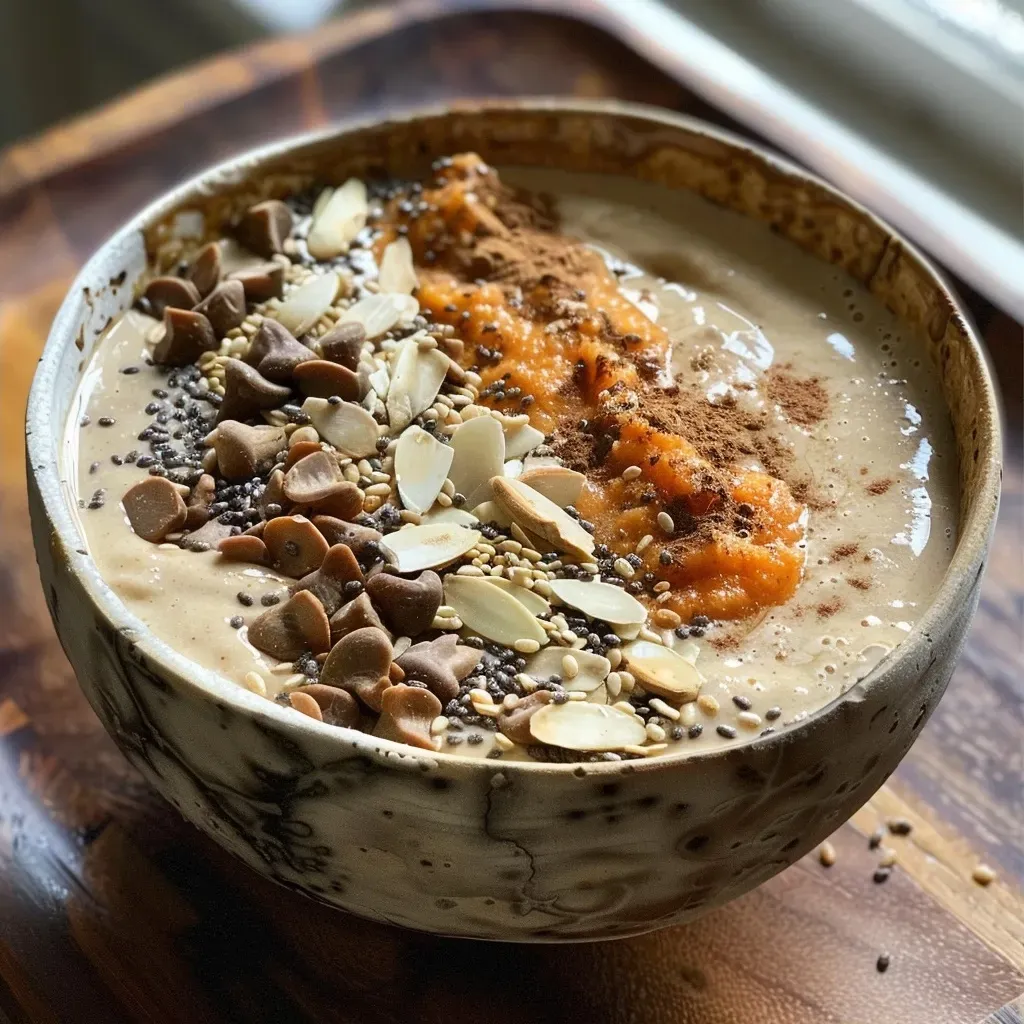
Welcome to a culinary adventure that captures the essence of autumn in every delicious bite! This Pumpkin Chai Smoothie Bowl is not just a recipe; it’s a celebration of flavors, culture, and connection. By blending warm chai tea with creamy pumpkin and a hint of spice, you can indulge in a nutritious and comforting dish that’s perfect for breakfast or a snack. Join me, Jack, as we dive into the delightful world of this smoothie bowl that will transport you with every spoonful.

In this article, we’ll explore a comprehensive guide to making the perfect Pumpkin Chai Smoothie Bowl, complete with detailed ingredient breakdowns, expert tips, and variations to suit every palate. Let’s get started on this flavorful journey!

Why You’ll Love This Recipe

  • Seasonal Flavors: Experience the cozy flavors of fall with pumpkin, chai spices, and sweet maple syrup.
  • Nutrient-Packed: This smoothie bowl is rich in vitamins, antioxidants, and healthy fats, thanks to pumpkin and almond butter.
  • Easy to Prepare: With just a few simple steps, you can create a delicious breakfast or snack in no time.
  • Customizable: Adjust ingredients to suit your taste preferences or dietary needs, making it truly your own.
  • Visually Appealing: The vibrant colors and textures make for an Instagram-worthy dish that will impress your friends and family.

Ingredient Breakdown

Our Pumpkin Chai Smoothie Bowl is crafted from simple, wholesome ingredients. Here’s what you’ll need:


Belgian Waffle Maker

★ Recommended Kitchen Tool

Belgian Waffle Maker

Make this recipe even easier with a quality Belgian Waffle Maker — a must-have kitchen staple!


🛒 See Deals on Amazon →

As an Amazon Associate, we earn from qualifying purchases.
  • Chai Tea: Use 2 chai tea bags steeped in 1/2 cup of boiling water for a rich base. You can substitute with your favorite tea if you prefer.
  • Pumpkin Puree: A 1/2 cup of canned pumpkin puree provides creaminess and flavor. Fresh pumpkin is also an option if you want to go the extra mile.
  • Almond Milk: 1 cup of vanilla unsweetened almond milk enhances the bowl’s creaminess, but feel free to swap it out for coconut milk or your preferred non-dairy milk.
  • Almond Butter: A tablespoon adds healthy fats and protein. Peanut or cashew butter can serve as alternatives.
  • Maple Syrup: Use 3 tablespoons to sweeten your bowl naturally. Agave syrup or honey can also be used for sweetness.
  • Stevia: A teaspoon adds extra sweetness without calories; however, you can omit it if you prefer a less sweet flavor.
  • Kosher Salt: A pinch (1/8 teaspoon) balances the sweetness.
  • Vanilla Extract: A teaspoon to enhance the flavor profile.
  • Pumpkin Spice: A 1/2 teaspoon gives that quintessential fall taste.

Pro Tips for the Perfect Smoothie Bowl

Close-up of a creamy Pumpkin Chai Smoothie Bowl garnished with spices and nuts.

To elevate your Pumpkin Chai Smoothie Bowl, keep these expert insights in mind:

  • Chill Your Ingredients: For an extra refreshing smoothie bowl, chill your almond milk and pumpkin puree before blending.
  • Freeze Your Banana: If you want a thicker texture, freeze a banana ahead of time and add it to the mix.
  • Blend in Stages: Start by blending the chai tea and pumpkin puree first, then gradually add the remaining ingredients for a smoother consistency.
  • Adjust Sweetness: Taste your smoothie before serving and adjust the sweetness by adding more maple syrup or stevia if needed.
  • Use the Right Equipment: A high-speed blender can make a significant difference in achieving a smooth texture.
  • Garnish Creatively: Top your smoothie bowl with fresh fruits, nuts, seeds, or granola for extra crunch and flavor.
  • Prep in Advance: Make the smoothie mixture the night before and freeze it for a quick breakfast option.
  • Serve Immediately: For the best texture and flavor, enjoy your smoothie bowl right after making it.

Avoid These Common Mistakes

Even the most seasoned chefs can make mistakes! Here are some pitfalls to avoid:

  • Over-Processing: Blending too long can warm your smoothie, losing that refreshing chill.
  • Wrong Ratios: Using too much liquid can make your smoothie bowl runny, while too little can make it too thick.
  • Skipping the Salt: A pinch of kosher salt enhances the overall flavor—don’t skip this step!
  • Forgetting to Taste: Always taste your mixture before freezing to ensure the flavors are balanced.

Delicious Variations

Mix things up with these fun variations:

  • Chocolate Pumpkin Chai: Add 2 tablespoons of cocoa powder for a rich, chocolatey twist.
  • Spicy Ginger Chai: Incorporate fresh grated ginger for an extra kick of spice.
  • Nutty Delight: Swirl in a tablespoon of nut butter for added creaminess and flavor.
  • Fruit Fusion: Blend in a banana or a handful of spinach for added nutrition and flavor.

Storage and Make-Ahead Instructions

If you want to prepare ahead:

  • Freezing: Pour the smoothie mixture into a freezer-safe container and freeze it for up to 2 months. When ready to enjoy, thaw in the fridge overnight.
  • Refrigeration: Store any leftovers in an airtight container in the fridge for up to 24 hours. Give it a quick stir before serving.

Frequently Asked Questions

Here are some common queries about the Pumpkin Chai Smoothie Bowl:

  • Can I use fresh pumpkin instead of canned? Yes, just make sure to cook and puree the pumpkin before adding it to the smoothie.
  • What can I substitute for almond milk? Any non-dairy milk works well, including oat milk, coconut milk, or soy milk.
  • How can I make this smoothie bowl vegan? This recipe is already vegan-friendly with the right ingredients.
  • Is this smoothie bowl high in calories? The calorie count depends on the ingredients you choose; you can make it lower-calorie by reducing sweeteners.
  • Can I add protein powder? Absolutely! A scoop of your favorite protein powder can boost the nutritional content.
  • What toppings do you recommend? Fresh fruits, nuts, seeds, granola, and coconut flakes are all excellent choices!
  • How long does it take to prepare? The prep and blending time is about 10 minutes, plus freezing time.
  • Can I make this a smoothie instead of a bowl? Yes! Just add more liquid to achieve a drinkable consistency.

Nutritional Tips and Dietary Adaptations

This Pumpkin Chai Smoothie Bowl not only tantalizes your taste buds but also supports your health goals:

  • Vegan-Friendly: All ingredients can be tailored to vegan diets, ensuring everyone can enjoy.
  • Low Sugar Options: Use stevia or reduce the maple syrup for a lower-sugar version.
  • Gluten-Free: This recipe is naturally gluten-free, perfect for those with gluten sensitivities.
  • High Fiber: With pumpkin and nuts, this bowl promotes digestive health.

Equipment Recommendations

To create the perfect Pumpkin Chai Smoothie Bowl, you’ll need:

  • High-Speed Blender: Essential for achieving a creamy texture.
  • Freezer-Safe Containers: For freezing the mixture.
  • Measuring Cups and Spoons: To ensure accurate ingredient measurements.

Serving Suggestions

Unleash your creativity when serving:

  • Garnish: Top with sliced bananas, a drizzle of almond butter, and a sprinkle of pumpkin seeds for added crunch.
  • Pair with: Serve alongside whole grain toast or a fruit salad for a complete meal.
  • Presentation: Use a beautiful bowl and vibrant toppings to make it visually appealing.

Conclusion

Now that you’ve explored the depths of flavor and nutrition in this Pumpkin Chai Smoothie Bowl, it’s time to whip up your own culinary masterpiece! Whether you’re enjoying it as a leisurely breakfast or a quick snack, this recipe is sure to warm your heart and satisfy your cravings. Remember, cooking is about discovery and connection—so share your creation with friends and family, and let the flavors of autumn bring you together. Happy cooking!

Pumpkin Chai Smoothie Bowl

Prep Time 10 minutes
Total Time 10 minutes
Servings 2 servings
Calories 250
A delicious and warming smoothie bowl combining the flavors of pumpkin and chai, perfect for a cozy breakfast or snack.

Ingredients

Brewed Tea

  • 2 cups chai tea
  • 1/2 cup boiling water
  • 1/2 cup canned pumpkin puree
  • 1 cup vanilla unsweetened almond milk
  • 1 Tbsp almond butter
  • 3 Tbsp maple syrup
  • 1 Tsp stevia
  • 1/8 Tsp kosher salt
  • 1 Tsp vanilla extract
  • 1/2 Tsp pumpkin spice

Instructions 

  • Brew chai tea in boiling water and cool.
  • Blend brewed tea with pumpkin, almond milk, almond butter, maple syrup, stevia, salt, vanilla, and pumpkin spice until smooth.
  • Pour into a container, cover, and freeze for 24 hours.
  • Uncover, twist in the blade, and lock the cup.
  • Select the Smoothie Bowl setting and start.
  • Remove, twist off the blade, and serve immediately.

Notes

For a creamier texture, top with nuts or granola.
Calories: 250kcal
Cost: $15
Course: Breakfast
Cuisine: fusion
Keyword: chai, pumpkin, Smoothie

Unleash the Flavor: Explore the World of Smoky Sweet Potato and Black Bean Enchiladas

Welcome to a culinary adventure that takes your taste buds on a journey through the heart of Mexico! Today, we’re diving into the vibrant world of Smoky Sweet Potato and Black Bean Enchiladas. This dish is not just a meal; it’s a celebration of flavors, a blend of textures, and a warm hug from the inside out. With the earthy sweetness of sweet potatoes and the hearty goodness of black beans, these enchiladas are perfect for family gatherings or a cozy dinner at home.

By the end of this article, you’ll not only have a delicious recipe but also insights into ingredient selections, cooking tips, and ways to personalize the dish to make it your own. So grab your apron, and let’s embark on this flavorful journey together!

Why You’ll Love This Recipe

Here are five compelling reasons to try making Smoky Sweet Potato and Black Bean Enchiladas:


Meal Prep Container Set

★ Recommended Kitchen Tool

Meal Prep Container Set

Make this recipe even easier with a quality Meal Prep Container Set — a must-have kitchen staple!


🛒 Shop This Tool →

As an Amazon Associate, we earn from qualifying purchases.
  • Nutritious and Wholesome: Packed with vitamins and minerals, sweet potatoes and black beans provide a healthy dose of fiber and protein.
  • Plant-Based Delight: This recipe is a perfect vegetarian option, making it suitable for a variety of dietary preferences.
  • Flavor Explosion: The combination of spices like smoked paprika and cumin creates a rich, smoky flavor that is absolutely irresistible.
  • Customizable: You can easily adjust the ingredients to suit your taste or dietary needs, from adding different vegetables to trying out various toppings.
  • Easy to Prepare: With straightforward steps, this recipe is perfect for both beginner cooks and seasoned chefs looking for a quick weeknight meal.

Ingredient Breakdown for Smoky Sweet Potato and Black Bean Enchiladas

Let’s take a closer look at the ingredients that bring this dish to life. Here’s what you’ll need:

  • 1 large sweet potato, cubed: The star of the dish, providing natural sweetness and creamy texture.
  • 1 small onion, chopped: Adds depth of flavor; feel free to substitute with red or yellow onion.
  • 1 small sweet red pepper, chopped: For a burst of color and sweetness; green bell pepper can be used instead for a more bitter taste.
  • 1/2 cup minced fresh cilantro: Brings freshness and an aromatic element to the filling.
  • 1 teaspoon smoked paprika: Infuses the dish with a smoky flavor that elevates the overall taste.
  • 1/2 teaspoon garlic powder: For that essential savory note.
  • 1/2 teaspoon ground cumin: Adds warmth and earthiness, a key player in Mexican cuisine.
  • 1/2 teaspoon ground coriander: Complements the cumin and enhances the dish’s flavor profile.
  • 1/2 teaspoon pepper: For seasoning; adjust according to your taste.
  • 1 can (15 ounces) black beans, rinsed and drained: The protein powerhouse of the dish.
  • 1 can (15 ounces) enchilada sauce: The perfect sauce to drizzle on top for that classic enchilada experience.
  • 12 corn tortillas (6 inches), warmed: The base for your enchiladas; warming them makes them pliable for rolling.
  • 2 cups shredded Monterey Jack cheese, divided: Melts beautifully on top and adds creaminess.
  • Optional toppings: Consider cubed avocado, sour cream, salsa, minced cilantro, and hot sauce for added flavor and decoration.

Step-by-Step Directions to Prepare Your Enchiladas

Close-up view of smoky sweet potato and black bean enchiladas topped with cheese and fresh cilantro.

Now that we have our ingredients ready, let’s dive into the cooking process. Follow these simple steps to create your own Smoky Sweet Potato and Black Bean Enchiladas:

  1. Preheat Oven: Set your oven to 375°F (190°C).
  2. Steam the Vegetables: In a large saucepan, fill with a large amount of water and place a steamer basket over it. Add the cubed sweet potato, chopped onion, and red pepper into the basket. Bring the water to a boil, then reduce the heat to maintain a simmer. Cover and steam for 15 to 20 minutes until tender.
  3. Mash the Filling: Transfer the steamed vegetables into a large bowl. Mash them together, gradually adding the minced cilantro, smoked paprika, garlic powder, ground cumin, ground coriander, and pepper until you reach your desired consistency. Stir in the rinsed black beans until well combined.
  4. Assemble the Enchiladas: Spread 1/3 cup of enchilada sauce into a greased 13×9-inch baking dish. Take a warmed tortilla, fill the center with 1/3 cup of the vegetable mixture, and sprinkle with 4 teaspoons of cheese. Roll it up and place it seam-side down in the baking dish. Repeat until all tortillas are filled and placed in the dish.
  5. Top and Bake: Pour the remaining enchilada sauce over the rolled tortillas and sprinkle with the remaining cheese. Bake uncovered for 20 to 25 minutes, or until the cheese is melted and the casserole is heated through.
  6. Serve: Allow the enchiladas to cool slightly before serving. Top with your choice of optional toppings for an extra flavor kick!

Pro Tips for Perfect Enchiladas

To ensure your enchiladas turn out perfectly every time, consider these expert insights:

  • Choose the Right Tortillas: Opt for corn tortillas for authenticity; they hold up better than flour tortillas in enchiladas.
  • Don’t Overfill: Keep the filling to a moderate amount to prevent tearing the tortillas.
  • Add Depth with Roasted Veggies: For an extra layer of flavor, roast your sweet potatoes and peppers before mashing.
  • Make Your Own Sauce: If you have time, consider making homemade enchilada sauce for a fresher taste.
  • Experiment with Cheese: Try different cheeses like Oaxaca or Queso Fresco for varied flavor.
  • Top with Fresh Ingredients: Adding freshly chopped cilantro or green onions right before serving adds brightness.
  • Serve with Sides: Pair enchiladas with a fresh green salad or Mexican rice for a complete meal.
  • Store Leftovers Properly: Keep leftover enchiladas in an airtight container in the fridge for up to 3 days.

Common Mistakes and Troubleshooting

If you encounter any issues while making your enchiladas, here are some common mistakes and how to avoid them:

  • Too Dry: If your enchiladas are dry, ensure you’re using enough sauce both inside and on top before baking.
  • Tortillas Breaking: Make sure to warm your tortillas before filling them; this prevents them from cracking.
  • Underseasoned Filling: Taste your filling before assembling; adjust spices as necessary to enhance flavor.
  • Overcooked Cheese: Keep an eye on your enchiladas towards the end of baking to avoid burnt cheese.

Variations to Elevate Your Enchiladas

Feel free to get creative with your enchiladas! Here are some delicious variations to try:

  • Spicy Kick: Add diced jalapeños or a splash of hot sauce to the filling for a spicier version.
  • Green Enchiladas: Use green enchilada sauce instead of red for a different flavor profile.
  • Protein Boost: Incorporate shredded rotisserie chicken or ground turkey for added protein.
  • Veggie Lovers: Include black olives, spinach, or zucchini in the filling for more veggies.

Storage and Make-Ahead Instructions

Planning ahead? Here’s how to store and prepare your enchiladas in advance:

  • Make-Ahead: Assemble the enchiladas a day before, cover tightly, and refrigerate. Bake just before serving.
  • Freezing: Freeze assembled enchiladas before baking for up to 3 months. Thaw in the fridge overnight before baking.
  • Storing Leftovers: Keep leftover enchiladas in an airtight container in the fridge for up to 3 days. Reheat in the oven at 350°F until warmed through.

Comprehensive FAQ

Here are some common questions about Smoky Sweet Potato and Black Bean Enchiladas:

  • Can I use frozen sweet potatoes?: Yes, frozen sweet potatoes can be used; just ensure they are fully thawed before mashing.
  • What can I substitute for black beans?: You can use pinto beans or kidney beans as alternatives.
  • How can I make this recipe gluten-free?: Use corn tortillas and ensure your enchilada sauce is gluten-free.
  • Can I add meat to this recipe?: Absolutely! Shredded chicken or beef can be included for a heartier dish.
  • What toppings go well with enchiladas?: Consider sour cream, guacamole, salsa, or freshly chopped cilantro.
  • How spicy are these enchiladas?: They are mild with the option to add heat through spices or toppings, as desired.
  • Can I make this a casserole?: Yes! Layer the ingredients in a baking dish for a delicious enchilada casserole instead.
  • Is this recipe suitable for meal prep?: Yes, they store well, making them great for meal prep!

Nutritional Information and Dietary Adaptations

This recipe not only tastes great but is also nutritious! Here’s a breakdown of the nutritional benefits:

  • Fiber: Both sweet potatoes and black beans are high in fiber, aiding digestion and promoting satiety.
  • Vitamins and Minerals: Sweet potatoes are rich in vitamins A and C, while black beans provide iron and magnesium.
  • Low in Saturated Fat: This dish is naturally low in saturated fats, making it heart-healthy.
  • Dairy-Free Option: Substitute cheese with a dairy-free cheese alternative or nutritional yeast for a vegan version.

Essential Equipment for Making Enchiladas

To create your enchiladas, you’ll need the following kitchen tools:

  • Steamer Basket: Essential for steaming the sweet potatoes and vegetables.
  • Large Bowl: For mashing and mixing your filling ingredients.
  • Baking Dish: A 13×9-inch dish is ideal for baking the assembled enchiladas.
  • Wooden Spoon or Potato Masher: For combining your filling ingredients smoothly.

Serving Suggestions for a Complete Meal

To round out your meal, consider these serving suggestions:

  • Fresh Salad: A light green salad with a citrus vinaigrette pairs beautifully.
  • Mexican Rice: Serve alongside fluffy Mexican rice for a filling meal.
  • Chips and Salsa: Don’t forget the crunchy tortilla chips and fresh salsa for appetizers!
  • Refreshing Drinks: Pair your enchiladas with a fresh agua fresca or a cold cerveza.

In conclusion, Smoky Sweet Potato and Black Bean Enchiladas are more than just a meal; they are a culinary experience that invites you to savor every bite. With their rich flavors, nutritional benefits, and endless customization options, these enchiladas are sure to become a favorite in your kitchen. So go ahead, gather your loved ones, and embark on this delicious journey of taste and culture!

Smoky Sweet Potato and Black Bean Enchiladas

Prep Time 20 minutes
Cook Time 25 minutes
Total Time 45 minutes
Servings 4 servings
Calories 350
These flavorful enchiladas combine smoky spices, tender sweet potatoes, and hearty black beans for a satisfying vegetarian meal.

Ingredients

Vegetables

  • 1 large sweet potato, cubed
  • 1 small onion, chopped
  • 1 small sweet red pepper, chopped

Herbs & Spices

  • 1 teaspoon smoked paprika
  • 1/2 teaspoon garlic powder
  • 1/2 teaspoon ground cumin
  • 1/2 teaspoon ground coriander
  • 1/2 teaspoon pepper

Canned Goods

  • 1 can black beans (15 oz), rinsed and drained
  • 1 can enchilada sauce (15 oz)

Tortillas & Cheese

  • 12 pieces corn tortillas (6 inches), warmed
  • 2 cups shredded Monterey Jack cheese, divided

Optional toppings

  • as desired Cubed avocado, sour cream, salsa, minced cilantro and hot sauce

Instructions 

  • Steam sweet potato, onion, and red pepper until tender, about 15-20 minutes.
  • Mash vegetables in a bowl, add cilantro and spices, then stir in black beans.
  • Spread enchilada sauce in a baking dish. Fill tortillas with vegetable mixture, roll up, and place seam side down. Top with remaining sauce and cheese.
  • Bake at 375°F (190°C) for 20-25 minutes until cheese melts. Serve with optional toppings.

Notes

Use fresh cilantro for best flavor and consider adding hot sauce for extra spice.
Calories: 350kcal
Cost: $12
Course: Main Course
Cuisine: Mexican
Keyword: Enchiladas, Sweet Potato, vegetarian

Discover the Fusion of Flavors in Banana Chai Muffins

Embark on a culinary adventure with Banana Chai Muffins that perfectly blend the comforting warmth of chai spices and the natural sweetness of overripe bananas. This delightful recipe transforms simple ingredients into a flavorful treat, perfect for breakfast or an afternoon snack. Known for their **super moist** texture and enticing aroma, these muffins not only satisfy your sweet tooth but also provide a touch of exotic flair. Let’s dive into the world of flavors and culture that these muffins embody!

Why You’ll Love This Recipe

These Banana Chai Muffins are not just delicious; they offer a multitude of benefits that make them a must-try:

  • Flavorful Fusion: The combination of chai spices and ripe bananas creates a unique taste that excites the palate.
  • Healthy Indulgence: Made with wholesome ingredients, they’re a guilt-free treat that can be enjoyed any time of day.
  • Easy to Make: This straightforward recipe makes it simple for bakers of all skill levels to whip up a batch.
  • Perfect for Meal Prep: These muffins can be made ahead, stored, and enjoyed throughout the week, making them an ideal grab-and-go option.
  • Customizable: With plenty of options for substitutions and variations, you can easily tailor this recipe to your dietary needs and preferences.

Ingredient Breakdown and Substitutions

Let’s take a closer look at the ingredients that make these muffins shine, along with some useful substitutions.


Silicone Baking Cups Set

★ Recommended Kitchen Tool

Silicone Baking Cups Set

Make this recipe even easier with a quality Silicone Baking Cups Set — a must-have kitchen staple!


🛒 Check Price on Amazon →

As an Amazon Associate, we earn from qualifying purchases.
  • Bananas: Use 1 pound of overripe bananas (about 1 ¾ to 2 cups when mashed). If you don’t have ripe bananas, you can substitute with applesauce for a different flavor.
  • Eggs: Two large eggs add moisture and richness. For a vegan option, replace with flax eggs (1 tablespoon ground flaxseed mixed with 3 tablespoons water per egg).
  • Brown Sugar: Provides sweetness and depth. Coconut sugar can be used as a healthier alternative.
  • Chai Spice Mix: A blend of spices like cinnamon, cardamom, and ginger. You can make your own or buy pre-mixed chai spice.
  • Flour: All-purpose flour is used, but whole wheat flour can be a nutritious substitute.
  • Butter: For a dairy-free option, use coconut oil or a plant-based butter.

Pro Tips for Perfect Banana Chai Muffins

Close-up view of a moist Banana Chai Muffin showcasing its golden-brown top and specks of walnuts.

To elevate your baking game, consider these expert tips:

  • Whip the Eggs: Beat the eggs for five full minutes to incorporate air, resulting in fluffier muffins.
  • Fresh Spices: Use fresh spices for your chai mix to enhance flavor and aroma.
  • Don’t Overmix: When combining wet and dry ingredients, mix just until combined to prevent dense muffins.
  • Use a Scoop: Use a large ice cream scoop for even muffin sizes and consistent baking.
  • Check for Doneness: Insert a toothpick into the center; if it comes out clean, they are ready!
  • Let Cool: Allow muffins to cool in the pan for a few minutes before transferring to a wire rack.
  • Experiment with Toppings: Try adding a sprinkle of coarse sugar or nuts on top before baking for extra crunch.
  • Store Safely: Keep muffins in an airtight container to maintain freshness, and consider freezing for longer storage.

Avoiding Common Mistakes

Even experienced bakers can run into hiccups! Here are some common mistakes to avoid:

  • Using Cold Ingredients: Always bring your eggs and butter to room temperature for a smoother batter.
  • Skipping the Spices: Omitting the chai spice can dull the flavor profile; don’t skip it!
  • Overbaking: Keep an eye on the muffins to prevent them from drying out—check them a few minutes early.

Delicious Variations to Try

Feel free to mix things up with these fun variations:

  • Chocolate Chip Delight: Add a handful of chocolate chips for a sweet twist.
  • Nutty Banana Chai: Include chopped pecans or almonds for extra crunch.
  • Dried Fruit Medley: Toss in dried cranberries or raisins for a chewy texture.
  • Spiced Pumpkin Chai Muffins: Substitute half the mashed bananas with pumpkin puree for a seasonal flavor.

Storage and Make-Ahead Instructions

These muffins are perfect for making ahead of time:

  • Room Temperature: Store in an airtight container at room temperature for up to two days.
  • Freezing: Wrap tightly in plastic wrap and freeze for up to three months. Thaw at room temperature before enjoying.
  • Make Ahead: You can prepare the batter and refrigerate it overnight before baking for an early morning treat.

Frequently Asked Questions

Here are answers to some common questions about Banana Chai Muffins:

  • Can I make these muffins gluten-free? Yes, substitute with a gluten-free flour blend.
  • How can I make these muffins less sweet? Reduce the brown sugar by half and adjust to taste.
  • What can I use instead of butter? Coconut oil or a dairy-free butter work well as substitutes.
  • Can I add more spices? Absolutely! Adjust the chai spice to your liking for a stronger flavor.
  • Are these muffins suitable for kids? Yes! They are a great way to introduce new flavors to children.
  • What if my bananas aren’t very ripe? Bake them at 300°F for 15-20 minutes until the skins darken to enhance sweetness.
  • How do I know when they are done? The tops should be golden brown and a toothpick should come out clean.
  • Can I use frozen bananas? Yes, just thaw and drain excess moisture before mashing.

Nutritional Tips and Dietary Adaptations

For those mindful of nutrition, here are some tips:

  • Increase Fiber: Use whole wheat flour or add oats to boost fiber content.
  • Lower Sugar: Use ripe bananas to naturally sweeten and reduce added sugars.
  • Protein Boost: Add a scoop of protein powder to the batter for an extra nutritional kick.

Equipment Recommendations

Having the right tools makes all the difference in your baking experience:

  • Stand Mixer: Ideal for mixing the batter evenly and incorporating air.
  • Muffin Tin: Use a standard muffin tin with tulip liners for easy removal and a bakery-style look.
  • Mixing Bowls: A variety of sizes for mixing dry and wet ingredients separately.
  • Measuring Cups and Spoons: Accurate measurements are key to baking success.

Serving Suggestions

Enjoy these muffins on their own or pair with:

  • Butter or Nut Butter: Spread a layer for added richness.
  • Coffee or Tea: A warm beverage complements the flavors beautifully.
  • Fruit Salad: A fresh side adds a refreshing contrast.

In Conclusion

Banana Chai Muffins are more than just a delightful treat; they are a journey through cultures and flavors, inviting you to savor every bite. Whether you’re exploring the warm spices of chai or the sweetness of bananas, this recipe is sure to become a cherished favorite. So gather your ingredients, embrace the adventure, and let these muffins connect you to the world, one delicious bite at a time!

Banana Chai Muffins

Prep Time 15 minutes
Cook Time 35 minutes
Total Time 50 minutes
Servings 12 muffins
Calories 250
Delight in these moist, flavorful muffins infused with chai spices and ripe bananas, perfect for breakfast or a snack.

Ingredients

Dried ingredients

  • 2 large eggs
  • 1 cup brown sugar
  • 2 teaspoons vanilla
  • 1.75 cups overripe bananas (about 1 ¾ to 2 cups mashed)
  • 2.5 cups all-purpose flour
  • 2 teaspoons baking soda
  • 1 teaspoon baking powder
  • 1 tablespoon chai spice mix (see recipe here)
  • 0.5 teaspoon sea salt
  • 0.5 cup butter (1 stick)
  • 0.5 cup walnuts (chopped)
  • 0.25 cup granulated sugar
  • 1 teaspoon chai spice (see recipe here)
  • 6 tablespoons butter, softened

Instructions 

  • Prepare muffin tin with liners and spray with pan spray.
  • Preheat oven to 325°F (160°C).
  • Beat eggs, sugar, and vanilla until airy; add bananas and mix.
  • Mix sifted dry ingredients; add to wet mixture with butter, then fold in walnuts.
  • Divide batter into muffin cups, top with streusel, and bake for 35 minutes.

Notes

Store leftovers at room temperature for up to two days or freeze for longer storage.
Calories: 250kcal
Cost: $15
Course: Breakfast
Cuisine: American
Keyword: banana, chai, Muffins

Embark on a Culinary Voyage with Sheet Pan Shrimp Boil

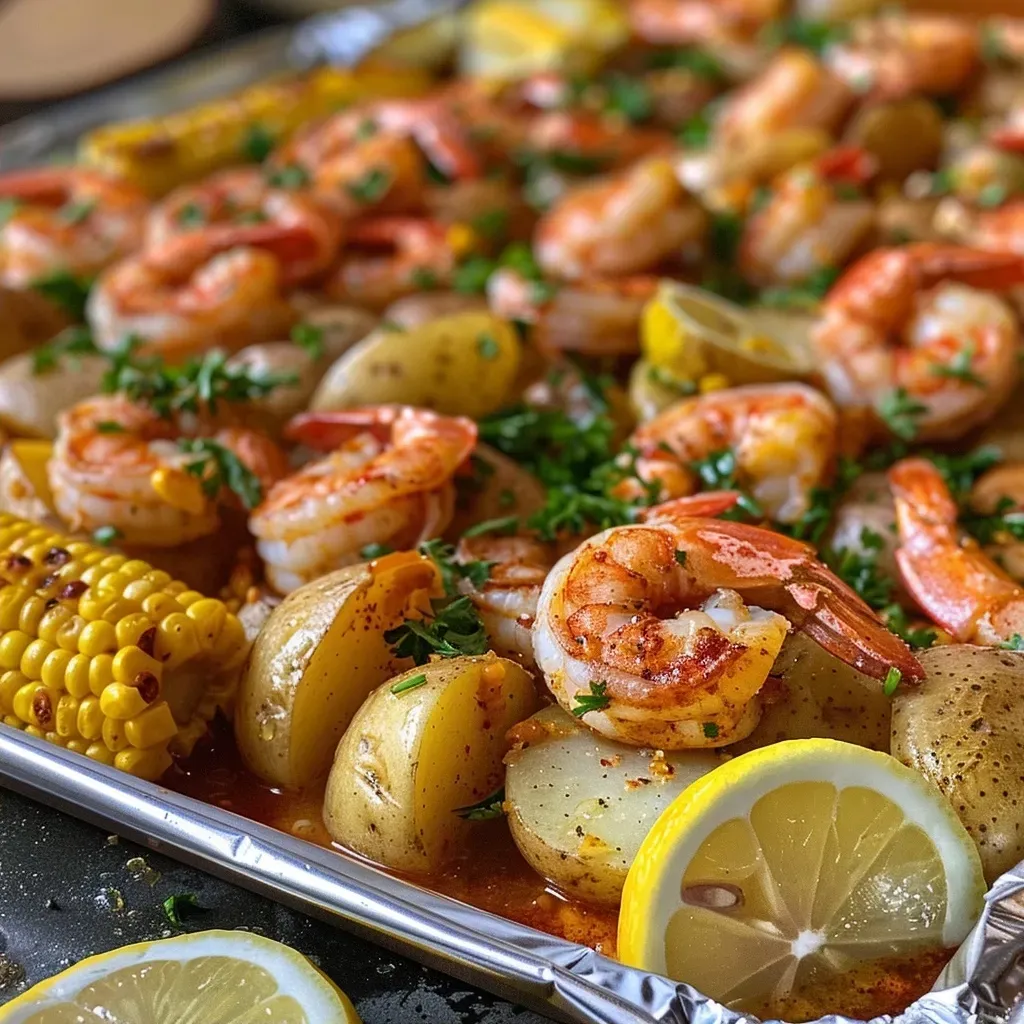
Welcome to a world of vibrant flavors and mouthwatering aromas! If you’re ready to dive into a dish that encapsulates the essence of coastal cuisine, then this Sheet Pan Shrimp Boil is your ticket to a delightful culinary adventure. Imagine succulent shrimp mingling with smoky sausage and fresh corn, all roasted to perfection in your oven. This dish not only brings the seaside to your kitchen but also celebrates the joy of gathering with friends and family, making it perfect for both casual weeknight dinners and festive gatherings.

In this article, we’ll explore everything you need to know about creating the ultimate shrimp boil, from ingredient highlights to expert cooking tips. So, roll up your sleeves and get ready to experience a flavor explosion that will transport you straight to the shores of your favorite beachside retreat!

Why You’ll Love This Sheet Pan Shrimp Boil

  • Simple Preparation: With just one sheet pan and minimal prep work, this recipe takes the hassle out of cooking while delivering maximum flavor.
  • Flavor Fusion: The combination of Old Bay seasoning, garlic, and butter creates a rich flavor profile that enhances the natural sweetness of the shrimp and corn.
  • Perfect for Gatherings: This dish is designed for sharing, making it a great centerpiece for your next family gathering or dinner party.
  • Customizable: Easily swap ingredients based on your preferences or what you have on hand, allowing for endless variations.
  • Quick Cleanup: Cooking on a single baking sheet means less time scrubbing pots and pans afterward.

Ingredients You’ll Need

This recipe is built around fresh, vibrant ingredients that complement each other beautifully. Here’s what you’ll need:


Air Fryer XL

★ Recommended Kitchen Tool

Air Fryer XL

Make this recipe even easier with a quality Air Fryer XL — a must-have kitchen staple!


🛒 See Deals on Amazon →

As an Amazon Associate, we earn from qualifying purchases.
  • 1 pound baby Dutch yellow potatoes: These potatoes are not only creamy and delicious but also retain their shape during cooking.
  • 3 ears corn: Cut each ear into 6 pieces for that perfect bite of sweetness.
  • 1/4 cup unsalted butter: Melted for a rich flavor that ties all the ingredients together.
  • 4 cloves garlic: Minced for an aromatic kick.
  • 1 tablespoon Old Bay seasoning: This iconic seasoning blend adds a touch of coastal charm.
  • 1 pound medium shrimp: Peeled and deveined for convenience.
  • 1 (12.8-ounce) package smoked andouille sausage: Adds a smoky depth to the dish.
  • 1 lemon: Cut into wedges for a zesty finish.
  • 2 tablespoons chopped fresh parsley leaves: For garnish and a pop of color.

Directions

A close-up side view of a sheet pan filled with shrimp, corn, potatoes, sausage, and lemon wedges.

Now that you have your ingredients ready, let’s get cooking! Follow these simple steps for a delicious Sheet Pan Shrimp Boil:

  1. Preheat your oven to 400 degrees F. Lightly oil a baking sheet or coat it with nonstick spray.
  2. In a large pot of boiling salted water, cook the baby Dutch yellow potatoes until just tender, about 10-13 minutes. Add the corn during the last 5 minutes of cooking time; then drain well.
  3. In a small bowl, combine the melted butter, minced garlic, and Old Bay seasoning.
  4. On the prepared baking sheet, arrange the parboiled potatoes, corn, shrimp, and sliced sausage in a single layer. Drizzle the butter mixture over the top and gently toss to combine.
  5. Place the baking sheet in the oven and bake for 12-15 minutes, or until the shrimp are opaque and the corn is tender.
  6. Serve immediately with lemon wedges and garnish with fresh parsley, if desired.

Pro Tips for Perfecting Your Shrimp Boil

  • Parboil for Even Cooking: Pre-cooking the potatoes and corn ensures they are tender and perfectly cooked when the shrimp finish baking.
  • Don’t Overcook the Shrimp: Keep an eye on the shrimp as they cook quickly; they should be opaque and firm but not rubbery.
  • Customize Your Sausage: Feel free to experiment with different types of sausage, such as spicy chorizo or turkey sausage, to suit your flavor preferences.
  • Season to Taste: Adjust the amount of Old Bay seasoning based on how much flavor you prefer in your dish.
  • Use Fresh Ingredients: Always opt for the freshest shrimp and vegetables for the best flavor and texture.
  • Try Different Vegetables: Feel free to add bell peppers or zucchini for additional color and flavor.
  • Let It Rest: Allow the dish to sit for a few minutes after removing it from the oven to let the flavors meld.
  • Serve with Dipping Sauces: Complement the dish with cocktail sauce or a spicy remoulade for an extra kick.

Common Mistakes and Troubleshooting

Even the best chefs can make mistakes, so here are some common pitfalls and how to avoid them:

  • Overcrowding the Pan: Ensure the shrimp and vegetables have enough space on the baking sheet. Overcrowding can lead to steaming instead of roasting.
  • Not Preheating the Oven: Always preheat your oven to ensure even cooking from the start.
  • Ignoring the Cooking Times: Keep track of the cooking times for each ingredient to avoid overcooking.
  • Skipping the Parboil: Don’t skip parboiling the potatoes and corn, as this step is crucial for even cooking.

Variations to Try

Feel like mixing things up? Here are a few delicious variations you can try:

  • Spicy Cajun Shrimp Boil: Add cayenne pepper or diced jalapeños for a fiery kick.
  • Vegetarian Option: Substitute shrimp and sausage with seasonal vegetables like asparagus, bell peppers, and mushrooms.
  • Lemon Garlic Butter Shrimp: Increase the amount of garlic and lemon juice for a zesty, fresh flavor.
  • Herbed Shrimp Boil: Incorporate fresh herbs like thyme or rosemary into the butter mixture for an aromatic twist.

Storage and Make-Ahead Instructions

This dish is best enjoyed fresh, but if you have leftovers, here’s how to store them:

  • Refrigeration: Store leftovers in an airtight container in the refrigerator for up to 3 days.
  • Freezing: While it’s not recommended due to the texture of the shrimp, you can freeze the mixture for up to 2 months. Reheat thoroughly before serving.
  • Reheating: Reheat in the oven at 350 degrees F until warmed through, about 10-15 minutes.

FAQs about Sheet Pan Shrimp Boil

  • Can I use frozen shrimp? Yes, just ensure they are fully thawed and drained before cooking.
  • What can I substitute for Old Bay seasoning? You can create your own blend using paprika, cayenne, celery salt, and black pepper.
  • Can I add other seafood? Absolutely! Crab legs or mussels can be great additions.
  • Is this recipe gluten-free? Yes, as long as you ensure that your sausage is gluten-free.
  • How spicy is this dish? The spiciness depends on the sausage and any additional spices you add; adjust to your preference.
  • Can I make this dish ahead of time? While best served fresh, you can prep the ingredients and store them separately until ready to bake.
  • What’s the best way to serve this dish? Serve family-style on the table for a fun, interactive dining experience.
  • How do I know when the shrimp are done? They should be opaque and firm to the touch, usually taking about 12-15 minutes in the oven.

Nutrition Tips and Dietary Adaptations

This Sheet Pan Shrimp Boil can easily be adapted to meet various dietary needs:

  • Low-Carb: Skip the potatoes for a lower-carb version packed with shrimp and vegetables.
  • Dairy-Free: Use olive oil instead of butter for a dairy-free alternative.
  • Whole30 Approved: Ensure all ingredients comply with Whole30 guidelines for a compliant meal.

Equipment Recommendations

Here are a few essential tools that will make your cooking experience easier:

  • Large Pot: For boiling the potatoes and corn.
  • Baking Sheet: A sturdy baking sheet is key for even roasting.
  • Mixing Bowl: For combining the butter and seasoning.

Serving Suggestions

To make your meal even more memorable, consider these serving suggestions:

  • Serve with Bread: Crusty bread or rolls are perfect for soaking up the delicious garlic butter.
  • Pair with a Salad: A fresh green salad balances out the richness of the dish.
  • Offer Dipping Sauces: Provide cocktail sauce, aioli, or hot sauce for added flavor.

In conclusion, this Sheet Pan Shrimp Boil is not just a meal; it’s a culinary experience that brings friends and family together around the table. With its ease of preparation and endless customization possibilities, it’s sure to become a favorite in your kitchen. So gather your ingredients, don your apron, and let the adventure begin!

Sheet Pan Shrimp Boil

Prep Time 15 minutes
Cook Time 15 minutes
Total Time 30 minutes
Servings 4 servings
Calories 600
A flavorful and easy-to-make seafood dish featuring shrimp, sausage, corn, and potatoes all roasted together on a sheet pan.

Ingredients

Vegetables

  • 1 pound baby Dutch yellow potatoes
  • 3 ears corn (each cut crosswise into 6 pieces)
  • 1 tablespoon Old Bay seasoning

Dairy

  • 1/4 cup unsalted butter (melted)

Seafood

  • 4 cloves garlic (minced)
  • 1 pound medium shrimp (peeled and deveined)
  • 1 (12.8-ounce) package smoked andouille sausage (thinly sliced)

Fruits

  • 1 lemon cut into wedges
  • 2 tablespoons chopped fresh parsley leaves

Instructions 

  • Preheat oven to 400°F (200°C). Lightly oil a baking sheet.
  • Cook potatoes in boiling salted water for 10-13 minutes; add corn in last 5 minutes, then drain.
  • Mix melted butter, garlic, and Old Bay seasoning in a small bowl.
  • Arrange potatoes, corn, shrimp, and sausage on the sheet; toss with butter mixture.
  • Bake for 12-15 minutes until shrimp are opaque and corn is tender. Serve with lemon wedges and parsley.

Notes

For extra flavor, sprinkle with additional parsley or serve with hot sauce.
Calories: 600kcal
Cost: $15
Course: Main Course
Cuisine: American
Keyword: Seafood

Embark on a Flavorful Journey with Chorizo Corn Potato Chowder

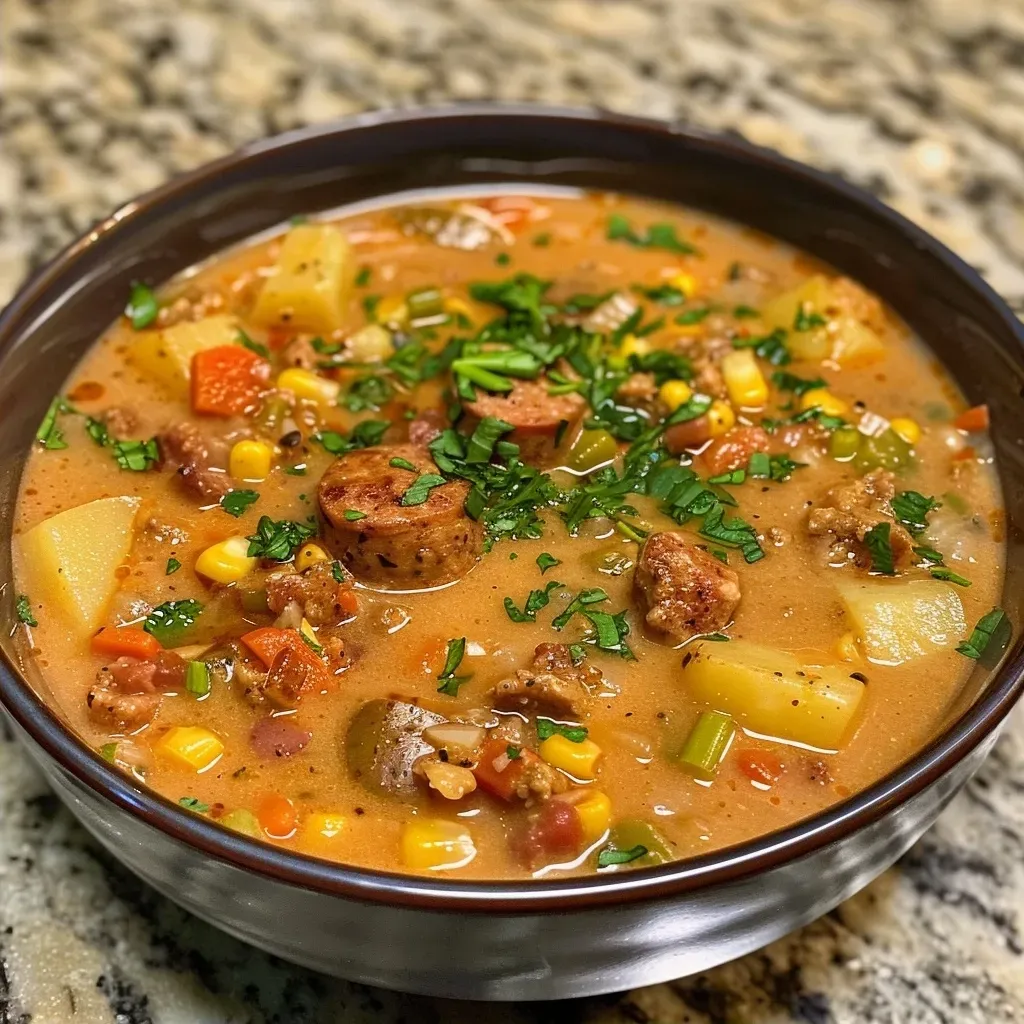
Welcome to a culinary adventure that celebrates the rich flavors of Chorizo Corn Potato Chowder! This delightful dish encapsulates the essence of harvest season, combining savory chorizo, sweet corn, and creamy potatoes into a warm, inviting bowl. As a chef and culinary explorer, I’ve discovered that food is not just about sustenance; it’s about connection, culture, and exploration. So grab your apron and let’s dive into this comforting recipe that promises to bring joy to your table.

Why You’ll Love This Recipe

  • Comfort in a Bowl: This chowder is the ultimate comfort food, perfect for chilly evenings when you crave something hearty and satisfying.
  • Rich and Savory Flavors: The combination of spicy chorizo, sweet corn, and creamy potatoes creates a symphony of flavors that will tantalize your taste buds.
  • Versatile and Adaptable: Whether you’re a meat lover or looking for vegetarian options, this recipe can be easily modified to suit your dietary preferences.
  • Quick and Easy Preparation: With simple ingredients and straightforward steps, you can whip up this chowder in under an hour, making it perfect for weeknight dinners.
  • Perfect for Sharing: This recipe yields a generous amount, making it ideal for family gatherings or cozy dinners with friends.

Ingredients Breakdown

Let’s take a closer look at the ingredients that make this chowder so special. Each component plays a crucial role in building the dish’s flavor profile.

  • 3 cups cauliflower florets: These add creaminess without the calories, creating a delightful base for the chowder.
  • 1 lb chorizo sausage: The star of the dish; its spiciness infuses the chowder with depth and warmth.
  • 2 ½ cups unsweetened almond milk: Keeps the chowder creamy and dairy-friendly, but you can substitute with regular milk if preferred.
  • 1 cup chicken stock: Enhances the overall flavor and provides a rich, savory backdrop.
  • Vegetables: 1 large onion, 1 cup finely diced celery, and 1 cup finely diced carrot contribute to the chowder’s texture and sweetness.
  • 4 ears of corn: Fresh corn kernels bring sweetness and a pop of color, making the dish visually appealing.
  • 1 lbs Yukon gold potatoes: Diced into 1-inch cubes, they add heartiness and a comforting feel to every spoonful.

How to Make Chorizo Corn Potato Chowder

Close-up view of a creamy chorizo, corn, and potato chowder topped with scallions.

Now, let’s get to the fun part—making the chowder! Follow these steps to create a delicious bowl of comfort.


Professional Chef Knife Set

★ Recommended Kitchen Tool

Professional Chef Knife Set

Make this recipe even easier with a quality Professional Chef Knife Set — a must-have kitchen staple!


🛒 Shop This Tool →

As an Amazon Associate, we earn from qualifying purchases.
  1. Prepare the Cauliflower Puree: In a large pot over medium heat, place the cauliflower florets and add 1 cup of chicken stock. Cover with a lid and cook for about 6 minutes or until the florets are very tender. Transfer the cauliflower and cooking liquid to a blender, add 1 ½ cups almond milk, and blend until smooth. Set aside.
  2. Cook the Chorizo: In the same pot, heat 1 tbsp olive oil over medium-high heat. Remove the chorizo from its casing, add it to the pot, and break it into small pieces. Cook until browned, then use a slotted spoon to transfer the chorizo to a bowl, leaving the drippings in the pot.
  3. Saute the Vegetables: Add the minced garlic, diced onion, carrot, and celery to the pot. Season with ½ tsp salt, ½ tsp pepper, and ½ tsp paprika. Sauté for about 5 minutes until the onion is soft.
  4. Combine Ingredients: Add the corn, diced potatoes, 1 cup of almond milk, and 2 cups of chicken stock to the pot. Bring to a boil and cook for approximately 10 minutes until the potatoes are tender, ensuring not to overcook.
  5. Finish the Chowder: Return the browned chorizo to the pot along with the cauliflower puree. Stir to combine and let it simmer for another 1-2 minutes. Adjust the consistency by adding more milk if desired.
  6. Garnish and Serve: Top with 2-3 tbsp chopped scallions and enjoy your culinary creation!

Expert Tips for the Perfect Chowder

  • Use Fresh Ingredients: Fresh corn and good-quality chorizo make a noticeable difference in flavor.
  • Don’t Rush the Puree: Ensure the cauliflower is very tender for a smooth texture.
  • Adjust Spice Levels: If you prefer less heat, opt for a milder chorizo or reduce the amount used.
  • Experiment with Dairy Alternatives: Feel free to try coconut milk or cashew cream for a different flavor profile.
  • Garnish Creatively: Add fresh herbs like cilantro or parsley for a refreshing touch.
  • Make it a Meal: Pair with a crusty bread or a light salad for a complete dining experience.
  • Store Properly: Keep leftovers in an airtight container to maintain freshness.
  • Reheat Gently: To prevent curdling, reheat on low heat, stirring frequently.

Common Mistakes and Troubleshooting

Even the best chefs can face challenges in the kitchen. Here’s how to avoid common pitfalls when making chowder:

  • Overcooking the Potatoes: Keep an eye on the potatoes; they should be tender but not mushy.
  • Inconsistent Texture: Ensure the cauliflower is fully blended to achieve a creamy consistency.
  • Too Much Liquid: If the chowder is too soupy, simmer it uncovered for a few minutes to thicken.

Delicious Variations to Try

If you’re feeling adventurous, consider these variations to give your chowder a unique twist:

  • Vegetarian Delight: Substitute chorizo with smoked paprika and add more vegetables like bell peppers and zucchini.
  • Spicy Twist: Add diced jalapeños or a dash of cayenne pepper to kick up the heat.
  • Seafood Chowder: Incorporate shrimp or crab for a delicious seafood twist.
  • Cheesy Version: Stir in cheese like cheddar or gouda for a rich, creamy finish.

Storage and Make-Ahead Instructions

This chowder is perfect for meal prep! Here’s how to store it:

  • Refrigerate: Allow the chowder to cool completely, then transfer to an airtight container. It can be stored in the fridge for up to 3-4 days.
  • Freeze: For longer storage, freeze the chowder in individual portions for up to 2-3 months. Thaw in the refrigerator overnight before reheating.

Frequently Asked Questions

Here are some common queries about Chorizo Corn Potato Chowder:

  • Can I use frozen corn?: Yes, frozen corn works well in this recipe and is a convenient option.
  • Is there a dairy-free version?: Absolutely! Substitute almond milk with coconut milk or any other plant-based milk.
  • How can I make it spicier?: Add cayenne pepper or use hot chorizo for an extra kick.
  • Can I use other types of potatoes?: Yes, feel free to use red potatoes or sweet potatoes for a different flavor profile.
  • What can I serve with this chowder?: This chowder pairs beautifully with crusty bread, a side salad, or cornbread.
  • How do I reheat leftovers?: Gently reheat on the stove over low heat, stirring frequently to prevent curdling.
  • Can I add beans?: Certainly! Adding white beans can enhance the protein content and add creaminess.
  • What’s the best way to store leftovers?: Store in an airtight container in the refrigerator for up to 3-4 days.

Nutritional Tips and Dietary Adaptations

This chowder can fit various dietary needs:

  • Low-Carb Option: Replace potatoes with more cauliflower for a low-carb, keto-friendly version.
  • Gluten-Free: This recipe is naturally gluten-free; just ensure all ingredients are certified gluten-free.
  • Heart-Healthy: Use turkey chorizo or reduce the amount for a lighter meal without sacrificing flavor.

Equipment Recommendations

To make this chowder, you’ll need:

  • Large Pot: A heavy-bottomed pot is ideal for even cooking.
  • Blender: An immersion blender works well, but a standard blender gives you a smoother puree.
  • Wooden Spoon: Perfect for stirring ingredients without scratching your pot.

Serving Suggestions

When it comes to serving your Chorizo Corn Potato Chowder, consider these ideas:

  • Top with Fresh Herbs: Garnish with chopped parsley or cilantro for a burst of freshness.
  • Serve with Crusty Bread: Pair with a warm baguette or homemade cornbread for a fulfilling meal.
  • Offer a Side Salad: A light salad with citrus dressing complements the chowder nicely.

In conclusion, this Chorizo Corn Potato Chowder is more than just a meal; it’s an experience that brings people together around the table. With its rich flavors, comforting texture, and the warmth of shared moments, this dish is sure to become a family favorite. So, gather your loved ones, savor each delicious bite, and enjoy the stories that unfold over a bowl of this delightful chowder. Happy cooking!

Chorizo, Corn, and Potato Chowder

Prep Time 10 minutes
Cook Time 20 minutes
Total Time 30 minutes
Servings 4 servings
Calories 350
A hearty and flavorful chowder combining chorizo, corn, and potatoes, perfect for a comforting meal.

Ingredients

Vegetables and Broth

  • 3 cups cauliflower florets
  • 1 cup chicken stock
  • 2.5 cups unsweetened almond milk

Cooking Oil and Meat

  • 1 tbsp olive oil
  • 1 lb chorizo sausage

Aromatics and Vegetables

  • 1 clove garlic (minced)
  • 1 large onion (finely diced)
  • 1 cup finely diced celery
  • 1 cup finely diced carrot

Seasonings

  • ½ tsp salt
  • ½ tsp pepper
  • ½ tsp paprika

Corn and Potatoes

  • 4 ears ears corn (approx 4 cups kernels)
  • 1 lbs yukon gold potatoes (peeled and diced into 1 inch cubes)

Additional Liquids and Garnish

  • 2 cups chicken stock
  • 2-3 tbsp chopped scallions

Instructions 

  • Cook cauliflower in 1 cup chicken stock until tender, then blend with almond milk until smooth.
  • Cook chorizo in a pot until browned, then remove and set aside.
  • Sauté garlic, onion, carrot, and celery with seasonings for 5 minutes. Add corn and potatoes, then boil for 10 minutes until tender.
  • Return chorizo and cauliflower puree to the pot, stir, and simmer for 1-2 minutes. Adjust with more milk if needed.
  • Garnish with chopped scallions before serving.

Notes

For a creamier texture, blend the cauliflower longer or add more almond milk as desired.
Calories: 350kcal
Cost: $15
Course: Main Course
Cuisine: American
Keyword: Chorizo

Introducing the Spiced Pecan Bourbon Shaken Espresso: Your New Favorite Drink

Welcome to a delightful journey where the rich, nutty flavors of pecans meet the boldness of bourbon in a refreshing cocktail that will whisk you away with every sip. The Spiced Pecan Bourbon Shaken Espresso is not just a drink; it’s an experience, a cozy hug in a glass, perfect for gatherings or as a spirited pick-me-up. This cocktail combines the warmth of spices with the smoothness of espresso, ensuring that every sip is a taste of adventure.

In this comprehensive guide, we’ll dive deep into the flavors, techniques, and variations of this cocktail, making sure you have everything you need to master it and impress your friends and family. So grab your cocktail shaker, and let’s embark on this flavorful escapade together!

Why You’ll Love This Recipe

This cocktail isn’t just about taste; it’s about all the incredible benefits it brings to your table:


Meal Prep Container Set

★ Recommended Kitchen Tool

Meal Prep Container Set

Make this recipe even easier with a quality Meal Prep Container Set — a must-have kitchen staple!


🛒 Check Price on Amazon →

As an Amazon Associate, we earn from qualifying purchases.
  • Rich Flavor Profile: The combination of spiced pecans, aromatic bitters, and smooth bourbon creates a complex flavor that dances on your palate.
  • Unique and Memorable: This drink will leave a lasting impression at any gathering, making you the star of the show.
  • Easy to Make: With a few simple ingredients and steps, you can whip this cocktail up in no time.
  • Customizable: This recipe allows for variations to suit different tastes, ensuring there’s always something for everyone.
  • Perfect for All Occasions: Whether it’s a cozy night in or a festive gathering, this cocktail fits the bill.

Ingredient Breakdown

Let’s explore the essential ingredients that come together to create this flavor-packed cocktail:

  • 1 cup water: The base for your syrup, essential for dissolving the brown sugar.
  • 1 cup brown sugar: Adds sweetness and a rich, caramel flavor that complements the pecans.
  • 1 cup pecans: The star ingredient, providing a nutty richness and texture.
  • 4 cinnamon sticks: Infuses the syrup with warm, spicy notes.
  • 1 ounce syrup: The sweet, spiced syrup that ties all flavors together.
  • 2 ounces bourbon: The bold spirit that adds depth to your cocktail.
  • 1 shot espresso: A crucial element that brings a coffee kick and balances the sweetness.
  • 1 dash aromatic bitters: Enhances the complexity with herbal notes.
  • 1 dash black walnut bitters: Adds a unique twist and depth of flavor.
  • 1/4 ounce Baileys: For a creamy finish that smooths out the drink.

### Substitutions and Variations

If you don’t have all the ingredients on hand, here are some substitutions you can consider:

  • Bourbon: Use rye whiskey for a spicier kick or a flavored whiskey for a twist.
  • Brown sugar: Maple syrup or honey can be used for a different sweetness profile.
  • Pecans: Walnuts or hazelnuts can work in a pinch, but adjust the flavor accordingly.
  • Espresso: Strong brewed coffee can be a great alternative if you don’t have espresso.

How to Make the Cocktail

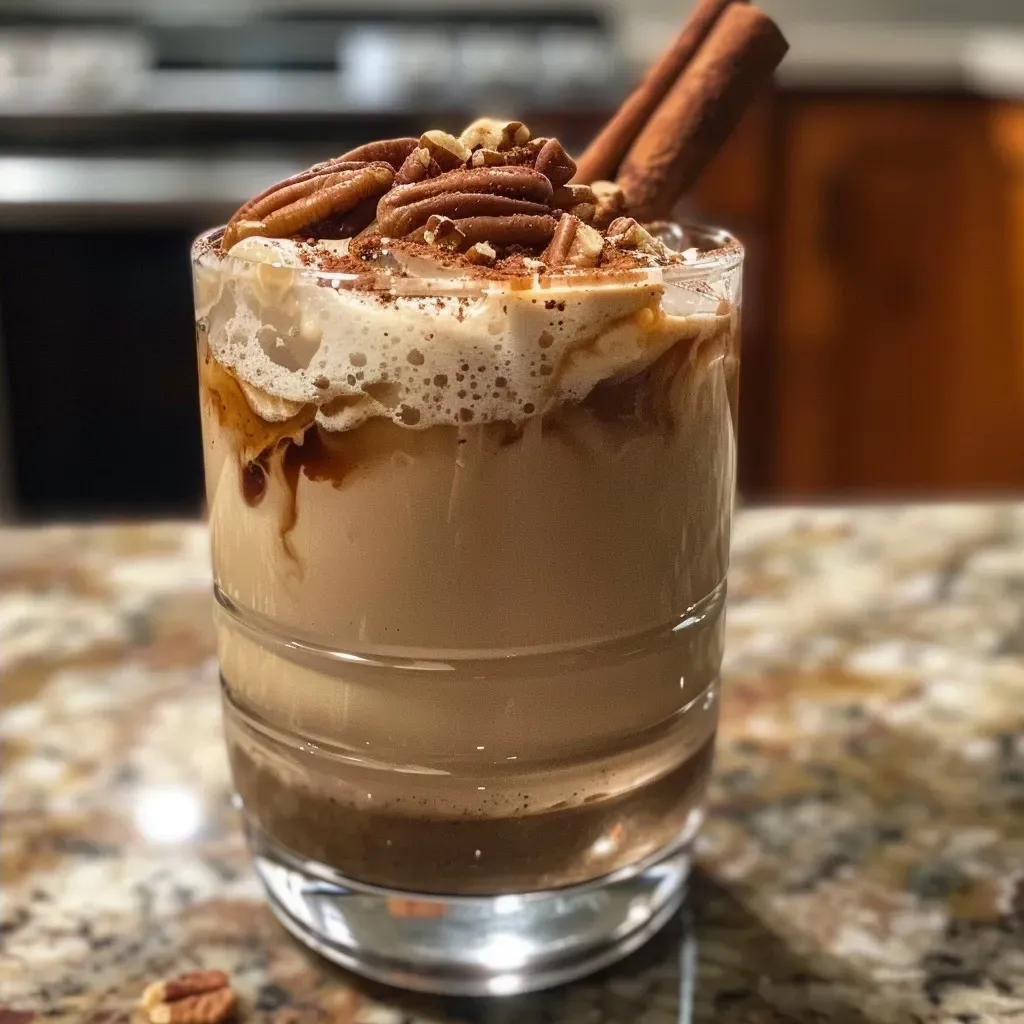
Close-up side view of a Spiced Pecan Bourbon Shaken Espresso in a clear glass.

Follow these steps to create your Spiced Pecan Bourbon Shaken Espresso:

  1. Make the syrup: In a small pot, combine the water, brown sugar, pecans, and cinnamon sticks. Heat over medium until the sugar dissolves and the pecans infuse the syrup, about 20 minutes. Let it cool, then strain.
  2. Prepare the cocktail: In a cocktail shaker, combine 1 ounce of the syrup, 2 ounces of bourbon, 1 shot of espresso, and a dash of bitters. Fill with ice.
  3. Shake well: Shake vigorously until the mixture is chilled and combined.
  4. Serve: Strain into a rocks glass filled with ice.
  5. Add a touch of cream: Top with 1/4 ounce of Baileys and stir gently.
  6. Garnish: Finish with a sprinkle of chopped pecans on top for an extra crunch.

Pro Tips for the Perfect Cocktail

Elevate your cocktail-making skills with these expert insights:

  • Chill your glass: Before pouring, chill your serving glass to keep the drink cool longer.
  • Use fresh ingredients: Freshly brewed espresso and high-quality bourbon make a significant difference in flavor.
  • Adjust sweetness: Taste your syrup before adding it to the shaker. Adjust the sweetness to your preference.
  • Strain well: Ensure you strain the cocktail thoroughly to remove any pecan bits for a smooth texture.
  • Experiment with bitters: Try different bitters to find the perfect flavor combination for your palate.
  • Batch it up: This recipe can easily be multiplied for larger gatherings. Just scale up the ingredients accordingly.
  • Use a cocktail shaker: A good cocktail shaker ensures proper mixing and chilling of your drink.
  • Garnish creatively: Consider adding a cinnamon stick or a whole pecan as a garnish for visual appeal.

Common Mistakes and Troubleshooting

Avoid these common pitfalls to ensure your cocktail is a success:

  • Overheating the syrup: Don’t boil the syrup; simmering is key to infuse flavors without burning.
  • Using cold espresso: For the best flavor, use freshly brewed espresso that’s still warm, but not hot.
  • Skipping the bitters: Bitters are essential for balancing sweetness; don’t skip them!
  • Pecans not chopped: If you don’t chop the pecans, they may not infuse properly into the syrup.

Variations on the Spiced Pecan Bourbon Shaken Espresso

Mix things up with these fun variations:

  • Chocolate Pecan Espresso: Add a splash of chocolate liqueur for a decadent twist.
  • Nutty Maple Bourbon: Substitute maple syrup for brown sugar for a different sweet note.
  • Iced Pecan Espresso: Serve over ice instead of shaken for a refreshing summer version.
  • Spiced Apple Bourbon: Use apple cider instead of water in the syrup for a fall-inspired flavor.

Storage and Make-Ahead Instructions

If you want to prep ahead of time:

  • Store the syrup: Keep the syrup in an airtight container in the refrigerator for up to a week.
  • Make the cocktail base ahead: Mix the bourbon, espresso, and bitters in advance, storing it in the fridge until you’re ready to shake.

Frequently Asked Questions

Here are some common queries about the Spiced Pecan Bourbon Shaken Espresso:

  • Can I use decaf espresso? Yes, decaf espresso works perfectly if you’re looking to avoid caffeine.
  • Is it possible to make this cocktail without alcohol? Absolutely! Replace bourbon with a non-alcoholic whiskey alternative.
  • How can I make this drink sweeter? Add more syrup or consider using flavored syrups for added sweetness.
  • What can I use if I don’t have pecans? Other nuts like walnuts or almonds can be a suitable substitute.
  • Can I make a large batch? Yes! Scale up the ingredients for large gatherings and serve in a pitcher.
  • What’s the best way to serve this cocktail? Serve it in a chilled rocks glass with ice for the best experience.
  • Can I add whipped cream? Yes! A dollop of whipped cream can add an indulgent touch.
  • What food pairs well with this cocktail? Consider serving it with rich desserts like chocolate cake or pecan pie.

Nutrition Tips and Dietary Adaptations

This cocktail can cater to various dietary preferences:

  • Low Sugar: Use a sugar substitute in the syrup to reduce overall sugar content.
  • Dairy-Free: Skip the Baileys or use a dairy-free alternative for a creamy finish.
  • Gluten-Free: Ensure that the bourbon and any bitters used are gluten-free.

Equipment Recommendations

To make this cocktail seamlessly, consider investing in:

  • Cocktail shaker: A quality shaker is essential for mixing and chilling your drink.
  • Fine mesh strainer: Helps remove pecan bits from your cocktail for a smooth finish.
  • Double jigger: For accurately measuring your ingredients.
  • Rocks glasses: Perfect for serving this cocktail in style.

Serving Suggestions

Enhance your cocktail experience with these serving ideas:

  • Pair with appetizers: Serve alongside cheese platters or spiced nuts for a delightful pairing.
  • Garnish creatively: Try adding a cinnamon stick or a sprinkle of nutmeg for visual and flavor enhancement.
  • Offer dessert pairings: This cocktail shines alongside desserts like chocolate tart or pumpkin pie.

Conclusion: Your Adventure Awaits

The Spiced Pecan Bourbon Shaken Espresso is more than just a drink; it’s a celebration of flavors that captures the essence of cozy gatherings and shared moments. With its rich taste, simple preparation, and endless variations, it’s time to embrace this cocktail and make it a staple in your home. So gather your ingredients, shake things up, and let the adventure begin! Cheers to flavorful journeys and unforgettable sips!

Spiced Pecan Bourbon Shaken Espresso

Prep Time 10 minutes
Cook Time 20 minutes
Total Time 30 minutes
Servings 1 glass
Calories 250
A rich and aromatic cocktail combining bourbon, espresso, and spiced pecan syrup for a delightful experience.

Ingredients

Syrup

  • 1 cup water
  • 1 cup brown sugar
  • 1 cup pecans
  • 4 sticks cinnamon sticks

Cocktail

  • 1 ounce syrup
  • 2 ounces bourbon
  • 1 shot espresso
  • 1 dash aromatic bitters
  • 1 dash black walnut bitters
  • 1/4 ounce Baileys

Instructions 

  • Make the syrup by heating water, brown sugar, pecans, and cinnamon sticks until the sugar melts and infuses, then strain and cool.
  • Add the syrup, bourbon, espresso, and bitters to a shaker with ice.
  • Shake well and pour into a glass filled with ice.
  • Top with Baileys, stir gently, and garnish with chopped pecans.

Notes

Use fresh pecans for the best flavor and consider garnishing with additional chopped pecans for presentation.
Calories: 250kcal
Cost: $15
Course: Cocktail
Cuisine: American
Keyword: Bourbon

Unveiling the Creamy Adventure of Banana Almond Smoothies

Welcome to a delightful journey through the world of Banana Almond Smoothies! This creamy concoction is not just a drink; it’s a passport to flavor, culture, and the joy of culinary exploration. As a chef and culinary explorer, I’ve blended the perfect mix of ripe bananas, smooth almond butter, and chilled almond milk to create a refreshing adventure in every sip. Whether you need a quick breakfast, a nourishing snack, or an afternoon pick-me-up, this recipe is your go-to solution.

Why You’ll Love This Recipe

This Banana Almond Smoothie is much more than just a delicious drink. Here are five specific benefits that make it a must-try:

  • Nutrient-Rich: Packed with vitamins and minerals, this smoothie provides essential nutrients that support your health and wellness.
  • Quick & Easy: With just a few ingredients and a blender, you can whip this up in under five minutes—perfect for busy mornings!
  • Customizable: This recipe offers numerous substitution options, allowing you to cater to your dietary needs without sacrificing flavor.
  • Filling & Satisfying: The combination of banana and almond butter creates a creamy texture that keeps you full and energized.
  • Deliciously Versatile: Whether served as a breakfast smoothie or an afternoon treat, it’s a delightful option for any time of day.

Ingredient Breakdown and Substitutions

Let’s dive into the ingredients that make this smoothie a standout and explore some handy substitutions to suit your preferences:


Belgian Waffle Maker

★ Recommended Kitchen Tool

Belgian Waffle Maker

Make this recipe even easier with a quality Belgian Waffle Maker — a must-have kitchen staple!


🛒 See Deals on Amazon →

As an Amazon Associate, we earn from qualifying purchases.
  • 1 large ripe banana: The banana adds natural sweetness and creaminess. If you prefer a thick texture, feel free to use a frozen banana.
  • 1 cup unsweetened almond milk: For a dairy-free option, almond milk is perfect. You can substitute with oat milk or coconut milk if you like.
  • 2 tablespoons almond butter: This adds healthy fats and protein. Peanut butter or cashew butter can also be great alternatives.
  • ½ cup plain Greek yogurt or plant-based yogurt: This boosts the creaminess and adds protein. Use coconut yogurt for a vegan option.
  • 1 tablespoon maple syrup: Adjust sweetness to taste. Honey or agave syrup works well, too!
  • ¼ teaspoon ground cinnamon: This optional spice adds warmth and depth. Feel free to omit it or try nutmeg for a different flavor.
  • ½ cup ice or 1 frozen banana: Ice gives a refreshing chill, while a frozen banana enhances thickness.

How to Make Your Banana Almond Smoothie

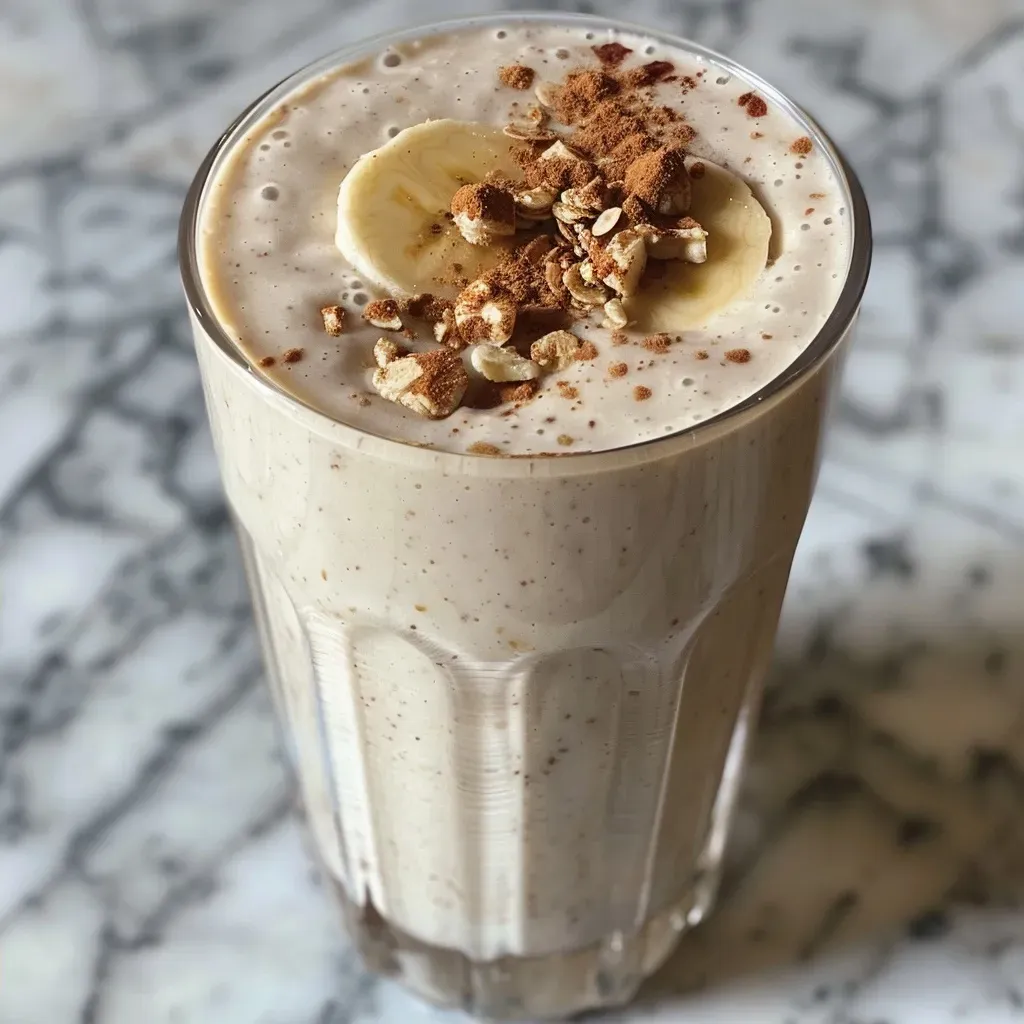
Close-up view of a creamy banana almond smoothie in a glass, garnished with almond slices.

Creating this smoothie is as easy as it gets! Just follow these simple steps:

  1. Add the banana, almond milk, almond butter, yogurt, maple syrup, and cinnamon to your blender.
  2. If you’re using ice, add it, or opt for a frozen banana for an extra thick texture.
  3. Blend on high for 45-60 seconds until smooth, remembering to scrape down the sides if needed.
  4. Give it a taste! Adjust sweetness or thickness by adding more milk or ice, then blend briefly.
  5. Pour into a glass and enjoy immediately for the best flavor and texture.

Pro Tips for the Perfect Smoothie

Here are some expert insights to help you create the ultimate Banana Almond Smoothie:

  • Use ripe bananas: The riper the banana, the sweeter and creamier your smoothie will be.
  • Chill your ingredients: For an even fresher taste, chill your almond milk and yogurt before blending.
  • Don’t over-blend: Just blend until smooth to maintain a creamy texture; over-blending can make it watery.
  • Add greens: Sneak in a handful of spinach or kale for added nutrients without changing the flavor significantly.
  • Experiment with flavors: Try adding a scoop of protein powder or a tablespoon of cocoa powder for a chocolate twist!
  • Watch your sweetness: Start with less maple syrup and add more as needed—some bananas are sweeter than others!
  • Make it a meal: Add oats or chia seeds to turn this smoothie into a more filling meal replacement.
  • Blend in batches: If you’re making multiple servings, blend in batches to keep everything evenly mixed.

Common Mistakes and Troubleshooting

Even the best chefs make mistakes! Here are common pitfalls and how to avoid them:

  • Too thick: If your smoothie is too thick, add a bit more almond milk and blend again.
  • Too sweet: Balance out sweetness by adding a pinch of salt or a squeeze of lemon juice.
  • Not creamy enough: If it’s not creamy enough, ensure you’re using ripe bananas and consider adding more almond butter or yogurt.
  • Using fresh banana: Fresh bananas can lead to a less creamy texture; try frozen for the best results.

Variations to Explore

Once you’ve mastered the basic recipe, consider these delicious variations:

  • Chocolate Banana Almond Smoothie: Add 1 tablespoon of cocoa powder for a rich chocolate flavor.
  • Berry Banana Smoothie: Toss in a handful of frozen berries for a fruity twist.
  • Green Banana Almond Smoothie: Add a handful of spinach or kale for a nutrient boost.
  • Protein-Packed Smoothie: Include a scoop of your favorite protein powder for a post-workout recovery drink.

Storage and Make-Ahead Instructions

This smoothie is best enjoyed fresh, but you can make it ahead of time if needed:

  • Refrigeration: Store in an airtight container in the fridge for up to 24 hours.
  • Freezing: You can freeze the smoothie in an ice cube tray and blend the cubes later for a quick treat.
  • Prepping ingredients: You can prep the ingredients the night before and just blend in the morning for a quick breakfast.

Frequently Asked Questions (FAQ)

Here are answers to some common questions about Banana Almond Smoothies:

  • Can I make this smoothie vegan? Yes! Use plant-based yogurt and maple syrup instead of honey.
  • How can I make this smoothie thicker? Use a frozen banana or add more ice for a thicker consistency.
  • Is this smoothie healthy? Absolutely! It’s packed with nutrients and can be tailored to fit various dietary needs.
  • Can I use other nut butters? Yes! Feel free to substitute almond butter with peanut butter or cashew butter.
  • How long does this smoothie last? It’s best consumed immediately, but can be stored in the fridge for up to 24 hours.
  • Can I add protein powder? Yes! Adding a scoop of protein powder is a great way to enhance the nutritional value.
  • What other fruits can I add? You can add berries, mangoes, or even avocado for a creamy texture.
  • Can I use flavored almond milk? Yes! Vanilla or chocolate almond milk can add an extra layer of flavor.

Nutritional Tips and Dietary Adaptations

Consider these tips to enhance the nutritional profile of your smoothie:

  • For added fiber: Include a tablespoon of chia seeds or flaxseeds.
  • For healthy fats: Add a few slices of avocado for creaminess and nutrition.
  • To reduce sugar: Use unsweetened almond milk and limit the maple syrup.
  • For a protein boost: Add Greek yogurt or protein powder as mentioned earlier.

Essential Equipment Recommendations

To make your Banana Almond Smoothie, you’ll need a few basic kitchen tools:

  • High-Speed Blender: A powerful blender ensures a smooth and creamy texture.
  • Measuring Cups: Accurate measurements help maintain consistency in your smoothie.
  • Spoon or Spatula: Use these to scrape down the sides of the blender for an even blend.

Delicious Serving Suggestions

Transform your Banana Almond Smoothie into a meal or snack with these ideas:

  • Top with granola: Add a sprinkle of granola on top for crunch and added fiber.
  • Serve with fruit: Pair it with fresh fruit like berries or banana slices on the side.
  • Make it a bowl: Pour it into a bowl and top with nuts, seeds, and coconut flakes for a smoothie bowl.

In conclusion, your Banana Almond Smoothie adventure awaits! With its rich flavors, health benefits, and countless variations, this recipe is sure to become a staple in your kitchen. So grab your ingredients, blend away, and savor the creamy delight of this smoothie that’s not just a drink, but a celebration of taste and culture!

Banana Almond Smoothie

Prep Time 5 minutes
Total Time 5 minutes
Servings 1 cup
Calories 250
A creamy and nutritious smoothie perfect for a quick breakfast or snack, combining ripe bananas, almond butter, and Greek yogurt for a delicious boost.

Ingredients

Main ingredients

  • 1 large banana, ripe; peeled
  • 1 cup unsweetened almond milk, chilled
  • 2 tablespoons almond butter, smooth
  • ½ cup plain Greek yogurt or plant-based yogurt
  • 1 tablespoon maple syrup, adjust to taste
  • ¼ teaspoon ground cinnamon, optional for warmth
  • ½ cup ice or use 1 frozen banana for extra thickness

Instructions 

  • Add the banana, almond milk, almond butter, yogurt, maple syrup, and cinnamon to the blender.
  • Add the ice or frozen banana for a thicker texture.
  • Blend on high for 45-60 seconds until smooth.
  • Taste and adjust sweetness or thickness, then blend briefly again.
  • Pour into a glass and enjoy immediately.

Notes

For extra creaminess, use frozen banana instead of ice.
Calories: 250kcal
Cost: $8
Course: Breakfast, Snack
Cuisine: American
Keyword: banana, healthy, Smoothie

Experience the Heart of Italian Comfort: Slow Cooker Chicken Gnocchi Soup

Welcome to a culinary journey that takes you straight to the sun-drenched hills of Tuscany! This Slow Cooker Chicken Gnocchi Soup combines tender chicken, pillowy gnocchi, and a rich broth infused with the flavors of Italy. Perfect for cozy dinners or gatherings with loved ones, this soup warms the soul and tantalizes the taste buds. Grab your slow cooker and let’s dive into this comforting masterpiece that captures the essence of Italian cuisine.

Why You’ll Love This Recipe

  • Effortless Preparation: Just toss all ingredients into the slow cooker and let it do the magic. Perfect for a busy weeknight dinner!
  • Rich Flavors: The combination of sun-dried tomatoes and Italian seasoning creates a depth of flavor that is both comforting and delicious.
  • Customizable: Easily adjust the ingredients to suit your taste or dietary needs, ensuring everyone can enjoy this meal.
  • Healthy Ingredients: Packed with vegetables and lean protein, this soup is a wholesome option that doesn’t compromise on taste.
  • Great for Leftovers: This soup tastes even better the next day, making it a fantastic choice for meal prep!

Ingredient Breakdown

Understanding our ingredients is key to a successful dish. Here’s a detailed look into what you’ll need and some potential substitutions:

  • Olive Oil: Essential for sautéing. You can substitute with avocado oil or butter if preferred.
  • Onion and Celery: These form the flavor base. You can use leeks or carrots as alternatives.
  • Garlic: Always fresh if possible, but garlic powder can be an alternative.
  • Sun-Dried Tomatoes: Adds a sweet and tangy flavor. If unavailable, consider using fresh tomatoes or tomato paste.
  • Chicken Broth: Homemade or store-bought works well. For a vegetarian version, use vegetable broth.
  • Chicken Breasts: Boneless and skinless is ideal, but thighs can make it richer.
  • Mini Gnocchi: Look for store-bought gnocchi; homemade is a treat but takes time. Gluten-free options are available!
  • Heavy Cream: Gives a velvety texture; use half-and-half or coconut milk for lighter versions.
  • Baby Spinach and Fresh Basil: These greens add color and nutrition. Kale or arugula can be used as substitutes.
  • Parmesan Cheese: For topping, this adds a salty kick. Nutritional yeast can be a non-dairy alternative.

Step-by-Step Instructions

Close-up of a creamy bowl of Tuscan Chicken Gnocchi Soup with colorful ingredients.

Now that we have our ingredients ready, let’s walk through the cooking process:


Digital Meat Thermometer

★ Recommended Kitchen Tool

Digital Meat Thermometer

Make this recipe even easier with a quality Digital Meat Thermometer — a must-have kitchen staple!


🛒 See Deals on Amazon →

As an Amazon Associate, we earn from qualifying purchases.
  1. If your slow cooker has a sauté function, turn it on. Add olive oil, diced onion, and celery. Sauté for 3-4 minutes until softened.
  2. Add minced garlic, salt, pepper, Italian seasoning, and sun-dried tomatoes. Stir well to combine.
  3. Transfer the mixture into the slow cooker and add the chicken breasts and chicken broth. Stir to ensure everything is coated.
  4. Cook on low for 7-8 hours or on high for 3-4 hours until the chicken is tender.
  5. After cooking, remove the chicken, shred it with two forks, and return it to the slow cooker.
  6. Add the gnocchi and cook for an additional 30 minutes on high.
  7. Finally, stir in the heavy cream, fresh basil, and spinach. Cook until the spinach is just wilted, about 2-3 minutes.
  8. Serve hot, garnished with grated Parmesan cheese and additional fresh basil if desired.

Pro Tips for the Perfect Soup

  • Don’t Overcook Gnocchi: Add the gnocchi towards the end of the cooking time to prevent them from becoming mushy.
  • Adjust the Consistency: If you prefer a thicker soup, reduce the amount of broth or add more cream.
  • Season as You Go: Taste throughout the cooking process and adjust seasonings to your liking.
  • Storing Leftovers: This soup stores well. Keep in an airtight container in the fridge for up to 4 days.
  • Freezing Tips: You can freeze leftover soup for up to 3 months. Just ensure it’s cooled and in a freezer-safe container.
  • Explore Variations: Add additional vegetables like carrots, mushrooms, or bell peppers for extra nutrition.
  • Use Fresh Herbs: Fresh herbs enhance the flavor significantly. If using dried, remember to adjust the quantity!
  • Experiment with Proteins: Swap chicken for turkey or even sausage for a different flavor profile.

Common Mistakes and Troubleshooting

Even the best cooks make mistakes! Here are common pitfalls to avoid:

  • Overcooking Chicken: Ensure to shred the chicken once it is tender but not dry.
  • Not Enough Flavor: Always taste your broth; you can add more seasoning or a splash of vinegar for brightness.
  • Gnocchi Too Soft: Cook them only as long as needed; they should be tender but still hold their shape.
  • Not Enough Broth: Adjust the quantity based on your preference for a soupy versus creamy texture.

Delicious Variations

Want to mix things up? Here are some fun variations to try:

  • Vegetarian Delight: Replace chicken with chickpeas or lentils and use vegetable broth for a hearty vegetarian soup.
  • Mediterranean Twist: Add olives and feta cheese for a briny flavor that complements the sun-dried tomatoes.
  • Spicy Kick: Include red pepper flakes or diced jalapeños for a spicy version of this comforting soup.
  • Herb-Infused: Experiment with herbs like thyme or rosemary for a different aromatic profile.

Storage and Make-Ahead Instructions

This soup is perfect for meal prep! Here’s how to store and reheat:

  • Refrigeration: Store in an airtight container for up to 4 days. Reheat on the stove over medium heat, stirring occasionally.
  • Freezing: Freeze in individual portions for easy meals. Thaw overnight in the fridge before reheating.
  • Make-Ahead: You can chop vegetables and prep everything a day in advance. Just combine and cook when ready!

Frequently Asked Questions

  • Can I use frozen gnocchi?: Yes! Frozen gnocchi can be added directly to the soup without thawing.
  • How do I make it dairy-free?: Use coconut milk instead of heavy cream and nutritional yeast for a cheesy flavor.
  • What can I serve with this soup?: A crusty loaf of bread or a simple side salad pairs beautifully!
  • Can I add more vegetables?: Absolutely! Feel free to add your favorite vegetables like zucchini or peas.
  • Is this soup gluten-free?: Check your gnocchi for gluten-free options to make this soup suitable.
  • How can I make it spicier?: Add some cayenne pepper or hot sauce to bring the heat!
  • What type of slow cooker should I use?: Any standard slow cooker will work, but one with multiple heat settings is ideal.
  • Can I use chicken thighs instead?: Yes! Chicken thighs will add more richness to the soup.

Nutritional Tips and Dietary Adaptations

This soup can easily fit various dietary needs:

  • Low-Carb Option: Substitute gnocchi with cauliflower rice for a low-carb alternative.
  • High-Protein Variation: Add more chicken or beans to boost protein content.
  • Heart-Healthy Version: Use less cream and replace with low-fat milk or almond milk.

Equipment Recommendations

To create this delicious dish, here are some essential tools:

  • Slow Cooker: A reliable slow cooker is essential for this recipe. Look for one with a sauté feature for ease.
  • Chopping Board: A sturdy board to chop your vegetables safely.
  • Sharp Knives: Quality knives will make prep work faster and safer.
  • Measuring Cups and Spoons: Accurate measurements ensure a delicious outcome!

Serving Suggestions

To enhance your dining experience, consider these serving ideas:

  • Fresh Basil Garnish: A sprinkle of fresh basil on top brightens up the dish.
  • Crusty Bread: Serve with a side of crusty bread for dipping.
  • Salad Pairing: A light salad with vinaigrette complements the richness of the soup.

In conclusion, this Slow Cooker Chicken Gnocchi Soup is not just a meal; it’s a warm embrace from the heart of Italy. Easy to prepare, packed with flavor, and perfect for sharing with loved ones, this recipe is sure to become a family favorite. Gather your ingredients, set your slow cooker, and prepare to savor a taste of Tuscany right in your own kitchen!

Slow Cooker Tuscan Chicken Gnocchi Soup

Prep Time 10 minutes
Cook Time 8 hours
Total Time 8 hours 10 minutes
Servings 6 servings
Calories 350
A hearty and flavorful soup combining tender chicken, gnocchi, and fresh greens, perfect for cozy meals.

Ingredients

Vegetables and aromatics

  • 2 tbsp olive oil
  • 1 white onion white onion (diced)
  • 2 stalks celery (finely diced)
  • 4 cloves garlic (minced)
  • 1 tsp salt
  • 0.25 tsp pepper
  • 2 tsp Italian seasoning
  • 0.5 cup sun-dried tomatoes (drained from oil, chopped)

Broth and chicken

  • 4-5 cups chicken broth (Add more or less to desired consistency)
  • 1 lb boneless skinless chicken breasts

Gnocchi and dairy

  • 16 ounces mini gnocchi
  • 1 cup heavy cream

Greens and herbs

  • 2 cups chopped baby spinach
  • 0.25 cup fresh chopped basil (plus more for topping)

Topping

  • Grated Parmesan cheese (for topping)

Instructions 

  • If your slow cooker has a sauté function, cook onion, celery, and garlic in olive oil for 3-4 minutes. Add sun-dried tomatoes, seasonings, and stir.
  • Add chicken and broth to the slow cooker, then cook on low for 7-8 hours or high for 3-4 hours.
  • Shred the cooked chicken and return to the slow cooker. Add gnocchi and cook for 30 minutes on high.
  • Stir in cream, basil, and spinach; cook until spinach wilts. Serve topped with Parmesan and basil.

Notes

For a richer flavor, use homemade broth and fresh herbs.
Calories: 350kcal
Cost: $15
Course: Soup
Cuisine: Italian
Keyword: Chicken, Gnocchi

Discover the Flavors of Chai Poached Pears

Welcome, fellow culinary explorers! Today, we embark on a delightful journey into the world of Chai Poached Pears. This enchanting dessert transforms humble pears into a sophisticated treat, infused with the warm spices of chai tea. Perfect for impressing guests or enjoying a cozy evening at home, this recipe not only tantalizes your taste buds but also tells a story of culture and connection. Dive in, as we unravel the secrets behind this exquisite dish!

Why You’ll Love This Recipe

Chai Poached Pears are not just a feast for the palate; they offer a multitude of benefits that make them a must-try:

  • Elegant presentation: The vibrant colors and delicate poaching create a stunning visual appeal, perfect for special occasions.
  • Rich in flavor: The combination of chai spices—cinnamon, cardamom, and more—infuses the pears with a warmth that’s simply irresistible.
  • Easy to make: With simple ingredients and straightforward steps, this recipe is accessible even for novice cooks.
  • Health benefits: Pears are a great source of dietary fiber, vitamin C, and antioxidants, making this dessert a healthier choice.
  • Versatile serving options: Serve them warm with vanilla ice cream, or chilled with a dollop of whipped cream—your choice!

Ingredients You’ll Need

Gather the following ingredients for your Chai Poached Pears. Feel free to explore substitutions to suit your taste:


Professional Chef Knife Set

★ Recommended Kitchen Tool

Professional Chef Knife Set

Make this recipe even easier with a quality Professional Chef Knife Set — a must-have kitchen staple!


🛒 See Deals on Amazon →

As an Amazon Associate, we earn from qualifying purchases.
  • 1 litre water: The base for your poaching liquid.
  • 1½ cups (330g) caster (superfine) sugar: Sweetens the poaching syrup.
  • 2 chai tea bags: For that authentic chai flavor.
  • 1 cinnamon stick: Adds warmth and spice.
  • 3 cardamom pods, crushed: Provides a fragrant aroma.
  • 4 medium beurre bosc pears, peeled: The star of the dish, chosen for their firm texture and sweetness.

How to Make Spiced Chai Poached Pears

Side view of Chai Poached Pears in a bowl, glistening and juicy.

Follow these simple steps to create your own Chai Poached Pears:

  • Step 1 – Prep Ingredients: Peel your pears carefully, ensuring you leave the stems intact for presentation.
  • Step 2 – Begin Cooking: In a medium saucepan, combine water, sugar, tea bags, cinnamon, and crushed cardamom. Bring to a boil.
  • Step 3 – Combine Ingredients: Remove tea bags and gently add the pears. Cover with non-stick baking paper and weigh down with a small plate.
  • Step 4 – Finish and Serve: Reduce heat to medium and simmer for 35–40 minutes or until pears are soft. Remove pears, increase heat, and cook syrup for another 20–25 minutes until slightly thickened. Spoon syrup over pears to serve.

Pro Tips for Perfect Results

To ensure your Chai Poached Pears turn out perfectly every time, consider these expert tips:

  • Choose ripe pears: Look for pears that yield slightly to pressure but are not overly soft.
  • Adjust sweetness: If you prefer a less sweet dessert, reduce the sugar in the poaching liquid.
  • Flavor infusion: Allow the pears to cool in the syrup for a few hours or overnight for deeper flavor.
  • Presentation matters: Serve your pears upright for a beautiful display on the plate.
  • Pair wisely: Consider serving with spiced nuts or a cheese platter for a delightful contrast.

Common Mistakes and Troubleshooting

Even the best chefs can encounter challenges. Here’s how to avoid common pitfalls:

  • Pears turning mushy: Ensure you monitor the simmering time closely to maintain the right texture.
  • Overly sweet syrup: Taste your syrup before serving; you can dilute it with a bit of water if needed.
  • Insufficient flavor: If the chai flavor isn’t strong enough, add more spices or let the pears soak longer in the syrup.

Delicious Variations of Chai Poached Pears

Feel free to get creative with these variations to suit your taste buds:

  • Ginger Poached Pears: Add slices of fresh ginger to the poaching liquid for a zesty kick.
  • Caramel Poached Pears: Drizzle with caramel sauce before serving for an indulgent touch.
  • Red wine poached pears: Substitute water with red wine for a richer flavor and color.
  • Spiced citrus version: Add orange zest and juice for a refreshing twist.

Storage and Make-Ahead Instructions

Plan ahead with these storage tips:

  • Refrigeration: Store poached pears in an airtight container in the refrigerator for up to 5 days.
  • Make-ahead: Prepare the pears a day in advance. They taste even better after absorbing the syrup overnight!
  • Freezing: While not ideal, you can freeze poached pears. Thaw in the refrigerator before serving.

Frequently Asked Questions

Here are some common questions related to Chai Poached Pears:

  • Can I use different types of pears? Absolutely! While beurre bosc are ideal, you can use any firm pears like Anjou or Bartlett.
  • Is this recipe vegan-friendly? Yes, simply substitute sugar with a vegan-friendly alternative like agave syrup.
  • How can I make the syrup thicker? Simmer longer after removing the pears to achieve your desired consistency.
  • What spices can I add? Feel free to experiment with star anise or cloves for added depth.
  • Can I serve this dish warm or cold? Both are delicious! Warm with ice cream, or chilled with whipped cream.
  • How long do the poached pears last? They can be stored in the refrigerator for up to a week.
  • Can I use chai concentrate instead of tea bags? Yes, just adjust the sugar accordingly.
  • What’s a good pairing for Chai Poached Pears? Pair them with cheese or nuts for a delightful contrast.

Nutritional Tips and Dietary Adaptations

To cater to various dietary needs, consider these adaptations:

  • Low-sugar option: Use a sugar substitute to lower the glycemic index.
  • Gluten-free: This recipe is naturally gluten-free, making it suitable for those with gluten sensitivities.
  • High-fiber boost: Serve with a sprinkle of flaxseeds or chia seeds for an added nutrient kick.

Essential Equipment Needed

Ensure you have the right tools for the job:

  • Medium saucepan: For poaching the pears.
  • Non-stick baking paper: To cover the pears while cooking.
  • Measuring cups and spoons: For accuracy in your ingredients.
  • Sharp knife and cutting board: For peeling and preparing the pears.

Serving Suggestions

Elevate your Chai Poached Pears with these serving ideas:

  • Ice cream: A scoop of vanilla or chai ice cream complements the flavors beautifully.
  • Whipped cream: A dollop of freshly whipped cream adds a light touch.
  • Nuts: Sprinkle with toasted almonds or walnuts for added texture.
  • Cheese: Pair with a tangy cheese like goat cheese for a savory contrast.

As we conclude this culinary adventure, remember that the beauty of cooking lies in the stories we create and share. With each bite of these enchanting Chai Poached Pears, you not only savor a delightful dessert but also experience a piece of cultural richness. So, let your kitchen be your passport, and may your culinary journeys be filled with flavor and discovery! Happy cooking!

Chai Poached Pears

Prep Time 10 minutes
Cook Time 40 minutes
Total Time 50 minutes
Servings 4 servings
Calories 150
Delight in tender pears infused with aromatic chai spices, perfect as a comforting dessert or elegant treat.

Ingredients

Liquid

  • 1 litre water
  • 1.5 cups caster (superfine) sugar
  • 2 bags chai tea bags
  • 1 stick cinnamon stick
  • 3 pods cardamom pods, crushed
  • 4 medium beurre bosc pears, peeled

Instructions 

  • Combine water, sugar, tea bags, cinnamon, and cardamom in a saucepan; bring to a boil.
  • Remove tea bags, add pears, and weigh down with baking paper and a plate.
  • Simmer for 35–40 minutes until pears are tender.
  • Remove pears, increase heat, and cook syrup until slightly thickened, about 20–25 minutes.
  • Pour syrup over pears and serve.

Notes

Use ripe pears for best flavor and tenderness.
Calories: 150kcal
Cost: $12
Course: Dessert
Cuisine: fusion
Keyword: Pears