Author

Jack

Browsing

Unveiling the Joy of Cranberry Brie Bites

Embark on a culinary adventure with Cranberry Brie Bites, a delightful union of creamy Brie, zesty orange marmalade, and crunchy nuts. These bite-sized wonders are not just a feast for the taste buds; they are a celebration of flavors and connections that bring people together. Perfect for cozy gatherings, festive occasions, or simply indulging your adventurous palate, this recipe encapsulates the spirit of discovery and joy that food brings to our lives.

Let’s dive into why you’ll absolutely love this scrumptious treat!

Why You’ll Love This Recipe

  • Quick and Easy: With simple ingredients and straightforward steps, you can whip these up in no time, making them perfect for unexpected guests.
  • Versatile Flavor Profile: The combination of sweet cranberry sauce and creamy Brie offers a delightful contrast that can suit any palate. You can even experiment with different toppings!
  • Perfect for Any Occasion: Whether it’s a holiday party, a family gathering, or a casual get-together, these bites are sure to impress your guests.
  • Visually Stunning: The vibrant colors of the cranberry sauce and the golden-brown pastry create an appealing presentation that enhances your table setup.
  • Make-Ahead Friendly: You can prepare these bites ahead of time, allowing you more time to enjoy with friends and family when it matters most.

Ingredient Breakdown

To create these delightful bites, gather the following ingredients:


Meal Prep Container Set

★ Recommended Kitchen Tool

Meal Prep Container Set

Make this recipe even easier with a quality Meal Prep Container Set — a must-have kitchen staple!


🛒 Check Price on Amazon →

As an Amazon Associate, we earn from qualifying purchases.
  • 8 ounces of crescent roll dough: This is the base of our bites. You can use puff pastry instead if you prefer a flakier texture.
  • Flour: For rolling out the dough and preventing sticking.
  • 6 ounces of Brie cheese: The star of the show! Don’t forget to keep the rind on for added flavor and texture.
  • ¼ cup of orange marmalade: This adds a sweet citrusy note that complements the tang of the cranberry sauce.
  • ¼ cup of whole cranberry sauce: Use homemade or store-bought—either works beautifully in this recipe.
  • ¼ cup chopped nuts: Pistachios, pecans, or walnuts provide a satisfying crunch.
  • Fresh rosemary or candied orange pieces: For garnish and an extra pop of flavor.

Pro Tips for Perfect Cranberry Brie Bites

Close-up of golden brown Cranberry Brie Bites topped with chopped nuts and rosemary.

To elevate your culinary game, consider these expert insights:

  • Keep It Cold: Ensure your dough is cold when handling it. This helps in achieving a flaky texture once baked.
  • Don’t Overfill: A teaspoon of the orange-cranberry mixture per bite is ideal. Too much can cause overflow during baking.
  • Experiment with Cheeses: If you want a twist, try using goat cheese or a sharp cheddar to diversify the flavor.
  • Season the Nuts: A sprinkle of sea salt or even a touch of cinnamon on your chopped nuts can add an unexpected layer of flavor.
  • Use Fresh Ingredients: Fresh rosemary or seasonal fruits can enhance the overall taste and visual appeal.
  • Watch the Baking Time: Every oven is different, so keep an eye on your bites to avoid over-baking.
  • Make It Gluten-Free: Switch to gluten-free crescent dough or puff pastry for a delicious alternative.
  • Try Different Sauces: Instead of cranberry sauce, consider using a cranberry orange sauce for a refreshing twist.

Avoid Common Mistakes

Even the best cooks can run into issues. Here are some common pitfalls to avoid:

  • Ignoring the Rind: Leaving the rind on the Brie is crucial for maintaining its shape and flavor during baking.
  • Skipping the Grease: Always grease your muffin pan well to prevent sticking; nobody wants to lose half their bite!
  • Not Preheating the Oven: Baking in a properly preheated oven is essential for achieving that golden perfection.
  • Overstretching the Dough: Be gentle when rolling out your dough. You want it to be even, but don’t overdo it.
  • Forgetting to Chill the Ingredients: If your ingredients are too warm, it can affect the final texture.

Variations to Try

Feel free to get creative! Here are some variations you can try:

  • Cranberry Jalapeño: Add sliced jalapeños to the cranberry mixture for a spicy kick.
  • Nutty Delight: Incorporate crushed almonds or hazelnuts for a different nutty flavor.
  • Sweet and Savory: Mix in some diced apples or pears with the cranberry mixture for added sweetness.
  • Maple Glaze: Drizzle some maple syrup over the finished bites for a sweet finish.

Storage and Make-Ahead Instructions

Planning ahead? Here’s how to store and prepare your Cranberry Brie Bites:

  • Refrigerate: Store leftover bites in an airtight container in the refrigerator for up to 3 days.
  • Freezing: These bites can be frozen before baking. Just assemble them and freeze on a baking sheet, then transfer to a freezer bag. Bake from frozen, adding a few extra minutes to the cooking time.
  • Make Ahead: You can prepare the filling and dough ahead of time, just assemble and bake when ready to serve.

Comprehensive FAQ

Have questions? Here are some common inquiries:

  • Can I use different cheeses? Absolutely! Experiment with other cheeses like goat cheese or cheddar.
  • How long do these bites last? They are best enjoyed fresh but can be refrigerated for up to 3 days.
  • Can I use store-bought cranberry sauce? Yes, store-bought works just fine—just ensure it’s high quality.
  • Is this recipe suitable for vegetarians? Yes, all ingredients are vegetarian-friendly.
  • What can I serve with these bites? Pair them with a light salad, or serve them alongside a charcuterie board.
  • Can I make these gluten-free? Yes, just use gluten-free crescent dough or puff pastry.
  • How can I make them healthier? Opt for reduced-fat cheese and use less sugar in the cranberry sauce.
  • What’s the best way to reheat leftovers? Reheat in the oven to maintain crispiness, about 5-10 minutes at 350°F.

Nutritional Tips and Dietary Adaptations

Keeping an eye on your nutritional intake? Here are some tips:

  • Lower Fat: Use light Brie or a vegan cheese alternative to reduce fat content.
  • Less Sugar: Choose unsweetened cranberry sauce and natural orange marmalade to cut down on sugar.
  • Incorporate Whole Grains: Try whole grain crescent rolls or puff pastry for added fiber.

Equipment Recommendations

To prepare these delicious bites, you’ll need:

  • 24-count mini muffin pan: Perfect for shaping and baking your bites.
  • Rolling pin: Essential for rolling out dough evenly.
  • Sharp knife: For cutting the Brie into perfect squares.
  • Mixing bowls: For combining your cranberry and orange mixture.

Serving Suggestions

Once baked, serve these delightful bites warm, garnished with fresh rosemary or candied orange pieces for that extra flair. They pair beautifully with:

  • Sparkling wine: The bubbles enhance the flavors wonderfully.
  • Cheese platters: Create a stunning cheese board with assorted cheeses, fruits, and nuts.
  • Seasonal salads: A crisp salad with vinaigrette balances the richness of the Brie.

In conclusion, Cranberry Brie Bites are more than just an appetizer; they are a culinary passport to delightful gatherings and heartwarming connections. With their rich flavors and delightful textures, they embody the essence of what it means to enjoy food together. So grab your apron, gather your ingredients, and let the adventure begin!

Cranberry Brie Bites

Prep Time 15 minutes
Cook Time 12 minutes
Total Time 27 minutes
Servings 24 pieces
Calories 150
These elegant Cranberry Brie Bites are perfect for entertaining, combining creamy cheese with sweet cranberry and orange marmalade in a flaky pastry.

Ingredients

Dough

  • 8 ounces Tube crescent roll dough
  • Flour Flour for rolling out the dough (for dusting surface)

Cheese

  • 6 ounces Brie cheese

Sauce and Marmalade

  • ¼ cup Orange marmalade
  • ¼ cup Whole cranberry sauce

Nuts

  • ¼ cup Chopped pistachios, pecans or walnuts

Garnish

  • Fresh rosemary or candied orange pieces (for garnish)

Instructions 

  • Preheat oven to 375°F and grease a 24-mini muffin pan.
  • Cut brie into 1-inch squares and refrigerate.
  • Mix orange marmalade and cranberry sauce; set aside.
  • Roll out crescent dough, cut into 24 squares, and place in muffin cups.
  • Top with brie, a teaspoon of sauce mixture, chopped nuts, and garnish.
  • Bake for 10-13 minutes until golden; cool slightly and serve warm.

Notes

Use a variety of nuts for different flavors and textures.
Calories: 150kcal
Cost: $15
Course: Appetizer
Keyword: brie, cranberry, Party

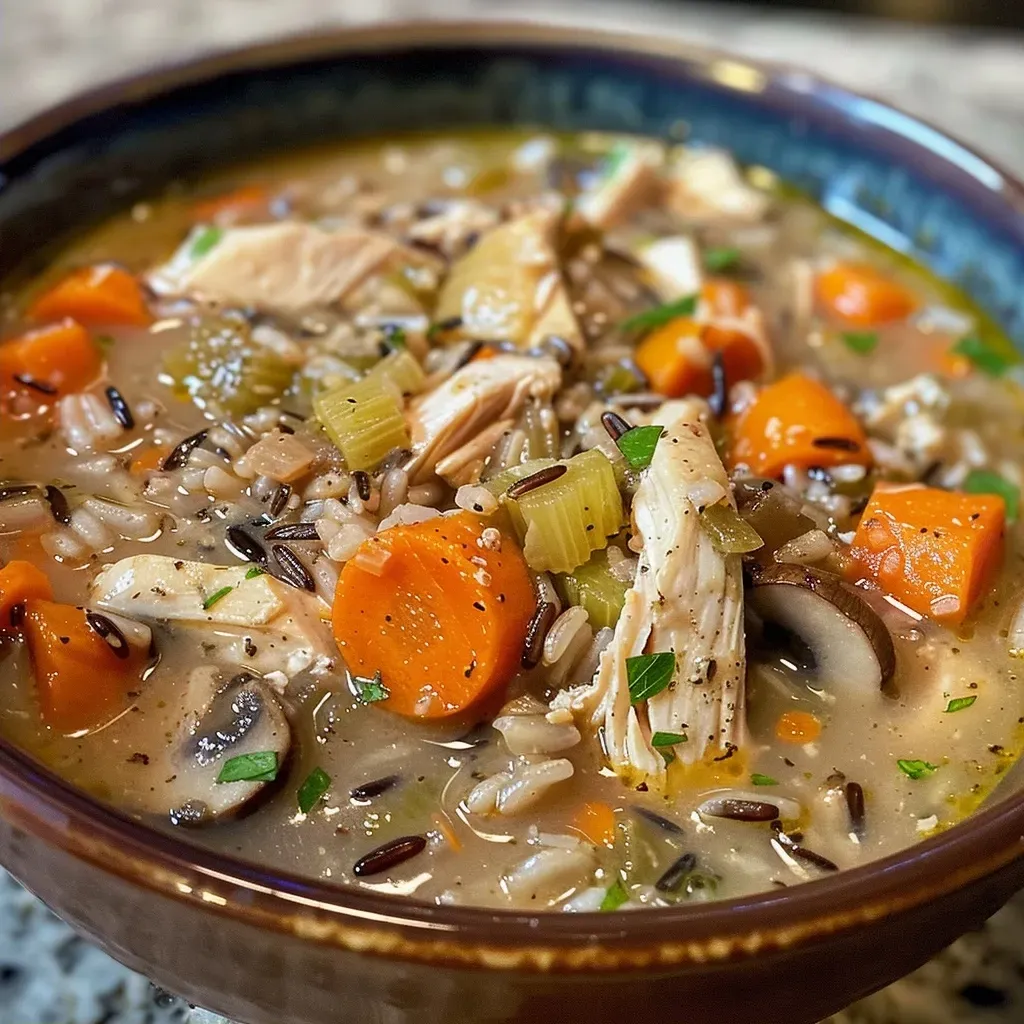
Welcome to a culinary adventure that celebrates the flavors of comfort food! This Slow Cooker Chicken and Wild Rice Soup is more than just a recipe; it’s a warm embrace on a chilly evening, a bowl full of memories, and a passport to the rich tapestry of culinary traditions. Whether you’re looking for a nourishing meal after a long day or a dish that brings family and friends together, this soup promises to deliver on all fronts. Join me as we explore the heartwarming essence of this delightful dish.

Why You’ll Love This Recipe

This soup is not just delicious; it’s packed with benefits that make it a must-try:

  • Comfort in a Bowl: This soup embodies warmth and coziness, perfect for chilly days.
  • Easy and Convenient: With a slow cooker, you can set it and forget it, allowing you to enjoy your day while it cooks.
  • Nutrient-Rich Ingredients: Packed with vegetables and lean protein, it’s a wholesome meal that feels indulgent.
  • Flavorful Depth: The combination of wild rice, chicken, and aromatic herbs creates a rich and hearty flavor profile.
  • Versatile and Adaptable: Easily modify the recipe with your favorite ingredients or dietary needs.

Ingredients You’ll Need

Gathering quality ingredients is the first step to creating a truly amazing soup. Here’s what you’ll need:


Nonstick Grill Pan

★ Recommended Kitchen Tool

Nonstick Grill Pan

Make this recipe even easier with a quality Nonstick Grill Pan — a must-have kitchen staple!


🛒 View on Amazon →

As an Amazon Associate, we earn from qualifying purchases.
  • 1 1/2 pounds boneless skinless chicken breasts: The main protein source that will become tender and juicy.
  • Kosher salt and freshly ground black pepper: Essential for seasoning; adjust to your taste.
  • 6 cups chicken stock: Use homemade or store-bought for a flavorful base.
  • 1 cup wild rice: This hearty grain adds texture and a nutty flavor.
  • 3 cloves garlic (minced): Aromatic and flavorful, garlic enhances the overall taste.
  • 1 onion (diced): Provides sweetness and depth when cooked.
  • 3 carrots (peeled and diced): Adds color, sweetness, and nutrition.
  • 3 stalks celery (diced): Contributes crunch and flavor.
  • 1/2 teaspoon dried thyme: A classic herb that pairs beautifully with chicken.
  • 1/2 teaspoon dried rosemary: Adds an aromatic touch to the soup.
  • 2 bay leaves: Infuses the soup with a subtle flavor.
  • 1 pound cremini mushrooms (thinly sliced): Earthy and rich, these mushrooms enhance the soup’s texture.
  • 1/4 cup unsalted butter: For creating a creamy base.
  • 1/4 cup all-purpose flour: To thicken the soup.
  • 1 cup milk: Adds a creamy richness to the broth.
  • 1 cup half and half: For an ultra-creamy texture—feel free to adjust based on your preference.
  • 2 tablespoons chopped fresh parsley: For garnish, adding a pop of color and freshness.

Step-by-Step: How to Make Slow Cooker Chicken and Wild Rice Soup

Now that you have everything you need, let’s dive into the process of creating this delightful soup:

Step 1: Prepare the Chicken

Season the chicken breasts with salt and pepper to taste. Place them into a 6-quart slow cooker.

Step 2: Add the Veggies and Stock

Stir in the chicken stock, wild rice, garlic, onion, carrots, celery, thyme, rosemary, and bay leaves. Adjust seasoning with salt and pepper as needed. Cover and cook on low heat for 6-8 hours.

Step 3: Incorporate the Mushrooms

About 30 minutes before serving, add the cremini mushrooms to the slow cooker.

Step 4: Create the Creamy Base

In a separate saucepan, melt butter over medium heat. Whisk in the flour until lightly browned, about 1 minute. Gradually whisk in the milk and half and half, cooking while whisking until slightly thickened, about 4-5 minutes. Season with salt and pepper to taste.

Step 5: Combine and Serve

Remove the chicken from the slow cooker and shred it using two forks. Stir the shredded chicken and creamy mixture back into the slow cooker. If the soup is too thick, add more half and half until you reach your desired consistency. Serve immediately, garnished with fresh parsley if desired.

Pro Tips for Perfecting Your Slow Cooker Chicken and Wild Rice Soup

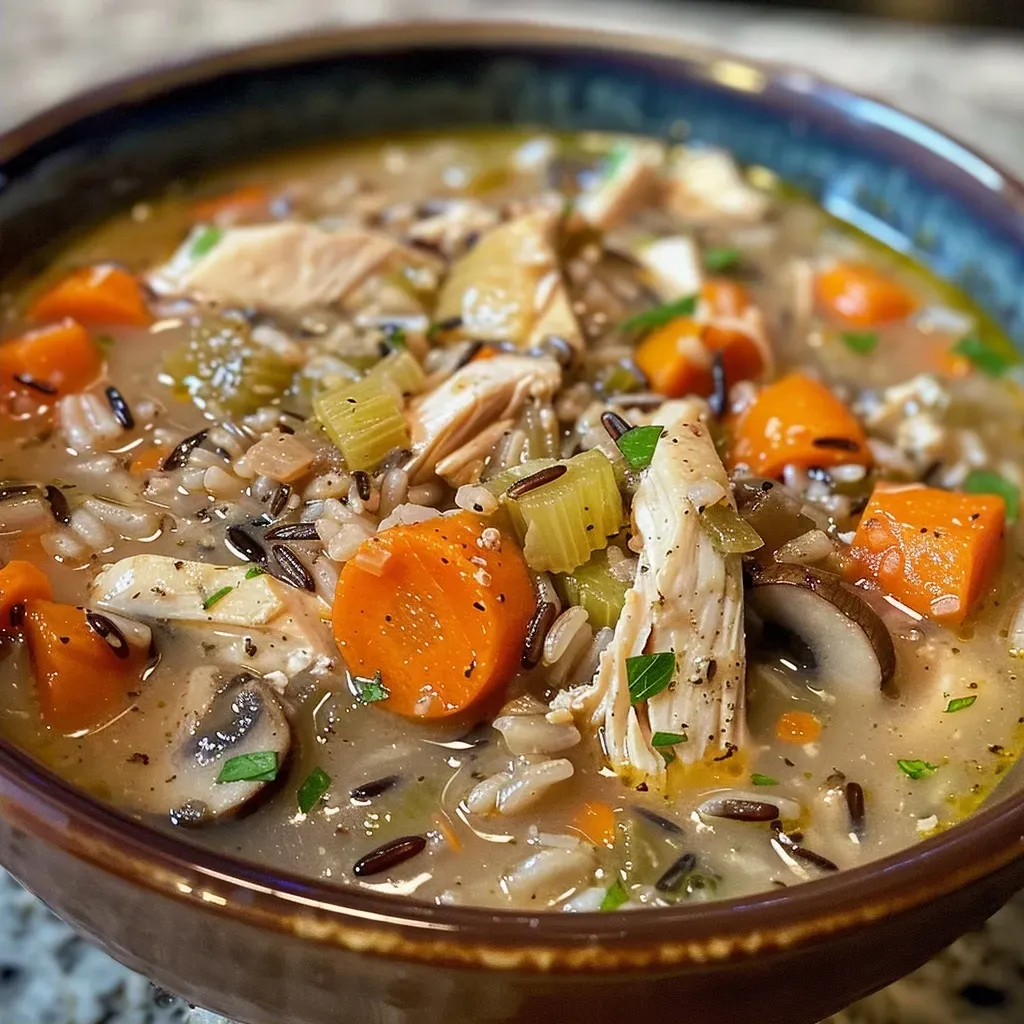
Close-up view of a bowl of Slow Cooker Chicken and Wild Rice Soup with visible ingredients.

To elevate your soup-making game, here are some expert insights:

  • Use Chicken Thighs: For a richer flavor, replace chicken breasts with thighs. They remain juicy and tender.
  • Adjust the Rice: Depending on the type of wild rice used, cooking times may vary. Check package instructions for best results.
  • Don’t Skip the Cream: The creamy base adds a luxurious texture; don’t hesitate to adjust the amount of half and half for your preference.
  • Fresh Herbs Matter: Opt for fresh parsley for garnishing; it brightens up the flavor.
  • Let It Sit: Allow the soup to sit for a few minutes after cooking to enhance the flavors.
  • Serve with Bread: Pair with crusty bread or crackers for a complete meal experience.
  • Make it Ahead: This soup makes for great leftovers; flavors deepen as it sits.
  • Keep It Warm: If serving later, keep the soup on warm in the slow cooker to maintain temperature and consistency.

Common Mistakes and Troubleshooting

Even the best chefs make mistakes! Here’s how to avoid common pitfalls:

  • Overcooking the Chicken: If the chicken is dry, it may have been overcooked. Keep an eye on cooking times.
  • Too Thick? Add Liquid: If the soup thickens too much, simply whisk in additional chicken stock or half and half.
  • Insufficient Seasoning: Always taste and adjust seasoning before serving; every palate is different!
  • Rice Not Cooked?: If the wild rice is still hard, allow it to cook longer; some varieties take longer to soften.

Variations to Try

Feel free to get creative with your soup! Here are some variations you can explore:

  • Vegetarian Version: Swap chicken for chickpeas or tofu and use vegetable stock.
  • Mushroom Medley: Experiment with different types of mushrooms like shiitake or portobello for added depth.
  • Spicy Kick: Add diced jalapeños or a dash of cayenne pepper for a spicy twist.
  • Herb-Infused: Try using fresh thyme or dill instead of dried herbs for a fresh flavor burst.

Storage and Make-Ahead Instructions

This soup is perfect for meal prep and leftovers. Here are some tips for storing:

  • Refrigerate: Keep leftovers in an airtight container in the fridge for up to 4 days.
  • Freeze: Store in freezer-safe containers for up to 3 months. Thaw overnight in the fridge before reheating.
  • Reheat Gently: When reheating, do so on low heat to prevent the soup from becoming too thick or overcooked.

Frequently Asked Questions (FAQs)

Here are answers to some common queries about this comforting dish:

  • Can I use brown rice instead of wild rice? Yes, but the cooking time will vary; brown rice typically takes longer to cook.
  • Is this soup gluten-free? To make it gluten-free, use cornstarch instead of flour for the creamy base.
  • How do I make it dairy-free? Substitute the milk and half and half with unsweetened almond or coconut milk.
  • Can I prepare this soup in advance? Absolutely! It can be made a day ahead and tastes even better after the flavors meld.
  • How spicy is this soup? This recipe is mild; feel free to add more spices if you prefer heat.
  • What side dishes pair well with this soup? Consider serving it with a fresh salad or a warm loaf of bread.
  • Can I add other vegetables? Certainly! Feel free to add peas, bell peppers, or corn for more variety.
  • What’s the best way to store leftovers? Store in an airtight container and refrigerate for up to 4 days.

Nutritional Tips and Dietary Adaptations

This soup can easily be adapted to fit various dietary needs:

  • Low-carb option: Substitute wild rice with cauliflower rice for a low-carb version.
  • High-protein: Add beans or lentils for an extra protein boost.
  • Vegan: Swap chicken for plant-based proteins and use vegetable stock and dairy-free cream.
  • Low-sodium: Opt for low-sodium chicken stock and limit added salt.

Equipment Recommendations

To make this soup, you’ll need:

  • 6-quart slow cooker: Essential for cooking the soup evenly.
  • Sharp knife: For easy vegetable prep.
  • Cutting board: To keep your workspace tidy and organized.
  • Whisk: For creating the creamy base without lumps.

Serving Suggestions

To enhance your dining experience, consider these serving ideas:

  • Fresh Bread: Serve with crusty sourdough or garlic bread for dipping.
  • Salad: A simple green salad adds freshness and balance to the meal.
  • Crackers: Pair with your favorite crackers for a delightful crunch.
  • Cheese: A sprinkle of grated Parmesan or a dollop of sour cream can elevate the flavors.

In conclusion, this Slow Cooker Chicken and Wild Rice Soup is not just a meal; it’s an experience that brings the warmth of home and the joy of culinary exploration to your table. So roll up your sleeves, gather your ingredients, and embark on this delicious journey. I can’t wait to hear about your own adventures with this recipe. Bon appétit!

Slow Cooker Chicken and Wild Rice Soup

Prep Time 15 minutes
Cook Time 6 hours 30 minutes
Total Time 6 hours 45 minutes
Servings 6 servings
Calories 350
A hearty and comforting soup combining tender chicken, wild rice, and vegetables, perfect for a cozy meal.

Ingredients

Protein

  • 1.5 pounds boneless skinless chicken breasts
  • 6 cups chicken stock
  • 1 cup wild rice
  • 3 cloves garlic (minced)
  • 1 onion diced onion
  • 3 carrots peeled and diced carrots
  • 3 stalks celery (diced)
  • 0.5 teaspoon dried thyme
  • 0.5 teaspoon dried rosemary
  • 1 pound cremini mushrooms (thinly sliced)
  • 0.25 cup unsalted butter
  • 0.25 cup all-purpose flour
  • 1 cup milk
  • 1 cup half and half
  • 2 tablespoons chopped fresh parsley

Instructions 

  • Season chicken with salt and pepper, then place into slow cooker with remaining ingredients except mushrooms.
  • Cook on low for 6-8 hours; add mushrooms in last 30 minutes.
  • Shred cooked chicken, then prepare a roux with butter and flour in a saucepan.
  • Whisk in milk and half and half, cook until slightly thickened, then stir into slow cooker.
  • Adjust thickness with more half and half if needed, then serve garnished with parsley.

Notes

For a creamier soup, add more half and half to reach desired consistency.
Calories: 350kcal
Cost: $15
Course: Soup
Cuisine: American
Keyword: Chicken, wild rice

Welcome to an unforgettable culinary journey where we uncover the rich, sweet delights of Maple Pecan Cinnamon Rolls. These rolls are not merely a treat but a celebration of flavors that bring warmth and joy to any table. Let’s dive into the world of baking, exploring the perfect blend of warm spices, rich maple syrup, and crunchy pecans, all wrapped in soft, pillowy dough. Whether you’re enjoying them for breakfast, dessert, or a cozy gathering with friends, these rolls are sure to become a beloved staple in your kitchen.

Why You’ll Love This Recipe

Here are just a few reasons why this Maple Pecan Cinnamon Roll recipe will capture your heart and taste buds:

  • Irresistible Flavor: The combination of maple syrup and toasted pecans creates a delightful taste that’s truly unique.
  • Soft and Fluffy Texture: The dough rises beautifully, yielding rolls that are light and airy, with a gooey filling that’s simply heavenly.
  • Perfect for Any Occasion: These rolls are versatile enough for breakfast, brunch, or a sweet treat after dinner.
  • Easy to Make: Even if you’re a beginner, this recipe is straightforward and guides you every step of the way.
  • Make-Ahead Friendly: Prepare the dough the night before, so you can wake up to the aroma of freshly baked cinnamon rolls.

Ingredient Breakdown

Understanding the ingredients is key to achieving the perfect Maple Pecan Cinnamon Rolls. Here’s what you’ll need:


5-Speed Electric Hand Mixer

★ Recommended Kitchen Tool

5-Speed Electric Hand Mixer

Make this recipe even easier with a quality 5-Speed Electric Hand Mixer — a must-have kitchen staple!


🛒 View on Amazon →

As an Amazon Associate, we earn from qualifying purchases.
  • All-Purpose Flour: 4 1/2 to 5 cups, essential for structure and texture. You can substitute with whole wheat flour for a healthier option.
  • Granulated Sugar: 1/3 cup, adds sweetness. You can use coconut sugar for a lower glycemic index alternative.
  • Instant Yeast: 2 packets (about 4 1/2 tsp), for that perfect rise. Active dry yeast can be used, but it requires proofing.
  • Salt: 1 tsp, enhances flavor. Sea salt is a great option for a more robust taste.
  • Water: 1 1/2 cups, must be warm (about 110°F) to activate the yeast.
  • Unsalted Butter: 6 tbsp and 1/4 cup at room temperature, for richness and flavor.
  • Large Egg: 1, contributes to the dough’s richness.
  • Light Brown Sugar: 1/2 cup, adds moisture and a hint of caramel flavor.
  • Cinnamon: 1 tbsp, the classic spice that makes cinnamon rolls irresistible.
  • Pure Maple Syrup: 2 tbsp, the star ingredient that gives these rolls their unique sweetness.
  • Chopped Pecans: 1 cup, toasted and chopped for crunch.
  • Powdered Sugar: 1 cup, for the icing. You can substitute with a sugar alternative for a healthier icing.
  • Heavy Cream or Milk: 2 tbsp, used to thin the icing. Non-dairy milk works well too.
  • Water: 1 tbsp (optional), to adjust icing consistency.

Pro Tips for Perfect Maple Pecan Cinnamon Rolls

To ensure your Maple Pecan Cinnamon Rolls turn out perfectly, here are some expert insights:

  • Temperature Matters: Make sure your ingredients are at room temperature, especially the butter and egg, for better mixing.
  • Knead Well: Knead the dough until it’s smooth and elastic; this creates the perfect texture for the rolls.
  • Don’t Rush the Rise: Allow the dough to rise until it doubles in size; this is crucial for fluffy rolls.
  • Use Fresh Ingredients: Check the expiration dates on your yeast and flour for the best results.
  • Perfectly Spaced Rolls: When placing the rolls in the baking dish, ensure they have enough space to puff up.
  • Experiment with Fillings: Feel free to add raisins, chocolate chips, or dried fruits for a twist on the classic recipe.
  • Store Correctly: Keep any leftovers in an airtight container to maintain freshness.
  • Test for Doneness: The rolls should be golden brown and sound hollow when tapped.

Common Mistakes and Troubleshooting

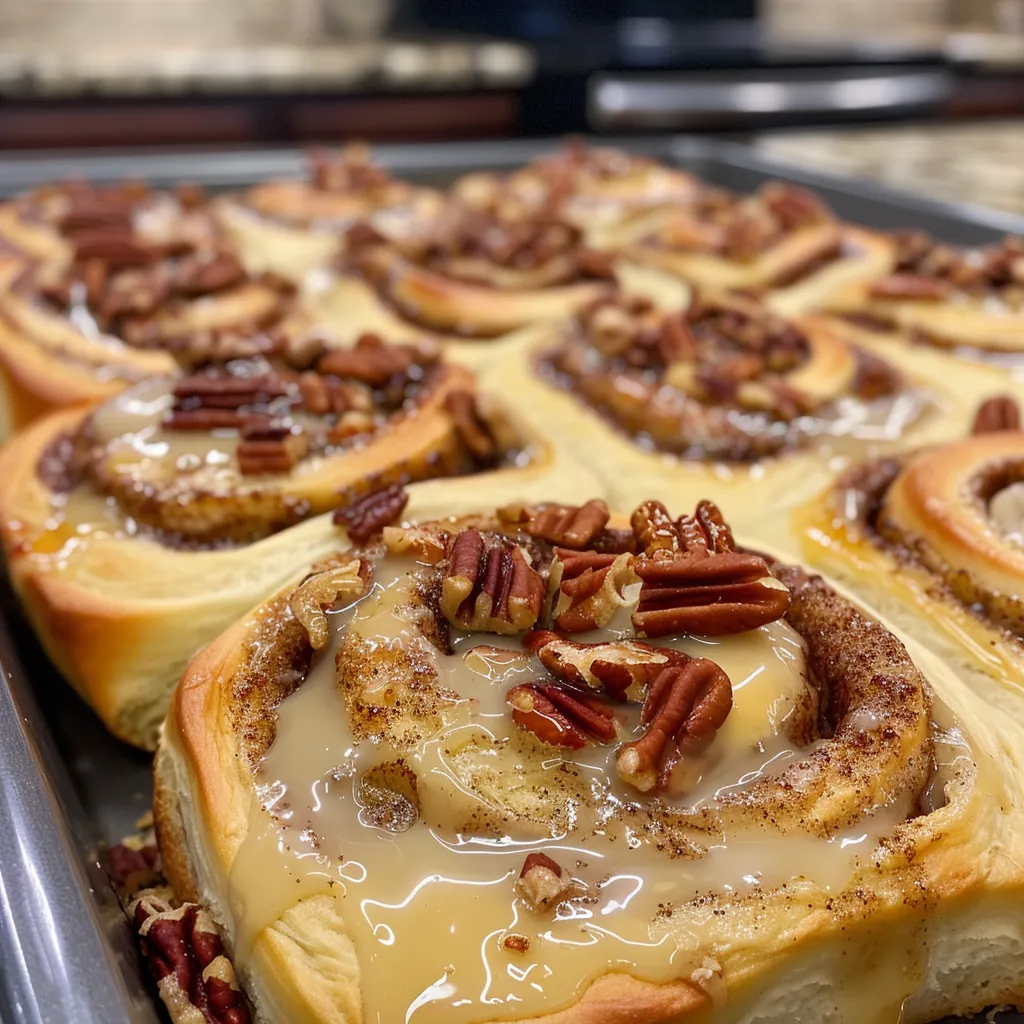
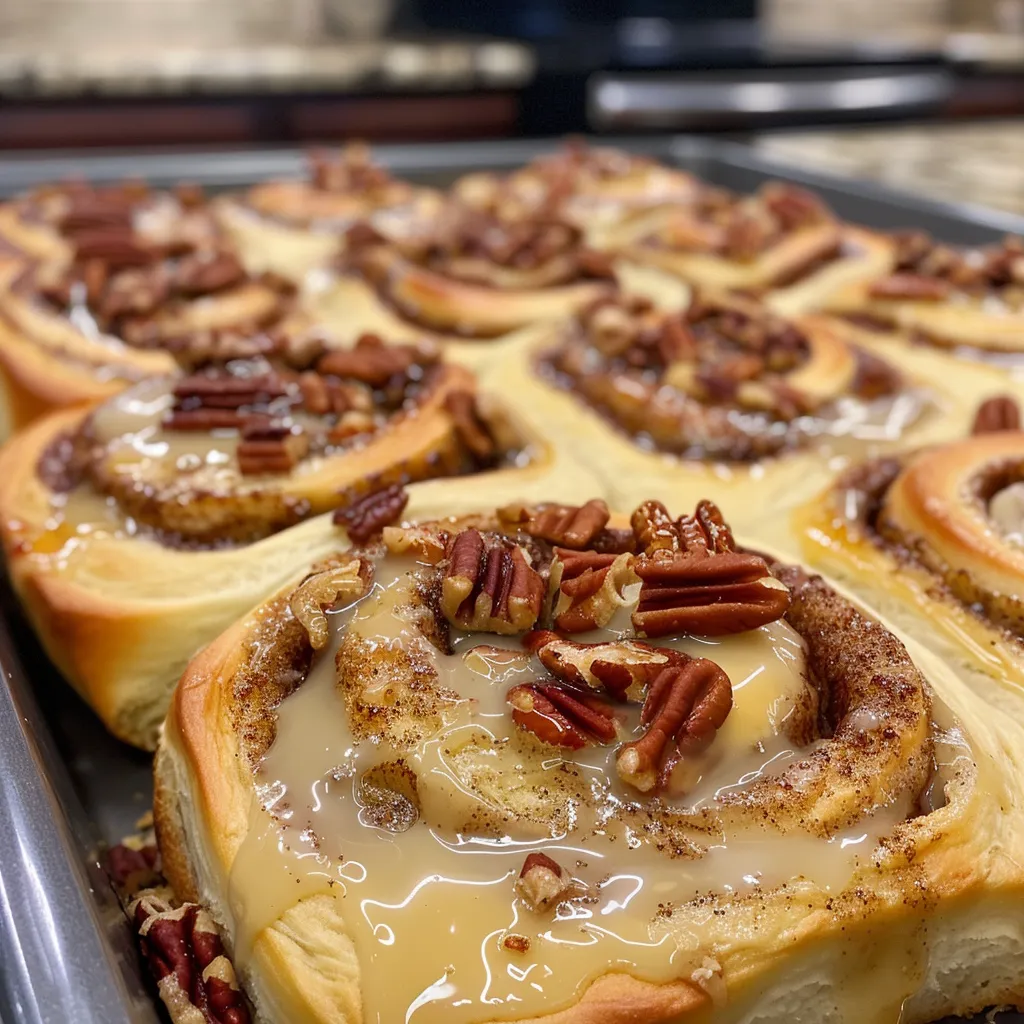
Close-up side view of golden-brown Maple Pecan Cinnamon Rolls drizzled with icing.

Even the most seasoned bakers can run into problems. Here’s how to avoid common pitfalls:

  • Dough is Too Sticky: If your dough is sticky, gradually add more flour, a tablespoon at a time, until it comes together.
  • Rolls Won’t Rise: Ensure your yeast is active; if it doesn’t foam when mixed with warm water, it’s likely expired.
  • Dry Rolls: Avoid over-baking; keep an eye on them during the last few minutes of baking.
  • Filling Leaks Out: Ensure the filling is spread evenly and not too close to the edges of the dough.
  • Too Much Cinnamon: Balance the cinnamon with sugar; too much can overpower the flavor.

Delicious Variations

Spice up your Maple Pecan Cinnamon Rolls with these delightful variations:

  • Apple Cinnamon Rolls: Add diced apples to the filling for a fruity twist.
  • Pumpkin Spice Rolls: Mix in pumpkin puree and pumpkin spice for a fall-inspired treat.
  • Chocolate Pecan Rolls: Incorporate chocolate chips into the filling for a decadent flavor.
  • Maple Walnut Rolls: Substitute walnuts for pecans to change up the nutty flavor.

Storage and Make-Ahead Instructions

Want to enjoy your rolls fresh out of the oven but short on time? Here’s how to prepare ahead:

  • Overnight Method: After shaping, cover the rolls with plastic wrap and refrigerate overnight. Bake them straight from the fridge in the morning.
  • Freezing Instructions: Freeze unbaked rolls on a baking sheet, then transfer them to a bag. When ready to bake, let them rise before baking.
  • Storing Baked Rolls: Keep rolls in an airtight container at room temperature for up to 3 days, or freeze for longer storage.

Frequently Asked Questions

Let’s tackle some common questions about Maple Pecan Cinnamon Rolls:

  • Can I use whole wheat flour?: Yes, it will yield a denser roll with a nuttier flavor.
  • How do I know when the rolls are done?: They should be golden brown and sound hollow when tapped.
  • Can I make these rolls vegan?: Substitute the egg with a flax egg and use non-dairy milk and butter.
  • What can I use instead of maple syrup?: Honey or agave syrup can be used, but they will alter the flavor slightly.
  • Can I make the dough in a bread machine?: Absolutely! Follow your machine’s manual for dough settings.
  • How can I make the rolls extra gooey?: Add more butter and brown sugar to the filling.
  • Is it necessary to use pecans?: No, feel free to use your favorite nuts or leave them out entirely.
  • How do I reheat leftover rolls?: Microwave for 10-15 seconds or warm in the oven at 350°F until heated through.

Nutrition Tips and Dietary Adaptations

For those mindful of dietary needs, here are some tips:

  • Gluten-Free Option: Use a gluten-free flour blend to make these rolls gluten-free.
  • Lower Sugar Version: Use less sugar in the dough and filling and substitute with a sugar alternative.
  • Healthy Fats: Replace butter with coconut oil for a dairy-free version.

Equipment Recommendations

To achieve the best results, having the right equipment is essential:

  • Stand Mixer: A stand mixer with a dough hook makes kneading easier.
  • Baking Dish: A 9×13 inch baking dish is perfect for holding the rolls together.
  • Rolling Pin: A good quality rolling pin helps spread the dough evenly.
  • Kitchen Thermometer: Ensures your ingredients are at the right temperature for optimal yeast activation.

Serving Suggestions

These Maple Pecan Cinnamon Rolls are delightful on their own, but here are some serving ideas:

  • With Coffee: Pair with a hot cup of coffee or tea for a warming breakfast.
  • With Ice Cream: Serve warm with a scoop of vanilla ice cream for a decadent dessert.
  • Drizzled with Extra Maple Syrup: For those who love a bit more sweetness, a drizzle over the top is perfect.

Now that you have all the tips, tricks, and insights, it’s time to embark on your baking adventure. Enjoy the process, savor the flavors, and share the joy of Maple Pecan Cinnamon Rolls with loved ones. Remember, cooking is about connection, and every bite tells a story. Happy baking!

Maple Pecan Cinnamon Rolls

Prep Time 30 minutes
Cook Time 20 minutes
Total Time 50 minutes
Servings 8 pieces
Calories 350
Delight in these soft, sweet cinnamon rolls filled with pecans and drizzled with maple glaze for a perfect breakfast treat.

Ingredients

Dough

  • 4.5 cups all purpose flour
  • 0.33 cup granulated sugar
  • 2 packets Fleischmann’s® RapidRise® Instant Yeast ((about 4 1/2 tsp))
  • 1 tsp salt
  • 1.5 cups water
  • 6 tbsp unsalted butter
  • 1 large egg
  • 0.25 cup unsalted butter, room temp
  • 0.5 cup light brown sugar, packed
  • 1 tbsp cinnamon
  • 2 tbsp pure maple syrup
  • 1 cup finely chopped pecans

Filling & Glaze

  • 1 cup powdered sugar
  • 2 tbsp heavy cream or milk
  • 2 tbsp pure maple syrup
  • 1 tbsp water to thin (optional)

Instructions 

  • Mix flour, sugar, yeast, and salt; add water and butter, then knead until smooth.
  • Let dough rise until doubled, about 1 hour.
  • Roll out dough, spread with butter, sprinkle with brown sugar, cinnamon, and pecans; roll up and cut into slices.
  • Bake at 350°F (175°C) for 20 minutes until golden.
  • Mix powdered sugar with cream and maple syrup to make glaze; drizzle over warm rolls.

Notes

For best results, use fresh yeast and measure ingredients accurately.
Calories: 350kcal
Cost: $15
Course: Breakfast
Cuisine: American
Keyword: Cinnamon Rolls

Embark on a Flavorful Adventure with Butternut Squash Coconut Curry

Welcome to a culinary exploration that celebrates the vibrant flavors of butternut squash coconut curry! This dish isn’t just a recipe; it’s a journey through spices, textures, and cultures. From the rich creaminess of coconut milk to the aromatic warmth of ginger and garlic, each bite transports you to a place where food brings people together. Perfectly paired with steamed basmati rice, this butternut squash coconut curry is a delightful comfort food that warms the soul.

In this guide, we’ll dive deep into the heart of this dish, exploring why you’ll love it, how to make it, and tips for personalizing it to your taste. Whether you’re a seasoned chef or a curious home cook, this recipe invites you to discover the magic of cooking and the stories woven into every ingredient.

Why You’ll Love This Recipe

This butternut squash coconut curry is not only easy to make but also packed with flavors and nutritional benefits. Here are some compelling reasons to add it to your culinary repertoire:


Meal Prep Container Set

★ Recommended Kitchen Tool

Meal Prep Container Set

Make this recipe even easier with a quality Meal Prep Container Set — a must-have kitchen staple!


🛒 Check Price on Amazon →

As an Amazon Associate, we earn from qualifying purchases.
  • Rich and Creamy Texture: The combination of coconut milk and roasted butternut squash creates a luscious, velvety curry that feels indulgent yet healthy.
  • Vibrant Flavors: With spices like garam masala and turmeric, every spoonful bursts with warmth and aromatic depth.
  • Nutritious and Wholesome: Packed with vitamins and minerals, butternut squash is a great source of fiber, promoting digestive health.
  • Quick and Easy Preparation: This recipe comes together in under 30 minutes, making it perfect for weeknight dinners.
  • Customizable for Everyone: Adapt the spice level and add your favorite vegetables or proteins for a personalized touch!

Ingredients Breakdown

Before we begin, let’s gather our ingredients. Here’s what you’ll need to make this delightful butternut squash coconut curry:

  • 1/4 cup coconut oil or ghee: For sautéing and adding rich flavor.
  • 2 large shallots (minced): Provides a sweet, aromatic base.
  • 4 cloves garlic (grated): Adds a punch of flavor.
  • 2 tbsp grated ginger: For warmth and zest.
  • 2 tbsp garam masala: The heart of the curry’s flavor profile.
  • 2 tsp turmeric: For color and health benefits.
  • 1/4 cup tomato paste: Provides depth and richness.
  • 1 tbsp minced fresh chili: Adjust based on your heat preference.
  • 2 cans full-fat coconut milk: For creaminess and flavor.
  • 1 medium butternut squash: Peeled, seeded, and cut into ½-inch pieces.
  • 4 cups steamed basmati rice: A perfect pairing.
  • 1/4 cup chopped cilantro: For garnishing and freshness.

Step-by-Step Instructions

A close-up view of Butternut Squash Coconut Curry featuring chunks of squash in a creamy sauce.

Now, let’s get cooking! Follow these easy steps to create your butternut squash coconut curry:

  1. Heat the oil: In a large skillet over medium heat, add the coconut oil or ghee. Once melted, add the minced shallots, garlic, and ginger. Sauté for about 5-7 minutes until soft and aromatic.
  2. Bloom the spices: Stir in the garam masala and turmeric, cooking for 1 minute to release their full flavors.
  3. Add tomato paste: Mix in the tomato paste and sauté for another 3-5 minutes, stirring frequently.
  4. Incorporate the main ingredients: Add the minced chili (or chili powder), coconut milk, and butternut squash. Season with a generous pinch of salt. Bring the mixture to a simmer.
  5. Simmer until tender: Lower the heat and cover the skillet, simmering for 10-20 minutes until the squash is tender and soft.
  6. Final touches: Taste and adjust seasoning with more salt or chili as needed. Serve over steamed basmati rice and top with chopped cilantro.

Pro Tips for Perfecting Your Curry

To elevate your butternut squash coconut curry, here are some expert tips to keep in mind:

  • Use fresh spices: Fresh spices enhance flavor significantly; consider using whole spices that you can toast and grind for maximum aroma.
  • Don’t rush the sauté: Allowing the shallots, garlic, and ginger to soften fully is key to developing deep flavors.
  • Experiment with vegetables: Feel free to add spinach, kale, or bell peppers for extra nutrition and color.
  • Adjust the thickness: If you prefer a thicker curry, let it simmer uncovered for a few extra minutes.
  • Make it vegan: This recipe is naturally vegan; just ensure the ghee is substituted with coconut oil.
  • Batch cooking: Double the recipe and freeze portions for quick meals later.
  • Top with nuts: Toasted cashews or peanuts add a wonderful crunch and contrast to the creamy curry.
  • Pair with naan: Serve with warm naan bread for a complete meal experience.

Common Mistakes and Troubleshooting

Even the best chefs can encounter hiccups! Here are some common mistakes and how to avoid them:

  • Overcooking the squash: Keep an eye on the squash while simmering; it should be tender but not mushy.
  • Not seasoning enough: Taste as you go! Adjust salt and spice levels to suit your preference.
  • Using low-fat coconut milk: For the best flavor and texture, opt for full-fat coconut milk.
  • Skipping the blooming step: Blooming spices in hot oil releases essential oils, enhancing flavor; don’t skip this step!

Delicious Variations to Try

This recipe is versatile, allowing you to play with flavors and ingredients. Here are some fun variations:

  • Chickpea Butternut Squash Curry: Add a can of chickpeas for protein.
  • Thai Style: Incorporate lemongrass, lime leaves, and peanuts for a Thai twist.
  • Spicy Peanut Sauce: Stir in a few tablespoons of peanut butter for a rich, nutty flavor.
  • Vegetable Medley: Add seasonal vegetables like zucchini, carrots, or green beans.

Storage and Make-Ahead Instructions

This curry keeps well, making it a great option for meal prep:

  • Refrigerate: Store in an airtight container in the fridge for up to 4 days.
  • Freeze: Allow to cool completely, then freeze in portions for up to 3 months. Thaw overnight in the fridge before reheating.
  • Reheat gently: Warm on the stovetop over low heat, adding a splash of coconut milk or water if necessary to loosen.

Frequently Asked Questions

Curious about this dish? Here are some common queries:

  • Can I use other types of squash? Yes! Acorn squash or pumpkin can be great substitutes.
  • Is this curry spicy? The spice level can be adjusted by adding more or less chili.
  • What can I serve with this curry? It pairs beautifully with steamed basmati rice, quinoa, or naan.
  • Can I make this in advance? Yes! It tastes even better the next day as the flavors meld.
  • Is it gluten-free? Absolutely! All ingredients are gluten-free.
  • How can I make it creamier? Add more coconut milk or a dollop of yogurt before serving.
  • Can I add protein? Yes! Chicken, shrimp, or tofu can be added for extra protein.
  • What’s the best way to store leftovers? Keep in an airtight container in the refrigerator for up to 4 days.

Nutritional Tips and Dietary Adaptations

This butternut squash coconut curry is not only delicious but also packed with nutrients. Here’s how you can adapt it:

  • Low-Carb Option: Serve over cauliflower rice instead of basmati rice.
  • High-Protein Variation: Add cooked lentils or chickpeas for an extra protein boost.
  • Low-Fat Adaptation: Use light coconut milk, but note that it may alter the flavor and texture slightly.
  • Vegan Friendly: The recipe is naturally vegan; just ensure all ingredients align with a vegan diet.

Essential Equipment for Your Curry

To make this dish, you’ll need a few essential kitchen tools:

  • Large Skillet: For sautéing and simmering the curry.
  • Chef’s Knife: For chopping vegetables efficiently.
  • Cutting Board: A sturdy board for prep work.
  • Measuring Cups and Spoons: Accurate measurements ensure the best results.

Serving Suggestions to Elevate Your Dish

Make your butternut squash coconut curry a feast with these serving suggestions:

  • Garnish with Fresh Herbs: Add fresh cilantro or mint for a burst of color and flavor.
  • Serve with Pickles: Indian-style pickles or a tangy chutney can add a delightful contrast.
  • Offer a Side Salad: A refreshing cucumber or mixed greens salad pairs beautifully.
  • Include a Creamy Yogurt Dip: A dollop of yogurt can balance the spices.

In conclusion, this butternut squash coconut curry is not just about feeding the body; it’s about feeding the soul. With its myriad flavors and comforting nature, it’s a dish that tells a story of culture, connection, and creativity. So grab your apron, gather your ingredients, and let’s create something magical that will transport you and your loved ones to a world of flavor!

Butternut Squash Coconut Curry

Prep Time 10 minutes
Cook Time 20 minutes
Total Time 30 minutes
Servings 4 servings
Calories 450
A flavorful and hearty vegan curry featuring roasted butternut squash simmered in a fragrant coconut milk sauce, perfect served over rice.

Ingredients

Oil and aromatics

  • 0.25 cup coconut oil or ghee
  • 2 large shallots (minced)
  • 4 cloves garlic (grated)
  • 2 tbsp grated ginger
  • 2 tbsp garam masala
  • 2 tsp turmeric
  • 0.25 cup tomato paste
  • 1 tbsp minced fresh chili or chili powder

Coconut milk and squash

  • 2 cans full-fat coconut milk
  • 1 medium butternut squash (peeled, seeded and cut into ½-inch pieces)

Cooked rice and herbs

  • 4 cups steamed basmati rice
  • 0.25 cup chopped cilantro

Instructions 

  • Heat coconut oil in a large skillet over medium heat. Sauté shallots, garlic, and ginger until soft, about 5-7 minutes. Add spices and cook for 1 minute.
  • Add tomato paste and cook for 3-5 minutes. Stir in coconut milk, squash, and salt. Simmer covered for 10-20 minutes until squash is tender.
  • Adjust seasoning with chili or salt as needed. Serve over rice topped with cilantro.

Notes

For extra flavor, garnish with additional cilantro or a squeeze of lime.
Calories: 450kcal
Cost: $15
Course: Main Course
Cuisine: Indian-inspired
Keyword: Butternut Squash, Curry, vegetarian

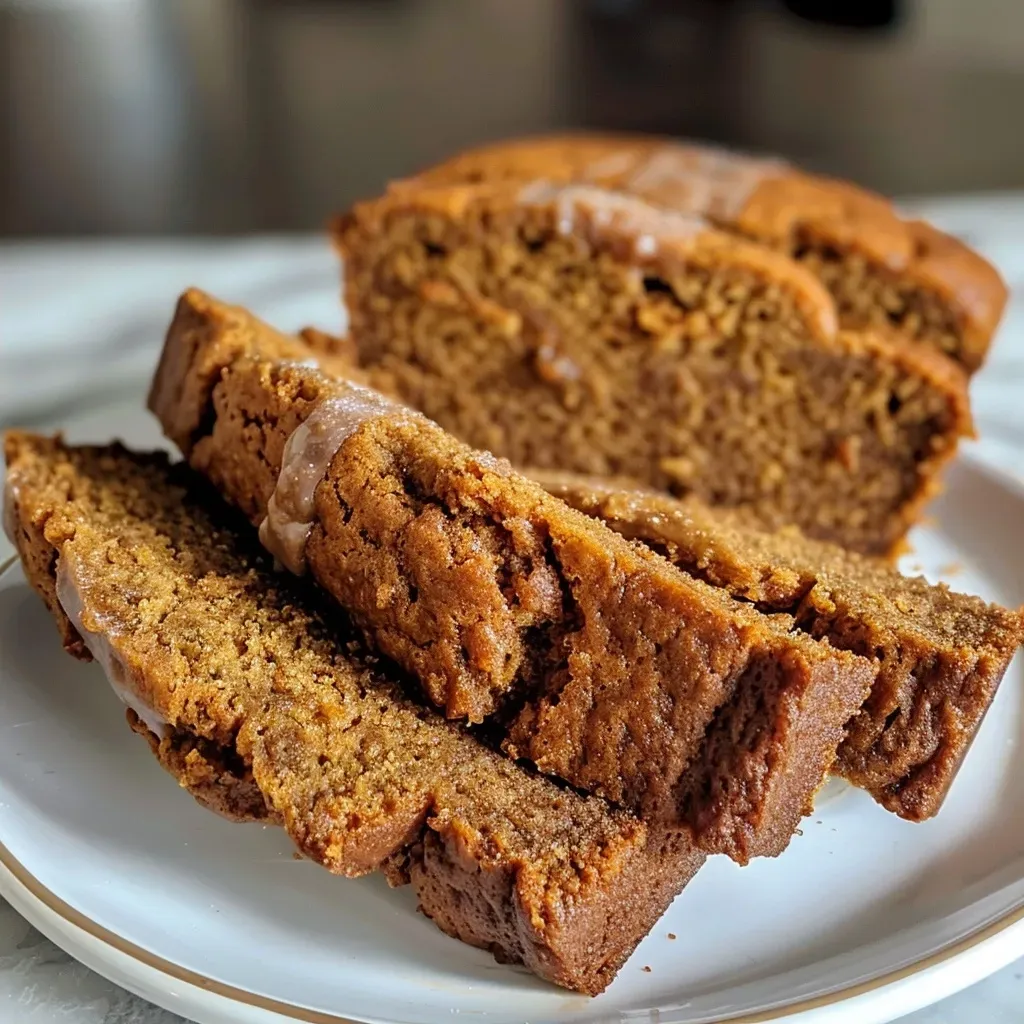
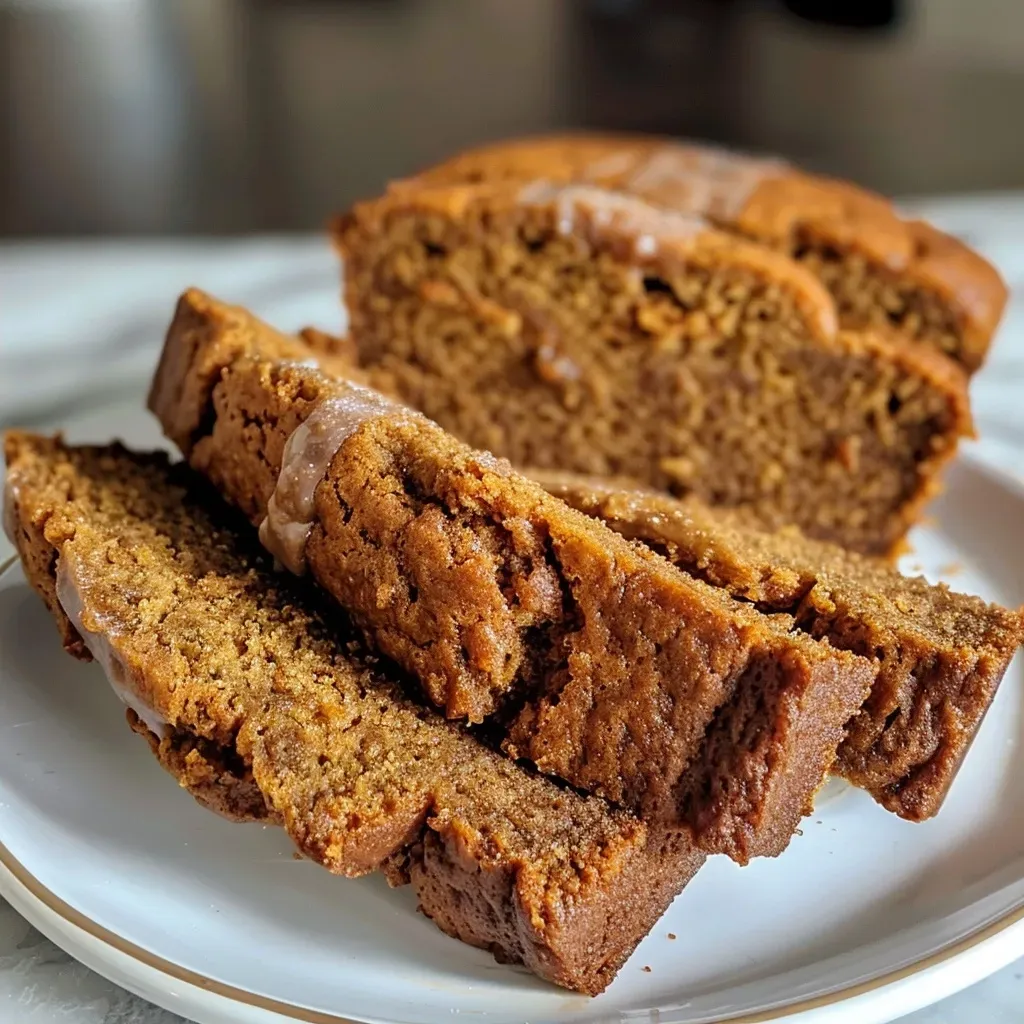
Welcome to the Flavors of Autumn: Healthy Pumpkin Bread with Maple Glaze

As the leaves turn golden and the air gets crisp, there’s an undeniable craving for cozy treats that warm the soul. This Healthy Pumpkin Bread with a luscious maple glaze is the perfect way to embrace the season. Packed with wholesome ingredients, warm spices, and a drizzle of sweetness, it’s more than just a recipe—it’s a journey through the heart of autumn.

Why You’ll Love This Recipe

This isn’t just any pumpkin bread; it’s a delightful blend of health and flavor. Here are five reasons you’ll adore making this recipe:

  • Wholesome Ingredients: Made with whole wheat pastry flour, this bread is a healthier twist on a classic favorite, providing fiber and nutrients.
  • Natural Sweetness: Sweetened with pure maple syrup, it offers a rich flavor without refined sugars. You can feel good about indulging!
  • Versatile Enjoyment: Perfect for breakfast, a snack, or dessert, this pumpkin bread fits seamlessly into any part of your day.
  • Easy to Make: With straightforward instructions, even novice bakers can whip up this treat without a hitch!
  • Delicious Variations: This recipe serves as a base for numerous delightful adaptations, ensuring you can customize it to your taste.

Ingredient Breakdown

Let’s dive into the ingredients that make this pumpkin bread a must-have this fall:


Digital Kitchen Scale

★ Recommended Kitchen Tool

Digital Kitchen Scale

Make this recipe even easier with a quality Digital Kitchen Scale — a must-have kitchen staple!


🛒 See Deals on Amazon →

As an Amazon Associate, we earn from qualifying purchases.
  • Butter (⅓ cup or 75g): Adds richness and flavor. For a dairy-free option, substitute with coconut oil.
  • Pumpkin Puree (1 can, 15 ounces or 425g): The star of the show! Make sure it’s pure pumpkin puree, not pumpkin pie filling.
  • Pure Maple Syrup (½ cup or 156g): Offers natural sweetness; feel free to use honey as an alternative if desired.
  • Eggs (2): These provide structure and moisture. For a vegan option, consider flax eggs or applesauce.
  • Vanilla Extract (1 teaspoon): Enhances the overall flavor profile.
  • Whole Wheat Pastry Flour (1 ¾ cups or 198g): A healthier alternative to all-purpose flour, providing more nutrients and fiber.
  • Baking Soda (1 teaspoon): Essential for leavening, helping the bread rise.
  • Spices (cinnamon, nutmeg, ground ginger, allspice): These warm spices bring that cozy autumn flavor.
  • Powdered Sugar (½ cup or 57g) for the glaze: Sweetens the glaze, adding a delightful finishing touch.
  • Almond Milk (1 tablespoon): Used to adjust the glaze’s consistency; any milk works!

Pro Tips for Perfect Pumpkin Bread

Close-up shot of healthy pumpkin bread drizzled with maple glaze.

To ensure your pumpkin bread turns out perfectly every time, follow these professional tips:

  • Don’t Overmix: When combining wet and dry ingredients, mix just until combined. Overmixing can lead to dense bread.
  • Check Doneness: Use a toothpick to test; it should come out clean or with a few crumbs attached.
  • Cool Completely: Allow the bread to cool in the pan for 10 minutes before transferring it to a wire rack to cool completely.
  • Flavor Development: For the best flavor, let the bread sit overnight before slicing. The flavors deepen and improve.
  • Substitutions: Feel free to swap out some whole wheat flour for all-purpose flour if desired, or add in your favorite nuts or chocolate chips!
  • Storage: Store leftovers in an airtight container to keep it fresh for up to a week.
  • Freezing: For longer storage, wrap the bread tightly in plastic wrap and freeze for up to three months.
  • Glaze Perfection: If your glaze is too thick, gradually add a bit more almond milk until you reach your desired consistency.

Common Mistakes and Troubleshooting

Even the best bakers can run into issues! Here are some common pitfalls and how to avoid them:

  • Too Dense: This often results from overmixing or adding too much flour. Measure carefully!
  • Not Sweet Enough: If you prefer a sweeter bread, consider adding a bit more maple syrup or serving it with a sweetened butter.
  • Burnt Edges: If the top is browning too quickly, cover it loosely with aluminum foil halfway through baking.
  • Dry Texture: This can happen if the bread is overbaked. Use a timer and keep an eye on it as it nears the end of baking time.

Delicious Variations to Try

Want to mix things up? Here are some tasty variations to consider:

  • Pumpkin Chocolate Chip Bread: Fold in a cup of chocolate chips for a sweet twist.
  • Gluten-Free Pumpkin Bread: Substitute the whole wheat flour with a gluten-free flour blend.
  • Nutty Pumpkin Bread: Add chopped walnuts or pecans for a delightful crunch.
  • Spiced Pumpkin Bread: Increase the spice levels by adding a teaspoon of pumpkin pie spice.

Storage and Make-Ahead Instructions

This pumpkin bread can be made ahead and stored for future enjoyment:

  • Room Temperature: Store in an airtight container for up to a week.
  • Refrigerator: For longer storage, keep it in the fridge for up to two weeks.
  • Freezing: Wrap tightly in plastic wrap and foil, then freeze for up to three months. Thaw overnight in the refrigerator before serving.

Frequently Asked Questions (FAQs)

Got questions? Here are answers to some common queries:

  • Can I use fresh pumpkin instead of canned? Yes! Just cook and puree the pumpkin until smooth.
  • Is this recipe suitable for kids? Absolutely! The sweetness from the maple syrup and spices makes it kid-friendly.
  • How should I store leftover pumpkin bread? Keep it in an airtight container at room temperature or in the fridge if you prefer it chilled.
  • Can I make this vegan? Yes! Substitute eggs with flax eggs or unsweetened applesauce.
  • How do I know when it’s done baking? A toothpick inserted into the center should come out clean or with a few moist crumbs.
  • Can I add other spices? Yes! Feel free to experiment with cardamom or cloves for an extra flavor kick.
  • What can I serve with this pumpkin bread? It’s delicious on its own, but try it with cream cheese, butter, or even a scoop of ice cream!
  • Can I turn this recipe into muffins? Yes! Divide the batter into a muffin tin and bake for 18-20 minutes.

Nutrition Tips and Dietary Adaptations

This pumpkin bread isn’t just delicious; it’s also packed with nutrition:

  • Whole Grains: Using whole wheat flour increases fiber content, promoting better digestion.
  • Low Sugar: By utilizing maple syrup instead of refined sugars, you’re making a healthier choice.
  • Vegan & Gluten-Free Options: With simple substitutions, this recipe can fit various dietary needs.

Equipment Recommendations

To make this pumpkin bread, you’ll need:

  • Loaf Pan: A standard 8 ½ x 4 ½ inch loaf pan works best.
  • Mixing Bowls: Use at least two bowls for mixing wet and dry ingredients.
  • Whisk: A good whisk helps combine the ingredients evenly.
  • Measuring Cups and Spoons: Accurate measurements are key to a successful bake.
  • Cooling Rack: Essential for cooling the bread evenly after baking.

Serving Suggestions

Enjoy this pumpkin bread in various delightful ways:

  • As is: Fresh out of the oven, it’s a warm comforting treat.
  • With Spreads: Try it with butter, cream cheese, or nut butter for added flavor.
  • Toasted: A slice toasted with a sprinkle of cinnamon and sugar can elevate your breakfast.
  • With Coffee or Tea: Pair it with your favorite hot beverage for the perfect cozy experience.

Final Thoughts

There you have it—the ultimate guide to making the best Healthy Pumpkin Bread with a maple glaze! This recipe not only fills your kitchen with the comforting aromas of autumn but also brings a slice of health and happiness to your table. So grab your apron, channel your inner culinary explorer, and let this delightful bread take you on a flavorful journey.

Healthy Pumpkin Bread with Maple Glaze

Prep Time 15 minutes
Cook Time 1 hour
Total Time 1 hour 15 minutes
Servings 8 slices
Calories 250
A moist and flavorful pumpkin bread with warm spices, topped with a sweet maple glaze, perfect for cozy fall days.

Ingredients

For the wet ingredients

  • 0.33 cup butter
  • 1 can (15 oz) pumpkin puree
  • 0.5 cup pure maple syrup
  • 2 eggs eggs
  • 1 teaspoon vanilla extract

For the dry ingredients

  • 1.75 cups whole wheat pastry flour ((or white whole wheat flour))
  • 1 teaspoon baking soda
  • 0.25 teaspoon salt
  • 1.5 teaspoons cinnamon
  • 0.5 teaspoon nutmeg
  • 0.5 teaspoon ground ginger
  • 0.5 teaspoon allspice

For the glaze

  • 0.5 cup powdered sugar
  • 1 tablespoon pure maple syrup
  • 1 tablespoon unsweetened almond milk ((or any milk, if necessary to thin glaze))

Instructions 

  • Preheat oven to 350°F, line a loaf pan with parchment, and spray with nonstick spray.
  • Cook butter over medium heat until browned and nutty, then cool for 5-10 minutes.
  • Whisk pumpkin, maple syrup, eggs, vanilla, and browned butter until smooth.
  • Mix dry ingredients, then combine with wet ingredients. Pour into pan and bake for 50-65 minutes. Cool completely.
  • Mix powdered sugar, maple syrup, and almond milk to make glaze. Pour over cooled bread and serve.

Notes

Ensure bread is fully cooled before applying glaze for best results.
Calories: 250kcal
Cost: $15
Course: Dessert
Cuisine: American
Keyword: maple, pumpkin

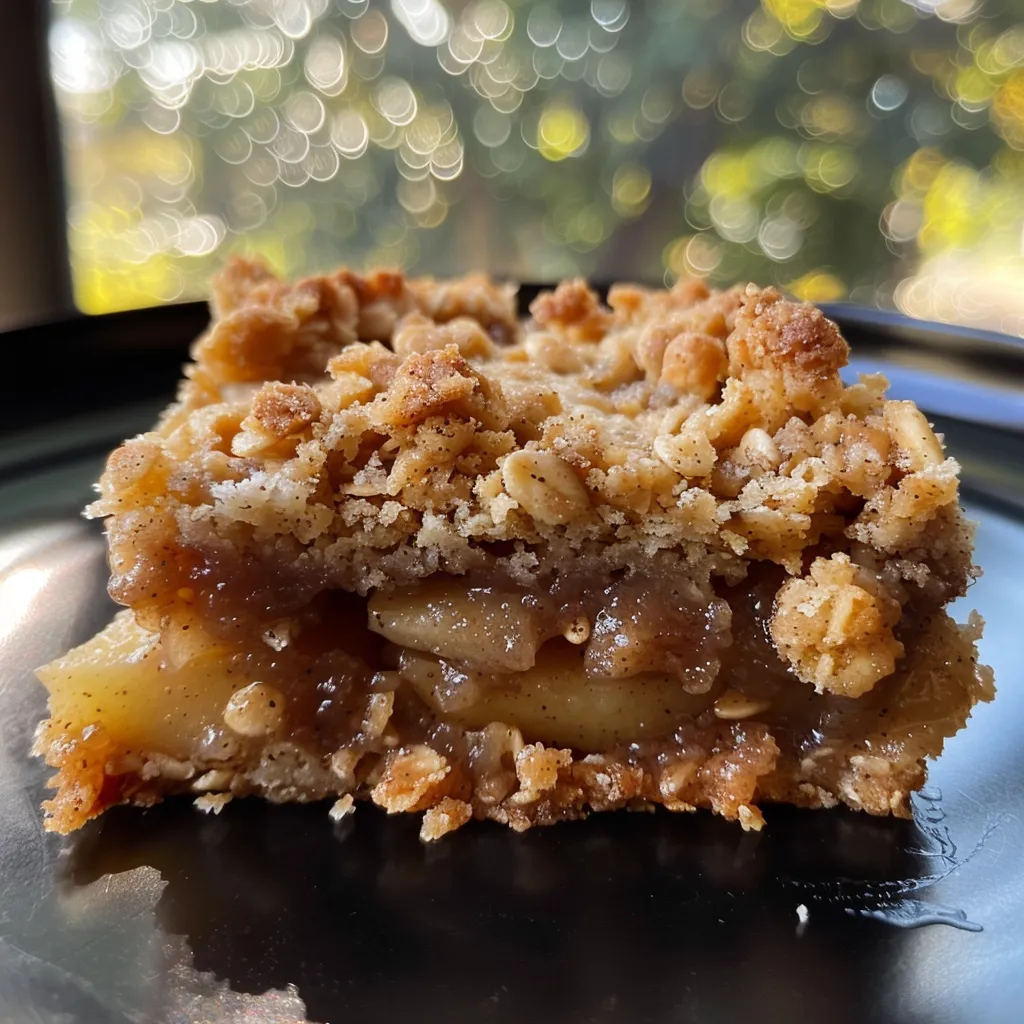
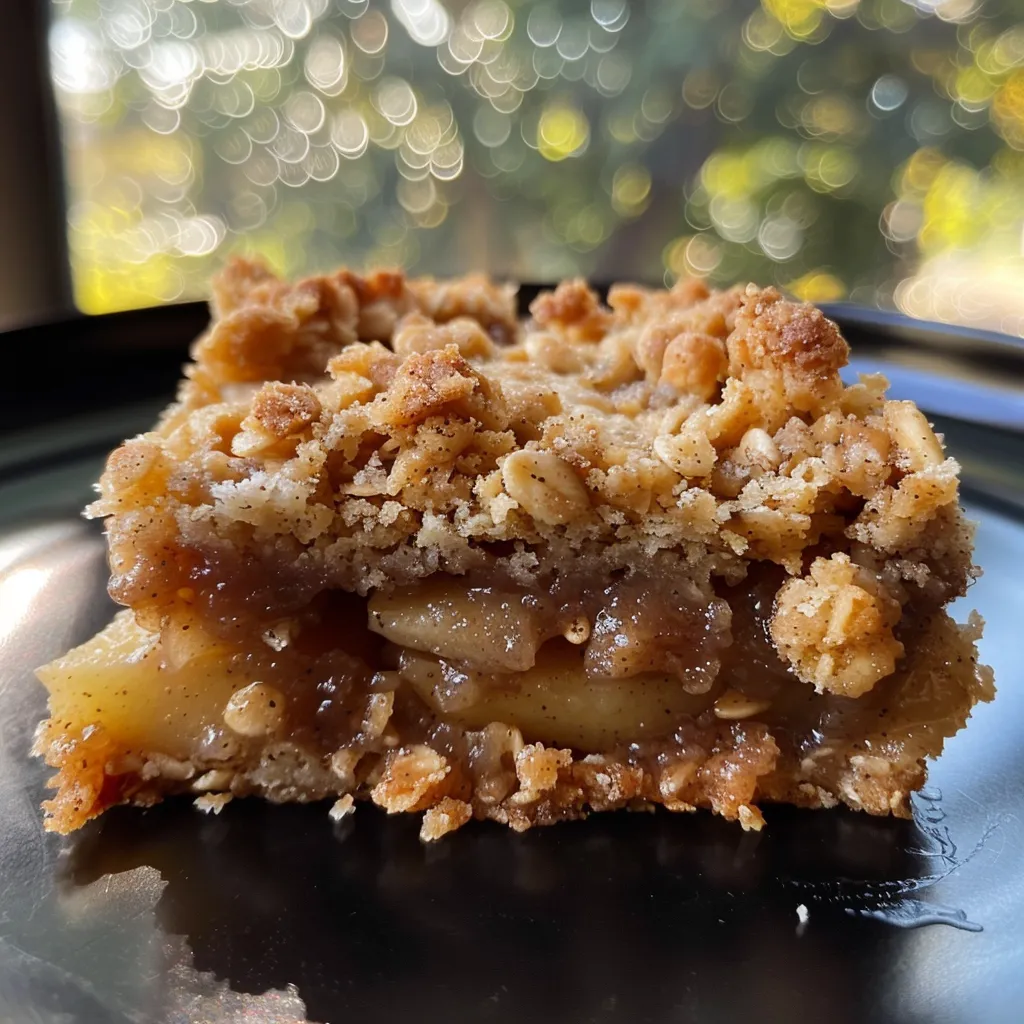
Discover the Magic of Apple Cinnamon Crumble Bars

Welcome to a delightful journey through the flavors of fall with these Apple Cinnamon Crumble Bars. Perfectly spiced, these bars are not just a treat for your taste buds but also a warm hug for your soul. Imagine tender apples nestled beneath a golden, crunchy crumble topping, each bite echoing the cozy autumn afternoons spent with loved ones. This recipe is a celebration of simplicity and warmth, inviting you to savor the rich tastes of cinnamon and apple while creating lasting memories.

In this guide, I’ll take you through every step of crafting these delectable bars—from selecting the best ingredients to mastering the technique. Whether you’re a seasoned chef or a curious beginner, you’ll find tips, tricks, and variations to make this recipe uniquely yours. So, grab your apron and let’s dive into the world of cozy baking!

Why You’ll Love This Recipe

There are countless reasons to embrace this recipe, but here are just a few that will have you reaching for your baking pan:


Meal Prep Container Set

★ Recommended Kitchen Tool

Meal Prep Container Set

Make this recipe even easier with a quality Meal Prep Container Set — a must-have kitchen staple!


🛒 Check Price on Amazon →

As an Amazon Associate, we earn from qualifying purchases.
  • Quick & Easy Preparation: These bars come together in under an hour, making them perfect for unexpected guests or a sweet craving.
  • Simple Ingredients: No need for fancy shopping trips—most ingredients are pantry staples you likely have on hand.
  • Perfect for Sharing: The warm, inviting aroma and delightful flavors make these bars a hit at any gathering.
  • Versatile Recipe: Feel free to mix and match ingredients or add your personal touch with nuts, dried fruits, or even chocolate.
  • Healthier Dessert Option: With the addition of oats and fruit, these bars offer a nutritious twist on classic desserts.

Ingredients Breakdown

Let’s take a closer look at what you’ll need to create these delicious bars:

  • All-Purpose Flour: 1 1/4 cups (160g) – Provides structure; you can substitute with gluten-free flour if needed.
  • Rolled Oats: 1 cup (90g) – Adds chewiness and texture to the crumble topping.
  • Granulated Sugar: 1/2 cup (100g) – Sweetens the bars; consider using coconut sugar for a lower glycemic option.
  • Unsalted Butter: 1/2 cup (110g), cold and cubed – For richness and flakiness; vegan butter is a great alternative.
  • Baking Powder: 1/2 teaspoon – Helps the crumble rise slightly.
  • Salt: 1/4 teaspoon – Enhances flavor.
  • Apples: 3 medium, peeled, cored, and diced (Granny Smith recommended) – For the filling; feel free to mix varieties for complexity.
  • Granulated Sugar: 2 tablespoons – For the apple filling, balancing the tartness of the apples.
  • Brown Sugar: 1 tablespoon – Adds depth and moisture to the filling.
  • Ground Cinnamon: 1 teaspoon – The star of the dish, bringing warmth and comfort.
  • Lemon Juice: 1 tablespoon – Brightens the flavors and prevents apple browning.
  • Cornstarch: 1 tablespoon – Thickens the apple filling so it doesn’t get runny.
  • Optional Ingredients: 1/2 teaspoon vanilla extract and a pinch of nutmeg for extra flavor depth.

Pro Tips for Perfect Apple Cinnamon Crumble Bars

Close-up of apple cinnamon crumble bars with a golden brown topping.

Here are some expert insights to elevate your baking experience and ensure your bars turn out perfectly every time:

  • Choose the Right Apples: Opt for firm varieties like Granny Smith or Honeycrisp. They hold their shape well and balance sweetness perfectly.
  • Keep Butter Cold: For a flaky crumble, keep your butter cold until ready to mix; this prevents it from melting into the dry ingredients.
  • Don’t Overmix: When combining ingredients, mix just until combined to maintain a tender texture.
  • Let Them Cool: Allow your bars to cool completely before slicing for clean, beautiful squares.
  • Experiment with Flavors: Add nuts, dried fruits, or chocolate chips to the crumble topping for a personalized touch.
  • Use Parchment Paper: Line your baking pan with parchment for easy removal and cleanup.
  • Double the Recipe: If you’re serving a crowd, consider doubling the recipe and using a larger baking dish.
  • Store Properly: Keep your bars in an airtight container to maintain freshness and prevent them from drying out.

Common Mistakes and Troubleshooting

Even the best bakers can encounter hiccups. Here are some common mistakes to avoid:

  • Using the Wrong Apple: Avoid soft apples like Red Delicious that turn mushy; stick with firm varieties.
  • Overbaking: Keep an eye on the oven; you want the topping golden brown, not burnt.
  • Skipping the Cooling Time: Patience is key; cutting too soon will lead to messy bars.
  • Not Using Enough Lemon Juice: This adds brightness and prevents browning; don’t skip it!

Variations & Adaptations

Feeling adventurous? Here are some delightful variations to try:

  • Nutty Oat Topping: Add 1/2 cup of chopped nuts (walnuts or pecans) to the crumble mixture for added crunch.
  • Berry Bliss: Mix in 1 cup of fresh or frozen berries with the apples for a fruity twist.
  • Chocolate Chip Delight: Stir in 1/2 cup of chocolate chips into the crumble for a sweet surprise.
  • Vegan Version: Substitute butter with coconut oil and use flaxseed meal in place of eggs for a fully vegan treat.

Storage and Make-Ahead Instructions

Planning ahead can save you time in the kitchen:

  • Storage: Keep your bars in an airtight container at room temperature for up to 3 days or in the refrigerator for up to a week.
  • Freezing: You can freeze the bars for up to 3 months. Wrap them tightly in plastic wrap and place them in a freezer-safe container.
  • Make-Ahead: Prepare the crumble mixture a day in advance and store it in the fridge. Assemble and bake the bars when you’re ready.

FAQ: Everything You Need to Know

Here are some frequently asked questions about these irresistible bars:

  • Can I use other fruits? Absolutely! Pears or peaches would also work well in this recipe.
  • What if I don’t have cornstarch? You can substitute with an equal amount of all-purpose flour.
  • Can I make these gluten-free? Yes! Just use gluten-free flour and ensure your oats are certified gluten-free.
  • How can I make them sweeter? Add an extra tablespoon of sugar to the apple filling if desired.
  • What’s the best way to reheat leftovers? Warm them in the microwave for 10-15 seconds or in the oven at 350°F (175°C) for a few minutes.
  • Can I add spices? Feel free to add nutmeg, ginger, or cloves for an extra flavor boost.
  • What’s the best way to slice them? Use a sharp knife and let them cool completely for clean slices.
  • How do I know when they are done baking? The topping should be golden brown, and the apple filling should be bubbling up.

Nutritional Tips and Dietary Adaptations

For those mindful of nutrition, here are some tips for adapting the recipe:

  • Low Sugar Option: Reduce the sugar by half and use ripe apples for natural sweetness.
  • Healthy Fats: Swap butter for avocado oil or nut butter for a healthier fat option.
  • Increase Fiber: Add ground flaxseed or chia seeds to the crumble for extra fiber.
  • Low-Calorie Alternative: Use unsweetened applesauce instead of butter to cut calories.

Equipment Recommendations

Having the right tools can make all the difference:

  • 8×8-inch Baking Pan: Perfect size for even baking.
  • Parchment Paper: Essential for easy removal of the bars.
  • Mixing Bowls: A set of various sizes helps in organizing your ingredients.
  • Pastry Cutter: For easily incorporating butter into dry ingredients.

Serving Suggestions

Here are some delightful ways to enjoy your Apple Cinnamon Crumble Bars:

  • With Ice Cream: Serve warm with a scoop of vanilla ice cream for a decadent treat.
  • With Whipped Cream: Top with a dollop of whipped cream for a light, airy finish.
  • As Breakfast: Pair with coffee or tea for a cozy breakfast option.
  • With Nuts: Garnish with chopped nuts for added texture and flavor.

In conclusion, these Apple Cinnamon Crumble Bars offer a delightful culinary adventure that captures the essence of autumn in each bite. Whether enjoyed at a family gathering, a cozy night in, or as a sweet snack on the go, they promise warmth and flavor in every square. So, gather your ingredients and embark on this delicious journey. Happy baking!

Cozy Apple Cinnamon Crumble Bars

Prep Time 20 minutes
Cook Time 50 minutes
Total Time 1 hour 10 minutes
Servings 12 bars
Calories 250
Delight in these warm, cinnamon-spiced apple crumble bars with a buttery oat crust, perfect for cozy afternoons.

Ingredients

Crust and topping

  • 1 1/4 cups all-purpose flour
  • 1 cup old-fashioned rolled oats
  • 1/2 cup granulated sugar
  • 1/2 cup unsalted butter, cold and cubed (use vegan butter for dairy-free)
  • 1/2 teaspoon baking powder
  • 1/4 teaspoon salt

Apple filling

  • 3 medium apples, peeled, cored, and diced (Granny Smith recommended)
  • 2 tablespoons granulated sugar
  • 1 tablespoon brown sugar
  • 1 teaspoon ground cinnamon
  • 1 tablespoon lemon juice
  • 1 tablespoon cornstarch
  • Optional vanilla extract (1/2 teaspoon optional)
  • Optional nutmeg (pinch)

Instructions 

  • Preheat oven to 350°F (175°C). Line an 8×8-inch pan with parchment.
  • Mix flour, oats, sugar, baking powder, salt, and cut in butter until crumbly. Reserve 1 cup for topping.
  • Press remaining mixture into pan for crust. Bake 12-15 minutes until golden.
  • Mix apples with lemon juice, sugars, cinnamon, cornstarch, and optional vanilla and nutmeg. Spread over crust.
  • Sprinkle reserved crumble over apples. Bake 35-40 minutes until topping is golden and filling bubbles.
  • Cool at least 30 minutes, then lift out using parchment and cut into bars.

Notes

For best results, use firm, tart apples like Granny Smith.
Calories: 250kcal
Cost: $15
Course: Dessert
Keyword: Apple, bars, crumble

Embrace the Flavors of Fall with This Cozy Chowder

As the leaves turn golden and the air becomes crisp, there’s nothing quite like a warm bowl of chowder to celebrate the essence of autumn. This Fall Harvest Vegetarian Corn and Butternut Chowder is a delightful blend of fresh corn, creamy butternut squash, and aromatic sage. Whether you’re gathered around the dinner table with loved ones or savoring a quiet night in, this recipe is sure to offer a comforting embrace that warms both the heart and the soul.

Why You’ll Love This Recipe

  • Seasonal Sensation: Celebrate the flavors of fall with ingredients that are at their peak during this time of year.
  • Easy to Make: With simple steps and minimal prep time, this chowder can be whipped up in under 30 minutes.
  • Nutritious and Hearty: Packed with vegetables and healthy fats, this chowder is both filling and nutritious.
  • Versatile and Adaptable: Easily modify the recipe to cater to different dietary preferences or ingredient availability.
  • Perfect for Any Occasion: Serve it as a starter, main dish, or at a gathering; it fits seamlessly into any meal plan.

Ingredient Breakdown

Creating a delicious chowder starts with the right ingredients. Here’s a closer look at what you’ll need:

  • Sweet Fresh Corn: Use 2 ears of husked corn for maximum sweetness. If out of season, frozen corn works well too.
  • Butternut Squash: A small butternut squash, sliced to about 8 ounces, adds creaminess and a slight sweetness. Substitute with pumpkin if preferred.
  • Onion: A small onion, diced, contributes depth of flavor.
  • Peeled Potatoes: Two small potatoes (about 8 ounces) give the chowder a hearty texture.
  • Butter: Using 4 tablespoons of butter enriches the chowder. For a healthier option, consider olive oil.
  • Flour: This helps thicken the chowder; gluten-free alternatives can be used if necessary.
  • Vegetable Stock: Use 3 cups for a flavorful base; homemade stock is ideal.
  • Sage: Fresh sage (1 teaspoon) adds a lovely aroma; dried sage can be substituted.
  • White Beans: Adding ¼ cup of drained, rinsed white beans boosts protein and fiber.
  • Seasoned Salt: 1 teaspoon enhances the overall flavor; adjust according to taste.
  • Heavy Cream: 1 cup for a rich finish; for a lighter option, consider coconut milk or half-and-half.
  • Ciabatta Bread: Perfect for serving on the side, this bread complements the chowder beautifully.

Steps to Culinary Success

Close-up view of a bowl of creamy corn and butternut chowder topped with herbs.

Now that you have your ingredients, let’s dive into the cooking process:


Professional Chef Knife Set

★ Recommended Kitchen Tool

Professional Chef Knife Set

Make this recipe even easier with a quality Professional Chef Knife Set — a must-have kitchen staple!


🛒 Check Price on Amazon →

As an Amazon Associate, we earn from qualifying purchases.
  1. In a medium nonstick pot over medium-high heat, melt the butter and add the squash, corn, and onions. Sauté for about 4 minutes.
  2. Add the flour, stirring continuously for 1 minute to create a roux.
  3. Drain the diced potatoes and add them to the pot along with the vegetable stock, sage, rinsed white beans, and seasoned salt. Increase heat to high.
  4. Once the mixture reaches a boil, reduce to a medium boil and cook uncovered for 10-12 minutes, stirring occasionally until the potatoes are tender.
  5. Remove from heat and stir in the heavy cream until well combined. Serve hot, accompanied by toasted Ciabatta bread spread with a little butter.

Pro Tips for Perfecting Your Chowder

To elevate your chowder-making game, keep these tips in mind:

  • Fresh Ingredients: Always choose fresh, seasonal produce for the best flavor.
  • Texture Control: For a chunkier chowder, reserve some corn and potatoes to blend in later.
  • Spice It Up: Add a pinch of cayenne pepper for a subtle kick.
  • Herb Infusion: Experiment with other herbs like thyme or rosemary for different flavor profiles.
  • Make Ahead: This chowder can be made a day in advance and reheated, as the flavors deepen over time.
  • Freezer-Friendly: Portion leftovers and freeze for an easy meal later.
  • Presentation: Garnish with fresh herbs or a drizzle of cream for an appealing finish.
  • Adjust Seasoning: Always taste and adjust seasoning before serving; flavors can mellow during cooking.

Avoiding Common Mistakes

Here are some common pitfalls to avoid:

  • Overcooking Vegetables: Keep an eye on the cooking time to ensure vegetables remain tender but not mushy.
  • Too Thick or Thin: Adjust with more stock or cream to achieve desired consistency.
  • Neglecting Flavor: Don’t skip on seasoning; taste as you cook!
  • Forgetting to Stir: Stir occasionally to prevent sticking and ensure even cooking.

Variations to Try

Feel free to put your spin on this chowder with these delicious variations:

  • Spicy Southwest Chowder: Add diced jalapeños and smoked paprika for a spicy twist.
  • Curried Chowder: Stir in curry powder for an exotic flavor profile.
  • Mexican Fiesta: Top with avocado, cilantro, and lime for a fresh, zesty touch.
  • Cheesy Delight: Stir in shredded cheese for an extra creamy texture.

Storage and Make-Ahead Instructions

This chowder is perfect for meal prep! Store in an airtight container in the fridge for up to 4 days. For longer storage, freeze in portions for up to 3 months. Reheat gently on the stovetop, adding a splash of stock or cream if needed.

Frequently Asked Questions

Got questions? Let’s clear them up!

  • Can I use frozen corn? Yes, frozen corn can be substituted for fresh corn.
  • Is this chowder vegan? To make it vegan, replace butter with olive oil and heavy cream with coconut cream.
  • How can I make it gluten-free? Use a gluten-free flour blend instead of regular flour.
  • Can I add more vegetables? Absolutely! Carrots, bell peppers, or zucchini would be great additions.
  • What can I serve with chowder? Serve with a side of bread, salad, or roasted vegetables for a complete meal.
  • How do I reheat leftovers? Gently reheat on the stove, adding a bit of stock if it’s too thick.
  • Can I double the recipe? Yes, simply double all ingredients and adjust cooking time as needed.
  • What’s the best way to store leftovers? Store in an airtight container in the fridge for up to 4 days or freeze for longer storage.

Nutritional Tips and Dietary Adaptations

This chowder is not only delicious but also nutritious. Here are a few tips to consider:

  • Low-Calorie Option: Substitute heavy cream with almond milk for a lighter version.
  • Protein Boost: Add cooked lentils or chickpeas for extra protein.
  • Low-Carb Option: Replace potatoes with cauliflower for a lower-carb alternative.
  • Fiber-Focused: Incorporate more beans or legumes for added fiber.

Essential Kitchen Tools

Make sure you have these tools ready:

  • Nonstick Pot: For easy cooking and cleanup.
  • Cutting Board and Sharp Knife: For efficient chopping of vegetables.
  • Measuring Cups and Spoons: Precision is key in cooking.
  • Wooden Spoon: Perfect for stirring without scratching your pot.

Serving Suggestions

To complete your chowder experience, consider these serving ideas:

  • Garnish: Add fresh herbs like parsley or chives for a pop of color.
  • Accompaniments: Serve with a side of crusty bread or a fresh salad.
  • Wine Pairing: A crisp white wine, like Sauvignon Blanc, pairs beautifully with this dish.
  • Comforting Toppings: Croutons or a sprinkle of cheese can elevate your chowder.

Final Thoughts

As we wrap up this culinary journey, I hope this Fall Harvest Vegetarian Corn and Butternut Chowder brings warmth and joy to your table. Cooking is about exploration and connection, and each bowl of chowder tells a story of the season’s bounty. So gather your ingredients, invite your friends or family, and let’s create something delicious together. Happy cooking!

Fall Harvest Vegetarian Corn and Butternut Chowder

Prep Time 10 minutes
Cook Time 20 minutes
Total Time 30 minutes
Servings 4 servings
Calories 350
A warm, hearty vegetarian chowder perfect for fall, combining sweet corn, butternut squash, and creamy flavors.

Ingredients

Vegetables

  • 2 ears sweet fresh corn, husked
  • 8 ounces small butternut squash (to make 8 ounces sliced)
  • ¼ cup diced small onion (about ¼ cup diced)
  • 8 ounces small peeled potatoes (to make about 8 ounces diced)
  • 4 tablespoons butter (plus extra for bread)
  • 1 tablespoon flour
  • 3 cups vegetable stock
  • 1 teaspoon chopped fresh sage (or ½ teaspoon dried)
  • ¼ cup canned white beans (drained and rinsed)
  • 1 teaspoon seasoned salt (such as Lawry’s)
  • 1 cup heavy cream

Bread

  • Ciabatta bread (to serve with chowder)

Instructions 

  • Melt butter in a medium pot, add squash, corn, and onions. Sauté 4 minutes, then stir in flour and cook 1 minute.
  • Drain potatoes and add to the pot with stock, sage, white beans, and seasoned salt. Bring to a boil, then simmer uncovered for 10-12 minutes until potatoes are tender.
  • Remove from heat, stir in heavy cream, and serve with toasted Ciabatta bread spread with butter.

Notes

For a richer flavor, garnish with additional sage or a drizzle of olive oil.
Calories: 350kcal
Cost: $15
Course: Soup
Cuisine: American
Keyword: Butternut Squash, corn, vegetarian

Embrace the Essence of Autumn with Easiest Pumpkin Dump Cake

As the leaves turn vibrant shades of amber and gold, there’s a certain magic that fills the air—the unmistakable aroma of fall baking. One dessert that captures this seasonal spirit perfectly is the easiest pumpkin dump cake. Combining the warm flavors of pumpkin spice with the effortless charm of a dump cake, this recipe is your ticket to a delightful autumn experience. If you’re looking to celebrate the season with a dessert that’s both simple and spectacular, you’ve come to the right place!

Why You’ll Love This Recipe

Here are five compelling reasons why this pumpkin dump cake will become your go-to fall dessert:

  • Effortless Preparation: With a simple dumping method, this recipe requires no mixing or fancy techniques—just layer the ingredients and let the oven do the magic.
  • Rich, Indulgent Flavors: The combination of pumpkin puree and spice cake mix creates a moist, flavorful cake that tastes like a hug in dessert form.
  • Customizable to Your Taste: Add chocolate chips, nuts, or even a drizzle of caramel sauce to make this cake uniquely yours.
  • Perfect for Gatherings: This cake serves a crowd, making it an excellent choice for Thanksgiving, potlucks, or cozy family dinners.
  • Delightful Texture: Expect a wonderful contrast of creamy pumpkin base, moist cake, and a crunchy topping, making each bite a satisfying experience.

Gather Your Ingredients: What You’ll Need

Here’s what you’ll need to create this delightful dessert:


5-Speed Electric Hand Mixer

★ Recommended Kitchen Tool

5-Speed Electric Hand Mixer

Make this recipe even easier with a quality 5-Speed Electric Hand Mixer — a must-have kitchen staple!


🛒 See Deals on Amazon →

As an Amazon Associate, we earn from qualifying purchases.
  • 1 (15 ounce) can pumpkin puree: Look for 100% pure pumpkin for the best flavor and texture.
  • 1 (15.25 ounce) box spice cake mix: This mix provides the warm spices that make this cake sing.
  • 1 (12 ounce) can evaporated milk: This ingredient adds richness and moisture.
  • 1 cup melted butter: A must for achieving the perfect cake texture.
  • 1 cup chopped pecans (optional): Adds a delightful crunch and nutty flavor, but can be omitted if you prefer.

Let’s Get Baking: Step-by-Step Instructions

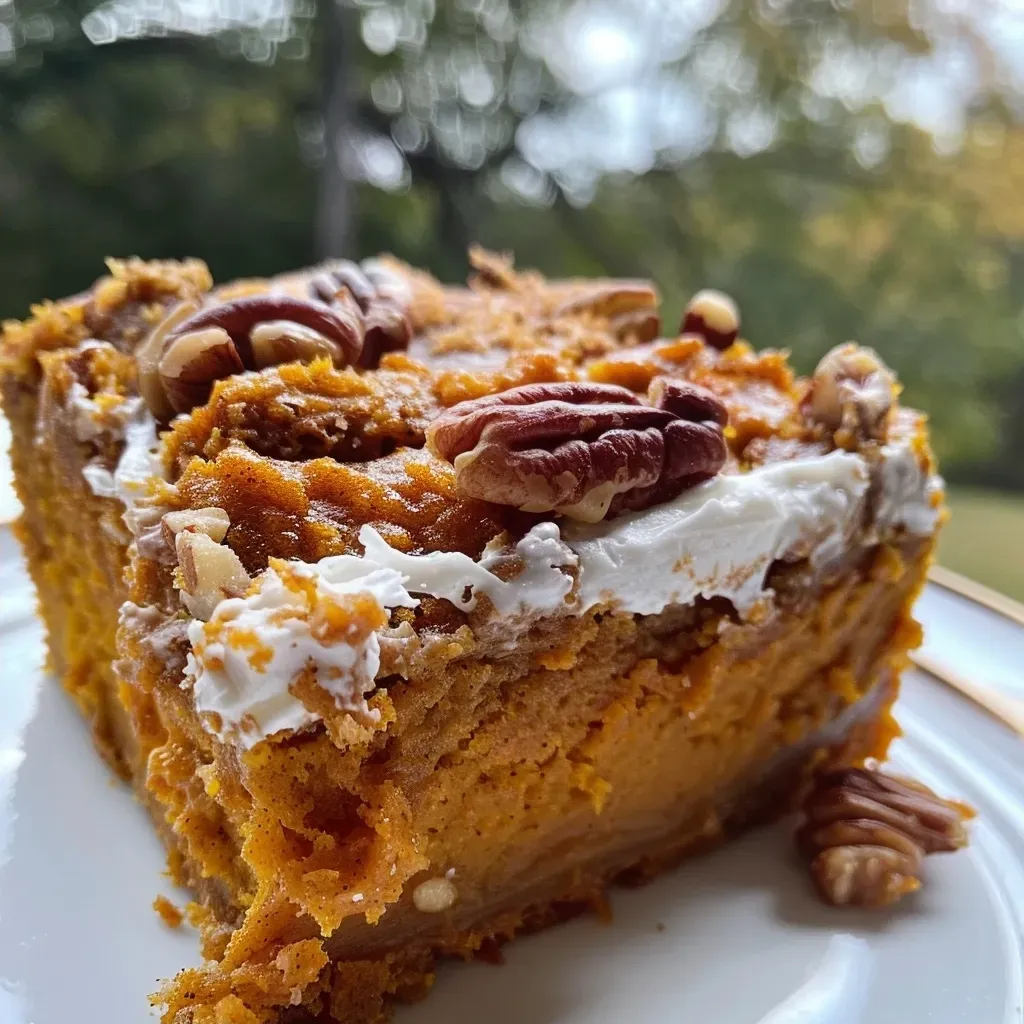
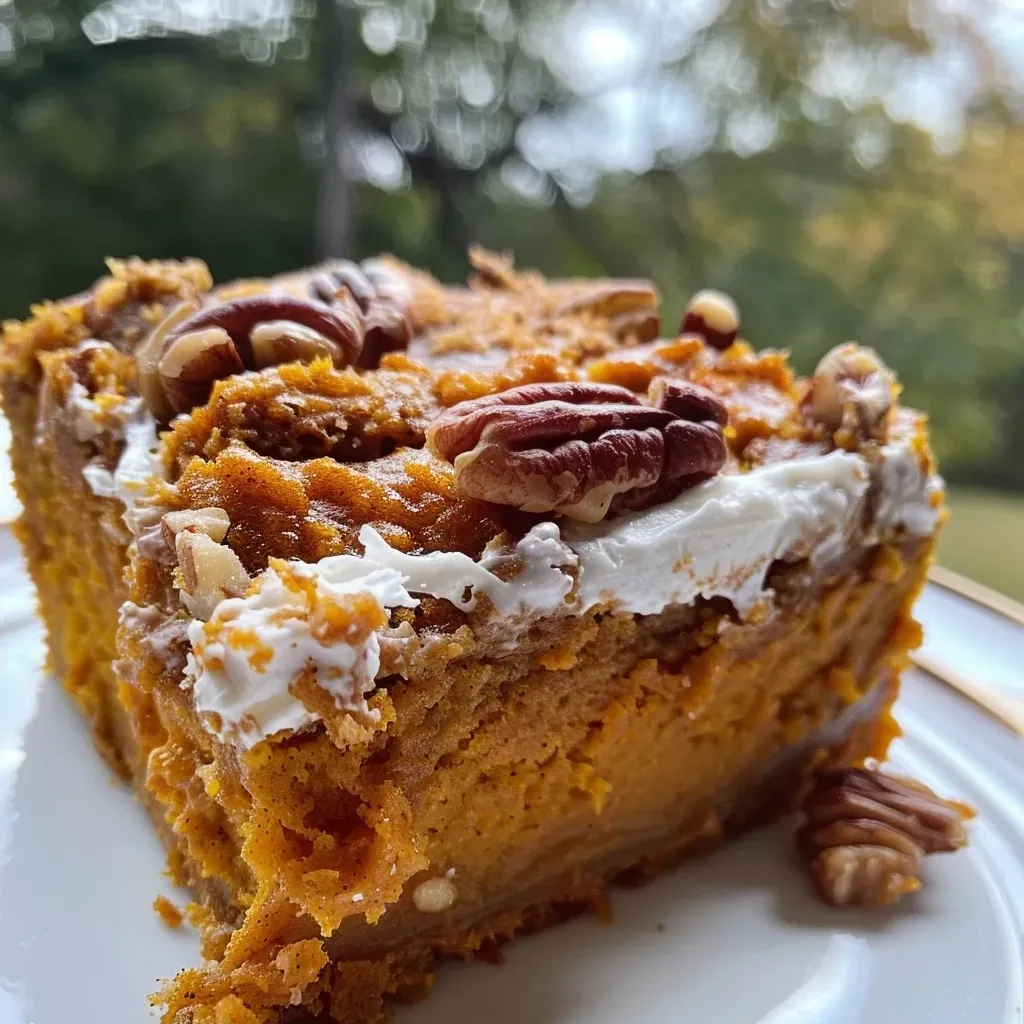
Close-up of a juicy pumpkin dump cake, highlighting the texture and toppings.

Ready to create your pumpkin dump cake? Follow these easy steps:

  1. Preheat your oven to 350°F (175°C).
  2. Pour the pumpkin puree into a 9×13 inch baking dish, spreading it evenly across the bottom.
  3. Sprinkle the spice cake mix evenly over the pumpkin puree. No need to stir!
  4. Pour the evaporated milk evenly over the cake mix.
  5. Drizzle the melted butter over the top of the cake mix and evaporated milk mixture.
  6. Sprinkle the chopped pecans on top, if using.
  7. Bake for 45-50 minutes, or until a toothpick inserted into the center comes out clean or with a few moist crumbs.
  8. Let cool completely before cutting and serving.

Pro Tips for the Perfect Pumpkin Dump Cake

To ensure your dessert turns out perfectly, consider these expert tips:

  • Use fresh ingredients: Whenever possible, opt for fresh spices and high-quality pumpkin puree to enhance flavor.
  • Don’t stir!: The beauty of a dump cake lies in its distinct layers; stirring can ruin the delightful texture.
  • Experiment with toppings: Try whipped cream, ice cream, or even a drizzle of caramel sauce for added indulgence.
  • Adjust sweetness: If you prefer a sweeter cake, you can add a bit of brown sugar to the pumpkin puree.
  • Monitor baking time: Ovens can vary; check your cake a few minutes early to prevent overbaking.
  • Let it cool: Allowing the cake to cool fully helps it set, making it easier to cut.
  • Make it a day ahead: This cake actually tastes better the next day as the flavors meld.
  • Store properly: Cover leftovers tightly and refrigerate for up to 4 days.

Common Mistakes and Troubleshooting

Even with the simplest recipes, it’s easy to make a few common mistakes. Here’s how to avoid them:

  • Soggy cake: This can happen if too much liquid is added—be sure to measure carefully.
  • Burnt edges: If your oven runs hot, consider using a baking shield or reducing the temperature slightly.
  • Dense texture: If you stir the batter, the cake may become dense instead of light and fluffy.
  • Uneven baking: Ensure your oven is preheated properly, and rotate the cake halfway through baking for even results.

Delicious Variations to Try

Looking to switch things up? Here are a few fun variations of this pumpkin dump cake:

  • Chocolate Delight: Add a layer of chocolate chips between the pumpkin and cake mix for a rich twist.
  • Nutty Banana: Incorporate mashed bananas into the pumpkin layer for a fruity surprise.
  • Maple Pecan: Use maple syrup in place of melted butter for a sweet, maple-infused flavor.
  • Vegan Version: Substitute the evaporated milk with coconut milk and use a vegan butter alternative.

Storage and Make-Ahead Instructions

Want to prepare this delicious dessert in advance? Here’s how to store it:

  • Refrigerate: Store leftovers in an airtight container in the fridge for up to 4 days.
  • Freeze: You can freeze the cooled cake for up to 3 months. Just make sure it’s well-wrapped.
  • Reheat: To enjoy, thaw in the fridge overnight and reheat in the oven until warmed through.

Frequently Asked Questions

Got questions? We’ve got answers!

  • Can I make this pumpkin dump cake ahead of time?
    Yes! You can prepare it a day in advance and refrigerate before baking.
  • Can I freeze pumpkin dump cake?
    Absolutely! Just ensure it’s tightly wrapped to prevent freezer burn.
  • Can I use fresh pumpkin instead of canned puree?
    Yes, but be sure to cook and puree it properly for the best results.
  • How can I make this cake healthier?
    Consider using a sugar substitute or whole wheat flour in the cake mix.
  • Can I add chocolate chips to this recipe?
    Yes! Chocolate chips complement the pumpkin beautifully.
  • What’s the best way to serve pumpkin dump cake?
    Serve it warm with whipped cream or a scoop of vanilla ice cream.
  • My cake is soggy. What did I do wrong?
    Sogginess often results from too much liquid or not baking long enough—be sure to follow the recipe closely.
  • Can I use a different cake mix?
    Absolutely! Vanilla or yellow cake mixes can also work well, but spice cake is recommended for that warm flavor.

Nutritional Tips and Dietary Adaptations

To make this dessert fit your dietary needs:

  • Gluten-Free: Use a gluten-free cake mix for a gluten-free version.
  • Lower Sugar: Opt for sugar-free cake mix and feel free to reduce the sugar in the pumpkin layer.
  • Dairy-Free: Replace evaporated milk with almond or oat milk, and use a dairy-free butter alternative.

Equipment Recommendations

Here’s what you’ll need for this recipe:

  • 9×13 inch baking dish: A classic size that works perfectly for this cake.
  • Mixing bowls: For easily measuring and pouring ingredients.
  • Measuring cups and spoons: Precision is key to ensuring the best results.
  • Spatula: For scraping the sides of your baking dish and serving the cake.

Serving Suggestions

To elevate your pumpkin dump cake, consider these serving ideas:

  • Top with whipped cream: A dollop of whipped cream adds a light, airy touch.
  • Drizzle with caramel sauce: For an indulgent treat, drizzle caramel over each slice.
  • Pair with ice cream: Vanilla or cinnamon ice cream makes for a delightful combination.
  • Garnish with nuts: Sprinkle toasted pecans or walnuts on top for extra crunch.

In conclusion, the easiest pumpkin dump cake is not just a dessert; it’s a celebration of fall flavors and a testament to the joys of simple cooking. Whether you’re sharing it at a gathering or enjoying it on a cozy evening at home, this cake is sure to bring warmth and happiness to your table. So gather your ingredients, preheat that oven, and let the magic of autumn unfold in your kitchen!

Easiest Pumpkin Dump Cake Spice Cake Mix Magic

Prep Time 10 minutes
Cook Time 45 minutes
Total Time 55 minutes
Servings 8 pieces
Calories 250
This simple and delicious pumpkin dump cake combines spice cake mix and pumpkin for an easy dessert perfect for fall gatherings.

Ingredients

Pumpkin Puree

  • 1 can pumpkin puree (15 ounces)

Cake Mix

  • 1 box spice cake mix (15.25 ounces)

Evaporated Milk

  • 1 can evaporated milk (12 ounces)

Butter

  • 1 cup melted butter

Pecans

  • 1 cup chopped pecans (optional)

Instructions 

  • Preheat oven to 350°F (175°C).
  • Pour pumpkin into a 9×13 inch baking dish and sprinkle cake mix over it.
  • Pour evaporated milk over the mixture and drizzle melted butter on top.
  • Sprinkle pecans if using, then bake for 45-50 minutes until set.
  • Let cool before serving.

Notes

This dessert is best served warm or at room temperature.
Calories: 250kcal
Cost: $10
Course: Dessert
Cuisine: American
Keyword: pumpkin

Experience the Essence of Autumn with Pumpkin Ravioli

As the leaves turn and the air grows crisp, there’s no better way to celebrate the season than with a comforting plate of pumpkin ravioli bathed in a rich, nutty brown butter sauce. This dish not only embraces the flavors of fall but also brings a sense of warmth and nostalgia to the dining table.

Why You’ll Love This Recipe

This Pumpkin Ravioli with Sage Brown Butter Sauce is not just a meal; it’s an experience! Here are five reasons why you’ll adore this dish:

  • Quick and Easy: With minimal prep and cook time, you can whip up this dish in under 30 minutes, making it perfect for busy weeknights!
  • Rich, Flavorful Sauce: The combination of nutty brown butter and aromatic sage creates a sauce that is absolutely delicious and elevates the humble ravioli to gourmet status.
  • Seasonal Ingredients: This recipe uses fresh, seasonal ingredients that capture the essence of autumn, including pumpkin and sage.
  • Customizable: With numerous variations and substitutions, you can easily adapt this recipe to suit your dietary preferences or whatever ingredients you have on hand.
  • Impressive Presentation: Serve this dish at your next dinner party, and watch your guests marvel at the beautiful plating and delightful flavors.

Ingredient Breakdown

Before we dive into the cooking process, let’s look at the essential ingredients you’ll need for this dish, along with some potential substitutions:


Meal Prep Container Set

★ Recommended Kitchen Tool

Meal Prep Container Set

Make this recipe even easier with a quality Meal Prep Container Set — a must-have kitchen staple!


🛒 Check Price on Amazon →

As an Amazon Associate, we earn from qualifying purchases.
  • ½ cup butter: Cut into chunks. For a lighter option, consider using olive oil or a plant-based butter.
  • 8-10 fresh sage leaves: Essential for flavor. Dried sage can be used in a pinch but will not provide the same freshness.
  • ¼ cup chopped hazelnuts: Adds crunch and nuttiness. Feel free to substitute with walnuts or pecans if preferred.
  • Salt: To taste, enhances all the flavors.
  • Freshly grated Parmigiano cheese: For serving. Parmesan brings a salty, umami note to the dish.
  • Store-bought pumpkin ravioli: About 1 pound. Alternatively, you can make your own ravioli if you’re feeling adventurous!

How to Make Pumpkin Ravioli with Sage Brown Butter Sauce

Close-up view of pumpkin ravioli garnished with sage and brown butter sauce.

Ready to create this delightful dish? Follow these simple steps to make your own pumpkin ravioli with sage brown butter sauce:

  1. In a large pot of salted boiling water, cook the store-bought pumpkin ravioli according to package instructions. Typically, this takes about 3-5 minutes.
  2. While the ravioli cooks, melt the butter in a large skillet over medium heat. Allow it to cook until it turns golden brown and develops a nutty aroma, about 5-7 minutes.
  3. Add the fresh sage leaves to the skillet and sauté for an additional minute until they are crispy and fragrant.
  4. Once the ravioli are cooked, carefully drain and add them to the skillet with the brown butter sauce. Gently toss to coat the ravioli in the sauce.
  5. Sprinkle in the chopped hazelnuts and season with salt to taste. Serve immediately, topped with freshly grated Parmigiano cheese.

Pro Tips for Perfect Pumpkin Ravioli

To ensure your pumpkin ravioli is a hit, consider these expert tips:

  • Don’t Overcook Ravioli: Keep an eye on your ravioli while cooking. Overcooked ravioli can become mushy and lose their shape.
  • Use Fresh Ingredients: Fresh sage and high-quality butter will enhance the flavors significantly. Opt for real Parmigiano cheese rather than pre-grated for the best taste.
  • Adjust the Sauce: If the sauce is too thick, add a splash of pasta water to loosen it up. This will help the sauce adhere to the ravioli better.
  • Experiment with Nuts: Don’t hesitate to try different nuts! Each type will bring a unique flavor and texture to the dish.
  • Make it Vegan: Substitute the butter with a plant-based alternative and use a dairy-free cheese for a vegan version.
  • Serve with Bread: A hearty bread is perfect to soak up any leftover brown butter sauce on your plate!
  • Garnish Creatively: Add a sprinkle of red pepper flakes or lemon zest for an extra flavor boost.
  • Pair with Wine: A glass of crisp white wine, such as Sauvignon Blanc, complements the richness of the dish beautifully.

Common Mistakes and Troubleshooting

Even the best chefs can encounter hiccups in the kitchen. Here’s how to troubleshoot common issues:

  • Sauce Separation: If your brown butter sauce separates, try whisking in a bit of warm pasta water to bring it together.
  • Too Salty: If the sauce ends up too salty, balance it out with a squeeze of lemon juice.
  • Ravioli Sticking Together: Toss the ravioli in a little olive oil after draining to prevent them from sticking.

Delicious Variations

Looking to switch things up? Here are a few tasty variations on this classic recipe:

  • Spinach and Ricotta Ravioli: Replace pumpkin ravioli with spinach and ricotta for a lighter option.
  • Brown Butter Sage Noodles: Instead of ravioli, use fettuccine or any pasta for a quick and easy dish.
  • Mushroom Addition: Sauté some mushrooms with the butter for an earthy flavor.
  • Spicy Kick: Add crushed red pepper flakes to the brown butter for a spicy twist!

Storage and Make-Ahead Instructions

This dish is best enjoyed fresh, but if you have leftovers, here’s how to store them:

  • Refrigeration: Store any leftover ravioli in an airtight container in the fridge for up to 3 days.
  • Freezing: You can freeze the uncooked ravioli for up to 2 months. Just layer them between sheets of parchment paper to prevent sticking.
  • Reheating: To reheat, simply warm in a skillet over low heat, adding a splash of water or stock to rehydrate the sauce.

Frequently Asked Questions

Have questions about this dish? Here are some common inquiries:

  • Can I use homemade ravioli? Absolutely! Homemade ravioli adds a personal touch and can be filled with your choice of stuffing.
  • What type of pumpkin should I use? For the best flavor, opt for sugar pumpkins or canned pumpkin puree.
  • Is this dish vegetarian? Yes, as long as you use vegetarian cheese. It’s a hearty vegetarian option!
  • Can I make this dish gluten-free? Yes! Simply use gluten-free ravioli.
  • What can I serve with this dish? A simple arugula salad or garlic bread pairs nicely!
  • How do I store leftover brown butter sauce? Store in an airtight container in the fridge for up to a week.
  • Can I use dried sage instead? Yes, but fresh sage provides a more vibrant flavor.
  • How do I know when the butter is browned? It should be golden brown and smell nutty, not burnt.

Nutritional Tips and Dietary Adaptations

This dish can be adapted to suit various dietary needs:

  • Low Carb: Use zucchini noodles instead of ravioli for a low-carb alternative.
  • Nut-Free: Omit the hazelnuts and consider using seeds like pumpkin seeds for crunch.
  • Dairy-Free: Choose non-dairy butter and cheese for a dairy-free version.

Equipment Recommendations

Here’s what you’ll need to make this dish:

  • Large Pot: For boiling the ravioli.
  • Skillet: A heavy-bottomed skillet is ideal for making the brown butter sauce.
  • Slotted Spoon: Perfect for transferring the ravioli from pot to skillet without losing any.

Serving Suggestions

This dish is a showstopper on its own, but consider these serving ideas:

  • Garnish: Top with crispy sage leaves or extra chopped hazelnuts for added texture.
  • Wine Pairing: A crisp white wine like Pinot Grigio perfectly complements the dish.
  • Side Salad: A light salad with a vinaigrette can balance the richness of the ravioli.

Conclusion

In conclusion, this Pumpkin Ravioli with Sage Brown Butter Sauce is more than just a recipe; it’s a celebration of autumn flavors and a wonderful way to connect with loved ones around the table. The rich, nutty brown butter sauce, combined with the tender pumpkin ravioli, creates a dish that is both comforting and sophisticated. So grab your apron and let’s embark on this culinary adventure together!

Pumpkin Ravioli with Sage Brown Butter Sauce Recipe

Prep Time 10 minutes
Cook Time 15 minutes
Total Time 25 minutes
Servings 4 servings
Calories 450
A delicious fall-inspired dish featuring store-bought pumpkin ravioli topped with a fragrant sage brown butter sauce and toasted hazelnuts.

Ingredients

Dairy

  • ½ cup butter (cut into chunks)
  • 8-10 leaves fresh sage leaves
  • ¼ cup chopped hazelnuts (or other nuts of choice)
  • to taste salt Salt
  • for serving Freshly Grated Parmigiano cheese (Parmesan cheese)
  • about 1 pound store-bought pumpkin ravioli (plus salt for pasta water)

Instructions 

  • Cook the pumpkin ravioli in salted boiling water until tender, then drain.
  • In a skillet, melt the butter over medium heat and cook until golden brown, then add sage leaves and cook until fragrant.
  • Pour the sage brown butter over the cooked ravioli and toss gently to coat.
  • Sprinkle chopped hazelnuts and freshly grated Parmigiano cheese on top before serving.

Notes

For extra flavor, add a splash of white wine to the butter sauce.
Calories: 450kcal
Cost: $15
Course: Main Course
Cuisine: Italian
Keyword: pumpkin, Ravioli

Experience the Magic of Apple Cinnamon Cream Cheese Danishes

Welcome to a delightful journey where we craft the perfect Apple Cinnamon Cream Cheese Danish! This recipe is not just about combining ingredients; it’s about creating a culinary experience that whisks you away to a cozy bakery, enveloped in the fragrant aroma of baked apples and warm cinnamon. Imagine flaky puff pastry cradling a creamy cheese filling, and the first bite brings a symphony of flavors that dance on your palate. Let’s dive into the world of this delectable treat that’s perfect for breakfast, brunch, or any moment you want to celebrate.

Why You’ll Love This Recipe

  • Irresistible Flavor Combination: The sweet and tangy apple filling melds perfectly with the rich cream cheese, creating an explosion of flavors.
  • Easy to Make: With simple steps, you can whip up these danishes even if you’re a novice in the kitchen.
  • Versatile Serving Options: They can be served warm for breakfast, as a sweet snack, or as a dessert, making them perfect for any occasion.
  • Customizable Ingredients: You can easily substitute ingredients to suit your dietary needs or flavor preferences.
  • Perfect for Meal Prep: These danishes can be made ahead of time and frozen, making them a convenient treat for busy days.

Ingredient Breakdown

Let’s take a closer look at the ingredients that make this cream cheese danish so special:

  • Puff Pastry Sheets: Use one package of thawed puff pastry sheets. These are the foundation of your danish, providing that signature flaky texture. Make sure they are completely thawed for easier handling.
  • Cream Cheese: An 8-ounce block of softened cream cheese creates a rich, smooth filling. Softening it beforehand helps it blend seamlessly with the sugar and spices.
  • Granulated Sugar: Two tablespoons add sweetness without overpowering the other flavors.
  • Vanilla Extract: One teaspoon enhances the flavor profile, adding a warm, sweet aroma to the filling.
  • Ground Cinnamon: One teaspoon provides that classic apple cinnamon flavor that everyone loves.
  • Medium Apples: Two peeled, cored, and thinly sliced apples (Granny Smith or Honeycrisp work wonderfully) bring freshness and juiciness to the filling.
  • Lemon Juice: A tablespoon of lemon juice brightens the apple filling, balancing the sweetness.
  • Brown Sugar: Two tablespoons give a deeper, molasses-like flavor to the apples.
  • All-Purpose Flour: Just one tablespoon helps thicken the apple filling, preventing excess moisture from making the pastry soggy.
  • Egg and Milk: One large egg mixed with a tablespoon of milk creates a golden egg wash that gives your danish a beautiful finish.
  • Powdered Sugar (optional): For dusting, this adds a touch of sweetness and a lovely presentation.

Expert Pro Tips for Success

A close-up view of a golden-brown Apple Cinnamon Cream Cheese Danish with visible apple slices and a creamy filling.

Want to elevate your danish-making game? Here are some expert tips to ensure your Apple Cinnamon Cream Cheese Danish turns out perfect every time:


Silicone Baking Cups Set

★ Recommended Kitchen Tool

Silicone Baking Cups Set

Make this recipe even easier with a quality Silicone Baking Cups Set — a must-have kitchen staple!


🛒 View on Amazon →

As an Amazon Associate, we earn from qualifying purchases.
  • Perfect Puff Pastry: Ensure your puff pastry is cold when handling. This helps create those flaky layers during baking.
  • Don’t Overfill: Be cautious not to overfill with the apple mixture, as it can cause the pastry to burst.
  • Use a Sharp Knife: For cutting the pastry, a sharp knife will give you cleaner edges and a neater appearance.
  • Experiment with Spices: Feel free to add a pinch of nutmeg or allspice to the apple filling for an extra depth of flavor.
  • Check for Doneness: Keep an eye on your danishes as they bake. They should be golden brown and puffed up when ready.
  • Cool Before Serving: Allow your danishes to cool for a few minutes before serving to let the filling set and avoid burns.
  • Glaze for Extra Flavor: Consider drizzling a simple glaze made from powdered sugar and milk over the cooled danishes for added sweetness.
  • Store Properly: If you have leftovers, store them in an airtight container at room temperature for up to two days, or refrigerate for longer freshness.

Common Mistakes and Troubleshooting

Even the best chefs make mistakes! Here are some common pitfalls and how to avoid them:

  • Soggy Pastry: This can happen if the apple filling is too wet. Be sure to drain any excess liquid after cooking the apples and sprinkle flour to thicken.
  • Underbaked Pastry: If your pastry isn’t golden brown, it may need more time in the oven. Always follow the baking time, but adjust as needed based on your oven.
  • Filling Overflow: To prevent this, use a smaller amount of filling and ensure the edges are sealed well before baking.
  • Flavorless Filling: Always taste your filling before assembling the danish. Adjust the sugar and spices to your liking.

Delicious Variations

Feeling adventurous? Here are some delightful variations of the Apple Cinnamon Cream Cheese Danish:

  • Pear and Ginger Variation: Substitute apples with ripe pears and add fresh ginger for a zesty twist.
  • Nutty Addition: Mix in some chopped walnuts or pecans to the apple filling for an added crunch.
  • Caramel Drizzle: After baking, drizzle some caramel sauce over the danishes for a decadent finish.
  • Berry Bliss: Swap out apples for mixed berries like blueberries and raspberries for a fruity version.

Storage and Make-Ahead Instructions

Want to enjoy these danishes later? Here’s how to store and prepare them:

  • Freezing: You can freeze unbaked danishes. Assemble them, place on a baking sheet, and freeze until solid. Then transfer to a freezer bag and bake from frozen, adding a few extra minutes to the baking time.
  • Refrigerating Baked Danishes: Store leftovers in an airtight container in the fridge for up to three days. Reheat in the oven for a few minutes to regain the flaky texture.

FAQs: Your Questions Answered

  • Can I use store-bought cream cheese? Yes, store-bought cream cheese works perfectly for this recipe.
  • What type of apples are best for baking? Granny Smith and Honeycrisp are excellent choices due to their balance of sweetness and tartness.
  • Can I use whole wheat pastry flour instead of all-purpose flour? Yes, but it may change the texture slightly, making it denser.
  • How can I make this recipe gluten-free? Use gluten-free puff pastry and all-purpose flour alternatives.
  • What’s the best way to reheat leftover danishes? Reheat in the oven at 350°F for about 5-10 minutes for optimal texture.
  • Can I make the filling in advance? Yes, you can prepare the apple filling a day ahead and store it in the refrigerator until ready to use.
  • How do I know when my danishes are done baking? They should be golden brown and puffed up. A toothpick inserted into the filling should come out clean.
  • Can I add more sugar to the filling? Absolutely, adjust the sugar based on your sweetness preference.

Nutritional Tips and Dietary Adaptations

This recipe can be adapted to fit various dietary needs:

  • Low-Sugar Option: Use a sugar substitute or reduce the amount of sugar in the filling.
  • Vegan Adaptation: Substitute cream cheese with a plant-based alternative and use a flax egg for the egg wash.
  • Gluten-Free Version: As mentioned, ensure you use gluten-free puff pastry.

Equipment Recommendations

Here are a few tools to make your danish-making experience smooth and enjoyable:

  • Rolling Pin: Essential for rolling out your puff pastry to the desired thickness.
  • Baking Sheet: A sturdy baking sheet ensures even baking and prevents bending.
  • Parchment Paper: Line your baking sheet with parchment for easy cleanup and to prevent sticking.
  • Pastry Brush: Use this for applying the egg wash to achieve a beautiful golden crust.

Serving Suggestions

How you serve your danishes can enhance the experience:

  • Pair with Coffee or Tea: These danishes are perfect with a hot cup of coffee or a soothing herbal tea.
  • Serve Warm with Ice Cream: Warm danishes served with a scoop of vanilla ice cream create a delightful dessert.
  • Add Fresh Fruit: A side of fresh berries or sliced fruit can add a refreshing contrast to the richness of the danish.

Conclusion: Your Culinary Adventure Awaits

And there you have it! A comprehensive guide to making your own Apple Cinnamon Cream Cheese Danishes. With this recipe, you’ll not only impress your family and friends but also embark on a delicious journey of flavors and textures. So, gather your ingredients, roll up your sleeves, and get ready to create a treat that’s as delightful to make as it is to eat. Remember, cooking is all about exploration and joy, and every bite of your danish will carry a story worth sharing. Happy baking!

Apple Cinnamon Cream Cheese Danish

Prep Time 15 minutes
Cook Time 20 minutes
Total Time 35 minutes
Servings 8 pieces
Calories 250
Delight in flaky puff pastry filled with sweet apples, cinnamon, and creamy cheese for a perfect breakfast or treat.

Ingredients

Dough

  • 1 package Puff Pastry Sheets (thawed)

Filling

  • 8 ounce Cream Cheese (softened)
  • 2 tablespoon Granulated Sugar
  • 1 teaspoon Vanilla Extract
  • 1 teaspoon Ground Cinnamon
  • 2 medium Apples (peeled, cored, thinly sliced)
  • 1 tablespoon Lemon Juice
  • 2 tablespoon Brown Sugar
  • 1 tablespoon All-Purpose Flour
  • 1 large Egg
  • 1 tablespoon Milk
  • to taste optional Powdered Sugar (for dusting)

Instructions 

  • Preheat oven to 375°F (190°C). Roll out puff pastry and cut into squares.
  • Mix cream cheese, sugar, vanilla, and cinnamon until smooth. Spread on pastry squares.
  • Top with sliced apples and drizzle with lemon juice and brown sugar.
  • Fold edges slightly to contain filling and brush with beaten egg mixed with milk.
  • Bake for 20 minutes until golden brown. Optional: dust with powdered sugar before serving.

Notes

For a crispier crust, bake a few extra minutes and keep an eye on it.
Calories: 250kcal
Cost: $12
Course: Breakfast
Cuisine: American
Keyword: Apple, Cinnamon, Danish