Author

Jack

Browsing

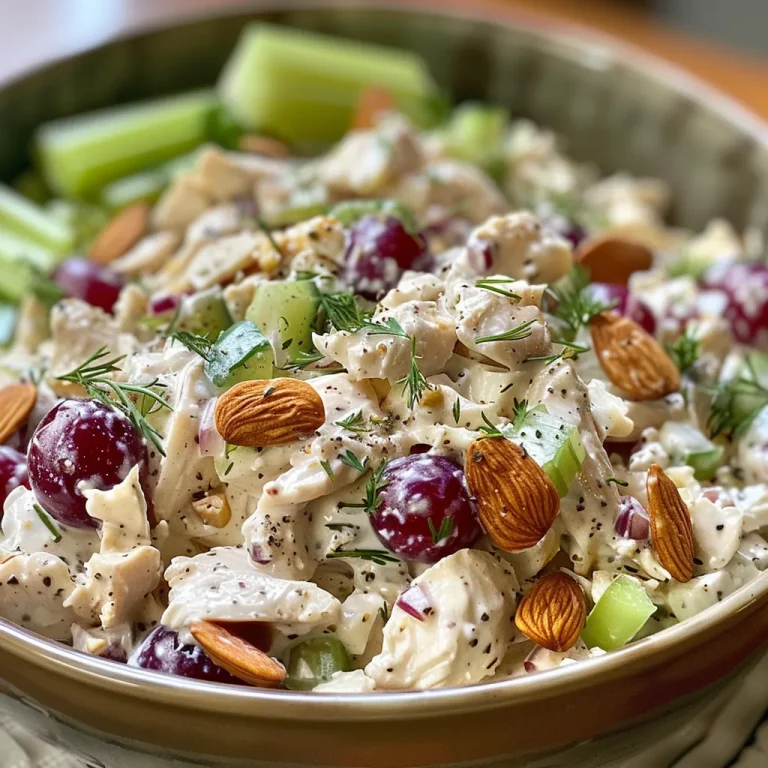
Unlock the Flavors of the Mediterranean with Greek Yogurt Chicken Salad

Are you ready to embark on a culinary journey that combines the vibrant flavors of the Mediterranean with the comfort of home-cooked meals? Allow me to introduce my Greek Yogurt Chicken Salad, a dish that transcends borders and brings together the freshness of ingredients with a touch of creativity. This salad is more than just a meal; it’s a celebration of culture, connection, and the joy of sharing food.

This Greek yogurt chicken salad is not only delicious but also a **satisfying dish** that keeps well in the fridge. Perfect for picnics, lunchboxes, or a light dinner, it’s a quick and easy recipe that can easily become a staple in your kitchen. So, let’s dive into why you’ll love this recipe!

Why You’ll Love This Recipe

  • Healthier alternative: By using Greek yogurt instead of mayonnaise, this salad is lower in calories and packed with protein, making it a guilt-free indulgence.
  • Quick prep time: With just a handful of ingredients and minimal cooking, you can whip this salad up in under 30 minutes!
  • Flavor explosion: The combination of sweet grapes, crunchy almonds, and creamy yogurt creates a delightful medley of flavors and textures.
  • Meal prep friendly: Make a big batch and store it in the fridge for up to five days, ensuring you have a nutritious meal ready whenever you need it.
  • Culinary versatility: This Greek yogurt chicken salad can be enjoyed on its own, in a sandwich, or served on a bed of greens, making it perfect for any occasion.

Ingredients Breakdown

Let’s take a closer look at the ingredients that make this salad not only delicious but also nutritious:

  • 2 cups shredded chicken: Use rotisserie chicken for convenience or poach your own for a fresh taste.
  • ½ cup grapes, halved: Choose seedless grapes for a sweet burst of flavor. Red or green, you can’t go wrong!
  • ½ cup chopped celery: This adds a satisfying crunch and freshness to the salad.
  • ¼ cup diced red onion: It gives a mild bite and beautiful color.
  • ½ cup plain Greek yogurt: The creamy base that ties all the flavors together while providing protein.
  • 2 Tablespoons chopped salted almonds: For added crunch and nutty flavor. Feel free to substitute with walnuts or pecans if desired.
  • ½ Tablespoon Dijon mustard: This adds a subtle tang that elevates the dish.
  • 1 Tablespoon chopped parsley: A fresh herb that brightens up the flavors.
  • ¼ teaspoon pepper and ⅛ teaspoon fine sea salt: Essential seasonings to enhance the overall taste.

Step-by-Step Instructions

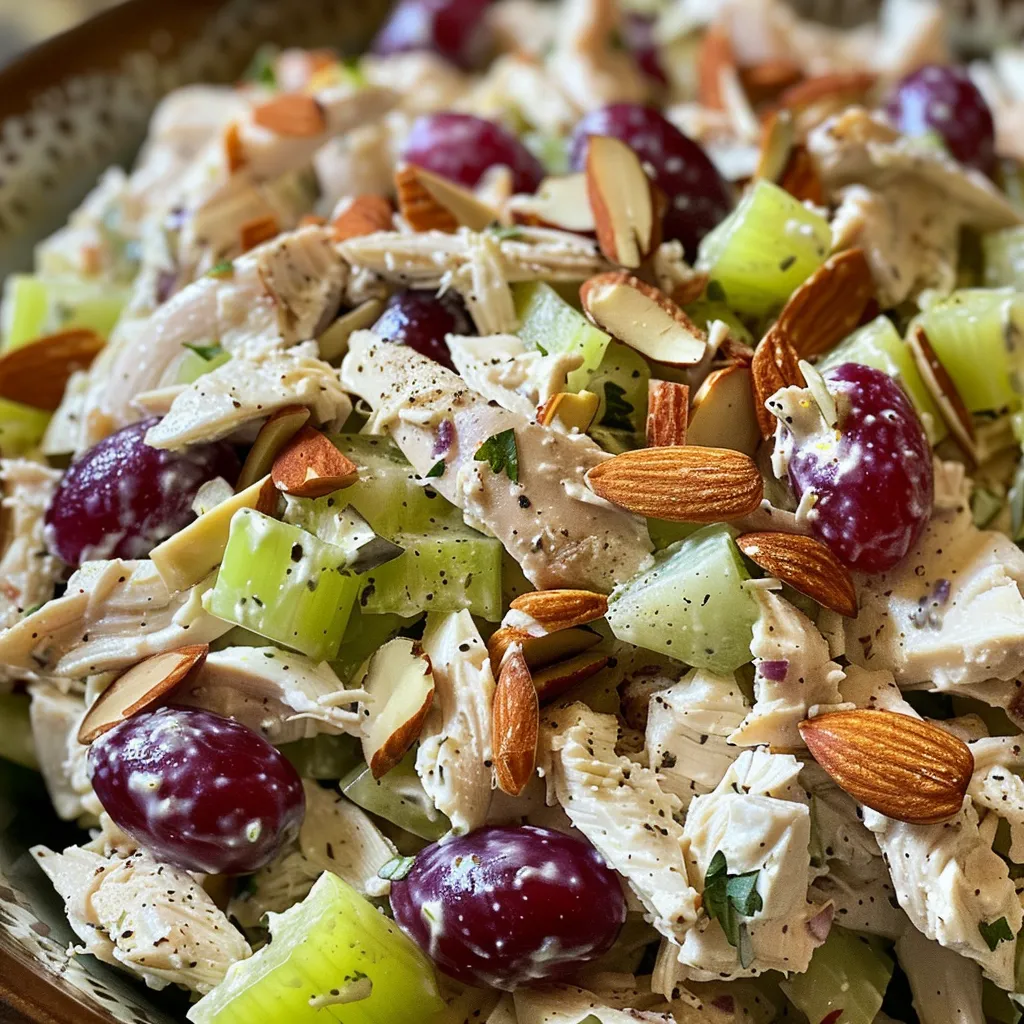
Fresh Greek Yogurt Chicken Salad with a focus on the juicy chicken and assorted vegetables.

Creating this Greek yogurt chicken salad is as easy as pie. Follow these simple steps:

  1. Shred the chicken into bite-sized pieces.
  2. In a large bowl, combine shredded chicken, grapes, celery, and red onion.
  3. In a separate bowl, mix Greek yogurt, Dijon mustard, parsley, salt, and pepper until well combined.
  4. Pour the yogurt mixture over the chicken and stir until evenly coated.
  5. Stir in chopped almonds and adjust seasoning to your preference.
  6. For the best flavor, chill for 30 minutes before serving, if possible.

Pro Tips for Perfecting Your Salad

To ensure your Greek yogurt chicken salad turns out perfectly every time, consider these expert insights:

  • Use cold ingredients: Chill your chicken and ingredients before mixing to enhance the freshness.
  • Adjust flavors: Don’t hesitate to tweak the seasoning; everyone’s taste is different!
  • Experiment with textures: Add diced apples or pears for a sweet crunch or swap almonds for sunflower seeds.
  • Make it tangy: For a zesty kick, add a splash of lemon juice or apple cider vinegar.
  • Herb infusion: Try adding dill or cilantro for a different flavor profile.
  • Toast the nuts: Lightly toasting your almonds can enhance their flavor and crunch.
  • Check for freshness: Ensure your Greek yogurt is fresh; it makes a significant difference in taste.
  • Pair wisely: Serve with whole grain pita or on a bed of leafy greens for a complete meal.

Common Mistakes and Troubleshooting

Even the best cooks can run into issues. Here’s how to troubleshoot:

  • Too dry? Add a bit more Greek yogurt to moisten the salad.
  • Too salty? Balance it out with additional grapes or a squeeze of fresh lemon juice.
  • Too sweet? Introduce a pinch of salt or a dash of vinegar to cut the sweetness.
  • Not enough crunch? Incorporate more celery or nuts for that desired texture.

Variations on a Classic

Don’t be afraid to get creative! Here are some delicious variations of this Greek yogurt chicken salad:

  • Southwestern Style: Add black beans, corn, and diced avocado for a zesty twist.
  • Asian-Inspired: Incorporate sesame oil, shredded carrots, and chopped scallions for an Asian flair.
  • Fruit Medley: Mix in diced apples, cranberries, or even pineapple for a sweet surprise.
  • Spicy Kick: Add chopped jalapeños or a dash of hot sauce for those who love heat.

Storage and Make-Ahead Instructions

You can easily prepare this salad ahead of time. Here’s how to store it properly:

  • In the fridge: Store your Greek yogurt chicken salad in an airtight container for up to five days.
  • Make it ahead: Prepare the salad in advance and let the flavors meld in the fridge for a few hours before serving.
  • Freezing is not recommended: The texture of the Greek yogurt may change when frozen, so it’s best enjoyed fresh.

Frequently Asked Questions

Here are some common questions I get about Greek yogurt chicken salad:

  • Can I use leftover chicken? Absolutely! Leftover grilled or roasted chicken works great.
  • What’s the best way to serve this salad? It’s delicious on its own, in a sandwich, or over a bed of greens!
  • Can I use flavored Greek yogurt? Yes, but it may alter the taste significantly, so choose wisely.
  • How can I make it dairy-free? Substitute Greek yogurt with a plant-based yogurt alternative.
  • Is this salad keto-friendly? Yes! This recipe is low in carbs and high in protein, perfect for a keto diet.
  • What can I serve it with? Pair it with whole grain bread, crackers, or fresh vegetable sticks.
  • How do I make it vegan? Replace chicken with chickpeas or tofu and use a vegan yogurt substitute.
  • Can I add herbs? Definitely! Fresh herbs like dill or cilantro enhance the flavor.

Nutritional Tips and Dietary Adaptations

This Greek yogurt chicken salad is not only delicious but also packed with nutrients. Here are some dietary adaptations you might consider:

  • High protein: Greek yogurt is an excellent source of protein, making this salad perfect for muscle recovery.
  • Low-calorie option: By replacing mayonnaise with Greek yogurt, you reduce the calorie count without sacrificing flavor.
  • Gluten-free: This recipe is naturally gluten-free; just be cautious with the bread or serving options.
  • Vegetarian-friendly: Swap chicken for chickpeas or beans for a hearty vegetarian option.

Essential Equipment for Making Greek Yogurt Chicken Salad

To prepare this delightful dish, you’ll need a few essential tools:

  • Mixing bowls: A large bowl for mixing the salad and a smaller one for the dressing.
  • Cutting board and knife: For chopping your vegetables and fruits quickly and efficiently.
  • Measuring cups and spoons: To ensure accurate ingredient measurements for consistent results.
  • Storage containers: Airtight containers for storing leftovers or meal prep.

Serving Suggestions

This Greek yogurt chicken salad can be enjoyed in various ways:

  • On a bed of greens: Serve it over mixed greens for a light yet filling meal.
  • In a sandwich: Use whole grain bread, wraps, or pita for a hearty lunch option.
  • With crackers: Pair it with your favorite crackers for a delightful snack.
  • As part of a charcuterie board: Include it as a protein option alongside cheeses and fruits.

In conclusion, my Greek Yogurt Chicken Salad is more than just a recipe; it’s a journey into the heart of Mediterranean flavors. With its health benefits, versatility, and ease of preparation, it’s no wonder this dish has become a beloved favorite. So, gather your ingredients, channel your inner culinary explorer, and enjoy this salad as you create connections around the dining table. Bon appétit!

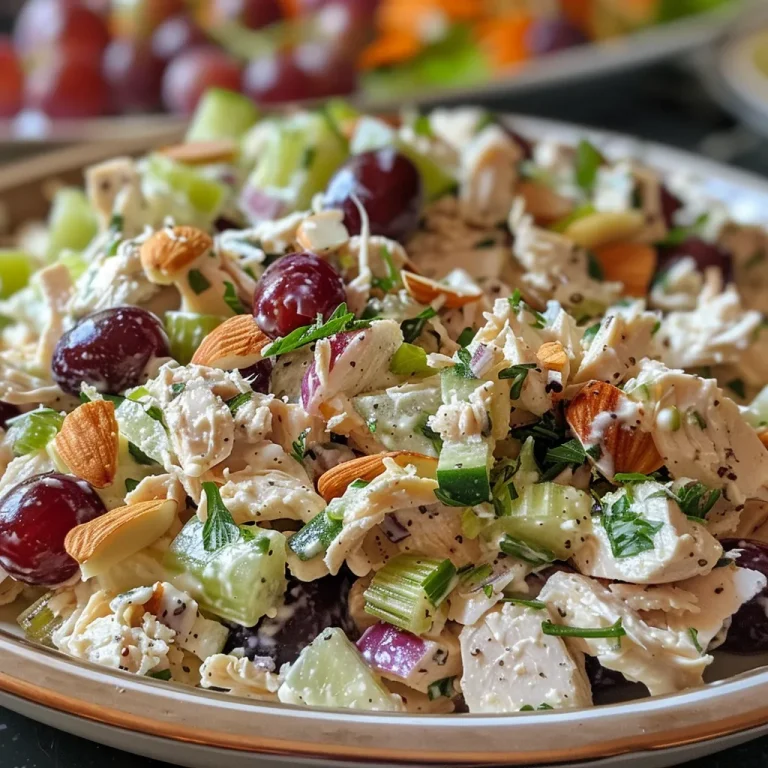
Greek Yogurt Chicken Salad

Prep Time 10 minutes
Total Time 10 minutes
Servings 4 servings
Calories 250
A healthy and creamy chicken salad with fresh grapes and crunchy almonds, perfect for a quick lunch or light dinner.

Ingredients

Protein

  • 2 cups shredded chicken
  • ½ cup grapes, halved
  • ½ cup chopped celery
  • ¼ cup diced red onion
  • ½ cup plain Greek yogurt
  • 2 Tablespoons chopped salted almonds
  • ½ Tablespoon Dijon mustard
  • 1 Tablespoon chopped parsley
  • ¼ teaspoon pepper
  • teaspoon fine sea salt

Instructions 

  • Shred the chicken into bite-sized pieces.
  • Combine chicken, grapes, celery, and onion in a bowl.
  • Mix yogurt, mustard, parsley, salt, and pepper in a separate bowl.
  • Pour dressing over chicken mixture and stir to combine.
  • Stir in almonds and chill for 30 minutes before serving.
Notes

For extra flavor, add a squeeze of lemon before serving.
Calories: 250kcal
Cost: $15
Course: Salad
Cuisine: Greek
Keyword: Chicken, healthy, Yogurt

Embark on a Culinary Adventure with Chicken Salad

Welcome to a delightful journey through the world of flavors with this Healthy Homemade Chicken Salad. Whether you’re a seasoned chef or a curious home cook, this recipe will inspire you to explore the magic of food. Imagine tender chicken, creamy Greek yogurt, and crunchy almonds coming together in a bowl, each bite telling a story of connection and culture. In this article, we’ll not only share the recipe but also dive deep into each ingredient, expert tips, and variations that make this dish a versatile favorite. Let’s get started!

Why You’ll Love This Recipe

  • Quick Preparation: This healthy chicken salad can be ready in just 20 minutes, making it a perfect choice for busy weekdays.
  • Versatile Ingredients: With pantry staples like Greek yogurt and fresh vegetables, you can customize this salad to suit your tastes.
  • Rich in Protein: Packed with shredded chicken and Greek yogurt, this salad is a protein powerhouse, ideal for a nutritious meal.
  • Perfect for Meal Prep: Make it ahead of time and store it in the fridge for quick lunches or snacks throughout the week.
  • Kid-Friendly Flavor: The combination of sweet grapes and creamy dressing makes this salad appealing to both kids and adults.

Ingredient Breakdown and Substitutions

Understanding each ingredient in our healthy chicken salad is key to making the dish truly your own. Here’s a closer look at what you’ll need:

  • Shredded Cooked Chicken (3 cups): Rotisserie chicken works great for a quick option. You can also poach chicken breasts for a healthier alternative.
  • Plain Greek Yogurt (0.5 cup): This adds creaminess with fewer calories. For a dairy-free option, consider using coconut yogurt.
  • Mayonnaise (0.25 cup): A touch of traditional mayo complements the yogurt. If avoiding dairy, opt for vegan mayo.
  • Fresh Lemon Juice (1 tablespoon): Adds brightness. Lime juice can be used as a zesty alternative.
  • Dijon Mustard (1 teaspoon): This ingredient enhances flavor depth. Honey mustard can be a sweeter substitute.
  • Garlic Powder (0.5 teaspoon): For a hint of savory depth. Fresh garlic can be used for a bolder taste.
  • Onion Powder (0.5 teaspoon): Adds flavor without the crunch. Fresh onions are an alternative but use sparingly.
  • Kosher Salt (0.5 teaspoon): Essential for taste. Adjust according to your dietary needs.
  • Freshly Ground Black Pepper (0.25 teaspoon): A pinch of pepper elevates the flavors.
  • Red Grapes (1 cup, halved): These provide sweetness and crunch. Diced apples or dried cranberries work well as substitutes.
  • Celery (0.5 cup, diced): For crunch. Carrots or bell peppers can add a different texture.
  • Sliced Almonds (0.33 cup): Adds a delightful crunch and nutty flavor. Sunflower seeds or walnuts are great alternatives.

How to Make This Healthy Chicken Salad

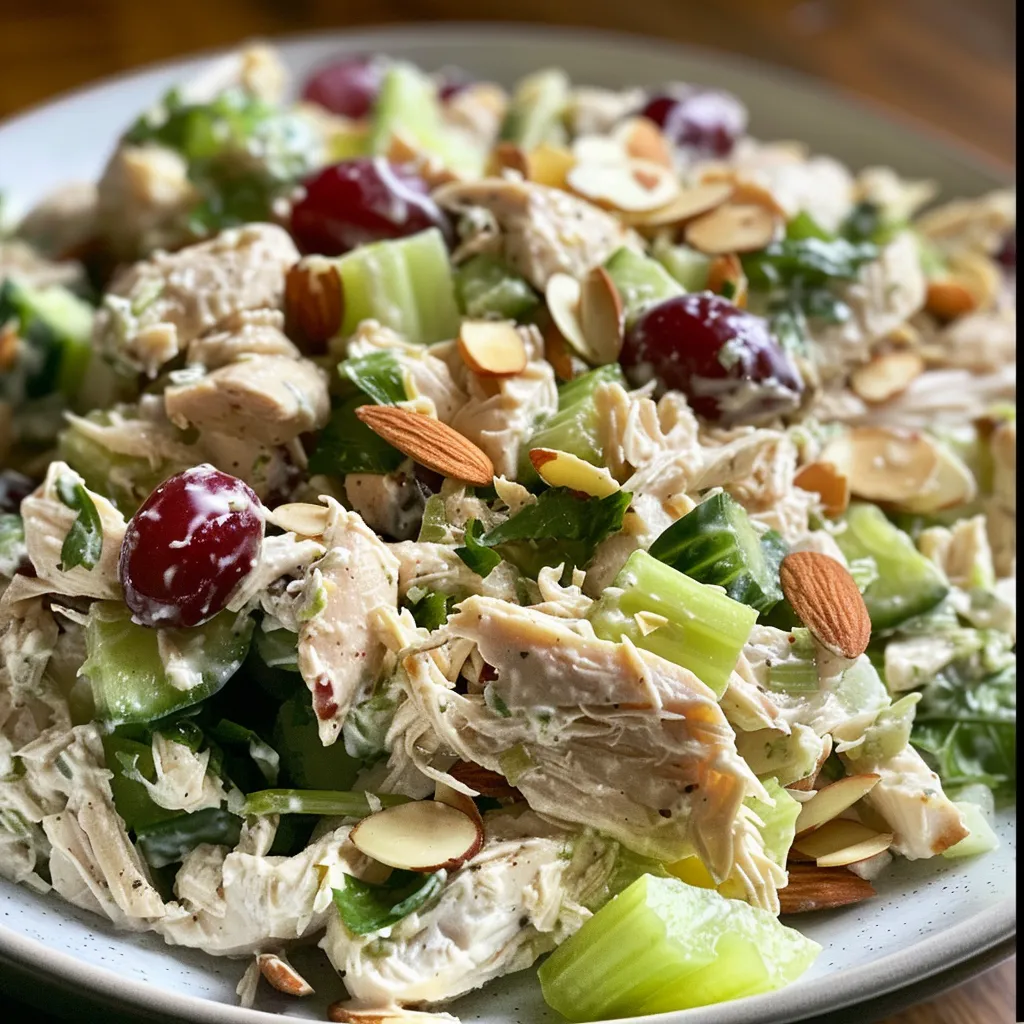
A close-up image of a nutritious chicken salad with a mix of greens, grapes, and sliced almonds.

Now that we have our ingredients ready, let’s dive into the steps to make this delightful salad:

  • In a large mixing bowl, combine shredded chicken, Greek yogurt, mayonnaise, lemon juice, Dijon mustard, garlic powder, onion powder, salt, and pepper.
  • Gently fold in the halved grapes, diced celery, and sliced almonds until everything is well combined.
  • Taste and adjust seasoning as needed, adding more salt or pepper for flavor.
  • Refrigerate for about 30 minutes to allow flavors to meld. This step enhances the taste!
  • Serve chilled, either on a bed of greens, in a sandwich, or with whole grain crackers.

Pro Tips for the Perfect Chicken Salad

  • Use Leftover Chicken: For a quick meal, use leftover rotisserie or grilled chicken.
  • Customize to Your Taste: Feel free to add other ingredients like bell peppers, raisins, or herbs for extra flavor.
  • Adjust for Creaminess: If you prefer a creamier salad, increase the amount of Greek yogurt or mayo.
  • Chill Before Serving: Allowing the salad to chill enhances the flavors and makes it more refreshing.
  • Keep It Fresh: Store the salad in an airtight container to maintain freshness in the refrigerator.
  • Experiment with Spices: Try adding cayenne pepper or paprika for a kick of heat.
  • Ensure Even Mixing: Gently fold ingredients rather than stirring vigorously to keep the chicken from breaking apart.
  • Make Ahead: This salad holds up well for a few days, making it perfect for meal prep.
  • Pack for Lunch: Portion out in containers for easy grab-and-go lunches.

Common Mistakes and Troubleshooting

Even the best chefs have off days! Here are common pitfalls and how to avoid them:

  • Too Dry? Add more Greek yogurt or mayonnaise to moisten the salad.
  • Too Watery? Ensure your vegetables are patted dry before mixing. Excess moisture can dilute flavors.
  • Bland Flavor? Adjust seasoning with additional salt, pepper, or a splash of vinegar for brightness.
  • Too Crunchy? If your salad is too crunchy, consider adding a bit more mayonnaise or yogurt for creaminess.
  • Can’t Find Ingredients? Substitute similar ingredients, keeping in mind flavor profiles.

Delicious Variations of Chicken Salad

This healthy chicken salad is incredibly versatile! Here are some exciting variations to try:

  • Classic Mediterranean Chicken Salad: Add olives, feta cheese, and sun-dried tomatoes for a Mediterranean twist.
  • Curried Chicken Salad: Mix in curry powder and diced apples for a flavorful, exotic version.
  • Southwestern Chicken Salad: Incorporate black beans, corn, and a zesty lime dressing for a Southwestern flair.
  • Fruit and Nut Chicken Salad: Include dried cranberries and walnuts for a sweet and crunchy texture.

Storage and Make-Ahead Instructions

Planning to enjoy this salad throughout the week? Here’s how to store it:

  • Refrigeration: Store in an airtight container in the fridge for up to 3 days.
  • Make-Ahead: Prepare the salad 1-2 days in advance for optimal flavor.
  • Freezing: Not recommended, as the texture may change upon thawing.

Frequently Asked Questions

Let’s address some common questions about this healthy chicken salad:

  • Can I use canned chicken? Yes, canned chicken can be a convenient option, just drain and rinse before using.
  • What if I don’t have Greek yogurt? You can substitute with regular yogurt or additional mayonnaise.
  • Is this recipe gluten-free? Yes, as long as you use gluten-free mayonnaise and serve it on gluten-free bread or crackers.
  • Can I add herbs? Absolutely! Fresh herbs like dill or parsley add a refreshing touch.
  • How can I make it dairy-free? Substitute Greek yogurt and mayonnaise with vegan alternatives.
  • What goes well with chicken salad? It pairs beautifully with whole-grain bread, leafy greens, or as a dip with veggies.
  • How long can I keep it in the fridge? Generally, it lasts about 3-4 days when stored properly.
  • Can I make it spicy? Yes, add jalapeños or a dash of hot sauce for a spicy kick!

Nutrition Tips and Dietary Adaptations

This chicken salad is not only delicious but also offers nutritional benefits:

  • High Protein Content: Perfect for a post-workout meal or snack.
  • Low in Carbs: A great option for those following a low-carb or keto diet.
  • Rich in Vitamins: The addition of vegetables provides essential vitamins and minerals.
  • Customizable for Dietary Needs: Easily adapt to fit vegan, gluten-free, or low-fat diets.

Essential Equipment for Your Chicken Salad

To make this healthy chicken salad, you’ll need:

  • Mixing Bowl: A large bowl for all the ingredients.
  • Measuring Cups and Spoons: For accurate ingredient measurements.
  • Knife and Cutting Board: To chop your vegetables and fruits.
  • Storage Containers: Airtight containers for storing leftovers.

Serving Suggestions

Ready to serve your delicious chicken salad? Here are some ideas:

  • On a Bed of Greens: Serve over a mix of spinach, arugula, or romaine for a refreshing salad.
  • In a Sandwich: Layer between whole-grain bread for a tasty lunch.
  • With Crackers: Pair with whole-grain or gluten-free crackers for a quick snack.
  • Stuffed in Avocados: Scoop into halved avocados for a beautiful presentation and added healthy fats.

Final Thoughts

This Healthy Homemade Chicken Salad is more than just a meal; it’s a celebration of flavors and textures that brings people together. With its quick preparation, nutritional benefits, and endless variations, it’s bound to become a staple in your kitchen. So grab your ingredients, channel your inner chef, and embark on this culinary adventure that promises to satisfy your taste buds and nourish your soul. Happy cooking!

Healthy Homemade Chicken Salad

Prep Time 10 minutes
Cook Time 20 minutes
Total Time 30 minutes
Servings 4 servings
Calories 350
A light and nutritious chicken salad perfect for a quick lunch or snack, packed with fresh ingredients and flavor.

Ingredients

Protein

  • 3 cups shredded cooked chicken
  • 0.5 cup plain Greek yogurt
  • 0.25 cup mayonnaise
  • 1 tablespoon fresh lemon juice
  • 1 teaspoon Dijon mustard
  • 0.5 teaspoon garlic powder
  • 0.5 teaspoon onion powder
  • 0.5 teaspoon kosher salt
  • 0.25 teaspoon freshly ground black pepper
  • 1 cup red grapes (halved)
  • 0.5 cup celery (diced)
  • 0.33 cup sliced almonds

Instructions 

  • In a large bowl, combine shredded chicken, Greek yogurt, mayonnaise, lemon juice, mustard, garlic powder, onion powder, salt, and pepper.
  • Add grapes, celery, and sliced almonds; mix well.
  • Chill in the refrigerator for at least 15 minutes before serving.

Notes

For extra flavor, add fresh herbs like dill or parsley.
Calories: 350kcal
Cost: $12
Course: Salad
Cuisine: American
Keyword: Chicken, healthy

Embark on a Culinary Adventure with Crispy Paprika Roast Chicken

Welcome, fellow food explorers! Today, we’re diving deep into a delightful culinary journey with my Crispy Paprika Roast Chicken recipe. This dish is not just about the amazing flavors that come together in your kitchen; it’s a passport to culture, tradition, and the warmth of home. As we navigate through this recipe, you’ll discover how to create a roast chicken that’s not only crispy on the outside but also tender and juicy on the inside, seasoned to perfection with vibrant paprika and aromatic herbs.

Why You’ll Love This Recipe

There are countless reasons to fall in love with this roast chicken recipe. Here are just a few:

  • Flavor Explosion: The blend of paprika, garlic, and herbs creates a symphony of flavors that will tantalize your taste buds.
  • Perfectly Crispy Skin: Achieve that coveted crispy skin with my foolproof roasting technique, ensuring every bite is satisfying.
  • Easy to Prepare: With simple ingredients and straightforward steps, this recipe is perfect for both novice cooks and seasoned chefs.
  • Impressive Presentation: Serve it up for family dinners or gatherings, and watch as your guests rave about your culinary skills.
  • Versatile Leftovers: Enjoy delicious leftovers that can be transformed into salads, sandwiches, or soups the next day.

Ingredient Breakdown

Let’s talk about what you’ll need to create this mouthwatering dish, along with some handy substitutions:

  • Whole Chicken (about 4-5 lbs): This is the star of the show! Look for a fresh, organic chicken if possible for the best flavor.
  • Paprika: I recommend using a combination of sweet and smoked paprika for a depth of flavor. If you prefer a milder taste, sweet paprika alone will work beautifully.
  • Garlic Powder & Onion Powder: These add a savory depth. Fresh minced garlic or onions can also be used if you prefer.
  • Dried Thyme & Rosemary: Fresh herbs can be substituted if you have them on hand; just double the quantity.
  • Salt and Pepper: Essential for enhancing all the flavors.
  • Olive Oil or Melted Butter: This helps the spices adhere to the chicken and contributes to that crispy skin.
  • Lemon: A splash of acidity brightens the dish; feel free to use lime if you prefer.
  • Fresh Herbs for Garnish: Optional, but they add a lovely touch of color and freshness.

Pro Tips for Perfect Roast Chicken

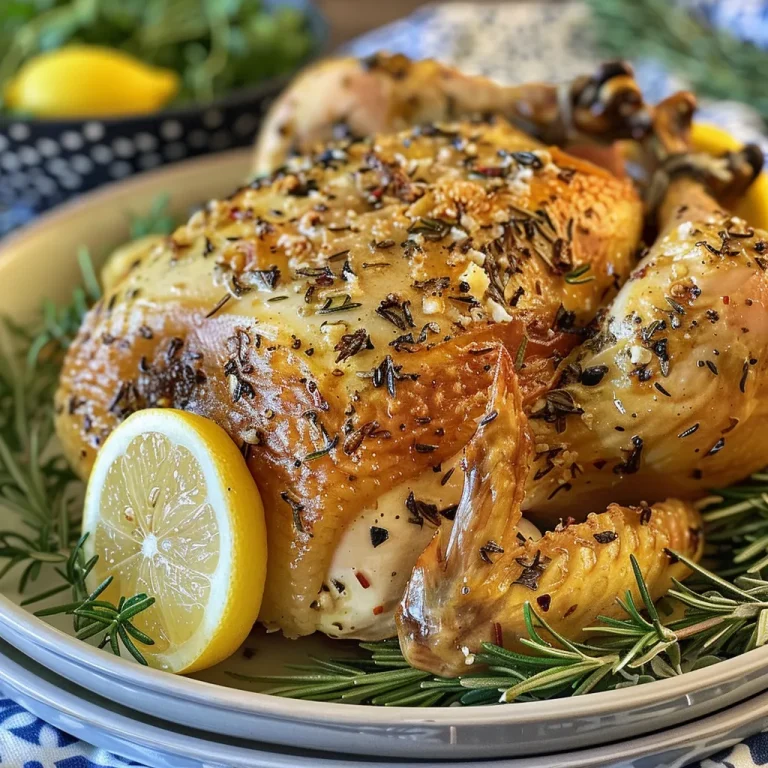
Detailed shot of a roasted chicken garnished with fresh herbs and lemon halves.

Here are some expert insights that will elevate your roast chicken game:

  • Pat Dry: Always pat your chicken dry with paper towels before seasoning. This helps achieve that golden, crispy skin.
  • Rub Under the Skin: For maximum flavor, gently rub the spice mixture underneath the skin as well as on top.
  • Rest After Roasting: Letting the chicken rest for 15 minutes post-roasting allows the juices to redistribute for a juicier bite.
  • Use a Meat Thermometer: To ensure your chicken is perfectly cooked, check that the internal temperature reaches 165°F (75°C).
  • Experiment with Spices: Don’t hesitate to add your favorite spices or herbs to the seasoning blend for a personal touch.
  • Consider Spatchcocking: This technique can reduce cooking time and improve evenness of cooking.
  • Brine for Extra Moisture: A simple brine solution before seasoning can result in super juicy chicken.
  • Pair with Seasonal Vegetables: Roast veggies alongside the chicken for a complete meal with minimal effort.

Common Mistakes and Troubleshooting

Even the best chefs can face challenges when roasting a chicken. Here are some common pitfalls and how to avoid them:

  • Underseasoning: Don’t skimp on the spices! A well-seasoned chicken is key to great flavor.
  • Overcooking: Keep an eye on your chicken as it roasts; using a thermometer is the best way to avoid this.
  • Not Letting It Rest: Skipping the resting period will result in dry meat. Patience pays off!
  • Not Preheating the Oven: Always preheat your oven to the correct temperature to ensure even cooking.

Delicious Variations of the Crispy Paprika Roast Chicken

Let’s mix it up a bit! Here are some variations that can add a unique twist to your dish:

  • Herb Butter Roast Chicken: Use a mixture of fresh herbs and softened butter instead of olive oil for a richer flavor.
  • Spicy Paprika Chicken: Add cayenne pepper or chili powder to the spice mix for a kick of heat.
  • Citrus Herb Roast Chicken: Use orange or lime instead of lemon for a different citrus twist.
  • Honey Mustard Glaze: Brush a mixture of honey and Dijon mustard over the chicken for a sweet and tangy flavor.

Storage and Make-Ahead Instructions

If you’re planning ahead, here’s how to manage your roast chicken:

  • Make-Ahead: You can prepare the spice mixture a day in advance and store it in an airtight container.
  • Storing Leftovers: Keep any leftover chicken in an airtight container in the fridge for up to 3 days.
  • Freezing: For longer storage, freeze the leftovers in a freezer-safe container for up to 3 months. Thaw in the refrigerator before reheating.

Frequently Asked Questions

Here are some common questions about roast chicken:

  • Can I use a frozen chicken? Yes, but ensure it’s fully thawed before cooking for even roasting.
  • How do I know when the chicken is done? The internal temperature should reach 165°F (75°C) in the thickest part of the chicken.
  • Can I roast vegetables with the chicken? Absolutely! Just make sure they’re cut into similar sizes for even cooking.
  • What sides go well with roast chicken? Mashed potatoes, roasted vegetables, or a fresh salad are all excellent choices.
  • Can I use other spices? Certainly! Feel free to experiment with your favorite herbs and spices.
  • Is it better to roast with the breast up or down? Breast up allows for crispy skin; breast down can help keep it moist.
  • How long does it take to roast a chicken? Generally, about 1 hour and 15 minutes at 425°F (220°C) for a 4-5 lb chicken.
  • What if I don’t have paprika? You can substitute with a blend of chili powder and cumin for a different flavor profile.

Nutritional Tips and Dietary Adaptations

This recipe can easily be adapted for various dietary needs:

  • Gluten-Free: This recipe is naturally gluten-free, making it suitable for those with gluten sensitivities.
  • Low-Carb: Perfect for low-carb diets; pair with non-starchy veggies for a complete meal.
  • Paleo-Friendly: This dish fits well into a paleo diet, focusing on wholesome ingredients.
  • Whole30 Compliant: Check your spices to ensure they are Whole30 compliant for a clean eating option.

Essential Equipment for Roasting

To make your roasting experience seamless, consider having these tools on hand:

  • Roasting Pan: A sturdy roasting pan with a rack will help elevate the chicken for even cooking.
  • Meat Thermometer: Essential for checking doneness without cutting into the chicken.
  • Sharp Carving Knife: A good knife makes carving your perfectly roasted chicken a breeze.
  • Cutting Board: A stable surface for carving and serving your chicken.

Serving Suggestions

Now that your Crispy Paprika Roast Chicken is ready, let’s talk about how to serve it:

  • Platter Presentation: Serve your chicken on a large platter, garnished with fresh herbs and lemon wedges for a beautiful display.
  • Accompanying Sides: Pair with creamy mashed potatoes, roasted seasonal vegetables, or a zesty arugula salad.
  • Gravy: Don’t forget a rich gravy made from the pan drippings to elevate your meal.
  • Bread: Serve with crusty bread to soak up all those delicious juices.

In conclusion, this Crispy Paprika Roast Chicken recipe is more than just a meal; it’s a celebration of flavors and a connection to the culinary traditions that bring us together. Whether it’s a cozy dinner at home or an extravagant feast with friends, this dish will surely impress. So roll up your sleeves, gather your ingredients, and let’s make some delicious memories together in the kitchen!

Crispy Paprika Roast Chicken

Prep Time 15 minutes
Cook Time 1 hour 15 minutes
Total Time 1 hour 30 minutes
Servings 4 servings
Calories 850
A flavorful and crispy roasted chicken seasoned with paprika and herbs, perfect for a hearty meal.

Ingredients

Main

  • 1 whole chicken (about 4-5 lbs)
  • 2 tablespoons paprika
  • 1 tablespoon garlic powder
  • 1 tablespoon onion powder
  • 1 teaspoon dried thyme
  • 1 teaspoon dried rosemary
  • to taste Salt and pepper
  • 2 tablespoons olive oil or melted butter
  • 1 lemon lemon, halved
  • optional Fresh herbs for garnish

Instructions 

  • Preheat oven to 425°F (220°C). Pat chicken dry and place in a roasting pan.
  • Mix paprika, garlic powder, onion powder, thyme, rosemary, salt, pepper, and olive oil to form a paste. Rub all over the chicken, including under the skin and inside the cavity. Squeeze lemon halves into cavity.
  • Roast for about 75 minutes until internal temperature reaches 165°F (75°C) and skin is crispy.
  • Let rest for 15 minutes before carving. Garnish with fresh herbs if desired.

Notes

Ensure the chicken reaches the proper internal temperature for safety and best texture.
Calories: 850kcal
Cost: $15
Course: Main Course
Cuisine: International
Keyword: Chicken

Discover the Magic of Lemon Herb Roasted Chicken

Welcome to an exciting culinary adventure where we explore the delectable world of roasted chicken infused with zesty lemon and aromatic herbs! This recipe is not just a meal; it’s a celebration of flavors and cultures coming together in your kitchen. Whether you’re preparing for a cozy family dinner or a gathering with friends, this Lemon Herb Roasted Chicken will impress and satisfy. With a beautifully golden skin, juicy meat, and fragrant herb butter, this dish is sure to become a favorite in your home.

As we embark on this journey, let’s dive into why this recipe is a must-try and how you can recreate it perfectly.

Why You’ll Love This Recipe

  • Flavor Explosion: The combination of fresh herbs and lemon creates a vibrant flavor profile that enhances the natural taste of the chicken.
  • Easy to Make: With straightforward instructions, this recipe is perfect for chefs of all skill levels. You don’t need to be a culinary expert to achieve delicious results.
  • Impressive Presentation: The golden-brown skin and aromatic herbs make this dish visually appealing, making it ideal for entertaining guests.
  • Versatile Ingredients: Most ingredients are pantry staples, meaning you can whip this up whenever you desire a comforting meal.
  • Leftover Delight: The leftovers can be transformed into various dishes, ensuring nothing goes to waste while allowing for creative meal planning.

Ingredient Breakdown

Let’s take a closer look at the ingredients needed for this recipe:

  • 1 (4-pound) whole roasting chicken: Choose an organic or free-range chicken for the best flavor and quality.
  • Kosher salt and freshly ground black pepper: Essential for seasoning and enhancing the chicken’s natural flavors.
  • 4 tablespoons unsalted butter: At room temperature, this will be the base for our herb butter.
  • 2 tablespoons chopped fresh rosemary: Adds a robust flavor that pairs beautifully with chicken.
  • 2 tablespoons chopped fresh thyme leaves: This herb brings a subtle earthiness to the dish.
  • 2 tablespoons chopped fresh parsley leaves: For freshness and a pop of color.
  • 3 cloves garlic (minced): Infuses the chicken with aromatic goodness.
  • Zest of 1 lemon: Provides a bright and zesty flavor that cuts through the richness of the chicken.

Pro Tips for Perfect Roasted Chicken

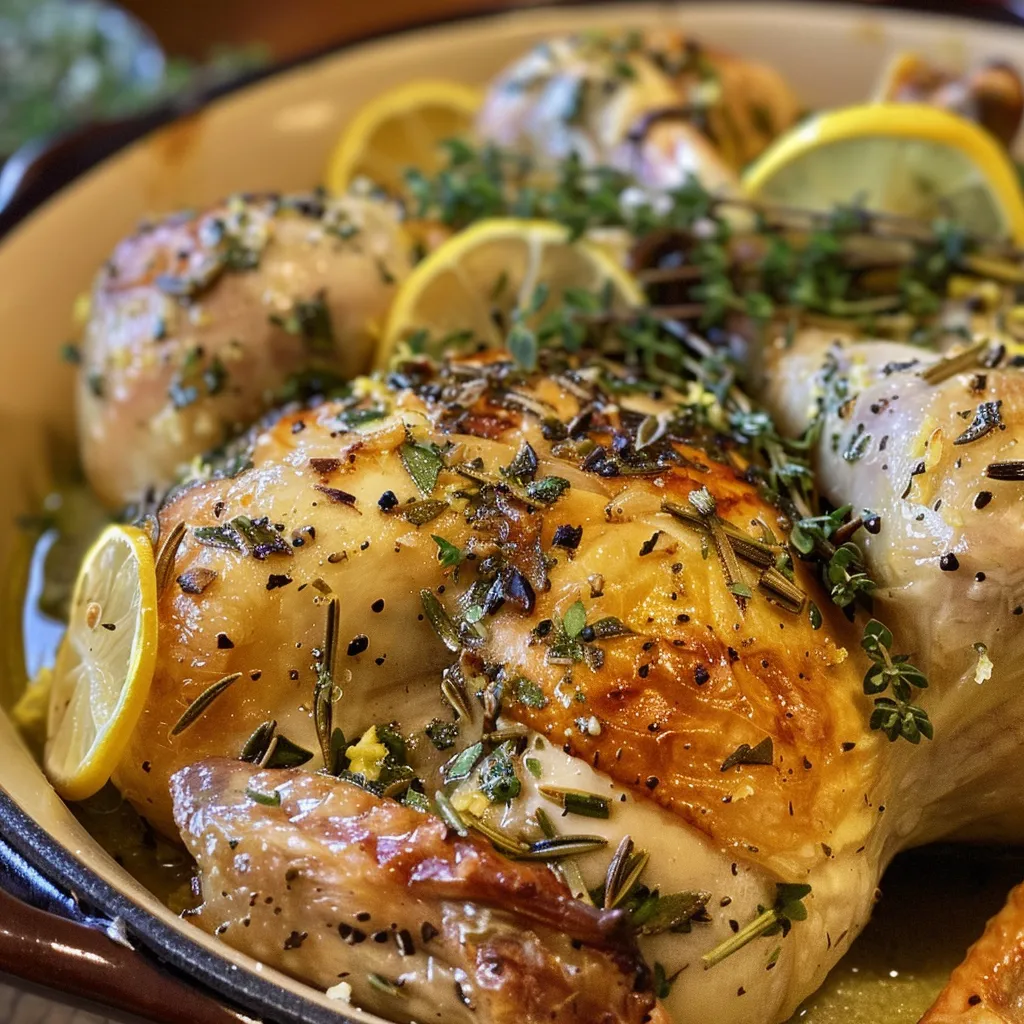
Lemon Herb Roasted Chicken on a plate with herbs and lemon zest.

Here are some expert insights to ensure your roasted chicken turns out perfectly every time:

  • Dry the Chicken: Ensure your chicken is thoroughly dried before seasoning. This helps achieve a crispy skin.
  • Temperature Matters: Preheat your oven to 425°F for a golden and crispy skin. Don’t skip this step!
  • Season Generously: Don’t be shy with the salt and pepper. Proper seasoning is key to flavor.
  • Butter Under the Skin: Loosening the skin and spreading the herb butter underneath ensures maximum flavor.
  • Use a Meat Thermometer: To ensure your chicken is fully cooked, use a thermometer to check for an internal temperature of 165°F.
  • Let It Rest: Allow the chicken to rest for 10-15 minutes after roasting. This helps the juices redistribute for a moist result.
  • Save the Drippings: Don’t forget to save the pan drippings for a delicious gravy or sauce!
  • Experiment with Herbs: Feel free to mix and match herbs based on your preference; dried herbs can also be used in a pinch.

Common Mistakes and Troubleshooting

Even the best cooks can have off days. Here are some common mistakes to avoid:

  • Not Drying the Chicken: A wet chicken won’t crisp up properly. Always pat it dry before seasoning.
  • Overcrowding the Pan: Ensure there’s enough space for the hot air to circulate around the chicken for even cooking.
  • Ignoring the Rest Period: Cutting into the chicken too soon will cause the juices to run out, resulting in dry meat.
  • Underseasoning: Make sure to taste and adjust seasoning throughout the cooking process.

Delicious Variations

Looking to switch things up? Here are some variations to try:

  • Spicy Citrus Chicken: Add crushed red pepper flakes or cayenne pepper to the herb butter for a kick.
  • Honey Mustard Glazed Chicken: Mix honey and Dijon mustard into the butter for a sweet and tangy twist.
  • Garlic Herb Butter Chicken: Increase the garlic and add herbs like oregano and basil for a Mediterranean flair.
  • Stuffed Chicken: Stuff the cavity with lemon wedges and fresh herbs for added flavor during roasting.

Storage and Make-Ahead Instructions

Want to prepare ahead of time? Here’s how to store and reheat:

  • Refrigeration: Store leftovers in an airtight container in the fridge for up to 3 days.
  • Freezing: You can freeze cooked chicken for up to 3 months. Thaw in the refrigerator before reheating.
  • Reheating: To reheat, place the chicken in a preheated oven at 350°F until warmed through.

Comprehensive FAQ

Let’s address some commonly asked questions:

  • How long should I cook a 4-pound chicken? A 4-pound chicken typically takes about 1 hour to roast at 425°F.
  • Can I use dried herbs instead of fresh? Yes, but use about a third of the amount, as dried herbs are more concentrated.
  • What should I serve with roasted chicken? Popular sides include roasted vegetables, mashed potatoes, and a fresh salad.
  • How do I know when the chicken is done? Use a meat thermometer to ensure the internal temperature reaches 165°F.
  • Can I use an air fryer for this recipe? Absolutely! Adjust the temperature and cooking time according to your air fryer’s instructions.
  • What can I do with leftover chicken? Use it in soups, salads, or sandwiches to create new meals.
  • What’s the best way to season the chicken? Season both inside the cavity and on the skin for maximum flavor.
  • Can I marinate the chicken overnight? Yes, marinating overnight in the fridge can enhance flavor and tenderness.

Nutritional Tips and Dietary Adaptations

This recipe can easily be adapted for various dietary preferences:

  • Gluten-Free: Naturally gluten-free; just ensure any side dishes are also gluten-free.
  • Dairy-Free: Substitute the butter with olive oil or a dairy-free butter replacement.
  • Low-Carb: Pair with non-starchy vegetables like zucchini or broccoli for a low-carb meal.

Equipment Recommendations

For this recipe, here are a few essential tools:

  • Roasting Pan: A sturdy roasting pan with a rack is ideal for even cooking.
  • Meat Thermometer: Ensures your chicken is cooked to perfection.
  • Kitchen Twine: Useful for tying the legs together for a better presentation.

Serving Suggestions

When it comes to serving, consider these delightful pairings:

  • Wine Pairing: A chilled Sauvignon Blanc complements the bright flavors of the lemon.
  • Side Dishes: Roasted vegetables, garlic mashed potatoes, or a fresh garden salad make excellent accompaniments.
  • Garnish: Fresh herbs and lemon wedges add a pop of color and flavor to your presentation.

Conclusion

With its vibrant flavors and comforting aroma, this Lemon Herb Roasted Chicken is more than just a meal; it’s an experience that brings loved ones together. The blend of fresh herbs, zesty lemon, and perfectly roasted chicken captures the essence of home-cooked warmth and cultural connection. So gather your ingredients, roll up your sleeves, and embark on this delicious journey—your taste buds will thank you!

Lemon Herb Roasted Chicken

Prep Time 20 minutes
Cook Time 1 hour
Total Time 1 hour 20 minutes
Servings 4 servings
Calories 850
A flavorful roasted chicken infused with fresh herbs and lemon zest, perfect for a hearty meal.

Ingredients

Main

  • 1 whole 4-pound whole roasting chicken
  • 4 tablespoons unsalted butter (at room temperature)
  • 2 tablespoons chopped fresh rosemary
  • 2 tablespoons chopped fresh thyme leaves
  • 2 tablespoons chopped fresh parsley leaves
  • 3 cloves garlic (minced)
  • Zest of 1 lemon lemon zest

Instructions 

  • Preheat oven to 425°F (220°C).
  • Prepare the chicken, season cavity with salt and pepper, and tie drumsticks.
  • Mix butter, herbs, garlic, and lemon zest; loosen skin and spread half under it, then spread remaining over the chicken.
  • Roast until golden and internal temperature reaches 165°F (74°C), about 1 hour. Rest for 10-15 minutes.

Notes

Use kitchen twine to secure the drumsticks for even cooking.
Calories: 850kcal
Cost: $20
Course: Main Course
Cuisine: American
Keyword: Chicken

Welcome to Your New Favorite Gluten-Free Dinner Rolls!

Are you ready to transform your kitchen into a haven of delightful aromas and irresistible flavors? These gluten-free dinner rolls are not just any rolls; they are a cozy embrace of warmth, perfect for any occasion, from family dinners to festive gatherings. With their soft, fluffy texture and rich taste, you’ll forget they’re gluten-free! Let’s embark on this culinary adventure together, exploring the magic of these dairy-free rolls that bring comfort and joy to your table.

Why You’ll Love This Recipe

Here are some compelling reasons to dive into this recipe:

  • Perfectly fluffy texture: These rolls are soft and light, mirroring the texture of traditional dinner rolls, ensuring no one will miss the gluten.
  • Simple pantry ingredients: Most of the ingredients are staples you likely already have, making it easy to whip up a batch anytime.
  • Dairy-free friendly: Adaptable to meet dietary needs, using dairy-free alternatives ensures everyone can enjoy them.
  • Versatile for any meal: Whether it’s a holiday feast or a casual weeknight dinner, these rolls fit seamlessly into any menu.
  • Kid-approved: The soft texture and slightly sweet flavor make them a hit with children and adults alike!

Ingredient Breakdown

Let’s take a closer look at the ingredients that make these rolls a hit, along with possible substitutions:

  • 3 cups gluten-free flour: Any all-purpose gluten-free flour blend will work, but I recommend a blend that contains xanthan gum for the best texture. (e.g., King Arthur or Bob’s Red Mill)
  • 2 tsp instant yeast: This creates the perfect rise. If using active dry yeast, proof it in warm liquid for 5-10 minutes.
  • 2 tbsp granulated sugar: Not only sweetens, but also feeds the yeast for better rising.
  • 1 tsp salt: Enhances flavor.
  • 2 eggs, room temperature: Provides structure and richness. For an egg-free option, use flax eggs (2 tbsp ground flaxseed + 6 tbsp water).
  • 1/4 cup unsalted butter, softened (dairy-free optional): Adds richness. Substitute with coconut oil or dairy-free butter for a dairy-free version.
  • 1 1/4 cups milk, room temperature (dairy-free or lactose-free possible): Almond or oat milk works beautifully.
  • 1 tsp apple cider vinegar or lemon juice: Helps with the leavening process and adds a hint of tang.

How to Make These Delightful Dinner Rolls

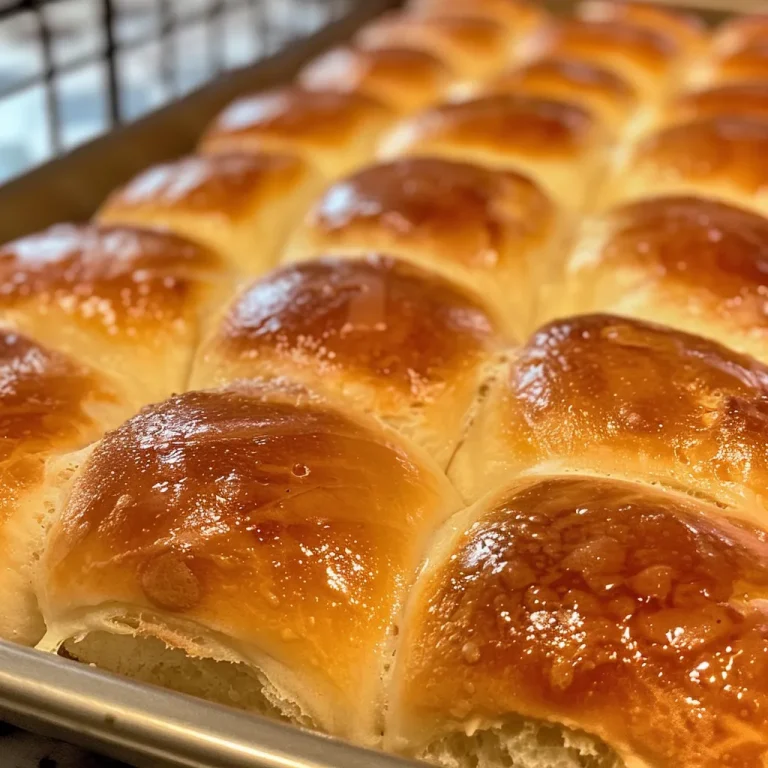
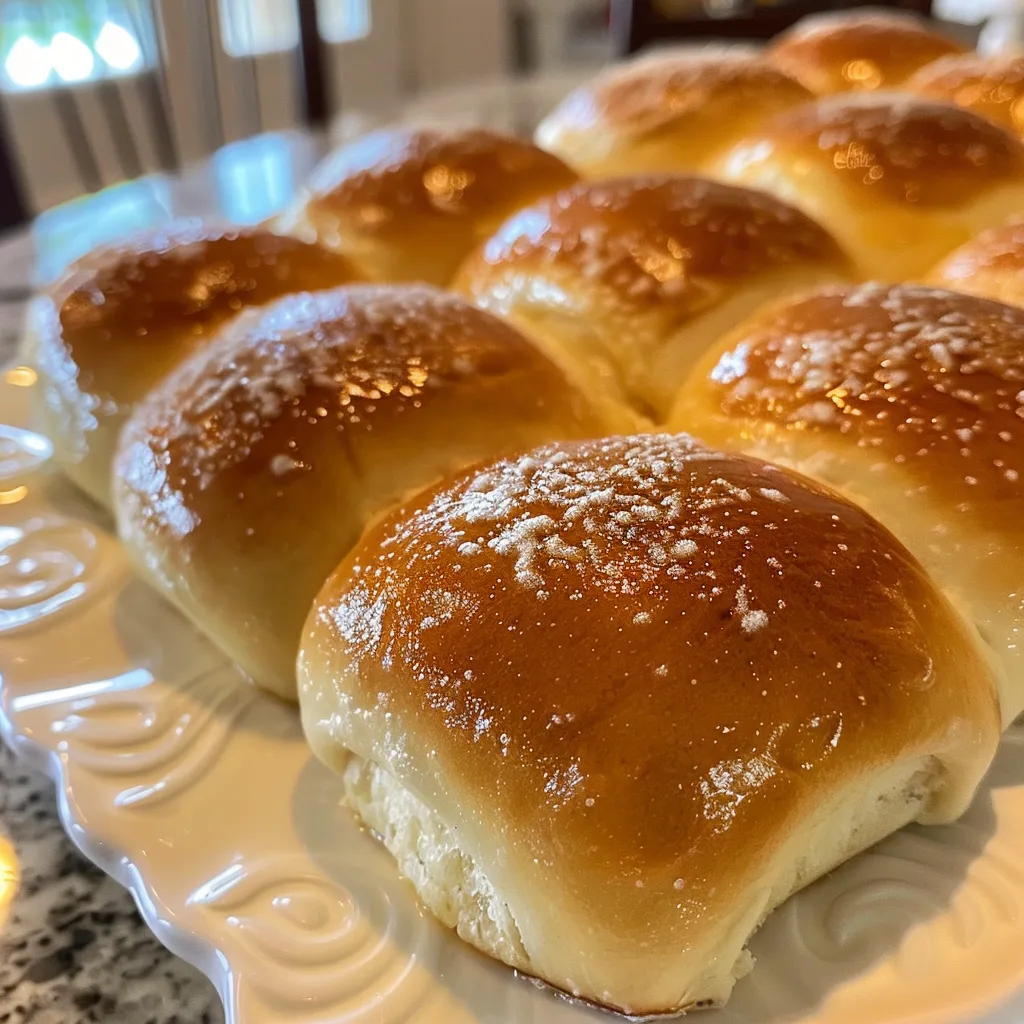
Golden dinner rolls, dairy-free and gluten-free, stacked on a serving plate.

Now, let’s get into the step-by-step process of bringing these rolls to life!

Step 1: Mix the Dry Ingredients

In a large mixing bowl, combine the gluten-free flour, instant yeast, sugar, and salt. Whisk together until evenly mixed.

Step 2: Combine Wet Ingredients

In a separate bowl, whisk together the eggs, melted butter, milk, and apple cider vinegar. Ensure the milk is at room temperature for the best results.

Step 3: Form the Dough

Gradually add the wet mixture to the dry ingredients, stirring until a soft dough forms. It should be slightly sticky but manageable.

Step 4: Rise the Dough

Cover the bowl with a clean kitchen towel and let it rise in a warm place for about 1 hour, or until it has doubled in size.

Step 5: Shape the Rolls

After rising, gently deflate the dough and divide it into 12 equal pieces. Roll each piece into a ball and place them on a parchment-lined baking sheet.

Step 6: Second Rise

Cover the shaped rolls with the towel again and let them rise for an additional 30 minutes.

Step 7: Bake

Preheat your oven to 375°F (190°C). Bake for 20-25 minutes or until golden brown on top. Optional: brush with melted butter right after baking for extra flavor!

Expert Tips for Success

Ensure your rolls come out perfectly every time with these expert tips:

  • Use room temperature ingredients: This helps the dough rise better.
  • Don’t skip the second rise: It’s crucial for achieving that light, airy texture.
  • Check your yeast: Always ensure your yeast is fresh to guarantee proper rising.
  • Egg substitute: If using a flax egg, let it sit for 5 minutes to thicken before adding to the mixture.
  • Brush with butter: For a golden finish, brush melted butter on the tops right after baking.
  • Experiment with flavors: Add herbs or garlic powder to the dough for a flavorful twist.
  • Keep an eye on the baking time: Ovens vary; check for golden brown tops to avoid overbaking.
  • Let them cool: Allow rolls to cool slightly before serving to enhance their texture.

Avoid Common Mistakes

Here are some common pitfalls to avoid when making your gluten-free dinner rolls:

  • Too much flour: Measuring flour by weight is more accurate. Too much can lead to dry rolls.
  • Not enough rising time: Ensure the dough rises adequately to get that fluffy texture.
  • Cold ingredients: Using cold milk or eggs can prevent the dough from rising properly.
  • Overmixing the dough: Mix until just combined to avoid dense rolls.

Delicious Variations

Want to switch things up? Try these variations:

  • Herb-Infused Rolls: Add 1 tablespoon of dried herbs like rosemary or thyme to the dry ingredients for a savory twist.
  • Cheesy Rolls: Incorporate 1 cup of shredded dairy-free cheese for a cheesy delight.
  • Sweet Cinnamon Rolls: Add 1 teaspoon of cinnamon and a sprinkle of sugar to the dough for a sweet breakfast option.
  • Garlic Butter Rolls: Brush with garlic-infused olive oil before baking for a flavorful finish.

Storage and Make-Ahead Instructions

Want to prepare ahead? Here’s how:

  • Room temperature: Store cooked rolls in an airtight container for up to 3 days.
  • Freezing: Freeze unbaked rolls after shaping; thaw in the fridge overnight before the second rise and bake as usual.
  • Reheating: Warm rolls in the oven at 350°F (175°C) for 5-10 minutes for best results.

Common FAQs

Here are some frequently asked questions about gluten-free dinner rolls:

  • Can I use all-purpose flour instead of gluten-free flour? No, this recipe specifically requires gluten-free flour for the best results.
  • What’s the best way to measure gluten-free flour? Weighing your flour is the most accurate method. If using cups, spoon the flour into the cup and level off.
  • Can I make these rolls vegan? Yes! Substitute eggs with flax eggs and use dairy-free butter and milk.
  • How do I know if my rolls are done baking? The tops should be golden brown, and they should sound hollow when tapped.
  • Is xanthan gum necessary? If your gluten-free flour blend doesn’t contain xanthan gum, you’ll need to add about 1 teaspoon for proper texture.
  • Can I add seeds or nuts? Absolutely! Add them to the dough before shaping for extra flavor and crunch.
  • What if my dough is too sticky? Dust your hands with gluten-free flour when shaping, or add a little more flour to the dough if necessary.
  • Can I make these rolls in advance? Yes, you can prepare the dough and refrigerate it for up to 24 hours before baking.

Nutritional Information

Each roll contains approximately:

  • Calories: 150
  • Protein: 4g
  • Carbohydrates: 25g
  • Fat: 5g
  • Sugar: 2g

Equipment Recommendations

To make this recipe smooth and easy, here’s what you’ll need:

  • Mixing bowls: A large bowl for mixing and a smaller one for wet ingredients.
  • Whisk: Essential for combining dry and wet ingredients evenly.
  • Measuring cups and spoons: Accurate measurement ensures the best results.
  • Baking sheet: A half-sheet pan works perfectly for placing the rolls.
  • Parchment paper: Helps prevent sticking and makes cleanup a breeze.

Serving Suggestions

These gluten-free dinner rolls pair beautifully with various dishes:

  • Soups and stews: Their fluffy texture is perfect for soaking up delicious broths.
  • Salads: Serve alongside fresh salads for a complete meal.
  • Grilled meats: Perfect as a side to barbecued or roasted meats.
  • Breakfast spreads: Enjoy with jam or honey in the morning for a delightful start to your day.

Final Thoughts

These dairy-free and gluten-free dinner rolls are more than just a recipe; they are an invitation to create, share, and enjoy. With a little adventure in your kitchen, you’ll craft rolls that not only satisfy your dietary needs but also warm your heart. So, gather your ingredients, roll up your sleeves, and let’s bake some memories together!

Dairy-Free & Gluten-Free Dinner Rolls - Alrightwithme

Prep Time 15 minutes
Cook Time 20 minutes
Total Time 35 minutes
Servings 8 pieces
Calories 150
Enjoy soft, fluffy dinner rolls that are both dairy-free and gluten-free, perfect for any dietary need.

Ingredients

Dry ingredients

  • 3 cups gluten-free flour
  • 2 tsp instant yeast
  • 2 tbsp granulated sugar
  • 1 tsp salt

Wet ingredients

  • 2 eggs eggs, room temperature
  • 1/4 cup unsalted butter, softened (dairy-free optional)
  • 1 1/4 cups milk, room temperature (dairy-free or lactose-free possible)
  • 1 tsp apple cider vinegar or lemon juice

Instructions 

  • Mix dry ingredients in a large bowl.
  • Whisk eggs, milk, vinegar, and softened butter together.
  • Combine wet and dry ingredients until a dough forms.
  • Divide dough into 8 pieces and shape into rolls.
  • Place rolls on a baking sheet and let rise for 10 minutes.
  • Bake at 375°F (190°C) for 20 minutes until golden.

Notes

Ensure the dough is not overmixed to keep rolls fluffy.
Calories: 150kcal
Cost: $12
Course: Side Dish
Cuisine: American
Keyword: bread, Dairy-Free, gluten-free

Indulge in a Delightful Chocolate Mug Cake Adventure

Picture this: a cold evening, a cozy blanket, and the aroma of rich chocolate wafting through your kitchen. You’re just minutes away from experiencing a warm, gooey chocolate mug cake that feels like a big hug in a mug. This easy and delightful recipe is not just a dessert; it’s a sweet escape that invites you to indulge your senses and reminisce about sweet memories. Whether you’re a busy professional, a student cramming for exams, or just someone with a sweet tooth, this chocolate mug cake is your ticket to a moment of chocolate bliss.

Why You’ll Love This Recipe

  • Quick and Easy: In just 5 minutes, you can whip up a delightful treat that satisfies your chocolate cravings.
  • Minimal Cleanup: Using just one mug means fewer dishes to wash, making it perfect for late-night cravings.
  • Customizable: Add your favorite toppings or substitute ingredients to create a unique flavor profile every time.
  • Perfect for One: This recipe is designed for a single serving, so you can indulge without leftovers tempting you for days.
  • Microwave Magic: You don’t need an oven; just pop it in the microwave, and you’re good to go!

Essential Ingredients and Substitutions

Let’s dive into the core of this recipe—the ingredients! Each component plays a vital role in ensuring your mug cake is both delicious and satisfying. Here’s what you need:

  • 4 tablespoons all-purpose flour: Provides the structure. You can substitute with gluten-free flour or almond flour for a gluten-free option.
  • 2 tablespoons unsweetened cocoa powder: Dutch-processed cocoa gives a rich chocolate flavor. If unavailable, regular cocoa works too.
  • 3 tablespoons granulated sugar: Sweetness is key! For a healthier option, try coconut sugar or honey.
  • ¼ teaspoon baking powder: This helps the cake rise to perfection.
  • Pinch of salt: Enhances the chocolate flavor.
  • 5 tablespoons milk: Any kind works! Almond milk or oat milk can be used for a dairy-free version.
  • 2 tablespoons vegetable oil or melted butter: For richness. Use coconut oil for a tropical twist.
  • ¼ teaspoon vanilla extract: Adds depth of flavor.
  • 1 tablespoon chocolate chips: Optional but highly recommended for gooey pockets of chocolate.

Step-by-Step Guide to Your Mug Cake

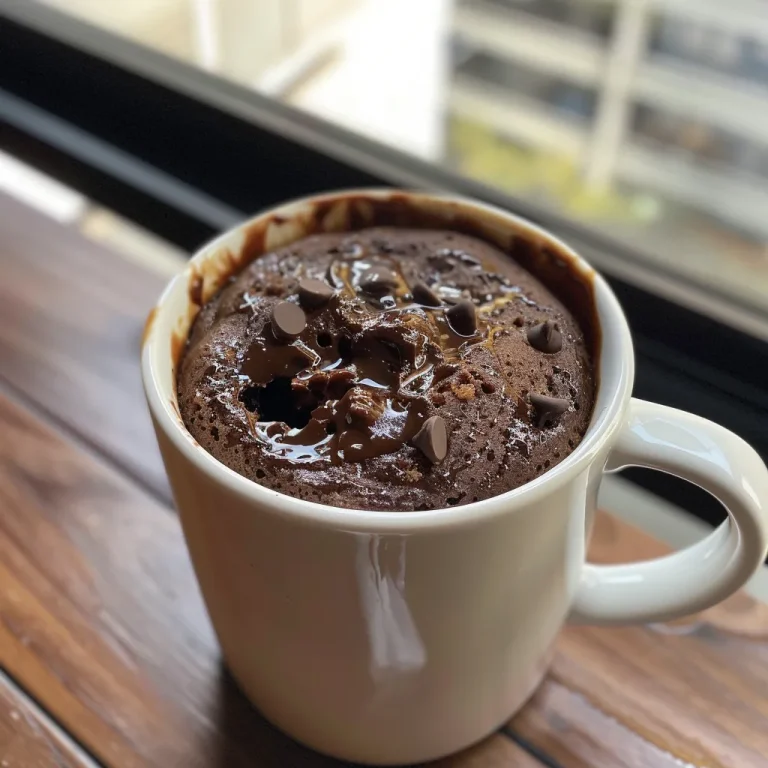
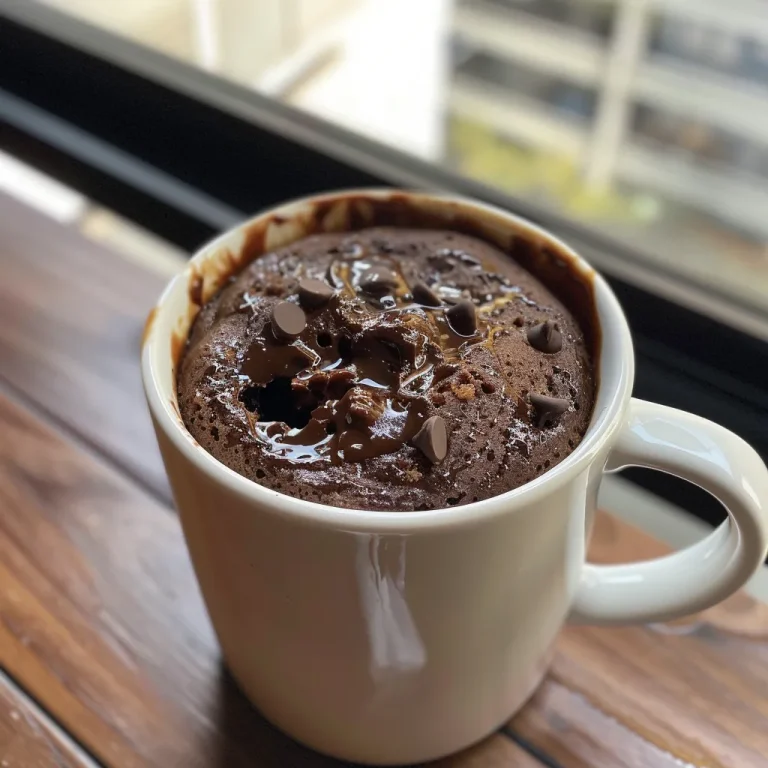
Homemade chocolate mug cake with a gooey center, placed on a rustic background.

Now that you have all the ingredients, let’s get baking! Follow these simple steps to create your own chocolate mug cake:

  1. Prepare your mug: Ensure it’s microwave-safe and at least 12 ounces in capacity to prevent overflow.
  2. Add all dry ingredients: Combine the flour, cocoa powder, sugar, baking powder, and salt in your mug. Whisk with a fork until well combined and no lumps remain.
  3. Incorporate wet ingredients: Pour in the milk, oil, and vanilla. Stir until you have a smooth batter, scraping the bottom and sides of the mug.
  4. Optional chocolate chips: Sprinkle them on top of the batter—they’ll melt into pockets of gooey goodness.
  5. Microwave: On high for 70-90 seconds, watching carefully. The cake is done when it rises and looks set but slightly moist on top. For a molten center, aim for 70 seconds.
  6. Rest and enjoy: Let the cake rest for 1 minute before indulging—it will be extremely hot and continue cooking slightly as it stands.

Pro Tips for the Perfect Mug Cake

To ensure your chocolate mug cake turns out perfectly every time, consider these expert tips:

  • Watch the time: Microwaves vary in strength. Start with 70 seconds and add more time if necessary.
  • Don’t overmix: Stir until just combined to avoid a dense texture.
  • Use a large mug: A larger mug allows for better rising and prevents overflow.
  • Experiment with flavors: Add a pinch of cinnamon or a dash of espresso powder for a flavor boost.
  • Top it off: Serve with a scoop of ice cream or whipped cream for an indulgent experience.
  • Make it a party: Double the recipe and share with a friend—just use two mugs!
  • Try reducing sugar: If you prefer a less sweet cake, reduce the sugar by 1 tablespoon.
  • Store wisely: Leftovers can be refrigerated for up to 2 days, but it’s best enjoyed fresh.

Common Mistakes and Troubleshooting

Mug cakes are simple, but a few common pitfalls can lead to disappointment. Here’s how to troubleshoot:

  • Overflowing cake: Ensure your mug is large enough (at least 12 ounces) and don’t exceed the cooking time.
  • Rubbery texture: This can happen from overmixing or overcooking. Mix gently and monitor cooking time closely.
  • Too dry: If your mug cake is dry, you may have cooked it for too long. Aim for a moist center!
  • Not rising: Check that your baking powder is fresh; it’s crucial for lift.
  • Flavorless cake: Ensure you’re using quality cocoa powder and vanilla extract for a rich flavor.

Variations to Try

Feeling adventurous? Customize your chocolate mug cake with these delicious variations:

  • Peanut Butter Delight: Add 1 tablespoon of peanut butter to the batter for a nutty twist.
  • Minty Fresh: Stir in a few drops of peppermint extract for a refreshing flavor.
  • Banana Chocolate Mug Cake: Mash half a ripe banana into the batter for natural sweetness and moisture.
  • Coconut Bliss: Add shredded coconut and substitute coconut milk for a tropical flavor.

Storage and Make-Ahead Instructions

Though best enjoyed fresh, you can store your chocolate mug cake in the fridge for up to 2 days. Simply cover it tightly to prevent it from drying out. For make-ahead options, prepare the dry ingredients in advance and store them in an airtight container. When cravings strike, just add the wet ingredients and microwave!

Nutrition Tips and Dietary Adaptations

Looking for a healthier alternative? Here are some tips:

  • Gluten-Free: Substitute all-purpose flour with almond flour or a gluten-free blend.
  • Lower Sugar: Reduce the sugar amount or use a sugar substitute like stevia.
  • Vegan Option: Use plant-based milk and replace butter with coconut oil.
  • Add Fiber: Mix in a tablespoon of chia seeds for added nutrition.

Equipment Recommendations

To ensure the best results, here’s what you’ll need:

  • Microwave-safe mug: A sturdy, large mug is essential for even cooking.
  • Fork or small whisk: For mixing ingredients efficiently.
  • Measuring spoons and cups: Accurate measurements lead to the best results.

Serving Suggestions

Your chocolate mug cake is ready to be enjoyed! Here are some serving ideas:

  • Top with ice cream: A scoop of vanilla or mint chocolate chip ice cream takes your cake to the next level.
  • Drizzle with caramel or chocolate sauce: Enhance the indulgence with a rich drizzle.
  • Fresh berries: Serve with strawberries or raspberries for a refreshing contrast.
  • Whipped cream: Lighten up the dessert with a dollop of cream.

Frequently Asked Questions

  • Can I make this without a microwave? Yes! You can bake it in a conventional oven at 350°F for about 20 minutes.
  • How do I know when my mug cake is done? The cake should rise and look set but still have a moist top. A toothpick inserted should come out with a few moist crumbs.
  • Can I use a different type of flour? Absolutely! Just keep in mind that it may change the texture.
  • Is there a way to make this cake healthier? Yes, try reducing sugar and using whole wheat flour or almond flour.
  • What can I add to make it more chocolatey? Extra cocoa powder or chocolate chips work wonderfully!
  • Can I double the recipe? Yes! Just make sure to use a larger mug or bowl to accommodate the extra batter.
  • What’s the best way to store leftovers? Cover and refrigerate. Reheat in the microwave for a few seconds before enjoying.
  • Can I freeze the mug cake? It’s best fresh, but you can freeze the batter and microwave it from frozen when you’re ready to bake.

Wrapping Up Your Sweet Adventure

There you have it! A comprehensive guide to creating the ultimate chocolate mug cake—your quick escape into a world of flavor and comfort. With its ease and delightful taste, this recipe is bound to become a staple in your kitchen. The best part? Every mug cake carries the potential for unique twists and personal touches, making it a canvas for your culinary creativity. So grab your ingredients, find your favorite mug, and let the chocolate magic begin!

Chocolate Mug Cake

Prep Time 2 minutes
Cook Time 2 minutes
Total Time 4 minutes
Servings 1 serving
Calories 250
A quick and indulgent chocolate mug cake perfect for satisfying sweet cravings in minutes.

Ingredients

Dry ingredients

  • 4 tablespoons all-purpose flour
  • 2 tablespoons unsweetened cocoa powder (Dutch-processed works best)
  • 3 tablespoons granulated sugar
  • ¼ teaspoon baking powder
  • Pinch salt

Wet ingredients

  • 5 tablespoons milk (any kind works)
  • 2 tablespoons vegetable oil or melted butter
  • ¼ teaspoon vanilla extract
  • 1 tablespoon chocolate chips (optional, but highly recommended)

Instructions 

  • Add dry ingredients to mug and whisk until combined.
  • Pour in wet ingredients and stir to form a smooth batter.
  • Sprinkle chocolate chips on top if using.
  • Microwave on high for 70-90 seconds until risen and set.
  • Let rest for 1 minute before enjoying.

Notes

Use a microwave-safe mug at least 12 oz to prevent overflow.
Calories: 250kcal
Cost: $3
Course: Dessert
Keyword: chocolate

Embark on a Flavor Journey with Oven Baked BBQ Chicken Thighs

Welcome, fellow culinary adventurers! If you’re craving a dish that combines **smoky barbecue flavors** with the juicy goodness of chicken thighs, you’re in for a treat. This recipe for **Oven Baked BBQ Chicken Thighs** not only tantalizes your taste buds but also invites you to explore the rich heritage behind each ingredient. So, let’s dive into this flavor-packed journey that promises to transport you from your kitchen to the heart of BBQ country!

Why You’ll Love This Recipe

These **oven baked BBQ chicken thighs** are more than just a meal; they’re an experience! Here are five compelling reasons to get excited:

  • Juicy Perfection: Chicken thighs offer a tender, juicy bite that’s hard to resist, especially when baked to perfection.
  • Easy Preparation: With simple ingredients and straightforward steps, this recipe is perfect for both novice cooks and experienced chefs alike.
  • Customizable Flavor: Feel free to adjust the spices and sauces to suit your taste; this recipe is a canvas for your culinary creativity!
  • Healthier Alternative: Baking instead of frying allows you to enjoy that crispy texture with less oil, making this dish a healthier choice.
  • Delicious Leftovers: These chicken thighs taste even better the next day, making them ideal for meal prep or parties!

Ingredients Breakdown

To make the most delicious **oven baked BBQ chicken thighs**, here’s what you’ll need:

  • 4 pieces Chicken Thighs (bone-in): For juicy, flavorful meat. You can use boneless for quicker cooking.
  • 2 tablespoons Olive Oil: A great base for your marinade; vegetable oil can also be a substitute.
  • 1 teaspoon Salt
  • 1 teaspoon Black Pepper: Garlic salt offers a twist if you desire.
  • 2 tablespoons Brown Sugar: Adds a touch of sweetness; coconut sugar can be used as a swap.
  • Spices: 1 teaspoon each of Paprika, Garlic Powder, Onion Powder, Chili Powder, Cumin, Smoked Paprika, and 1/4 teaspoon Cayenne Pepper (adjust to suit spice preference).
  • 1 cup Ketchup: Homemade ketchup gives you more control over sweetness and flavor.
  • 1/4 cup Apple Cider Vinegar
  • 1 tablespoon Worcestershire Sauce: For a deeper flavor; can be omitted for a simpler sauce.
  • 2 tablespoons Honey: Maple syrup is a fantastic alternative.
  • 1 teaspoon Liquid Smoke: For that authentic BBQ flavor; add fewer drops for a milder taste.

Step-by-Step Instructions

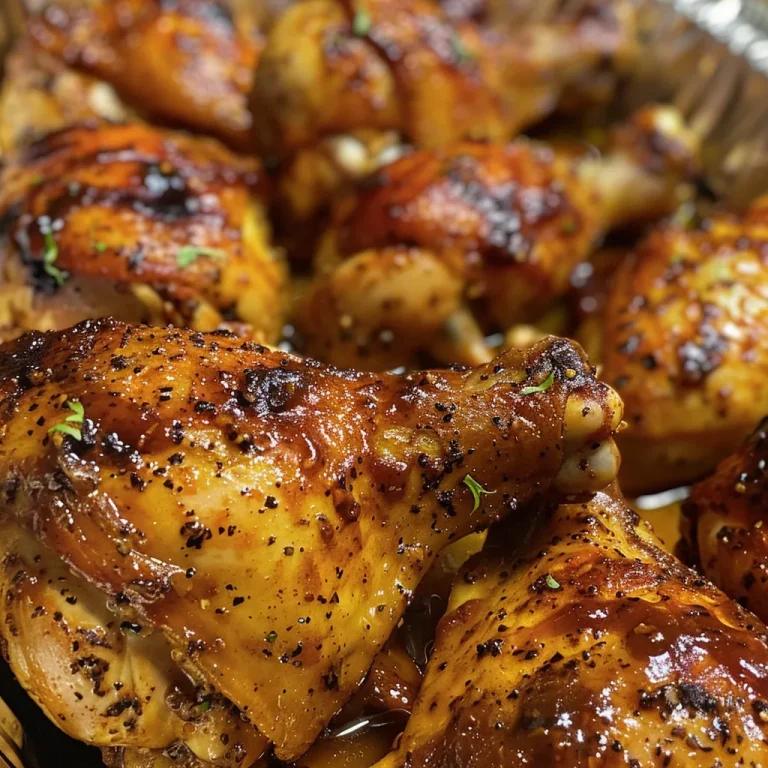
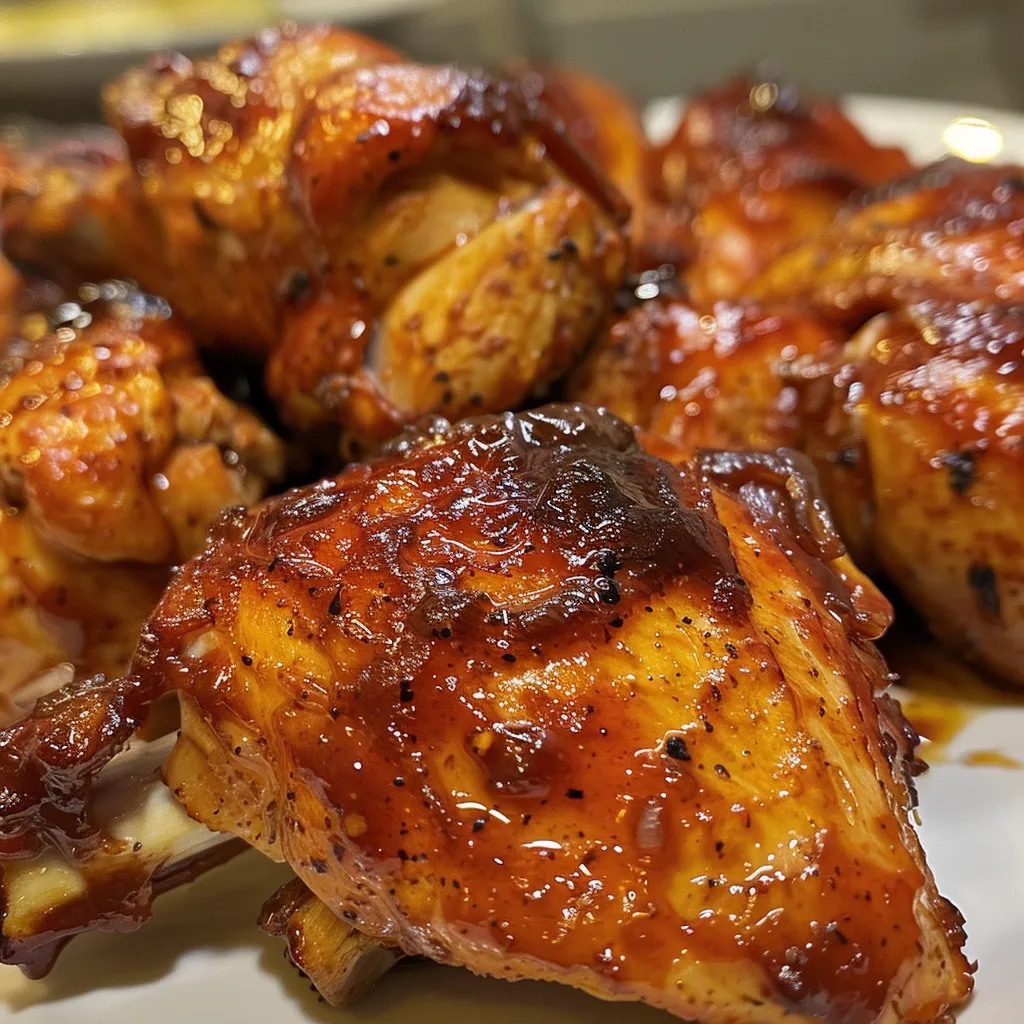
Tender chicken thighs coated in rich BBQ sauce ready to eat.

Creating these **oven baked BBQ chicken thighs** is a breeze when you follow these simple steps:

  • Preheat Your Oven: Start by preheating your oven to 425°F (220°C) to ensure a crispy finish.
  • Prepare the Marinade: In a bowl, mix olive oil, salt, pepper, brown sugar, and spices. This will be your flavor-packed marinade.
  • Coat the Chicken: Rub the marinade all over the chicken thighs. Make sure every inch is covered for maximum flavor.
  • Arrange in a Baking Dish: Place the marinated chicken thighs skin-side up in a baking dish. This allows the skin to crisp up beautifully.
  • Mix the BBQ Sauce: In a separate bowl, combine ketchup, apple cider vinegar, Worcestershire sauce, honey, and liquid smoke. Stir until well combined.
  • Bake the Chicken: Drizzle half of the BBQ sauce over the chicken and bake for 25-30 minutes. Then, baste with the remaining sauce and bake for an additional 10-15 minutes until the internal temperature reaches 165°F (74°C).
  • Let It Rest: Once out of the oven, let the chicken rest for 5 minutes before serving. This helps retain the juices.

Pro Tips for Perfect BBQ Chicken Thighs

To elevate your oven baked BBQ chicken thighs, consider these expert tips:

  • Marinate Overnight: For deeper flavor, marinate the chicken overnight in the fridge.
  • Line Your Baking Sheet: Use parchment paper or foil to prevent sticking and simplify cleanup.
  • Monitor the Temperature: Investing in a meat thermometer ensures your chicken is cooked perfectly every time.
  • Broil for Extra Crispiness: If you like extra crispy skin, broil the chicken for the last 2-3 minutes of cooking.
  • Use a Basting Brush: For even coverage of the BBQ sauce, apply it with a basting brush.
  • Let It Rest: Allowing the chicken to rest post-cooking keeps it juicy.
  • Pair with Fresh Herbs: Garnish with fresh herbs like parsley or cilantro for added freshness.
  • Experiment with Spices: Don’t hesitate to add your favorite spices to the marinade for a personal touch!

Common Mistakes and Troubleshooting

Even the most seasoned cooks can encounter hiccups. Here’s how to avoid common mistakes:

  • Not Preheating the Oven: Always preheat to ensure even cooking.
  • Skipping the Marinade: Don’t skip marinating; it’s crucial for flavor.
  • Overcrowding the Pan: Give each thigh space to cook evenly; this prevents steaming.
  • Ignoring Cooking Times: Always check the internal temperature for doneness.

Variations to Try

Feel like switching things up? Here are some delicious variations of the classic oven baked BBQ chicken thighs:

  • Honey Mustard Chicken: Swap BBQ sauce for a honey mustard glaze for a sweet and tangy twist.
  • Spicy Asian BBQ: Use soy sauce, ginger, and sesame oil for an Asian-inspired flavor.
  • Herb-Infused Thighs: Incorporate fresh herbs like thyme and rosemary into the marinade for an aromatic touch.
  • Chipotle BBQ: Add chipotle peppers in adobo sauce to your BBQ sauce for a smoky, spicy kick.

Storage and Make-Ahead Instructions

Planning ahead? Here’s how to store and prepare your chicken thighs:

  • Refrigeration: Store leftovers in an airtight container in the fridge for up to 4 days.
  • Freezing: For longer storage, freeze cooked chicken thighs for up to 3 months. Just thaw in the fridge before reheating.
  • Make-Ahead Option: You can marinate the chicken up to 24 hours in advance. Just bake when you’re ready!

Frequently Asked Questions

Got questions? Here are some answers to common queries about our oven baked BBQ chicken thighs:

  • Can I use boneless chicken thighs? Yes, boneless thighs will cook faster; adjust the cooking time accordingly.
  • What should the internal temperature be? Chicken should reach an internal temperature of 165°F (74°C).
  • Can I grill these instead? Absolutely! You can use the same marinade and grill for a smoky flavor.
  • How do I know when the chicken is done? Use a meat thermometer to ensure it has reached the appropriate temperature.
  • What sides pair well with BBQ chicken? Classic sides include coleslaw, cornbread, and grilled vegetables.
  • Can I make this dish gluten-free? Yes, just ensure your BBQ sauce is gluten-free.
  • What’s the best way to reheat leftovers? Reheat in the oven for best results, keeping it covered to retain moisture.
  • Can I use other cuts of chicken? Yes! Feel free to use drumsticks or breasts, but adjust cooking times accordingly.

Nutritional Tips and Dietary Adaptations

For those conscious about health, here are some tips and adaptations:

  • Lower the Sugar: Reduce brown sugar or use sugar-free alternatives for a lighter option.
  • Increase Fiber: Serve with a side of quinoa or brown rice for added fiber.
  • Protein Boost: Pair with legumes for a protein-packed meal.

Essential Equipment Recommendations

To create the best oven baked BBQ chicken thighs, consider these kitchen essentials:

  • Meat Thermometer: A must-have for ensuring perfectly cooked chicken.
  • Baking Dish: A sturdy, non-stick dish will work wonders for even cooking.
  • Basting Brush: For applying BBQ sauce evenly.
  • Mixing Bowls: Having a variety of sizes helps with prep work.

Serving Suggestions

Finally, let’s talk about how to serve your delicious chicken thighs:

  • With a Side Salad: A fresh garden salad balances the richness of the chicken.
  • On a Bun: Turn your BBQ chicken into sliders for an exciting twist!
  • With Grilled Corn: Pair with grilled corn on the cob for a classic BBQ feel.
  • With Roasted Vegetables: Roasted seasonal veggies make for a colorful and nutritious side.

Conclusion: Your Culinary Adventure Awaits!

Now that you have the ultimate guide to making **Oven Baked BBQ Chicken Thighs**, it’s time to roll up your sleeves and get cooking! Remember, each ingredient has a story, and every bite is a chance to travel through flavors. So gather your loved ones around the table and enjoy the heartwarming experience of sharing good food. Happy cooking, adventurers!

Oven Baked BBQ Chicken Thighs: Juicy Flavor You’ll Love

Prep Time 10 minutes
Cook Time 40 minutes
Total Time 50 minutes
Servings 4 pieces
Calories 350
Enjoy tender, flavorful baked chicken thighs coated in a rich BBQ sauce, perfect for a satisfying meal.

Ingredients

Meat

  • 4 pieces Chicken Thighs (bone-in) (Use boneless for quicker cooking.)
  • 2 tablespoons Olive Oil (Vegetable oil can be a substitute.)
  • 1 teaspoon Salt
  • 1 teaspoon Black Pepper (Garlic salt can offer an interesting twist.)
  • 2 tablespoons Brown Sugar (Coconut sugar can be used as a swap.)
  • 1 teaspoon Paprika
  • 1 teaspoon Garlic Powder
  • 1 teaspoon Onion Powder
  • 1 teaspoon Chili Powder
  • 1 teaspoon Cumin
  • 1 teaspoon Smoked Paprika
  • 1/4 teaspoon Cayenne Pepper (Adjust to suit spice preference.)
  • 1 cup Ketchup (Homemade can be used for more control.)
  • 1/4 cup Apple Cider Vinegar
  • 1 tablespoon Worcestershire Sauce (Can omit for a simpler sauce.)
  • 2 tablespoons Honey (Maple syrup is a great alternative.)
  • 1 teaspoon Liquid Smoke (Add fewer drops for a distinct taste.)

Additional

  • 1 teaspoon Garlic Powder
  • 1 teaspoon Onion Powder

Instructions 

  • Preheat oven to 400°F (200°C).
  • Mix spices and brush olive oil on chicken thighs.
  • Arrange chicken on baking sheet and bake for 35-40 minutes.
  • Combine BBQ sauce ingredients and simmer to thicken.
  • Brush sauce over cooked chicken and serve hot.

Notes

For extra flavor, marinate the chicken in the sauce for a few hours before baking.
Calories: 350kcal
Cost: $15
Course: Main Course
Cuisine: American
Keyword: baked, BBQ, Chicken

Embark on a Flavorful Journey with Greek Yogurt Chicken Salad

Welcome, fellow food explorers! Today, we’re diving into the vibrant world of Greek yogurt chicken salad—a dish that not only tantalizes your taste buds but also carries with it the essence of culture, freshness, and connection. This recipe is perfect for meal prep, making it a fantastic choice for busy days when you crave something wholesome yet delightful. With a blend of tender chicken, creamy Greek yogurt, and a medley of fresh ingredients, this salad is a light lunch that will keep you nourished and satisfied. Let’s embark on this culinary adventure together!

Why You’ll Love This Recipe

This Greek yogurt chicken salad is not just another meal prep recipe; it’s a delightful blend of health, flavor, and versatility. Here are a few reasons why you’ll adore this dish:

  • High Protein Content: Packed with shredded chicken and Greek yogurt, this salad provides a robust source of protein, perfect for muscle repair and growth.
  • Light and Refreshing: With fresh vegetables and a creamy yogurt dressing, this salad is a refreshing alternative to heavier meals, keeping you light and energized.
  • Quick and Easy Meal Prep: Prepare a batch of this salad in advance, and you have ready-to-eat lunches for days!
  • Customizable: You can easily modify this recipe with different ingredients or seasonings based on your preferences or what you have on hand.
  • Perfect for Sharing: Whether at a picnic, potluck, or family dinner, this dish is sure to impress your guests!

Essential Ingredients for Your Greek Yogurt Chicken Salad

Let’s explore the vibrant ingredients that make this salad a must-try:

  • 2 cups cooked, shredded chicken breast: The star of our dish, providing a delicious base.
  • 1/2 cup plain Greek yogurt: For creaminess and a tangy kick, opt for full-fat for a richer flavor.
  • 1/4 cup finely chopped celery: Adds a satisfying crunch and freshness.
  • 1/4 cup finely chopped red onion: For a bit of zing and depth of flavor.
  • 2 tablespoons fresh dill, chopped: A fragrant herb that complements the yogurt beautifully.
  • 1 tablespoon fresh lemon juice: Brightens up the salad with a zesty note.
  • 1 teaspoon Dijon mustard: Adds a subtle spice and depth of flavor.
  • Salt and black pepper to taste: Essential for seasoning your salad just right!

Ingredient Notes & Substitutions

Feel free to get creative with your ingredients. Here are some substitutions and enhancements:

  • Chicken: Use leftover roasted chicken or a store-bought rotisserie chicken for convenience.
  • Greek Yogurt: If you’re looking for a lighter option, consider using low-fat Greek yogurt.
  • Vegetables: Swap in diced bell peppers, cucumbers, or carrots for variety.
  • Herbs: Don’t hesitate to experiment with parsley or tarragon if dill isn’t your favorite.

Step-by-Step Instructions for Making Greek Yogurt Chicken Salad

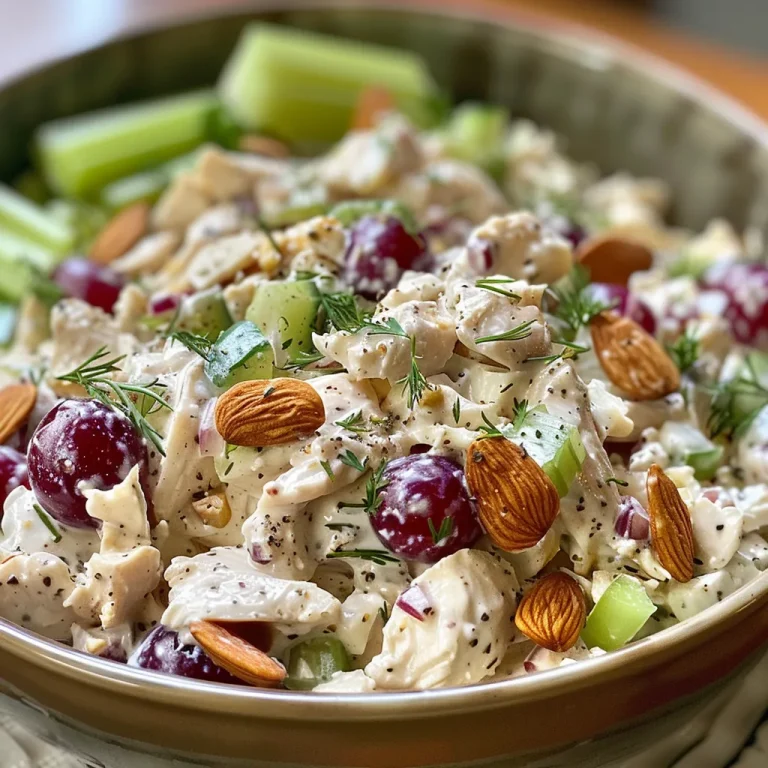
Delicious Greek yogurt chicken salad featuring chunks of chicken and vibrant chopped ingredients.

Follow these simple steps to create your salad masterpiece:

  1. Place the shredded chicken in a medium mixing bowl.
  2. Add the Greek yogurt, celery, red onion, dill, lemon juice, and Dijon mustard.
  3. Mix all ingredients gently until everything is well combined.
  4. Season with salt and black pepper to your liking.
  5. Cover and refrigerate for at least 30 minutes before serving to allow flavors to meld.
  6. Portion into containers for your light lunch meal prep.

Pro Tips for Success Making Your Greek Yogurt Chicken Salad

To elevate your salad game, consider these expert insights:

  • Chill for Flavor: The longer you let the salad rest, the more the flavors develop. Aim for at least an hour in the fridge.
  • Texture Variations: For added crunch, try incorporating chopped nuts or seeds, such as almonds or sunflower seeds.
  • Seasonal Adaptations: Use seasonal vegetables for freshness—think diced apples in fall or ripe tomatoes in summer.
  • Save Time: Make a double batch and freeze half for those busy weeks ahead!
  • Serving Temperature: Serve it chilled for a refreshing experience, especially on hot days.

Variations of Greek Yogurt Chicken Salad

There are countless ways to enjoy this salad! Here are a few variations to try:

  • Curried Chicken Salad: Add curry powder and raisins for a unique twist!
  • Mexican Style: Incorporate diced avocado, black beans, and cilantro for a fiesta in a bowl.
  • Asian-Inspired: Mix in soy sauce, sesame oil, and sliced green onions for an Asian flavor profile.
  • Fruit-Infused: Add diced grapes or apples for a sweet contrast to the savory chicken.

Storage and Make-Ahead Instructions

This Greek yogurt chicken salad is perfect for meal prep. Here’s how to store it:

  • Refrigeration: Store in an airtight container in the fridge for up to four days.
  • Freezing: While not ideal, you can freeze it for up to three months. Thaw in the fridge overnight before consuming.
  • Make-Ahead: Prepare the salad up to two days in advance for optimal convenience.

Common Mistakes and Troubleshooting

A few common pitfalls to avoid:

  • Overmixing: Gently combine the ingredients to maintain texture; overmixing can lead to a mushy salad.
  • Ignoring Seasoning: Don’t forget to taste and adjust seasoning; a pinch of salt can elevate the entire dish.
  • Using Dry Chicken: Ensure your chicken is moist; dry chicken can ruin the overall flavor experience.

Frequently Asked Questions (FAQs)

Here are some common questions about Greek yogurt chicken salad:

  • Can I use canned chicken? Yes, canned chicken is a convenient option; just drain and rinse before adding.
  • Is this salad gluten-free? Absolutely! All ingredients used are gluten-free.
  • Can I make this vegan? Substitute chicken with chickpeas or tofu and use a dairy-free yogurt.
  • How can I make it spicier? Add a dash of hot sauce or diced jalapeños for an extra kick.
  • What can I serve with this salad? It pairs beautifully with whole-grain crackers, pita bread, or a fresh green salad.
  • Can I use flavored Greek yogurt? Yes, but be cautious with sweet flavors; they may alter the salad’s taste.
  • How long does this salad last? This salad can last up to four days in the refrigerator.
  • Can I eat it warm? While it’s best served cold, feel free to enjoy it at room temperature!

Nutritional Tips and Dietary Adaptations

This Greek yogurt chicken salad is already a healthy choice, but here are ways to adapt it for specific dietary needs:

  • Low-Calorie Option: Use low-fat Greek yogurt and limit high-calorie add-ins.
  • Keto-Friendly: Stick to low-carb vegetables and ensure your yogurt is full-fat.
  • Paleo Adaptation: Replace yogurt with avocado or a homemade mayo alternative using egg yolk.

Equipment Recommendations

To make your cooking experience seamless, here’s a list of recommended equipment:

  • Mixing Bowl: A medium-sized bowl for combining ingredients.
  • Measuring Cups and Spoons: Precision in your ingredients makes all the difference.
  • Sharp Knife: For chopping vegetables with ease.
  • Storage Containers: Airtight containers are essential for keeping your salad fresh.

Serving Suggestions

This Greek yogurt chicken salad is versatile. Here are a few ways to serve it:

  • As a Sandwich Filling: Spread between whole-grain bread or in a wrap for a hearty lunch.
  • On a Bed of Greens: Serve over mixed greens for a light yet filling salad.
  • With Crackers: Pair with your favorite whole-grain crackers for a satisfying snack.
  • As a Dip: Serve with veggie sticks or pita chips as a delightful appetizer.

In conclusion, this Greek yogurt chicken salad is more than just a recipe; it’s a celebration of flavors, culture, and connections that brings people together. Whether you’re meal prepping for the week or sharing stories over dinner, this dish is bound to become a beloved staple in your culinary repertoire. Happy cooking, and may your kitchen adventures be filled with joy and delicious discoveries!

Amazing Greek Yogurt Chicken Salad for 4 Days

Prep Time 10 minutes
Total Time 10 minutes
Servings 4 servings
Calories 250
A creamy, flavorful chicken salad made with Greek yogurt, perfect for meal prep and light lunches over four days.

Ingredients

Protein

  • 2 cups cooked, shredded chicken breast
  • 1/2 cup plain Greek yogurt (full-fat recommended)
  • 1/4 cup finely chopped celery
  • 1/4 cup finely chopped red onion
  • 2 tablespoons fresh dill, chopped
  • 1 tablespoon fresh lemon juice
  • 1 teaspoon Dijon mustard
  • to taste NA Salt
  • to taste NA Black pepper

Instructions 

  • Place the shredded chicken in a bowl.
  • Add yogurt, celery, onion, dill, lemon juice, and mustard. Mix gently.
  • Season with salt and pepper to taste.
  • Refrigerate for at least 30 minutes before serving.
  • Portion into containers for meal prep.

Notes

This salad is best enjoyed fresh but can be stored in the refrigerator for up to 3 days.
Calories: 250kcal
Cost: $15
Course: Salad
Cuisine: Greek
Keyword: Chicken, Yogurt

Welcome to a delightful culinary journey where we explore the magic of a chocolate mug cake. This quick and easy recipe is perfect for those moments when you crave something sweet yet want to keep it simple. In just a few minutes, you can whip up a warm, comforting dessert that brings a smile to your face. So, grab your favorite mug and let’s dive into this chocolate cake adventure!

Why You’ll Love This Recipe

This chocolate mug cake isn’t just another dessert; it’s a passport to flavor and comfort. Here’s why you’ll adore this recipe:

  • Quick and Easy: Perfect for those busy nights when you need a sweet treat in a hurry.
  • Single Serving: No need to bake an entire cake; just one mug cake satisfies your cravings.
  • Customizable: Add your favorite ingredients, like nuts or chocolate chips, to make it uniquely yours.
  • Minimal Cleanup: With everything cooked in one mug, cleanup is a breeze.
  • Warm & Comforting: There’s nothing like enjoying a warm dessert right out of the microwave.

Ingredients for Chocolate Mug Cake

Gather these simple ingredients to embark on your chocolatey adventure:

  • 4 tablespoons all-purpose flour: This forms the base, giving your cake structure.
  • 4 tablespoons granulated sugar: Sweetens the cake to perfection.
  • 2 tablespoons unsweetened cocoa powder: The source of rich chocolate flavor.
  • 1/8 teaspoon baking powder: Helps the cake rise beautifully.
  • 1/8 teaspoon salt: Balances the sweetness and enhances flavors.
  • 3 tablespoons milk: Adds moisture; you can use plant-based milk for a vegan option.
  • 2 tablespoons vegetable oil: Keeps the cake tender and moist.
  • 1/4 teaspoon vanilla extract: A hint of vanilla elevates the flavor.
  • 2 tablespoons chocolate chips (optional): For an extra chocolatey indulgence.

How to Make Chocolate Mug Cake

This delightful treat is incredibly easy to make. Follow these steps:

  • In a microwave-safe mug, combine the flour, sugar, cocoa powder, baking powder, and salt.
  • Add the milk, vegetable oil, and vanilla extract to the dry ingredients. Mix until smooth.
  • If desired, stir in the chocolate chips for an extra layer of deliciousness.
  • Microwave the mug on high for 1 minute and 30 seconds, or until the cake has risen and is set in the middle.
  • Let it cool for a minute before diving into your delicious chocolate mug cake!

Pro Tips for Success

Rich chocolate mug cake displayed in a cozy kitchen setting.

To ensure your mug cake turns out perfectly every time, keep these expert tips in mind:

  • Microwave Times Vary: Every microwave is different; start with 1 minute and add time in 10-second intervals as needed.
  • Don’t Overmix: Mix just until combined to keep the cake light and fluffy.
  • Check Consistency: The cake should be set in the middle but slightly moist; it will continue to cook as it cools.
  • Experiment with Flavors: Try adding a pinch of cinnamon or a splash of coffee for a unique twist.
  • Use a Bigger Mug: Make sure your mug is large enough to allow the cake to rise without overflowing.
  • Chill Ingredients: If you prefer a denser cake, use cold ingredients.
  • Layer It Up: For a layered effect, add a layer of peanut butter or Nutella in the middle before microwaving.
  • Garnish Wisely: Top with whipped cream, fruit, or a scoop of ice cream for an indulgent finish.

Common Mistakes and Troubleshooting

Even the best chefs make mistakes! Here are some common pitfalls and how to avoid them:

  • Dense Cake: Overmixing or using too much flour can lead to a heavy texture. Measure accurately and mix gently.
  • Overflowing Mug: Using a small mug can cause spillover. Opt for a larger mug to allow for expansion.
  • Undercooked Cake: If the center is gooey, it needs more time. Microwave in short bursts until fully set.
  • Too Dry: If the cake is dry, consider adding more milk or oil next time.

Variations of Chocolate Mug Cake

Shake things up with these exciting variations:

  • Peanut Butter Cup: Add a spoonful of peanut butter before microwaving for a nutty twist.
  • Mint Chocolate: Mix in a few drops of peppermint extract for a refreshing flavor.
  • Espresso Delight: Substitute some of the milk with brewed coffee for a mocha mug cake.
  • Vegan Version: Replace milk with almond or oat milk and use a flaxseed egg for binding.

Storage and Make-Ahead Instructions

While this mug cake is best enjoyed fresh, here’s how to make it ahead of time:

  • Make Ahead: Prepare the dry ingredients in advance and store them in an airtight container for up to a week.
  • Storage: If you have leftovers (which is rare!), refrigerate them in a sealed container for up to 24 hours.
  • Reheating: Microwave for quick bursts of 10-15 seconds to restore warmth.

Comprehensive FAQ

Here are some frequently asked questions about chocolate mug cakes:

  • Can I use gluten-free flour? Yes, you can substitute all-purpose flour with a gluten-free blend.
  • Can I double the recipe? It’s best to make each cake separately to ensure even cooking.
  • What if I don’t have cocoa powder? You can try using carob powder or omit it for a vanilla mug cake.
  • Can I freeze my mug cake? It’s not recommended, as the texture changes upon thawing.
  • Can I use a different sweetener? Absolutely! Experiment with honey, maple syrup, or stevia as alternatives.
  • How can I make it richer? Use more chocolate chips or add a dollop of chocolate frosting on top.
  • Is there a microwave-safe alternative? Yes, you can use a small ramekin or a bowl, just ensure it’s microwave-safe.
  • Can kids make it? Yes! It’s a fun and easy recipe for kids under adult supervision.

Nutritional Tips and Dietary Adaptations

Want to make your delicious treat a bit healthier? Here are some adaptations:

  • Lower Sugar: Reduce sugar by half without compromising taste.
  • Healthy Fats: Substitute vegetable oil with unsweetened applesauce for a lower-fat option.
  • Dairy-Free: Use almond, coconut, or oat milk for a vegan-friendly dessert.
  • Extra Protein: Add a scoop of protein powder to boost the nutritional value.

Equipment Recommendations

To make your mug cake adventure seamless, here’s what you’ll need:

  • Microwave-Safe Mug: Choose a sturdy mug that can withstand high heat.
  • Measuring Cups and Spoons: Accurate measurements are key for success.
  • Mixing Spoon: A simple spoon or a small whisk works perfectly.
  • Microwave: Ensure your microwave is functioning well for optimal cooking.

Serving Suggestions

Enjoy your chocolate mug cake in style with these delightful serving ideas:

  • Top with Ice Cream: A scoop of vanilla or chocolate ice cream melts beautifully over the warm cake.
  • Add Fresh Fruit: Sliced strawberries or bananas add a refreshing contrast to the rich chocolate.
  • Drizzle with Sauce: A drizzle of caramel or chocolate sauce elevates the dessert.
  • Sprinkle Nuts: Chopped walnuts or pecans add a crunchy texture to each bite.

In closing, this chocolate mug cake isn’t just a dessert; it’s an experience filled with flavor and joy. So next time you’re looking for a sweet escape, remember that in just a few minutes, you can create a warm, chocolatey hug in a mug. Enjoy your adventure in the world of flavors, and happy baking!

Chocolate Mug Cake: Indulge in a Quick Delight!

Prep Time 2 minutes
Cook Time 2 minutes
Total Time 4 minutes
Servings 1 serving
Calories 250
Enjoy a rich and moist chocolate mug cake in just minutes with this easy recipe.

Ingredients

dry ingredients

  • 4 tablespoons all-purpose flour
  • 4 tablespoons granulated sugar
  • 2 tablespoons unsweetened cocoa powder
  • 1/8 teaspoon baking powder
  • 1/8 teaspoon salt

wet ingredients

  • 3 tablespoons milk
  • 2 tablespoons vegetable oil
  • 1/4 teaspoon vanilla extract
  • 2 tablespoons chocolate chips (optional)

Instructions 

  • Mix dry ingredients in a microwave-safe mug.
  • Add wet ingredients and stir until smooth.
  • Stir in chocolate chips if desired.
  • Microwave on high for 1.5 minutes.
  • Let cool briefly before enjoying.

Notes

Use a microwave-safe mug and watch the cake as it cooks to prevent overflow.
Calories: 250kcal
Cost: $3
Course: Dessert
Keyword: chocolate

Discover the Magic of Chocolate Mug Cake

Imagine this: it’s a late night, you’re craving something sweet, and the thought of whipping up an elaborate dessert feels daunting. Enter the chocolate mug cake—a delightful creation that offers a quick, single serving of bliss in just minutes. This chocolate mug cake recipe combines simple ingredients like cocoa, sugar, and a touch of vanilla to create a warm, gooey treat that will whisk you away into a world of indulgence. Join me, Jack, as we dive into this culinary adventure and explore the joy of making your very own chocolate mug cake!

Why You’ll Love This Recipe

This chocolate mug cake isn’t just a dessert; it’s an experience! Here are a few reasons why this recipe will become your go-to for satisfying those sweet cravings:

  • Quick and Easy: Ready in under 2 minutes, this recipe is perfect for late-night cravings or unexpected guests.
  • Single Serving: No more leftovers! This mug cake is designed for one, so you can indulge without guilt.
  • Customizable: Add your favorite toppings or mix-ins to make it uniquely yours.
  • No Special Equipment Needed: All you need is a microwave and a mug—no oven required!
  • Deliciously Decadent: With rich chocolate flavor and a gooey center, this cake is a chocolate lover’s dream come true.

Ingredients Needed

Let’s gather our ingredients! Here’s what you need to create this delightful chocolate mug cake:

  • 3 Tbsp all-purpose flour: This forms the base of your cake.
  • 2 Tbsp granulated sugar: For sweetness that balances the cocoa.
  • 1 Tbsp unsweetened cocoa powder: The star ingredient, giving your cake that rich chocolate flavor.
  • 0.25 tsp baking powder: This will help your cake rise to fluffy perfection.
  • 1 pinch salt: Enhances the overall flavor of your cake.
  • 3 Tbsp milk: Any type you prefer—dairy or non-dairy works!
  • 1 Tbsp canola oil or melted butter: Adds moisture and richness to the batter.
  • 0.125 tsp vanilla extract: For a hint of warmth and depth in flavor.
  • 1 tsp chocolate chips: Optional but recommended for a gooey center!

How to Make Your Chocolate Mug Cake

Mouthwatering chocolate mug cake with a soft texture, ready to eat.

Ready to get started? Let’s make this delicious chocolate mug cake step by step!

  • Prepare Your Mug: Lightly coat the inside of a microwave-safe mug with cooking spray to prevent sticking.
  • Mix Dry Ingredients: Add flour, sugar, cocoa powder, baking powder, and salt to the mug. Stir until evenly mixed to avoid dry pockets in your batter.
  • Add Wet Ingredients: Pour in the milk, oil, and vanilla extract. Mix until the batter is smooth, ensuring to reach the bottom of the mug.
  • Incorporate Chocolate Chips: Stir in the chocolate chips for an extra gooey layer or leave them on top for a delightful melting effect.
  • Microwave: Heat in the microwave for 70 to 90 seconds. Stop when the top looks set but still shiny to maintain moisture.
  • Let it Rest: Allow the mug to sit in the microwave for one minute before enjoying to let the texture settle.

Essential Cooking Tips

To ensure your chocolate mug cake turns out perfectly every time, keep these expert tips in mind:

  • Microwave Wattage: Cooking times may vary based on your microwave’s wattage. Start with 70 seconds and add more time if needed.
  • Don’t Overmix: Be gentle when mixing the batter to avoid a dense cake.
  • Check for Doneness: The top should be set and slightly shiny; it continues to cook after removing from the microwave.
  • Use Room Temperature Ingredients: This helps create a smoother batter and a more uniform bake.
  • Experiment with Toppings: Consider whipped cream, ice cream, or fresh fruit to elevate your mug cake experience.
  • Use a Larger Mug: Ensure you use a big enough mug to contain the cake as it rises during cooking.
  • Make it Vegan: Substitute milk with almond or oat milk, and use a plant-based oil for a vegan-friendly option.
  • Try Different Flavors: Add a pinch of cinnamon or a splash of espresso for a unique twist.

Variations of Chocolate Mug Cake

Feeling adventurous? Here are some delicious variations to try:

  • Peanut Butter Mug Cake: Add a tablespoon of peanut butter to the batter for a nutty flavor.
  • Mint Chocolate Mug Cake: Incorporate a few drops of peppermint extract for a refreshing twist.
  • Chocolate Chip Cookie Mug Cake: Replace cocoa powder with brown sugar and add chocolate chips for cookie flavor.
  • Mocha Mug Cake: A splash of brewed coffee in the batter will create a delightful mocha experience.

Common Mistakes and Troubleshooting

Here are some pitfalls to avoid when making your chocolate mug cake:

  • Overcooking: Microwaves can vary greatly; always start with the minimum time and adjust as needed.
  • Using a Small Mug: A smaller mug can cause the batter to overflow, creating a mess. Choose a larger one!
  • Ignoring Ingredient Temperatures: Cold ingredients can lead to a lumpy batter. Room temperature is best.

Storage and Make-Ahead Instructions

While mug cakes are best enjoyed immediately, here’s how to handle leftovers:

  • Store Leftovers: If you have any leftover batter, cover the mug and store it in the refrigerator for up to 24 hours.
  • Reheat in Microwave: Warm up for 15-20 seconds to regain moisture before enjoying.
  • Make Ahead: Prepare the dry ingredients in advance and store them in a sealed container for quick assembly later.

Comprehensive FAQ

Here are some frequently asked questions about chocolate mug cakes:

  • Can I use gluten-free flour? Yes! Use a 1:1 gluten-free flour blend for a gluten-free version.
  • Can I double the recipe? This recipe is designed for one serving. Doubling it may require adjusting cooking times and a larger container.
  • Can I use a different type of milk? Absolutely! Almond, soy, or oat milk works perfectly.
  • What if my cake is too dry? This can happen if overcooked. Reduce cooking time next time.
  • Can I make this cake without eggs? Yes, this recipe does not require eggs, making it inherently egg-free.
  • What toppings go well with a chocolate mug cake? Consider whipped cream, ice cream, or fresh berries for a delightful finish.
  • How can I make my cake richer? Adding more chocolate chips or a tablespoon of cocoa powder can enhance richness.
  • Is it safe to use a metal mug in the microwave? No, always use microwave-safe ceramic or glass mugs.

Nutritional Tips and Dietary Adaptations

Want to make your chocolate mug cake healthier? Here are some ideas:

  • Reduce Sugar: Cut the sugar by half or use a sugar substitute for a lower-calorie option.
  • Substitute Oil: Use applesauce instead of oil for a lower-fat version.
  • Protein Boost: Mix in a scoop of protein powder for added nutrition.

Equipment Recommendations

Here’s what you’ll need to make your mug cake:

  • Microwave: A reliable microwave for quick cooking.
  • Microwave-Safe Mug: Ensure it’s large enough to avoid overflow.
  • Mixing Spoon: A small spoon for stirring the batter.

Serving Suggestions

Enjoy your chocolate mug cake on its own, or elevate it with these serving ideas:

  • Serve with Ice Cream: A scoop of vanilla or chocolate ice cream takes it to the next level.
  • Top with Whipped Cream: A dollop of whipped cream adds a light, fluffy texture.
  • Add Fresh Berries: Strawberries or raspberries provide a refreshing contrast to the rich chocolate.

In conclusion, the chocolate mug cake is a simple yet satisfying treat that brings a taste of adventure to your kitchen. With endless possibilities for customization, this recipe is sure to become a staple in your dessert repertoire. So grab your mug, mix up the batter, and let the flavors whisk you away!

Chocolate Mug Cake

Prep Time 2 minutes
Cook Time 1 minute
Total Time 3 minutes
Servings 1 serving
Calories 250
A quick and delicious chocolate mug cake perfect for satisfying your sweet tooth in minutes.

Ingredients

Dry ingredients

  • 3 Tbsp all purpose flour
  • 2 Tbsp granulated sugar
  • 1 Tbsp unsweetened cocoa powder
  • 0.25 tsp baking powder
  • 1 pinch salt

Wet ingredients

  • 3 Tbsp milk (any type you prefer)
  • 1 Tbsp canola oil or melted butter
  • 0.125 tsp vanilla extract

Add-ins

  • 1 tsp chocolate chips (or any baking chips you enjoy)

Instructions 

  • Mix dry ingredients in the mug.
  • Add wet ingredients and stir until smooth.
  • Stir in chocolate chips.
  • Microwave for 70-90 seconds until set.
  • Let sit for 1 minute before eating.

Notes

Use a microwave-safe mug and adjust cooking time as needed.
Calories: 250kcal
Cost: $3
Course: Dessert
Keyword: chocolate