Author

Jack

Browsing

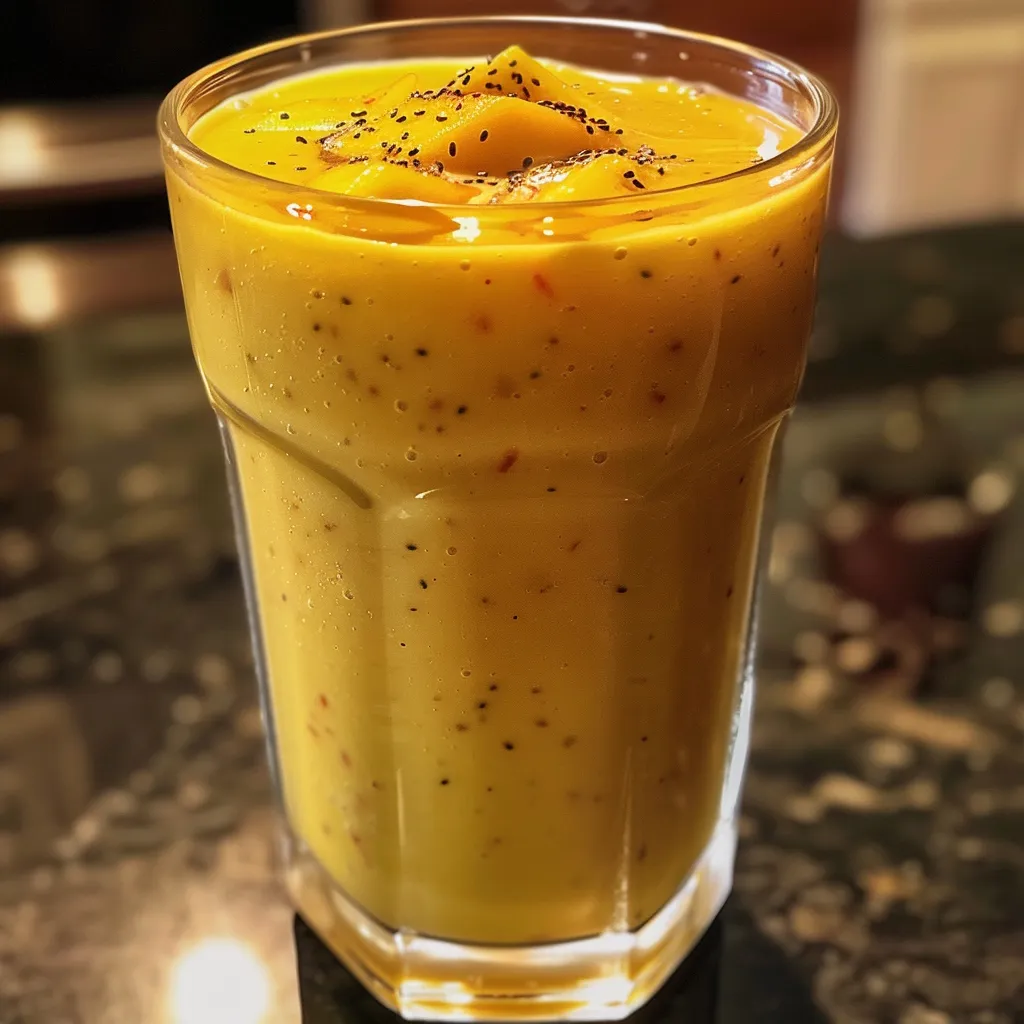
Embark on a Flavorful Journey with the Röda bär Vaniljprotein Smoothie

If you’re looking to kickstart your mornings with a burst of energy and a taste of nature’s sweetness, then this Röda bär Vaniljprotein Smoothie is the perfect recipe for you! This smoothie is not just a drink; it’s an experience that blends the vibrant flavors of frozen berries with the creaminess of almond milk and a hint of vanilla, creating a delicious concoction that tantalizes your taste buds. Join me, Jack, as we explore the delightful world of this berry smoothie that celebrates the simplicity and beauty of wholesome ingredients.

Why You’ll Love This Recipe

  • Quick and Easy: This smoothie takes just 5 minutes to whip up, making it an ideal choice for busy mornings.
  • Nutrient-Rich: Packed with antioxidants from berries and protein from vanilla powder, this smoothie is a powerhouse of nutrition.
  • Customizable: Feel free to substitute ingredients to suit your dietary preferences, ensuring everyone can enjoy it!
  • Deliciously Creamy: The addition of coconut yogurt gives this smoothie a rich, creamy texture that you’ll love.
  • Perfect for Meal Prep: Make a batch ahead of time and store it for a quick grab-and-go breakfast option!

Ingredient Breakdown

Understanding the ingredients in your smoothie is essential for mastering this recipe. Here’s what you’ll need:

  • 250 ml of plant milk: I recommend almond milk for its subtle nutty flavor, but you can use oat, soy, or coconut milk as alternatives.
  • 1 frozen banana: This adds natural sweetness and creaminess. If you’re avoiding bananas, consider using avocado for a similar texture.
  • 150 g of frozen berry mix: I used strawberries, raspberries, and red currants, but feel free to mix it up with blueberries, blackberries, or even tropical fruits!
  • 2 tbsp of coconut yogurt: This contributes to the creaminess and adds a touch of tartness. Greek yogurt is a great alternative if you prefer something thicker.
  • 1 scoop of vanilla protein powder: I used Rawnice Vanilla Caramel Protein Powder, but any plant-based protein will do.

Pro Tips for the Perfect Smoothie

Close-up of a Röda bär & Vaniljprotein Smoothie, highlighting its creamy consistency and colorful ingredients.

To elevate your smoothie-making game, consider these expert insights:

  • Chill Your Ingredients: Ensure your fruits are frozen for a frosty texture. Fresh fruits can be used, but they may require extra ice.
  • Blend in Stages: Start by blending the liquid and powders first, then add the fruits. This ensures a smoother consistency.
  • Taste and Adjust: Blend and taste your smoothie. If it’s not sweet enough, add a drizzle of honey or maple syrup.
  • Use a High-Powered Blender: This ensures a silky smooth texture, especially with fibrous ingredients like bananas.
  • Experiment with Add-Ins: Superfoods like chia seeds or spinach can be added for an extra nutritional boost.
  • Don’t Skip the Yogurt: This ingredient not only enhances the creaminess but also packs probiotics for gut health.
  • Garnish for Presentation: Top your smoothie with a few whole berries or a sprinkle of granola for a beautiful finish.
  • Serving Size: This recipe yields approximately two servings, perfect for sharing or saving for later.

Avoid Common Mistakes

Even the best recipes can have hiccups! Here are common mistakes to watch out for:

  • Too Much Liquid: Adding excessive milk can make your smoothie too thin. Start with less and adjust as needed.
  • Not Blending Long Enough: Ensure you blend until completely smooth. Chunky smoothies are less enjoyable!
  • Using Overripe Bananas: While bananas add flavor, too ripe can lead to an overly sweet smoothie. Choose bananas that are just ripe.
  • Ignoring Texture: If your smoothie is gritty, it might be due to insufficient blending or low-quality protein powder.

Delicious Variations to Try

Feeling adventurous? Here are some exciting variations you can try:

  • Tropical Twist: Substitute berries with mango and pineapple for a refreshing tropical experience.
  • Green Smoothie: Add a handful of spinach or kale for a nutritional kick without altering the taste significantly.
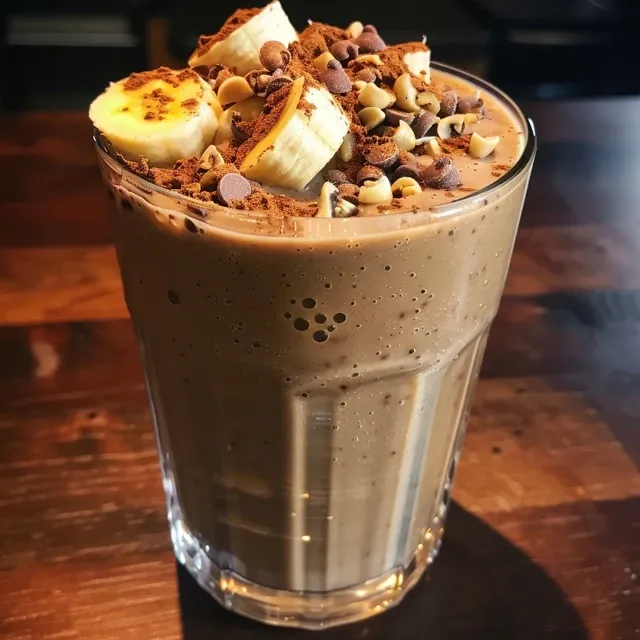
  • Cacao Delight: Mix in a tablespoon of cocoa powder for a chocolatey twist that pairs beautifully with the vanilla.
  • Nutty Flavor: Include a tablespoon of almond butter or peanut butter for added creaminess and protein.

Storage and Make-Ahead Instructions

Planning ahead is key to a smooth morning routine:

  • Refrigeration: You can store your smoothie in an airtight container in the fridge for up to 24 hours, but the freshness is best enjoyed immediately.
  • Freezing: Prepare smoothie packs by portioning out the ingredients and freezing them. Just blend with your choice of liquid when ready!

Frequently Asked Questions

Here are some common questions about this smoothie:

  • Can I use fresh berries instead of frozen? Yes, but you might need to add ice to achieve that frosty texture.
  • Is this smoothie vegan? Absolutely! All ingredients can be plant-based.
  • How can I make it sugar-free? Use unsweetened plant milk and avoid added sweeteners; the banana and berries should provide enough natural sweetness.
  • Can I use a different flavor of protein powder? Yes, any flavor you enjoy can be substituted, but keep in mind it will alter the overall flavor profile.
  • What’s the best time to drink this smoothie? It’s perfect for breakfast, but also a great snack or post-workout recovery drink!
  • How can I make it thicker? Add more frozen fruit or a scoop of oats for a thicker consistency.
  • Can I add greens without changing the flavor? Yes! Spinach or kale blends well without overpowering the taste.
  • What’s the nutritional value of this smoothie? It’s rich in vitamins, antioxidants, and protein, making it a balanced choice for any meal.

Nutritional Tips and Dietary Adaptations

To cater to various dietary needs, consider these adaptations:

  • For Gluten-Free: This recipe is naturally gluten-free, ensuring it’s safe for those with gluten sensitivities.
  • For Dairy-Free: All ingredients can be substituted with plant-based options for a completely dairy-free smoothie.
  • For High-Protein: Increase the protein powder or add Greek yogurt for an extra protein boost.
  • For Low-Carb: Reduce the banana and use fewer berries; consider using avocado for creaminess without the carbs.

Equipment Recommendations

Having the right tools makes all the difference:

  • High-Powered Blender: A quality blender will ensure a smooth and creamy texture.
  • Measuring Cups: Accurate measurements help maintain consistency in your smoothies.
  • Storage Containers: Use glass or BPA-free plastic containers for meal prep and storage.

Serving Suggestions

Here are some ideas to enhance your smoothie experience:

  • Top with Granola: A sprinkle of granola adds crunch and a delightful texture.
  • Pair with Toast: Enjoy your smoothie alongside whole-grain toast topped with avocado or nut butter.
  • Create a Smoothie Bowl: Pour into a bowl and top with sliced fruits, nuts, and seeds for a beautiful presentation.

In conclusion, the Röda bär Vaniljprotein Smoothie is more than just a refreshing beverage; it’s an exploration of flavor and nutrition that invites you to savor every sip. With its vibrant colors and delicious taste, this smoothie embodies the essence of what it means to eat well and feel good. So grab your blender, gather your ingredients, and embark on this culinary adventure. Cheers to your health and happiness!

Röda bär Vaniljprotein Smoothie

Prep Time 5 minutes
Total Time 5 minutes
Servings 1 serving
Calories 250
Enjoy a delicious and nutritious berry vanilla protein smoothie perfect for a quick breakfast or snack.

Ingredients

Liquid

  • 250 ml växtmjölk (mandel)
  • 1 piece fryst banan
  • 150 g fryst bärmix (jordgubbar, hallon, röda vinbär)
  • 2 msk kokosyoghurt
  • 1 skopa Rawnice Vanilla Caramel Protein Pulver

Instructions 

  • Place all ingredients in a blender and blend until smooth and creamy.

Notes

Use frozen berries for a thicker, colder smoothie.
Calories: 250kcal
Cost: $8
Course: Smoothie
Cuisine: Swedish
Keyword: berries, Protein, vanilla

Welcome to the World of Banana Nut Bread

Ah, the aroma of freshly baked banana nut bread wafting through the kitchen—it’s a scent that tugs at the heartstrings and evokes memories of family gatherings and cozy mornings. This classic recipe is more than just a way to use up ripe bananas; it’s a journey into the warmth of Grandma’s kitchen, where every slice tells a story. Whether you’re a novice baker or a seasoned pro, this comprehensive guide will ensure your banana nut bread is the talk of the table.

Why You’ll Love This Recipe

Banana nut bread isn’t just delicious; it’s also versatile and comforting. Here are five reasons why this recipe will become a staple in your home:

  • Easy to Make: With simple ingredients and straightforward steps, this recipe is perfect for bakers of all skill levels.
  • Customizable: Add your favorite nuts, spices, or even chocolate chips to create a unique twist on the classic.
  • Great for Breakfast or Snack: Enjoy a slice with your morning coffee or as a midday treat—it’s perfect for any time of day.
  • Incredibly Moist: Thanks to the ripe bananas and butter, this bread stays fresh and tender for days.
  • Freezes Well: Make a double batch and freeze half for a quick breakfast option later on.

Ingredient Breakdown

Let’s dive into the magic behind this recipe. Each ingredient plays a pivotal role in creating the perfect banana nut bread.

  • Ripe Bananas: The star of the show! Sweet, overripe bananas not only add flavor but also moisture to the bread. Aim for bananas that are heavily speckled.
  • Melted Butter: Provides richness and helps achieve that soft crumb. You can substitute with vegetable oil for a dairy-free version.
  • Sugar: While granulated sugar is standard, you can reduce it for a less sweet bread or substitute with honey or maple syrup for a natural sweetness.
  • Egg: Acts as a binding agent and adds structure. For a vegan option, use flax eggs.
  • Vanilla Extract: Adds depth and warmth to the flavor profile.
  • Baking Soda: The leavening agent that helps the bread rise.
  • Salt: Enhances the overall flavor of the bread.
  • All-Purpose Flour: Provides the necessary structure. Whole wheat flour can be used for a nuttier flavor and added nutrition.
  • Chopped Walnuts or Pecans: Adds a delightful crunch and nutty flavor. Feel free to substitute with chocolate chips or dried fruit if preferred.

Pro Tips for Baking Success

Ready to bake? Here are some expert insights to ensure your banana nut bread is a hit:

  • Don’t Overmix: Gently fold the wet and dry ingredients together to keep the bread light and airy.
  • Check for Ripeness: Use bananas that are well-spotted and soft; they provide the best flavor.
  • Toast Your Nuts: Toasting walnuts or pecans before adding them enhances their flavor dramatically.
  • Measure Accurately: Use a kitchen scale for precision, especially with flour, to avoid dense bread.
  • Use Room Temperature Ingredients: This helps the batter combine more easily.
  • Cool Properly: Allow the bread to cool in the pan for 10 minutes before transferring to a wire rack to prevent crumbling.
  • Experiment with Spices: A pinch of cinnamon or nutmeg can elevate your banana nut bread to new heights.
  • Don’t Rush the Baking: Every oven is different; check your bread a few minutes before the suggested baking time.
  • Use a Toothpick Test: Insert a toothpick into the center; it should come out clean or with a few moist crumbs.

Avoiding Common Mistakes

Even the best bakers make mistakes! Here’s how to troubleshoot common issues:

  • Dense Bread: This often results from overmixing. Mix just until combined.
  • Too Sweet: Reduce sugar or use ripe bananas for natural sweetness.
  • Dry Texture: Ensure you’re measuring your flour correctly and don’t overbake.
  • Uneven Baking: Rotate the pan halfway through baking for even heat distribution.

Delicious Variations

While the classic banana nut bread is fantastic as is, here are some variations to keep things exciting:

  • Chocolate Chip Banana Nut Bread: Add 1 cup of semi-sweet chocolate chips for a gooey, indulgent twist.
  • Blueberry Banana Nut Bread: Mix in 1 cup of fresh or frozen blueberries for a fruity burst.
  • Maple Pecan Banana Bread: Substitute maple syrup for sugar and add chopped pecans for a warm flavor.
  • Coconut Banana Nut Bread: Add 1 cup of shredded coconut for a tropical flair.

Storage and Make-Ahead Instructions

Want to enjoy this delightful bread later? Here’s how to store and prepare it in advance:

  • Room Temperature: Store the bread in an airtight container for up to 3 days.
  • Refrigerator: If you live in a humid climate, refrigerate for up to a week.
  • Freezer: Wrap the cooled bread tightly in plastic wrap and foil. It can be frozen for up to 3 months. Thaw overnight in the fridge before serving.
  • Make-Ahead: You can prepare the batter a day in advance and bake it when you’re ready.

Frequently Asked Questions

Let’s tackle some common queries about banana nut bread:

  • Can I use frozen bananas? Yes! Just thaw them and drain any excess liquid before mashing.
  • What can I substitute for eggs? Use a flax egg (1 tablespoon ground flaxseed mixed with 2.5 tablespoons water) or unsweetened applesauce.
  • How can I make it gluten-free? Substitute all-purpose flour with a gluten-free flour blend.
  • What nuts are best in banana nut bread? Walnuts and pecans are classic choices, but feel free to experiment!
  • Why is my bread not rising? Check that your baking soda is fresh; expired leavening agents can lead to dense bread.
  • Can I add yogurt or sour cream? Absolutely! They can add moisture and tanginess to the bread.
  • How do I know when my bread is done baking? A toothpick inserted into the center should come out clean or with a few crumbs.
  • Can I make mini loaves? Yes! Adjust baking time to about 25-35 minutes for mini loaves.

Nutrition Tips and Dietary Adaptations

Banana nut bread can be made healthier without sacrificing flavor:

  • Whole Wheat Flour: Substitute half of the all-purpose flour with whole wheat for added fiber.
  • Reduce Sugar: Cut the sugar by a third or use natural sweeteners like honey.
  • Add Seeds: Incorporate chia or flax seeds for extra nutrition.
  • Dairy-Free Option: Use coconut oil instead of butter and almond milk instead of regular milk.

Essential Equipment for Baking

Here’s a quick list of tools to help you bake the perfect banana nut bread:

  • Mixing Bowls: A set of various sizes for combining ingredients.
  • Measuring Cups and Spoons: For accurate measurements.
  • Whisk and Spatula: Essential for mixing and folding ingredients.
  • 9×5-Inch Loaf Pan: The perfect size for this recipe.
  • Cooling Rack: To let your bread cool properly after baking.

Serving Suggestions

Enjoy your banana nut bread in various delightful ways:

  • With Butter: A simple spread of butter enhances the flavor.
  • With Cream Cheese: For a rich and tangy twist, top with cream cheese.
  • Toast It: A quick toast brings out the flavors and adds a satisfying crunch.
  • Pair with Coffee: The perfect accompaniment to your morning cup.

Conclusion

Banana nut bread is more than just a recipe; it’s a comforting hug in food form. Whether you’re enjoying a slice yourself or sharing it with friends and family, this recipe promises warmth, flavor, and a bit of nostalgia. So, gather your ingredients, preheat the oven, and embark on this delicious adventure. Every slice is a reminder that food is indeed a passport to culture and connection. Happy baking!

Grandma s Banana Nut Bread

Prep Time 15 minutes
Cook Time 1 hour 5 minutes
Total Time 1 hour 20 minutes
Servings 8 slices
Calories 250
A delicious and moist banana nut bread with a perfect balance of sweetness and crunch, ideal for breakfast or a snack.

Ingredients

Wet ingredients

  • 3 pieces ripe bananas, mashed
  • 0.5 cup melted butter
  • 0.5 cup sugar (can reduce to 0.25 cup for less sweetness)
  • 1 large egg, beaten
  • 1 teaspoon vanilla extract

Dry ingredients

  • 1.5 cups all purpose flour
  • 0.5 teaspoon baking soda
  • pinch salt

Nuts

  • 0.5 cup chopped walnuts or pecans

Instructions 

  • Preheat oven to 175°C (350°F) and grease a 9x5-inch pan.
  • Mash bananas in a bowl, then stir in melted butter, sugar, egg, and vanilla.
  • Mix flour, baking soda, and salt in a separate bowl, then fold into wet ingredients.
  • Gently fold in chopped nuts, then pour batter into prepared pan.
  • Bake for 60-70 minutes until a toothpick comes out clean, then cool in pan for 10 minutes before transferring to a wire rack.

Notes

For a less sweet bread, reduce sugar to 1/4 cup.
Calories: 250kcal
Cost: $10
Course: Dessert
Cuisine: American
Keyword: banana, bread, nut

Embark on a Culinary Adventure with Garlic Ginger Beef

Welcome to a vibrant exploration of flavors with our Garlic Ginger Beef Stir Fry. This dish is more than just a recipe; it’s a passport to a world of culinary delight. Imagine tender beef sizzling in a sweet and savory garlic-ginger sauce, perfectly complemented by colorful vegetables. Whether you’re a seasoned chef or a kitchen novice, this meal is designed to inspire and satisfy. Get ready to dive into a delightful culinary journey that transforms simple ingredients into an unforgettable feast!

Why You’ll Love This Recipe

This Garlic Ginger Beef Stir Fry is not just another dinner option—it’s a celebration of flavor and convenience. Here are five compelling reasons why you’ll want to make this dish your go-to weeknight favorite:

  • Quick and Easy: Ready in just 30 minutes, this meal is perfect for those busy weeknights when time is of the essence.
  • Flavor Explosion: The harmonious blend of garlic, ginger, and soy sauce creates a mouthwatering flavor profile that will leave you craving more.
  • Nutritious and Colorful: Packed with vibrant vegetables like broccoli, bell peppers, and snow peas, this stir fry is as nutritious as it is delicious.
  • Customizable: Feel free to swap in your favorite veggies or proteins—this recipe adapts to your preferences!
  • Leftover Friendly: This dish stores well, making it ideal for meal prepping or enjoying as leftovers the next day.

Ingredients You’ll Need

To whip up this delightful Garlic Ginger Beef Stir Fry, gather the following ingredients:

For the Stir Fry Sauce

  • ½ cup low-sodium soy sauce: A savory base for your sauce, keeping it flavorful without excess salt.
  • ⅓ cup rice vinegar: Adds a tangy depth that balances the sweetness of the sauce.
  • ½ cup brown sugar: For that sweet kick that complements the savory elements.
  • 2 teaspoons minced garlic: Fresh garlic brings a robust flavor that is essential for stir-fry.
  • ½ teaspoon ground ginger: A warm spice that enhances the dish’s aromatic qualities.
  • ¼ teaspoon crushed red pepper flakes (optional): For a hint of heat, adjust according to your spice preference.
  • ⅓ cup cold water: To help thicken the sauce.
  • 1 tablespoon cornstarch: To give the sauce a glossy finish.

For the Beef and Vegetables

  • 1 pound flank steak or sirloin: Thinly sliced against the grain for maximum tenderness.
  • 2 tablespoons toasted sesame oil or olive oil: Adds a rich flavor to the stir fry.
  • 2 cups broccoli florets: A nutritious addition that keeps its crunch.
  • 3 bell peppers (any color): For a burst of color and sweetness.
  • ½ cup mushrooms, sliced: Adds earthiness and texture.
  • ½ cup baby corn: A delightful crunch in every bite.
  • 1 cup snow peas: For a crisp, sweet contrast.
  • ⅓ cup shredded carrots: Adds sweetness and color.
  • Kosher salt and freshly ground black pepper: To taste.
  • Chopped green onions and toasted sesame seeds: For garnishing and added flavor.

Step-by-Step Instructions

Juicy, thinly sliced beef stir fry with broccoli, bell peppers, and mushrooms on a white plate.

Now that you have your ingredients ready, let’s dive into the cooking process!

Prepare the Sauce

  1. In a small saucepan, whisk together the soy sauce, rice vinegar, brown sugar, minced garlic, ground ginger, and crushed red pepper flakes.
  2. Bring the sauce to a gentle boil over medium heat.

Thicken the Sauce

  1. In a separate bowl, whisk the cold water and cornstarch until smooth.
  2. Slowly pour this mixture into the boiling sauce while stirring constantly.
  3. Continue to cook for 1-2 minutes, until the sauce thickens and becomes glossy. Remove from heat and set aside.

Cook the Beef

  1. Heat 1 tablespoon of sesame oil in a large skillet or wok over medium-high heat.
  2. Add the thinly sliced beef in a single layer and season lightly with salt and pepper.
  3. Stir-fry for 3-4 minutes, or until browned and just cooked through. Remove the beef from the skillet and set aside.

Cook the Vegetables

  1. Add the remaining 1 tablespoon of sesame oil to the same skillet.
  2. Add the broccoli, bell peppers, mushrooms, baby corn, snow peas, and carrots.
  3. Stir-fry for 7-9 minutes, or until the vegetables are tender-crisp.

Combine Everything

  1. Return the cooked beef to the skillet.
  2. Pour the prepared sauce over the beef and vegetables, stirring to coat everything evenly.
  3. Simmer for 1-2 minutes, allowing the flavors to meld together and the sauce to thicken slightly.

Serve and Garnish

  1. Remove from heat. Garnish with chopped green onions and toasted sesame seeds.
  2. Serve immediately over steamed rice or noodles for a complete meal.

Pro Tips for Perfect Stir Fry

  • Slice beef while slightly frozen: This makes it easier to achieve thin slices, ensuring tenderness.
  • Use high heat: Cooking on high heat helps to achieve that signature stir-fry sear.
  • Work in batches: Avoid overcrowding the pan to ensure even cooking.
  • Prep everything beforehand: Have all ingredients prepped and ready to go, as stir-frying is a quick process.
  • Experiment with flavors: Add a dash of lime juice or sesame oil before serving for added depth.
  • Customize veggies: Don’t hesitate to use snap peas, zucchini, or asparagus for variety.
  • Leftovers: Store in an airtight container in the fridge for up to 3 days. Reheat in a skillet for the best texture.
  • Make it gluten-free: Substitute soy sauce with tamari for a gluten-free version.
  • Add nuts: For an extra crunch, throw in some cashews or peanuts at the end.

Common Mistakes and Troubleshooting

Even the best chefs can make mistakes. Here are some common pitfalls to avoid when making a stir fry:

  • Overcooking the beef: Keep a close eye on the cooking time to ensure the beef stays tender. It should be just cooked through.
  • Under-seasoning: Make sure to taste and adjust seasoning as needed. A good stir fry should have a balanced flavor.
  • Using cold ingredients: If your vegetables are cold from the fridge, they may steam instead of stir-fry. Let them sit at room temperature for a bit.
  • Neglecting the sauce: Ensure your sauce is well-balanced and has the right consistency before adding it to the stir fry.

Variations and Substitutions

Don’t hesitate to get creative! Here are some variations to try:

  • Chicken Ginger Stir Fry: Substitute beef with sliced chicken breast for a lighter option.
  • Vegetarian Delight: Replace meat with tofu or tempeh and add extra vegetables like bok choy and zucchini.
  • Spicy Garlic Ginger Beef: Increase the amount of crushed red pepper flakes for an extra kick.
  • Thai Inspired: Add Thai basil and a splash of coconut milk for a tropical twist.

Storage and Make-Ahead Instructions

This dish is perfect for meal prep! Here’s how to store and reheat:

  • Refrigerate: Store leftovers in an airtight container in the refrigerator for up to 3 days.
  • Freeze: For longer storage, freeze the stir fry without the sauce. Thaw overnight before reheating.
  • Reheat: To maintain texture, reheat in a skillet over medium heat, adding a splash of water if needed.

FAQs About Easy Garlic Ginger Beef Stir Fry

Here are some frequently asked questions to help you on your culinary adventure:

  • Can I use different cuts of beef? Yes! Cuts like ribeye or sirloin work well too.
  • Is this stir fry gluten-free? Use gluten-free soy sauce or tamari to make it gluten-free.
  • How can I make it spicier? Add more crushed red pepper flakes or fresh chili peppers to the stir fry.
  • Can I add more vegetables? Absolutely! Feel free to include your favorites like bell peppers, snap peas, or carrots.
  • What can I serve it with? Serve over steamed rice, noodles, or quinoa for a complete meal.
  • How long can I store leftovers? Leftovers can be stored in the refrigerator for up to 3 days.
  • Can I make this ahead of time? Yes! You can prepare the ingredients and sauce ahead of time for quick cooking.
  • Is it suitable for meal prep? Yes! It’s an excellent choice for meal prepping since it reheats well.

Nutritional Tips and Dietary Adaptations

This Garlic Ginger Beef Stir Fry can be adapted to fit various dietary needs:

  • Low-Carb: Serve over cauliflower rice instead of traditional rice.
  • Dairy-Free: This recipe is naturally dairy-free, making it great for those with lactose intolerance.
  • High-Protein: With beef as the main ingredient, this dish is packed with protein.
  • Vegetarian Option: Substitute beef with tempeh or chickpeas for a protein-rich vegetarian meal.

Equipment Recommendations

To make your cooking experience seamless, here’s what you’ll need:

  • Wok or large skillet: Essential for even cooking and high heat stir-frying.
  • Sharp knife: For easy slicing of beef and vegetables.
  • Whisk: Useful for mixing sauces and ensuring no lumps.
  • Cutting board: A sturdy surface for prepping your ingredients.

Serving Suggestions

Want to elevate your meal? Here are some serving ideas:

  • Serve with rice: Steamed jasmine rice or brown rice pairs perfectly with this dish.
  • Try noodles: Toss your stir fry with cooked rice noodles or soba noodles for a delightful twist.
  • Garnish: Top with fresh herbs like cilantro or basil for an extra burst of flavor.
  • Include a side salad: A simple cucumber salad or Asian slaw complements the stir fry beautifully.

This Garlic Ginger Beef Stir Fry is not just a meal; it’s an experience filled with flavor and joy. Now that you have all the tools and knowledge, it’s time to gather your ingredients and create a dish that will impress your family and friends. Remember, cooking is about exploration and connection—so enjoy every moment of this culinary adventure!

Easy Garlic Ginger Beef Stir Fry Your Go-To Weeknight Favorite

Prep Time 10 minutes
Cook Time 15 minutes
Total Time 25 minutes
Servings 4 servings
Calories 450
A quick and flavorful stir fry combining tender beef with colorful vegetables and a savory garlic-ginger sauce, perfect for weeknights.

Ingredients

For the Stir Fry Sauce

  • 0.5 cup low-sodium soy sauce
  • 0.33 cup rice vinegar
  • 0.5 cup brown sugar
  • 2 teaspoons minced garlic
  • 0.5 teaspoon ground ginger
  • 0.25 teaspoon crushed red pepper flakes (optional, adjust to taste)
  • 0.33 cup cold water
  • 1 tablespoon cornstarch

For the Beef and Vegetables

  • 1 pound flank steak or sirloin (thinly sliced against the grain)
  • 2 tablespoons toasted sesame oil or olive oil (divided)
  • 2 cups broccoli florets
  • 3 any bell peppers (sliced, any color)
  • 0.5 cup mushrooms (sliced)
  • 0.5 cup baby corn
  • 1 cup snow peas
  • 0.33 cup shredded carrots

For Garnish

  • to taste Kosher salt and freshly ground black pepper
  • for garnish Chopped green onions and toasted sesame seeds

Instructions 

  • Whisk together soy sauce, rice vinegar, brown sugar, garlic, ginger, and red pepper flakes. Bring to a boil.
  • Whisk water and cornstarch, then slowly add to boiling sauce, stirring until thickened. Remove from heat.
  • Heat 1 tbsp oil in a skillet, cook beef until browned, then set aside.
  • Add remaining oil, stir-fry vegetables until tender-crisp, then return beef to skillet. Pour sauce over and cook 1-2 minutes.
  • Garnish with green onions and sesame seeds. Serve immediately over rice or noodles.

Notes

For ultra-tender beef, slice against the grain while slightly frozen. Add lime juice before serving for brightness. Customize vegetables as desired. Store leftovers in the fridge for up to 3 days and reheat in a skillet.
Calories: 450kcal
Cost: $15
Course: Main Course
Cuisine: Asian
Keyword: beef, Stir-Fry

Discover the Joy of High-Protein Banana Muffins

Welcome to a culinary adventure that marries health with flavor! Our High-Protein Banana Muffins are not just another snack; they represent a delightful journey through the world of wholesome ingredients and vibrant tastes. Perfectly moist and packed with protein, these muffins are your ideal companion for breakfast or a mid-afternoon boost. With every bite, you’ll experience the richness of ripe bananas, the creaminess of Greek yogurt, and the sweetness of honey or maple syrup, all wrapped in a muffin that can fuel your adventures!

Why You’ll Love This Recipe

These muffins are not just nutritious; they are crafted with care to ensure you enjoy every aspect of them. Here’s why they should be your go-to recipe:

  • High in Protein: Each muffin is packed with protein from Greek yogurt and whey protein powder, making them ideal for muscle recovery or a satisfying breakfast.
  • Moist and Flavorful: Using ripe bananas and applesauce ensures the muffins are moist without being overly dense or dry.
  • Versatile Ingredients: The basic recipe allows for countless variations—add chocolate chips, nuts, or even dried fruits to customize your muffins.
  • Quick and Easy: With straightforward steps, you can whip up a batch in under 30 minutes, perfect for busy mornings.
  • Meal Prep Friendly: These muffins stay fresh in an airtight container for up to a week, making them a perfect make-ahead option!

Ingredients Breakdown

Let’s dive into the ingredients that make these muffins shine:

  • Ripe Bananas: About 1 cup of mashed bananas adds natural sweetness and moisture.
  • Large Eggs: Two eggs provide structure and richness.
  • Greek Yogurt: A quarter cup adds protein and creaminess; you can substitute with any plain yogurt.
  • Unsweetened Applesauce: This keeps the muffins moist while reducing added sugars.
  • Honey or Maple Syrup: Use either for a touch of natural sweetness.
  • Oat Flour: A gluten-free alternative that adds fiber; you can substitute with whole wheat flour if desired.
  • Whey Protein Powder: Adds protein to keep you full longer; other protein powders can be used based on preference.
  • Baking Soda and Baking Powder: Essential for leavening the muffins.
  • Ground Cinnamon: A pinch adds warmth and depth of flavor.
  • Chopped Walnuts or Pecans: For a delightful crunch; feel free to omit if nut-free.
  • Dark Chocolate Chips: Optional but recommended for a touch of indulgence!

Expert Tips for Perfect Muffins

To ensure your muffins turn out perfectly every time, consider these expert tips:

  • Choose the Right Bananas: The riper the bananas, the sweeter and moister your muffins will be.
  • Don’t Overmix: Mix until ingredients are just combined to keep your muffins tender.
  • Cool Properly: Allow muffins to cool in the pan for a few minutes before transferring to a wire rack to prevent sogginess.
  • Experiment with Flavors: Try adding spices like nutmeg or vanilla extract for a flavor twist.
  • Check Doneness: Use a toothpick to check if they are done—look for minimal moist crumbs.
  • Storage Matters: Store in an airtight container at room temperature to maintain freshness for up to a week.
  • Freeze for Later: These muffins freeze well; wrap them individually and store in a freezer bag for easy snacks later.
  • Try Different Sweeteners: If you prefer, you can use agave syrup or coconut sugar.

Common Mistakes and Troubleshooting

Here are some common pitfalls to avoid when making these muffins:

  • Using Unripe Bananas: This can result in less sweetness and moisture.
  • Overbaking: Keep a close eye on the time to avoid dry muffins; they should be golden and a toothpick should come out clean.
  • Ignoring Ingredient Temperatures: Using cold eggs or yogurt can affect the batter consistency; let them sit at room temperature before mixing.
  • Not Measuring Ingredients Accurately: Use measuring cups and spoons for best results—baking is a science!
  • Skipping the Cooling Step: Allowing muffins to cool properly helps them firm up and enhances texture.

Variations to Try

Feel free to customize your muffins with these delightful variations:

  • Chocolate Chip Banana Muffins: Fold in dark chocolate chips for a sweet treat.
  • Berry Banana Muffins: Add fresh or frozen blueberries or raspberries for a fruity twist.
  • Peanut Butter Swirl: Add a dollop of peanut butter to the batter before baking for nutty goodness.
  • Spiced Pumpkin Muffins: Substitute half the banana with pumpkin puree and add pumpkin spice for a seasonal favorite.

Storage and Make-Ahead Instructions

These muffins are perfect for meal prep! Here’s how to store and prepare them:

  • Room Temperature Storage: Keep in an airtight container for up to a week.
  • Freezing: Wrap each muffin in plastic wrap and place in a freezer bag for up to three months. Thaw overnight in the fridge or microwave when ready to enjoy.
  • Make-Ahead: Prepare the batter the night before and refrigerate; bake fresh in the morning for a delicious start to your day!

Frequently Asked Questions

Here are some common questions regarding our muffins:

  • Can I use gluten-free flour? Yes, you can substitute oat flour with a gluten-free baking mix.
  • What can I use instead of Greek yogurt? Any plain yogurt or even cottage cheese can work as a substitute.
  • How do I know when my muffins are done? Insert a toothpick into the center; it should come out clean or with a few moist crumbs.
  • Can I add nuts or seeds? Absolutely! Chopped nuts or seeds add great texture and flavor.
  • What’s the best way to reheat muffins? Microwave for 10-15 seconds or warm in a toaster oven for a few minutes.
  • Can I make these vegan? Yes, use flax eggs instead of regular eggs and a vegan yogurt alternative.
  • What’s the protein content per muffin? Each muffin contains approximately 8-10 grams of protein, depending on your ingredients.
  • How can I add more sweetness? You can increase the amount of honey or maple syrup, or add a little stevia or monk fruit if desired.

Nutritional Tips and Dietary Adaptations

Here’s how you can adapt this recipe to suit different dietary needs:

  • Low-Carb Option: Use almond flour instead of oat flour and lower the sweetener.
  • Nut-Free Option: Omit nuts and use sunflower seeds instead.
  • Higher Fiber: Add chia seeds or flaxseeds to boost the fiber content.
  • Dairy-Free: Use almond milk yogurt or coconut yogurt in place of Greek yogurt.

Equipment Recommendations

To make your baking experience seamless, here are some recommended tools:

  • Muffin Tin: A non-stick muffin tin is ideal for easy removal.
  • Mixing Bowls: Use large mixing bowls to combine ingredients effectively.
  • Whisk: A good whisk helps incorporate wet ingredients smoothly.
  • Rubber Spatula: Perfect for folding in delicate ingredients without overmixing.

Serving Suggestions

These muffins are incredibly versatile. Here are some serving ideas:

  • With Coffee: Pair your muffins with a morning coffee or tea for a delightful breakfast.
  • As a Snack: Enjoy them as a post-workout snack or a mid-afternoon pick-me-up.
  • With Yogurt: Serve with a side of Greek yogurt and fresh fruit for a balanced meal.
  • As a Dessert: Drizzle with melted dark chocolate for an indulgent treat!

In conclusion, our High-Protein Banana Muffins are not just a recipe; they are a passport to culinary exploration and nourishment. Whether you’re on the go or enjoying a cozy breakfast at home, these muffins bring warmth and satisfaction to your table. Embrace the flavors, share the joy, and keep exploring the wonderful world of food!

High-Protein Banana Muffins

Prep Time 10 minutes
Cook Time 20 minutes
Total Time 30 minutes
Servings 12 muffins
Calories 210
Enjoy these nutritious, protein-packed banana muffins perfect for a healthy snack or breakfast.

Ingredients

Fruits

  • 3 medium ripe bananas (mashed approximately 1 cup)
  • 2 large eggs
  • 0.25 cup plain Greek yogurt
  • 0.25 cup unsweetened applesauce
  • 0.25 cup honey or maple syrup
  • 1 teaspoon vanilla extract

Dry Ingredients

  • 1.5 cups oat flour or finely ground rolled oats
  • 0.5 cup vanilla or unflavored whey protein powder
  • 1 teaspoon baking soda
  • 0.5 teaspoon baking powder
  • 0.5 teaspoon ground cinnamon
  • 0.25 teaspoon salt

Add-ins

  • 0.33 cup chopped walnuts or pecans
  • 0.33 cup dark chocolate chips

Instructions 

  • Preheat oven to 350°F (175°C) and prepare muffin tin.
  • In a large bowl, mash bananas and mix in eggs, yogurt, applesauce, honey, and vanilla.
  • Combine dry ingredients in a separate bowl and stir thoroughly.
  • Gradually mix dry ingredients into wet until just combined, then fold in nuts and chocolate chips.
  • Divide batter evenly into muffin cups, filling about 3/4 full, and bake for 18-22 minutes.
  • Cool muffins in pan for 5 minutes, then transfer to wire rack to cool completely.

Notes

For best results, do not overmix the batter to keep muffins tender.
Calories: 210kcal
Cost: $12
Course: Breakfast
Cuisine: American
Keyword: banana, Muffins, Protein

Welcome to a world where flavors dance and the sun shines even on the cloudiest of days! Today, we embark on a culinary journey with a delightful Mango Peach Smoothie. This luscious blend of fresh fruits and creamy yogurt is not just a drink; it’s a vibrant celebration of taste that transports you to a sun-soaked paradise. Perfect for breakfast or as a refreshing snack, this smoothie is full of nutrients and flavor!

Why You’ll Love This Recipe

This Mango Peach Smoothie is a fan favorite for many reasons. Here are just a few benefits that make it a must-try:

  • Quick and Easy: This smoothie is ready in under 10 minutes, making it a perfect choice for busy mornings or a quick snack.
  • Health Boost: Packed with vitamins from mangoes and peaches, this smoothie supports your immune system and keeps you energized.
  • Customizable: You can easily swap in your favorite ingredients or adjust the sweetness to suit your taste.
  • Refreshing Flavor: The tropical flavors of mango and peach create a refreshing drink that’s perfect for hot days.
  • Family-Friendly: Kids love the sweet taste, making it a great way to sneak in some healthy fruits.

Ingredients Breakdown

Let’s dive into the main ingredients that make this smoothie sing:

  • Mango: 1 cup chopped, fresh or frozen. If you’re using frozen mango, you’ll get a thicker and creamier texture.
  • Peach: 1 cup peeled, seeded, and sliced, fresh or frozen. Fresh peaches provide a juicy sweetness, while frozen peaches save time and add chill.
  • Almond Milk: 1/2 cup. You can swap in dairy milk or any plant-based milk of your choice for creaminess.
  • Greek Yogurt: 1/2 cup plain or vanilla. This adds protein and a delightful creaminess.
  • Maple Syrup or Honey: 1 tablespoon (optional). Sweeten to taste, but the fruits are generally sweet enough!
  • Ice Cubes: 2 (optional). If using fresh fruit, ice helps chill the smoothie.
  • Protein Powder: 1/2 scoop (optional). For a protein boost, add your favorite vanilla-flavored protein powder.
  • Flaxseed Meal and Chia Seeds: 1 tablespoon each. These are excellent sources of omega-3 fatty acids and fiber.

How to Make This Smoothie

Ready to blend? Here’s a step-by-step guide:

  1. Add the chopped peaches, mangoes, almond milk, Greek yogurt, maple syrup, and ice cubes to a high-speed blender.
  2. Blend until completely creamy and smooth. If the mixture is too thick for your liking, add more almond milk gradually.
  3. Pour the smoothie into glasses, garnishing with a few slices of mango and peach if desired.
  4. Serve immediately and enjoy this refreshing treat!

Pro Tips for the Perfect Smoothie

Side view of a refreshing mango peach smoothie, highlighting the colorful layers of fruit and milk.

Want to take your smoothie game to the next level? Here are some expert insights:

  • Use Frozen Fruit: If you want a super creamy texture, using frozen fruit eliminates the need for ice and thickens your smoothie.
  • Blend in Layers: Start with liquids first, followed by soft ingredients, and then add frozen items. This promotes even blending.
  • Sweetness Adjustment: Always taste your smoothie before serving. Depending on the ripeness of your fruit, you may need more or less sweetener.
  • Experiment with Greens: For added nutrients, try adding a handful of spinach or kale; they blend in seamlessly without altering the flavor.
  • Chill Your Glasses: For an extra-refreshing experience, chill your serving glasses in the freezer before pouring your smoothie.
  • Don’t Overfill Your Blender: For the best blending results, fill your blender only to the max line, allowing space for ingredients to move freely.
  • Storage Tip: If you have leftovers, store them in an airtight container in the fridge for up to 24 hours, but note that the texture may change.
  • Making Ahead: You can prep smoothie packs by portioning out the fruits and storing them in the freezer for a quick blend later!

Common Mistakes and Troubleshooting

Even the best of us can run into hiccups! Here are some common mistakes and how to avoid them:

  • Smoothie Too Thick: Add a splash more almond milk and blend again until you reach your desired consistency.
  • Not Blending Smoothly: Make sure your blender is powerful enough. If not, blend in smaller batches.
  • Too Sweet: If your smoothie ends up too sweet, balance it out by adding a handful of spinach or a splash of lemon juice.
  • Flavor Not Poping: A pinch of salt or a squeeze of citrus can enhance the flavors and bring out the sweetness of your fruits.

Variations to Try

Feeling adventurous? Here are some tasty variations you can explore:

  • Green Mango Peach Smoothie: Add a handful of spinach for a nutrient boost without impacting the flavor.
  • Tropical Twist: Incorporate pineapple or coconut for a more tropical flavor profile.
  • Nutty Delight: Blend in a tablespoon of almond butter or peanut butter for a nutty twist and extra protein.
  • Dairy-Free Delight: Use coconut yogurt instead of Greek yogurt for a rich, dairy-free option.

Storage and Make-Ahead Instructions

Planning ahead? Here’s how to store and prepare your smoothie:

  • Refrigeration: Store leftover smoothie in an airtight container for up to 24 hours. Stir well before consuming.
  • Freezer Packs: Pre-chop your fruits and freeze them in individual bags. Just add almond milk and yogurt when you’re ready to blend!
  • Meal Prep: You can prepare smoothie jars with all the ingredients except liquid. Just add milk and blend when you’re ready to enjoy.

Frequently Asked Questions

Got questions? Here are some answers to common queries:

  • Can I use canned peaches? Yes! Canned peaches in juice work great; just drain them well before blending.
  • What can I substitute for Greek yogurt? You can use silken tofu or any dairy-free yogurt alternative.
  • Is this smoothie vegan? Yes, as long as you use plant-based milk and yogurt.
  • Can I add protein powder? Absolutely! A scoop of your favorite protein powder can enhance the nutritional profile.
  • How can I make it more filling? Adding oats or nut butter will increase the fiber and protein content, making it a more substantial meal.
  • How do I make it lower in calories? Use unsweetened almond milk and skip the sweeteners or use a low-calorie sweetener.
  • Is it safe for kids? Definitely! This smoothie is a great way to introduce kids to healthy fruits.
  • What if I don’t like peaches? You can easily swap them out for another fruit like strawberries or bananas!

Nutrition Tips and Dietary Adaptations

This Mango Peach Smoothie is not only delicious but also nutritious! Here are some tips to enhance its health benefits:

  • Protein Boost: Adding Greek yogurt or protein powder increases the protein content, aiding muscle recovery.
  • Fiber-Rich: Flaxseed meal and chia seeds add fiber, promoting digestive health.
  • Low Sugar Option: Skip the sweetener and opt for ripe fruits to keep sugar levels lower.

Equipment Recommendations

For the best results, here’s what you’ll need:

  • High-Speed Blender: A good quality blender ensures a smooth consistency.
  • Measuring Cups: For accurate ingredient measurements.
  • Spatula: To scrape down the sides of your blender for thorough blending.

Serving Suggestions

Ready to serve? Here are some fun ways to enjoy your smoothie:

  • Garnish: Top with fresh fruit slices, a sprinkle of granola, or a drizzle of honey.
  • Glassware: Serve in vibrant glasses to enhance the tropical vibe!
  • Pairing: Enjoy with a side of whole grain toast or a healthy muffin for a complete breakfast.

In Conclusion, the Mango Peach Smoothie is not just a drink; it’s a delightful experience that brings joy and health in every sip. Whether you’re enjoying it as a quick breakfast, a post-workout snack, or a refreshing treat on a hot day, this smoothie is sure to become a staple in your kitchen. So grab your blender, and let’s make this tropical escape together!

Mango Peach Smoothie

Prep Time 5 minutes
Total Time 5 minutes
Servings 2 cups
Calories 250
A refreshing and nutritious smoothie combining the sweet flavors of mango and peach with protein and healthy seeds.

Ingredients

Fruits

  • 1 cup mango chopped, fresh or frozen
  • 1 cup peach peeled, seeded and sliced, fresh or frozen
  • 0.5 cup almond milk or dairy milk
  • 0.5 cup greek yogurt plain or vanilla
  • 1 tablespoon maple syrup or honey (optional)
  • 2 ice cubes ice cubes
  • 0.5 scoop vanilla protein powder
  • 1 tablespoon flaxseed meal
  • 1 tablespoon chia seeds

Instructions 

  • Add peaches, mango, milk, yogurt, maple syrup, and ice to a blender and blend until smooth.
  • If too thick, add more milk and blend again.
  • Pour into glasses and garnish with mango and peach slices, if desired.
  • Serve immediately and enjoy!

Notes

You can use frozen fruits to skip adding ice for a creamier texture.
Calories: 250kcal
Cost: $10
Course: Breakfast, Snack
Cuisine: fusion
Keyword: Fruits, Smoothie

Embark on a Delicious Journey with Chocolate Crinkle Cookies

Welcome to a delightful adventure where we explore the rich and inviting world of Chocolate Crinkle Cookies. These delectable treats are not just desserts; they are sweet memories waiting to be baked and shared. With their crackly tops and fudgy centers, chocolate crinkle cookies have earned their place as a beloved favorite across cultures. Join me as we dive into the joy of baking these cookies, each bite a passport to heritage and warmth.

Why You’ll Love This Recipe

Chocolate crinkle cookies offer an array of benefits that make them a must-try in any kitchen. Here are five reasons to get excited:

  • Irresistible texture: Enjoy the perfect balance of crispy edges and a soft, chewy center that melts in your mouth.
  • Quick and easy: With minimal prep time, you can whip up a batch in no time, making them perfect for surprise guests.
  • Versatile flavors: Easily adapt the recipe by adding flavors like espresso or peppermint for a delightful twist.
  • Perfect for any occasion: Whether it’s a holiday, birthday, or just a cozy evening at home, these cookies fit right in.
  • Fun to decorate: Roll the dough in powdered sugar for that signature crinkle effect and a beautiful presentation.

Ingredients for Chocolate Crinkle Cookies

Understanding the ingredients used in Chocolate Crinkle Cookies is crucial for achieving the best results. Here’s a detailed breakdown of what you’ll need and some suggested substitutions:

  • Unsweetened cocoa powder (1 cup): This is the star of the show, providing rich chocolate flavor. You can substitute with Dutch-processed cocoa for a smoother taste.
  • Granulated sugar (1¾ cups): Essential for sweetness and texture, though you can use coconut sugar for a healthier alternative.
  • Vegetable oil (½ cup): This keeps the cookies moist; melted coconut oil works beautifully as a substitute.
  • Large eggs (4): Room temperature eggs help bind the ingredients; you can use flax eggs for a vegan version.
  • Vanilla extract (2 teaspoons): Enhances the flavor; almond extract is a delicious alternative.
  • All-purpose flour (2 cups): Provides structure; whole wheat flour can be used for a nuttier flavor.
  • Baking powder (2 teaspoons): A leavening agent that helps the cookies rise.
  • Salt (¾ teaspoon): Balances out the sweetness; sea salt can elevate the flavor.
  • Powdered sugar (1 cup): Used for rolling the cookies, adding a sweet finishing touch.

Pro Tips for Baking Perfection

To ensure your chocolate crinkle cookies turn out perfectly every time, consider these expert insights:

  • Chill the dough: Allowing the dough to chill for at least 4 hours (or overnight) prevents excessive spreading and enhances flavor.
  • Use quality cocoa: The chocolate flavor is key, so opt for high-quality cocoa powder for the best results.
  • Don’t overmix: Mix until just combined to maintain a tender texture; overmixing can lead to tough cookies.
  • Roll in powdered sugar generously: This creates the signature crinkle look and adds a delightful sweetness.
  • Use parchment paper: Lining your baking sheets ensures easy release and cleanup.
  • Keep an eye on baking time: Bake just until edges are set; the centers should appear slightly underbaked for that gooey texture.
  • Experiment with add-ins: Consider adding chocolate chips, nuts, or dried fruit for added texture and flavor.
  • Store properly: To maintain freshness, store cookies in an airtight container at room temperature.

Avoid Common Mistakes

Even the most experienced bakers can encounter challenges. Here are some common pitfalls to avoid:

  • Skipping the chill: If you skip chilling the dough, you risk flat cookies. Patience is key!
  • Incorrect oven temperature: Always preheat your oven; an improperly heated oven can lead to uneven baking.
  • Not measuring accurately: Baking is a science; use a kitchen scale for precision, especially with flour.
  • Not accounting for humidity: In humid conditions, the dough may require a bit more flour to achieve the right consistency.

Delicious Variations to Try

Once you master the classic chocolate crinkle cookie, feel free to mix things up with these delightful variations:

  • Espresso-infused crinkles: Add 1 tablespoon of espresso powder to the dough for a rich coffee flavor.
  • Mint chocolate crinkles: Incorporate 1 teaspoon of peppermint extract for a refreshing holiday twist.
  • Nutty chocolate crinkles: Fold in chopped nuts like walnuts or pecans for added crunch and flavor.
  • Gluten-free crinkles: Substitute all-purpose flour with a gluten-free blend to accommodate dietary needs.

Storage and Make-Ahead Instructions

To keep your chocolate crinkle cookies fresh and delicious:

  • Room temperature storage: Store in an airtight container for up to one week.
  • Freezing: Freeze baked cookies in a single layer, then transfer to a zip-top bag for up to 3 months.
  • Make-ahead dough: You can prepare and chill the dough in advance; just scoop and bake when you’re ready!

Frequently Asked Questions

Got questions? Let’s clarify some common inquiries about chocolate crinkle cookies:

  • Can I use cocoa powder instead of chocolate? Yes, cocoa powder is essential for this recipe, as it gives the cookies their chocolate flavor.
  • How do I know when the cookies are done? The edges will be set while the centers remain soft and slightly puffed.
  • Can I substitute eggs? Yes, for a vegan option, use flax eggs or applesauce as a binding agent.
  • Why did my cookies spread too much? This usually happens if the dough was not chilled long enough or if the oven was too hot.
  • Can I add chocolate chips? Absolutely! Fold in ½ cup of chocolate chips for extra chocolaty goodness.
  • What can I do with leftover powdered sugar? Use it to dust other baked goods or make frosting!
  • Are these cookies suitable for freezing? Yes, they freeze beautifully for later enjoyment.
  • What’s the best way to serve them? Pair with a glass of milk or a scoop of vanilla ice cream for a delightful treat!

Nutritional Tips and Dietary Adaptations

Being mindful of nutrition is important. Here are some tips to adapt this recipe for different dietary needs:

  • Lower sugar option: Use less sugar or sugar substitutes for a healthier version.
  • Flour alternatives: Use almond flour or oat flour for gluten-free options.
  • Nut-free option: Ensure to avoid any cross-contamination with nuts if allergies are a concern.

Essential Equipment Recommendations

To ensure the best baking experience, here are some recommended tools:

  • Mixing bowls: A set of various sizes is essential for mixing ingredients.
  • Silicone spatula: Perfect for folding dough without deflating it.
  • Baking sheets: Opt for heavy-duty sheets for even baking.
  • Parchment paper: This makes for easy cleanup and prevents sticking.
  • Cookie scoop: Helps in portioning dough evenly for uniform cookies.

Serving Suggestions for Chocolate Crinkle Cookies

These cookies are a treat on their own, but you can elevate the experience with some serving ideas:

  • With a glass of milk: A classic pairing that never disappoints!
  • Ice cream sandwiches: Use two cookies to encase a scoop of your favorite ice cream.
  • Garnish with fruit: Serve alongside fresh berries for a touch of brightness.
  • Serve warm: Heat cookies slightly in the microwave for that freshly baked taste.

As we conclude this delicious journey through the world of chocolate crinkle cookies, I hope you feel inspired to bake, share, and enjoy. Every bite tells a story of adventure and connection, inviting you to create your own memories in the kitchen. Happy baking, my friends!

Chocolate Crinkle Cookies

Prep Time 15 minutes
Cook Time 12 minutes
Total Time 27 minutes
Servings 24 cookies
Calories 150
Delight in these rich, fudgy cookies with a crackled exterior and soft center, perfect for any chocolate lover.

Ingredients

Dough

  • 1 cup unsweetened cocoa powder
  • cups granulated sugar
  • ½ cup vegetable oil
  • 4 large eggs (room temperature)
  • 2 teaspoons vanilla extract
  • 2 cups all-purpose flour
  • 2 teaspoons baking powder
  • ¾ teaspoon salt
  • 1 cup powdered sugar

Instructions 

  • Mix cocoa, sugar, and oil until combined, then beat in eggs and vanilla.
  • Whisk flour, baking powder, and salt separately, then add to wet mixture and combine.
  • Chill dough for 4 hours or overnight.
  • Preheat oven to 350°F, line baking sheets, scoop 1-inch balls, and roll in powdered sugar.
  • Bake for 10-12 minutes, cool for 5 minutes, then transfer to wire rack.

Notes

For best results, chill the dough thoroughly before baking.
Calories: 150kcal
Cost: $10
Course: Dessert
Cuisine: American
Keyword: chocolate

Unleashing Flavor: Your Guide to Spicy Shrimp Ramen Bowls

Welcome to a culinary adventure that tantalizes your taste buds and transports you to the vibrant streets of Asia. Today, we’re diving into the world of spicy shrimp ramen bowls, a dish that beautifully marries warmth, comfort, and a burst of flavors. This recipe is not just about noodles; it’s about crafting a nourishing escape with every slurp.

In this comprehensive guide, we’ll explore the secrets behind these spicy shrimp ramen bowls, share personal stories that enrich the experience, and provide you with all the knowledge you need to make this dish your own. Whether you’re a seasoned chef or a kitchen newbie, you’ll find joy in creating a bowl that tells a story of heat and harmony.

Why You’ll Love This Recipe

  • Quick and Easy: This recipe is perfect for busy weeknights, taking less than 30 minutes from start to finish.
  • Customizable: You can easily adjust the spice level and swap out ingredients based on your preferences or dietary needs.
  • Nutritious: Packed with fresh veggies and tender shrimp, this dish is a wholesome option that doesn’t compromise on flavor.
  • A Comfort Food Classic: The warm broth, chewy noodles, and vibrant toppings create the ultimate comfort food experience.
  • Impressive Presentation: With its colorful ingredients and garnishes, this dish is sure to impress your family and friends.

Ingredient Breakdown

Let’s take a closer look at the ingredients that make this dish shine, along with some handy substitutions:

  • Ramen Noodles: Traditional ramen noodles are ideal, but you can also use instant noodles or rice noodles for a gluten-free alternative.
  • Shrimp: I recommend medium to large shrimp, peeled and deveined. If you prefer, you can substitute chicken or tofu.
  • Broth: Use chicken, vegetable, or seafood stock to enhance the flavor. Homemade stock elevates the dish, but store-bought works just as well.
  • Vegetables: Fresh veggies like cabbage, carrots, and bell peppers add crunch and nutrition. Feel free to include bok choy, mushrooms, or snap peas for variety.
  • Spices and Sauces: Sriracha gives the broth a spicy kick, while soy sauce adds depth. Adjust the amount of sriracha according to your heat preference.

Pro Tips for Perfect Ramen

Close-up view of a Spicy Shrimp Ramen Bowl featuring shrimp, noodles, and fresh garnishes.

Before you dive into cooking, let’s explore some expert insights to elevate your ramen-making game:

  • Fresh Ingredients: Use the freshest ingredients possible. This enhances the flavors and gives your dish a vibrant look.
  • Don’t Overcook the Shrimp: Tender shrimp should only take 1-2 minutes on each side. Overcooking makes them rubbery!
  • Layer Flavors: Sautéing garlic and ginger before adding the broth creates a flavor-packed base.
  • Adjusting Spice: Start with a small amount of sriracha and increase it gradually. You can always add more, but it’s hard to take it away!
  • Garnish Generously: Fresh herbs like cilantro or green onions bring brightness and freshness to each bowl.
  • Make It Ahead: Prepare the broth and veggies in advance. When you’re ready to eat, just cook the noodles and shrimp!
  • Test the Broth: Always taste and adjust the seasoning of the broth before serving. A splash of lime juice can brighten it up!
  • Use Quality Stock: A rich stock truly elevates the flavor of your ramen. Consider making your own for a deeper taste.

Common Mistakes and Troubleshooting

Even the best chefs can encounter hiccups. Here are some common mistakes to avoid:

  • Overcooked Noodles: Cook ramen noodles separately and add them to the bowl just before serving to prevent them from becoming mushy.
  • Flavorless Broth: If your broth tastes bland, try adding more soy sauce, sriracha, or a dash of sesame oil.
  • Too Much Spice: If your ramen is too spicy, balance it out with a dollop of sour cream or yogurt.
  • Skipping the Garnish: Don’t overlook garnishes! They add essential flavor and visual appeal.

Variations of Spicy Shrimp Ramen

Get adventurous and try these variations:

  • Seafood Ramen: Add scallops and mussels for a seafood medley.
  • Veggie-Loaded Ramen: Make it vegetarian by using tofu and loading up on veggies like bok choy and mushrooms.
  • Coconut Curry Ramen: Add coconut milk and curry paste for a rich, creamy twist.
  • Spicy Miso Ramen: Incorporate miso paste to enhance the umami flavor and create a deeper broth.

Storage and Make-Ahead Instructions

Planning ahead? Here’s how to store and prepare your ramen:

  • Storing Leftovers: Store the broth, noodles, and toppings separately in airtight containers. The broth can last up to 3 days in the refrigerator.
  • Make-Ahead Broth: Prepare the broth in advance and freeze it in portions. Just thaw and heat when ready to use!
  • Reheating: Reheat the broth on the stove and add fresh noodles and shrimp just before serving.

Frequently Asked Questions

Here are some common questions about spicy shrimp ramen bowls:

  • Can I use frozen shrimp? Yes, just thaw them before cooking.
  • What’s the best way to cook the noodles? Cook them according to package instructions and add them to the broth just before serving.
  • Can I make it gluten-free? Absolutely! Use gluten-free noodles and tamari instead of soy sauce.
  • How spicy is this dish? The spice level can be adjusted by varying the amount of sriracha used.
  • What’s the best type of stock to use? Chicken, vegetable, or seafood stock works great; choose based on your flavor preference.
  • Can I add more vegetables? Definitely! Feel free to include your favorites like broccoli, snap peas, or baby corn.
  • How do I make it vegan? Use vegetable broth and tofu instead of shrimp, and skip the fish sauce.
  • How do I enhance the flavors? A splash of lime juice or a sprinkle of sesame seeds can elevate the dish even further.

Nutrition Tips and Dietary Adaptations

This spicy shrimp ramen bowl is not only delicious but can also fit various dietary needs:

  • Low-Carb Option: Substitute noodles with zucchini noodles or shirataki noodles for a low-carb version.
  • High-Protein: Add more shrimp or include edamame for an extra protein boost.
  • Vegetarian: Swap shrimp for tofu and use vegetable broth to keep it vegetarian.
  • Low-Sodium: Use low-sodium soy sauce and homemade stock to control salt levels.

Essential Equipment

Here’s what you’ll need to whip up these spicy shrimp ramen bowls:

  • Large Pot: For making the broth and cooking the noodles.
  • Skillet: For sautéing shrimp and vegetables.
  • Measuring Cups: To ensure accurate ingredient quantities.
  • Sharp Knife: For precise chopping of vegetables.
  • Cutting Board: A stable surface for prep work.

Serving Suggestions

Bring your ramen to life with these serving ideas:

  • Garnish: Top with fresh cilantro, green onions, and lime wedges for a burst of flavor.
  • Side Dishes: Pair with spring rolls or dumplings for a complete meal.
  • Drink Pairing: Enjoy with a light beer or a refreshing iced tea to balance the spice.

Conclusion

Embark on a culinary journey with these spicy shrimp ramen bowls that are sure to impress your taste buds and nourish your soul. With its rich flavors and vibrant colors, this dish is more than just a meal; it’s a celebration of culture and connection. So gather your ingredients, channel your inner chef, and let the adventure unfold in your kitchen. The world of flavors awaits!

Spicy Shrimp Ramen Bowls

Prep Time 10 minutes
Cook Time 20 minutes
Total Time 30 minutes
Servings 4 servings
Calories 450
Enjoy a flavorful bowl of spicy shrimp ramen, packed with fresh vegetables and a savory broth for a satisfying meal.

Ingredients

Seasoning Packets

  • 1.5 lbs medium-large shrimp, peeled and deveined
  • 6 cups chicken, vegetable, or seafood stock
  • 2 tablespoons olive oil
  • 1-2 tablespoons sriracha (depending on heat preference)
  • 3 tablespoons soy sauce
  • 3 cloves garlic, minced
  • 1 teaspoon grated fresh ginger
  • 1.5 tablespoons brown sugar
  • 2 cups shredded green cabbage
  • 0.75 cup carrots, thinly sliced
  • 0.75 cup sweet peppers, thinly sliced
  • 0.5 cup onion, thinly sliced
  • 1 lime juice of 1 lime

Cilantro

Instructions 

  • Cook shrimp in 1 tablespoon olive oil until pink, then set aside.
  • Sauté carrots, onions, cabbage, and peppers in 1 tablespoon olive oil for 2-3 minutes, then add garlic and ginger and cook for 1 minute.
  • Add stock, soy sauce, brown sugar, lime juice, and sriracha; bring to a boil, then simmer for 8 minutes.
  • Cook ramen noodles in broth for 2-3 minutes, then remove from heat.
  • Divide noodles and broth into bowls, add shrimp, and garnish with cilantro before serving.

Notes

Adjust sriracha for desired spice level and garnish with fresh cilantro for added flavor.
Calories: 450kcal
Cost: $15
Course: Main Course
Cuisine: Asian
Keyword: Ramen, shrimp, spicy

Experience the Joy of Homemade Vanilla Iced Coffee

Ah, iced coffee—the refreshing delight that awakens our senses and transports us to sunlit cafes filled with laughter and vibrant conversations. If you’re looking to recreate this magical experience right in your kitchen, you’ve come to the right place! In this comprehensive guide, we’ll dive into making the perfect Vanilla Iced Coffee that not only quenches your thirst but also brings a taste of adventure into your daily routine.

With just a few ingredients, including chilled coffee, rich vanilla syrup, and a splash of cream, you can whip up a drink that rivals your favorite coffee shop creations. So, grab your apron and let’s embark on this delicious journey!

Why You’ll Love This Recipe

This Vanilla Iced Coffee recipe is about more than just flavor; it’s an experience. Here are five delightful reasons to indulge:

  • Quick and Easy: Ready in under 10 minutes, this recipe is perfect for busy mornings or a refreshing afternoon pick-me-up.
  • Customizable: Adjust the sweetness and creaminess to your liking. Whether you prefer a little or a lot, you’re in control!
  • Cost-Efficient: Enjoy café-quality iced coffee at home, saving money while enjoying a delicious drink that’s just as good, if not better.
  • Quality Ingredients: With homemade vanilla syrup, you ensure that your coffee is free from artificial flavors and additives.
  • Cultural Connection: Each sip transports you to a cozy café atmosphere, reminding you of shared moments and delightful conversations over coffee.

Ingredients You’ll Need

Let’s gather the essentials for this dreamy vanilla iced coffee.

  • Chilled Coffee or Cold Brew: 8 ounces—opt for your favorite blend. Cold brew offers a smooth flavor, while regular brewed coffee can be chilled in the fridge.
  • Vanilla-Flavored Simple Syrup: 1 tablespoon—this can be store-bought or homemade for a richer taste.
  • Ice Cubes: 1 cup—essential for that refreshing chill.
  • Half and Half or Cream: 2 tablespoons—adds a luscious creaminess. Feel free to substitute with any milk alternative you love.

**Substitutions:** If you’re looking to mix things up, here are a few ideas:

  • Milk Alternatives: Almond milk, oat milk, or coconut cream can replace half and half for a dairy-free version.
  • Sweetener Options: Honey or agave syrup can be used instead of vanilla syrup for a unique twist.
  • Flavor Add-Ins: Consider adding a pinch of cinnamon or cocoa powder for a different flavor profile.

Pro Tips for the Best Vanilla Iced Coffee

To elevate your iced coffee experience, keep these expert tips in mind:

  • Chill Your Coffee: Ensure your coffee is chilled before adding ice to prevent dilution. Brew in advance and store it in the fridge.
  • Make Your Own Vanilla Syrup: Combine equal parts sugar and water with a vanilla bean, simmer until dissolved, and store in a jar for future use.
  • Experiment with Brew Strength: A stronger coffee base enhances the overall flavor, especially when adding ice and cream.
  • Layer Ingredients: For a visually appealing drink, layer your ingredients—start with coffee, then syrup, followed by ice, and finally cream.
  • Garnish Creatively: Top with a sprinkle of cinnamon or a vanilla bean for a touch of elegance.
  • Use Fresh Ingredients: For the best flavor, opt for fresh coffee and high-quality syrups.
  • Try Cold Brew: Cold brew coffee reduces acidity, offering a smoother taste, perfect for iced coffee lovers.
  • Glassware Matters: Serve in clear glassware to showcase the beautiful layers of your iced coffee!

Common Mistakes and Troubleshooting

Even the best of us can make a slip while crafting this delightful drink. Here’s how to avoid common pitfalls:

  • Overly Diluted Coffee: Using ice that melts too quickly can water down your drink. Use coffee ice cubes made from leftover coffee to maintain flavor.
  • Too Much Sweetness: Always start with less syrup; you can always add more if needed. Remember, you can’t take sweetness away!
  • Not Chilling the Coffee: Skipping the chilling step can result in a lukewarm drink. Plan ahead to enjoy that refreshing cold experience.
  • Skipping the Cream: Half and half or cream adds the desired richness. Don’t skip it if you want that creamy texture!

Variations to Try

If you’re feeling adventurous, here are some delicious variations to explore:

  • Mocha Iced Coffee: Add a tablespoon of chocolate syrup for a delightful mocha twist!
  • Almond Vanilla Iced Coffee: Substitute regular milk with almond milk and add a dash of almond extract.
  • Spiced Vanilla Iced Coffee: Incorporate a pinch of nutmeg or cardamom for a warm, spiced flavor.
  • Vanilla Iced Coffee Float: Top your iced coffee with a scoop of vanilla ice cream for a decadent treat.

Storage Instructions

Want to make your iced coffee ahead of time? Here’s how to store your ingredients:

  • Chilled Coffee: Store brewed coffee in the fridge for up to a week. Make sure to keep it in an airtight container to maintain freshness.
  • Vanilla Syrup: Homemade syrup can last for about a month in the fridge. Store it in a sealed jar.
  • Ice Cubes: Make extra coffee ice cubes and store them in a freezer bag for future iced coffee making.

Frequently Asked Questions

Let’s address some common inquiries to help you perfect your Vanilla Iced Coffee:

  • Can I use instant coffee? Yes! Just dissolve it in hot water and chill before using.
  • What’s the best coffee for iced coffee? A medium to dark roast works best as it holds its flavor when chilled.
  • How can I make my iced coffee less sweet? Simply reduce the amount of syrup or opt for unsweetened alternatives.
  • Can I use flavored syrups? Absolutely! Vanilla, caramel, or hazelnut syrups can add fun twists.
  • How long does homemade vanilla syrup last? About one month in the fridge, stored in an airtight container.
  • Is this recipe vegan? Yes, by using plant-based milk and syrup, it becomes vegan-friendly!
  • Can I make this coffee without cream? Sure! Just adjust the sweetness to balance the flavors.
  • What’s the best way to serve vanilla iced coffee? Serve it in a tall glass with ice and a straw for a refreshing look!

Nutritional Tips and Dietary Adaptations

Making your Vanilla Iced Coffee not only fills your cup with joy but can also be tailored to fit various dietary needs:

  • Low-Calorie Option: Use a sugar substitute for the syrup and opt for skim milk or a plant-based milk.
  • Dairy-Free: Choose almond milk, oat milk, or coconut cream for a creamy texture without dairy.
  • Gluten-Free: All the ingredients used are gluten-free, making this recipe safe for those with gluten sensitivities.

Equipment Recommendations

To make your iced coffee experience seamless, here’s a list of helpful tools:

  • Coffee Maker: A reliable coffee maker or French press for brewing your favorite coffee.
  • Ice Cube Trays: Essential for freezing coffee into ice cubes.
  • Measuring Spoons: For precise measurements of syrup and cream.
  • Clear Glassware: Show off your beautiful layered iced coffee.

Serving Suggestions

Now that you’ve crafted your Vanilla Iced Coffee, consider these serving suggestions:

  • Garnish: Top with whipped cream and a sprinkle of cocoa for a luxurious touch.
  • Pair with Snacks: Enjoy with a buttery croissant or a piece of rich chocolate cake for a delightful treat.
  • Presentation: Serve with colorful straws and in unique glassware to impress your guests.

So there you have it! A comprehensive guide to making the best Vanilla Iced Coffee that not only tantalizes your taste buds but also connects you with cultures and stories over each sip. Whether you’re enjoying it solo or sharing it with friends, this recipe is your passport to a world of flavors. Cheers to your next coffee adventure!

Easy Homemade Vanilla Iced Coffee

Prep Time 5 minutes
Total Time 5 minutes
Servings 1 cup
Calories 80
Enjoy a refreshing and creamy vanilla iced coffee made easily at home with just a few simple ingredients.

Ingredients

Beverages

  • 8 ounces chilled coffee or cold brew
  • 1 tablespoon vanilla-flavored simple syrup (store-bought or homemade)
  • 1 cup ice cubes
  • 2 tablespoons half and half or creamer (of your choice)

Instructions 

  • Pour the chilled coffee into a glass.
  • Add vanilla simple syrup and stir well.
  • Fill the glass with ice cubes.
  • Pour in the half and half or creamer.
  • Stir gently and enjoy your iced coffee.

Notes

You can adjust the sweetness by adding more or less vanilla syrup.
Calories: 80kcal
Cost: $5
Course: Beverage
Keyword: iced coffee, refreshing, vanilla

Discover the Heartwarming Flavors of Beef Onion Rice Skillet

Welcome to a culinary adventure that warms the soul! Our Easy Beef Onion Rice Skillet is not just a meal; it’s a passport to comfort, inviting you to savor the rich, savory flavors that remind us of home. This delightful dish melds the robust taste of ground beef with the sweet essence of caramelized onions, all enveloped in fluffy rice, making it the perfect one-pan solution for busy days and cozy evenings alike. In this article, we’ll delve into why this recipe is a must-try, explore its ingredients, share expert tips, and provide variations to suit every palate.

Why You’ll Love This Recipe

Here are just a few reasons why this beef onion rice skillet will quickly become a favorite:

  • One-Pan Convenience: All ingredients cook together in a single skillet, minimizing cleanup while maximizing flavor.
  • Quick and Easy: With prep and cooking time under 30 minutes, this dish is perfect for weeknight dinners.
  • Customizable Flavors: Adapt this recipe to your taste by adding your favorite vegetables or spices.
  • Great for Leftovers: Enjoy satisfying meals for days, as this dish stores well in the fridge.
  • Family-Friendly: Its hearty nature and comforting taste appeal to all ages, making it a meal everyone will love.

A Closer Look at the Ingredients

Understanding the ingredients is key to making a delectable onion rice skillet. Here’s what you’ll need:

  • 1 pound ground beef: Opt for a lean variety to keep the dish flavorful yet not greasy.
  • 1 cup long-grain white rice: This type of rice cooks perfectly fluffy and separates well.
  • 2.5 cups beef broth: Provides depth and moisture, ensuring the rice remains tender.
  • 2 yellow onions: Caramelized slowly, they add a natural sweetness to the dish.
  • 3 garlic cloves: Minced for an aromatic kick that elevates the overall flavor.
  • 0.5 teaspoon salt: Enhances all the flavors in the dish.
  • 0.25 teaspoon pepper: Adds a subtle heat to balance the sweetness of the onions.
  • 1 teaspoon paprika: This spice introduces a smoky note that complements the beef beautifully.
  • 1 tablespoon olive oil: Used for sautéing the onions and garlic, adding healthy fats.

How to Make Beef Onion Rice Skillet

Side view of a beef and rice skillet filled with ground beef, onions, and spices.

Creating this cozy meal is straightforward and rewarding. Follow these steps:

  1. In a large skillet, heat the olive oil over medium heat.
  2. Add the onions and sauté until they are soft and caramelized, about 5-7 minutes.
  3. Stir in the garlic and cook for an additional minute until fragrant.
  4. Add the ground beef, breaking it apart with a spoon, and cook until browned.
  5. Stir in the rice, beef broth, salt, pepper, and paprika. Bring to a boil.
  6. Reduce the heat to low, cover, and simmer for 20 minutes or until the rice is tender and has absorbed the liquid.
  7. Remove from heat, fluff the rice with a fork, and serve. Enjoy your hearty meal!

Expert Tips for Perfecting Your Skillet Meal

To elevate your cooking experience, consider these expert tips:

  • Choose the right beef: Lean ground beef is preferable for less greasiness, but if you enjoy a richer flavor, go for regular.
  • Don’t skip the caramelization: Allowing the onions to caramelize enhances their sweetness, creating a more complex flavor.
  • Let it rest: After cooking, let the skillet sit covered for a few minutes. This allows the flavors to meld beautifully.
  • Experiment with spices: Feel free to add spices like cumin or chili powder for a kick of heat.
  • Use fresh garlic: Freshly minced garlic adds a vibrant flavor that dried garlic cannot replicate.
  • Fluff the rice: Use a fork to fluff the rice gently after cooking for the best texture.
  • Storage: Let leftovers cool completely before transferring them to an airtight container for storage in the fridge.
  • Reheat carefully: When reheating, add a splash of beef broth to keep the rice moist.

Delicious Variations to Try

Customize your beef onion rice skillet to suit your cravings with these variations:

  • Vegetable-Loaded Skillet: Add bell peppers, peas, or carrots to incorporate more nutrition and color.
  • Spicy Twist: Incorporate diced jalapeños or a dash of hot sauce for a kick.
  • Cheesy Delight: Stir in shredded cheese just before serving for added creaminess.
  • Herb Infusion: Add fresh herbs like parsley or basil for a burst of freshness.

Storage and Make-Ahead Instructions

This dish is perfect for meal prep! Here’s how to store and prepare ahead:

  • In the fridge: Let the skillet cool completely, then transfer to an airtight container. It will keep well for up to 3-4 days.
  • Freezing: Store in an airtight container for up to 3 months. To reheat, thaw in the refrigerator overnight before warming on the stove.
  • Make-Ahead: You can prepare the beef and onion mixture a day in advance. Just add the rice and broth when you’re ready to cook.

Frequently Asked Questions

Here are some common questions to help you navigate your cooking:

  • Can I use brown rice instead of white? Yes, but adjust the cooking time and liquid ratio as brown rice typically takes longer to cook.
  • What can I serve with this dish? This skillet meal pairs beautifully with a side salad or steamed vegetables.
  • Can I make this recipe in advance? Absolutely! You can prepare the ingredients ahead of time and cook when you’re ready.
  • How do I store leftovers? Allow leftovers to cool before placing them in an airtight container in the fridge for up to 4 days.
  • Is it possible to make this vegetarian? Yes! Substitute the ground beef with lentils or a plant-based meat alternative and use vegetable broth.
  • What if I don’t have beef broth? Chicken or vegetable broth can be used in place of beef broth for a different flavor profile.
  • Can I add more spices? Definitely! Feel free to experiment with spices to suit your taste preferences.
  • What’s the best way to reheat this dish? Reheat in a skillet over low heat, adding a splash of broth to keep it moist.

Nutrition Tips and Dietary Adaptations

This beef onion rice skillet can be adapted to fit various dietary needs:

  • Low-Carb Option: Substitute rice with cauliflower rice for a low-carb version.
  • Gluten-Free: Ensure your broth is gluten-free and avoid any added sauces that may contain gluten.
  • Heart-Healthy: Use leaner cuts of beef and incorporate more vegetables to boost fiber.

Essential Equipment for Success

To make this dish, you’ll need:

  • Skillet: A large, heavy-bottom skillet works best for even cooking.
  • Spatula: For stirring and breaking up the meat.
  • Measuring Cups and Spoons: Essential for accurate ingredient measurements.
  • Cutting Board and Knife: For preparing your vegetables and garlic.

Serving Suggestions

Serve your beef onion rice skillet hot, garnished with fresh herbs, if desired. You can also accompany it with:

  • Crusty Bread: Perfect for soaking up the delicious juices.
  • Side Salad: A fresh green salad complements the rich flavors of the skillet.
  • Yogurt or Sour Cream: A dollop adds creaminess and balances the spices.

In conclusion, this Easy Beef Onion Rice Skillet is more than just a meal; it’s a comforting embrace that brings families together. With its rich flavors, ease of preparation, and adaptability, you’ll find it a staple in your culinary repertoire. So grab your apron, and let’s get cooking! Your taste buds are in for a delightful treat!

Easy Beef Onion Rice Skillet Recipe for Comfort Food Lovers

Prep Time 10 minutes
Cook Time 20 minutes
Total Time 30 minutes
Servings 4 servings
Calories 650
This hearty skillet combines savory ground beef, caramelized onions, and fluffy rice for a comforting and satisfying meal.

Ingredients

Meat

  • 1 pound ground beef (Choose lean for less grease.)
  • 1 cup long-grain white rice (Stays fluffy and separates well.)
  • 2.5 cups beef broth (Keeps the rice moist while cooking.)
  • 2 yellow onions yellow onions (Caramelize slowly for sweetness.)
  • 3 cloves garlic cloves (Mince finely for flavor.)
  • 0.5 teaspoon salt
  • 0.25 teaspoon pepper
  • 1 teaspoon paprika
  • 1 tablespoon olive oil (For sautéing.)

Instructions 

  • Heat olive oil in a skillet over medium heat. Add ground beef and cook until browned, then remove and set aside.
  • In the same skillet, add sliced onions and cook slowly until caramelized, about 10 minutes.
  • Add minced garlic, salt, pepper, and paprika; cook for 1 minute.
  • Return beef to the skillet, add rice and beef broth. Bring to a boil, then reduce heat to low, cover, and simmer for 15 minutes until rice is tender.
  • Remove from heat and let sit for 5 minutes before serving.

Notes

For extra flavor, garnish with chopped fresh herbs or cheese.
Calories: 650kcal
Cost: $12
Course: Main Course
Cuisine: American
Keyword: beef, Comfort Food, rice

Embark on a Culinary Adventure with the Mexican Chicken and Rice Bowl

Welcome to a vibrant journey through the flavors of Mexico! In this article, you’ll learn how to craft a delectable Mexican Chicken and Rice Bowl that not only tantalizes your taste buds but also tells a rich story of culture and connection. This bowl, packed with bold spices and fresh ingredients, is a delightful way to bring a slice of Mexico into your kitchen. Let’s dive in and discover the magic within each ingredient, where chicken and rice unite to create a meal that’s as comforting as it is exciting.

Why You’ll Love This Recipe

  • Flavor Explosion: Each bite bursts with authentic Mexican spices, making every meal an adventure.
  • Customizable: You can easily adapt the recipe to suit your dietary preferences, whether you’re a meat lover or vegetarian.
  • Meal Prep Friendly: Prepare your ingredients ahead of time and assemble fresh bowls for lunch or dinner.
  • Healthy and Nutritious: Packed with protein, fiber, and essential nutrients, this bowl is both satisfying and wholesome.
  • Cultural Connection: Experience a taste of Mexico—each bowl is a celebration of the country’s rich culinary heritage.

Ingredients You’ll Need

Gathering the right ingredients is key to achieving the perfect Mexican Chicken and Rice Bowl. Here’s what you’ll need:

  • 1 lb boneless skinless chicken breasts or thighs: Choose thighs for a juicier option.
  • 2 tbsp olive oil: For sautéing and flavor.
  • 2 garlic cloves minced: Adds depth and aroma.
  • 1 tsp chili powder: For that classic Mexican heat.
  • 1 tsp cumin: Earthy and warm, it brings a distinctive flavor.
  • ½ tsp smoked paprika: Adds a smoky undertone.
  • ½ tsp dried oregano: Herbaceous notes that enhance the dish.
  • Juice of 1 lime: Brightens up the flavors.
  • Salt and pepper to taste: Essential for seasoning.
  • 1 cup long-grain white or brown rice: Choose brown rice for added fiber.
  • 2 cups chicken broth: For cooking the rice, enhancing its flavor.
  • ½ cup diced tomatoes: Fresh or canned for moisture.
  • ½ cup corn kernels (optional): Sweetness and texture.
  • ½ tsp turmeric: Adds color and health benefits.
  • 1 cup black beans: A protein-rich addition.
  • 1 avocado sliced: Creaminess that completes the bowl.
  • ½ cup chopped cilantro: Freshness to brighten the dish.
  • ¼ cup diced red onion: For crunch and a bit of bite.
  • Lime wedges: A zesty garnish.
  • ½ cup shredded cheddar or cotija cheese: For a savory finish.
  • ¼ cup sour cream or Greek yogurt: Creamy topping.
  • Pickled jalapeños or hot sauce to taste: For those who love heat!

How to Make a Mexican Chicken and Rice Bowl

Now that you have all your ingredients, let’s put them together in a few simple steps:

1. Cook the Chicken

In a large skillet, heat the olive oil over medium heat. Add the minced garlic and sauté until fragrant, about 30 seconds. Season the chicken with chili powder, cumin, smoked paprika, oregano, lime juice, salt, and pepper. Cook the chicken for about 6-8 minutes on each side until golden brown and cooked through. Remove from heat and let it rest for a few minutes before slicing.

2. Prepare the Rice

In a medium saucepan, combine the rice and chicken broth. Bring to a boil, then reduce heat to low, cover, and simmer for 15-20 minutes (or according to package instructions) until the rice is tender. If using, add diced tomatoes and corn in the last 5 minutes of cooking. Stir in turmeric for added color and flavor.

3. Assemble Your Bowl

Start with a base of fluffy rice, then layer with sliced chicken, black beans, avocado, chopped cilantro, red onion, and cheese. Finish with a dollop of sour cream, a squeeze of lime, and a sprinkle of jalapeños or hot sauce if desired.

Customization Ideas for Every Lifestyle

This recipe is wonderfully adaptable. Here are some ideas to make it your own:

  • Vegetarian Delight: Swap the chicken for roasted vegetables or tofu to make a hearty vegetarian bowl.
  • Cauliflower Rice: For a low-carb option, use cauliflower rice instead of traditional rice.
  • Spice Level: Adjust the spiciness by adding more or fewer jalapeños or using a different hot sauce.
  • Protein Options: Use shrimp or beef as an alternative protein source for a different flavor profile.

Storage and Make-Ahead Instructions

This dish is perfect for meal prep! Store individual components separately in airtight containers in the fridge for up to 4 days. Assemble just before serving for the freshest experience. You can also freeze the cooked chicken and rice for up to 3 months; just thaw and reheat when ready to enjoy.

Common Mistakes and Troubleshooting

Even the best chefs make mistakes! Here are some tips to avoid common pitfalls:

  • Overcooking the Chicken: Use a meat thermometer to ensure the chicken reaches an internal temperature of 165°F.
  • Sticky Rice: Rinse rice before cooking to remove excess starch and prevent stickiness.
  • Too Much Spice: If your dish ends up too spicy, add a bit of sugar or honey to balance the heat.
  • Dry Chicken: Let the chicken rest after cooking to retain moisture before slicing.

Frequently Asked Questions

  • Can I make this dish ahead of time? Yes, you can prepare the ingredients ahead and store them separately.
  • What type of rice works best? Both long-grain white and brown rice work well; choose based on your preference.
  • Is this recipe gluten-free? Yes, if you use gluten-free soy sauce or broth, it can be made gluten-free.
  • How can I make it spicier? Add more chili powder or incorporate fresh jalapeños.
  • Can I use frozen chicken? Yes, but ensure it is fully thawed before cooking for even results.
  • What can I substitute for black beans? You can use pinto beans or even chickpeas for a different flavor.
  • How long will leftovers last? Leftovers can be stored in the fridge for up to 4 days.
  • Can I add other vegetables? Absolutely! Bell peppers, zucchini, or corn are great additions.

Nutritional Tips and Dietary Adaptations

This Mexican Chicken and Rice Bowl is not only delicious but can also be tailored to fit various dietary needs:

  • Low-Carb: Substitute rice with cauliflower rice or spiralized zucchini.
  • High-Protein: Add extra beans or chicken to boost protein content.
  • Dairy-Free: Skip the cheese and sour cream, and use avocado instead for creaminess.
  • Low-Sodium: Use low-sodium broth and limit added salt for a healthier option.

Essential Equipment Recommendations

To craft this delightful bowl, consider having the following tools on hand:

  • Non-stick Skillet: Ideal for cooking the chicken evenly without sticking.
  • Medium Saucepan: Perfect for cooking rice to fluffy perfection.
  • Meat Thermometer: Ensures your chicken is cooked safely and accurately.
  • Cutting Board and Sharp Knife: For easy slicing and dicing of your ingredients.

Serving Suggestions

Serve your bowls with a side of tortilla chips and fresh salsa for a complete meal experience. Pair with a refreshing agua fresca or a crisp Mexican beer to enhance the flavors. Enjoy your culinary adventure with friends and family, sharing stories and laughter around the table.

In conclusion, the Mexican Chicken and Rice Bowl is more than just a meal—it’s an exploration of culture, flavor, and creativity. Whether you’re whipping it up for a quick weeknight dinner or preparing for a gathering, this recipe will certainly impress and delight. So, gather your ingredients, unleash your inner chef, and let the flavors of Mexico transport you on a delicious journey!

Mexican Chicken and Rice Bowl

Prep Time 10 minutes
Cook Time 20 minutes
Total Time 30 minutes
Servings 4 servings
Calories 650
A flavorful and colorful Mexican-inspired dish combining seasoned chicken, rice, beans, and fresh toppings for a satisfying meal.

Ingredients

Protein

  • 1 lb boneless skinless chicken breasts or thighs
  • 2 tbsp olive oil
  • 2 cloves garlic minced
  • 1 tsp chili powder
  • 1 tsp cumin
  • 0.5 tsp smoked paprika
  • 0.5 tsp dried oregano
  • 1 unit lime (Juice of 1 lime)
  • to taste Salt and pepper

Grains

  • 1 cup long-grain white or brown rice
  • 2 cups chicken broth
  • 0.5 cup diced tomatoes (fresh or canned)
  • 0.5 cup corn kernels (optional)
  • 0.5 tsp turmeric
  • 1 cup black beans
  • 1 unit avocado (sliced)
  • 0.5 cup chopped cilantro
  • 0.25 cup diced red onion
  • to taste Lime wedges
  • 0.5 cup shredded cheddar or cotija cheese
  • 0.25 cup sour cream or Greek yogurt
  • to taste Pickled jalapeños or hot sauce

Instructions 

  • Cook rice in chicken broth with turmeric until tender, about 15 minutes.
  • While rice cooks, season chicken with chili powder, cumin, paprika, oregano, salt, and pepper. Cook in olive oil until browned and cooked through, about 8-10 minutes.
  • Mix diced tomatoes, corn, black beans, red onion, and cilantro in a bowl. Squeeze lime juice over the mixture.
  • Assemble bowls with rice, sliced chicken, bean mixture, sliced avocado, cheese, and a dollop of sour cream. Add jalapeños or hot sauce as desired.

Notes

Feel free to customize toppings and spice levels to your preference.
Calories: 650kcal
Cost: $15
Course: Main Course
Cuisine: Mexican
Keyword: Chicken, rice