Author

Jack

Browsing

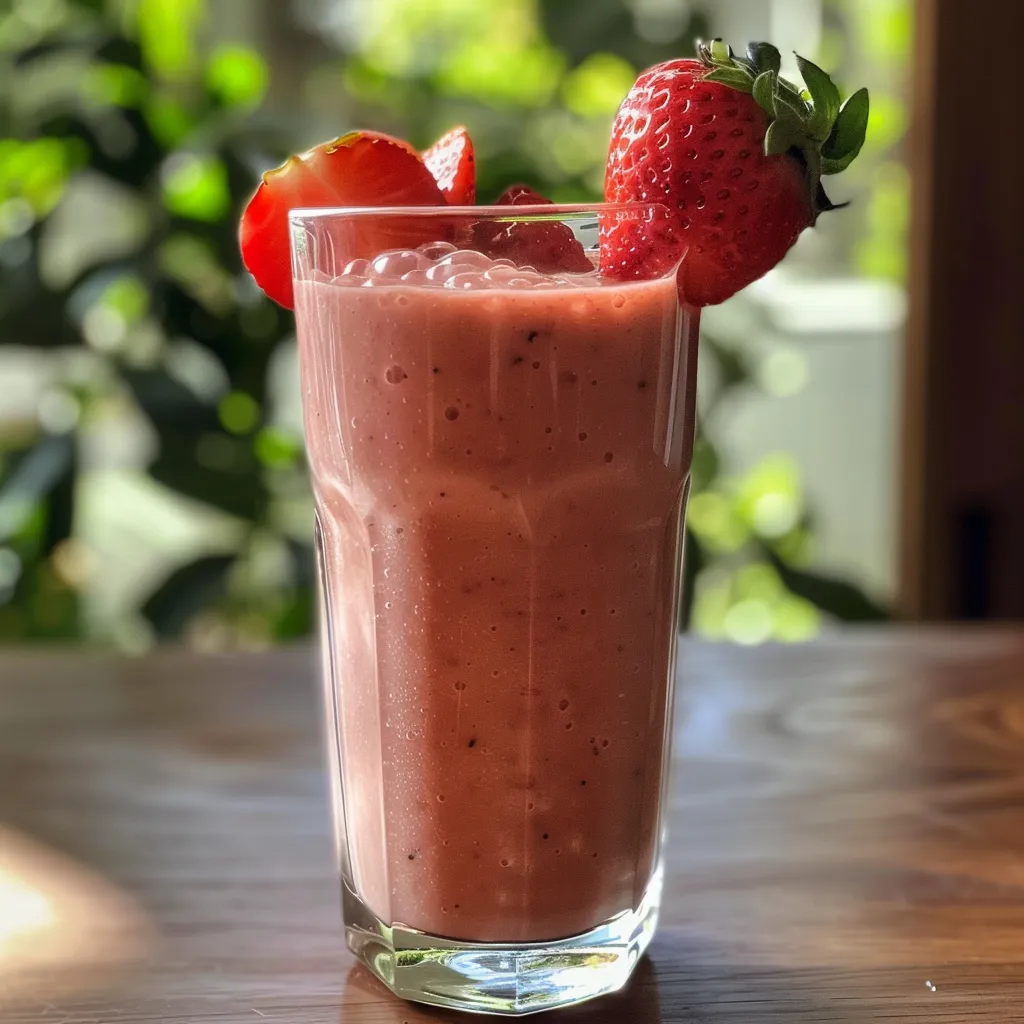
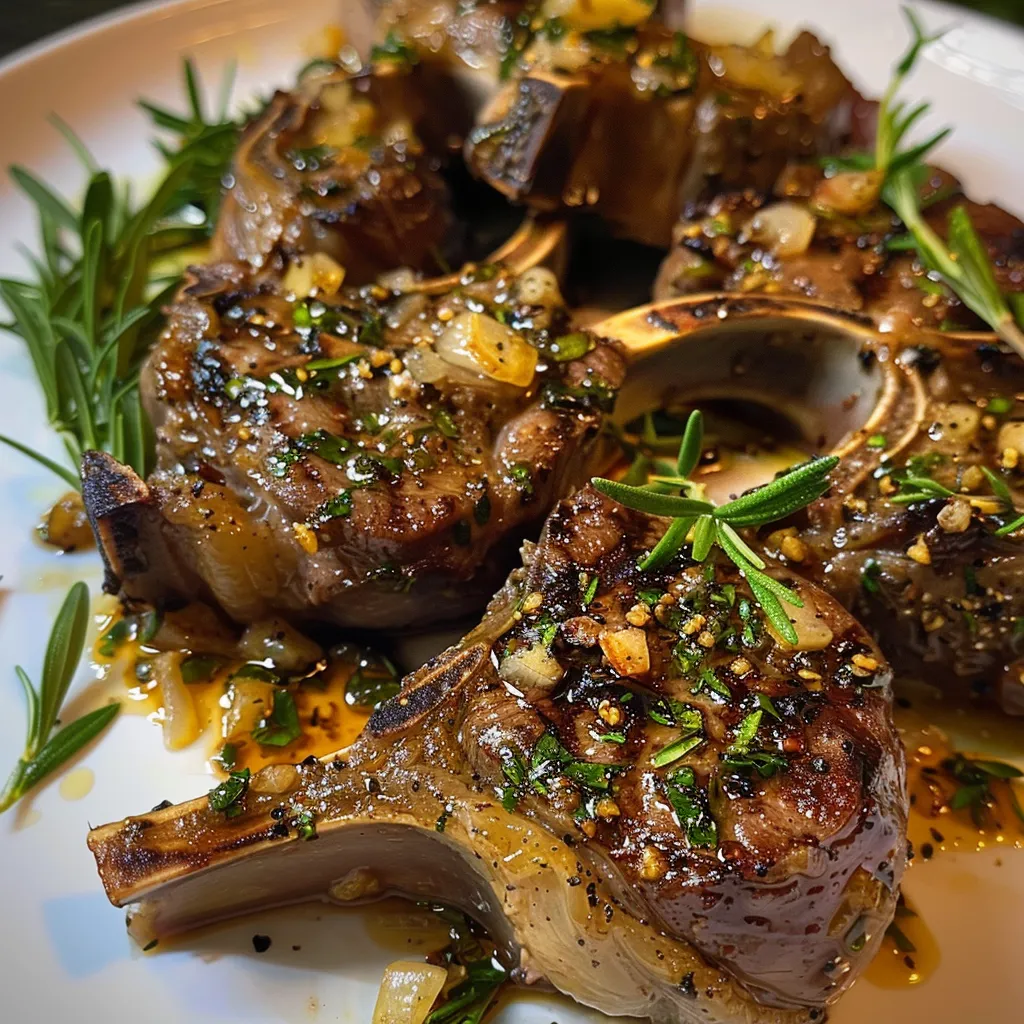
Embark on a Culinary Adventure with the Mexican Chicken and Rice Bowl

Welcome to a vibrant journey through the flavors of Mexico! In this article, you’ll learn how to craft a delectable Mexican Chicken and Rice Bowl that not only tantalizes your taste buds but also tells a rich story of culture and connection. This bowl, packed with bold spices and fresh ingredients, is a delightful way to bring a slice of Mexico into your kitchen. Let’s dive in and discover the magic within each ingredient, where chicken and rice unite to create a meal that’s as comforting as it is exciting.

Why You’ll Love This Recipe

  • Flavor Explosion: Each bite bursts with authentic Mexican spices, making every meal an adventure.
  • Customizable: You can easily adapt the recipe to suit your dietary preferences, whether you’re a meat lover or vegetarian.
  • Meal Prep Friendly: Prepare your ingredients ahead of time and assemble fresh bowls for lunch or dinner.
  • Healthy and Nutritious: Packed with protein, fiber, and essential nutrients, this bowl is both satisfying and wholesome.
  • Cultural Connection: Experience a taste of Mexico—each bowl is a celebration of the country’s rich culinary heritage.

Ingredients You’ll Need

Gathering the right ingredients is key to achieving the perfect Mexican Chicken and Rice Bowl. Here’s what you’ll need:

  • 1 lb boneless skinless chicken breasts or thighs: Choose thighs for a juicier option.
  • 2 tbsp olive oil: For sautéing and flavor.
  • 2 garlic cloves minced: Adds depth and aroma.
  • 1 tsp chili powder: For that classic Mexican heat.
  • 1 tsp cumin: Earthy and warm, it brings a distinctive flavor.
  • ½ tsp smoked paprika: Adds a smoky undertone.
  • ½ tsp dried oregano: Herbaceous notes that enhance the dish.
  • Juice of 1 lime: Brightens up the flavors.
  • Salt and pepper to taste: Essential for seasoning.
  • 1 cup long-grain white or brown rice: Choose brown rice for added fiber.
  • 2 cups chicken broth: For cooking the rice, enhancing its flavor.
  • ½ cup diced tomatoes: Fresh or canned for moisture.
  • ½ cup corn kernels (optional): Sweetness and texture.
  • ½ tsp turmeric: Adds color and health benefits.
  • 1 cup black beans: A protein-rich addition.
  • 1 avocado sliced: Creaminess that completes the bowl.
  • ½ cup chopped cilantro: Freshness to brighten the dish.
  • ¼ cup diced red onion: For crunch and a bit of bite.
  • Lime wedges: A zesty garnish.
  • ½ cup shredded cheddar or cotija cheese: For a savory finish.
  • ¼ cup sour cream or Greek yogurt: Creamy topping.
  • Pickled jalapeños or hot sauce to taste: For those who love heat!

How to Make a Mexican Chicken and Rice Bowl

Now that you have all your ingredients, let’s put them together in a few simple steps:

1. Cook the Chicken

In a large skillet, heat the olive oil over medium heat. Add the minced garlic and sauté until fragrant, about 30 seconds. Season the chicken with chili powder, cumin, smoked paprika, oregano, lime juice, salt, and pepper. Cook the chicken for about 6-8 minutes on each side until golden brown and cooked through. Remove from heat and let it rest for a few minutes before slicing.

2. Prepare the Rice

In a medium saucepan, combine the rice and chicken broth. Bring to a boil, then reduce heat to low, cover, and simmer for 15-20 minutes (or according to package instructions) until the rice is tender. If using, add diced tomatoes and corn in the last 5 minutes of cooking. Stir in turmeric for added color and flavor.

3. Assemble Your Bowl

Start with a base of fluffy rice, then layer with sliced chicken, black beans, avocado, chopped cilantro, red onion, and cheese. Finish with a dollop of sour cream, a squeeze of lime, and a sprinkle of jalapeños or hot sauce if desired.

Customization Ideas for Every Lifestyle

This recipe is wonderfully adaptable. Here are some ideas to make it your own:

  • Vegetarian Delight: Swap the chicken for roasted vegetables or tofu to make a hearty vegetarian bowl.
  • Cauliflower Rice: For a low-carb option, use cauliflower rice instead of traditional rice.
  • Spice Level: Adjust the spiciness by adding more or fewer jalapeños or using a different hot sauce.
  • Protein Options: Use shrimp or beef as an alternative protein source for a different flavor profile.

Storage and Make-Ahead Instructions

This dish is perfect for meal prep! Store individual components separately in airtight containers in the fridge for up to 4 days. Assemble just before serving for the freshest experience. You can also freeze the cooked chicken and rice for up to 3 months; just thaw and reheat when ready to enjoy.

Common Mistakes and Troubleshooting

Even the best chefs make mistakes! Here are some tips to avoid common pitfalls:

  • Overcooking the Chicken: Use a meat thermometer to ensure the chicken reaches an internal temperature of 165°F.
  • Sticky Rice: Rinse rice before cooking to remove excess starch and prevent stickiness.
  • Too Much Spice: If your dish ends up too spicy, add a bit of sugar or honey to balance the heat.
  • Dry Chicken: Let the chicken rest after cooking to retain moisture before slicing.

Frequently Asked Questions

  • Can I make this dish ahead of time? Yes, you can prepare the ingredients ahead and store them separately.
  • What type of rice works best? Both long-grain white and brown rice work well; choose based on your preference.
  • Is this recipe gluten-free? Yes, if you use gluten-free soy sauce or broth, it can be made gluten-free.
  • How can I make it spicier? Add more chili powder or incorporate fresh jalapeños.
  • Can I use frozen chicken? Yes, but ensure it is fully thawed before cooking for even results.
  • What can I substitute for black beans? You can use pinto beans or even chickpeas for a different flavor.
  • How long will leftovers last? Leftovers can be stored in the fridge for up to 4 days.
  • Can I add other vegetables? Absolutely! Bell peppers, zucchini, or corn are great additions.

Nutritional Tips and Dietary Adaptations

This Mexican Chicken and Rice Bowl is not only delicious but can also be tailored to fit various dietary needs:

  • Low-Carb: Substitute rice with cauliflower rice or spiralized zucchini.
  • High-Protein: Add extra beans or chicken to boost protein content.
  • Dairy-Free: Skip the cheese and sour cream, and use avocado instead for creaminess.
  • Low-Sodium: Use low-sodium broth and limit added salt for a healthier option.

Essential Equipment Recommendations

To craft this delightful bowl, consider having the following tools on hand:

  • Non-stick Skillet: Ideal for cooking the chicken evenly without sticking.
  • Medium Saucepan: Perfect for cooking rice to fluffy perfection.
  • Meat Thermometer: Ensures your chicken is cooked safely and accurately.
  • Cutting Board and Sharp Knife: For easy slicing and dicing of your ingredients.

Serving Suggestions

Serve your bowls with a side of tortilla chips and fresh salsa for a complete meal experience. Pair with a refreshing agua fresca or a crisp Mexican beer to enhance the flavors. Enjoy your culinary adventure with friends and family, sharing stories and laughter around the table.

In conclusion, the Mexican Chicken and Rice Bowl is more than just a meal—it’s an exploration of culture, flavor, and creativity. Whether you’re whipping it up for a quick weeknight dinner or preparing for a gathering, this recipe will certainly impress and delight. So, gather your ingredients, unleash your inner chef, and let the flavors of Mexico transport you on a delicious journey!

Mexican Chicken and Rice Bowl

Prep Time 10 minutes
Cook Time 20 minutes
Total Time 30 minutes
Servings 4 servings
Calories 650
A flavorful and colorful Mexican-inspired dish combining seasoned chicken, rice, beans, and fresh toppings for a satisfying meal.

Ingredients

Protein

  • 1 lb boneless skinless chicken breasts or thighs
  • 2 tbsp olive oil
  • 2 cloves garlic minced
  • 1 tsp chili powder
  • 1 tsp cumin
  • 0.5 tsp smoked paprika
  • 0.5 tsp dried oregano
  • 1 unit lime (Juice of 1 lime)
  • to taste Salt and pepper

Grains

  • 1 cup long-grain white or brown rice
  • 2 cups chicken broth
  • 0.5 cup diced tomatoes (fresh or canned)
  • 0.5 cup corn kernels (optional)
  • 0.5 tsp turmeric
  • 1 cup black beans
  • 1 unit avocado (sliced)
  • 0.5 cup chopped cilantro
  • 0.25 cup diced red onion
  • to taste Lime wedges
  • 0.5 cup shredded cheddar or cotija cheese
  • 0.25 cup sour cream or Greek yogurt
  • to taste Pickled jalapeños or hot sauce

Instructions 

  • Cook rice in chicken broth with turmeric until tender, about 15 minutes.
  • While rice cooks, season chicken with chili powder, cumin, paprika, oregano, salt, and pepper. Cook in olive oil until browned and cooked through, about 8-10 minutes.
  • Mix diced tomatoes, corn, black beans, red onion, and cilantro in a bowl. Squeeze lime juice over the mixture.
  • Assemble bowls with rice, sliced chicken, bean mixture, sliced avocado, cheese, and a dollop of sour cream. Add jalapeños or hot sauce as desired.

Notes

Feel free to customize toppings and spice levels to your preference.
Calories: 650kcal
Cost: $15
Course: Main Course
Cuisine: Mexican
Keyword: Chicken, rice

Welcome to the World of Garlic Herb Butter Dinner Rolls!

Imagine a warm kitchen filled with the aroma of freshly baked rolls, golden brown and glistening with garlic herb butter. These Garlic Herb Butter Dinner Rolls are not just a side dish; they are a culinary embrace, inviting you to experience the joy of homemade bread. This recipe combines simplicity with rich flavors, making it an adventurous experience for both novice and seasoned bakers. Let’s embark on this flavorful journey, discovering how to create the perfect rolls that will elevate any meal!

Why You’ll Love This Recipe

These Garlic Herb Butter Dinner Rolls are more than just fluffy bread; they bring a multitude of benefits that will make them your go-to recipe for any occasion:

  • Irresistible Fluffiness: Each roll is light and airy, thanks to the perfect yeast activation and kneading technique.
  • Rich Garlic Butter Flavor: The combination of fresh garlic and herbs creates an unforgettable taste that complements any dish.
  • Easy to Make: With step-by-step instructions, this recipe is approachable for bakers of all skill levels.
  • Customizable: Feel free to mix in your favorite herbs or spices to make these rolls uniquely yours.
  • Perfect for Any Occasion: Whether it’s a holiday feast or a casual dinner, these rolls are the ideal accompaniment.

Gather Your Ingredients

Before we dive into the baking, let’s take a closer look at what you’ll need to create these delightful rolls:

  • 6 tablespoons unsalted butter: This is essential for flavor and richness.
  • 3 garlic cloves, grated or pressed: Fresh garlic adds a robust flavor that elevates the rolls.
  • ⅓ cup fresh herbs: A mix of chives, parsley, and thyme works wonders, but feel free to experiment!
  • 1 cup warm water (between 110-115°F): This temperature is crucial for activating the yeast.
  • 2 tablespoons sugar: This helps to feed the yeast and contributes to a golden crust.
  • 2¼ teaspoons instant yeast (one packet): The key to fluffy rolls!
  • ½ cup milk: Adds moisture and a tender crumb.
  • 3½ cups all-purpose flour: The backbone of your dough.
  • 1 teaspoon kosher salt: Enhances flavor.
  • Egg wash: A beaten egg mixed with a splash of water for a glossy finish.
  • Flaky sea salt: For sprinkling on top just before serving.

Step-by-Step Guide to Making Garlic Herb Butter Dinner Rolls

Close-up of soft, fluffy dinner rolls topped with melted garlic herb butter.

Let’s get those rolls rising! Follow these detailed steps to achieve the best results:

1. Prepare the Garlic Herb Butter

Melt the butter in a small saucepan. Add the grated garlic and herbs, cooking for a few minutes until fragrant. Remove from heat and let cool slightly.

2. Activate the Yeast

In a mixing bowl, combine warm water and sugar. Stir until dissolved, then add the yeast. Allow it to sit for about 5-10 minutes until frothy. This indicates that the yeast is active and ready.

3. Combine Wet Ingredients

Microwave the milk until warm (not hot) and add it to the yeast mixture along with 3 tablespoons of the garlic herb butter. Mix to combine.

4. Mix the Dough

Gradually add the flour to the wet ingredients. If using a stand mixer, use the dough hook attachment. If mixing by hand, stir until the dough comes together. Add the salt.

5. Knead the Dough

Mix on low speed for 2-3 minutes until smooth. If kneading by hand, transfer to a floured surface and knead for about 5 minutes until elastic. The dough should be slightly sticky but not cling to your hands.

6. First Rise

Form the dough into a ball and place it in a greased bowl. Cover with a towel and let rise in a warm area for about 30 minutes, or until doubled in size. A turned-off oven works great for this!

7. Shape the Rolls

Punch down the dough to release excess air. Divide into 15 equal pieces and shape each into a smooth ball. Place in a greased 9 x 13-inch baking pan, leaving some space between them.

8. Second Rise

Cover the rolls with a towel and let them rise for another 20-30 minutes until puffed and touching.

9. Preheat and Bake

Preheat your oven to 400°F. Brush the risen rolls with egg wash. Bake for 20-25 minutes until golden brown on top. Remove from the oven and brush with remaining garlic herb butter.

10. Serve Warm

Sprinkle with flaky sea salt and serve immediately for the best flavor and texture!

Pro Tips for Perfect Rolls

To ensure your Garlic Herb Butter Dinner Rolls are a success, keep these expert tips in mind:

  • Use Fresh Ingredients: Fresh garlic and herbs will significantly enhance flavor.
  • Monitor Yeast Temperature: Ensure the water is warm, not hot, to keep the yeast alive.
  • Knead Effectively: Proper kneading develops gluten, giving the rolls their structure.
  • Don’t Rush the Rises: Allow dough to rise fully for the best texture.
  • Temperature Matters: Bake in a preheated oven for even cooking.
  • Experiment with Flavors: Try different herbs or even cheese for unique variations.
  • Store Properly: Keep rolls in an airtight container to maintain freshness.
  • Reheat with Care: Warm leftovers in the oven for best results.

Common Mistakes and Troubleshooting

Even experienced bakers can face challenges. Here are some common pitfalls and how to avoid them:

  • Dough Not Rising: Ensure your yeast is fresh and the environment is warm enough.
  • Dense Rolls: Knead longer to develop gluten; consider adding a touch more flour if the dough is too sticky.
  • Overbaking: Keep an eye on the rolls as they bake; they should be golden brown, not dark.

Delicious Variations to Try

Feel free to customize these rolls to suit your tastes! Here are a few ideas:

  • Cheesy Garlic Rolls: Add shredded mozzarella or cheddar to the dough for a cheesy twist.
  • Spicy Herb Rolls: Incorporate crushed red pepper flakes for a touch of heat.
  • Honey Butter Glaze: Drizzle honey butter over the rolls instead of garlic butter for a sweeter option.
  • Stuffed Rolls: Fill each roll with a mixture of cheese and herbs before shaping for a delightful surprise.

Storage and Make-Ahead Instructions

You can prepare these rolls in advance or store leftovers easily:

  • Make-Ahead: Prepare the dough and refrigerate it overnight. Allow it to come to room temperature before shaping and rising.
  • Storage: Keep baked rolls in an airtight container at room temperature for up to 3 days or freeze for longer storage.
  • Reheating: Warm rolls in a preheated oven at 350°F for about 10 minutes to restore their freshness.

Frequently Asked Questions

Here are some common questions about baking Garlic Herb Butter Dinner Rolls:

  • Can I use active dry yeast instead of instant yeast? Yes, just bloom it in warm water before adding it to the mixture.
  • How do I know if my yeast is active? It should froth and bubble after mixing with warm water and sugar.
  • Can I make these rolls gluten-free? Yes, substitute with a gluten-free flour blend, adjusting the liquid as necessary.
  • What can I serve these rolls with? They pair beautifully with soups, stews, or as a side to any main dish.
  • How do I keep the rolls soft? Store them in an airtight container and avoid refrigeration.
  • Can I add more herbs to the recipe? Absolutely! Feel free to experiment with your favorite herbs.
  • Why is my dough sticky? You may need to add a little more flour until the dough pulls away from the sides of the bowl.
  • How long do these rolls take to bake? Bake for 20-25 minutes, or until golden brown.

Nutritional Tips and Dietary Adaptations

These rolls can be adapted to fit various dietary needs:

  • Lower Calorie Option: Use less butter and substitute whole milk with almond or oat milk.
  • Dairy-Free: Replace butter with a plant-based alternative and use non-dairy milk.
  • Herb Choices: Opt for dried herbs if fresh aren’t available, but adjust the quantity since dried herbs are more concentrated.

Equipment Recommendations

Having the right tools can make a big difference in your baking experience:

  • Stand Mixer: Ideal for kneading dough quickly and efficiently.
  • Baking Pan: A 9 x 13-inch pan works perfectly for these rolls.
  • Measuring Cups and Spoons: Accurate measurements are critical for baking success.
  • Kitchen Thermometer: Ensure your water is at the right temperature for yeast activation.

Serving Suggestions

These rolls are versatile and can enhance any meal:

  • Pair with Soups: Serve alongside a warm bowl of soup for the ultimate comfort food experience.
  • As a Side Dish: They are the perfect accompaniment to roasted meats or vegetarian dishes.
  • Breakfast Treat: Enjoy them warm with a smear of butter and jam for breakfast.

Now that you have all the knowledge and tips to make your own Garlic Herb Butter Dinner Rolls, it’s time to get baking! Remember, cooking is a journey, and every roll you make is a step into the rich tapestry of culinary culture. Enjoy this delicious adventure, and may your kitchen be filled with warmth and joy!

Garlic Herb Butter Dinner Rolls

Prep Time 20 minutes
Cook Time 25 minutes
Total Time 45 minutes
Servings 15 rolls
Calories 250
Soft, flavorful dinner rolls infused with garlic and herbs, perfect for any meal or special occasion.

Ingredients

Dough

  • 6 tablespoons unsalted butter
  • 3 cloves garlic, grated or pressed
  • 1/3 cup fresh herbs (chives, parsley, thyme)
  • 1 cup warm water (110-115F)
  • 2 tablespoons sugar
  • teaspoons instant yeast (one packet)
  • 3 tablespoons garlic herb butter
  • ½ cup milk (2% or whole)
  • cups all-purpose flour
  • 1 teaspoon kosher salt

Egg wash

  • 1 egg beaten egg (with a splash of water)

Topping

  • Flaky sea salt flaky sea salt

Instructions 

  • Melt butter, add garlic and herbs, cook until fragrant, then cool slightly.
  • Combine warm water and sugar, stir until dissolved, then add yeast. Warm milk, then mix with garlic-herb butter and add to yeast mixture.
  • Gradually add flour and salt, knead until smooth and elastic, then let rise until doubled in size, about 30 minutes.
  • Punch down dough, divide into 15 pieces, shape into balls, place in greased pan, and let rise until touching, about 20-30 minutes.
  • Preheat oven to 400°F, brush rolls with egg wash, bake for 20-25 minutes until golden, then brush with remaining garlic herb butter and sprinkle with flaky sea salt.

Notes

For best results, ensure milk is warm but not hot to activate the yeast properly.
Calories: 250kcal
Cost: $15
Course: Side Dish
Cuisine: American
Keyword: bread, garlic, herbs

Welcome to Your New Favorite Beverage: The Chocolate Cream Cold Brew

Picture this: you wake up on a warm summer morning, the sun peeking through the curtains, and the thought of a rich, creamy drink dances in your mind. Enter the Chocolate Cream Cold Brew—a delightful fusion of bold cold brew coffee and luscious chocolate cream that transports you to a world of flavor and refreshment. This drink isn’t just about satisfying your caffeine cravings; it’s an adventure for your taste buds. In this article, we’ll dive deep into making the perfect Chocolate Cream Cold Brew at home, exploring every aspect from ingredients to variations, ensuring you have everything you need for a perfect sip.

Why You’ll Love This Recipe

There are countless reasons to fall in love with this Chocolate Cream Cold Brew. Here are just a few:

  • Indulgent Flavor: The combination of rich chocolate and smooth cold brew creates a flavor explosion that’s both refreshing and satisfying.
  • Versatile Treat: Perfect for breakfast, an afternoon pick-me-up, or a dessert drink, it fits any occasion.
  • Easy to Customize: You can adjust sweetness, creaminess, and flavor profiles to suit your personal taste.
  • Homemade Goodness: Making it at home means you control the ingredients—no preservatives or additives here!
  • Impressive Presentation: Layering the chocolate cream over coffee not only tastes amazing but looks stunning too.

Understanding the Ingredients

Let’s break down the ingredients that make up this delicious drink, along with some great substitutions if you’re looking to mix things up.

  • Cold Brew Coffee: Use your favorite brand of cold brew, or make your own by steeping coarsely ground coffee in cold water for 12-24 hours.
  • Ice Cubes: Regular ice works fine, but for an extra coffee kick, freeze some cold brew into ice cubes!
  • Heavy Cream: For a vegan option, substitute with coconut cream or almond milk.
  • Milk: Any type of milk will do! Consider oat or almond milk for a dairy-free alternative.
  • Chocolate Syrup: Use high-quality chocolate syrup for richer flavor; you can also experiment with homemade chocolate sauce.
  • Vanilla Extract: This adds depth; feel free to omit it if you want a pure chocolate flavor.
  • Sugar: Optional for sweetening; try natural sweeteners like agave or honey.

Pro Tips for the Perfect Chocolate Cream Cold Brew

To ensure your Chocolate Cream Cold Brew turns out perfectly every time, keep these expert tips in mind:

  • Quality Ingredients: Always choose high-quality coffee and cream to enhance the overall flavor.
  • Chill Your Glass: Pre-chilling your serving glass can keep the drink colder for longer.
  • Whisk Vigorously: Whisk the chocolate cream until it thickens; this adds air, creating a lighter texture.
  • Layering Technique: Pour the cold brew slowly to create a beautiful layered effect with the cream.
  • Experiment with Flavors: Try adding flavored syrups like hazelnut or caramel for a unique twist.
  • Don’t Skip the Ice: Ice helps maintain the drink’s chill and adds a refreshing quality.
  • Adjust Sweetness: Taste as you go; everyone has different sweetness preferences.
  • Serve Immediately: For the best experience, enjoy your drink right after making it.

Avoiding Common Mistakes

Even the best chefs make mistakes! Here’s how to avoid common pitfalls when making your Chocolate Cream Cold Brew:

  • Too Much Water: If your cold brew is too diluted, try using more coffee grounds when brewing.
  • Not Whisking Enough: A thick chocolate cream is key; don’t rush this step.
  • Over-Sweetening: Start with less sugar; you can always add more later.
  • Using Hot Coffee: This drink is meant to be enjoyed cold; hot coffee will melt the ice too quickly.

Delicious Variations to Explore

The beauty of the Chocolate Cream Cold Brew lies in its versatility. Here are some variations to try:

  • Mocha Mint: Add a drop of mint extract to the chocolate cream for a refreshing twist.
  • Hazelnut Delight: Incorporate hazelnut syrup into the cold brew for an extra nutty flavor.
  • Spiced Chocolate: Add a pinch of cinnamon or nutmeg to the chocolate cream for a warm spice note.
  • Frozen Treat: Blend the cold brew and chocolate cream with ice for a frozen coffee treat.

Storage and Make-Ahead Instructions

If you want to enjoy this drink throughout the week, here are some tips for storing and making ahead:

  • Cold Brew Storage: Store cold brew coffee in the fridge for up to two weeks; it only gets better with time!
  • Make Chocolate Cream Ahead: Prepare the chocolate cream mixture a day in advance and store it in the refrigerator.
  • Layer Just Before Serving: For the best texture, layer the chocolate cream just before you’re ready to drink.

Frequently Asked Questions

1. How do I make cold brew coffee?
Combine coarsely ground coffee with cold water in a jar. Let it steep for 12-24 hours in the fridge, then strain.

2. Can I use decaf coffee for this recipe?
Absolutely! Decaf cold brew works just as well for a caffeine-free option.

3. What’s the difference between cold brew and iced coffee?
Cold brew is made by steeping coffee grounds in cold water, while iced coffee is brewed hot and then cooled.

4. How can I make this vegan?
Substitute heavy cream with coconut cream and regular milk with a plant-based alternative.

5. Can I use flavored chocolate syrup?
Yes! Flavored syrups like caramel or mint can add a unique twist.

6. What’s the best way to sweeten it?
Use simple syrup for a smooth sweetness, or opt for honey or agave for natural sweetness.

7. How do I achieve the perfect foam?
Whisk vigorously and consider using a milk frother to achieve a light, airy texture.

8. Can I make this drink without sugar?
Yes, feel free to skip the sugar or use a sugar alternative to keep it healthier.

Nutritional Tips and Dietary Adaptations

This drink can be tailored to fit various dietary needs. Here are some tips:

  • Low-Calorie Option: Use unsweetened almond milk and skip the sugar for a lighter drink.
  • High-Protein Adaptation: Add a scoop of protein powder to the chocolate cream for an extra boost.
  • Dairy-Free Delight: Use coconut cream and a non-dairy milk alternative.

Essential Equipment You’ll Need

To make your Chocolate Cream Cold Brew, you’ll need the following:

  • Coffee Grinder: For fresh coffee grounds, use a burr grinder for the best texture.
  • French Press or Cold Brew Maker: Essential for brewing your cold brew coffee.
  • Mixing Bowl: To whisk your chocolate cream to perfection.
  • Whisk or Milk Frother: For aerating the cream mixture.
  • Measuring Cups and Spoons: To ensure you get the right amounts of each ingredient.

Serving Suggestions

Serving your Chocolate Cream Cold Brew can be as fun as making it! Here are a few ideas:

  • Garnish: Top with chocolate shavings or a drizzle of chocolate syrup for a decadent touch.
  • Pair with Snacks: Enjoy with a pastry, a slice of coffee cake, or chocolate-covered pretzels.
  • Presentation: Serve in a clear glass to show off the beautiful layers of coffee and cream.

In Conclusion: Sip Your Way Around the World

Making your own Chocolate Cream Cold Brew at home is not just about enjoying a delicious drink; it’s about embracing the adventure of flavor and creativity. With every sip, you’re reminded that food has the power to connect us, to tell stories of distant places, and to bring joy into our daily lives. So grab your apron, gather your ingredients, and embark on this delicious journey—your taste buds will thank you!

Chocolate Cream Cold Brew

Prep Time 5 minutes
Total Time 5 minutes
Servings 1 cup
Calories 180
A deliciously creamy and chocolatey cold brew coffee treat perfect for hot days or a special pick-me-up.

Ingredients

Cold Brew Coffee

  • 1 cup cold brew coffee

Ice Cubes

  • ¾ cup ice cubes

Cream and Flavorings

  • 3 tablespoons heavy cream
  • 1 tablespoon milk
  • 1 tablespoon chocolate syrup
  • ½ teaspoon vanilla extract
  • 1 teaspoon sugar (optional) (optional)

Instructions 

  • Combine heavy cream, milk, chocolate syrup, vanilla extract, and sugar in a small bowl. Whisk until smooth and slightly thickened.
  • Fill a tall glass with ice cubes almost to the top.
  • Pour cold brew coffee over the ice, leaving space for the cream.
  • Gently pour the whipped chocolate cream over the cold brew.

Notes

Adjust sweetness to taste and enjoy immediately.
Calories: 180kcal
Cost: $4
Course: Beverage
Keyword: chocolate, Coffee, Cold Brew

Welcome to the world of creamy, fruity delights where we embark on a journey to create the ultimate strawberry smoothie. This easy strawberry smoothie recipe is not just a drink; it’s an experience that bursts with flavor and freshness, perfect for a refreshing morning sip or a delightful afternoon treat. Let’s dive deep into the art of smoothie-making and explore how you can blend fresh and frozen ingredients to capture the essence of summer in every sip!

Why You’ll Love This Recipe

This strawberry smoothie is more than just delicious; it’s packed with benefits that make it a must-try for anyone looking to enjoy a healthy and tasty treat. Here are just a few reasons why I love this recipe:

  • Nutrient-rich: Combining strawberries, yogurt, and bananas means you’re getting a good dose of vitamins, minerals, and antioxidants.
  • Quick and easy: With just five simple ingredients, this smoothie comes together in minutes. Perfect for busy mornings!
  • Customizable: Adjust ingredients based on your taste preferences or dietary needs—there’s no wrong way to enjoy this smoothie!
  • Kid-friendly: This smoothie is a hit with kids, making it a fun way to sneak in some healthy fruits.
  • Versatile: Enjoy it as a breakfast replacement, a snack, or even a dessert when you add a scoop of ice cream!

Ingredients Breakdown

Let’s take a closer look at the ingredients you’ll need for this delightful strawberry smoothie and some tasty substitutions:

  • Strawberries: 1 cup fresh or frozen strawberries—while fresh strawberries have a vibrant flavor, frozen ones add a delightful chill that’s perfect for smoothies.
  • Milk: 1 cup of your choice—whether it’s almond milk, cow’s milk, or oat milk, each brings a unique flavor and texture.
  • Greek Yogurt: 1 cup plain or vanilla Greek yogurt—this adds creaminess and a protein boost. You can substitute with coconut yogurt for a dairy-free option.
  • Banana: 1 banana, preferably frozen—this acts as a natural sweetener and thickener. If bananas aren’t your thing, consider using avocado for a creamy texture without the sweetness.
  • Honey: 2 tablespoons of honey—perfect for adding sweetness. Maple syrup or agave nectar can serve as great alternatives.

Step-by-Step Instructions

Making this easy strawberry smoothie is a breeze! Follow these simple steps:

  1. Gather all your ingredients.
  2. Combine all ingredients in a blender.
  3. Blend on high speed until everything is thick, smooth, and delicious.
  4. Taste your smoothie and adjust sweetness if needed.
  5. Pour into a glass and enjoy!

Expert Pro Tips for the Perfect Smoothie

Side view of a thick strawberry smoothie topped with a fresh strawberry.

To elevate your smoothie game, here are some expert tips:

  • Use frozen fruit: It helps achieve that thick and creamy texture we all love in smoothies.
  • Experiment with flavors: Add a splash of vanilla extract or a handful of spinach for added nutrients without altering the flavor too much.
  • Blend in stages: If your blender struggles, blend the soft ingredients first, then add the frozen ones gradually.
  • Try different sweeteners: Depending on your preference, you can use dates, stevia, or even fruit juice.
  • Chill your glass: For an extra refreshing experience, chill your glass in the freezer before serving.
  • Use a high-speed blender: It ensures a smooth blend without any chunks.
  • Portion control: This recipe makes about 3 cups; feel free to halve or double the recipe based on your needs.
  • Add protein: Consider adding protein powder or nut butter for a post-workout boost!

Common Mistakes and Troubleshooting

Even the best can make mistakes! Here are some common pitfalls and how to avoid them:

  • Too thick? Add a splash of milk to thin it out. Blend again until smooth!
  • Not sweet enough? Add a touch more honey or your preferred sweetener.
  • Grainy texture? Make sure to blend long enough, and consider using a higher-speed blender.
  • Too icy? If using frozen fruit, reduce the amount or let it sit out for a few minutes before blending.

Variations to Try

Variety is the spice of life! Here are four delicious variations of this strawberry smoothie:

  • Strawberry Banana Delight: Stick with the original recipe but add a handful of spinach for a nutrient boost.
  • Berry Medley: Mix in blueberries and raspberries for a mixed berry smoothie that’s bursting with flavor.
  • Tropical Twist: Substitute strawberries with mango and add coconut milk for a tropical vibe.
  • Chocolate Strawberry Smoothie: Blend in a tablespoon of cocoa powder or chocolate protein powder for a chocolatey indulgence.

Storage and Make-Ahead Instructions

Want to prepare ahead of time? Here’s how:

  • Refrigerate: Store your smoothie in an airtight container for up to 24 hours. Shake well before drinking.
  • Freeze: Pour into ice cube trays or freezer-safe containers for up to a month. Blend frozen cubes for a quick smoothie!

Frequently Asked Questions

Before we wrap up, let’s tackle some common questions about this strawberry smoothie:

  • Can I use fresh strawberries instead of frozen? Absolutely! Just add some ice to keep it chilled.
  • Is this smoothie vegan? Yes, just swap out Greek yogurt for a plant-based yogurt.
  • Can I make this smoothie without bananas? Yes! You can use avocado or omit it entirely; just adjust the yogurt for creaminess.
  • How can I make it more filling? Add a scoop of protein powder or nut butter for an extra protein punch.
  • Can I add greens? Definitely! Spinach or kale work well without altering the taste much.
  • What’s the best way to sweeten it? You can use honey, maple syrup, or even dates for natural sweetness.
  • How long does it take to make? This smoothie takes about 5 minutes from start to finish.
  • Is it suitable for kids? Yes! It’s a healthy and delicious way to get fruits into their diet.

Nutrition Tips and Dietary Adaptations

Your smoothie can be as nutritious as you want it to be! Here are some tips:

  • Protein boost: Add Greek yogurt or protein powder to make it more satiating.
  • Fiber-rich: Incorporate chia seeds or flaxseeds for added fiber.
  • Low-sugar option: Use unsweetened yogurt and adjust the sweetener to your preference.

Equipment Recommendations

To make the best smoothie, the right equipment is key:

  • High-speed blender: A good quality blender makes all the difference in achieving that smooth texture.
  • Measuring cups: Accurate measurements ensure consistent results every time.
  • Re-sealable bags: Perfect for storing prepped smoothie ingredients in the freezer.

Serving Suggestions

Finally, let’s talk about how to serve this delicious smoothie:

  • Garnish: Top with fresh strawberries or a sprinkle of granola for added texture.
  • Glassware: Serve in a chilled glass or a fun mason jar for a rustic feel.
  • Pair it: Enjoy alongside a slice of whole-grain toast or a piece of fruit for a balanced meal.

In conclusion, this easy strawberry smoothie is not just a recipe; it’s a celebration of flavors and health. With endless possibilities, you can customize it to fit your taste and dietary needs. So grab your blender and let’s start creating memories one sip at a time!

Easy Strawberry Smoothie Recipe

Prep Time 5 minutes
Total Time 5 minutes
Servings 2 cups
Calories 250
Enjoy a quick and delicious strawberry smoothie that's perfect for a healthy snack or breakfast.

Ingredients

Fruits

  • 1 cup strawberries (fresh or frozen)

Dairy

  • 1 cup milk (almond or any variety)

Dairy

  • 1 cup greek yogurt (plain or vanilla)

Fruits

  • 1 can frozen banana

Sweeteners

  • 2 tablespoons honey

Instructions 

  • Combine all ingredients in a blender.
  • Blend on high until smooth and thick.

Notes

Use frozen banana for a creamier texture.
Calories: 250kcal
Cost: $5
Course: Breakfast, Snack
Cuisine: American
Keyword: Smoothie, Strawberry

Welcome to a flavorful journey where culinary excitement meets comfort! Today, we’re diving into a dish that perfectly balances zest and heartiness: Herby Lemon Garlic Steak and Rice. In just 30 minutes, you can whip up a meal that celebrates the tender sirloin, invigorating lemon, and aromatic herbs. This dish is not just food; it’s a passport to a sunlit terrace, bringing joy and connection to your dining table, whether it’s a quick weeknight meal or a special occasion.

Why You’ll Love This Recipe

This recipe isn’t just about cooking; it’s about savoring each moment in the kitchen. Here are five specific reasons why this dish will become a staple in your home:

  • Quick and Easy: Ready in just 30 minutes, making it perfect for busy weeknights.
  • Flavor Explosion: The combination of zesty lemon, aromatic garlic, and fresh herbs creates a vibrant taste that will delight your palate.
  • Versatile: Enjoy it as a main course or serve it with a side salad for a complete meal.
  • Customizable: Adapt the recipe to fit your dietary preferences or ingredient availability.
  • Impressive Presentation: The vibrant colors of the dish make for an eye-catching centerpiece at any dining table.

The Ingredients: What You’ll Need

Gather these fresh ingredients for a delightful culinary experience:

  • 1 lb sirloin steak: For a juicy and flavorful protein.
  • 1 cup uncooked rice: White or brown, your choice! Brown rice adds nuttiness.
  • 2 cups beef broth: This adds depth to the rice’s flavor.
  • 4 cloves garlic: Minced for that aromatic punch.
  • 1 lemon: Zest and juice for a citrusy brightness.
  • 3 tablespoons olive oil: For cooking and enhancing flavor.
  • 1 teaspoon dried oregano: A classic herb that pairs beautifully with beef.
  • 1 teaspoon dried thyme: Adds an earthy note.
  • Salt and pepper: Essential for seasoning.
  • Fresh parsley: Chopped, for garnish to brighten the dish.
  • Lemon slices: For serving and extra zest.

Step-by-Step Instructions

Creating the 30 Minute Herby Lemon Garlic Steak and Rice is straightforward. Just follow these steps for a perfect meal:

  1. Prep the Steak: Start by patting the steak dry with paper towels. This ensures a better sear. Season both sides with salt, pepper, and half of the dried oregano and thyme.
  2. Cook the Rice: In a medium saucepan, bring the beef broth to a boil. Add the rice, cover, and reduce the heat to low. Allow the rice to simmer according to package instructions (about 15-20 minutes).
  3. Heat the Skillet: While the rice cooks, heat 2 tablespoons of olive oil in a large skillet over medium-high heat.
  4. Sear the Steak: Once the oil is hot, add the seasoned steak. Sear for about 4-5 minutes on each side for medium-rare, adjusting based on your preference. Remove the steak from the skillet and let it rest.
  5. Sauté the Garlic: In the same skillet, add the remaining tablespoon of olive oil, followed by the minced garlic and remaining herbs. Sauté for about 30 seconds, until fragrant.
  6. Add Lemon Zest and Juice: Stir in the lemon juice and zest, allowing it to combine with the garlic. Cook for another minute.
  7. Combine Rice and Garlic Mixture: Once the rice is cooked, fluff it with a fork and mix it into the skillet with the garlic and lemon mixture. Stir until well combined, and season with salt and pepper as needed.
  8. Slice the Steak: After resting, slice the steak against the grain into thin pieces.
  9. Serve: Serve a generous portion of the herby lemon garlic rice on plates, topped with sliced steak. Garnish with chopped parsley and lemon slices.

Pro Tips for Cooking Success

Enhance your cooking experience with these expert insights:

  • Resting Time: Always allow your steak to rest for a few minutes after cooking to retain its juices.
  • Rice Consistency: Fluff the rice gently with a fork to keep it light and airy.
  • Fresh Ingredients: Use fresh herbs whenever possible for the best flavor profile.
  • Slice Against the Grain: This technique ensures tender slices of steak for a delightful texture.
  • Adjust Seasoning: Taste and adjust the seasoning of the rice mixture to match your preference.
  • Meal Prep: Prepare the rice and steak separately for easy reheating and serving later.
  • Experiment: Don’t hesitate to add your favorite vegetables to the rice mixture!
  • Use a Meat Thermometer: For precise cooking, aim for 130°F for medium-rare steak.

Common Mistakes and Troubleshooting

Even the best chefs make mistakes! Here’s how to troubleshoot common issues:

  • Overcooked Steak: If your steak is overcooked, slice it thinly and serve over the rice to mask the texture.
  • Undercooked Rice: If the rice is still hard, add a splash more broth and cover until cooked through.
  • Too Much Lemon: If overzealous with lemon, balance it with a touch of honey or sugar to mellow the acidity.
  • Sticky Rice: Use a little olive oil in the cooking water to prevent clumping.

Delicious Variations & Serving Ideas

Make this recipe your own with these creative twists:

  • Herby Lemon Garlic Chicken: Substitute steak with chicken breast for a lighter version.
  • Vegetable Stir-Fry: Add seasonal veggies like bell peppers, zucchini, and asparagus for a colorful addition.
  • Spicy Kick: Incorporate crushed red pepper flakes for a hint of heat.
  • Cilantro Lime Rice: Swap lemon for lime and add cilantro for a fresh twist.

Storage and Make-Ahead Instructions

Want to prepare ahead of time? Here’s how to store it:

  • Refrigeration: Store leftovers in an airtight container for up to 3 days.
  • Freezing: Freeze the steak and rice separately for up to 2 months. Thaw in the refrigerator before reheating.
  • Reheating: Gently reheat in a skillet or microwave, adding a splash of broth to revive the flavors.

Frequently Asked Questions

Got questions? We’ve got answers! Here are some common queries regarding the Herby Lemon Garlic Steak and Rice:

  • Can I use a different cut of beef? Absolutely! Cuts like ribeye or flank steak work well too.
  • Is this dish gluten-free? Yes, as long as you use gluten-free beef broth and rice.
  • What sides pair best with this dish? A fresh green salad or grilled vegetables complement the meal beautifully.
  • Can I omit the garlic? While garlic adds depth, you can use garlic powder or leave it out for a milder flavor.
  • How do I know when the steak is cooked perfectly? Use a meat thermometer; 130°F for medium-rare is ideal.
  • Can I prepare the rice in advance? Yes, cooked rice can be stored in the refrigerator for up to 5 days.
  • What can I use instead of beef broth? Vegetable broth or water can be used as substitutes.
  • How spicy is this recipe? It’s mild, but feel free to add spices to match your taste preference!

Nutritional Tips and Dietary Adaptations

Looking to adapt this dish for dietary needs? Here are some options:

  • Low-Carb: Replace rice with cauliflower rice for a lighter option.
  • Whole30: Use compliant ingredients and avoid grains.
  • Vegetarian: Substitute steak with marinated tofu or tempeh, and use vegetable broth.
  • Low-Sodium: Opt for low-sodium beef broth and limit added salt.

Essential Equipment Recommendations

Make your cooking experience seamless with the right tools:

  • Skillet: A heavy-bottomed skillet ensures even heat distribution for perfect searing.
  • Medium Saucepan: Ideal for cooking rice to fluffy perfection.
  • Meat Thermometer: For precise steak doneness, an essential tool in any kitchen.
  • Cutting Board: A sturdy board is a must for slicing your steak.

Serving Suggestions

Make your dining experience even more delightful:

  • Wine Pairing: A chilled white wine or a light red complements the flavors beautifully.
  • Garnish: Top with extra herbs or a sprinkle of feta for an added zing.
  • Presentation: Serve on colorful plates, adding a side of grilled vegetables for contrast.

Conclusion

Embark on your culinary journey with this Herby Lemon Garlic Steak and Rice recipe. The vibrant flavors and quick preparation time make it a must-try for any home cook. Whether you’re reminiscing about sunlit terraces or simply looking for a delicious dinner option, this dish is sure to impress. So gather your ingredients, unleash your inner chef, and let the world of flavors transport you. Happy cooking!

30 Minute Herby Lemon Garlic Steak and Rice An Incredible Ultimate Recipe

Prep Time 10 minutes
Cook Time 20 minutes
Total Time 30 minutes
Servings 4 servings
Calories 550
This flavorful and quick-to-make steak and rice dish is packed with fresh herbs, lemon, and garlic, perfect for a satisfying meal in just 30 minutes.

Ingredients

Meat

  • 1 lb sirloin steak

Grains

  • 1 cup uncooked rice (white or brown)

Broth

  • 2 cups beef broth for cooking rice

Aromatics

  • 4 cloves garlic, minced

Herbs & Citrus

  • 1 lemon lemon zest and juice

Oils & Seasonings

  • 3 tablespoons olive oil
  • 1 teaspoon dried oregano
  • 1 teaspoon dried thyme

Salt & Pepper

  • Salt and pepper, to taste

Garnish & Serve

  • Fresh parsley, chopped
  • Lemon slices for serving

Instructions 

  • Pat the steak dry, season with salt, pepper, half of the herbs, and half of the dried oregano and thyme.
  • Bring beef broth to a boil, add rice, cover, and simmer for 15-20 minutes until cooked.
  • Heat 2 tablespoons of olive oil in a skillet, sear the steak 4-5 minutes per side, then rest.
  • In the same skillet, add remaining olive oil, garlic, herbs, sauté 30 seconds, then add lemon juice and zest, cook 1 minute.
  • Fluff cooked rice, mix into skillet with garlic and lemon, season as needed, then serve topped with sliced steak, parsley, and lemon slices.

Notes

Ensure the steak is rested before slicing for maximum juiciness.
Calories: 550kcal
Cost: $15
Course: Main Course
Cuisine: International
Keyword: garlic, lemon, rice, Steak

A Culinary Adventure Awaits: Garlic Lamb Chops with Rosemary

Welcome to a flavor-packed journey that takes you deep into the heart of culinary tradition with these **Garlic Lamb Chops with Rosemary**. This dish isn’t just about cooking; it’s about embracing culture, experiencing rich flavors, and creating connections around the dinner table. With every bite, you’ll find yourself transported to sun-kissed Mediterranean fields where fresh herbs flourish and the aroma of grilled meats fills the air. Let’s dive into this savory delight and explore the world of lamb like never before!

Why You’ll Love This Recipe

Before we get started, let me share a few reasons why this recipe is truly special:

  • Unforgettable Flavor: The combination of garlic, fresh rosemary, and marinated lamb chops creates a mouthwatering experience that tantalizes your taste buds.
  • Quick Preparation: With just a few simple steps, you can have a gourmet meal on the table in under an hour, perfect for a weeknight dinner or special occasion.
  • Versatile Pairings: These lamb chops pair beautifully with a variety of sides, from roasted vegetables to creamy mashed potatoes, making them suitable for any gathering.
  • Cultural Connection: Cooking lamb is a tradition in many cultures, allowing you to explore and share the stories behind this beloved dish.
  • Health Benefits: Lamb is a rich source of high-quality protein and essential nutrients, making it a hearty choice for a balanced diet.

Ingredient Breakdown

To craft these mouthwatering garlic lamb chops, let’s take a closer look at the ingredients and possible substitutions:

  • Olive Oil (½ cup): A staple for marinating; consider using avocado oil for a different flavor profile.
  • Minced Garlic (2 teaspoons): Fresh garlic adds a robust flavor; garlic powder can be used in a pinch.
  • Shallot (1, minced): Adds sweetness; substitute with red onion if necessary.
  • Apple Cider Vinegar (1 ½ tablespoons): Balances flavors; white wine vinegar is a good alternative.
  • Honey Mustard (2 teaspoons): Adds depth; feel free to replace with Dijon mustard for a spicier kick.
  • Fresh Rosemary (1 tablespoon): Provides an aromatic touch; dried rosemary can be used, but fresh is preferred for flavor.
  • Fresh Thyme (1 tablespoon): Enhances the herbaceous notes; oregano can be a substitute.
  • Lemon Zest (1 tablespoon): Brightens the dish; lime zest can be a refreshing alternative.
  • Sea Salt (1 2 teaspoon): Essential for seasoning; kosher salt works well too.
  • Coarse Black Pepper (1 4 teaspoon): For a little heat; freshly ground black pepper enhances flavor.
  • Lamb Chops (2 ½ pounds): Choose rib chops for tenderness; loin chops are also a great option.
  • Vegetable Oil (1 tablespoon): For cooking; grapeseed oil is another high-heat option.

How to Make Garlic Lamb Chops

Golden-brown lamb chops with garlic seasoning and fresh herbs.

Ready to bring this dish to life? Here’s how to prepare your garlic lamb chops:

  1. In a medium bowl, whisk together olive oil, minced garlic, shallot, apple cider vinegar, honey mustard, rosemary, thyme, lemon zest, salt, and black pepper.
  2. Set aside ¼ cup of the mixture in the refrigerator for serving later.
  3. Place the lamb chops in a large bowl and pour in the remaining marinade. Cover and let marinate for at least 2 to 6 hours, turning occasionally to ensure even coating.
  4. Once marinated, drain the lamb chops and pat them dry with paper towels. Season with additional salt and pepper if desired.
  5. In a large cast-iron skillet, heat vegetable oil over medium-high heat. Cook the lamb chops for about 3-4 minutes per side until they reach an internal temperature of 145°F (medium-rare) or your preferred doneness.
  6. Let the lamb chops rest for 5 minutes before serving. Enjoy with the reserved marinade drizzled on top!

Pro Tips for Perfect Lamb Chops

Want to elevate your cooking game? Here are some expert insights:

  • Marinate Longer: For even deeper flavors, marinate the lamb chops overnight.
  • Bring to Room Temperature: Let the lamb sit at room temperature for about 30 minutes before cooking for even cooking.
  • Use a Meat Thermometer: Ensure perfect doneness by checking the internal temperature.
  • Resting Time is Key: Allow the meat to rest after cooking to retain juices.
  • Explore Cooking Methods: Try grilling for a smoky flavor or broiling for a quick finish.
  • Experiment with Herbs: Don’t hesitate to mix in other herbs like mint or basil for a unique twist.
  • Use Quality Meat: Source your lamb from a reputable butcher for the best flavor and texture.
  • Pair with Wine: A glass of red wine can enhance the dining experience.

Avoid Common Mistakes

Even seasoned cooks can make missteps. Here are some common mistakes to avoid:

  • Skipping the Marinade: Don’t rush this step; marinating is crucial for flavor.
  • Overcooking the Lamb: Keep an eye on the cooking time to avoid tough meat.
  • Poor Seasoning: Don’t be shy with salt and pepper; seasoning is key!
  • Using Cold Meat: Cooking straight from the fridge can lead to uneven cooking.

Variations to Try

Feeling adventurous? Here are some delicious variations you can explore:

  • Herbed Crust: Coat lamb chops with a mixture of breadcrumbs and herbs before cooking for added texture.
  • Spicy Kick: Incorporate chili flakes or diced jalapeños into the marinade for some heat.
  • Honey Glaze: Drizzle honey over the lamb chops during the last minute of cooking for a sweet finish.
  • Fruit Infusion: Serve with a side of mint and peach salsa for a refreshing contrast.

Storage and Make-Ahead Instructions

If you want to prepare ahead of time or store leftovers, follow these guidelines:

  • Make-Ahead: Marinate the lamb chops up to 24 hours in advance for maximum flavor.
  • Storage: Store leftover cooked lamb chops in an airtight container in the refrigerator for up to 3 days.
  • Reheating: Gently reheat in a skillet over medium heat until warmed through to retain tenderness.

Frequently Asked Questions

Here are some common questions about making garlic lamb chops:

  • Can I use frozen lamb chops? Yes, just ensure they are fully thawed before marinating and cooking.
  • What is the best cooking temperature for lamb? Aim for an internal temperature of 145°F for medium-rare.
  • How do I know when the lamb is done? Use a meat thermometer to check the internal temperature.
  • Can I cook lamb chops in the oven? Absolutely! Roast at 400°F for about 15-20 minutes.
  • What should I serve with lamb chops? Pair with roasted vegetables, couscous, or a fresh salad.
  • How long should I marinate lamb chops? Marinate for at least 2 hours, but overnight is best.
  • Is lamb healthy? Yes, lamb is a great source of protein and essential nutrients.
  • Can I grill lamb chops? Yes, grilling adds a lovely smoky flavor and is a great option!

Nutrition Tips and Dietary Adaptations

This dish can easily fit various dietary preferences:

  • Gluten-Free: Naturally gluten-free, make sure all ingredients are certified gluten-free if needed.
  • Paleo-Friendly: This recipe fits well within a paleo diet—just skip the honey mustard.
  • Low-Carb: Enjoy a low-carb meal by pairing with non-starchy vegetables.

Essential Equipment for Cooking Lamb Chops

To make your cooking experience smooth, consider having these essential tools on hand:

  • Cast Iron Skillet: Ideal for achieving a perfect sear.
  • Meat Thermometer: Ensures your lamb is cooked to perfection.
  • Mixing Bowls: For preparing marinades and mixing ingredients.
  • Wooden Spoon: Perfect for mixing and marinating without scratching your bowls.

Serving Suggestions

To truly impress your guests, consider these serving ideas:

  • Fresh Herbs: Garnish with chopped mint or parsley for a vibrant touch.
  • Pair with Sides: Serve alongside roasted potatoes, seasonal veggies, or a fresh salad.
  • Drizzle Sauce: Use the reserved marinade as a dipping sauce for added flavor.

Embark on this culinary adventure and savor each bite of succulent garlic lamb chops infused with rosemary. Cooking is about discovery—so let’s explore the world through flavors and traditions, one recipe at a time. Enjoy your meal!

Garlic Lamb Chops with Rosemary

Prep Time 20 minutes
Cook Time 10 minutes
Total Time 30 minutes
Servings 4 servings
Calories 650
Enjoy tender, flavorful lamb chops marinated with garlic, herbs, and a tangy vinegar glaze, perfect for a sophisticated dinner.

Ingredients

Marinade

  • 0.5 cup olive oil
  • 2 teaspoons minced garlic
  • 1 shallot minced shallot
  • 1.5 tablespoons apple cider vinegar
  • 2 teaspoons honey mustard
  • 1 tablespoon chopped fresh rosemary
  • 1 tablespoon chopped fresh thyme leaves
  • 1 tablespoon lemon zest
  • 0.25 cup sea salt
  • 0.25 teaspoon coarse black pepper
  • 2.5 pounds lamb chops
  • 1 tablespoon vegetable oil

Instructions 

  • Whisk together olive oil, garlic, shallot, vinegar, mustard, herbs, lemon zest, salt, and pepper. Reserve 1/4 cup for serving.
  • Marinate lamb chops in remaining mixture for 2-6 hours, turning occasionally. Drain before cooking.
  • Pat chops dry, season with additional salt and pepper. Heat oil in skillet and cook chops 3-4 minutes per side until internal temperature reaches 145°F. Rest 5 minutes before serving.

Notes

Use a meat thermometer for perfect doneness and let the lamb rest before serving for juiciness.
Calories: 650kcal
Cost: $20
Course: Main Course
Cuisine: Western
Keyword: garlic, herbs, Lamb

Embark on a Flavorful Journey with Roasted Garlic Chicken and Garden Fresh Veggies

Are you ready to explore a dish that not only tantalizes your taste buds but also warms your heart? This Roasted Garlic Chicken and Vegetables recipe is a culinary adventure that brings together succulent chicken, vibrant veggies, and the aromatic allure of garlic. It’s the kind of dish that transforms an ordinary dinner into a memorable feast, perfect for family gatherings or cozy nights in. Let’s dive into this delectable journey!

Why You’ll Love This Recipe

  • One-Pan Wonder: Enjoy effortless cleanup as everything cooks together beautifully in one dish.
  • Flavor Explosion: The combination of roasted garlic and herbs creates a rich, savory flavor that elevates the chicken and vegetables.
  • Healthful and Nourishing: Packed with lean protein and colorful veggies, this dish is as nutritious as it is delicious.
  • Versatile and Adaptable: Customize the veggies based on what you have on hand or what’s in season for a fresh twist.
  • Perfect for Meal Prep: Make a large batch to enjoy throughout the week, making weeknight dinners a breeze!

Ingredients Breakdown

Here’s what you’ll need to create this mouthwatering dish:

  • 4 bone-in, skin-on chicken thighs: These provide rich flavor and moisture; you can substitute with breasts if preferred.
  • 2 cups baby potatoes, halved: Feel free to use any small potatoes; sweet potatoes add a lovely sweetness.
  • 2 cups carrots, peeled and cut into chunks: Carrots add a natural sweetness and vibrant color.
  • 1 red bell pepper, sliced: For a touch of sweetness and crunch.
  • 1 yellow onion, cut into wedges: Adds depth and sweetness as it caramelizes.
  • 1 head garlic, cloves peeled and left whole: The star ingredient that infuses the dish with a rich, aromatic flavor.
  • 2 tbsp olive oil: Helps to roast the veggies and chicken to perfection; you can use avocado oil as a substitute.
  • 1 tsp dried rosemary or 1 tbsp fresh, chopped: Rosemary pairs beautifully with chicken.
  • 1 tsp dried thyme: Another herb that complements the flavors.
  • 1 tsp paprika: Adds a hint of smokiness.
  • Salt and black pepper, to taste: Essential for enhancing flavors.
  • Juice of ½ lemon (optional): Adds brightness and acidity, balancing the richness of the dish.

Pro Tips for Perfect Roasted Garlic Chicken

  • Pat Dry for Crispy Skin: Make sure to dry the chicken thighs with paper towels before seasoning for the crispiest skin.
  • Let it Rest: After roasting, allow the chicken to rest for 5 minutes; this keeps it juicy.
  • Experiment with Herbs: Feel free to mix in fresh herbs like thyme or parsley for added freshness.
  • Use a Meat Thermometer: Ensure the chicken reaches an internal temperature of 165°F (75°C) for safe consumption.
  • Customize the Vegetables: Substitute any seasonal or favorite vegetables for a personal touch.
  • Preheat the Oven: Always preheat your oven for even cooking and optimal roasting.
  • Don’t Crowd the Pan: Give your chicken and vegetables space on the baking sheet to ensure they roast rather than steam.
  • Save the Drippings: Use leftover drippings for a flavorful gravy or sauce.

Avoiding Common Mistakes

Here are some pitfalls to avoid while making this roasted chicken:

  • Not Preheating the Oven: Skipping this step can lead to uneven cooking.
  • Overcrowding the Pan: Too much food in one pan can cause steaming, preventing that delicious roast.
  • Skipping the Resting Step: Cutting into the chicken immediately will result in lost juices.
  • Underseasoning: Don’t be shy with spices and herbs; they’re essential for flavor!

Flavor Variations to Elevate Your Dish

Want to switch things up? Here are some delightful variations:

  • Herb-Infused Chicken: Marinate the chicken in a blend of your favorite herbs and olive oil for deeper flavor.
  • Spicy Kick: Add red pepper flakes or cayenne pepper to the rub for a bit of heat.
  • Italian Twist: Incorporate Italian seasoning and serve with a side of marinara sauce.
  • Asian Fusion: Use soy sauce, ginger, and sesame oil for an Asian-inspired version.

Make-Ahead and Storage Instructions

This recipe is perfect for meal prepping. Here’s how to handle leftovers:

  • Make-Ahead: Prepare the chicken and veggies in advance and store in the fridge, then roast when ready to eat.
  • Storing Leftovers: Keep any leftovers in an airtight container in the fridge for up to 3 days.
  • Freezing Options: You can freeze the chicken and vegetables before roasting; defrost in the fridge before cooking.

FAQs about Roasted Garlic Chicken

Got questions? Here are some common inquiries:

  • Can I use boneless chicken? Yes! Boneless chicken breasts or thighs will work; adjust cooking time accordingly.
  • How do I know when the chicken is done? Use a meat thermometer; chicken should reach 165°F (75°C).
  • Can I use frozen vegetables? Yes, but expect longer cooking times for frozen veggies.
  • What should I serve with this dish? Consider a fresh salad or crusty bread to complete the meal.
  • Can I use different herbs? Absolutely! Feel free to experiment with your favorites.
  • Can I roast other meats? Yes! This recipe is versatile for pork or beef, but cooking times will vary.
  • How do I store leftovers? Refrigerate in an airtight container for up to 3 days.
  • Can I add cheese? Yes! Sprinkle some parmesan cheese on top for a creamy finish.

Nutritional Benefits and Dietary Adaptations

This Roasted Garlic Chicken and Vegetables dish is not only delicious but also nutritious. Here are some highlights:

  • Low-Carb Option: Skip the potatoes for a lower-carb meal, focusing on the chicken and veggies.
  • Paleo-Friendly: This dish is naturally paleo, as it contains whole foods without processed ingredients.
  • Gluten-Free: All ingredients are gluten-free, making it suitable for those with gluten sensitivities.

Essential Equipment for Success

Here’s what you’ll need to make this recipe:

  • Baking Sheet or Roasting Pan: A large, sturdy pan ensures even cooking.
  • Mixing Bowl: For tossing the chicken and vegetables together.
  • Meat Thermometer: Essential for checking the chicken’s doneness.
  • Sharp Knife: For chopping vegetables and preparing the chicken.

Serving Suggestions

To elevate your dining experience, consider these serving suggestions:

  • Rustic Family Style: Serve directly from the roasting pan for a cozy, communal meal.
  • Garnish with Fresh Herbs: Top with chopped parsley or basil for a burst of color.
  • Pair with Wine: A light white wine, such as Sauvignon Blanc, complements the flavors beautifully.
  • Include a Side Salad: A fresh green salad balances the heartiness of the dish.

As you savor each bite of this Roasted Garlic Chicken and Vegetables, remember that every ingredient carries a story, a journey, a connection to the larger world of food and culture. So gather your loved ones, share the warmth of this meal, and let the flavors take you on a delightful adventure. Happy cooking, my friends!

Roasted Garlic Chicken and Vegetables

Prep Time 15 minutes
Cook Time 45 minutes
Total Time 1 hour
Servings 4 servings
Calories 650
A flavorful and hearty roasted chicken dish with tender vegetables, perfect for a family dinner.

Ingredients

Protein

  • 4 pieces bone-in, skin-on chicken thighs

Vegetables

  • 2 cups baby potatoes, halved
  • 2 cups carrots, peeled and cut into chunks
  • 1 piece red bell pepper, sliced
  • 1 piece yellow onion, cut into wedges
  • 1 head garlic, cloves peeled and left whole

Seasonings and Oil

  • 2 tbsp olive oil
  • 1 tsp dried rosemary or 1 tbsp fresh, chopped
  • 1 tsp dried thyme
  • 1 tsp paprika
  • to taste Salt and black pepper
  • ½ lemon juice of lemon (optional)

Instructions 

  • Preheat oven to 400°F (200°C). Grease a baking dish.
  • Toss potatoes, carrots, onion, bell pepper, and garlic with half the herbs, spices, and 1 tbsp olive oil. Spread on the pan.
  • Pat chicken dry, rub with remaining oil, herbs, and spices. Place over vegetables, skin-side up.
  • Roast for 40-45 minutes until chicken reaches 165°F and vegetables are tender. Rest for 5 minutes.
  • Optional: Squeeze lemon juice over the chicken before serving. Serve straight from the pan.

Notes

For extra flavor, add fresh herbs or a splash of white wine before roasting.
Calories: 650kcal
Cost: $15
Course: Main Course
Cuisine: American
Keyword: Chicken, Roasted Vegetables

Embark on a Flavor Journey with Ina Garten’s Garlic Bread

When it comes to comfort food, few dishes resonate as much as garlic bread. This recipe, inspired by the beloved Ina Garten, transports your taste buds to the sun-drenched streets of Italy. Here, I’ll guide you through the steps to create a garlic bread that’s not just a side dish, but a flavorful adventure. Ready to dive in? Let’s make some magic in the kitchen!

Why You’ll Love This Recipe

Ina Garten’s Garlic Bread is more than just a loaf slathered in butter and garlic. Here are five irresistible reasons to whip it up:

  • Captivating Aroma: The moment you pull this bread from the oven, your kitchen will be filled with an enticing aroma that beckons everyone to gather around.
  • Rich Flavor Profile: The combination of fresh garlic, herbs, and Parmesan creates a depth of flavor that’s both savory and satisfying.
  • Simple Ingredients: With just a handful of pantry staples, you can create a dish that feels gourmet without breaking the bank.
  • Versatile Pairing: This garlic bread pairs perfectly with a variety of dishes, from hearty pastas to crisp salads, making it a great addition to any meal.
  • Easy to Customize: Feel free to experiment with different herbs and cheeses to make it uniquely yours!

Ingredients You’ll Need

Before we dive into the how-to, let’s gather our ingredients. Here’s what you’ll need for Ina Garten’s Garlic Bread:

  • 1 large French loaf or Italian bread
  • 1 stick (½ cup) butter, softened
  • 4 garlic cloves, minced
  • 2 tablespoons fresh parsley, chopped
  • 2 tablespoons fresh basil, chopped
  • 2 tablespoons olive oil
  • 1 teaspoon salt
  • 1 teaspoon black pepper
  • ½ cup grated Parmesan cheese

**Substitutions:** If you’re looking to tweak the recipe, consider the following:

  • Butter Alternative: Use vegan butter for a dairy-free version.
  • Herb Options: Swap basil and parsley for oregano or thyme for a different flavor profile.
  • Cheese Variations: Experiment with mozzarella or cheddar for a cheesy twist.

Step-by-Step Instructions

Sliced garlic bread with melted butter, garlic, and fresh parsley.

Let’s break down the process to make this delectable garlic bread:

  1. Preheat the Oven: Start by preheating your oven to 375°F (190°C).
  2. Make the Garlic Butter: In a bowl, combine softened butter, minced garlic, chopped parsley, chopped basil, olive oil, salt, and pepper. Mix until well combined.
  3. Prepare the Bread: Slice the French loaf in half, lengthwise. Place the halves cut-side up on a baking sheet.
  4. Spread the Garlic Butter: Generously spread the garlic butter mixture over the cut sides of the bread.
  5. Top with Cheese: Sprinkle the grated Parmesan cheese evenly over the buttered bread.
  6. Bake the Garlic Bread: Place the baking sheet in the oven and bake for 15-20 minutes, or until the bread is golden and the cheese is melted.
  7. Broil for Extra Crunch (optional): For a crispy top, switch to broil for an additional 2-3 minutes, but keep an eye on it to prevent burning.
  8. Slice and Serve: Once golden and bubbly, remove from the oven, slice into pieces, and serve warm.

Pro Tips for the Best Garlic Bread

Want to elevate your garlic bread game? Here are some expert tips:

  • Use Fresh Garlic: Freshly minced garlic will give you the strongest flavor. Avoid garlic powders if possible.
  • Don’t Skip the Herbs: Fresh herbs add brightness and depth. Dried herbs can work in a pinch but won’t provide the same punch.
  • Room Temperature Butter: Ensure your butter is at room temperature for easy spreading and maximum flavor absorption.
  • Wrap for Softness: For a softer bread, wrap the garlic bread in aluminum foil while baking.
  • Experiment with Cheeses: Mixing cheeses like mozzarella and Parmesan can provide a delightful stretch and a rich flavor.
  • Make It Ahead: Prepare the garlic butter ahead of time and store it in the fridge for easy assembly later.
  • Don’t Overload: While it’s tempting to pile on the garlic, too much can make the bread overly pungent.
  • Let It Sit: Allow the bread to rest for a few minutes before slicing to help retain its shape.

Avoiding Common Mistakes

Even the best chefs can trip up! Here are some common mistakes to avoid:

  • Using Cold Butter: Cold butter won’t spread easily and can result in uneven flavor distribution.
  • Baking at the Wrong Temperature: Always preheat your oven; baking at too low a temperature can lead to soggy bread.
  • Skipping the Salt: Salt enhances the flavors—don’t skip it, even if you’re using salted butter.
  • Not Using Enough Garlic: This is garlic bread, after all! Ensure you’re generous with the garlic for maximum flavor.

Variations to Try

Feeling adventurous? Here are some delightful variations of garlic bread you can try:

  • Cheesy Garlic Bread: Add mozzarella cheese on top of the Parmesan for a gooey delight.
  • Herbed Garlic Bread: Mix in different herbs like dill or chives for a unique flavor profile.
  • Spicy Garlic Bread: Add a pinch of red pepper flakes or sliced jalapeños to the butter mixture for a kick.
  • Garlic Breadsticks: Shape the bread into sticks before baking for a fun twist.

Storage and Make-Ahead Instructions

Planning ahead? Here’s how to store and reheat your garlic bread:

  • Storage: Keep leftover garlic bread in an airtight container in the fridge for up to 3 days.
  • Freezing: Wrap baked garlic bread tightly in foil and freeze for up to 3 months. Thaw in the fridge before reheating.
  • Reheating: To reheat, wrap in foil and place in a preheated oven at 350°F (175°C) for about 10-15 minutes.

Frequently Asked Questions

Got questions? Here are some common inquiries about garlic bread:

  • Can I use sourdough bread? Absolutely! Sourdough adds a delightful tang to the garlic bread.
  • What can I serve with garlic bread? Garlic bread pairs well with pasta, salad, soups, or even grilled meats.
  • Can I make garlic butter ahead of time? Yes! Garlic butter can be made in advance and stored in the fridge for convenience.
  • Is this recipe gluten-free? You can use gluten-free bread to make a gluten-free version of garlic bread.
  • How can I make it dairy-free? Substitute with dairy-free butter and nutritional yeast for a cheesy flavor.
  • What’s the best way to slice garlic bread? Use a serrated knife for clean cuts without squishing the bread.
  • Can I add more cheese? Definitely! Feel free to load it up with your favorite cheeses.
  • How do I know when it’s done? Look for a golden brown top and melted cheese for the perfect bake.

Nutritional Information and Dietary Adaptations

This garlic bread is a delightful treat, but here are some tips for making it more nutritious:

  • Whole Grain Bread: Opt for whole grain or multigrain bread for added fiber and nutrients.
  • Reducing Butter: Use less butter or substitute with avocado for a healthier fat option.
  • Add Veggies: Incorporate spinach or roasted red peppers into the garlic butter for extra vitamins.

Essential Equipment for Making Garlic Bread

Before you start, make sure you have the following equipment:

  • Sharp Knife: For slicing the bread evenly.
  • Baking Sheet: A sturdy baking sheet for even cooking.
  • Mixing Bowl: To mix your garlic butter.
  • Spatula: For spreading the butter mixture easily.

Serving Suggestions

Now that your garlic bread is ready, here are some delicious ways to serve it:

  • As a Side Dish: Pair it with your favorite Italian pasta dishes.
  • With Soup: Enjoy it alongside a warm bowl of tomato soup or minestrone.
  • As an Appetizer: Serve it as a starter with marinara sauce for dipping.
  • For a Snack: Enjoy it on its own as a delightful, buttery snack.

Conclusion

Creating Ina Garten’s Garlic Bread is not just a recipe; it’s a culinary experience that brings people together. With its rich flavors and comforting aroma, it’s a dish that will warm your heart and home. So gather your ingredients, roll up your sleeves, and let the aroma of freshly baked garlic bread fill your kitchen. Bon appétit!

Ina Garten Garlic Bread Recipe

Prep Time 10 minutes
Cook Time 15 minutes
Total Time 25 minutes
Servings 8 slices
Calories 250
This flavorful garlic bread is perfect as a side for pasta or any Italian meal, offering a crispy crust and aromatic herb-infused butter.

Ingredients

Bread

  • 1 large French or Italian bread
  • 1 stick butter (softened)
  • 4 cloves garlic (minced)
  • 2 tablespoons fresh parsley (chopped)
  • 2 tablespoons fresh basil (chopped)
  • 2 tablespoons olive oil
  • 1 teaspoon salt
  • 1 teaspoon black pepper
  • ½ cup Parmesan cheese (grated)

Instructions 

  • Preheat oven to 375°F (190°C).
  • Mix softened butter, minced garlic, chopped herbs, olive oil, salt, and pepper.
  • Slice the bread and spread the garlic herb butter evenly over each slice.
  • Sprinkle grated Parmesan cheese on top.
  • Bake for 15 minutes until golden and crispy.

Notes

For extra flavor, add a pinch of red pepper flakes or more herbs.
Calories: 250kcal
Cost: $12
Course: Side Dish
Cuisine: Italian
Keyword: bread, garlic, herbs

Welcome, fellow culinary explorers! Today, I’m thrilled to take you on a delightful adventure into the world of chocolate chip cookies—the iconic treat that bridges cultures and generations. In this comprehensive guide, we’ll delve into the secrets of creating the **best chocolate chip cookies** you’ll ever bake. With every bite, you’ll taste the warmth of home and the joy of sharing delicious moments with loved ones. So, roll up your sleeves, grab your apron, and let’s embark on this journey through sweetness together!

Why You’ll Love This Recipe

This recipe is not just about cookies; it’s about crafting memories. Here are five compelling reasons why you’ll adore these chocolate chip cookies:

  • Perfect Texture: Experience the delightful contrast of crispy edges and a soft, chewy center that keeps you coming back for more.
  • Rich Flavor: Each cookie is loaded with semi-sweet chocolate chips, creating a decadent chocolate experience that’s simply irresistible.
  • Easy to Follow: With straightforward instructions, this recipe is perfect for bakers of all skill levels—whether you’re a novice or a seasoned pro.
  • Make Ahead: The dough can be chilled or frozen, allowing you to bake fresh cookies whenever the craving strikes.
  • Customizable: From nuts to different types of chocolate, this recipe provides a solid base that you can personalize to your heart’s content.

Ingredients You’ll Need

Before we dive into the baking process, let’s gather our ingredients. Here’s everything you need to whip up these delightful cookies:

  • 1 cup (2 sticks) unsalted butter, softened—feel free to substitute with margarine for a dairy-free option.
  • ¾ cup granulated sugar—you can use coconut sugar for a healthier alternative.
  • ¾ cup packed light brown sugar—this adds moisture and depth of flavor.
  • 2 large eggs—for a vegan version, replace with flax eggs.
  • 1 tablespoon pure vanilla extract—use almond extract for a unique twist.
  • 2 ¼ cups all-purpose flour—you can opt for gluten-free flour if needed.
  • 1 teaspoon baking soda—this helps the cookies rise.
  • ½ teaspoon salt—to balance the sweetness.
  • 2 cups semi-sweet chocolate chips—mix in dark chocolate or white chocolate for a fun variation.

How to Make the Best Chocolate Chip Cookies

Let’s get baking! Follow these simple steps to create your delicious cookies:

Step 1: Cream the Butter and Sugars

In a large bowl (or the bowl of a stand mixer), cream together the softened butter, granulated sugar, and light brown sugar until the mixture is light and fluffy—this usually takes about 2-3 minutes.

Step 2: Add Eggs and Vanilla

Beat in the eggs one at a time, mixing well after each addition. Stir in the pure vanilla extract for that wonderful aroma!

Step 3: Combine Dry Ingredients

In a separate medium bowl, whisk together the all-purpose flour, baking soda, and salt. This ensures even distribution of the leavening agent.

Step 4: Mix Wet and Dry Ingredients

Gradually add the dry ingredients to the wet ingredients, mixing on low speed until just combined. Avoid overmixing to keep the cookies tender.

Step 5: Fold in Chocolate Chips

Gently fold in the semi-sweet chocolate chips using a spatula or wooden spoon, ensuring even distribution throughout the dough.

Step 6: Chill the Dough

Cover the bowl with plastic wrap and refrigerate the dough for at least 30 minutes, or up to 24 hours. Chilling the dough enhances the flavor and texture.

Step 7: Preheat Oven and Prepare Baking Sheets

Preheat your oven to 375°F (190°C). Line two large baking sheets with parchment paper to prevent sticking.

Step 8: Scoop and Bake

Scoop rounded tablespoons of the chilled dough onto the prepared baking sheets, placing them about 2 inches apart. Bake for 10-12 minutes, or until the edges are golden.

Step 9: Cool and Enjoy

Let the cookies cool on the baking sheets for a few minutes before transferring them to a wire rack to cool completely. Enjoy the aroma wafting through your kitchen!

Pro Tips for Perfect Cookies

Want to elevate your cookie game even further? Here are some expert tips to ensure your cookies come out perfectly every time:

  • Use Room Temperature Ingredients: Allow your butter and eggs to come to room temperature for better mixing and texture.
  • Don’t Skip the Chill: Chilling the dough is crucial for preventing spreading and enhancing flavor.
  • Monitor Baking Time: For softer cookies, remove them from the oven when they appear slightly underbaked—this ensures they remain chewy.
  • Experiment with Chocolate: Try using a mix of milk, dark, and white chocolate chips for a delightful chocolate medley.
  • Watch Your Oven Temperature: Always preheat your oven to ensure even baking; an oven thermometer can help maintain accuracy.
  • Use Parchment Paper: This prevents cookies from sticking and promotes even browning.
  • Allow for Cooling Time: Let your cookies rest for a few minutes on the tray before transferring them to a cooling rack.
  • Customize Add-Ins: Consider adding nuts, dried fruit, or even spices like cinnamon for unique flavors.

Common Mistakes and Troubleshooting

Even the best bakers face challenges! Here are some common pitfalls and how to avoid them:

  • Cookies Spread Too Much: Ensure your dough is properly chilled and check your oven temperature.
  • Too Dry or Crumbly: This can happen if you’ve added too much flour; measure accurately using the spoon-and-level method.
  • Not Enough Chocolate Flavor: Don’t skimp on the chocolate chips—adding extra can enhance the overall flavor.
  • Burnt Bottoms: Check your oven rack position; cookies should be baked in the center of the oven.

Variations on the Classic

Feeling adventurous? Here are some delightful variations to try:

  • Nutty Delight: Add 1 cup of chopped walnuts or pecans for a crunchy texture.
  • Double Chocolate: Replace ½ cup of flour with cocoa powder for rich, chocolatey cookies.
  • Oatmeal Chocolate Chip: Mix in 1 cup of rolled oats for a chewy twist.
  • Stuffed Cookies: Place a chocolate square or caramel in the center of each cookie for a gooey surprise.

Storage and Make-Ahead Instructions

Want to enjoy these cookies later? Here’s how to store and prepare them in advance:

  • Room Temperature: Store baked cookies in an airtight container at room temperature for up to one week.
  • Freezing Baked Cookies: Freeze cookies in a single layer on a baking sheet, then transfer to a zip-top bag for up to three months.
  • Freezing Cookie Dough: Roll dough into balls, freeze until solid, then store in a zip-top bag. Bake straight from the freezer, adding an extra minute to the baking time.

FAQs about Chocolate Chip Cookies

Got questions? Here are some common queries about chocolate chip cookies:

  • Can I use brown sugar only?: Yes, using all brown sugar will make the cookies chewier.
  • What if I don’t have baking soda?: You can substitute baking powder at a ratio of 1:3, but the cookies may be less chewy.
  • How do I know when they’re done baking?: Look for golden edges and a slightly soft center; they’ll continue to cook on the baking sheet.
  • Can I add other flavors?: Absolutely! Try almond extract or a touch of espresso powder for a unique flavor profile.
  • How do I make them gluten-free?: Substitute all-purpose flour with a gluten-free blend designed for baking.
  • What’s the best way to reheat cookies?: Microwave for a few seconds or pop them in a warm oven for a minute to revive their freshness.
  • Can I make them vegan?: Yes, substitute butter with coconut oil and eggs with flax eggs.
  • How long should I chill the dough?: At least 30 minutes, but you can chill it up to 24 hours for enhanced flavor.

Nutrition Tips and Dietary Adaptations

For those looking to make healthier choices, here are some tips to adapt the recipe:

  • Lower Sugar: Reduce the sugar content by up to 25% without sacrificing flavor.
  • Healthy Fats: Substitute half of the butter with unsweetened applesauce for a lower-fat version.
  • Add Fiber: Incorporate whole wheat flour for added fiber and nutrition.
  • Nut Butters: Use nut butters to replace some butter for healthier fats and added flavor.

Equipment Recommendations

To make your baking experience seamless, here are some essential tools:

  • Stand Mixer: For effortless mixing and creaming of ingredients.
  • Silicone Baking Mat: A reusable alternative to parchment paper that prevents sticking.
  • Cookie Scoop: For uniform cookie sizes and even baking.
  • Offset Spatula: Perfect for transferring cookies from the baking sheet to the cooling rack.

Serving Suggestions

These cookies are delightful on their own, but here are some creative serving suggestions:

  • With Ice Cream: Create a delicious cookie sandwich by adding your favorite ice cream between two cookies.
  • With Coffee or Milk: Pair these cookies with a comforting cup of coffee or a glass of cold milk for the ultimate treat.
  • As Gifts: Package them in a beautiful box or jar, perfect for sharing with friends and loved ones.

As we wrap up this cookie journey, I hope you’re inspired to create these chocolate chip cookies that not only satisfy your sweet tooth but also evoke cherished memories and connections. Remember, cooking is an adventure, and every dish tells a story. So, gather your ingredients, share your creations, and bring a little sweetness into the world. Happy baking!

The Best Chocolate Chip Cookies You ll Ever Bake

Prep Time 15 minutes
Cook Time 12 minutes
Total Time 27 minutes
Servings 24 cookies
Calories 150
Enjoy these classic, chewy chocolate chip cookies with a perfect balance of sweetness and gooey chocolate.

Ingredients

Dough

  • 1 cup unsalted butter, softened
  • ¾ cup granulated sugar
  • ¾ cup packed light brown sugar
  • 2 large eggs
  • 1 tablespoon pure vanilla extract
  • 2 ¼ cups all-purpose flour
  • 1 teaspoon baking soda
  • ½ teaspoon salt
  • 2 cups semi-sweet chocolate chips

Instructions 

  • Cream together softened butter, granulated sugar, and light brown sugar until light and fluffy, about 2-3 minutes.
  • Beat in eggs one at a time, then stir in vanilla extract.
  • Whisk together flour, baking soda, and salt in a separate bowl.
  • Gradually add dry ingredients to wet, mixing on low until just combined, then fold in chocolate chips.
  • Chill dough for at least 30 minutes, preheat oven to 375°F (190°C), line baking sheets with parchment.
  • Scoop dough onto sheets, bake for 10-12 minutes, then cool on wire racks.

Notes

For softer cookies, slightly underbake and let sit on the baking sheet for a few minutes before transferring.
Calories: 150kcal
Cost: $10
Course: Dessert
Cuisine: American
Keyword: chocolate, cookies

Uncover the Delight of Chocolate Chip Oat Muffins

Welcome to a world where flavors dance and stories unfold with every bite. Today, we embark on an adventure to create Chocolate Chip Oat Muffins, a delightful fusion of hearty oats and rich chocolate chips. This recipe not only satisfies your sweet tooth but also brings an element of comfort and nostalgia, making it perfect for breakfast, a snack, or an indulgent dessert. Join me as we explore the intricacies of this recipe, designed to elevate your baking game and bring joy to your kitchen.

Why You’ll Love This Recipe

These Chocolate Chip Oat Muffins are not just another baked good; they are a journey of flavor and texture. Here are five reasons to get excited about this recipe:

  • Nutritious Ingredients: Packed with old-fashioned rolled oats, these muffins are a wholesome choice, offering fiber and essential nutrients.
  • Kid-Friendly: The delightful combination of chocolate and oats ensures that even the pickiest eaters will be clamoring for more.
  • Easy to Make: With simple steps and minimal equipment, you can whip these up in no time, perfect for busy mornings.
  • Customizable: This base recipe allows for endless variations—add fruits, nuts, or spices to make it your own!
  • Bakery-Style Texture: Achieve that coveted dome-like muffin top, making them look as good as they taste.

Ingredients You Need

To create these delectable muffins, gather the following ingredients:

  • 1 1/2 cups old-fashioned rolled oats
  • 1 1/2 cups milk (any type)
  • 2 cups all-purpose flour (or whole wheat flour; gluten-free if needed)
  • 1 1/2 teaspoons baking powder
  • 1 1/2 teaspoons baking soda
  • 3/4 teaspoon salt
  • 3/4 cup unsalted butter (melted and cooled; you can substitute coconut oil)
  • 3/4 cup packed brown sugar (or coconut sugar for a healthier option)
  • 3 large eggs (room temperature)
  • 1 1/2 teaspoons vanilla extract
  • 1 1/4 cups semi-sweet chocolate chips
  • Sanding sugar for topping (optional)

How to Make Chocolate Chip Oat Muffins

A detailed image of moist chocolate chip oat muffins, showcasing their texture and chocolate inclusions.

Follow these simple steps to create your muffins:

  1. Prepare the Muffin Tin: Line a muffin pan with paper liners and spray with nonstick spray.
  2. Soak the Oats: In a large bowl, combine the rolled oats and milk. Let them soak for 10-15 minutes until the oats absorb the liquid.
  3. Mix Dry Ingredients: In a separate bowl, whisk together the flour, baking powder, baking soda, and salt.
  4. Combine Wet Ingredients: In a third large bowl, whisk together the melted butter, brown sugar, eggs, and vanilla extract until well combined. Add the soaked oats to the wet ingredients and mix well.
  5. Mix the Batter: Gradually add the dry ingredients to the wet mixture, stirring until just combined. Be careful not to overmix. Gently fold in the chocolate chips.
  6. Rest the Batter: Let the batter rest for 15 minutes. During this time, preheat your oven to 425°F.
  7. Bake: Spoon the batter into the prepared muffin cups, filling each to the top. Bake in the preheated oven for 5 minutes, then turn the heat down to 350°F and continue baking for 13-15 minutes, or until a toothpick inserted into the center comes out clean.
  8. Cool: Allow the muffins to cool in the tin for 15 minutes, then transfer them to a wire rack to cool completely. Repeat with the second batch, turning the temperature back up to 425°F before baking again.

Pro Tips for Perfect Muffins

Enhance your muffin-making experience with these expert insights:

  • Use Room Temperature Ingredients: For the best mixing and baking results, ensure your eggs and milk are at room temperature.
  • Don’t Overmix: Mixing the batter too much can lead to dense muffins. Stir until just combined for a light texture.
  • Experiment with Add-ins: Try adding nuts, dried fruits, or spices like cinnamon for a unique twist.
  • Check Oven Temperature: Use an oven thermometer to ensure accurate baking temperatures for best results.
  • Cool Completely: Allow muffins to cool completely before storing to prevent sogginess.
  • Use a Cookie Scoop: This ensures even portioning and helps create uniform muffin sizes.
  • Store Properly: Keep muffins in an airtight container to maintain freshness.
  • Freeze for Later: These muffins freeze well. Wrap individually and store in a freezer bag for up to three months.

Common Mistakes and Troubleshooting

Even the best bakers make mistakes! Here’s how to avoid common pitfalls:

  • Dense Muffins: Caused by overmixing or using too much flour. Always measure flour accurately.
  • Uneven Baking: Ensure your oven is preheated and check for hot spots by rotating the muffin tin halfway through baking.
  • Sticking to the Pan: Use liners and nonstick spray to prevent sticking, or consider using a silicone muffin pan.
  • Too Sweet or Not Sweet Enough: Adjust sugar according to your taste; consider using less sugar or a sugar substitute if desired.

Delicious Variations

Feel free to get creative with these muffin variations:

  • Banana Chocolate Chip Muffins: Replace half the oats with mashed bananas for a fruity twist.
  • Peanut Butter Oat Muffins: Add 1/2 cup of creamy peanut butter to the wet ingredients for a nutty flavor.
  • Blueberry Oat Muffins: Swap chocolate chips for fresh or frozen blueberries for a refreshing change.
  • Spiced Pumpkin Muffins: Add 1/2 cup of pumpkin puree and a teaspoon of pumpkin spice for a seasonal treat.

Storage and Make-Ahead Instructions

To keep your muffins fresh and delicious:

  • Room Temperature: Store in an airtight container for up to 3 days.
  • Refrigerator: Extend freshness by storing in the fridge for up to a week.
  • Freezer: For longer storage, freeze muffins in a single layer, then transfer to a freezer bag. Thaw overnight in the fridge before enjoying.

Frequently Asked Questions

Here are some common questions about Chocolate Chip Oat Muffins:

  • Can I use quick oats instead of rolled oats? Yes, but the texture may be different. Rolled oats provide a nice chewiness.
  • Are these muffins healthy? They are healthier than traditional muffins due to the oats and lower sugar content.
  • Can I make these muffins vegan? Yes! Substitute the eggs with flax eggs and use plant-based milk and butter.
  • What can I substitute for brown sugar? Coconut sugar or maple syrup can be used as alternatives.
  • How do I know when the muffins are done? A toothpick inserted into the center should come out clean or with a few moist crumbs.
  • Can I add nuts to the recipe? Absolutely! Chopped walnuts or pecans would be a great addition.
  • How should I store leftover muffins? Keep them in an airtight container at room temperature for up to three days or refrigerate for longer freshness.
  • Can I use gluten-free flour? Yes, gluten-free all-purpose flour works great in this recipe.

Nutritional Tips and Dietary Adaptations

To enhance the nutritional profile or accommodate dietary preferences:

  • For Lower Sugar: Reduce the brown sugar by 1/4 cup or use a natural sweetener like stevia.
  • For Gluten-Free: Use certified gluten-free oats and flour to ensure safety for those with gluten sensitivities.
  • For Dairy-Free: Substitute the butter with coconut oil and use almond or oat milk.
  • For Added Fiber: Consider adding chia seeds or flaxseeds to the batter for extra nutrition.

Essential Equipment Recommendations

Here’s what you’ll need to get started:

  • Muffin Tin: A good quality nonstick or silicone muffin pan will yield the best results.
  • Mixing Bowls: Have a set of mixing bowls in different sizes to accommodate all ingredients.
  • Measuring Cups and Spoons: Accurate measurements are crucial for baking success.
  • Whisk and Spatula: Essential tools for mixing your ingredients smoothly.
  • Cooling Rack: Allows muffins to cool evenly after baking, ensuring a perfect texture.

Serving Suggestions

These muffins are versatile and can be enjoyed in various ways:

  • With Coffee or Tea: A perfect pairing for your morning beverage or afternoon snack.
  • With Fresh Fruit: Serve alongside fresh berries or banana slices for a balanced meal.
  • With a Spread: Top with a dollop of Greek yogurt or a smear of nut butter for added flavor and protein.

As we wrap up our adventure into the world of Chocolate Chip Oat Muffins, I hope you feel inspired to bake these delightful treats. Each muffin is a bite of joy, a connection to tradition, and a taste of exploration. Remember, cooking is not just about the food; it’s about the experiences we create and the stories we share. Happy baking!

Chocolate Chip Oat Muffins

Prep Time 15 minutes
Cook Time 20 minutes
Total Time 35 minutes
Servings 12 muffins
Calories 220
Delicious and wholesome muffins packed with oats and chocolate chips, perfect for a quick breakfast or snack.

Ingredients

Dry ingredients

  • 1.5 cups old-fashioned rolled oats
  • 1.5 cups milk (any type)
  • 2 cups all-purpose flour or whole wheat flour (gluten-free if needed)
  • 1.5 teaspoons baking powder
  • 1.5 teaspoons baking soda
  • 0.75 teaspoon salt
  • 0.75 cup unsalted butter (melted and cooled, or coconut oil)
  • 0.75 cup packed brown sugar or coconut sugar
  • 3 large eggs (room temperature)
  • 1.5 teaspoons vanilla extract
  • 0.25 cups semi-sweet chocolate chips

Topping

  • Sanding sugar (for topping)

Instructions 

  • Line a muffin pan with paper liners and spray with nonstick spray. Combine oats and milk; let soak 10-15 minutes. Whisk dry ingredients in a bowl. Whisk wet ingredients in another bowl, then add soaked oats. Mix dry into wet, fold in chocolate chips, and let rest 15 minutes. Preheat oven to 425°F. Spoon batter into muffin cups, bake 5 minutes at 425°F, then reduce to 350°F and bake 13-15 minutes until a toothpick comes out clean. Cool in pan 15 minutes, then transfer to wire rack.

Notes

For best results, do not overmix the batter and fold in chocolate chips gently.
Calories: 220kcal
Cost: $12
Course: Breakfast
Cuisine: American
Keyword: chocolate, Muffins, Oats