Author

Jack

Browsing

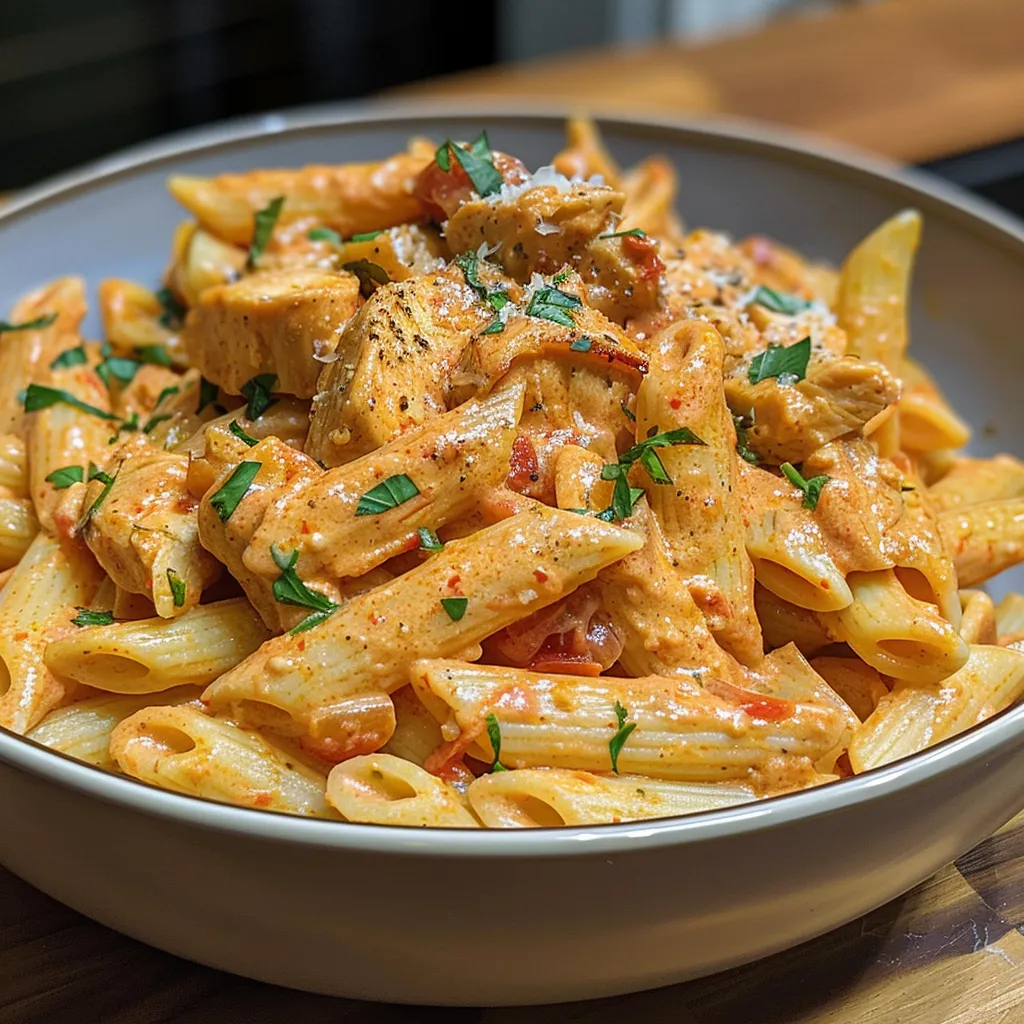
Embark on a Flavor Journey with Cajun Steak Alfredo

Welcome to a culinary adventure that combines the bold, zesty flavors of Louisiana with the creamy comfort of Italian cuisine. In this article, we’ll dive deep into the world of Cajun Steak Alfredo, a dish that promises to tantalize your taste buds and elevate your dinner experience. Whether you’re planning a romantic date night or just treating yourself to a delicious meal, this recipe is a perfect choice for every occasion. With rich, creamy sauce enveloping perfectly seared steak and pasta, you’ll find that every bite is a celebration of flavor and culture.

Why You’ll Love This Recipe

  • Flavor Explosion: The combination of Cajun seasoning and smoked paprika gives this dish a bold, smoky heat that is perfectly balanced by the creamy Alfredo sauce.
  • Restaurant-Quality at Home: You’ll be amazed at how simple it is to recreate this luxurious dish right in your own kitchen.
  • Customizable Spice Level: Adjust the heat to your liking—perfect for everyone from spice novices to heat enthusiasts!
  • Quick and Easy: With just a few simple steps, you can whip up a gourmet meal in under 30 minutes, making it great for busy weeknights.
  • Cultural Fusion: This dish is a beautiful blend of Cajun and Italian cuisines, showcasing the versatility of flavors and cooking techniques.

Ingredients Breakdown

Before we get cooking, let’s gather our ingredients. This is a crucial step to ensure you have everything on hand for the perfect Cajun Steak Alfredo.

  • 1 lb sirloin or ribeye steak: Choose the best cut you can find—it makes all the difference in flavor and tenderness.
  • 1 tbsp olive oil: For a perfect sear, this is essential.
  • 2 tsp Cajun seasoning: This will add that signature spice. Feel free to use store-bought or make your own blend!
  • Salt and pepper to taste: Essential for seasoning your steak and sauce.
  • 2 tbsp unsalted butter: This contributes to the richness of the Alfredo sauce.
  • 2 cloves garlic, minced: Fresh garlic adds a delightful aroma and flavor.
  • 1 ½ cups heavy cream: The base of our creamy sauce.
  • 1 cup grated Parmesan cheese: For that cheesy goodness that ties everything together.
  • 1 tsp Cajun seasoning or more for extra spice: Adjust based on your heat preference!
  • ½ tsp smoked paprika (optional): For an extra layer of flavor.
  • 12 oz fettuccine or penne pasta: Choose your favorite pasta shape to hold the sauce.
  • Chopped parsley for garnish: A fresh touch to brighten your dish.

Pro Tips for Perfect Cajun Steak Alfredo

Ready to take your dish to the next level? Here are some expert tips to ensure your Cajun Steak Alfredo is a hit!

  • Perfect Searing: Preheat your skillet before adding the steak—this ensures a nice crust forms while keeping the inside juicy.
  • Resting Time: Always let the steak rest for at least 5 minutes after cooking. This allows the juices to redistribute for a more flavorful bite.
  • Whisking Technique: When adding the cheese to the sauce, whisk vigorously to avoid lumps and achieve a smooth consistency.
  • Fresh Ingredients: Whenever possible, use fresh garlic and high-quality cheese for the best flavor.
  • Cooking Pasta: Save some pasta water before draining; it can help thin out the sauce if needed.
  • Serving Temperature: Serve immediately for the best experience—this dish is best enjoyed fresh!
  • Spice Balance: If you’re unsure of your spice preference, start with less Cajun seasoning and add more gradually.
  • Garnish Wisely: Fresh parsley not only adds color but also a hint of freshness that complements the rich flavors.

Common Mistakes and Troubleshooting

Even seasoned cooks can run into issues. Here’s how to avoid common pitfalls!

  • Overcooking the Steak: Use a meat thermometer to check doneness—medium-rare is about 130°F.
  • Too Thick Alfredo Sauce: If your sauce is too thick, gradually whisk in reserved pasta water to reach your desired consistency.
  • Clumpy Cheese Sauce: If cheese clumps form, turn down the heat and whisk vigorously to smooth it out.
  • Spicy Overload: If it gets too spicy, add a splash of cream to mellow the heat.

Delicious Variations to Try

Looking to mix things up? Here are some creative variations of Cajun Steak Alfredo that you can try!

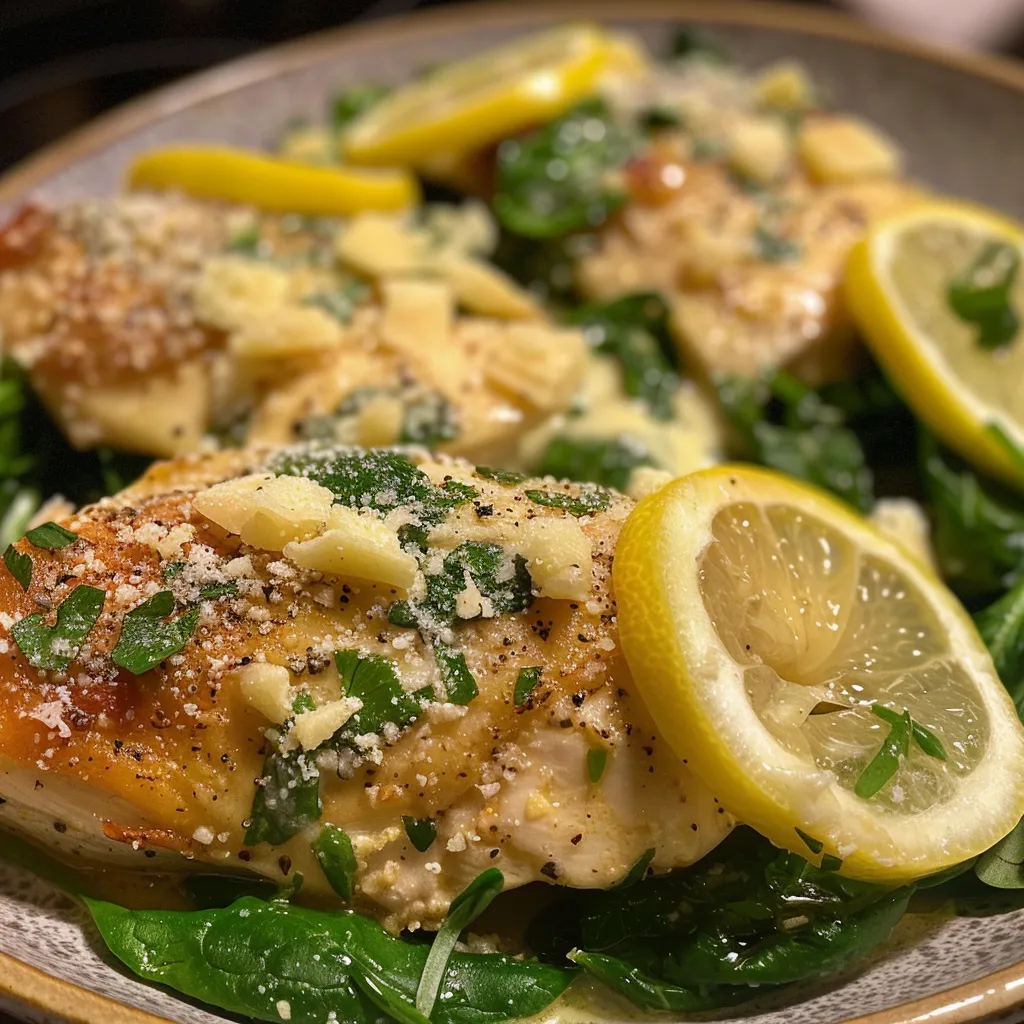
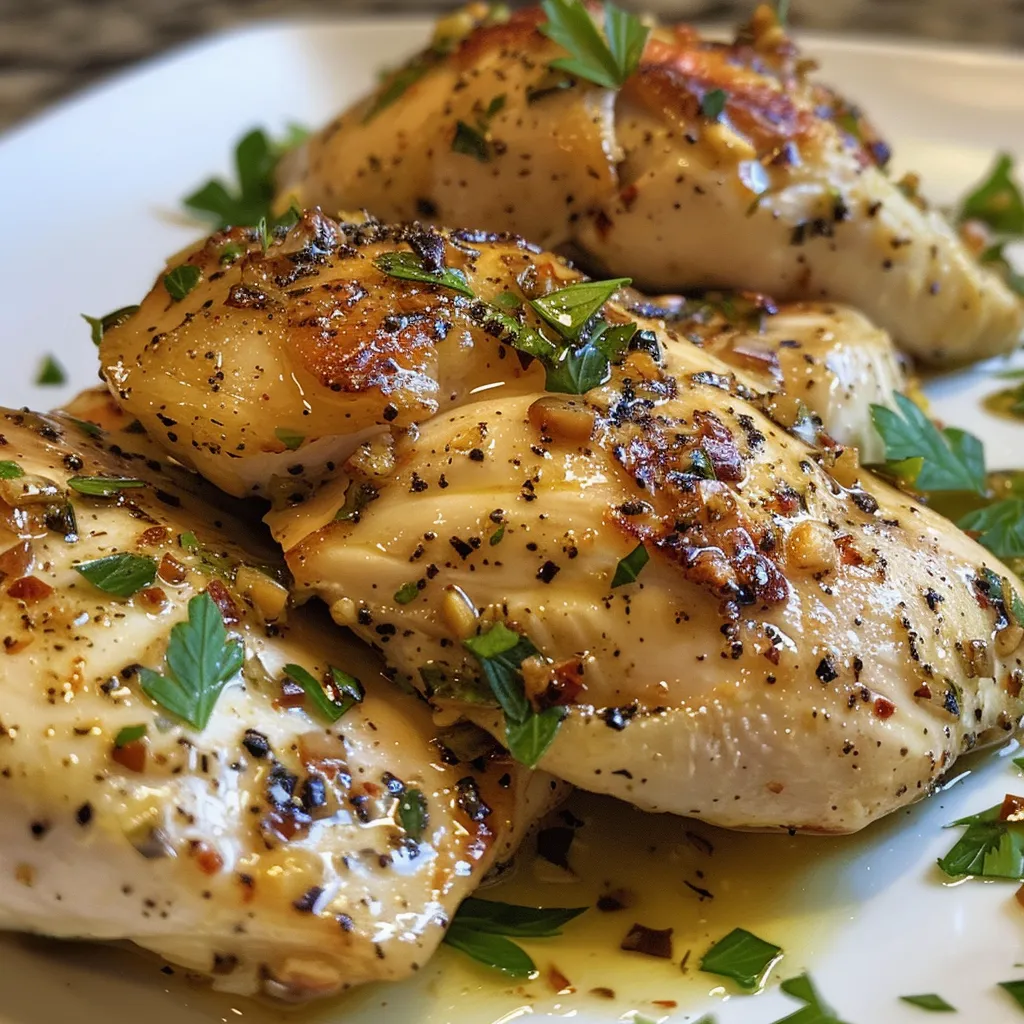
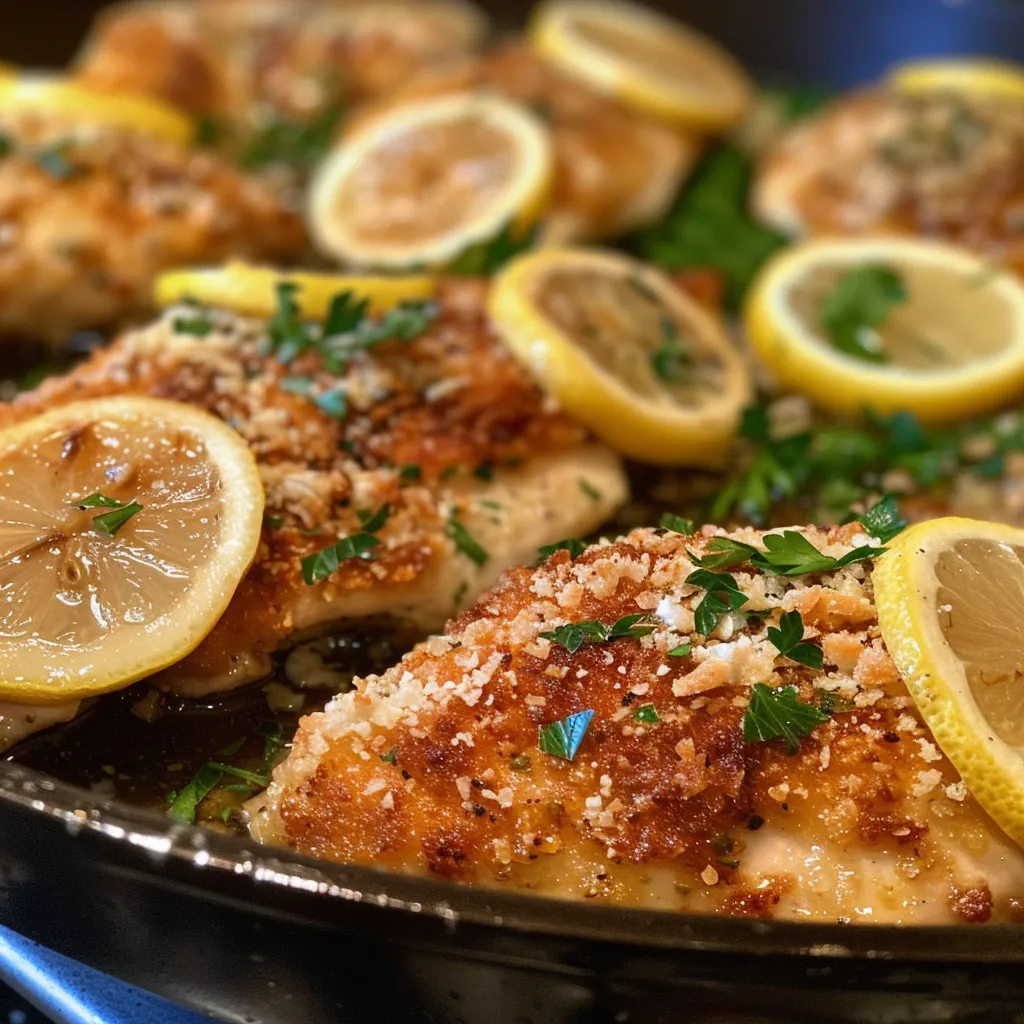
  • Chicken Cajun Alfredo: Swap out the steak for grilled chicken for a lighter option.
  • Shrimp Cajun Alfredo: Add sautéed shrimp for a seafood twist that pairs beautifully with the creamy sauce.
  • Vegetarian Option: Use sautéed mushrooms and zucchini instead of meat, making it a hearty vegetarian dish.
  • Spicy Sausage Alfredo: Incorporate andouille sausage for a smoky, spicy kick that embodies Cajun flavors.

Storage and Make-Ahead Instructions

Want to prepare this dish ahead of time? Here’s how to store it properly:

  • Refrigeration: Store leftovers in an airtight container in the fridge for up to 3 days.
  • Freezing: While not ideal for pasta, you can freeze the sauce separately for up to 2 months. Reheat gently on the stove.
  • Make-Ahead: Prepare the sauce and steak in advance, and just cook the pasta when you’re ready to serve.

Frequently Asked Questions

Got questions? Here are some common inquiries about Cajun Steak Alfredo!

  • Can I use a different type of steak? Absolutely! Ribeye, flank, or even filet mignon can work beautifully.
  • Is Cajun seasoning spicy? It can be! Adjust the amount to suit your taste.
  • What if I don’t have heavy cream? You can substitute half-and-half or whole milk, but the sauce will be less rich.
  • Can I make this dish gluten-free? Yes, just use gluten-free pasta and check your Cajun seasoning for gluten-containing ingredients.
  • How can I make it less rich? Consider using less cream or adding more vegetables to balance the richness.
  • What should I serve with Cajun Steak Alfredo? Garlic bread and a crisp salad are perfect accompaniments!
  • How do I know when the steak is done? Use a meat thermometer—medium-rare is ideal for this dish.
  • Can I add vegetables? Yes! Bell peppers and onions sautéed with the steak add great flavor and color.

Nutritional Tips and Dietary Adaptations

This dish can be adapted for various dietary needs:

  • Low-Carb Option: Substitute pasta with zucchini noodles or spaghetti squash.
  • Lower-Calorie Version: Use less cream and more vegetables to cut calories.
  • Dairy-Free Alternative: Try coconut cream and nutritional yeast for a dairy-free version.

Equipment Recommendations

To make your cooking experience seamless, here are some essential tools you’ll need:

  • Non-Stick Skillet: Ideal for searing steak and making the sauce without sticking.
  • Meat Thermometer: Perfect for ensuring your steak is cooked to your liking.
  • Whisk: Essential for mixing the Alfredo sauce smoothly.
  • Pasta Pot: A large pot for boiling your pasta to perfection.

Serving Suggestions

Now that your Cajun Steak Alfredo is ready, here’s how to serve it:

  • Presentation: Plate the creamy pasta and top with sliced steak, garnishing with chopped parsley for color.
  • Accompaniments: Serve alongside garlic bread and a fresh green salad for a balanced meal.
  • Wine Pairing: A medium-bodied red wine like Merlot complements the rich flavors of the dish beautifully.

In conclusion, this Cajun Steak Alfredo recipe is not just a meal; it’s a flavorful journey that will delight your senses and bring people together. So, gather your ingredients, unleash your inner chef, and savor every bite of this creamy, spicy delight. Happy cooking!

Creamy Cajun Steak Alfredo

Prep Time 10 minutes
Cook Time 15 minutes
Total Time 25 minutes
Servings 4 servings
Calories 850
A rich and flavorful pasta dish featuring tender steak in a creamy Cajun Alfredo sauce, perfect for a satisfying dinner.

Ingredients

Meat

  • 1 lb sirloin or ribeye steak
  • 1 tbsp olive oil
  • 2 tsp Cajun seasoning
  • to taste Salt and pepper
  • 2 tbsp unsalted butter
  • 2 cloves garlic, minced
  • 1.5 cups heavy cream
  • 1 cup grated Parmesan cheese
  • 1 tsp Cajun seasoning or more for extra spice
  • ½ tsp smoked paprika (optional)
  • 12 oz fettuccine or penne pasta, cooked and drained

Garnish

  • as needed Chopped parsley for garnish

Instructions 

  • Rub the steak with olive oil, Cajun seasoning, salt, and pepper. Sear in a skillet over medium-high heat for 3-4 minutes per side, then rest and slice thinly.
  • Melt butter in the same skillet, sauté garlic until fragrant, then add heavy cream and simmer. Whisk in Parmesan, Cajun seasoning, smoked paprika, salt, and pepper until smooth.
  • Toss cooked pasta in the sauce until coated. Top with sliced steak and garnish with chopped parsley.

Notes

For extra spice, add more Cajun seasoning or a dash of hot sauce.
Calories: 850kcal
Cost: $15
Course: Main Course
Cuisine: American
Keyword: creamy, Pasta, Steak

Embark on a Culinary Journey: The Allure of Classic Lemon Bars

Welcome to a delightful culinary adventure where we dive deep into the world of lemon bars! These zesty treats not only tantalize your taste buds but also evoke cherished memories of sun-filled days and laughter. In this article, we will explore the intricacies of crafting the perfect lemon bars, complete with a buttery shortbread crust and a luscious lemon filling. Get ready to unlock culinary secrets and master this classic dessert that connects cultures and creates joy!

Why You’ll Love This Recipe

  • Perfect balance of flavors: The combination of tart lemon and sweet sugar creates an irresistible balance that dances on your palate.
  • Versatile dessert: Lemon bars can be served at any occasion, from brunch gatherings to elegant dinner parties, making them a versatile favorite.
  • Simple ingredients: With just a handful of pantry staples, you can create a dessert that feels luxurious without breaking the bank.
  • Make-ahead convenience: These bars can be made in advance, allowing you to enjoy your time with guests without the last-minute rush.
  • Endless variations: Once you master the classic recipe, you can experiment with flavors, fillings, and crusts to create your unique twist!

Ingredient Breakdown: What You’ll Need

Let’s gather our ingredients for these delightful lemon bars! Each component plays a crucial role in achieving the perfect texture and flavor.

  • Sliced almonds (⅓ cup): Adds a nutty flavor and crunch to the crust. Substitute with pecans or walnuts for a different twist.
  • All-purpose flour (1 ¾ cups): The backbone of the crust. Whole wheat flour can be used for a healthier alternative.
  • Baking powder (¼ teaspoon): Helps the crust rise slightly for that perfect texture.
  • Unsalted butter (¾ cup): Use butter softened to 65-67ºF (18-19ºC) for the best consistency. Margarine can be a substitute if needed.
  • Granulated sugar (½ cup + 3 cups): Sweetens both the crust and the filling. For a lower-calorie option, consider using coconut sugar.
  • Kosher salt (¼ teaspoon): Balances the sweetness and enhances the flavors.
  • Eggs (7 large, room temperature): Essential for the filling, providing structure and richness.
  • Lemon zest (1 tablespoon): Infuses the filling with bright citrus flavor. Use organic lemons for the best zest.
  • Lemon juice (1 cup): Freshly squeezed juice is a must for that vibrant taste. About 4-5 lemons should suffice.
  • Vanilla extract (2 teaspoons): Adds depth to the flavors.
  • Powdered sugar: For dusting, adding a touch of elegance!

Mastering the Lemon Bar Recipe

Side view of freshly baked lemon bars, showcasing their creamy lemon filling and almond crust.

Now that we’re equipped with our ingredients, let’s navigate through the steps to create these heavenly lemon bars.

Step 1: Prepare the Crust

Start by preheating your oven to 350°F (175°C). In a mixing bowl, combine the sliced almonds, flour, baking powder, sugar, and salt. Add the softened butter and mix until the mixture resembles coarse crumbs. Press this mixture firmly into the bottom of a greased 9×13 inch baking dish.

Step 2: Par-Bake the Crust

Bake the crust for about 15-20 minutes, until it’s lightly golden. This crucial step ensures a sturdy base that won’t get soggy from the lemon filling.

Step 3: Make the Lemon Filling

While the crust bakes, whisk together the eggs, granulated sugar, lemon zest, lemon juice, and vanilla extract in a separate bowl. Make sure to mix until well combined and smooth.

Step 4: Combine and Bake

Once the crust is ready, pour the lemon filling over the hot crust and return it to the oven. Bake for an additional 20-25 minutes, or until the filling is set but still slightly jiggly in the center.

Step 5: Cool and Serve

Allow the lemon bars to cool completely in the pan before cutting them into squares. Dust with powdered sugar before serving for that picture-perfect finish!

Pro Tips for the Perfect Lemon Bars

  • Room temperature ingredients: Ensure your eggs and butter are at room temperature for better mixing and texture.
  • Fresh lemons: Always opt for fresh lemons for zest and juice; bottled juice lacks the bright flavor of fresh.
  • Cooling time: Let the bars cool completely before cutting to prevent the filling from breaking.
  • Use a sharp knife: Clean cuts are essential for beautiful presentation; dip the knife in warm water and wipe it clean between cuts.
  • Experiment with flavors: Add herbs like thyme or basil for an aromatic twist to your filling.
  • Store properly: Keep lemon bars in an airtight container in the fridge for up to a week.
  • Freezing option: Freeze cut bars layered with parchment paper for up to three months.
  • Presentation matters: Serve with fresh berries or a dollop of whipped cream for an eye-catching dessert.

Common Mistakes and Troubleshooting

Even the best chefs can encounter hiccups in the kitchen. Here are some common mistakes to watch out for:

  • Overbaking: If the filling is cooked too long, it can become dry. Aim for a slight jiggle in the center.
  • Underbaking the crust: A soggy crust is the result of not pre-baking long enough. Ensure it’s golden for a sturdy base.
  • Using cold ingredients: Cold eggs or butter can lead to uneven mixing and texture. Always use room temperature ingredients.
  • Too much lemon juice: While we love tartness, too much lemon juice can overpower the balance of flavors. Stick to the recommended amount!

Delicious Variations to Try

Once you’ve mastered the classic lemon bars, here are some exciting variations to explore:

  • Berry Lemon Bars: Add fresh raspberries or blueberries to the filling for a fruity twist.
  • Matcha Lemon Bars: Mix in matcha powder to the filling for a vibrant green color and unique flavor.
  • Coconut Lemon Bars: Incorporate shredded coconut into the crust for a tropical flair.
  • Chocolate Lemon Bars: Drizzle melted chocolate on top for a decadent touch!

Storage and Make-Ahead Instructions

These lemon bars are perfect for make-ahead treats! Here’s how to store and prepare them in advance:

  • Refrigeration: Store cooled lemon bars in an airtight container in the fridge for up to one week.
  • Freezing: Freeze bars individually wrapped in plastic wrap for up to three months. Thaw in the fridge before serving.
  • Make-ahead filling: You can prepare the lemon filling a day in advance and store it in the fridge until ready to bake.

Frequently Asked Questions

  • Can I use bottled lemon juice? It’s best to use fresh lemon juice for optimal flavor, but bottled can work in a pinch.
  • What’s the best way to cut lemon bars? Use a sharp knife and clean it between cuts for neat pieces.
  • Can I reduce the sugar? You can adjust the sugar, but it may affect the texture of the filling.
  • How do I know when they’re done? The filling should be set with a slight jiggle in the center when done.
  • What if my bars are too tart? This can happen if too much lemon juice is used. Balance with a little extra sugar next time.
  • Can I add other flavors? Yes! Feel free to experiment with herbs or spices to create your unique version.
  • How long do they keep? Properly stored, they’ll last up to a week in the fridge.
  • Can I make them gluten-free? Absolutely! Substitute with a gluten-free flour blend for the crust.

Nutritional Tips and Dietary Adaptations

For those mindful of their diet, here are some tips to adapt this recipe:

  • Lower sugar: Substitute sugar with a natural sweetener like agave or stevia for a healthier option.
  • Gluten-free option: Use almond flour or a gluten-free flour blend to cater to gluten sensitivities.
  • Dairy-free alternative: Replace butter with coconut oil or a dairy-free spread for a vegan version.

Equipment Recommendations

To achieve the best results, here are some essential kitchen tools you’ll need:

  • 9×13 inch baking pan: Ideal size for baking and cutting the bars.
  • Mixing bowls: Having various sizes helps with different steps of the recipe.
  • Whisk: Essential for combining your filling ingredients effectively.
  • Sharp knife: For cleanly cutting the bars into perfect squares.

Serving Suggestions

When it comes to serving your lemon bars, presentation is key! Here are some delightful ideas:

  • Fresh berries: Serve alongside a mix of strawberries, blueberries, or raspberries for a pop of color.
  • Whipped cream: A dollop of freshly whipped cream makes for an elegant touch.
  • Mint leaves: Garnish with fresh mint for a refreshing contrast and beautiful presentation.
  • Tea pairing: These lemon bars pair wonderfully with herbal teas or a refreshing iced tea.

Conclusion

As we wrap up this flavorful journey, I hope you’re inspired to bake your own batch of lemon bars, sharing them with loved ones while creating joyful memories. Remember, cooking is not just about the finished dish; it’s about the stories and experiences we gather along the way. So, grab your apron, embrace your inner chef, and let the zesty sunshine of lemon bars brighten your culinary adventures!

Classic Lemon Bars

Prep Time 20 minutes
Cook Time 30 minutes
Total Time 50 minutes
Servings 12 pieces
Calories 250
Delight in these tangy and sweet lemon bars with a buttery crust and zesty lemon filling, perfect for any occasion.

Ingredients

Crust and topping

  • 0.33 cup sliced almonds
  • 1.75 cups all-purpose flour
  • 0.25 teaspoon baking powder
  • 0.75 cup unsalted butter softened to 65 to 67ºF 18 to 19ºC
  • 0.5 cup granulated sugar
  • 0.25 teaspoon kosher salt
  • 1 large egg room temperature
  • 1 teaspoon vanilla extract
  • 6 large eggs room temperature
  • 1 tablespoon lemon zest
  • 1 cup lemon juice about 4 to 5 lemons
  • 3 cups granulated sugar
  • 1 cup all-purpose flour

For dusting

  • as needed powdered sugar (for dusting)

Instructions 

  • Preheat oven to 350°F (175°C). Prepare crust by mixing flour, almonds, baking powder, sugar, salt, and butter; press into pan.
  • Bake crust for 15 minutes. Meanwhile, whisk eggs, sugar, lemon zest, lemon juice, and vanilla until smooth.
  • Pour lemon filling over baked crust and bake for an additional 15 minutes.
  • Allow to cool, then dust with powdered sugar before serving.

Notes

Chill the bars before serving for best texture.
Calories: 250kcal
Cost: $15
Course: Dessert
Cuisine: American
Keyword: lemon

Welcome to the delightful world of Chocolate Oatmeal! This comforting dish combines rich cocoa and warm spices, making it the perfect breakfast or a sweet treat to kickstart your day. With its creamy texture and chocolatey goodness, each spoonful is an invitation to savor the stories behind every ingredient. Are you ready to embark on this culinary adventure? Let’s dive in!

Why You’ll Love This Recipe

This chocolate oatmeal isn’t just a meal; it’s a cozy experience. Here are five reasons why you’ll fall in love with it:

  • Comfort in a bowl: Creamy and rich, this oatmeal feels like a warm hug on a chilly morning.
  • Quick and easy: Ready in just 10 minutes, it’s perfect for those busy mornings when you need something delicious fast.
  • Customizable flavors: Add your favorite toppings—from fruits to nuts—to make it uniquely yours.
  • Healthy indulgence: Packed with nutrients from oats and cocoa, it’s a guilt-free way to satisfy your chocolate cravings.
  • Vegan-friendly: This recipe can easily be adapted for plant-based diets, making it accessible for everyone!

Ingredients That Bring This Chocolate Oatmeal to Life

Let’s gather our ingredients! Here’s what you’ll need:

  • 1 cup rolled oats: The base of our oatmeal, providing fiber and texture.
  • 1 cup plant-based milk: Almond, oat, or coconut milk works wonders for creaminess.
  • 1 cup water: This helps to cook the oats and achieve that perfect consistency.
  • 2 tablespoons unsweetened cocoa powder: For rich chocolate flavor without added sugars.
  • 1 to 2 tablespoons maple syrup: Sweeten to your liking—nature’s perfect sweetener!
  • 1/2 teaspoon vanilla extract: Adds depth of flavor.
  • 1/2 teaspoon ground cinnamon: A warm spice to enhance the chocolate.
  • 1/8 teaspoon salt: Balances the sweetness and enhances flavors.

Make It Your Own: Ingredient Substitutions

What if you don’t have all the ingredients? No problem! Here are some easy substitutions:

  • Oats: Use quick oats or steel-cut oats (adjust cooking time accordingly).
  • Milk: Any dairy or non-dairy milk will work—experiment with flavors like coconut or soy.
  • Cocoa powder: Substitute with melted chocolate for a richer taste.
  • Sweeteners: Try honey, agave syrup, or even mashed bananas for a different twist.
  • Spices: Add nutmeg or ginger for a unique flavor profile.

Let’s Make This Chocolatey Goodness: Step-by-Step Instructions

Ready to cook? Follow these simple steps to create your delicious chocolate oatmeal:

  1. Place rolled oats, cocoa powder, maple syrup, vanilla extract, ground cinnamon, salt, plant-based milk, and water into a small saucepan.
  2. Set the pot over medium heat and stir to combine the ingredients.
  3. Cook, stirring often, for about 6 to 8 minutes, until the oats have softened and the mixture thickens to a creamy consistency.
  4. Remove from heat and spoon into bowls.
  5. Add your favorite toppings and serve warm. Enjoy!

Pro Tips for Perfect Chocolate Oatmeal

Want to elevate your oatmeal game? Here are some expert tips:

  • Stir regularly: This prevents the oats from sticking to the bottom of the pot and ensures even cooking.
  • Add a splash of vanilla: A little extra vanilla can enhance the flavors beautifully.
  • Experiment with toppings: Try adding fresh berries, sliced bananas, or a dollop of nut butter for added nutrition and flavor.
  • Make it creamy: If you prefer a richer texture, add a little more plant-based milk while cooking.
  • Chill leftovers: If you have any, store it in the fridge for a quick breakfast the next day!
  • Try different sweeteners: Maple syrup is great, but consider brown sugar, agave, or even stevia for a sugar-free option.
  • Incorporate superfoods: Mix in chia seeds or flaxseeds for added omega-3 fatty acids.
  • Mind the heat: Keep an eye on the heat to avoid boiling over; medium is usually perfect.

Common Mistakes and Troubleshooting

Here are some common pitfalls to avoid when making chocolate oatmeal:

  • Using instant oats: They may turn mushy and lose that hearty texture.
  • Overcooking: If you cook for too long, the oats can become overly thick; keep stirring and taste test!
  • Not adjusting sweetness: Remember, you can always add more sweetener, but you can’t take it out once it’s in!
  • Skipping toppings: Don’t miss out on the fun of customizing your bowl—toppings can elevate the dish significantly!

Delicious Variations to Try

Feeling adventurous? Here are some creative twists on the classic chocolate oatmeal:

  • Peanut Butter Chocolate Oatmeal: Stir in a tablespoon of peanut butter while cooking for a nutty flavor.
  • Mocha Oatmeal: Add a shot of espresso or instant coffee for a caffeinated kick.
  • Berry Chocolate Oatmeal: Top with fresh or frozen berries for a fruity contrast.
  • Spicy Chocolate Oatmeal: Add a pinch of cayenne pepper or chili powder for a surprising kick!

Storage and Make-Ahead Instructions

Want to prepare ahead of time? Here’s how to store your chocolate oatmeal:

  • Refrigeration: Store any leftovers in an airtight container in the fridge for up to 3 days.
  • Reheating: Warm in the microwave or on the stovetop, adding a little extra milk to restore creaminess.
  • Make-ahead option: Prepare a batch of chocolate oatmeal at the beginning of the week for quick breakfasts!

FAQ About Chocolate Oatmeal

Here are answers to some frequently asked questions:

  • What type of oats are best for chocolate oatmeal? Rolled oats provide the best texture and creaminess.
  • Can I make chocolate oatmeal ahead of time? Yes! Make it in advance and store it in the fridge.
  • Is it possible to freeze chocolate oatmeal? Absolutely! Freeze in individual portions for quick meals later.
  • Can I use water instead of milk? Yes, but the texture will be less creamy.
  • How do I make chocolate oatmeal gluten-free? Use certified gluten-free oats to ensure safety.
  • Can I add protein powder to my chocolate oatmeal? Yes, just mix it in when cooking for an extra protein boost.
  • What are some topping ideas? Fresh fruits, nuts, seeds, and nut butters work wonderfully!
  • How do I make it less sweet? Reduce the amount of maple syrup or omit it entirely and use mashed bananas instead.

Nutritional Tips and Dietary Adaptations

This chocolate oatmeal is not just tasty; it can be quite nutritious! Here are some adaptations:

  • High in fiber: Oats are a great source of dietary fiber, which is good for digestion.
  • Low in sugar: Control sweetness by adjusting the amount of maple syrup used.
  • Plant-based protein: Add nuts or seeds for an extra protein boost.
  • Rich in antioxidants: Cocoa powder contains antioxidants, making your breakfast both delicious and healthy!

Essential Equipment Recommendations

Here’s what you’ll need to get started:

  • Medium saucepan: A must for cooking oatmeal evenly.
  • Wooden or silicone spoon: Great for stirring without scratching your cookware.
  • Measuring cups and spoons: Accurate measurements ensure the best results.

Serving Suggestions

Now that your chocolate oatmeal is ready, here are some delightful serving ideas:

  • Garnish with fresh fruits: Berries or banana slices add a burst of freshness.
  • Drizzle with nut butter: A swirl of almond or peanut butter enhances flavor and adds healthy fats.
  • Top with shredded coconut: Adds a tropical touch and extra texture.
  • Sprinkle with nuts or seeds: Add crunch and nutrition to your bowl.

As you embark on this delicious journey with chocolate oatmeal, remember that each ingredient has a story and a purpose. Enjoy the process of making it, and don’t hesitate to make it your own. Happy cooking!

Chocolate Oatmeal

Prep Time 2 minutes
Cook Time 8 minutes
Total Time 10 minutes
Servings 2 bowls
Calories 250
A warm, comforting bowl of chocolate oatmeal perfect for a quick breakfast or snack, made with wholesome ingredients and a touch of sweetness.

Ingredients

Dry ingredients

  • 1 cup rolled oats
  • 2 tablespoons unsweetened cocoa powder
  • 1 to 2 tablespoons maple syrup (to taste)
  • 1/2 teaspoon vanilla extract
  • 1/2 teaspoon ground cinnamon
  • 1/8 teaspoon salt

Liquid ingredients

  • 1 cup plant-based milk
  • 1 cup water

Instructions 

  • Combine oats, cocoa powder, maple syrup, vanilla, cinnamon, salt, plant-based milk, and water in a saucepan.
  • Set over medium heat and stir to combine.
  • Cook for 6-8 minutes, stirring often until thick and creamy.
  • Remove from heat and spoon into bowls.
  • Add toppings and serve warm.

Notes

You can customize toppings with fruits, nuts, or seeds for added flavor and nutrition.
Calories: 250kcal
Cost: $5
Course: Breakfast
Cuisine: American
Keyword: Oats

Embark on a Culinary Adventure with Chicken Pasta in Creamy Tomato Sauce

Welcome to a delightful culinary journey where your kitchen transforms into a world of rich flavors and comforting aromas! In this article, we’re diving into the exquisite recipe of Chicken Pasta in Creamy Tomato Sauce. This dish is not just a meal; it’s a passport to exploring the heart of Italian cuisine right from the comfort of your home. Let’s savor the magic of combining tender chicken with a luscious creamy tomato sauce that envelops every strand of pasta, making it perfect for family gatherings or cozy dinners.

Ready to experience the explosion of flavors? Let’s get started!

Why You’ll Love This Recipe

  • Quick and Easy: Ready in under 30 minutes, this creamy chicken pasta recipe is perfect for busy weeknights.
  • Rich and Flavorful: The combination of heavy cream and diced tomatoes creates a sauce that is both creamy and vibrant.
  • Customizable: This dish is versatile; you can easily add your favorite vegetables or swap the protein.
  • Hearty and Satisfying: With tender chicken and pasta, this meal is filling and comforting, perfect for any occasion.
  • Kid-Friendly: The creamy sauce is a hit with children, making it a great family meal.

Ingredients for Chicken Pasta in Creamy Tomato Sauce

Gathering the right ingredients is crucial for achieving the best flavor in this dish. Below is a detailed breakdown of what you’ll need:

  • 3-4 boneless, skinless chicken breasts: Choose organic or free-range for the best flavor and quality.
  • Pasta of your choice: Penne or fettuccine work wonderfully, but feel free to experiment with your favorite type.
  • 2 cloves fresh garlic: Fresh garlic adds a robust flavor; avoid pre-minced for the best results.
  • 1 can diced tomatoes (14.5 oz): Opt for fire-roasted for an added depth of flavor.
  • 1 cup heavy cream: This is what gives the sauce its creamy texture, but you can substitute with half-and-half for a lighter option.
  • 1 teaspoon Italian seasoning: A blend of herbs that complements the tomatoes and chicken beautifully.
  • Olive oil, salt, and pepper: Essential for cooking and seasoning.

How to Make Chicken Pasta in Creamy Tomato Sauce

Side view of a plated chicken pasta in creamy tomato sauce, garnished with parsley.

Let’s take a step-by-step look at how to create this delightful meal:

  1. Prepare ingredients: Start by chopping the chicken into bite-sized pieces and mincing the garlic. Cook the pasta according to package instructions until al dente.
  2. Cook chicken: In a skillet over medium heat, add olive oil and cook the chicken until golden brown, about 5-7 minutes.
  3. Add garlic and tomatoes: Sauté the minced garlic for a minute, then stir in the canned diced tomatoes along with their juices.
  4. Create sauce: Pour in the heavy cream and sprinkle in the Italian seasoning. Let it simmer for about 5 minutes until slightly thickened.
  5. Combine pasta and sauce: Add the cooked pasta to the skillet and toss gently to coat it in the creamy tomato sauce.
  6. Serve hot: Plate the dish and drizzle with extra sauce if desired.

Pro Tips for Perfecting Your Chicken Pasta

  • Don’t Overcook the Pasta: Aim for al dente—firm to the bite. This enhances the texture and prevents sogginess.
  • Season the Chicken: Before cooking, season the chicken with salt and pepper. This simple step elevates the overall flavor.
  • Use High-Quality Ingredients: Fresh ingredients lead to a more vibrant and flavorful dish.
  • Adjust the Creaminess: If you prefer a thicker sauce, let it simmer longer; for a lighter version, reduce the heavy cream.
  • Garnish for Aesthetic: A sprinkle of fresh basil or parsley on top adds color and freshness to the dish.
  • Experiment with Cheese: A sprinkle of Parmesan or mozzarella while serving can enhance the flavor profile.
  • Add Vegetables: Consider adding spinach, bell peppers, or mushrooms for more nutrients and flavor.
  • Marinate Chicken: For extra flavor, marinate the chicken in Italian dressing before cooking.

Common Mistakes and Troubleshooting

Even the best chefs can make mistakes! Here are common pitfalls and how to avoid them:

  • Overcooking the Chicken: This can lead to dry, tough chicken. Aim for a golden brown exterior and a juicy interior.
  • Sauce Too Thin: If your sauce is too runny, simmer it longer to thicken.
  • Not Enough Flavor: Always taste and adjust seasoning as needed. Salt and pepper can make a big difference!
  • Pasta Sticking Together: If your pasta clumps, toss it with a bit of olive oil after cooking.

Variations of Chicken Pasta in Creamy Tomato Sauce

Make this dish your own with these fun variations:

  • Vegetarian Option: Substitute chicken with chickpeas or tofu for a plant-based twist.
  • Spicy Kick: Add red pepper flakes or diced jalapeños for a spicy version.
  • Herb Infusion: Swap out Italian seasoning with fresh herbs like basil or thyme for a different flavor profile.
  • Cheesy Delight: Stir in cream cheese or ricotta for an extra creamy texture.

Storage and Make-Ahead Instructions

This dish can be made ahead and stored for later enjoyment:

  • Refrigeration: Store leftovers in an airtight container for up to 3 days.
  • Freezing: You can freeze the cooked dish for up to 3 months. Thaw overnight in the fridge before reheating.
  • Make-Ahead: Prepare the sauce in advance and cook the pasta just before serving for the best texture.

Frequently Asked Questions

  1. Can I use a different type of pasta? Absolutely! Any pasta shape you love will work.
  2. Is this recipe gluten-free? Use gluten-free pasta to make this dish gluten-free.
  3. How can I make this dish spicier? Add crushed red pepper flakes or diced jalapeños during the cooking process.
  4. Can I use fresh tomatoes instead of canned? Yes, just be sure to peel and chop them before adding.
  5. How long does it take to prepare? This dish takes about 30 minutes from start to finish.
  6. Can I make this dairy-free? Substitute heavy cream with coconut cream or a dairy-free alternative.
  7. What can I serve with this dish? A simple salad or garlic bread makes great accompaniments.
  8. Can I add vegetables to the sauce? Yes! Spinach, bell peppers, or zucchini would be great additions.

Nutritional Tips and Dietary Adaptations

To make this dish healthier:

  • Whole Grain Pasta: Substitute regular pasta with whole grain or legume-based pasta for added fiber.
  • Low-Fat Options: Use low-fat cream or Greek yogurt instead of heavy cream.
  • Mindful Portions: Serve with a generous side of vegetables to balance the meal.

Recommended Equipment

To make your cooking experience smoother, here are some essential tools:

  • Skillet: A large skillet is perfect for sautéing and combining ingredients.
  • Pot: A sturdy pot for boiling pasta.
  • Measuring Cups and Spoons: Accurate measurements are key to achieving the best results.
  • Wooden Spoon: Ideal for mixing and avoiding scratches on your cookware.

Serving Suggestions

To elevate your Chicken Pasta in Creamy Tomato Sauce, consider these serving suggestions:

  • Garnish: Top with freshly chopped basil or parsley for a burst of color and flavor.
  • Cheese: Offer grated Parmesan or mozzarella on the side for those who love cheesy goodness.
  • Accompaniments: Serve with a crisp green salad or garlic bread to complete the meal.

Conclusion

This Chicken Pasta in Creamy Tomato Sauce is not just a recipe; it’s a celebration of flavors and a testament to the joy of cooking. Whether you’re sharing it with family or enjoying a quiet evening at home, this dish is sure to make any meal feel special. So grab your apron, unleash your culinary spirit, and let’s make some delicious memories together!

Chicken Pasta in Creamy Tomato Sauce

Prep Time 10 minutes
Cook Time 20 minutes
Total Time 30 minutes
Servings 4 servings
Calories 650
A delicious and creamy pasta dish featuring tender chicken and a rich tomato sauce, perfect for a satisfying meal.

Ingredients

Protein

  • 3-4 pieces boneless, skinless chicken breasts
  • 200 g Pasta (penne or fettuccine)
  • 2 cloves fresh garlic
  • 1 can diced tomatoes 14.5 oz
  • 1 cup heavy cream
  • 1 teaspoon Italian seasoning
  • to taste Olive oil, salt, and pepper

Instructions 

  • Cook pasta according to package instructions until al dente. Prepare chicken and garlic.
  • Cook chicken in olive oil until golden brown, about 5-7 minutes.
  • Sauté garlic for one minute, then stir in diced tomatoes.
  • Add heavy cream and Italian seasoning, simmer for 5 minutes until thickened.
  • Combine cooked pasta with sauce and toss gently.
  • Serve hot, garnished with extra sauce if desired.

Notes

For a richer flavor, add grated Parmesan cheese on top before serving.
Calories: 650kcal
Cost: $15
Course: Main Course
Cuisine: Italian
Keyword: Chicken, Creamy Tomato, Pasta

Embark on a Flavor Journey with Lemon Basil Chicken

Welcome to the vibrant world of Lemon Basil Chicken, a dish that encapsulates the essence of fresh ingredients and culinary creativity! This recipe is not just about putting dinner on the table; it’s a delightful adventure that brings together the zest of lemons and the aromatic charm of basil. Whether you’re hosting a dinner party or enjoying a weeknight meal, this dish promises to elevate your dining experience. So, let’s dive into the details of this culinary gem and discover why it deserves a spot in your recipe repertoire!

Why You’ll Love This Recipe

There are countless reasons to adore this basil chicken recipe, but here are just a few that stand out:

  • Quick and Easy Preparation: With just a few simple steps, you can have a delicious meal on the table in under 30 minutes!
  • Fresh and Vibrant Flavors: The combination of lemon and basil creates a refreshing taste that brightens your palate.
  • One-Pan Wonder: This recipe minimizes cleanup as everything cooks in a single skillet, making it perfect for busy weeknights.
  • Versatile Pairing: Lemon Basil Chicken pairs beautifully with a variety of sides, from pasta to rice to fresh salads.
  • Healthier Option: Using lean chicken breasts and fresh ingredients makes this dish a guilt-free indulgence.

Ingredients Breakdown

To whip up this delightful dish, you’ll need the following ingredients:

  • 2 large boneless skinless chicken breasts: Cut in half lengthwise for quicker cooking.
  • 2-3 tablespoons olive oil: For sautéing the chicken and adding rich flavor.
  • 2 cloves garlic: Minced for an aromatic base.
  • 1 teaspoon dried basil or 1 tablespoon chopped fresh basil: Fresh basil is preferable for its vibrant flavor.
  • 1/4 teaspoon onion powder: To enhance the savory depth of the dish.
  • 1/2 cup low sodium chicken broth: To keep the dish moist and flavorful.
  • 3/4 cup heavy cream: For that creamy texture that brings everything together.
  • 2 tablespoons fresh lemon juice: Adds the zesty kick! Freshly squeezed is best.
  • Salt and pepper to taste: Essential for seasoning.
  • 1/2 tablespoon fresh chopped parsley: For garnish and a touch of color.
  • 1 lemon: Thinly sliced, for presentation and extra flavor.

Pro Tips for Perfect Lemon Basil Chicken

Side view of tender Lemon Basil Chicken garnished with fresh lemon slices and herbs.

To ensure your dish turns out perfectly every time, keep these expert insights in mind:

  • Room Temperature Chicken: Allow your chicken to sit at room temperature for 15 minutes before cooking. This helps to achieve even cooking.
  • Don’t Crowd the Pan: Cook chicken in batches if necessary to ensure a nice golden brown sear.
  • Garnish Generously: A sprinkle of fresh parsley and lemon slices not only adds flavor but also enhances presentation.
  • Simmer for Flavor: Let the sauce simmer for a few extra minutes to infuse the flavors fully.
  • Adjust Creaminess: If you prefer a lighter dish, substitute half of the heavy cream with low-fat milk or broth.
  • Rest the Chicken: After cooking, let your chicken rest for a few minutes to retain its juices.
  • Experiment with Herbs: Feel free to mix in other herbs like thyme or oregano for a unique twist.
  • Save Leftover Sauce: This creamy sauce can be drizzled over vegetables or pasta for a second meal!

Common Mistakes and Troubleshooting

Even the most seasoned chefs encounter hiccups. Here are some common mistakes and how to avoid them:

  • Overcooking Chicken: Keep an eye on your chicken; it should reach an internal temperature of 165°F. Use a meat thermometer for accuracy!
  • Too Thick Sauce: If your sauce thickens too much, add a splash of chicken broth or water to loosen it.
  • Lack of Flavor: Always taste and adjust seasoning as you cook. A pinch of salt or a squeeze of lemon can make a world of difference!

Variations of Lemon Basil Chicken

Get creative with these variations to keep things exciting:

  • Lemon Basil Chicken Pasta: Toss cooked pasta into the skillet for a complete meal.
  • Grilled Lemon Basil Chicken: Marinate the chicken in lemon juice and basil before grilling for a smoky flavor.
  • Spicy Lemon Basil Chicken: Add red pepper flakes for a little heat!
  • Lemon Basil Chicken Salad: Slice the chicken and serve over mixed greens with a lemon vinaigrette.

Storage and Make-Ahead Instructions

This dish stores well, making it a great candidate for meal prep:

  • Refrigeration: Store leftover chicken and sauce in an airtight container for up to 3 days.
  • Freezing: Freeze cooked chicken (without sauce) for up to 2 months. Thaw in the refrigerator before reheating.
  • Make-Ahead: Prepare the chicken and sauce a day in advance; just reheat gently before serving.

Comprehensive FAQ

Here are some frequently asked questions that can help enhance your cooking experience:

  • Can I use chicken thighs instead of breasts? Yes, thighs will add more flavor and moisture.
  • What can I substitute for heavy cream? You can use coconut milk or Greek yogurt for a lighter option.
  • Can I add vegetables to this dish? Absolutely! Spinach, bell peppers, or zucchini make great additions.
  • How do I know when the chicken is cooked? Use a meat thermometer to ensure it reaches 165°F internally.
  • Can I make this gluten-free? Yes, just ensure your chicken broth is gluten-free.
  • What sides pair well with Lemon Basil Chicken? Consider serving it with rice, quinoa, or a fresh garden salad.
  • Is there a vegetarian version of this recipe? You can substitute chicken with tofu or chickpeas and adjust the cooking time.
  • How spicy can I make this dish? Adjust the amount of red pepper flakes to your preferred spice level!

Nutritional Tips and Dietary Adaptations

This recipe is already a healthier option, but here are some tips for various dietary needs:

  • Low-Carb: Serve with steamed vegetables instead of pasta.
  • Heart-Healthy: Use skinless chicken breasts and reduce the amount of cream.
  • Dairy-Free: Substitute heavy cream with cashew cream or coconut milk.
  • Low-Sodium: Use homemade chicken broth to control sodium levels.

Essential Equipment for Success

Having the right tools can make your cooking experience smoother:

  • Skillet: A high-quality non-stick or cast iron skillet is ideal for searing.
  • Meat Thermometer: Ensures your chicken is perfectly cooked every time.
  • Cutting Board: A sturdy cutting board for easy prep.
  • Sharp Knife: For slicing chicken and chopping ingredients efficiently.

Serving Suggestions

Transform your Lemon Basil Chicken into a complete meal with these serving ideas:

  • Angel Hair Pasta: Light and delicate, it pairs perfectly with the creamy sauce.
  • Quinoa Salad: For a nutritious side, toss quinoa with fresh veggies and a lemon vinaigrette.
  • Garlic Bread: A crusty bread is perfect for soaking up the delicious sauce.
  • Roasted Vegetables: Seasonal veggies drizzled with olive oil make a colorful addition.

In conclusion, Lemon Basil Chicken is more than just a meal; it’s an experience that brings fresh flavors and cultural connections to your kitchen. So, roll up your sleeves, embrace your adventurous side, and let this recipe transport you to a world of culinary delight. Happy cooking!

Lemon Basil Chicken

Prep Time 10 minutes
Cook Time 20 minutes
Total Time 30 minutes
Servings 4 servings
Calories 450
A flavorful and creamy chicken dish infused with lemon and fresh basil, perfect for a quick dinner.

Ingredients

Protein

  • 2 large boneless skinless chicken breasts (cut in half lengthwise)
  • 3 tablespoons olive oil
  • 2 cloves garlic minced
  • 1 teaspoon dried basil (or 1 tablespoon chopped fresh basil)
  • 0.25 teaspoon onion powder
  • 0.5 cup low sodium chicken broth
  • 0.75 cup heavy cream
  • 2 tablespoons fresh lemon juice
  • to taste Salt and pepper
  • 0.5 tablespoon fresh chopped parsley
  • 1 lemon thinly sliced lemon

Instructions 

  • In a large skillet, heat 1 tablespoon olive oil and brown chicken on both sides. Keep warm.
  • Add 1 tablespoon olive oil to the skillet, cook garlic, basil, and onion powder for 30 seconds.
  • Pour in chicken broth, scrape brown bits, then add cream and simmer until thickened (10-15 mins).
  • Stir in lemon juice, season with salt and pepper, then return chicken to skillet and cook 5 more minutes.
  • Garnish with parsley and lemon slices before serving.

Notes

For extra flavor, marinate chicken with lemon and basil beforehand.
Calories: 450kcal
Cost: $15
Course: Main Course
Cuisine: American
Keyword: basil, Chicken, lemon

Discover the Zesty Magic of Lemon Spinach Parmesan Chicken

Welcome to a culinary adventure that unravels the delicious world of Lemon Spinach Parmesan Chicken. This dish is not just a recipe; it’s a celebration of flavors that bring the warmth of home-cooked meals and the excitement of global cuisines to your table. Imagine tender chicken breasts, sautéed to perfection, enveloped in a creamy, zesty sauce that combines the freshness of spinach and the richness of Parmesan cheese. With just a few ingredients and simple steps, you can transform your weeknight dinner into a gourmet experience that will impress your family and friends. Let’s dive in!

Why You’ll Love This Recipe

  • Quick & Easy: This recipe comes together in under 30 minutes, making it perfect for busy weeknights.
  • One-Pan Wonder: Minimal cleanup is required, as all the magic happens in a single skillet.
  • Flavor Explosion: The combination of lemon, garlic, and Parmesan creates a harmonious and satisfying dish that bursts with flavor.
  • Healthy & Nutritious: Packed with protein and vitamins from fresh spinach, this meal is a nutritious choice for the whole family.
  • Versatile: Easily adaptable to suit dietary preferences or ingredient availability, ensuring there’s something for everyone.

Ingredients Breakdown

Before we get started, let’s take a closer look at the ingredients that will bring this dish to life. Here’s what you’ll need:

  • 4 boneless, skinless chicken breasts: The star of the dish, providing lean protein that cooks to golden perfection.
  • Salt and pepper, to taste: Essential for enhancing all the flavors and seasoning the chicken.
  • 2 tablespoons olive oil: For browning the chicken and adding richness to the dish.
  • 3 cloves garlic, minced: This adds aromatic depth and flavor to the sauce.
  • 1 cup chicken broth: Forms the base of the sauce, keeping it moist and flavorful.
  • ¾ cup heavy cream: This creates a luscious, creamy texture that coats the chicken beautifully.
  • Juice and zest of 1 lemon: Provides that bright, zesty flavor that elevates the entire dish.
  • ½ cup grated Parmesan cheese: Melts beautifully into the sauce, adding a salty, nutty flavor.
  • 4 cups fresh spinach leaves: Adds color, nutrition, and a slight earthy flavor to balance the richness.
  • Optional extra Parmesan and lemon slices for garnish: For that restaurant-quality presentation.

Step-by-Step Instructions

Close-up of Lemon Spinach Parmesan Chicken garnished with lemon slices and Parmesan.

Ready to embark on this culinary journey? Follow these steps to create your Lemon Spinach Parmesan Chicken:

  1. Prep the Chicken: Pound the chicken breasts to an even thickness using a meat mallet. Season both sides generously with salt and pepper.
  2. Cook the Chicken: In a large skillet, heat the olive oil over medium-high heat. Add the chicken and sear for 3-4 minutes on each side until they are golden brown and cooked through. Remove the chicken from the pan and set aside.
  3. Make the Sauce: In the same skillet, add the minced garlic and sauté for about 1 minute until fragrant. Pour in the chicken broth, lemon juice, and zest. Let the mixture simmer for 2 minutes, allowing the flavors to meld.
  4. Add Cream and Cheese: Reduce the heat to low. Stir in the heavy cream and Parmesan cheese, letting the sauce thicken slightly for about 3-4 minutes while stirring occasionally.
  5. Add Spinach: Toss in the fresh spinach and stir until it wilts down, integrating its vibrant color into the sauce.
  6. Return Chicken & Serve: Place the chicken back into the skillet. Spoon the creamy sauce over the top and let it simmer for an additional 2-3 minutes to heat through. Garnish with lemon slices and extra Parmesan if desired.

Pro Tips for Perfect Lemon Spinach Parmesan Chicken

  • Pound the Chicken: Ensure even cooking and tenderness by pounding the chicken breasts to a uniform thickness.
  • Use Fresh Ingredients: Fresh spinach and freshly squeezed lemon juice enhance the dish’s flavors significantly.
  • Don’t Skip the Garlic: Sautéing garlic until fragrant infuses the oil with flavor, enhancing the overall taste of the sauce.
  • Adjust Creaminess: For a lighter version, substitute half the heavy cream with chicken broth or use Greek yogurt.
  • Experiment with Cheese: Try substituting Parmesan with Pecorino Romano for a sharper flavor profile.
  • Cook on Medium Heat: Be patient and cook the chicken on medium heat to avoid burning while ensuring it cooks through.
  • Serve Immediately: For the best experience, serve the dish right away to enjoy the creamy texture and vibrant flavors.
  • Make Ahead: Prep the ingredients in advance for a quick assembly when you’re ready to cook.

Common Mistakes & Troubleshooting

Even the best chefs can run into a few hiccups! Here are some common mistakes and how to avoid them:

  • Chicken Drying Out: Ensure you don’t overcook the chicken. Use a meat thermometer to check for doneness (165°F).
  • Too Thick Sauce: If the sauce becomes too thick, add a splash of chicken broth to achieve your desired consistency.
  • Not Enough Flavor: Taste the sauce and adjust seasoning with more salt, pepper, or lemon juice as needed.
  • Spinach Not Wilting: Make sure the skillet is hot enough to wilt the spinach quickly.

Variations to Try

Feeling adventurous? Here are some delicious variations to put your unique spin on this dish:

  • Herb-Infused: Add fresh herbs like thyme or basil for an aromatic twist.
  • Spicy Kick: Incorporate red pepper flakes into the sauce for a hint of heat.
  • Vegetarian Delight: Replace chicken with grilled portobello mushrooms for a hearty vegetarian option.
  • Cheesy Spinach Stuffing: Stuff the chicken breasts with a mixture of spinach and ricotta cheese before searing.

Storage & Make-Ahead Instructions

This dish can be made ahead of time and stored in the refrigerator for up to 3 days. To store:

  • Allow the chicken to cool completely before transferring it to an airtight container.
  • Reheat gently in a skillet over low heat, adding a splash of chicken broth to keep the sauce creamy.

Frequently Asked Questions

Here are answers to some common questions you might have about this recipe:

  • How do I prevent the chicken from drying out? Pound the chicken to an even thickness and cook it until just done, checking for an internal temperature of 165°F.
  • Can I use frozen spinach? Yes, just thaw and drain it thoroughly before adding it to the sauce.
  • What can I substitute for heavy cream? You can use half-and-half or Greek yogurt for a lighter alternative.
  • Can I use pre-grated Parmesan cheese? While fresh is best, pre-grated cheese can be used in a pinch.
  • Is this dish gluten-free? Yes, this recipe is naturally gluten-free!
  • How can I make this dish dairy-free? Substitute heavy cream with coconut milk and omit the cheese.
  • What sides pair well with this dish? Serve with rice, quinoa, or a fresh salad for a complete meal.
  • Can I make this in advance? Yes, you can prep the ingredients ahead of time and cook them just before serving.

Nutritional Tips & Dietary Adaptations

This dish is rich in protein and vitamins, thanks to the chicken and spinach. For those mindful of their nutrition:

  • Low-Carb Option: Serve without rice or pasta, focusing on the chicken and spinach.
  • High-Protein: Add chickpeas or lentils for additional protein content.

Equipment Recommendations

To create this Lemon Spinach Parmesan Chicken, you’ll need:

  • Large Skillet: A good-quality skillet is essential for even cooking and sauce preparation.
  • Meat Mallet: For pounding the chicken to an even thickness.
  • Spatula or Tongs: For flipping the chicken and mixing the sauce.

Serving Suggestions

To elevate your dining experience:

  • Pair with a Light Salad: A citrusy arugula salad complements the flavors beautifully.
  • Serve with Garlic Bread: Perfect for soaking up the creamy sauce.
  • Wine Pairing: A chilled Sauvignon Blanc or a light Pinot Grigio enhances the zesty notes of the dish.

With this comprehensive guide, you’re now equipped to create a stunning Lemon Spinach Parmesan Chicken that not only tastes amazing but also tells a story of culinary adventure. Every bite is a journey through flavor and culture, and I can’t wait for you to share this experience with your loved ones. So put on your apron, gather your ingredients, and let’s get cooking!

Lemon Spinach Parmesan Chicken

Prep Time 10 minutes
Cook Time 15 minutes
Total Time 25 minutes
Servings 4 servings
Calories 550
A flavorful and creamy chicken dish with lemon, spinach, and Parmesan that’s perfect for a quick dinner.

Ingredients

Protein

  • 4 pieces boneless, skinless chicken breasts
  • 2 tablespoons olive oil
  • 3 cloves garlic, minced
  • 1 cup chicken broth
  • ¾ cup heavy cream
  • 1 piece lemon (juice and zest) (juice of 1 lemon, zest about 1 teaspoon)
  • ½ cup grated Parmesan cheese
  • 4 cups fresh spinach leaves

Optional Garnish

  • to taste extra Parmesan and lemon slices (for garnish)

Instructions 

  • Pound chicken to even thickness, season with salt and pepper.
  • Heat oil in skillet, sear chicken 3-4 minutes per side until golden. Remove and set aside.
  • Cook garlic 1 minute, add chicken broth, lemon juice, and zest; simmer 2 minutes.
  • Reduce heat, stir in cream and Parmesan, cook 3-4 minutes until thickened.
  • Add spinach, cook until wilted, then return chicken to skillet. Spoon sauce over and heat through 2-3 minutes. Garnish with lemon slices and extra Parmesan if desired.

Notes

Ensure not to overcook the chicken for best tenderness.
Calories: 550kcal
Cost: $15
Course: Main Course
Cuisine: American
Keyword: Chicken, lemon, Spinach

Embark on a Culinary Adventure with Garlic Herb Chicken Breast

Imagine the savory aroma of garlic wafting through your kitchen as you prepare a dish that not only tantalizes your taste buds but also tells a story of global flavors. This Garlic Herb Chicken Breast recipe is a perfect blend of simplicity and sophistication, making it suitable for a weeknight dinner or a festive gathering with friends. With just a few fresh ingredients, you can create a dish that brings the essence of culinary exploration right to your table.

Why You’ll Love This Recipe

This recipe isn’t just about cooking; it’s about savoring the journey of flavors. Here’s why you’ll adore this garlic herb chicken:

  • Quick and Easy: With under 30 minutes of prep and cooking time, this dish is perfect for busy weeknights.
  • Flavorful and Aromatic: The combination of garlic and fresh herbs creates a mouth-watering aroma that fills your kitchen.
  • Healthy and Nutritious: Chicken breast is a lean protein, making this dish both nutritious and satisfying.
  • Versatile: Pair it with a variety of sides like roasted vegetables, salads, or grains to suit your mood.
  • Meal Prep Friendly: This dish is ideal for meal prepping, allowing you to enjoy delicious leftovers throughout the week.

Detailed Ingredient Breakdown

Let’s explore the ingredients that make this dish shine, along with some substitution options for your culinary creativity:

  • 2 boneless, skinless chicken breasts: For a vegetarian option, try using firm tofu or tempeh.
  • 3 tablespoons olive oil: Grapeseed or avocado oil can also be used for a different flavor profile.
  • 1 tablespoon fresh lemon juice or vinegar: White wine vinegar adds a tangy twist.
  • 4 garlic cloves, minced: Feel free to adjust the amount according to your garlic preference.
  • 1 teaspoon salt: Sea salt or kosher salt can enhance the flavor.
  • ½ teaspoon black pepper: Freshly cracked black pepper offers the best taste.
  • 1 teaspoon dried oregano: Fresh oregano can also be used for a more vibrant flavor.
  • 1 teaspoon dried basil: Experiment with fresh basil for a different taste experience.
  • ½ teaspoon paprika: Smoked paprika adds depth to the dish.
  • 1 tablespoon fresh parsley, chopped (optional): Basil or cilantro can serve as delightful garnishes as well.
  • 1 tablespoon butter (optional for pan-searing): Use ghee for a lactose-free option.

Step-by-Step Preparation for Garlic Herb Chicken Breast

Side view of a perfectly seared Garlic Herb Chicken Breast on a plate.

Follow these simple steps to prepare your delicious garlic herb chicken:

  • Pound the Chicken: Use a meat mallet or rolling pin to pound the chicken breasts to an even thickness, ensuring they cook evenly.
  • Prepare the Marinade: In a bowl, combine olive oil, lemon juice, minced garlic, salt, pepper, oregano, basil, and paprika.
  • Marinate the Chicken: Place the chicken in a resealable bag or shallow container, pour the marinade over it, and let it marinate for at least 30 minutes or up to 8 hours in the fridge.
  • Preheat Your Cooking Surface: Preheat a skillet over medium heat or prepare your grill. Add butter or a small amount of olive oil if desired.
  • Cook the Chicken: Cook the marinated chicken for about 5-6 minutes per side, or until golden brown and the internal temperature reaches 165°F (75°C).
  • Rest and Serve: Allow the chicken to rest for 5 minutes before slicing. Garnish with fresh parsley and serve hot.

Pro Tips for Success

Enhance your cooking experience and achieve restaurant-quality results with these expert insights:

  • Marinate Longer: For maximum flavor, marinate the chicken overnight.
  • Use Fresh Herbs: Fresh herbs elevate the dish, providing vibrant flavors.
  • Check Temperature: Invest in a meat thermometer to avoid overcooking.
  • Let it Rest: Rest the chicken after cooking; this retains the juices.
  • Experiment with Spices: Feel free to add spices like cumin or coriander for a twist.
  • Pair Wisely: Serve with sides that complement the garlic herb flavors, such as roasted potatoes or a fresh salad.
  • Cook in Batches: For meal prep, consider cooking multiple breasts at once.
  • Keep It Simple: Sometimes, less is more; let the flavors shine without too many additions.

Common Mistakes and Troubleshooting

Avoid these pitfalls for a flawless cooking experience:

  • Skipping the Marinade: Don’t rush the marinating process—it’s key for flavor.
  • Not Pounding Chicken: Chicken of uneven thickness can lead to uneven cooking.
  • Overcrowding the Pan: Cook in batches to ensure proper browning.
  • Ignoring Rest Time: Skipping the resting period can result in dry chicken.

Delicious Variations on Garlic Herb Chicken Breast

Get creative and try these delightful variations:

  • Spicy Garlic Herb Chicken: Add red pepper flakes to the marinade for a kick.
  • Honey Garlic Herb Chicken: Mix in a tablespoon of honey for a sweet glaze.
  • Lemon Herb Chicken: Increase the lemon juice for a zippier taste.
  • Italian Herb Chicken: Use Italian seasoning instead of individual herbs for a quick mix.

Storage and Make-Ahead Instructions

This dish is perfect for meal prep! Here’s how to store and reheat:

  • Refrigeration: Store cooked chicken in an airtight container in the fridge for up to 4 days.
  • Freezing: Freeze cooked chicken for up to 3 months. Thaw in the fridge before reheating.
  • Reheating: Reheat in a skillet over medium heat until warmed through, adding a splash of broth to keep it moist.

Comprehensive FAQ

Here are answers to some common questions:

  • Can I use bone-in chicken? Yes, just adjust the cooking time to ensure it’s cooked through.
  • Can I grill this chicken? Absolutely! Grilling adds a delicious smoky flavor.
  • How do I know when the chicken is done? Use a meat thermometer; it should read 165°F (75°C).
  • Is this recipe gluten-free? Yes, all ingredients are gluten-free.
  • Can I make this dish dairy-free? Simply skip the butter or use a dairy-free alternative.
  • What sides pair well? Roasted vegetables, quinoa, or a fresh salad complement the dish perfectly.
  • Can I marinate overnight? Yes, marinating overnight enhances the flavor.
  • What should I do with leftovers? Slice and add to salads, wraps, or grain bowls for a quick meal.

Nutrition Tips and Dietary Adaptations

This Garlic Herb Chicken Breast is not only delicious but also nutritious. Here are some tips to enhance its health benefits:

  • Lean Protein: Chicken breast is a great source of lean protein, essential for muscle repair and growth.
  • Healthy Fats: Olive oil provides heart-healthy fats, while herbs are packed with antioxidants.
  • Low-Carb Option: This dish is naturally low in carbs, making it suitable for low-carb diets.
  • High in Vitamins: Fresh herbs contribute vitamins and minerals to your meal.

Equipment Recommendations

For this recipe, having the right tools can make a difference:

  • Meat Mallet: Ensures even cooking for the chicken.
  • Skillet or Grill: A non-stick skillet or grill is perfect for achieving a great sear.
  • Meat Thermometer: Essential for checking doneness without cutting into the meat.
  • Cutting Board and Knife: For easy preparation and garnishing.

Serving Suggestions

Serve your Garlic Herb Chicken Breast with these delicious accompaniments:

  • Roasted Vegetables: Carrots, zucchini, and bell peppers make a colorful and nutritious side.
  • Fresh Salad: A crisp green salad with a vinaigrette dressing complements the rich flavors.
  • Quinoa or Couscous: These grains absorb the delicious juices from the chicken.
  • Garlic Bread: A side of garlic bread is perfect for dipping into the chicken juices.

In conclusion, this Garlic Herb Chicken Breast recipe is more than just food—it’s an invitation to explore the world through flavors. With its easy preparation and versatility, you can enjoy this dish in countless ways. So gather your ingredients, unleash your inner chef, and embark on a culinary adventure that promises not just a meal but a story that brings people together around the table. Happy cooking!

Garlic Herb Chicken Breast

Prep Time 10 minutes
Cook Time 12 minutes
Total Time 22 minutes
Servings 4 pieces
Calories 250
Juicy, flavorful chicken breasts marinated with garlic and herbs, perfect for a quick and healthy meal.

Ingredients

Protein

  • 2 pieces boneless, skinless chicken breasts
  • 3 tablespoons olive oil
  • 1 tablespoon fresh lemon juice or vinegar
  • 4 cloves garlic, minced
  • 1 teaspoon salt
  • ½ teaspoon black pepper
  • 1 teaspoon dried oregano
  • 1 teaspoon dried basil
  • ½ teaspoon paprika
  • 1 tablespoon fresh parsley, chopped (optional for garnish)
  • 1 tablespoon butter (optional for pan-searing)

Instructions 

  • Pound chicken to even thickness. Mix olive oil, lemon juice, garlic, salt, pepper, oregano, basil, and paprika to make marinade.
  • Marinate chicken for at least 30 minutes. Preheat skillet or grill, add butter if desired.
  • Cook chicken for about 5-6 minutes per side until golden and internal temp reaches 165°F (75°C). Rest for 5 minutes.
  • Garnish with parsley and serve hot.

Notes

For extra flavor, marinate longer or add a squeeze of fresh lemon before serving.
Calories: 250kcal
Cost: $15
Course: Main Course
Cuisine: American
Keyword: Chicken, garlic, Herb

Experience the Bright Flavors of Lemon Chicken

Welcome, culinary adventurers! If you’re ready to embark on a delightful journey of taste, look no further than this Easy Parmesan-Crusted Lemon Chicken recipe. This dish not only brings the sunshine of citrus to your table but also offers an exciting blend of textures and flavors that will surely make your taste buds dance. As we dive into the world of cooking, let’s savor the essence of cooking that connects cultures and celebrates the joy of food.

Why You’ll Love This Recipe

This isn’t just another chicken recipe; it’s a celebration of flavor, texture, and culinary creativity. Here are some standout reasons why this lemon chicken will become a staple in your kitchen:

  • Quick and Easy: Perfect for busy weeknights, this meal can be ready in just 30 minutes, allowing you to spend less time cooking and more time enjoying.
  • Crispy and Juicy: The golden-brown parmesan crust locks in moisture, ensuring every bite is bursting with flavor.
  • Vibrant Flavor Profile: The lemon butter sauce adds a zesty kick that elevates the dish, making it feel gourmet.
  • Versatile Serving Options: Pair it with rice, pasta, or a fresh salad to create a well-rounded meal that suits any occasion.
  • Make-Ahead Friendly: Prepare the chicken in advance and store it for a quick reheat, making weeknight dinners a breeze.

Ingredients You’ll Need

Gathering the right ingredients is crucial for achieving the best results. Here’s what you’ll need to create this delicious parmesan crusted lemon chicken:

  • 1 ½ lb boneless, skinless chicken breasts (about 2 large, patted dry)
  • 1 tbsp olive oil (for sautéing)
  • Optional: Fresh parsley and lemon slices (for garnish)
  • 2 large eggs
  • 1 garlic clove (minced)
  • ½ tsp Italian seasoning
  • ½ tsp salt
  • ¼ tsp ground black pepper
  • 1 cup grated Parmesan cheese
  • 3 tbsp all-purpose flour
  • 8 tbsp (1 stick) unsalted butter
  • 2 garlic cloves (minced for the sauce)
  • ¼ cup fresh lemon juice
  • ¼ cup chicken broth
  • ¼ tsp ground black pepper (to taste)

Step-by-Step Instructions

Side view of delicious lemon chicken with a golden, crispy Parmesan crust on a plate.

Let’s roll up our sleeves and dive into the cooking process! Follow these detailed steps to create your parmesan crusted lemon chicken:

  • Step 1: Prep the Chicken – Cut chicken breasts in half lengthwise to create thinner cutlets. Pound to even thickness using a meat mallet for consistent cooking.
  • Step 2: Coat the Chicken – In one bowl, whisk together eggs with minced garlic, Italian seasoning, salt, and pepper. In another bowl, combine grated Parmesan cheese and flour. Dip each chicken piece in the egg mixture, then dredge in the Parmesan mixture, ensuring an even coat.
  • Step 3: Cook the Chicken – Heat olive oil in a non-stick skillet over medium heat. Add the breaded chicken and cook for 4-5 minutes per side until golden brown and cooked through (internal temp should reach 165°F). Adjust heat as necessary to avoid burning.
  • Step 4: Make the Lemon Butter Sauce – While the chicken is cooking, melt the butter in a separate pan and add the minced garlic. Cook until fragrant (about 1 minute). Stir in lemon juice, chicken broth, and pepper. Let it simmer for 2-3 minutes until slightly thickened.
  • Step 5: Combine – Once the chicken is done, pour the sauce over the cooked chicken or return the chicken to the pan to coat it in the sauce for an extra flavor boost.

Pro Tips for Perfect Lemon Chicken

Here are some expert insights to elevate your dish:

  • Use Fresh Ingredients: Fresh lemons and high-quality Parmesan cheese will enhance the overall flavor of the dish.
  • Don’t Rush the Cooking: Allowing the chicken to cook evenly ensures a juicy and tender result.
  • Experiment with Herbs: Try adding fresh thyme or rosemary to the breadcrumb mixture for a unique twist.
  • Check for Doneness: Use a meat thermometer to ensure the chicken is cooked through without overcooking.
  • Make It Gluten-Free: Substitute all-purpose flour with almond flour or gluten-free breadcrumbs.
  • Control the Heat: Adjust your stovetop heat as needed to avoid burning the crust while ensuring the chicken cooks through.
  • Rest the Chicken: Allow the chicken to rest for a few minutes after cooking to retain its juices.
  • Serve Hot: This dish is best enjoyed immediately while the chicken is still crispy and the sauce is warm.

Common Mistakes and Troubleshooting

Even seasoned cooks can run into a few hiccups. Here’s how to avoid common pitfalls:

  • Burnt Crust: If your crust is burning before the chicken is cooked through, lower the heat and cook a bit longer.
  • Dry Chicken: Overcooking can lead to dryness. Always check the internal temperature.
  • Uneven Coating: Ensure the chicken is well-coated in both mixtures for a consistent crust.
  • No Flavor in Sauce: Adjust seasoning in the sauce to your taste; adding more lemon juice can brighten it up.

Variations to Try

Feel free to get creative with this recipe! Here are a few variations you can explore:

  • Herb-Infused Chicken: Mix chopped fresh herbs like basil or parsley into the egg mixture for added flavor.
  • Spicy Kick: Add red pepper flakes to the Parmesan mixture for a spicy twist.
  • Cheesy Delight: Combine mozzarella with Parmesan for a gooey, cheesy crust.
  • Vegetable Medley: Add sautéed vegetables like zucchini or bell peppers to the pan while cooking the chicken.

Storage and Make-Ahead Instructions

This lemon chicken recipe is not only delicious but also practical for meal prep:

  • Refrigerate: Store leftovers in an airtight container in the fridge for up to 3 days.
  • Freezing: You can freeze the cooked chicken for up to 2 months. Thaw in the refrigerator before reheating.
  • Reheating: To maintain crispiness, reheat in an oven or air fryer rather than a microwave.
  • Make-Ahead: Prepare the chicken and sauce ahead of time. Store separately and assemble when ready to serve.

Frequently Asked Questions

Here are some common questions that can help you navigate any uncertainties:

  • Can I bake this chicken instead of frying? Yes, for a healthier option, bake at 400°F for 25-30 minutes or until cooked through.
  • How do I prevent the crust from falling off? Ensure the chicken is well-coated and let it sit for a few minutes before cooking.
  • Can I use chicken thighs instead? Absolutely! Chicken thighs will add a richer flavor and remain moist.
  • What sides pair well with lemon chicken? Consider serving with roasted vegetables, rice pilaf, or a fresh garden salad.
  • Can I make this dish dairy-free? Use a dairy-free cheese alternative and omit the butter, substituting with olive oil.
  • How can I modify the recipe for a low-carb diet? Substitute breadcrumbs with crushed pork rinds or almond flour.
  • What if I don’t have chicken broth? You can use water or vegetable broth as a substitute.
  • Can I add other flavors to the sauce? Yes, consider adding capers or white wine for an extra depth of flavor.

Nutritional Tips and Dietary Adaptations

For those who are health-conscious or have dietary restrictions, here are some considerations:

  • Low-Calorie Option: Use skinless chicken breast and reduce the amount of butter for a lighter dish.
  • High-Protein Meal: This dish is packed with protein, making it great for muscle repair post-exercise.
  • Gluten-Free Adaptation: As mentioned, use gluten-free breadcrumbs or almond flour.
  • Vegetarian Version: Substitute chicken with firm tofu or seitan for a vegetarian option.

Equipment Recommendations

Here’s what you’ll need to make this recipe a success:

  • Non-Stick Skillet: Ideal for frying the chicken without sticking.
  • Meat Mallet: Helps achieve even thickness for the chicken cutlets.
  • Mixing Bowls: For preparing the egg wash and crumb mixture.
  • Meat Thermometer: To ensure your chicken is cooked perfectly every time.

Serving Suggestions

Let’s make your meal even more delightful! Here are some serving ideas:

  • Garnish: Top with fresh parsley and lemon slices for a beautiful presentation.
  • Pair with Wine: A crisp white wine like Sauvignon Blanc complements the lemony flavors beautifully.
  • Fresh Salad: Serve alongside a simple mixed greens salad drizzled with a light vinaigrette.
  • Grains: Pair with fluffy couscous or quinoa to soak up the delicious lemon butter sauce.

Cooking is a journey of exploration, and with this Easy Parmesan-Crusted Lemon Chicken recipe, you’ll not only create a meal but also memories. So grab your apron, gather your loved ones, and let’s bring the flavors of the world to your kitchen—because every dish tells a story, and yours is just beginning!

Easy Parmesan-Crusted Lemon Chicken with Lemon Butter Sauce

Prep Time 15 minutes
Cook Time 15 minutes
Total Time 30 minutes
Servings 4 servings
Calories 550
This flavorful chicken recipe features a crispy Parmesan crust topped with a zesty lemon butter sauce, perfect for a quick and elegant meal.

Ingredients

Chicken

  • 1.5 lb boneless, skinless chicken breasts (about 2 large, patted dry)
  • 1 tbsp olive oil (for sautéing)
  • 2 large eggs
  • 1 clove garlic (minced)
  • 0.5 tsp Italian seasoning
  • 0.5 tsp salt
  • 0.25 tsp ground black pepper
  • 1 cup grated Parmesan cheese
  • 3 tbsp all-purpose flour
  • 8 tbsp unsalted butter (1 stick)
  • 2 cloves garlic (minced)
  • 0.25 cup fresh lemon juice
  • 0.25 cup chicken broth

Garnish

  • Optional fresh parsley and lemon slices (for garnish)

Instructions 

  • Cut chicken breasts in half lengthwise, pound to even thickness.
  • Whisk eggs with garlic, Italian seasoning, salt, and pepper. Dredge chicken in egg mixture, then coat with Parmesan and flour.
  • Heat olive oil in a skillet and cook chicken 4-5 minutes per side until golden and cooked through.
  • Melt butter in a separate pan, cook garlic until fragrant, then stir in lemon juice, chicken broth, and pepper. Simmer 2-3 minutes.
  • Pour sauce over chicken or coat chicken in sauce before serving. Garnish with parsley and lemon slices if desired.

Notes

Ensure chicken is cooked to an internal temperature of 165°F for safety.
Calories: 550kcal
Cost: $15
Course: Main Course
Cuisine: American
Keyword: Chicken, lemon, Parmesan

Discover the Mediterranean Chicken Couscous Bowl: A Culinary Adventure Awaits

Welcome, fellow food explorers! Today, we embark on a flavorful journey with a dish that captures the heart and soul of Mediterranean cuisine—the Mediterranean Chicken Couscous Bowl. This bowl is not just a meal; it’s a passport to diverse cultures, vibrant markets, and mouth-watering flavors. With its aromatic spices, fresh ingredients, and easy preparation, this recipe is perfect for busy weeknights or lazy weekends. Join me, Jack, as we explore this delightful dish that speaks to the senses and warms the heart.

Why You’ll Love This Recipe

Here are just a few reasons why this mediterranean chicken couscous bowl will become a staple in your kitchen:

  • Quick and Easy: This dish comes together in under 30 minutes, making it perfect for weeknight dinners.
  • Flavor Explosion: The combination of spices and fresh ingredients creates a satisfying flavor profile that will impress your family and friends.
  • Nutritious and Balanced: Packed with protein, veggies, and whole grains, this bowl is a wholesome meal option.
  • Customizable: Feel free to adapt the ingredients to suit your taste or dietary needs.
  • Meal Prep Friendly: Make extra portions for easy lunches throughout the week!

Ingredients Breakdown

Let’s dive into the essential ingredients for our Mediterranean Chicken Couscous Bowl:

  • 2 cups chicken breast: Lean protein that serves as the base for our dish. You can also use turkey or tofu for a vegetarian option.
  • 1 cup couscous: The foundation of the bowl, providing a light and fluffy texture. Feel free to use whole wheat couscous for added fiber.
  • 2 tbsp olive oil: Adds richness and helps to sauté the chicken and vegetables.
  • 1 tbsp cinnamon: Infuses warmth and depth to the dish, enhancing the overall flavor.
  • 1 tbsp paprika: Provides color and a mild sweetness that balances the spices.
  • 1 tsp ground ginger: Offers a zesty kick that brightens the dish.
  • 1 tsp nutmeg: Adds a subtle nutty flavor, enhancing the aroma.
  • 1/2 tsp cayenne pepper: Brings heat for those who like a spicy twist.
  • 1 tsp salt: Essential for enhancing the flavors of the dish.
  • 2 tbsp Moroccan spice mix: A key seasoning that ties all the flavors together.
  • 1 cup cucumber: Adds freshness and crunch to the bowl.
  • 1 cup cherry tomatoes: Sweetness and acidity that balance the dish perfectly.
  • 1/2 cup red onion: Provides sharpness and vibrant color.
  • 1/2 cup Greek yogurt: A creamy topping that tempers the spices.
  • 1/4 cup fresh parsley: Brightens the dish and adds freshness.

Step-by-Step Instructions

Vibrant Mediterranean Chicken Couscous Bowl with fresh vegetables and creamy yogurt.

Now that we have our ingredients, let’s get cooking!

  1. In a large skillet, heat the olive oil over medium heat. Add the chicken breast, season with salt and the Moroccan spice mix, and cook until golden brown, about 5-7 minutes.
  2. While the chicken cooks, prepare the couscous according to package instructions, typically involving boiling water and letting it sit covered for 5 minutes.
  3. Once the chicken is cooked through, add the cinnamon, paprika, ginger, nutmeg, and cayenne pepper to the skillet. Stir to coat the chicken evenly with the spices.
  4. Add the chicken broth to the skillet and bring to a gentle simmer, allowing the flavors to meld for about 5 minutes.
  5. Mix in the cherry tomatoes, cucumber, and red onion, cooking for an additional 2-3 minutes until the vegetables are tender yet crisp.
  6. Fluff the couscous with a fork and serve as a base in bowls. Top with the chicken and vegetable mixture, followed by a dollop of Greek yogurt and a sprinkle of fresh parsley.

Pro Tips for Perfection

Here are some expert insights to elevate your Mediterranean Chicken Couscous Bowl:

  • Layer Flavors: Marinate the chicken overnight in olive oil, lemon juice, and spices for deeper flavor.
  • Use Fresh Herbs: Fresh herbs like cilantro or mint can enhance the dish’s flavor profile tremendously.
  • Experiment with Veggies: Incorporate seasonal vegetables like bell peppers or zucchini for added color and nutrition.
  • Toast Your Couscous: Lightly toast couscous in the skillet before adding liquid for a nuttier flavor.
  • Adjust Spice Levels: Modify cayenne and black pepper levels according to your heat preference.
  • Let It Rest: Allow the chicken to rest for a few minutes after cooking to retain its juices.
  • Store Properly: Allow leftovers to cool completely before storing in airtight containers to maintain freshness.
  • Garnish Creatively: Add nuts like almonds or walnuts for crunch or pomegranate seeds for a burst of sweetness.

Common Mistakes and Troubleshooting

Let’s avoid some common pitfalls when making this dish:

  • Overcooking the Chicken: Ensure the chicken is cooked to an internal temperature of 165°F for juicy results.
  • Underseasoning: Don’t shy away from spices; they are essential for a rich flavor.
  • Too Much Liquid: If the couscous becomes mushy, reduce the amount of broth added.
  • Skipping the Resting Time: Letting the chicken rest allows juices to redistribute, preventing dryness.

Variations to Explore

Here are some delightful variations to make this dish your own:

  • Vegetarian Delight: Substitute chicken with chickpeas or grilled vegetables for a hearty vegetarian option.
  • Seafood Twist: Use grilled shrimp or salmon for a seafood-inspired couscous bowl.
  • Spicy Kick: Add harissa or sriracha for an extra layer of heat.
  • Creamy Dream: Swap Greek yogurt with tahini sauce for a nutty, creamy flavor.

Storage and Make-Ahead Instructions

This Mediterranean Chicken Couscous Bowl is perfect for meal prep:

  • Refrigerate: Store leftovers in an airtight container in the fridge for up to 4 days.
  • Freeze: For longer storage, freeze components separately. Couscous can be frozen, but may lose some texture upon thawing.
  • Make Ahead: Prepare the chicken and vegetables a day in advance and simply reheat when ready to serve.

Comprehensive FAQ

Here are answers to some common questions about this dish:

  • Can I use quinoa instead of couscous? Yes, quinoa is a great gluten-free alternative that adds protein.
  • How do I make this dish spicier? Increase the cayenne pepper or add sliced jalapeños for heat.
  • What can I serve with this bowl? A side salad or roasted vegetables complement this dish beautifully.
  • Can I use leftovers in other recipes? Absolutely! Use leftover chicken and couscous in wraps or salads.
  • Is this dish suitable for meal prep? Yes, it stores well and can be enjoyed throughout the week.
  • How long does it take to prepare? This dish takes about 30 minutes from start to finish.
  • Can I make it vegan? Yes, substitute chicken with chickpeas and use plant-based yogurt.
  • What type of couscous should I use? Instant couscous works best for quick preparation, but traditional couscous is also great.

Nutritional Tips and Dietary Adaptations

This Mediterranean Chicken Couscous Bowl can be adapted to fit various dietary needs:

  • High Protein: Add extra chicken or chickpeas to boost protein content.
  • Low Carb: Substitute couscous with cauliflower rice for a low-carb option.
  • Gluten-Free: Use gluten-free couscous or quinoa to meet dietary restrictions.

Essential Equipment Recommendations

Here are a few tools that will make your cooking experience smoother:

  • Non-stick skillet: Ideal for cooking chicken and preventing sticking.
  • Measuring cups and spoons: For accurate ingredient measurements.
  • Cooking thermometer: To ensure your chicken is perfectly cooked.
  • Cutting board and knife: Essential for preparing your fresh ingredients.

Serving Suggestions

To elevate your Mediterranean Chicken Couscous Bowl, consider these serving options:

  • Garnish: Top with additional fresh herbs or a drizzle of olive oil.
  • Pair with Wine: A crisp white wine like Sauvignon Blanc complements this dish perfectly.
  • Offer Sides: Serve with a side of tabbouleh or roasted vegetables for a complete meal.

Conclusion

Ready to dive into the vibrant world of the Mediterranean Chicken Couscous Bowl? This dish is not just about food; it’s a celebration of culture, flavors, and the joy of sharing meals with loved ones. Whether you’re preparing it for a quick weeknight dinner or a special occasion, this couscous bowl will surely transport you to sun-soaked Mediterranean shores. So grab your apron, gather your ingredients, and let’s create something delicious together!

Mediterranean Chicken Couscous Bowl for Easy Weeknight Bliss

Prep Time 10 minutes
Cook Time 20 minutes
Total Time 30 minutes
Servings 4 servings
Calories 520
A flavorful and quick Mediterranean-inspired chicken couscous bowl perfect for busy weeknights. Packed with spices, fresh vegetables, and creamy yogurt, it offers a balanced and satisfying meal.

Ingredients

Spices

  • 1 tbsp cinnamon (Adds warmth and depth.)
  • 1 tbsp paprika (Provides color and mild sweetness.)
  • 1 tsp ground ginger (Imparts a zesty kick.)
  • 1 tsp nutmeg (Adds a subtle nutty flavor.)
  • 2 tsp cayenne pepper (Brings heat to balance flavors.)
  • 1 tsp salt (Enhances overall flavor.)

Main ingredients

  • 2 cups chicken breast (Base protein, offers a lean option.)
  • 2 tbsp Moroccan spice mix (Key seasoning that ties the dish together.)
  • 2 tbsp tomato paste (Thickens sauce and adds richness.)
  • 2 tbsp olive oil (For cooking and adding richness.)
  • 1 cup chicken broth (Builds flavor in the sauce.)

Grains and vegetables

  • 1 cup couscous (Base providing texture.)
  • 1 cup cucumber (Adds freshness and crunch.)
  • 1 cup cherry tomatoes (Sweetness and acidity balance flavors.)
  • 1/2 cup red onion (Provides sharpness and color.)
  • 1/2 cup Greek yogurt (Creamy topping to temper spices.)
  • 1/4 cup fresh parsley (Brightens the dish with freshness.)

Instructions 

  • Season chicken with spices and cook until browned.
  • Prepare sauce with tomato paste, chicken broth, and Moroccan spice mix; simmer until thickened.
  • Cook couscous according to package instructions.
  • Chop vegetables and mix with cooked couscous.
  • Slice cooked chicken and assemble bowls with couscous, chicken, yogurt, and parsley.

Notes

For extra flavor, marinate chicken with spices ahead of time.
Calories: 520kcal
Cost: $15
Course: Main Course
Cuisine: Mediterranean
Keyword: Chicken, Couscous, healthy

Embark on a Culinary Journey with Creamy Tuscan Chicken

Welcome to the vibrant world of Italian cuisine! Today, we’re diving into a delightful dish that embodies the essence of Tuscany: Creamy Tuscan Chicken. This recipe not only showcases tender chicken breasts but also bursts with the flavors of sun-dried tomatoes and fresh spinach, all enveloped in a rich, creamy sauce. In just a few steps, you can transform your kitchen into a cozy Italian trattoria, inviting the aromas of Italy right to your dining table.

Why You’ll Love This Recipe

Here are five reasons why this Creamy Tuscan Chicken will become a staple in your meal rotation:

  • Quick and Easy: This dish comes together in just 30 minutes, making it perfect for busy weeknights.
  • Flavor Packed: With the combination of garlic, sun-dried tomatoes, and Italian seasoning, each bite is bursting with flavor.
  • Versatile: Pair it with pasta, rice, or even low-carb options like cauliflower rice or zucchini noodles for a balanced meal.
  • Healthy Ingredients: Packed with spinach, this recipe provides a nutritious boost while keeping it decadent with creamy goodness.
  • Impress Your Guests: Serve this dish at your next dinner party, and watch your guests rave about its rich flavors and stunning presentation.

Ingredients for Creamy Tuscan Chicken

Gather the following ingredients to create this mouthwatering dish:

  • 4 pieces boneless, skinless chicken breasts: Opt for organic chicken for the best flavor.
  • 2 tablespoons olive oil: A good quality oil elevates the dish.
  • Salt and black pepper: Essential for seasoning the chicken.
  • 3 cloves garlic, minced: Garlic provides a wonderful aroma and flavor.
  • 1/2 cup sun-dried tomatoes, chopped: These add a sweet, tangy richness.
  • 2 cups fresh baby spinach: For a vibrant color and nutritional boost.
  • 1 cup heavy cream: This forms the creamy base of the sauce.
  • 1/2 cup grated Parmesan cheese: Adds depth and flavor to the sauce.
  • 1/3 cup chicken broth: For deglazing the pan and adding flavor.
  • 1 teaspoon Italian seasoning: A mix of herbs that complements the dish beautifully.

How to Prepare Creamy Tuscan Chicken

Juicy boneless chicken breasts in a creamy sauce with green spinach and chopped sun-dried tomatoes.

Follow these easy steps for a delicious meal:

  1. Season the chicken: Sprinkle salt and black pepper on both sides of the chicken breasts.
  2. Heat the olive oil: In a large skillet, heat the olive oil over medium heat.
  3. Sear the chicken: Add the chicken to the skillet and cook until golden brown, about 4-6 minutes per side. Remove from the skillet and set aside.
  4. Sauté the aromatics: In the same skillet, add minced garlic and sauté for about 30 seconds until fragrant.
  5. Cook the vegetables: Add chopped sun-dried tomatoes and fresh spinach, cooking until the spinach has wilted.
  6. Create the creamy sauce: Pour in chicken broth and scrape up any browned bits from the bottom of the pan. Then, lower the heat and stir in heavy cream and grated Parmesan cheese, allowing the sauce to simmer and thicken.
  7. Return the chicken to the skillet: Place the chicken back into the pan, spooning sauce over each piece. Cook for a few more minutes until everything is heated through.
  8. Serve hot: This dish is excellent over cauliflower rice or zucchini noodles for a low-carb twist.

Expert Tips for Perfect Creamy Tuscan Chicken

Here are some pro tips to ensure your dish turns out perfectly every time:

  • Choose the right chicken: Boneless, skinless chicken breasts work best, but thighs can also be used for a richer flavor.
  • Adjust the cream: For a lighter version, substitute half the heavy cream with chicken broth or use a dairy-free cream alternative.
  • Fresh vs. dried herbs: While dried herbs are convenient, fresh herbs can elevate the flavor profile even more.
  • Mind the heat: Keep the heat low when adding cream to prevent it from curdling.
  • Customize the sauce: Feel free to add mushrooms or bell peppers for additional flavor and texture.
  • Use a cast iron skillet: For even cooking and better heat retention, consider using a cast iron pan.
  • Don’t skip the deglazing: Scraping the bottom of the pan enhances the sauce with deep flavors.
  • Rest the chicken: Letting the chicken rest after cooking helps retain its juices.

Common Mistakes and Troubleshooting

Even the best chefs can encounter challenges. Here’s how to troubleshoot:

  • Chicken is tough: Avoid overcooking the chicken; it should be just cooked through.
  • Too salty: If the sauce is too salty, balance it with a splash of cream or a pinch of sugar.
  • Thick sauce: If the sauce is too thick, add a bit more chicken broth to reach your desired consistency.
  • Sticking to the pan: Ensure your skillet is adequately heated before adding the chicken to prevent sticking.

Variations on Creamy Tuscan Chicken

Want to mix things up? Here are some delicious variations:

  • Pesto Creamy Tuscan Chicken: Swirl in a few tablespoons of pesto for an herby twist.
  • Mushroom Tuscan Chicken: Add sliced mushrooms with the garlic for an earthy flavor.
  • Spicy Tuscan Chicken: Incorporate red pepper flakes for a kick of heat.
  • Vegan Tuscan Chicken: Substitute chicken with tofu or chickpeas and use coconut cream for a plant-based version.

Storage and Make-Ahead Instructions

This dish is perfect for meal prep! Here’s how to store it:

  • Refrigerator: Store leftovers in an airtight container in the fridge for up to 3 days.
  • Freezer: You can freeze the creamy sauce separately for up to 2 months. Reheat gently.
  • Make-Ahead: You can prepare the sauce in advance and add the chicken just before serving.

Frequently Asked Questions

Here are some common questions about this recipe:

  • Can I substitute chicken thighs for breasts? Yes, thighs will provide richer flavor and moisture.
  • What can I serve with Creamy Tuscan Chicken? It’s delicious over pasta, rice, or with a side of garlic bread.
  • How do I reheat leftovers? Reheat gently in a skillet over low heat, adding a splash of broth if necessary.
  • Can I make this dish dairy-free? Yes, use a plant-based cream and nutritional yeast instead of Parmesan.
  • How can I make the sauce thicker? Simmer it longer to reduce, or add a cornstarch slurry.
  • What herbs work best in this recipe? Oregano, basil, and thyme complement the flavors beautifully.
  • Is this recipe suitable for meal prep? Absolutely! It stores well and is easy to reheat.
  • Can I add more vegetables? Yes! Broccoli or bell peppers add great flavor and nutrition.

Nutritional Tips and Dietary Adaptations

This Creamy Tuscan Chicken is not only delicious but can also accommodate various dietary needs:

  • Keto-Friendly: This dish is low in carbs, making it perfect for a keto diet.
  • Gluten-Free: Ensure all ingredients are gluten-free for a safe option.
  • Low-Calorie Option: Swap heavy cream for a lighter alternative to reduce calories.

Equipment Recommendations

To make the cooking process smoother, here are some recommended tools:

  • Heavy-bottomed skillet: Ideal for even cooking and browning.
  • Wooden spoon: Perfect for stirring and deglazing the pan.
  • Meat thermometer: Ensures your chicken is cooked perfectly without drying out.

Serving Suggestions

Make your dinner truly special with these serving ideas:

  • Pair with pasta: Serve it over fettuccine or spaghetti for a classic Italian meal.
  • Fresh salad: A side of arugula salad with lemon vinaigrette complements the richness of the dish.
  • Garlic bread: A slice of warm, crusty garlic bread is perfect for mopping up that creamy sauce.

In conclusion, this Creamy Tuscan Chicken with spinach and sun-dried tomatoes is more than a meal; it’s a passport to the rich culinary landscape of Tuscany. With its rich flavors and creamy texture, it’s bound to impress your family and friends. So, roll up your sleeves, grab your apron, and let’s cook up this delightful dish together!

Creamy Tuscan Chicken with Spinach Sun-Dried Tomatoes

Prep Time 10 minutes
Cook Time 20 minutes
Total Time 30 minutes
Servings 4 pieces
Calories 550
A flavorful and creamy chicken dish featuring sun-dried tomatoes, spinach, and Parmesan, perfect for a quick and satisfying meal.

Ingredients

Protein

  • 4 pieces boneless, skinless chicken breasts
  • 2 tablespoons olive oil
  • Salt and black pepper to taste Salt and black pepper
  • 3 cloves garlic, minced
  • 1/2 cup sun-dried tomatoes, chopped
  • 2 cups fresh baby spinach
  • 1 cup heavy cream
  • 1/2 cup grated Parmesan cheese
  • 1/3 cup chicken broth
  • 1 teaspoon Italian seasoning

Instructions 

  • Season chicken with salt and pepper. Heat oil in a skillet and sear chicken until golden and cooked through, about 4-6 minutes per side. Remove and set aside.
  • In the same skillet, sauté garlic until fragrant, then add sun-dried tomatoes and spinach, cooking until spinach wilts.
  • Pour in chicken broth, scraping up browned bits, then stir in heavy cream and Parmesan cheese. Simmer until sauce thickens.
  • Return chicken to the skillet, spoon sauce over, and cook until heated through. Serve hot with preferred sides.

Notes

For a lighter option, use half-and-half instead of heavy cream.
Calories: 550kcal
Cost: $15
Course: Main Course
Cuisine: Italian
Keyword: Chicken, creamy, Spinach