Author

Jack

Browsing

Embark on a Flavorful Journey with Mango Habanero Chicken Skewers

Indulge in a culinary adventure that takes your taste buds on a vibrant journey with these Mango Habanero Chicken Skewers. Imagine the tender, juicy chicken infused with the sweet, tropical essence of ripe mango and the fiery kick of habanero peppers. This dish isn’t just a meal; it’s an experience, transporting you to sunny shores and lively markets with every bite. In this recipe, you will discover how to create a dish that is not only delicious but also a feast for the eyes, perfect for gatherings, barbecues, or a cozy dinner at home.

Why You’ll Love This Recipe

  • Flavor Explosion: The combination of sweet mango and spicy habanero creates a unique taste that is both refreshing and exciting.
  • Easy Preparation: With simple ingredients and straightforward steps, you can whip up this dish in no time, making it perfect for busy weeknights.
  • Perfect for Grilling: These skewers are ideal for the grill, allowing you to enjoy the smoky flavors that come from outdoor cooking.
  • Versatile Serving Options: Serve these skewers with a variety of sides, from tropical salads to grilled vegetables, to suit any palate.
  • Great for Meal Prep: Marinate the chicken ahead of time for a quick and flavorful meal option that you can enjoy throughout the week.

Ingredients Breakdown

Gathering the right ingredients is crucial for making delicious mango habanero chicken skewers. Here’s what you’ll need:

  • 1.5 pounds chicken breasts or thighs: Cut into cubes for even cooking. You can substitute with tofu for a vegetarian option.
  • 1 ripe mango: Ensure it’s perfectly ripe for maximum sweetness and flavor.
  • 1 to 2 habanero peppers: Adjust the amount based on your spice tolerance; remember, these peppers pack a punch!
  • 2 tablespoons olive oil: Adds richness and helps the marinade adhere.
  • 2 tablespoons lime juice: Freshly squeezed for a zesty kick that balances the sweetness of the mango.
  • 1 tablespoon honey: Optional, for added sweetness if your mango isn’t ripe enough.
  • 2 garlic cloves, minced: For depth of flavor; fresh is always best.
  • Salt and black pepper: To taste, enhancing all the other ingredients.
  • Wooden or metal skewers: Soak wooden skewers in water for at least 30 minutes to prevent burning on the grill.

How to Make Mango Habanero Chicken Skewers

Side view of grilled chicken skewers featuring mango and habanero peppers.

Now that you have your ingredients ready, let’s get cooking! Follow these steps to make delicious mango habanero chicken skewers:

Step 1: Prepare the Marinade

In a blender or food processor, combine the diced mango, finely chopped habanero peppers, olive oil, lime juice, honey, minced garlic, salt, and pepper. Blend until smooth and creamy.

Step 2: Marinate the Chicken

Place the chicken cubes in a bowl and pour over the mango-habanero marinade. Ensure each piece is well-coated. Cover and refrigerate for at least 30 minutes, ideally 1 to 2 hours for maximum flavor.

Step 3: Assemble the Skewers

Thread the marinated chicken cubes onto your soaked skewers, reserving some marinade for basting later. This helps to lock in moisture and flavor while grilling.

Step 4: Preheat the Grill

Prepare your grill to a medium-high heat. A hot grill is essential for achieving that perfect char.

Step 5: Grill the Skewers

Place the skewers on the grill and cook for 10 to 12 minutes, turning occasionally and basting with the reserved marinade until the chicken is cooked through and has a nice char.

Step 6: Serve and Enjoy

Once grilled to perfection, remove the skewers from the grill, plate them, and serve immediately. These skewers are sure to impress!

Expert Tips for Perfect Mango Habanero Chicken Skewers

  • Marinate Longer: For deeper flavor, marinate the chicken overnight if possible.
  • Adjust Spice Level: If you’re not a fan of extreme heat, start with just one habanero and add more if desired.
  • Use Fresh Ingredients: Fresh mango and garlic will elevate the flavors significantly.
  • Grill Temperature: Keep an eye on the grill temperature to avoid burning the chicken.
  • Rest the Skewers: Allow skewers to rest for a few minutes after grilling to let the juices redistribute.
  • Serve with Dipping Sauces: A tangy yogurt sauce or a sweet chili sauce pairs wonderfully with these skewers.
  • Experiment with Vegetables: Add bell peppers, onions, or zucchini to your skewers for added nutrition and flavor.
  • Use an Instant-Read Thermometer: Ensure chicken is cooked to an internal temperature of 165°F for safety.

Common Mistakes and Troubleshooting

Even the best chefs encounter hiccups! Here are some common mistakes and how to fix them:

  • Overcooked Chicken: If the chicken turns out dry, it may have been grilled too long. Aim for a medium-high heat and check early.
  • Too Spicy: If you accidentally overdid the habanero, serve with a cooling side like yogurt or avocado to balance the heat.
  • Sticking to the Grill: Ensure the grill is well-oiled and preheated to prevent sticking.
  • Flavorless Marinade: Always taste the marinade before adding the chicken. Adjust seasoning as needed.

Variations on Mango Habanero Chicken Skewers

Get creative with these variations:

  • Teriyaki Twist: Replace the marinade with teriyaki sauce for a sweet and savory version.
  • Veggie Delight: Add assorted vegetables like bell peppers, cherry tomatoes, and zucchini for a colorful veggie skewer.
  • Fruit Fusion: Incorporate pineapple or peaches for an additional layer of sweetness.
  • Spicy Tofu Skewers: Substitute chicken with firm tofu for a delicious vegetarian option.

Storage Tips and Make-Ahead Instructions

Planning ahead? Here’s how to store and prep your skewers:

  • Refrigerate Leftovers: Store any leftover skewers in an airtight container in the fridge for up to 3 days.
  • Freezing: You can freeze marinated chicken (before grilling) for up to 2 months. Thaw in the refrigerator before grilling.
  • Make Ahead: Assemble skewers and marinate the night before, keeping them in the fridge until ready to grill.

Frequently Asked Questions

  • Can I use frozen mango? Yes, but fresh mango yields better flavor and texture.
  • How spicy are habanero peppers? Habaneros are quite hot; consider using fewer or removing the seeds for less heat.
  • What sides go well with these skewers? Try serving with a tropical salad or grilled corn for a full meal.
  • Can I cook these skewers in the oven? Yes, preheat to 400°F and cook on a baking sheet for about 15-20 minutes, turning halfway.
  • How do I know when the chicken is done? Chicken is safe to eat when it reaches an internal temperature of 165°F.
  • Can I use chicken thighs instead of breasts? Absolutely! Chicken thighs add extra juiciness.
  • What can I substitute for honey? Maple syrup or agave syrup make great alternatives.
  • Are the skewers gluten-free? Yes, this recipe is naturally gluten-free, making it suitable for gluten-sensitive diets.

Nutrition Tips and Dietary Adaptations

This recipe is not only delicious but can also be adapted to fit various dietary needs:

  • Low-Carb Option: Serve with a side of grilled vegetables instead of rice or bread.
  • Vegan Adaptation: Substitute chicken with tempeh or firm tofu for a plant-based meal.
  • Low-Calorie Version: Use skinless chicken breasts and minimal oil in the marinade.

Kitchen Equipment Recommendations

To make the most of your cooking experience, here’s some recommended equipment:

  • Grill or Grill Pan: Essential for achieving that authentic grilled flavor.
  • Skewers: Choose metal skewers for easy reuse or soak wooden ones ahead of time.
  • Blender or Food Processor: Ideal for creating a smooth marinade.
  • Instant-Read Thermometer: A must for checking chicken doneness accurately.

Serving Suggestions

Ready to impress your guests? Here are some serving ideas:

  • Garnish with Fresh Herbs: Cilantro or parsley add a fresh touch and vibrant color.
  • Pair with Dipping Sauces: Serve with a creamy ranch or tangy BBQ sauce for extra flavor.
  • Accompany with a Tropical Salad: A refreshing salad with lime dressing complements the skewers beautifully.

As you embark on this culinary journey, remember that food is more than just sustenance; it’s a way to connect with cultures and people. Enjoy the process, savor the flavors, and share this delightful dish with those you love. Happy cooking!

Mango Habanero Chicken Skewers

Prep Time 15 minutes
Cook Time 12 minutes
Total Time 27 minutes
Servings 4 servings
Calories 250
Enjoy a flavorful combination of sweet mango and spicy habanero peppers in these grilled chicken skewers, perfect for summer gatherings.

Ingredients

Meat

  • 1.5 pounds chicken breasts or thighs, cut into cubes
  • 1 ripe mango mango, peeled and diced
  • 1 to 2 habanero peppers habanero peppers, finely chopped
  • 2 tablespoons olive oil
  • 2 tablespoons lime juice
  • honey honey
  • 2 garlic cloves garlic cloves, minced
  • to taste salt and black pepper

Skewers

  • as needed wooden or metal skewers

Instructions 

  • Blend mango, habanero, olive oil, lime juice, honey, garlic, salt, and pepper until smooth.
  • Marinate chicken cubes in the mango-habanero mixture for at least 30 minutes.
  • Thread marinated chicken onto skewers and reserve some marinade for basting.
  • Preheat grill to medium-high and cook skewers for 10-12 minutes, basting occasionally until cooked through and charred.
  • Remove from grill, plate, and serve hot.
Notes

For extra flavor, brush with additional marinade during grilling.
Calories: 250kcal
Cost: $15
Course: Main Course
Cuisine: fusion
Keyword: Chicken, Habanero, Mango

Discover the Joy of Apple Oatmeal Pancakes

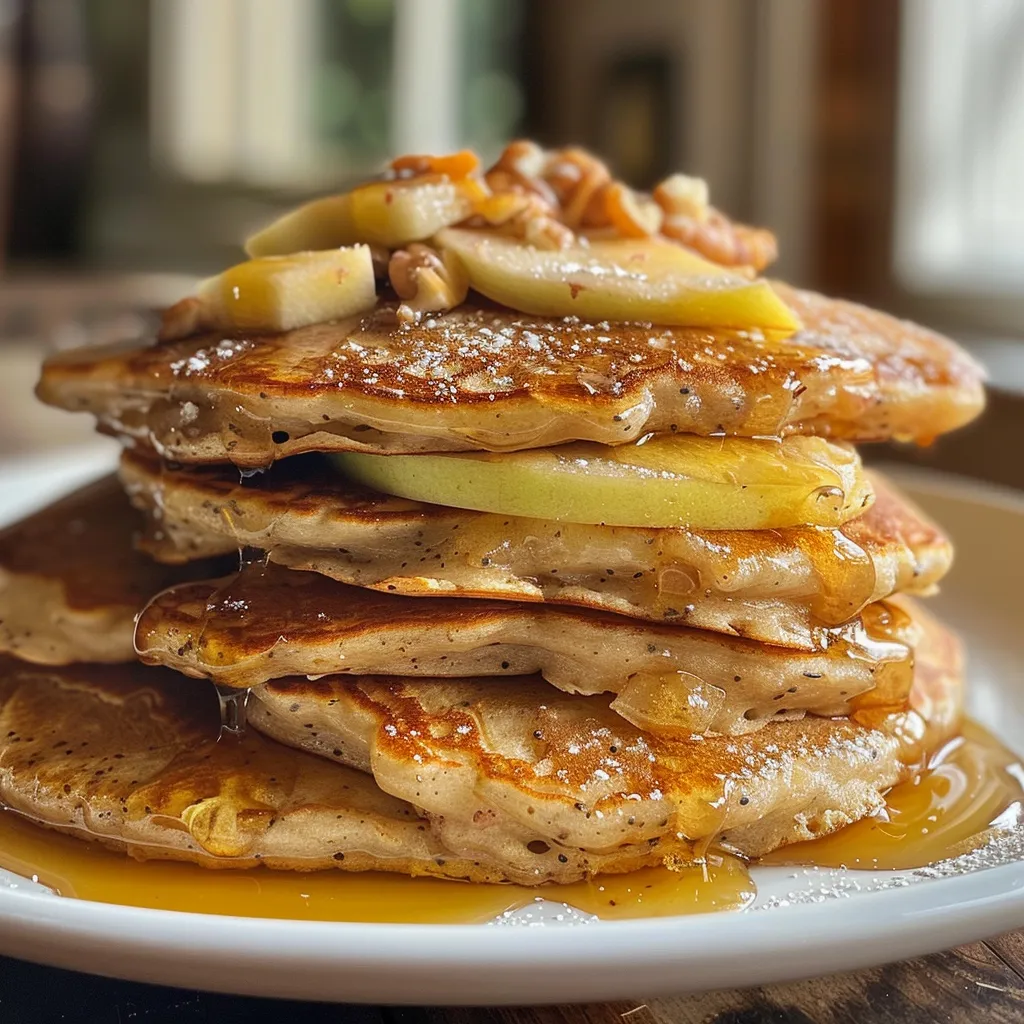
Welcome, culinary adventurers! Today, we’re diving into a delightful recipe that captures the essence of cozy mornings: Apple Oatmeal Pancakes. Inspired by my adventures exploring local markets, these pancakes are not just a meal; they’re a warm embrace that brings the flavors of home into your kitchen. With wholesome oats and fresh apples, they offer a nutritious start to your day and a taste of love in every bite. Let’s whisk together memories and make breakfast an unforgettable experience!

Why You’ll Love This Recipe

These pancakes are more than just delicious; they come packed with numerous benefits that will make you fall in love with them:

  • Wholesome Ingredients: Made with oats and apples, these pancakes are nutritious and filling, keeping you full longer.
  • Natural Sweetness: No refined sugars here! The natural sweetness from apples and optional maple syrup makes them a healthier choice.
  • Versatile and Customizable: You can easily adapt the recipe with different fruits, nuts, or even dairy alternatives to suit your dietary needs.
  • Quick and Easy: With a simple preparation method, you can whip up these pancakes in no time, perfect for busy mornings.
  • Kid-Friendly: These pancakes are a hit with kids, making breakfast both fun and nutritious!

Ingredients Breakdown

Let’s gather our ingredients. Here’s what you’ll need to create these delicious Apple Oatmeal Pancakes:

  • 1 cup oatmeal (quick oats or rolled oats): Oats are the star of the recipe, offering fiber and texture.
  • 2 apples (grated or finely chopped): Choose your favorite variety for sweetness—Granny Smith or Fuji work beautifully.
  • 2 eggs: These provide structure and moisture to the batter.
  • 150 g plain yogurt (about ⅔ cup): Greek yogurt adds creaminess and a protein boost.
  • 1 teaspoon baking powder: This is essential for making the pancakes fluffy.
  • ½ teaspoon cinnamon (optional): A sprinkle of cinnamon enhances the flavor, but feel free to omit it if you prefer.
  • Pinch of salt: Balances the sweetness.
  • Optional additions: Consider adding raisins, chopped walnuts, or chia seeds for an extra nutritional punch!

Pro Tips for Perfect Pancakes

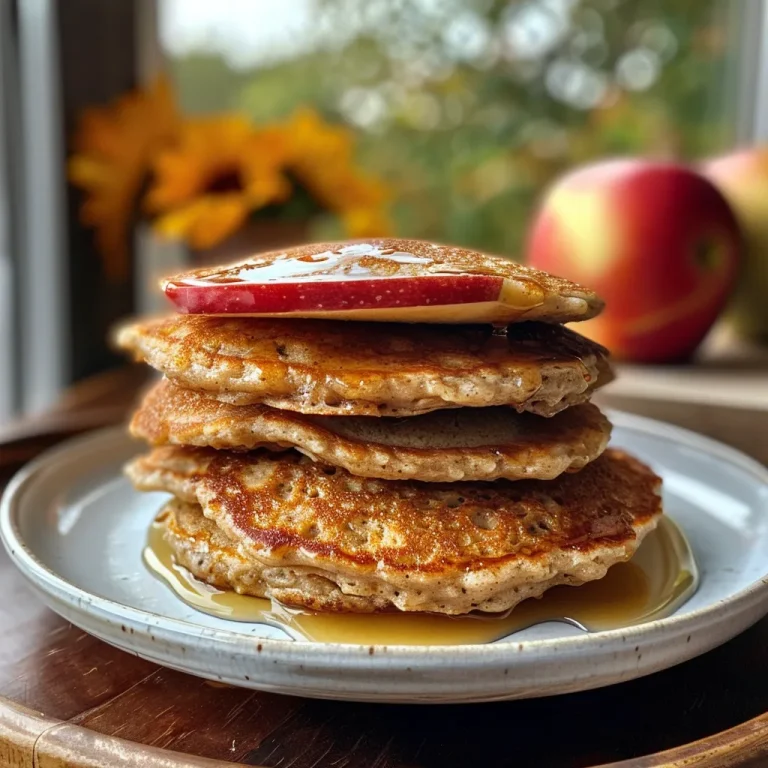
Side view of stacked Apple Oatmeal Pancakes with a dollop of yogurt and apple slices.

To ensure your pancakes turn out perfectly every time, keep these expert tips in mind:

  • Use fresh ingredients: Fresh apples and high-quality oats will elevate the flavor of your pancakes.
  • Don’t overmix the batter: Stir just until combined to keep the pancakes light and fluffy.
  • Preheat your pan: Ensure your non-stick pan is heated before adding the batter to achieve that golden-brown crust.
  • Flip with care: Wait until bubbles form on the surface before flipping to ensure the pancakes are cooked through.
  • Experiment with toppings: Serve with yogurt, honey, or a sprinkle of nuts for added texture!
  • Use gluten-free oats: If you’re gluten-sensitive, make sure to opt for certified gluten-free oats.
  • Adjust sweetness: Feel free to modify the sweetness by adding a bit of honey or maple syrup to the batter or as a topping.
  • Make them ahead: These pancakes can be made in batches and frozen for quick breakfasts later on.

Common Mistakes and Troubleshooting

Even the best chefs face challenges! Here are some common pitfalls and how to avoid them:

  • Pancakes are too dense: This could be due to overmixing the batter. Mix just until combined.
  • Pancakes stick to the pan: Ensure your pan is well-greased and hot before adding the batter.
  • Pancakes are burnt on the outside but raw inside: Lower the heat and cook them longer to ensure even cooking.
  • Flavor is lacking: Don’t forget to add salt and seasonings like cinnamon to enhance the taste.

Variations to Try

Feel free to get creative with these pancake variations! Here are some ideas to inspire your culinary journey:

  • Banana Oatmeal Pancakes: Substitute apples with mashed bananas for a different flavor profile.
  • Berry Blast Pancakes: Add a cup of mixed berries into the batter for a burst of fruity goodness.
  • Spiced Pumpkin Pancakes: Incorporate pumpkin puree and pumpkin spice for a fall-inspired twist.
  • Vegan Oatmeal Pancakes: Replace eggs with flaxseed meal and yogurt with non-dairy yogurt for a vegan option.

Storage and Make-Ahead Instructions

Want to make your mornings even easier? Here’s how to store and prepare these pancakes ahead of time:

  • Refrigerate: Store leftover pancakes in an airtight container in the refrigerator for up to 3 days.
  • Freeze: Place pancakes in a single layer on a baking sheet to freeze, then transfer to a zip-top bag for up to 2 months.
  • Reheat: To enjoy, simply microwave or toast frozen pancakes until warm.

Comprehensive FAQ

Let’s address some common questions about Apple Oatmeal Pancakes:

  • Can I make these pancakes gluten-free? Absolutely! Just use certified gluten-free oats.
  • Can I substitute the yogurt? Yes! You can use applesauce, non-dairy yogurt, or even buttermilk.
  • How do I know when the pancakes are done? They’re ready when they’re golden brown on both sides and firm to the touch.
  • Can I add protein powder? Yes! You can add a scoop of protein powder to the batter for an extra protein boost.
  • What toppings do you recommend? Try yogurt, fresh fruits, or a drizzle of maple syrup for a delightful finish!
  • How long do these pancakes last? They can last up to 3 days in the fridge and 2 months in the freezer.
  • Can I use whole oats instead of quick oats? Yes, but whole oats may yield a denser pancake. Consider blending them into a flour for a smoother batter.
  • Is it necessary to add baking powder? For fluffy pancakes, yes! Baking powder helps them rise.

Nutritional Tips and Dietary Adaptations

These pancakes can be made to fit various dietary needs:

  • Keto-Friendly: Use almond flour instead of oats and reduce the apples for a low-carb option.
  • High-Protein: Add a scoop of your favorite protein powder to the batter for an extra boost.
  • Dairy-Free: Substitute yogurt with non-dairy yogurt or applesauce.
  • Nut-Free: Omit any nuts from the recipe and use seeds instead, like sunflower seeds.

Equipment Recommendations

To make your cooking experience seamless, here’s a list of essential tools:

  • Non-stick Pan: A good-quality non-stick pan ensures pancakes cook evenly without sticking.
  • Mixing Bowl: A large mixing bowl is crucial for combining your ingredients smoothly.
  • Whisk: A whisk is essential for getting the batter smooth and creamy.
  • Spatula: A flexible spatula helps you flip the pancakes without breaking them.

Serving Suggestions

When it comes time to serve, here are some delightful ways to present your Apple Oatmeal Pancakes:

  • Classic Style: Stack them high, drizzle with maple syrup, and top with sliced apples.
  • Yogurt Parfait: Layer pancakes with yogurt and fresh berries for a beautiful breakfast bowl.
  • Nutty Delight: Top with chopped nuts and a drizzle of honey for added crunch.
  • Spiced Up: Dust with powdered sugar and cinnamon for a festive touch!

Conclusion

And there you have it—your ultimate guide to making Apple Oatmeal Pancakes! This recipe is not just about satisfying your taste buds; it’s about embracing the joy of cooking and sharing meals with those you love. So, gather your ingredients, invite your friends or family, and let’s create something wonderful together. Remember, every pancake tells a story, and I can’t wait to hear yours. Happy cooking!

Apple Oatmeal Pancakes

Prep Time 10 minutes
Cook Time 10 minutes
Total Time 20 minutes
Servings 4 pancakes
Calories 250
Delicious and healthy pancakes packed with oats and fresh apples, perfect for a nutritious breakfast.

Ingredients

Dry ingredients

  • 1 cup quick oats or rolled oats
  • 2 pieces apples, grated or finely chopped
  • 2 eggs eggs
  • 150 g plain yogurt (about ⅔ cup)
  • 1 teaspoon baking powder
  • ½ teaspoon cinnamon (optional)
  • Pinch salt

Optional additions

  • Raisins, Chopped walnuts or almonds, Chia seeds raisins, nuts, or chia seeds (for extra texture and nutrition)

Instructions 

  • Whisk eggs and mix in yogurt until smooth.
  • Stir in oats, baking powder, cinnamon, and salt.
  • Add grated apples and optional ingredients; mix until thick.
  • Heat a lightly greased non-stick pan over medium heat.
  • Spoon batter into pan; cook 2-3 minutes per side until golden.
  • Stack and serve warm.

Notes

You can add extra nuts or seeds for more crunch and nutrition.
Calories: 250kcal
Cost: $8
Course: Breakfast
Cuisine: American
Keyword: Apples, Oats, Pancakes

Experience a Tropical Escape with Every Sip

Welcome to a delightful adventure for your taste buds! This Mango Coconut Protein Smoothie is not just a drink; it’s a ticket to a tropical paradise. Imagine the sweet, juicy mangoes blended with creamy coconut milk, all while packing a protein punch. Whether you’re starting your day or looking for a refreshing post-workout treat, this smoothie is your perfect companion. Let’s dive into the world of flavors and nutrients that make this recipe a must-try!

Why You’ll Love This Recipe

1. **Tropical Flavor Explosion**: The natural sweetness of ripe mangoes combined with the rich creaminess of coconut milk creates a refreshing taste that transports you straight to the beach.

2. **Packed with Protein**: With the inclusion of protein powder and Greek yogurt, this smoothie supports muscle recovery and keeps you feeling full longer.

3. **Quick and Easy**: You can whip up this delicious smoothie in just minutes with minimal prep time, making it perfect for busy mornings.

4. **Nutrient-Dense**: Each ingredient brings its own health benefits, from vitamins and minerals in mango to healthy fats from coconut, ensuring you fuel your body right.

5. **Customizable**: Feel free to tweak the ingredients to suit your taste preferences or dietary needs, whether you’re vegan, gluten-free, or simply looking to mix things up!

Ingredients Breakdown

Here’s what you’ll need to make this mouthwatering smoothie:

  • 1 1/2 cups frozen mango chunks: The star of the show, providing sweetness and vibrant color.
  • 1 cup unsweetened coconut milk: Adds creaminess without added sugars, perfect for a refreshing texture.
  • 1 medium banana: Boosts sweetness and adds a smooth consistency.
  • 1 scoop vanilla protein powder: Enhances the protein content, making it ideal for post-workout recovery.
  • 1/2 cup Greek yogurt: Optional, but recommended for a creamy texture and probiotics.
  • 1 tablespoon shredded coconut: For a delightful coconut flavor and texture.
  • 1 teaspoon honey or maple syrup: Adjust sweetness to your liking.
  • 1/2 teaspoon vanilla extract: Adds depth and enhances flavor.
  • 4-6 ice cubes: For a chilled, refreshing drink.
  • 1 tablespoon chia seeds: Adds fiber and omega-3 fatty acids.
  • 1 tablespoon toasted coconut flakes: A crunchy topping for added texture.
  • Fresh mango slices: For garnish and extra flavor.

Expert Tips for the Perfect Smoothie

Creating the ideal smoothie is an art! Here are some tips to elevate your Mango Coconut Protein Smoothie:

  • Use frozen fruits: They provide a creamier texture and keep your smoothie chilled.
  • Adjust sweetness: Always taste your smoothie before serving and adjust the sweetness with honey or maple syrup as needed.
  • Invest in a high-speed blender: For the smoothest consistency, a high-speed blender makes a significant difference.
  • Don’t skip the chia seeds: They not only boost nutrition but also help thicken the smoothie.
  • Meal prep ingredients: Pre-portion your ingredients and freeze them in bags for a quick blend in the morning.
  • Add greens for extra nutrients: Spinach or kale can be added without changing the flavor drastically.
  • Use coconut water for a lighter version: If you prefer a thinner smoothie, substitute part of the coconut milk with coconut water.
  • Garnish creatively: Use fresh fruit slices, nuts, or seeds to create a visually appealing presentation.

Common Mistakes and Troubleshooting

Even the best smoothie makers can run into issues. Here are some common mistakes and how to fix them:

  • Too thick? Add more coconut milk or a splash of water to reach your desired consistency.
  • Too sweet? Balance it out with a squeeze of lemon juice or some plain Greek yogurt.
  • Not blended well? Make sure your blender is powerful enough, and blend longer if necessary.
  • Stringy texture? Ensure you’re using ripe, soft fruits and blend thoroughly to avoid chunks.
  • Too icy? Reduce the amount of ice or use frozen fruits only.

Delicious Variations to Try

Feel like switching things up? Here are some variations to keep your smoothie exciting:

  • Berry Tropical Twist: Substitute half of the mango with mixed berries like strawberries and blueberries.
  • Green Power Smoothie: Add a handful of spinach or kale for a nutrient boost without sacrificing flavor.
  • Pineapple Coconut Delight: Replace mango with frozen pineapple for a zesty twist.
  • Chocolate Coconut Smoothie: Add a tablespoon of cocoa powder for a chocolaty flavor that pairs beautifully with coconut.

Storage and Make-Ahead Instructions

Planning ahead? Here’s how to store your smoothie:

  • Make-ahead smoothies: You can prepare smoothie packs by portioning out ingredients in freezer bags. Just blend when you’re ready!
  • Storing leftovers: If you have leftover smoothie, store it in an airtight container in the fridge for up to 24 hours, but be aware it might separate.

Frequently Asked Questions

Got questions? Here are the answers to some common inquiries about this smoothie:

  • Can I use fresh mango instead of frozen? Yes, but you’ll want to freeze the fresh mango chunks for a few hours for a thicker smoothie.
  • Is this smoothie vegan? Yes, simply omit the Greek yogurt or use a plant-based yogurt.
  • Can I use flavored protein powder? Absolutely! Just keep in mind it might alter the flavor profile.
  • How can I make this smoothie dairy-free? Use coconut milk and omit the Greek yogurt, or use a dairy-free yogurt alternative.
  • What’s the best time to drink a protein smoothie? It’s great as a breakfast option or post-workout recovery drink.
  • How can I make this smoothie lower in calories? Use less sweetener, skip the yogurt, or reduce the amount of coconut milk.
  • Can I add supplements to this smoothie? Yes, you can incorporate various supplements like flaxseed, protein powder, or greens powder.
  • What’s the nutritional value of this smoothie? It varies based on your ingredient choices, but it’s generally high in protein, healthy fats, and vitamins.

Nutrition Tips and Dietary Adaptations

This smoothie is inherently nutritious, but here’s how you can adapt it:

  • Boost fiber content: Add a tablespoon of ground flaxseed or oats.
  • Reduce sugar intake: Opt for unsweetened coconut milk and skip the sweeteners.
  • Add superfoods: Consider adding spirulina, matcha, or cacao powder for extra health benefits.

Equipment Recommendations

To create the perfect smoothie, consider investing in:

  • High-speed blender: Brands like Vitamix or Blendtec can provide the smoothest results.
  • Measuring cups and spoons: Essential for accurate ingredient portions.
  • Reusable straws: Eco-friendly and perfect for enjoying your smoothie!

Serving Suggestions

For an ultimate smoothie experience, try these serving suggestions:

  • Pair with a healthy breakfast: Enjoy your smoothie alongside oatmeal or whole-grain toast for a balanced meal.
  • Garnish beautifully: Top with additional fresh mango slices, chia seeds, or a sprinkle of granola for crunch.
  • Serve in style: Use vibrant glasses to enhance the tropical vibe of your smoothie.

In conclusion, the Mango Coconut Protein Smoothie is more than just a drink; it’s a delightful way to nourish your body and transport your senses to a sun-soaked beach. With its rich flavors and nutritional benefits, this recipe is bound to become a staple in your kitchen. So grab your blender and embark on this tropical adventure – your taste buds will thank you!

Mango Coconut Protein Smoothie

Prep Time 5 minutes
Total Time 5 minutes
Servings 2 cups
Calories 250
A delicious and nutritious smoothie combining tropical mango, coconut, and protein for a perfect energizing treat.

Ingredients

Fruits and liquids

  • 2 cups frozen mango chunks
  • 1 cup unsweetened coconut milk
  • 1 medium banana
  • 1 scoop vanilla protein powder
  • 0.5 cup Greek yogurt (optional)
  • 1 tablespoon shredded coconut
  • 1 teaspoon honey or maple syrup
  • 0.5 teaspoon vanilla extract
  • 4 cubes ice
  • 1 tablespoon chia seeds
  • 1 tablespoon toasted coconut flakes

Fresh toppings

  • to taste fresh mango slices (for garnish)

Instructions 

  • Add frozen mango, coconut milk, banana, protein powder, Greek yogurt, shredded coconut, honey, and vanilla extract to a blender. Blend until smooth.
  • Add ice cubes and blend again until desired consistency is reached.
  • Taste and adjust sweetness if needed. Pour into glasses and garnish with chia seeds, toasted coconut, or mango slices.

Notes

Use frozen mango for a thicker smoothie, or fresh if preferred. Adjust sweetness to taste.
Calories: 250kcal
Cost: $10
Course: Breakfast, Snack
Cuisine: Tropical
Keyword: Mango, Protein, Smoothie

Embark on a Flavor Adventure with the Steak Avocado Bowl

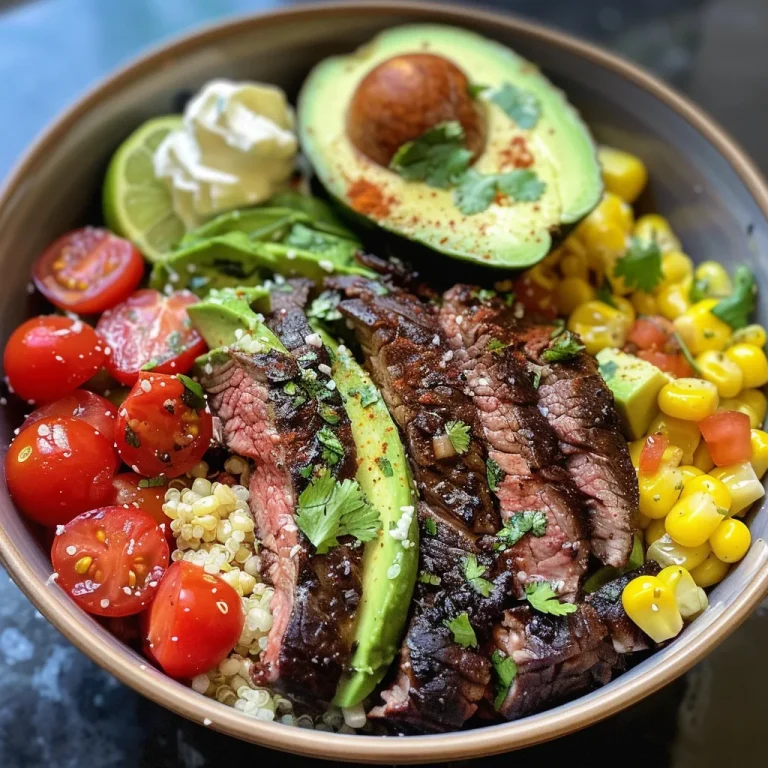
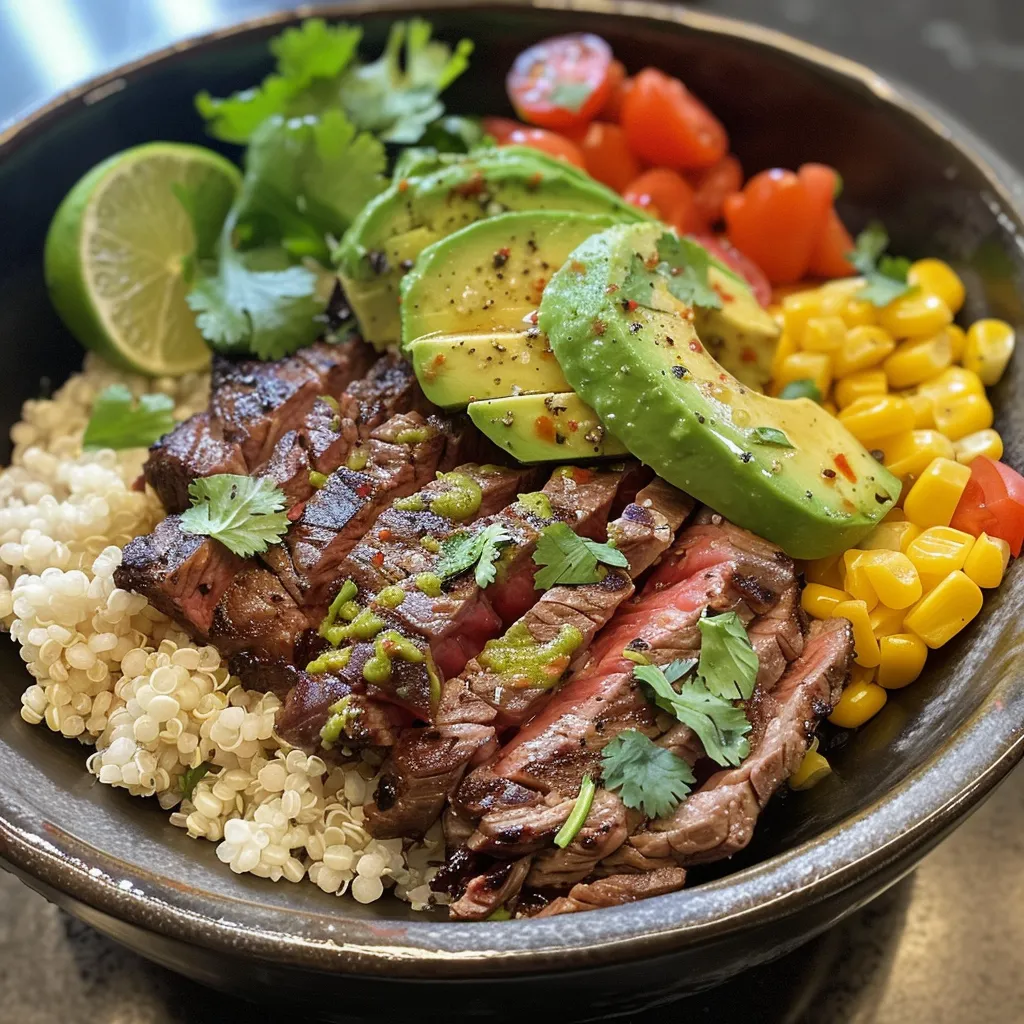
Are you ready to take your taste buds on a journey? The Steak, Avocado, and Roasted Corn Bowl is more than just a meal—it’s an experience. Infused with flavors from around the world, this dish features a zesty cilantro cream sauce that beautifully ties together the rich taste of grilled steak, creamy avocado, and sweet roasted corn. Perfect for gatherings or a cozy dinner at home, this bowl is a celebration of culinary exploration.

Why You’ll Love This Recipe

This recipe has something for everyone. Here are just a few reasons why you’ll want to add it to your culinary repertoire:

  • Easy to prepare: With simple steps and minimal ingredients, you’ll have a delicious meal on the table in no time.
  • Customizable: Feel free to adjust the ingredients to suit your taste or dietary preferences.
  • Flavor-packed: The combination of grilled steak, fresh vegetables, and a creamy sauce creates a symphony of flavors.
  • Healthy option: Packed with nutrients from the vegetables and lean protein, it’s a satisfying yet healthy choice.
  • Great for meal prep: This bowl can be prepared in advance, making it perfect for busy weekdays.

Ingredients Breakdown

To create this delightful bowl, you will need the following ingredients:

  • 1 lb steak: Choose flank or sirloin for the best flavor and tenderness.
  • 2 tablespoons olive oil: Essential for grilling and adds richness.
  • Salt and pepper: To taste, enhancing the natural flavors of the ingredients.
  • 2 cups corn kernels: Fresh or frozen, adding sweetness and texture.
  • 1 teaspoon chili powder: For a touch of heat and depth of flavor.
  • 1 teaspoon cumin: Complementing the steak with its warm, earthy notes.
  • 1 ripe avocado, diced: Creamy and rich, it balances the dish.
  • 1 cup cherry tomatoes, halved: Juicy and fresh, they brighten the bowl.
  • 1 cup cooked quinoa or rice (optional): For a heartier base, enhancing the dish’s nutritional value.
  • 1 lime, juiced: A bright garnish that enhances all the flavors.
  • Fresh cilantro: For garnish, adding freshness.
  • ½ cup sour cream: The base of your cilantro cream sauce.
  • ¼ cup mayonnaise: Adds creaminess to the sauce.
  • ½ cup fresh cilantro leaves: Essential for the sauce, giving it that vibrant flavor.
  • 1 clove garlic, minced: For an aromatic kick in the sauce.

Pro Tips for the Perfect Bowl

A colorful bowl featuring juicy steak, diced avocado, roasted corn, and fresh cherry tomatoes.

Here are some expert insights to elevate your Steak Avocado Bowl:

  • Rest your steak: Allowing the steak to rest for 5-10 minutes after grilling ensures juiciness.
  • Use a grill pan: If outdoor grilling isn’t an option, a grill pan works wonders indoors.
  • Ripe avocados: Choose avocados that yield slightly to pressure for the best creaminess.
  • Grill your corn: For added flavor, grill the corn on the cob and then cut it off.
  • Make it spicy: Add diced jalapeños for a kick of heat.
  • Fresh herbs: Experiment with other herbs like parsley or basil for unique flavor twists.
  • Marinate the steak: Marinating it for a few hours can enhance the flavor profile significantly.
  • Texture balance: Incorporate nuts or seeds for an added crunch.

Common Mistakes and Troubleshooting

Like any recipe, there are pitfalls to avoid:

  • Overcooking the steak: Use a meat thermometer; aim for 130°F for medium-rare.
  • Undercooking the corn: Ensure it’s slightly charred for the best flavor; roast for at least 15 minutes.
  • Too thick sauce: If the cilantro cream sauce is too thick, add a splash of water or more lime juice to thin it out.
  • Flavor imbalance: Adjust seasoning gradually; taste as you go!

Variations of the Steak Avocado Bowl

Feel free to explore these delightful variations:

  • Chicken Avocado Bowl: Substitute steak with grilled chicken for a different protein.
  • Vegetarian Bowl: Replace steak with black beans or chickpeas for a hearty vegetarian option.
  • Quinoa Bowl: Use only quinoa as a base for a gluten-free option.
  • Taco Bowl: Add taco seasoning and serve with tortilla chips for a fun twist.

Storage and Make-Ahead Instructions

This dish is perfect for meal prep:

  • Refrigeration: Store assembled bowls in airtight containers in the fridge for up to 3 days.
  • Separate storage: Keep the cilantro cream sauce separate to maintain freshness and texture.
  • Freezing: You can freeze cooked steak and corn, but fresh ingredients like avocado and tomatoes should be added just before serving.

Frequently Asked Questions

Here are some common questions about the Steak Avocado Bowl:

  • Can I use frozen corn? Yes, frozen corn works perfectly; just ensure it’s well-drained.
  • What if I don’t have flank steak? Other cuts like sirloin or ribeye can be used as substitutes.
  • Can I make this vegan? Absolutely! Swap the steak for tofu or tempeh and use vegan mayonnaise.
  • How do I adjust the spiciness? Simply add more or less chili powder and consider adding fresh jalapeños.
  • What can I serve with this bowl? Consider side salads, grilled vegetables, or fresh salsas to complement the meal.
  • How long does the cilantro cream sauce last? It can be stored in the fridge for up to a week in an airtight container.
  • Can I use other grains? Yes, brown rice, farro, or bulgur can be delicious alternatives to quinoa.
  • What’s the best way to dice an avocado? Cut it in half, remove the pit, score the flesh, and scoop it out for perfect cubes.

Nutritional Tips and Dietary Adaptations

This bowl is packed with nutrients:

  • Protein-rich: The steak and optional quinoa provide ample protein, essential for muscle health.
  • High in fiber: Corn and avocado contribute to your daily fiber intake, aiding digestion.
  • Heart-healthy fats: Avocado and olive oil are rich in healthy fats, promoting cardiovascular health.
  • Gluten-free: This recipe is naturally gluten-free, making it suitable for those with gluten sensitivities.

Equipment Recommendations

To make your cooking experience smoother:

  • Grill or grill pan: For perfectly cooked steak with beautiful grill marks.
  • Baking sheet: Essential for roasting corn evenly.
  • Mixing bowls: For preparing the cilantro cream sauce and assembling the bowl.
  • Meat thermometer: To ensure your steak is cooked to perfection.

Serving Suggestions

To finish your culinary journey:

  • Garnish generously: Use fresh cilantro and lime wedges to enhance presentation and flavor.
  • Pair with beverages: A crisp white wine or refreshing iced tea complements the dish beautifully.
  • Consider side salads: A light green salad can balance the richness of the bowl.

In conclusion, the Steak, Avocado, and Roasted Corn Bowl is not just a meal; it’s an adventure on your plate. Each bite tells a story of flavors, cultures, and shared experiences. So grab your ingredients, gather your loved ones, and embark on this delicious journey together!

Steak, Avocado, And Roasted Corn Bowl With Cilantro Cream Sauce

Prep Time 10 minutes
Cook Time 30 minutes
Total Time 40 minutes
Servings 4 servings
Calories 650
A vibrant and hearty bowl combining grilled steak, roasted corn, fresh avocado, and a flavorful cilantro cream sauce for a satisfying meal.

Ingredients

Meat

  • 1 lb steak such as flank or sirloin
  • 2 tablespoons olive oil
  • to taste salt
  • to taste pepper

Vegetables

  • 2 cups corn kernels fresh or frozen
  • 1 teaspoon chili powder
  • 1 teaspoon cumin
  • 1 ripe avocado, diced
  • 1 cup cherry tomatoes, halved
  • 1 cup cooked quinoa or rice optional for a heartier bowl
  • 1 lime juiced

Garnish & Sauce

  • 0.5 cup fresh cilantro
  • 0.5 cup sour cream
  • 0.25 cup mayonnaise
  • 1 lime juiced for sauce
  • 1 clove garlic, minced

Instructions 

  • Preheat grill to medium-high. Brush steak with olive oil, season with salt and pepper, then grill 5-7 minutes per side. Rest, then slice thinly.
  • Spread corn on a baking sheet, drizzle with olive oil, sprinkle with chili powder and cumin, then roast at 400°F (200°C) for 15 minutes.
  • Mix sour cream, mayonnaise, cilantro leaves, lime juice, and minced garlic until smooth. Season with salt and pepper.
  • Assemble bowls with a base of quinoa or rice, then add sliced steak, roasted corn, diced avocado, and cherry tomatoes. Drizzle with cilantro sauce and garnish with cilantro and lime.

Notes

For extra flavor, marinate the steak beforehand or add a squeeze of lime before serving.
Calories: 650kcal
Cost: $15
Course: Main Course
Cuisine: American
Keyword: Avocado, corn, Steak

Embark on a Delicious Journey with Soft White Filled Cookies

Welcome to the world of Soft White Filled Cookies, where each bite is a delightful embrace of sweetness and nostalgia. These cookies are not just a treat; they are a story, a memory, and a connection to the warmth of home. Join me as we dive into the rich flavors of these cookies, filled with luscious raspberry jam that will transport you back to your grandma’s kitchen. Whether you’re baking for a special occasion or simply to enjoy a cozy afternoon treat, this recipe is sure to become a cherished favorite in your household.

Why You’ll Love This Recipe

These cookies are perfect for any occasion, and here’s why you’ll love making them:

  • Irresistible Flavor: The combination of soft cookie dough and tart raspberry jam creates a perfect balance of sweetness and tang.
  • Easy to Make: With simple ingredients and straightforward steps, even novice bakers can whip these up with confidence.
  • Perfect for Sharing: These cookies are ideal for gatherings, parties, or just to brighten someone’s day with a homemade treat.
  • Customizable Options: Feel free to experiment with different fillings, such as strawberry or apricot jam, to suit your taste.
  • Nostalgic Connection: Each cookie carries a story, reminiscent of family gatherings and cherished memories, making your baking experience even more special.

Ingredient Breakdown

Let’s gather our ingredients for these delightful cookies:

  • 2 1/2 cups all-purpose flour: This is the foundation of our cookie dough. Make sure to measure accurately for the best results.
  • 1 tsp baking powder: This helps the cookies rise and achieve that soft, fluffy texture.
  • 1/2 tsp baking soda: Works with the baking powder to create the ideal cookie structure.
  • 1/2 tsp salt: A pinch of salt enhances all the flavors in the cookies.
  • 1 cup granulated sugar: Provides sweetness and contributes to the cookies’ lovely texture.
  • 1 stick (1/2 cup) unsalted butter, softened: The key to a rich and creamy dough.
  • 1 large egg: Acts as a binder and adds moisture to our cookies.
  • 1 tsp vanilla extract: A must-have for that warm, comforting flavor.
  • 1/2 cup sour cream: This adds a delightful tang and keeps the cookies moist.
  • Raspberry jam: The star of the show! Feel free to use your favorite brand or homemade jam for a personal touch.
  • Powdered sugar: For dusting the finished cookies, adding a touch of elegance and sweetness.

Pro Tips for Baking Success

Side view of cookies with a white, fluffy appearance and jam filling.

Here are some expert insights to ensure your cookie-making adventure is a success:

  • Chill the Dough: After mixing, wrap the dough and refrigerate for at least 2 hours. This helps the flavors meld and makes it easier to handle.
  • Watch the Baking Time: These cookies bake quickly, about 8 minutes. Keep an eye on them to avoid overbaking!
  • Use a Cookie Cutter: For perfectly shaped cookies, use a round cookie cutter or the rim of a glass to get uniform sizes.
  • Seal the Edges: When filling the cookies, crimp the edges tightly to prevent the jam from leaking during baking.
  • Experiment with Fillings: While raspberry is delightful, try using other flavors like cherry or lemon curd for a fun twist!
  • Let Them Cool: Allow the cookies to cool on the baking sheet for a few minutes before transferring them to a wire rack.
  • Dust with Powdered Sugar: For a beautiful presentation, dust the cooled cookies lightly with powdered sugar before serving.
  • Store Properly: Keep your cookies in an airtight container to maintain freshness for several days.

Avoiding Common Mistakes

Baking can be tricky, but here are some common pitfalls to avoid:

  • Not Measuring Ingredients: Baking is a science! Use proper measuring cups and spoons for accuracy.
  • Overmixing the Dough: Mix until just combined to prevent tough cookies.
  • Skipping the Chill: Don’t skip refrigerating the dough; it’s essential for the right texture.
  • Baking Straight from the Fridge: Allow the dough to sit at room temperature for a few minutes before rolling out.
  • Ignoring Oven Temperature: Always preheat your oven for even baking.

Delicious Variations to Try

Feeling adventurous? Here are some tasty variations to customize your cookies:

  • Chocolate Hazelnut Filling: Replace raspberry jam with chocolate hazelnut spread for a decadent treat.
  • Peanut Butter Cream: Use a creamy peanut butter filling instead of jam for a nutty twist.
  • Coconut Macaroons: Add shredded coconut to the dough for a tropical flavor.
  • Spiced Pumpkin Filling: For fall flavors, substitute the jam with spiced pumpkin puree.

Storage and Make-Ahead Instructions

Planning ahead? Here’s how to store and prepare for later:

  • Room Temperature: Store cookies in an airtight container for up to 5 days.
  • Refrigeration: For longer freshness, keep them in the fridge for up to a week.
  • Freezing: Freeze baked cookies in a single layer, then transfer to a container for up to 3 months. Thaw at room temperature before serving.
  • Make-Ahead Dough: Prepare the dough and freeze it. When ready to bake, just thaw and roll out!

Comprehensive FAQ

Here are some frequently asked questions about Soft White Filled Cookies:

  • Can I use different types of flour? Yes! You can substitute with whole wheat flour or gluten-free flour, but the texture may vary.
  • What can I use instead of sour cream? Greek yogurt works well as a substitute for sour cream.
  • How can I make these cookies less sweet? Reduce the sugar in the dough by 1/4 cup for a less sweet option.
  • Are these cookies suitable for freezing? Absolutely! They freeze well and can be enjoyed later.
  • Can I use homemade jam? Yes, homemade raspberry jam will add a personal touch and maximize flavor!
  • What’s the best way to crimp the edges? Use the tines of a fork or your fingers to seal the dough tightly around the filling.
  • How do I know when the cookies are done? Look for a light golden brown edge; the centers may look slightly underbaked.
  • Can I add nuts to the dough? Yes! Chopped nuts like walnuts or pecans can be added for extra texture.

Nutritional Tips and Dietary Adaptations

Here are some tips for making these cookies healthier:

  • Whole Grain Option: Use whole wheat flour for a fiber boost.
  • Less Sugar: Reduce sugar or use a natural sweetener like honey or maple syrup.
  • Dairy-Free Version: Substitute butter with coconut oil and use a dairy-free yogurt.
  • Vegan Adaptation: Replace the egg with a flax egg (1 tbsp ground flaxseed + 2.5 tbsp water).

Essential Equipment Recommendations

To create these delightful cookies, gather the following tools:

  • Mixing Bowls: A large and medium bowl for mixing ingredients.
  • Measuring Cups and Spoons: Essential for accurate measurements.
  • Rolling Pin: For rolling out the dough to the desired thickness.
  • Cookie Cutters: Use a round cutter for classic shapes.
  • Baking Sheet: A quality baking sheet ensures even baking.
  • Parchment Paper: To line the baking sheet for easy cleanup.
  • Cooling Rack: Helps cookies cool evenly after baking.

Serving Suggestions

These cookies can be enjoyed in various delightful ways:

  • With Tea or Coffee: Serve with a hot beverage for a charming afternoon treat.
  • Packaging for Gifts: Wrap them in decorative boxes or bags for thoughtful gifts.
  • At Picnics: These cookies are perfect for outdoor gatherings, bringing sweetness to your picnic basket.
  • As Dessert: Pair with vanilla ice cream for a delicious dessert experience.

Conclusion

As we wrap up our journey through the world of Soft White Filled Cookies, remember that baking is not just about the end result; it’s about the stories we create and the memories we share. These cookies, filled with the sweet essence of raspberry jam, are a delightful way to connect with loved ones and indulge in the joy of homemade treats. So put on your apron, gather your ingredients, and let the adventure begin! Happy baking!

Soft White Filled Cookies

Prep Time 20 minutes
Cook Time 8 minutes
Total Time 28 minutes
Servings 24 cookies
Calories 150
Delight in these soft, sweet cookies filled with raspberry jam and dusted with powdered sugar for a perfect treat.

Ingredients

Dough

  • 2 1/2 cups flour
  • 1 tsp baking powder
  • 1/2 tsp baking soda
  • 1/2 tsp salt
  • 1 cup sugar
  • 1 stick butter, softened
  • 1 egg egg
  • 1 tsp vanilla
  • 1/2 cup sour cream

Filling

  • raspberry jam raspberry jam (for filling cookies)

Topping

  • powdered sugar powdered sugar (for dusting)

Instructions 

  • Cream together butter and sugar. Add egg and vanilla, mix until just combined.
  • Whisk dry ingredients; add alternately with sour cream to form soft dough. Chill for 2-4 hours.
  • Preheat oven to 425°F (220°C). Roll out dough, cut into circles.
  • Place a teaspoon of jam on one cookie, top with another, seal edges. Bake for 8 minutes until golden.
  • Cool cookies, then dust with powdered sugar before serving.

Notes

Keep an eye on cookies while baking to prevent burning.
Calories: 150kcal
Cost: $10
Course: Dessert
Keyword: cookies

Discover the Joy of Morning Magic with Breakfast Apple Muffins

Welcome to a delightful journey where we explore the heartwarming world of **Breakfast Apple Muffins**. These muffins are not just a treat; they are a canvas for creativity and a celebration of flavors that will transform your morning routine. Imagine waking up to the warm aroma of fresh apples and spices wafting through your kitchen, inviting you to indulge in a comforting breakfast masterpiece. In this article, we will dive deep into the magic of these muffins, ensuring you have all the insights to make them perfectly. Let’s embark on this flavorful adventure together!

Why You’ll Love This Recipe

This recipe for Breakfast Apple Muffins is not just about taste; it’s about creating a memorable experience. Here are some reasons why you will cherish making these muffins:

  • Wholesome Ingredients: Made with whole wheat flour, fresh apples, and natural maple syrup, these muffins are a nutritious way to start your day.
  • Make-ahead Convenience: Bake a batch on Sunday and enjoy fresh muffins throughout the week—perfect for busy mornings!
  • Natural Sweetness: The combination of apples, applesauce, and maple syrup provides rich flavor without relying on refined sugars.
  • Versatile and Customizable: Easily adapt the recipe with your favorite nuts, spices, or even dried fruits to suit your taste.
  • Family-friendly: These muffins are a hit with kids and adults alike, making them an ideal choice for family breakfasts.

Ingredient Breakdown and Substitutions

Let’s dive into what makes these muffins so special. Here’s a detailed look at the key ingredients and some handy substitutions if you need them:

  • Whole Wheat Flour: Provides a hearty base. You can substitute with **all-purpose flour** or a gluten-free blend if desired.
  • Baking Powder & Baking Soda: Essential for leavening. Ensure they are fresh for optimal rise.
  • Ground Spices: Cinnamon and allspice add warmth. Feel free to experiment with nutmeg or pumpkin spice.
  • Room Temperature Eggs: They help create a smooth batter. If you forget to take them out, simply place them in warm water for a few minutes.
  • Unsweetened Applesauce: This adds moisture without extra sugar. You can replace it with mashed banana or yogurt for a twist.
  • Pure Maple Syrup: A natural sweetener that enhances flavor. Honey or agave syrup can be used as alternatives.
  • Coconut Oil or Butter: Adds richness. You can use vegetable oil if you prefer.
  • Grated Apples: The star of the show! Any sweet apple variety works, such as Fuji or Honeycrisp, but feel free to mix with tart apples for added depth.
  • Nuts: Optional, but they add crunch. Use walnuts, pecans, or leave them out for nut-free muffins.
  • Coarse Sugar for Topping: Gives a lovely crunch on top. You can skip this for a healthier version.

Pro Tips for Perfect Muffins

To ensure your muffins turn out heavenly every time, consider these expert insights:

  • Mixing Method: Don’t overmix the batter; it should be just combined for fluffy muffins.
  • Room Temperature Ingredients: Using eggs and applesauce at room temperature helps in achieving a uniform batter consistency.
  • Resting the Batter: Allow the batter to rest for about 10 minutes before baking to enhance the texture.
  • Oven Temperature: Preheat your oven properly; an adequate temperature ensures a good rise.
  • Muffin Liners: For easy cleanup and perfect shapes, use paper liners or grease the muffin pan well.
  • Don’t Skip the Topping: A sprinkle of coarse sugar before baking gives a delightful crunch.
  • Check for Doneness: Use a toothpick; it should come out clean but with a few moist crumbs for the perfect texture.
  • Cooling Time: Let the muffins cool in the pan for a few minutes before transferring to a wire rack to maintain their structure.

Common Mistakes and Troubleshooting

Even the best bakers face challenges. Here are some common mistakes and how to avoid them:

  • Too Dry Muffins: This often results from overbaking. Keep an eye on them and check for doneness a few minutes early.
  • Dense Texture: Overmixing can lead to tough muffins. Mix until just combined for a lighter result.
  • Uneven Baking: If your muffins are browning too quickly, rotate the pan halfway through baking.
  • Flavor Lacking: Always taste your batter before baking. Adjust sweetness or spices as needed.
  • Sticking to the Pan: Ensure you grease your muffin pan or use liners to avoid this issue.

Delicious Variations to Try

Once you master the basic recipe, here are some fun variations to keep things interesting:

  • Cherry Almond Muffins: Add a cup of chopped cherries and a teaspoon of almond extract for a delightful twist.
  • Spiced Pumpkin Apple Muffins: Replace half of the applesauce with pumpkin puree and add a pinch of nutmeg for a fall-inspired treat.
  • Chocolate Chip Apple Muffins: Stir in a cup of dark chocolate chips for an indulgent version that kids will adore.
  • Cranberry Orange Muffins: Substitute grated apple with fresh cranberries and add orange zest for a zesty flavor.

Storage and Make-Ahead Instructions

These muffins are perfect for meal prep! Here’s how to store them:

  • Room Temperature: Store in an airtight container for up to 3 days.
  • Refrigerator: Keep in the fridge for up to a week. Reheat in the microwave for a few seconds before serving.
  • Freezer: Freeze individual muffins for up to 3 months. Thaw overnight in the fridge or microwave for a quick snack.
  • Make-ahead Tips: Prepare the batter the night before and bake in the morning for fresh muffins!

Frequently Asked Questions

Got questions? We’ve got answers! Here are some common queries about Breakfast Apple Muffins:

  • Can I use frozen apples? Absolutely! Just thaw and drain excess moisture before adding to the batter.
  • How can I make these muffins gluten-free? Use a gluten-free flour blend and ensure all other ingredients are gluten-free.
  • What can I substitute for eggs? You can use flax eggs or unsweetened applesauce as a binder.
  • Can I add more spices? Definitely! Feel free to adjust spices to your preference for a more robust flavor.
  • Are these muffins suitable for kids? Yes! They are healthy and a great way to sneak in fruits.
  • How do I know when they are done? A toothpick inserted in the center should come out clean or with a few moist crumbs.
  • Can I double the recipe? Yes! Just make sure to use enough muffin pans or bake in batches.
  • What should I serve with these muffins? Pair with yogurt, fresh fruit, or a drizzle of honey for a delightful breakfast.

Nutritional Tips and Dietary Adaptations

These muffins can cater to various dietary needs:

  • Vegan Option: Substitute eggs with flax eggs and use plant-based milk.
  • Low-Sugar Option: Reduce the amount of maple syrup or use a sugar substitute.
  • High-Protein Boost: Add a scoop of protein powder to the dry ingredients.
  • Nut-Free Version: Simply omit the nuts or replace them with seeds.

Essential Equipment for Baking

Having the right tools can make all the difference. Here’s what you’ll need:

  • Muffin Pan: A standard 12-cup muffin pan works perfectly for this recipe.
  • Parchment Paper Liners: These prevent sticking and make cleanup a breeze.
  • Mixing Bowls: A large bowl for dry ingredients and a medium bowl for wet ingredients will streamline your process.
  • Whisk: Essential for combining ingredients smoothly.
  • Rubber Spatula: Great for folding in ingredients without overmixing.

Serving Suggestions

Ready to enjoy your muffins? Here are some delightful serving suggestions:

  • Warm with Butter: A pat of butter melting into a warm muffin is pure bliss.
  • Drizzle of Honey: Add a touch of sweetness with honey or maple syrup on top.
  • Yogurt Parfait: Layer your muffin with Greek yogurt and berries for a wholesome breakfast.
  • On-the-Go Snack: Pack a muffin in your bag for a healthy snack during your busy day.

In conclusion, these **Breakfast Apple Muffins** are more than just a recipe; they are a warm invitation to savor the simple joys of life. With their wholesome ingredients, delightful flavors, and endless variations, they are sure to become a staple in your kitchen. So grab your apron and let’s create some magical mornings together!

Best Breakfast Apple Muffins

Prep Time 10 minutes
Cook Time 20 minutes
Total Time 30 minutes
Servings 12 muffins
Calories 180
Start your day with these moist and flavorful apple muffins, packed with cinnamon and optional nuts for added crunch.

Ingredients

Dry ingredients

  • 2 cups whole wheat flour
  • 1 tsp baking powder
  • 1 tsp baking soda
  • 2 tsp ground cinnamon
  • 1.5 tsp allspice
  • 1.5 tsp salt

Wet ingredients

  • 2 large eggs, room temperature
  • 0.75 cup unsweetened smooth applesauce (room temperature)
  • 0.67 cup pure maple syrup (room temperature)
  • 0.33 cup melted coconut oil or vegetable oil or melted butter
  • 1.5 tsp pure vanilla extract

Main ingredients

  • 2 cups grated or shredded apple (about 2 peeled apples)
  • 0.75 cup chopped walnuts or pecans (optional)
  • 1 tbsp coarse sugar for topping

Instructions 

  • Preheat oven to 350°F (175°C). Line a muffin tin with paper liners.
  • In a large bowl, whisk together dry ingredients: flour, baking powder, baking soda, cinnamon, allspice, and salt.
  • In another bowl, beat eggs, then mix in applesauce, maple syrup, melted oil, and vanilla.
  • Combine wet and dry ingredients, then fold in grated apple and nuts if using.
  • Divide batter among muffin cups, sprinkle with coarse sugar, and bake for 20 minutes.

Notes

For extra flavor, add a pinch of nutmeg or top with additional nuts.
Calories: 180kcal
Cost: $12
Course: Breakfast
Cuisine: American
Keyword: Apple, breakfast, Muffins

Indulge in the Sweet Adventure of No-Bake Oreo Cheesecake Cups

Welcome to a delightful culinary journey where creamy textures and chocolatey bliss come together in a simple yet irresistible dessert: No-Bake Oreo Cheesecake Cups. This easy recipe invites you to savor each layer, making it the perfect treat for any occasion. Whether you’re hosting a gathering or just craving something sweet, these cheesecake cups not only look stunning but also promise a burst of flavor with every bite. Let’s dive into the world of flavors, creativity, and joy these little cups can bring!

Why You’ll Love This Recipe

This recipe isn’t just about satisfying your sweet tooth; it’s about sharing joy and creating memories. Here are five compelling reasons to fall in love with these No-Bake Oreo Cheesecake Cups:

  • No baking required: Perfect for those warm days when you want a sweet treat without heating up the kitchen.
  • Quick and easy: With minimal prep time, you can whip these up in under 30 minutes, leaving plenty of time for chilling.
  • Individual servings: These dessert cups are ideal for portion control—no slicing or guessing needed!
  • Customizable: Add your favorite toppings, from fresh fruit to chocolate drizzle, to create your perfect dessert.
  • Impressive presentation: Serve them in clear cups to showcase the beautiful layers, making them a hit at any gathering.

Ingredients Breakdown

To create these mouthwatering No-Bake Oreo Cheesecake Cups, you’ll need the following ingredients:

  • 18 Oreo cookies: Crushed for the base—feel free to substitute with gluten-free Oreos if needed.
  • 4 tablespoons melted butter: This binds the cookie crust together. Margarine can be used as an alternative.
  • 8 oz cream cheese: Ensure it’s softened for a smooth filling; you can use low-fat cream cheese for a lighter option.
  • ½ cup powdered sugar: Sweetens your cheesecake filling; you can substitute with a sugar alternative if desired.
  • 1 teaspoon vanilla extract: Adds depth of flavor; use pure vanilla extract for the best result.
  • 1 cup heavy whipping cream: Whipped to stiff peaks for a light, airy texture in the filling; coconut cream is a great dairy-free alternative.
  • Optional toppings: Crushed Oreos, chocolate drizzle, whipped cream, or mini chocolate chips to make your creation truly unique.

Step-by-Step Instructions

Side view of dessert cups showcasing creamy cheesecake and chocolate drizzle.

Follow these detailed steps to create your No-Bake Oreo Cheesecake Cups:

  1. Crush the Oreo cookies in a food processor or place them in a zip bag and crush them with a rolling pin until they resemble fine crumbs.
  2. Mix the crushed Oreos with melted butter until well combined.
  3. Spoon a layer of the Oreo mixture into the bottom of dessert cups and press it lightly to form a crust.
  4. In a mixing bowl, beat the softened cream cheese, powdered sugar, and vanilla extract until smooth and creamy.
  5. In another bowl, whip the heavy cream until stiff peaks form.
  6. Gently fold the whipped cream into the cream cheese mixture until fully combined.
  7. Pipe or spoon the cheesecake filling over the Oreo crust in each cup.
  8. If desired, add another layer of crushed Oreos on top of the cheesecake filling.
  9. Refrigerate for 1-2 hours until set and firm.
  10. Top with whipped cream, crushed Oreos, or a drizzle of chocolate before serving. Enjoy chilled!

Expert Tips for Perfect Cheesecake Cups

Here are some expert insights to elevate your No-Bake Oreo Cheesecake Cups:

  • Temperature matters: Ensure your cream cheese is at room temperature for easy blending and a creamy texture.
  • Whip it good: Make sure to whip the cream until stiff peaks form, which will give your filling a light and fluffy consistency.
  • Chill time: Don’t rush the chilling process; allowing the cups to set for a couple of hours will enhance the flavors and improve texture.
  • Layer strategically: For a stunning visual, alternate layers of cheesecake and crushed Oreos to create an appealing look.
  • Experiment with flavors: Consider adding flavored extracts like almond or mint to the cheesecake filling for a fun twist.

Common Mistakes and Troubleshooting

Even the best chefs make mistakes, so here are some common issues and how to avoid them:

  • Runny filling: Ensure that your heavy cream is whipped to stiff peaks and that the cream cheese is well-incorporated.
  • Crust falling apart: Use enough melted butter to bind the cookie crumbs together, and press firmly into the cups.
  • Overmixing the filling: Gently fold the whipped cream into the cream cheese mixture to keep it airy and light.

Creative Variations

Make these No-Bake Oreo Cheesecake Cups your own with these fun variations:

  • Chocolate Peanut Butter Cups: Add peanut butter to the cheesecake filling for a rich, nutty flavor.
  • Berry Bliss Cups: Layer in fresh berries like strawberries or raspberries for a fruity twist.
  • Mint Chocolate Cups: Incorporate mint extract into the filling for a refreshing flavor.
  • Mocha Delight: Mix instant coffee granules into the cheesecake filling for a coffee-flavored treat.

Storage and Make-Ahead Instructions

These cheesecake cups can be made ahead of time, making them a great option for gatherings:

  • Refrigeration: Store covered in the fridge for up to 4 days.
  • Freezing: Freeze for up to 1 month; thaw in the fridge before serving.

Frequently Asked Questions

Here are some common questions about No-Bake Oreo Cheesecake Cups:

  • Can I use low-fat cream cheese? Yes, low-fat cream cheese can be used for a lighter version without sacrificing too much flavor.
  • How do I make these cups dairy-free? Substitute cream cheese with a dairy-free alternative and use coconut cream instead of heavy cream.
  • What can I use instead of Oreos? Any chocolate cookie can be used as a crust; try chocolate graham crackers for a different flavor.
  • Can I make these in advance? Absolutely! They are perfect for making ahead of time and storing in the fridge.
  • How can I make these gluten-free? Use gluten-free Oreo cookies or another gluten-free cookie for the crust.
  • What toppings do you recommend? Whipped cream, crushed Oreos, chocolate drizzle, or fresh fruit are all excellent choices!
  • How long do they need to chill? They should chill for at least 1-2 hours to set properly.
  • Can I use flavored whipped cream? Yes! Flavored whipped toppings can add a unique twist to your dessert.

Nutrition Tips and Dietary Adaptations

For those conscious about nutrition or dietary restrictions, consider these adaptations:

  • Lower sugar option: Use a sugar substitute for powdered sugar and opt for unsweetened whipped cream.
  • Vegan alternative: Use vegan cream cheese and coconut cream for a completely plant-based dessert.
  • Protein boost: Incorporate protein powder into the cheesecake filling for added nutrition.

Equipment Recommendations

To create these cheesecake cups, here’s what you’ll need:

  • Food processor: Essential for crushing Oreos quickly and efficiently.
  • Mixing bowls: Use separate bowls for the cream cheese and whipped cream mixtures.
  • Hand mixer or stand mixer: For beating cream cheese and whipping cream.
  • Measuring cups and spoons: To ensure accurate ingredient measurements.
  • Clear dessert cups: Perfect for showcasing your beautiful layers!

Serving Suggestions

Serve these delightful cups at any gathering with these creative suggestions:

  • Buffet-style dessert table: Arrange the cups on a tiered stand for an impressive display.
  • Individual place settings: Present each guest with their own cup for a personal touch.
  • Pair with coffee or tea: These rich flavors complement a warm cup of coffee or a refreshing cup of tea beautifully.

In conclusion, the No-Bake Oreo Cheesecake Cups are not just a dessert; they are a story waiting to be shared. With layers of crunchy Oreos and silky cheesecake, each cup invites you to explore the delightful world of flavors. Perfect for any occasion, this recipe brings together simplicity, creativity, and a dash of love—all wrapped up in a deliciously sweet adventure. Happy baking!

No-Bake Oreo Cheesecake Cups

Prep Time 20 minutes
Total Time 20 minutes
Servings 4 cups
Calories 350
Delight in these creamy, no-bake cheesecake cups layered with crushed Oreos and topped with optional garnishes for a quick, indulgent treat.

Ingredients

Crust and Filling

  • 18 pieces Oreo cookies, crushed
  • 4 tablespoons melted butter
  • 8 oz cream cheese, softened
  • 0.5 cup powdered sugar
  • 1 teaspoon vanilla extract
  • 1 cup heavy whipping cream

Optional toppings

  • Crushed Oreos Crushed Oreos (optional)
  • Chocolate drizzle Chocolate drizzle (optional)
  • Whipped cream Whipped cream (optional)
  • Mini chocolate chips Mini chocolate chips (optional)

Instructions 

  • Crush Oreos and mix with melted butter to form crust.
  • Press mixture into the bottom of dessert cups.
  • Beat cream cheese, powdered sugar, and vanilla until smooth.
  • Whip heavy cream until stiff peaks form and fold into cream cheese mixture.
  • Spoon filling over crust, refrigerate for 1-2 hours, then top with optional toppings before serving.

Notes

Chill the cheesecake cups well for best texture and flavor.
Calories: 350kcal
Cost: $10
Course: Dessert
Keyword: cheesecake, Oreo

Welcome to Your Tropical Escape: The Coconut Strawberry Refresher

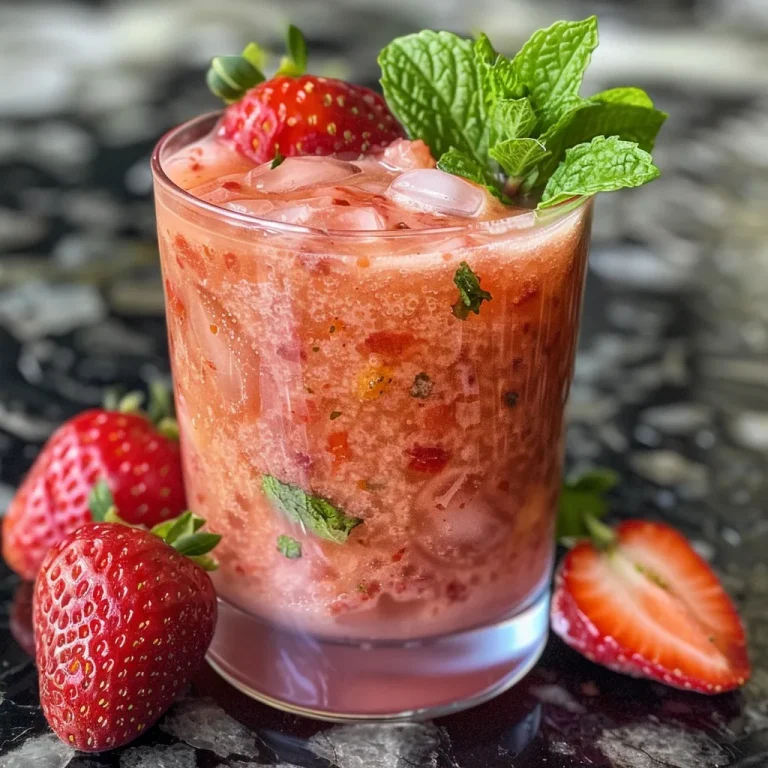
Imagine yourself lounging on a sun-kissed beach, the gentle sound of waves lapping at the shore, and a refreshing drink in hand that captures the essence of summer. Enter the Coconut Strawberry Refresher—a vibrant, tropical drink that marries the creamy goodness of coconut milk with the sweetness of fresh strawberries. Perfect for warm days or as a cheerful pick-me-up, this recipe is not just a drink; it’s a journey to sunny shores. Let’s dive into this delightful concoction!

Why You’ll Love This Recipe

There’s so much to love about the Coconut Strawberry Refresher! Here are five compelling reasons why this drink should be on your must-try list:

  • Refreshing Flavor Profile: The combination of coconut and strawberries creates a deliciously sweet and creamy drink that’s perfect for hot summer days.
  • Nutrient-Packed Ingredients: With fresh strawberries and coconut milk, you’re not just enjoying a tasty drink; you’re also getting vitamins, antioxidants, and healthy fats.
  • Customizable Options: Whether you’re looking for a vegan twist or a lower-calorie version, this refresher can easily adapt to your dietary preferences.
  • Quick and Easy Preparation: With just a handful of ingredients and minimal prep time, you can whip up this refresher in no time.
  • Perfect for Any Occasion: Whether it’s a backyard barbecue, a picnic, or a cozy night in, this drink fits right in!

Ingredients Breakdown

Let’s take a look at the ingredients that make this Coconut Strawberry Refresher so special:

  • 1 cup Coconut Milk: Use full-fat for a creamy texture or swap with almond milk for a lighter version.
  • 1 cup Strawberries: Fresh is great, but you can also use frozen strawberries for convenience.
  • 2 tablespoons Maple Syrup: This natural sweetener enhances the flavors; consider agave nectar as a substitute.
  • 1 tablespoon Lemon Juice: Adds a zesty kick; lime juice can be used for a different twist.
  • 1 cup Water: No substitutions needed; it helps to blend everything smoothly.
  • 1 cup Ice Cubes: Essential for chilling the drink and achieving that refreshing quality.
  • Garnish: A fresh strawberry or a sprig of mint for a lovely presentation.

Steps to Create Your Refresher

A refreshing drink with coconut milk and strawberries, garnished with a fresh strawberry.

Making this Coconut Strawberry Refresher is as easy as 1-2-3! Follow these simple steps:

  1. In a blender, combine the coconut milk, strawberries, maple syrup, lemon juice, water, and ice cubes.
  2. Blend until smooth and creamy. Adjust sweetness by adding more maple syrup if desired.
  3. Pour into a glass and garnish with a fresh strawberry or mint sprig. Serve immediately and enjoy!

Common Mistakes and Troubleshooting

To ensure your refresher turns out perfectly, avoid these common pitfalls:

  • Not using ripe strawberries: Choose fresh, ripe strawberries for the best flavor. Overripe or underripe berries can affect the taste.
  • Blending too long: Blend just until smooth; over-blending can make the drink too watery.
  • Forget to chill: Use plenty of ice to keep the drink cold and refreshing. If using fresh strawberries, chill them before blending.

Pro Tips for the Perfect Coconut Strawberry Refresher

Elevate your refreshing experience with these expert insights:

  • Experiment with flavors: Add a pinch of vanilla extract or coconut extract for an extra depth of flavor.
  • Mix it up: Incorporate other fruits like mango or pineapple to create a tropical blend.
  • Adjust thickness: If you prefer a thicker drink, reduce the amount of water or add more strawberries.
  • Chill your glass: For an extra refreshing experience, chill your serving glass in the freezer for a few minutes before pouring.
  • Make it a mocktail: Add a splash of sparkling water for a fun fizz.
  • Health boost: Throw in a handful of spinach or kale for a green smoothie twist without losing flavor.
  • Presentation counts: Use colorful straws or fun glasses to enhance visual appeal.
  • Garnish creatively: Use edible flowers or coconut flakes to make your drink Instagram-worthy!

Variations to Try

Feeling adventurous? Here are four delicious variations of the Coconut Strawberry Refresher:

  • Tropical Paradise Refresher: Add diced pineapple and coconut flakes to the blend for a taste of the tropics.
  • Coconut Strawberry Smoothie Bowl: Thicken the refresher with less water and serve it in a bowl topped with granola, chia seeds, and sliced fruits.
  • Berry Blast Refresher: Mix in blueberries and raspberries for a berry medley that’s bursting with flavor.
  • Green Coconut Refresher: Blend in a handful of spinach for a nutrient boost and a beautiful green color.

Make-Ahead and Storage Tips

If you want to prepare ahead of time, here’s how:

  • Make-Ahead: You can blend the ingredients (except ice) and store them in the fridge for up to 24 hours. Add ice just before serving.
  • Storage: The refresher is best enjoyed fresh, but you can store leftovers in an airtight container in the fridge for one day. Stir well before serving.

Frequently Asked Questions (FAQs)

Got questions? Here are some common inquiries about the Coconut Strawberry Refresher:

  • Can I use frozen strawberries? Yes! Frozen strawberries are great for a chilled refresher and can be used instead of fresh.
  • Is it possible to make this refresher without coconut milk? Absolutely! Almond milk or oat milk can be used as a substitute for a lighter option.
  • Can I make this drink alcoholic? Yes! A splash of rum or vodka can elevate it to a fun cocktail.
  • How can I make it sweeter? Adjust the sweetness by adding more maple syrup or honey according to your taste.
  • What’s the best way to serve it? Serve it chilled in a tall glass with a garnish for a beautiful presentation.
  • How do I store leftovers? Store any leftovers in an airtight container in the refrigerator for up to 24 hours.
  • What can I serve with this refresher? Pair it with light snacks like fruit skewers, chips and salsa, or fresh salads.
  • Can I use other fruits? Yes! Feel free to blend in other fruits like mango, pineapple, or blueberries for more variety!

Nutritional Tips and Dietary Adaptations

This Coconut Strawberry Refresher is naturally vegan and gluten-free, making it a versatile choice for many dietary needs. Here are some additional tips:

  • Low-Calorie Option: Reduce the amount of maple syrup or use a sugar-free sweetener.
  • Protein Boost: Add a scoop of protein powder or Greek yogurt to make it more filling.
  • Kid-Friendly Version: Make it fun for kids by adding colorful straws and letting them choose their favorite garnishes!

Essential Equipment for Your Refresher

To create this delightful drink, here’s what you’ll need:

  • Blender: A high-speed blender will ensure a smooth consistency.
  • Measuring Cups: For precise ingredient measurements.
  • Serving Glasses: Choose fun or colorful glasses to enhance the experience.
  • Strainer: Optional, if you prefer a smoother drink without pulp.

Serving Suggestions

Pair your Coconut Strawberry Refresher with these delightful options for a complete experience:

  • Fresh Fruit Skewers: A colorful array of seasonal fruits complements the drink beautifully.
  • Light Salads: Serve alongside a refreshing salad with citrus dressing.
  • Chips and Salsa: The savory crunch of chips goes perfectly with the sweet refresher.

Conclusion

With its luscious blend of coconut and strawberry, this Coconut Strawberry Refresher is a delightful way to transport your taste buds to tropical shores. Whether you’re enjoying it on a sunny day or serving it at a gathering, this drink is sure to impress. Don your apron, gather your ingredients, and embark on this culinary adventure. Cheers to your next tropical escape!

Coconut Strawberry Refresher Your Tropical Sip of Joy

Prep Time 5 minutes
Total Time 5 minutes
Servings 2 glasses
Calories 150
Enjoy a vibrant and refreshing tropical beverage that combines the sweetness of strawberries with the creamy richness of coconut milk, perfect for a hot day or a special occasion.

Ingredients

Liquid Base

  • 1 cup Coconut Milk (Swap with almond milk for a lighter version)
  • 1 cup Strawberries (Use fresh or frozen)
  • 2 tablespoons Maple Syrup (Agave nectar can substitute)
  • 1 tablespoon Lemon Juice (Lime juice for a zesty twist)
  • 1 cup Water (No substitutions needed)
  • 1 cup Ice Cubes (For chilling the drink)
  • 1 piece Fresh Strawberry or Mint Sprig (For garnish)

Instructions 

  • Add all ingredients to a blender.
  • Blend until smooth and frosty.
  • Pour into glasses and garnish with a strawberry or mint sprig.

Notes

For an extra tropical flavor, add a splash of pineapple juice.
Calories: 150kcal
Cost: $12
Course: Beverage
Cuisine: Tropical
Keyword: coconut, Strawberry

Welcome to a vibrant journey of flavors! If you’re looking for a drink that encapsulates the essence of summer, look no further than the Coconut Strawberry Refresher. This drink is a delightful mix of sweet, fresh strawberries and creamy coconut milk, with a touch of lemon to elevate it. Whether you’re lounging by the pool or hosting a gathering, this drink is a little slice of paradise that’s perfect for any occasion. Let’s dive into the world of this refreshing beverage—your taste buds are in for a treat!

Why You’ll Love This Recipe

This Coconut Strawberry Refresher is not just another drink; it’s an experience. Here are a few reasons why you’ll absolutely adore this recipe:

  • Refreshing Flavor: The combination of strawberries and coconut milk creates a fruity and creamy delight that’s incredibly refreshing on warm days.
  • Quick and Easy: With just a handful of ingredients and a blender, you can whip up this drink in no time—perfect for busy days or last-minute guests.
  • Customizable: This refresher is versatile! You can adjust the sweetness, add extra flavors, or even make it a smoothie bowl base.
  • Healthy Ingredients: Packed with natural sweetness from strawberries and the goodness of coconut milk, this drink is a healthier alternative to sugary beverages.
  • Perfect for Any Occasion: Whether it’s a sunny afternoon on the patio or a festive gathering, this drink fits right in!

Ingredients Breakdown

Before we get into the nitty-gritty of how to make this delightful refresher, let’s take a closer look at the ingredients you’ll need:

  • 1½ cups fresh strawberries: Make sure they are ripe and hulled for maximum sweetness and flavor.
  • 1 cup coconut milk: Use full-fat for a creamier texture or light coconut milk for a lighter option.
  • 1 cup cold water: This helps to dilute the mixture slightly, making it refreshing without being heavy.
  • 1-2 tablespoons maple syrup or honey: Adjust based on your sweetness preference—maple syrup adds a unique flavor!
  • 1 tablespoon fresh lemon juice: A touch of acidity that brightens the drink and balances the sweetness.
  • Ice cubes: Essential for that cold, refreshing sip!
  • Fresh strawberry slices (for garnish): Adds a pretty touch and a hint of extra flavor.
  • Mint leaves (optional): A sprinkle of mint can elevate the drink’s freshness.

Ingredient Substitutions

If you find yourself short on some ingredients, don’t worry! Here are some smart substitutions:

  • Strawberries: You can use frozen strawberries if fresh ones aren’t available—just keep in mind that it may change the texture slightly.
  • Coconut milk: Almond milk or oat milk can work as dairy-free alternatives for a similar creamy effect.
  • Maple syrup or honey: Agave nectar or stevia can be used if you’re looking for a low-calorie option.
  • Lemon juice: Lime juice can be a fun twist that complements the strawberries beautifully.

Step-by-Step Instructions

Ready to create your own Coconut Strawberry Refresher? Follow these simple steps:

  1. In a blender, combine the strawberries, coconut milk, cold water, maple syrup, and lemon juice.
  2. Blend until smooth and creamy. If you prefer a smoother texture, you can strain the mixture through a fine mesh sieve.
  3. Fill your glasses with ice, then pour in the blended refresher.
  4. If you’re serving later, let it chill in the fridge for about 20 minutes.
  5. Garnish with fresh strawberry slices and mint leaves before serving for an extra touch of elegance.

Pro Tips for the Perfect Coconut Strawberry Refresher

Want to elevate your refresher game? Here are some expert tips:

  • Use ripe strawberries: For the best flavor, opt for fresh, ripe strawberries that are bright red and fragrant.
  • Chill your ingredients: Chill your coconut milk and water beforehand for a refreshingly cold drink without diluting it with too much ice.
  • Experiment with flavors: Add a splash of vanilla extract or a handful of fresh basil for a unique twist.
  • Adjust sweetness: Taste as you go! You can always add more sweetener if needed.
  • Layer your drinks: For a beautiful presentation, blend the ingredients separately and layer them in the glass.
  • Make it a smoothie: Add a banana for extra creaminess and nutrition—perfect for breakfast!
  • Use a high-speed blender: This ensures a silky-smooth texture, making every sip a delight.
  • Serve immediately: This refresher is best enjoyed fresh to capture all the flavors and textures.

Common Mistakes and Troubleshooting

Even the best chefs make mistakes! Here are some common pitfalls and how to avoid them:

  • Too watery: If your drink is too thin, reduce the amount of cold water or add more strawberries.
  • Not sweet enough: Always taste before serving; you can add more maple syrup or honey to suit your palate.
  • Separation issues: If the mixture separates after sitting, give it a quick stir before serving for a uniform texture.

Variations of the Coconut Strawberry Refresher

Want to mix things up? Here are some fun variations to try:

  • Berry Blast: Add a mix of other berries like blueberries or raspberries for a colorful twist.
  • Tropical Paradise: Mix in some pineapple chunks for an even more tropical vibe!
  • Green Refresher: Blend in a handful of spinach or kale for a nutrient boost without sacrificing flavor.
  • Frozen Delight: Use frozen strawberries and skip the ice for a thicker, smoothie-like consistency.

Storage and Make-Ahead Instructions

Planning to serve this refresher for a gathering? Here’s how to prepare ahead of time:

  • Make ahead: You can prepare the mixture a few hours in advance and store it in the fridge. Just give it a good shake before serving.
  • Storage: Store leftovers in an airtight container in the fridge for up to 24 hours. Note that it’s best when fresh, as the flavors will diminish over time.

Frequently Asked Questions

Here are some common questions about the Coconut Strawberry Refresher:

  • Can I use frozen strawberries? Yes, frozen strawberries work great and can help chill the drink without needing ice!
  • Do I need to soak the chia seeds for added nutrition? If using chia seeds, soaking them for at least 30 minutes beforehand is recommended to enhance the texture.
  • Is this drink naturally sweet? Absolutely! The natural sweetness from strawberries and maple syrup makes it delicious without being overly sugary.
  • Can I make this drink ahead for a party? Yes! Prepare the mixture a few hours in advance and store it in the fridge until you’re ready to serve.
  • Can I replace coconut water? Yes, you can use coconut water in place of coconut milk for a lighter alternative.
  • Is it safe for kids? Definitely! This refresher is a kid-friendly drink that’s healthy and delicious.
  • How can I make it vegan? This recipe is already vegan-friendly, just ensure you’re using maple syrup instead of honey.
  • Can I add protein powder? Yes, adding a scoop of your favorite protein powder can turn this refresher into a post-workout drink!

Nutritional Tips and Dietary Adaptations

This Coconut Strawberry Refresher is not only delicious but can also be tailored to fit various dietary needs:

  • Low-Calorie Option: Use unsweetened coconut milk and reduce the amount of sweetener.
  • Gluten-Free: This drink is naturally gluten-free, making it suitable for those with gluten sensitivities.
  • Dairy-Free: Made entirely from plant-based ingredients, it’s perfect for anyone avoiding dairy.
  • Nut-Free: If you have nut allergies, stick to coconut milk, which is a safe and creamy alternative.

Equipment Recommendations

To make this Coconut Strawberry Refresher, you’ll need a few essential kitchen tools:

  • Blender: A high-speed blender is ideal for achieving that smooth, creamy texture.
  • Measuring Cups: Accurate measurements ensure the perfect balance of flavors.
  • Fine Mesh Sieve: If you prefer a smoother drink, this tool will help strain any pulp.
  • Glassware: Opt for tall glasses to showcase the beautiful color of your refresher.

Serving Suggestions

To make your Coconut Strawberry Refresher even more delightful, consider these serving suggestions:

  • Pair with Snacks: It goes wonderfully with light snacks like fruit platters, cheese boards, or tropical-themed appetizers.
  • Garnish Creatively: Use colorful straws, fun drink umbrellas, or edible flowers to make it visually appealing.
  • Create a Drink Station: For parties, set up a DIY drink station with various garnishes and flavor add-ins.

Embrace the joy of flavor exploration with this Coconut Strawberry Refresher! It’s not just a drink; it’s a celebration of summer, flavor, and the beauty of simple ingredients coming together. So grab your blender, gather your friends, and sip your way to paradise!

Coconut Strawberry Refresher

Prep Time 10 minutes
Total Time 10 minutes
Servings 2 glasses
Calories 150
A refreshing and fruity beverage perfect for hot days, blending fresh strawberries with coconut milk and a hint of lemon.

Ingredients

Fruits and liquids

  • 1.5 cups fresh strawberries, hulled
  • 1 cup coconut milk (full-fat or light)
  • 1 cup cold water
  • 2 tablespoons maple syrup or honey
  • 1 tablespoon fresh lemon juice
  • as needed ice cubes Ice cubes
  • for garnish Fresh strawberry slices
  • optional Mint leaves (for garnish)

Instructions 

  • Combine strawberries, coconut milk, water, maple syrup, and lemon juice in a blender. Blend until smooth.
  • Optional: Strain through a fine mesh sieve for a smoother texture.
  • Fill glasses with ice, then pour the blended mixture over.
  • Chill in the fridge for 20 minutes if serving later.
  • Garnish with strawberry slices and mint leaves before serving.

Notes

Use fresh strawberries for the best flavor and garnish with mint for a refreshing touch.
Calories: 150kcal
Cost: $10
Course: Beverage
Keyword: coconut, Strawberry

Welcome to the World of Mango Iced Tea!

When the sun is shining and the temperatures are soaring, nothing refreshes quite like a glass of Mango Iced Tea. This delightful drink not only quenches your thirst but also transports your taste buds to a tropical paradise with every sip. With its vibrant flavors and aromatic tea, this recipe is your passport to summer bliss. Join me, Jack Miller, as we explore the joys of making this refreshing beverage that’s perfect for warm days, gatherings, or simply relaxing on your porch.

Why You’ll Love This Recipe

Here are a few reasons why this homemade Mango Iced Tea will become your new favorite:

  • Refreshing Flavor: The sweet and tangy notes of ripe mango combined with the robust flavor of tea create a drink that’s both invigorating and satisfying.
  • Customizable: Adjust the sweetness and flavors to your liking by experimenting with different types of tea or sweeteners.
  • Healthy Alternative: Made with fresh ingredients, this iced tea is a healthier option compared to sugary store-bought beverages.
  • Easy to Prepare: With just a few simple steps, you can whip up a batch in no time, perfect for unexpected guests!
  • Versatile Drink: Serve it at parties, picnics, or enjoy it as a refreshing drink after a workout.

Ingredients Breakdown

Before we dive into the preparation, let’s look at the ingredients you’ll need to make this flavored iced tea:

  • 4 cups water: This is essential for brewing your tea base.
  • 2 black tea bags: For a robust flavor, though you can substitute with green tea for a lighter taste.
  • 1 ripe mango: Ensure it’s peeled and diced for a smooth puree.
  • 2 tablespoons honey: Adjust to taste; you can also use agave syrup or sugar if preferred.
  • 1 tablespoon lemon juice: This adds a zesty kick that complements the sweetness of the mango.
  • Ice cubes: To chill your drink to perfection.
  • Fresh mint (optional): For garnish and an extra layer of freshness.

How to Make Your Mango Iced Tea

Side view of a vibrant Mango Iced Tea, showcasing diced mango pieces and tea color.

Ready to make your own delicious Mango Iced Tea? Follow these simple steps:

  • Step 1: Brew the Tea – Bring 4 cups of water to a boil. Remove from heat, add the tea bags, and let them steep for 5 minutes. Discard the tea bags to avoid bitterness.
  • Step 2: Make the Mango Puree – In a blender, combine the diced mango, honey, and lemon juice. Blend until smooth. If you prefer a smoother texture, strain the puree.
  • Step 3: Mix the Tea and Mango – In a large pitcher, combine the brewed tea and mango puree. Stir well to blend the flavors.
  • Step 4: Chill and Serve – Let the mixture chill in the fridge for at least 1 hour. When ready to serve, fill glasses with ice, pour in the mango tea, and garnish with fresh mint.

Pro Tips for the Best Mango Iced Tea

To elevate your Mango Iced Tea, consider these expert insights:

  • Use Fresh Ingredients: Fresh mangoes yield the best flavor. If mangoes are out of season, consider frozen mango chunks.
  • Experiment with Tea: Try different types of tea such as herbal or flavored teas to create unique variations.
  • Sweetness Control: Taste as you go! You can always add more honey or lemon to adjust sweetness and acidity.
  • Chill Time: Allow the tea to chill for longer for a more intense flavor; overnight chilling works wonders.
  • Infuse Additional Flavors: Add a slice of ginger or a sprig of basil during the steeping process for a fresh twist.
  • Batch Prep: Make a larger batch for gatherings. This drink is sure to impress your guests!
  • Presentation Matters: Serve in tall glasses with ice and garnishes for an appealing look.
  • Pair with Food: This iced tea goes well with spicy dishes, salads, or grilled meats.

Common Mistakes and Troubleshooting

Even the best of us can have hiccups in the kitchen. Here are common mistakes to avoid:

  • Oversteeping the Tea: If you leave the tea bags in too long, it can become bitter. Stick to the recommended steeping time.
  • Using Unripe Mango: An unripe mango can lead to a less flavorful drink. Choose ripe mangoes for optimal sweetness.
  • Not Chilling: Serving the tea warm can diminish the refreshing experience. Always chill before serving.
  • Skipping the Straining: If you prefer a smoother drink, don’t skip the straining step after blending the mango.

Delicious Variations to Try

Now that you know the basic recipe, let’s explore some fun variations:

  • Mango Mint Iced Tea: Add a handful of fresh mint leaves during the blending process for an extra refreshing twist.
  • Spicy Mango Iced Tea: Infuse with a slice of jalapeño for a sweet and spicy combination.
  • Mango Hibiscus Iced Tea: Use hibiscus tea instead of black tea for a fruity and floral flavor.
  • Coconut Mango Iced Tea: Add coconut water while blending for a tropical flair.

Storage and Make-Ahead Instructions

This iced tea can be made ahead of time and stored properly:

  • Refrigeration: Store in an airtight container in the fridge for up to 5 days.
  • Freezing: If you have leftover mango puree, freeze it in ice cube trays for future use in smoothies or iced teas.

Frequently Asked Questions (FAQs)

Here are some common questions about making Mango Iced Tea:

  • Can I use green tea instead of black tea? Yes, green tea provides a lighter flavor that complements the mango beautifully.
  • How can I sweeten my iced tea naturally? Consider using agave syrup, maple syrup, or stevia as alternatives to honey.
  • Is it possible to make this iced tea without a blender? While blending is ideal for a smooth puree, you can smash the mango with a fork and mix it in.
  • Can I use store-bought mango puree? Yes, but fresh mango will give you the best flavor and texture.
  • How can I make this recipe vegan? Substitute honey with agave syrup or another vegan sweetener.
  • What’s the best way to garnish Mango Iced Tea? Fresh mint leaves or a slice of lime add a lovely touch!
  • Can I make this drink in larger quantities? Absolutely! Just multiply the ingredients to fit your pitcher size.
  • What foods pair well with Mango Iced Tea? Spicy dishes, grilled meats, and light salads make excellent pairings.

Nutritional Tips and Dietary Adaptations

This Mango Iced Tea is a fantastic choice for anyone looking to enjoy a refreshing drink without the guilt. Here are some dietary adaptations:

  • Low-Calorie Option: Reduce the amount of honey or use a sugar substitute to lower calories.
  • Antioxidant Boost: Black tea is rich in antioxidants, which can help protect your cells.
  • Hydration Hero: With its high water content, this drink helps keep you hydrated during hot summer days.

Essential Equipment Recommendations

To make your Mango Iced Tea, you’ll need:

  • A Blender: For making the mango puree.
  • A Pitcher: To mix and chill your iced tea.
  • A Fine Mesh Strainer: Optional, for a smoother texture.
  • A Saucepan: For boiling water to brew the tea.

Serving Suggestions

To serve your Mango Iced Tea in style, consider:

  • Fancy Glassware: Use tall glasses or mason jars for a rustic feel.
  • Garnishes: Fresh mint, lime wedges, or even edible flowers for a touch of elegance.
  • Accompanying Snacks: Pair with light appetizers like cucumber sandwiches or fresh fruit platters.

Final Thoughts

There you have it! A comprehensive guide to making your own delightful Mango Iced Tea. Whether you’re hosting a summer gathering or simply wanting to escape into a tropical moment, this drink promises to deliver sunshine in every sip. So grab your ingredients, follow the steps, and let the flavors whisk you away to a sunny paradise! Cheers to a refreshing experience!

Mango Iced Tea

Prep Time 10 minutes
Cook Time 10 minutes
Total Time 20 minutes
Servings 4 cups
Calories 150
A refreshing tropical beverage combining the sweetness of mango with the coolness of iced tea, perfect for hot days.

Ingredients

Water

  • 4 cups water

Tea bags

  • 2 bags black or green tea bags (for a lighter taste)

Fruit

  • 1 ripe mango ripe mango, peeled and diced

Sweetener

  • 2 tablespoons honey (or to taste)

Acid

  • 1 tablespoon lemon juice

Ice cubes

  • as needed ice cubes (for serving)

Garnish

  • optional fresh mint (for garnish)

Instructions 

  • Bring 4 cups of water to a boil, steep tea bags for 5 minutes, then discard.
  • Blend diced mango with honey and lemon juice until smooth.
  • Combine brewed tea and mango puree in a pitcher, chill for at least 1 hour.
  • Fill glasses with ice, pour mango tea, and garnish with mint if desired.

Notes

Adjust honey to taste for sweetness.
Calories: 150kcal
Cost: $10
Course: Beverage
Cuisine: Tropical
Keyword: Mango