Author

Jack

Browsing

Embarking on the Sourdough Adventure

Welcome to the world of **whole wheat sourdough bread**, where tradition meets innovation! If you’ve ever tasted a freshly baked loaf, you know how it whispers stories of the grains and the hands that crafted it. This recipe for **soft whole wheat sourdough sandwich bread** not only delivers a deliciously fluffy texture but also immerses you in a journey filled with flavor and culture. Get ready to dive into the art of baking that’s as much about the process as it is about the outcome!

Why You’ll Love This Recipe

This isn’t just any **sourdough bread recipe**—it’s a culinary experience! Here are five reasons why you’ll adore making this delightful loaf:

  • Community Connection: Each loaf you bake connects you with bakers around the world, sharing a timeless tradition.
  • Health Benefits: Whole wheat flour increases fiber content, making this bread a nutritious choice for your family.
  • Versatile Usage: Perfect for sandwiches, toast, or simply enjoying with a pat of butter, this bread suits any occasion.
  • Artisanal Quality: The sourdough fermentation process enhances flavor complexity and makes the bread naturally preservative-free.
  • Creative Variations: This recipe serves as a base for numerous variations—add seeds, nuts, or herbs for a personal touch!

Ingredients Breakdown

Before we get our hands floury, let’s discuss the essential ingredients for crafting this **sourdough sandwich bread**:

  • Active Sourdough Starter (150 g / 3/4 cup): The heart of the recipe that brings life to your dough. Ensure it’s bubbly and active.
  • Warm Milk (300 g / 1 1/4 cups): Adds moisture and a slight sweetness. You can substitute with almond or oat milk for a dairy-free option.
  • Honey (40 g / 2 tablespoons): A natural sweetener that complements the sour notes. Maple syrup can be a great alternative.
  • Unsalted Butter (57 g / 4 tablespoons, melted): Provides richness. Coconut oil can be used for a dairy-free version.
  • Whole Wheat Flour (125 g / 1 cup): The foundation for your bread, offering nutrients and flavor. You can swap it for spelt flour for a different taste.
  • Bread Flour (375 g / 2 2/3 cups): Offers the perfect gluten structure for a chewy texture. All-purpose flour can also work, though the texture may vary.
  • Salt (9 g / 1 1/2 teaspoons): Essential for flavor and strengthens the dough.

Crafting the Dough
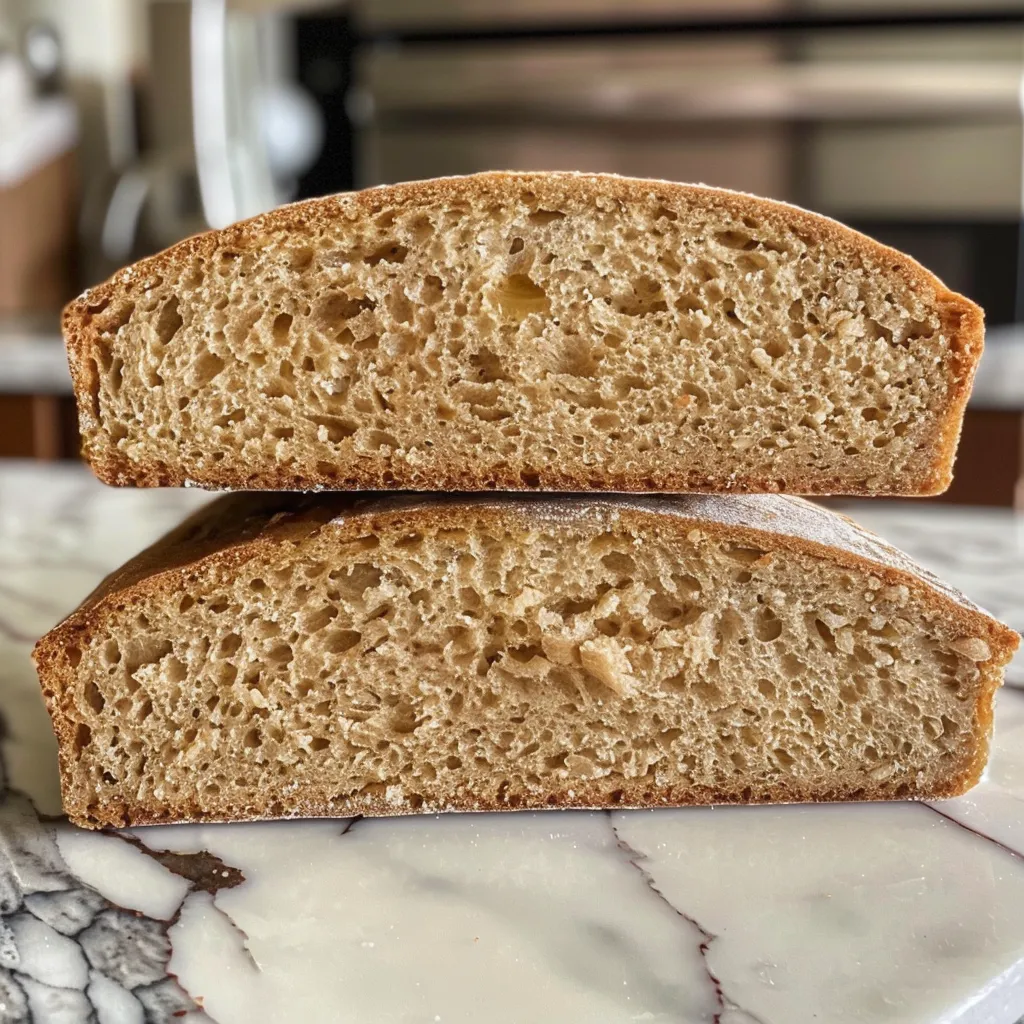
Side view of freshly baked whole wheat sourdough sandwich bread with a golden crust.

Now that we have our ingredients, let’s delve into the steps to create this heavenly loaf. Below are two sample baker’s schedules to guide your baking:

Sample Baker’s Schedule

Here’s how you can time your baking for the same day:

  • Morning: Feed your starter (see feeding instructions below).
  • Afternoon: Once your starter is bubbly, prepare the dough and let it rise.
  • Evening: Shape the dough and allow for a second rise, then bake!

Feeding Your Starter

To prepare your starter for baking, follow these steps:

  • Feed 25g of starter, 75g of warm water, and 75g of flour.
  • Mix until fully incorporated and allow it to rise until it doubles in size.
  • This typically takes about 12 hours in a 70°F (21°C) kitchen.

Step-by-Step Instructions

1. Prepare Your Dough

Once your starter is ready, it’s time to make the dough!

  • In a large mixing bowl, combine the active sourdough starter, warm milk, honey, and melted butter. Stir until well mixed.
  • Gradually add the whole wheat flour and bread flour, mixing until a shaggy dough forms.

2. Kneading the Dough

Kneading is crucial for developing gluten, which gives the bread its structure:

  • Turn the dough out onto a floured surface and knead for about 10 minutes until smooth and elastic.
  • If the dough is sticky, sprinkle a little more flour as needed.

3. Bulk Fermentation

Let the dough rise in a warm place:

  • Cover the bowl with a damp cloth and let it rise until doubled in size, about 4-6 hours, depending on your room temperature.
  • During this time, perform stretch and folds every hour to strengthen the dough.

4. Shaping the Dough

Once your dough has risen, it’s time to shape it:

  • Turn the dough onto a floured surface and gently press it into a rectangle.
  • Fold the sides over to the center and roll it tightly into a loaf shape.

5. Second Rise

Allow the shaped dough to rise again:

  • Place it in a greased loaf pan, cover, and let it rise for 1-2 hours until puffy.

6. Preheat and Bake

Get ready for that delightful aroma:

  • Preheat your oven to 375°F (190°C).
  • Bake for 30-35 minutes or until golden brown and the bread sounds hollow when tapped.

7. Cooling

Let your bread cool completely on a wire rack before slicing:

  • This allows the steam to escape and prevents sogginess.

Pro Tips for Perfect Bread

Here are some expert insights to elevate your sourdough game:

  • Temperature Matters: Dough rises best in warm environments, so consider using your oven with the light on or a proofing box.
  • Hydration Levels: Adjust hydration by adding more or less liquid, depending on your flour’s absorbency.
  • Give It Time: Don’t rush the fermentation process; flavor develops over time.
  • Use a Kitchen Scale: Weighing ingredients ensures accuracy and consistency in your baking.
  • Experiment with Flours: Try mixing different flours like rye or spelt for unique flavors.
  • Score Before Baking: Make a shallow cut on top of the loaf to control where it expands during baking.
  • Don’t Skip the Cooling: Cooling allows the crumb to set properly, enhancing texture.
  • Store Correctly: Keep your bread in a cloth bag or bread box to maintain freshness.

Common Mistakes and Troubleshooting

Even the best bakers encounter challenges. Here are some common mistakes and how to fix them:

  • Dough Not Rising: Ensure your starter is active and your kitchen is warm enough.
  • Dense Bread: This can happen from over-kneading; try reducing the kneading time.
  • Too Many Crumbs: If your bread is crumbly, it may be underbaked or too much flour was added.
  • Dry Bread: Ensure you’re measuring your ingredients accurately, especially the liquids.

Variations to Explore

Feeling adventurous? Here are some delightful variations to try:

  • Seeded Whole Wheat Sourdough: Add sunflower seeds, flaxseeds, or sesame seeds for an extra crunch.
  • Herb-Infused Bread: Mix in fresh herbs like rosemary or thyme for a fragrant twist.
  • Cheese and Chive Bread: Fold in shredded cheese and chopped chives before shaping for a savory treat.
  • Cinnamon Raisin Variation: Add cinnamon and raisins for a sweet breakfast option.

Storage and Make-Ahead Instructions

Want to enjoy your bread longer? Here’s how to store it:

  • **Room Temperature**: Store in a cloth bag or bread box for up to 3 days.
  • **Freezing**: Slice the bread and freeze for up to 3 months. Just toast slices directly from the freezer for a quick snack!

Frequently Asked Questions

Here are some common questions about this whole wheat sourdough bread:

  • Can I use all-purpose flour instead of bread flour? Yes, but the texture may be less chewy.
  • How can I tell if my sourdough starter is ready? It should be bubbly, double in size, and have a pleasant, tangy aroma.
  • Can I bake this bread in a Dutch oven? Absolutely! Just preheat the Dutch oven and bake covered for the first 20 minutes for a beautiful crust.
  • Is it possible to double the recipe? Yes, simply double each ingredient, but ensure your mixing bowl is large enough!
  • How can I make it gluten-free? You’ll need a gluten-free flour blend and a suitable gluten-free starter.
  • What’s the best way to slice the bread? Use a serrated knife for clean cuts without squashing the loaf.
  • Can I add nuts or dried fruits? Yes! Mix them in after the first rise for delicious variations.
  • Why does my bread have a sour taste? This is normal for sourdough; for less sourness, reduce fermentation time.

Nutritional Tips and Dietary Adaptations

This recipe is not only tasty but can also be tailored for various dietary needs:

  • Whole Wheat Benefits: Rich in dietary fiber, promoting digestive health.
  • Dairy-Free Option: Substitute milk and butter with plant-based alternatives for a vegan-friendly loaf.
  • Low Sugar Adaptation: Reduce the honey or omit it for a less sweet loaf.

Essential Equipment for Baking

Here’s a quick list of tools that will make your baking experience smoother:

  • Mixing Bowls: A set of various sizes for mixing and rising.
  • Loaf Pan: Essential for shaping your sandwich bread.
  • Kitchen Scale: For precise ingredient measurements.
  • Dough Scraper: Helps in handling sticky dough with ease.
  • Wire Rack: For cooling your bread evenly.

Serving Suggestions

Your sourdough sandwich bread is ready! Here are some ideas for enjoying it:

  • Classic Sandwiches: Use it for turkey, avocado, or classic BLTs.
  • Breakfast Toast: Top with smashed avocado, eggs, or your favorite jam.
  • French Toast: The sturdy texture holds up beautifully when soaked in custard.

Conclusion: Your Sourdough Story Awaits

As you embark on this sourdough journey, remember that every loaf carries a piece of your culinary adventure. With each rise and fold, you’re not just making bread—you’re weaving together flavors, cultures, and memories. So roll up your sleeves, grab your apron, and let the magic of baking fill your kitchen with warmth. Happy baking, and may your **sourdough sandwich bread** be the start of many delicious tales!

Soft Whole Wheat Sourdough Sandwich Bread Recipe

Prep Time 30 minutes
Cook Time 45 minutes
Total Time 1 hour 15 minutes
Servings 1 loaf
Calories 250
This wholesome sourdough bread combines the nutty flavor of whole wheat with the tang of sourdough, perfect for sandwiches and toast.

Ingredients

Sourdough Starter

  • 150 g active sourdough starter
  • 300 g warm milk
  • 40 g honey
  • 57 g unsalted butter, melted
  • 125 g whole wheat flour
  • 375 g bread flour
  • 9 g salt

Instructions 

  • Feed 25g of starter with 75g warm water and 75g flour; let it rise until peak.
  • Allow the starter to double in size with bubbles on top, about 12 hours at 70°F.
  • Mix the starter with milk, honey, melted butter, whole wheat flour, bread flour, and salt to form the dough.
  • Knead until smooth, then let the dough rise until doubled in size.
  • Shape the dough into a loaf, let it rise again, then bake at 375°F (190°C) for 45 minutes.

Notes

Ensure your starter is active for best rise and flavor.
Calories: 250kcal
Cost: $12
Course: Bread
Cuisine: American
Keyword: Sourdough, Whole Wheat

Embark on a Culinary Journey with Hot Honey Beef Bowls

Welcome to a delightful exploration of flavors with our Hot Honey Beef Bowls! This recipe combines the spicy sweetness of hot honey with hearty ingredients like lean beef, sweet potatoes, and creamy cottage cheese. Whether you’re preparing a cozy family dinner or planning meals for the week ahead, this dish promises to tantalize your taste buds and nourish your body.

In this comprehensive guide, we’ll take you through every step of crafting these delicious beef bowls, including tips for ingredient substitutions, storage instructions, and expert advice to ensure your culinary adventure is a success. So, roll up your sleeves, and let’s dive into the wonderful world of Hot Honey Beef Bowls!

Why You’ll Love This Recipe

This dish isn’t just about great taste; it’s about creating a wholesome meal that is:

  • Quick and Easy: Perfect for busy weeknights, these beef bowls can be prepared in under 30 minutes, ensuring you get a delicious meal on the table without the fuss.
  • Nutritious: Packed with protein from lean beef and cottage cheese, along with vitamins and minerals from sweet potatoes and broccoli, this recipe supports a healthy lifestyle.
  • Customizable: Feel free to swap out ingredients based on your dietary needs or preferences—whether you’re gluten-free or looking for a vegetarian alternative, there’s something for everyone!
  • Flavorful: The symphony of flavors—from the heat of the hot honey to the creaminess of cottage cheese—will leave your taste buds dancing.
  • Meal Prep Friendly: These bowls store well, making them a fantastic option for meal prepping and enjoying throughout the week.

Ingredients Breakdown and Substitutions

Here’s what you’ll need to create your Hot Honey Beef Bowls:

  • 2 tbsp hot honey: Adds the signature sweet and spicy flavor. Substitute with regular honey mixed with a pinch of cayenne for a milder version.
  • 250 g lean beef mince: Provides protein and flavor. You can swap with ground turkey for a lighter option or plant-based meat for a vegetarian choice.
  • Half a pack of taco seasoning (approx 2 tbsp): Enhances the beef’s flavor. Use homemade seasoning or a gluten-free blend if needed.
  • 200 g cottage cheese: Adds creaminess and protein. Greek yogurt can be a great substitute if you’re dairy-free.
  • 500 g sweet potatoes: A nutritious base for the bowl. Feel free to use regular potatoes or quinoa for a different texture.
  • 200 g tenderstem broccoli: Offers crunch and nutrients. You can replace it with spinach or any vegetable you prefer.
  • 1 medium avocado: Creamy and healthy fats. Substitute with guacamole for added flavor.
  • 1 tsp salt and 1 tsp smoked paprika: Essential seasonings to enhance the dish’s flavor.
  • Olive oil spray: For roasting the sweet potatoes and broccoli. Any cooking oil will work here!

How to Make Hot Honey Beef Bowls

Now that you have your ingredients ready, let’s get cooking! Follow these simple steps:

  1. Preheat your oven to 200°C (400°F).
  2. Peel the sweet potatoes and chop them into bite-sized chunks. Toss them in a bowl with olive oil, salt, and smoked paprika until evenly coated.
  3. Spread the sweet potatoes on a baking tray lined with parchment paper and roast for 25 minutes, or until golden and tender, flipping halfway through.
  4. While the sweet potatoes are roasting, heat a frying pan over medium heat. Add the beef mince and cook until browned, breaking it apart with a spoon as it cooks.
  5. Sprinkle the taco seasoning over the beef and mix well. Cook for an additional 2-3 minutes until the spices are fragrant.
  6. In the last few minutes of cooking the beef, steam or sauté the tenderstem broccoli until just tender.
  7. To assemble the bowls, place a generous scoop of roasted sweet potatoes at the base. Top with seasoned beef, a dollop of cottage cheese, tenderstem broccoli, and slices of avocado.
  8. Drizzle with hot honey before serving, and enjoy!

Pro Tips for Perfect Hot Honey Beef Bowls

Enhance your culinary experience with these expert insights:

  • Perfectly Roasted Sweet Potatoes: For crispy edges, ensure the sweet potato chunks are well spaced on the baking tray.
  • Flavor Boost: Marinate the beef in a bit of lime juice before cooking for an extra layer of flavor.
  • Meal Prep Magic: Prepare the beef, sweet potatoes, and veggies ahead of time and assemble the bowls fresh when ready to eat.
  • Spice Control: Adjust the amount of hot honey based on your heat preference—start with less, then add more to taste!
  • Fresh Toppings: Consider adding fresh cilantro or a squeeze of lime juice just before serving for brightness.
  • Batch Cooking: Double the recipe for a larger crowd or to have leftovers for the week. Store in airtight containers.
  • Texture Contrast: Mixing in some crunchy toppings like nuts or seeds can add a delightful contrast to the creamy and soft elements of the dish.
  • Seasonal Variations: Feel free to swap the vegetables based on what’s in season or what you have on hand.
  • Healthy Fats: Consider adding a sprinkle of hemp seeds or chia seeds on top for added nutrition.
  • Flavor Layering: Use different spices in the beef seasoning for unique flavor profiles—try cumin, coriander, or even chili powder!

Common Mistakes and Troubleshooting

Even the best chefs can make mistakes! Here’s how to avoid common pitfalls:

  • Overcooking the Sweet Potatoes: Keep an eye on them to prevent mushiness. They should be tender but retain their shape.
  • Beef Texture: Ensure you don’t overcrowd the pan when browning the beef. This helps achieve a nice sear rather than steaming.
  • Underseasoned Bowls: Always taste your components as you cook. Adjust seasoning to ensure each layer is flavorful.
  • Ingredient Substitutions: If you’re substituting ingredients, consider how those changes affect cooking times and flavors.

Variations and Customizations

Make this recipe your own with these exciting variations:

  • Vegetarian Delight: Replace beef with lentils or chickpeas for a hearty vegetarian option.
  • Spicy Kick: Incorporate jalapeños or crushed red pepper into the beef for an extra layer of heat.
  • Asian Fusion: Swap out the taco seasoning for teriyaki sauce and serve with steamed rice instead of sweet potatoes.
  • Breakfast Bowl: Add a fried egg on top for a protein-packed breakfast version of this recipe.

Storage and Make-Ahead Instructions

This dish is perfect for meal prepping. Here’s how to store it:

  • Refrigeration: Store assembled bowls in airtight containers for up to 4 days. Keep ingredients separate if possible to maintain texture.
  • Freezing: The beef and sweet potatoes can be frozen for up to 3 months. Just reheat before serving, adding fresh avocado and hot honey afterward.
  • Reheating: Use the microwave or a skillet to reheat, ensuring the food is heated through without drying out.

Comprehensive FAQ

Got questions? We’ve got answers! Here are some common inquiries:

  • Can I use ground turkey instead of beef? Yes! Ground turkey is a lean alternative that works wonderfully in this recipe.
  • How spicy is hot honey? It varies by brand, but it generally offers a mild to moderate kick that balances sweetness.
  • Can I make this dish vegetarian? Absolutely! Use lentils or a plant-based meat substitute for a delicious vegetarian bowl.
  • What can I substitute for cottage cheese? Greek yogurt serves as a great alternative, offering creaminess and protein.
  • How can I make this gluten-free? Ensure all seasoning and sauces used are gluten-free, including taco seasoning.
  • Are there any low-carb options? Replace sweet potatoes with cauliflower rice for a lower-carb version.
  • How long does it take to prepare? The total prep and cooking time is around 30 minutes.
  • What can I add for extra toppings? Try fresh herbs, nuts, or additional vegetables for added flavor and texture.

Nutritional Tips and Dietary Adaptations

Here are some tips to make this dish even healthier:

  • Protein Boost: Add extra cottage cheese or beans for additional protein content.
  • Fiber Up: Incorporate more vegetables like bell peppers or spinach to increase fiber.
  • Healthy Fats: Avocado offers healthy fats; consider adding nuts or seeds for crunch and nutrition.
  • Low-Carb Option: Use cauliflower rice instead of sweet potatoes for a lower-carb bowl.

Equipment Recommendations

To make your cooking experience seamless, here are some handy tools:

  • Sharp Knife: For efficiently chopping sweet potatoes and vegetables.
  • Cutting Board: A sturdy surface for prep work.
  • Baking Tray: Essential for roasting sweet potatoes and broccoli.
  • Frying Pan: A non-stick pan works best for browning the beef.
  • Mixing Bowls: Handy for tossing sweet potatoes with oil and seasonings.

Serving Suggestions

To enhance your dining experience, consider these serving ideas:

  • Garnish: Top with fresh herbs like cilantro or parsley for a burst of color and flavor.
  • Side Dishes: Pair with a simple green salad or crusty bread to round out the meal.
  • Drink Pairing: A refreshing iced tea or light beer complements the sweetness of the dish beautifully.

Conclusion: A Flavorful Adventure Awaits

Ready to savor the delightful flavors of Hot Honey Beef Bowls? This recipe not only delights your palate but also nourishes your body with wholesome ingredients. Whether it’s for a cozy weeknight dinner or meal prep for the week ahead, this recipe is sure to become a favorite in your kitchen. Share your culinary adventures with friends and family, and don’t forget to explore the vast world of flavors that awaits you in every dish!

Hot Honey Beef Bowls Recipe

Prep Time 10 minutes
Cook Time 25 minutes
Total Time 35 minutes
Servings 4 servings
Calories 650
Enjoy a flavorful and satisfying bowl featuring tender beef, sweet potatoes, and a spicy honey glaze for a perfect quick meal.

Ingredients

Main Ingredients

  • 2 tbsp hot honey
  • 250 g lean beef mince (I use 5% fat)
  • 2 tbsp taco seasoning (Half a pack of approx 2 tbsp)
  • 200 g cottage cheese
  • 500 g sweet potato
  • 200 g tenderstem broccoli
  • 1 medium avocado
  • 1 tsp salt
  • 1 tsp smoked paprika
  • Olive oil spray

Instructions 

  • Peel the sweet potatoes and chop into bite-sized chunks.
  • Toss the sweet potato chunks with olive oil, salt, and smoked paprika.
  • Bake the sweet potatoes at 200°C (390°F) for 25 minutes until tender.
  • Cook the beef mince in a skillet until browned, then stir in taco seasoning and hot honey.
  • Serve the beef over roasted sweet potatoes, topped with cottage cheese, tenderstem broccoli, and sliced avocado.

Notes

For extra flavor, add a squeeze of lime or fresh herbs.
Calories: 650kcal
Cost: $15
Course: Main Course
Cuisine: American
Keyword: beef, honey, Sweet Potato

Embark on a Culinary Adventure with Easy Garlic Herb Lamb Chops

Welcome to a flavor-packed journey where the rustic charm of Mediterranean kitchens meets the excitement of your own dining table! These Easy Garlic Herb Lamb Chops are not just a meal; they are a passport to a world of culinary delight, bringing the essence of sun-kissed landscapes right to your plate. Perfect for gatherings or a cozy dinner, this recipe promises to tantalize your taste buds and create unforgettable memories.

Why You’ll Love This Recipe

  • Quick and Easy: With just a handful of ingredients and minimal prep time, you can whip up a stunning dish that looks and tastes gourmet.
  • Flavor Explosion: Infused with fresh herbs and garlic, these lamb chops deliver a rich and aromatic flavor that will impress your guests.
  • Versatile Cooking Methods: Whether you choose to grill, pan-sear, or bake, this recipe adapts beautifully to your preferred cooking style.
  • Health Benefits: Lamb is a great source of protein and essential nutrients, making this dish a delicious yet nutritious option for any meal.
  • Perfect for Any Occasion: From family dinners to fancy gatherings, these lamb chops make a statement on any table.

Ingredient Breakdown

To create these flavorful lamb chops, you will need the following ingredients:

  • 8 pieces lamb chops: About 1 inch thick. Choose rib or loin chops for tenderness.
  • 4 cloves garlic: Minced for that aromatic punch.
  • 1/4 cup olive oil: Adds richness and helps in marinating.
  • 2 tablespoons fresh rosemary: Chopped, bringing a lovely herbal essence.
  • 2 tablespoons fresh parsley: Chopped, for freshness and color.
  • 1 tablespoon fresh thyme: Chopped, adding depth to the flavor.
  • 1 teaspoon salt: Enhances all the flavors.
  • 1/2 teaspoon black pepper: A dash of spice to elevate the dish.
  • 1 piece lemon: Juiced, providing acidity that balances the richness of the lamb.

Substitutions

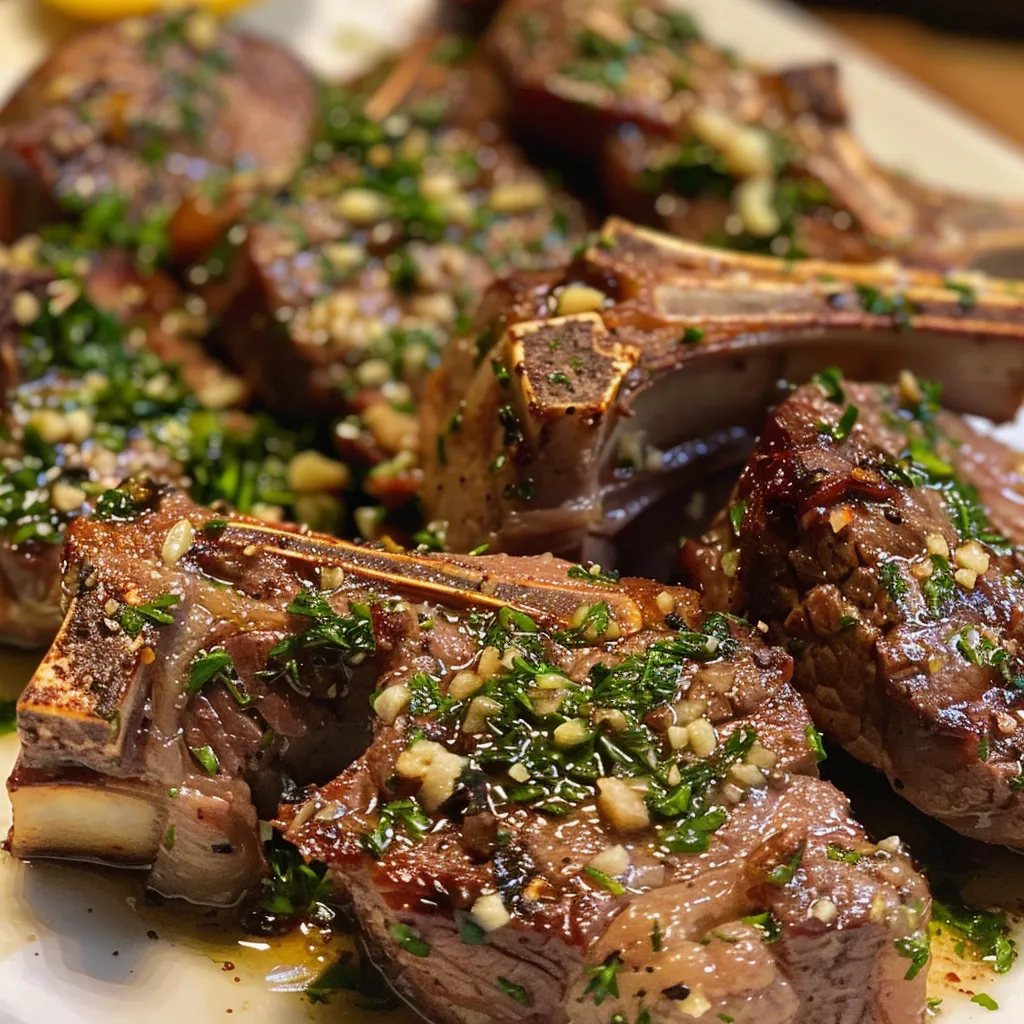
Close-up view of succulent lamb chops with garlic and herbs, showcasing their juicy texture.

If you can’t find certain ingredients, here are some easy substitutions:

  • Fresh Herbs: Use dried herbs (1/3 of the amount) if fresh ones aren’t available.
  • Lamb Chops: Substitute with pork chops or chicken thighs for a different flavor profile.
  • Olive Oil: Can be replaced with avocado oil for a higher smoke point.
  • Lemon Juice: White wine vinegar can be used for acidity if lemon isn’t on hand.

Pro Tips for Perfection

Want to elevate your lamb chops to the next level? Check out these expert insights:

  • Marinate Longer: For best flavor, marinate the lamb chops for at least 2 hours or overnight, if possible.
  • Bring to Room Temperature: Allow your lamb chops to sit out for about 30 minutes before cooking for even cooking.
  • Use a Meat Thermometer: Aim for an internal temperature of 145°F for perfectly cooked lamb.
  • Let Them Rest: After cooking, let the chops rest for 5 minutes to retain their juices.
  • Experiment with Flavors: Try adding spices like cumin or smoked paprika to the marinade for a twist.
  • Grill Marks: If grilling, ensure the grill is hot to achieve those beautiful sear marks.
  • Adjust Seasonings: Feel free to tweak the salt and pepper to suit your taste preferences.
  • Pair with Sides: Serve with roasted vegetables or a fresh salad for a complete meal.

Common Mistakes and Troubleshooting

Even the best chefs make mistakes! Here are some common pitfalls to avoid:

  • Overcooking: Lamb can easily become tough if overcooked. Use a thermometer for precision.
  • Skipping the Marinade: Don’t skip marinating; it’s essential for flavor and tenderness.
  • Not Resting: Cutting into the lamb immediately can cause juices to run out, resulting in dry meat.
  • Ignoring Quality: Choose high-quality lamb for the best flavor and texture.

Variations to Try

Mix things up with these creative variations of the basic recipe:

  • Spicy Garlic Herb Lamb Chops: Add crushed red pepper flakes to the marinade for a spicy kick.
  • Mint and Garlic Lamb Chops: Substitute mint for parsley for a refreshing twist.
  • Honey Mustard Glazed Lamb Chops: Mix in honey and Dijon mustard for a sweet and tangy flavor.
  • Herb-Crusted Lamb Chops: After marinating, coat the chops in breadcrumbs mixed with herbs before cooking for added crunch.

Storage and Make-Ahead Instructions

Planning ahead? Here’s how to store and prepare for later:

  • Refrigeration: Store leftovers in an airtight container for up to 3 days.
  • Freezing: Freeze marinated lamb chops for up to 3 months; just thaw in the fridge before cooking.
  • Make-ahead: You can marinate the lamb chops a day in advance for enhanced flavor.

Comprehensive FAQ

Got questions? We’ve got answers!

  • Can I use frozen lamb chops? Yes, just ensure they are fully thawed before marinating.
  • What side dishes pair well with lamb chops? Roasted vegetables, mashed potatoes, or a fresh salad are excellent choices.
  • How can I tell when lamb is done? Use a meat thermometer; 145°F is perfect for medium-rare.
  • Can I grill these lamb chops? Absolutely! Grilling adds a wonderful smoky flavor.
  • What wines pair with lamb? A robust red wine like Cabernet Sauvignon or a fruity Merlot complements lamb beautifully.
  • Are lamb chops healthy? Yes, they are a good source of protein and essential vitamins.
  • How do I prevent the lamb from being tough? Don’t overcook it and let it rest after cooking.
  • Can I add other herbs? Yes! Feel free to experiment with herbs like oregano or basil.

Nutritional Tips and Dietary Adaptations

For a balanced meal, consider these dietary adaptations:

  • Low-Carb Option: Pair with steamed broccoli or cauliflower instead of starchy sides.
  • Gluten-Free: All ingredients are naturally gluten-free; just ensure any sides are as well.
  • For Extra Fiber: Serve with a quinoa salad or roasted chickpeas for added nutrition.

Equipment Recommendations

To make your cooking experience smooth, consider these essential tools:

  • Grill Pan or Outdoor Grill: For achieving those perfect grill marks and flavors.
  • Meat Thermometer: Ensures optimal doneness without guesswork.
  • Mixing Bowls: For marinating and combining ingredients effectively.
  • Tongs: For safely flipping the chops while cooking.

Serving Suggestions

When it comes to serving these garlic herb lamb chops, presentation is key! Consider these serving ideas:

  • Garnish: Fresh herbs or lemon wedges add a pop of color and freshness.
  • Accompaniments: Serve with a flavorful pan sauce made from the drippings to enhance the meal.
  • Plating: Arrange the chops on a rustic wooden board with sides for a family-style meal.

Conclusion: A Culinary Journey Awaits

With these Easy Garlic Herb Lamb Chops, you’re not just cooking a meal; you’re creating a culinary adventure filled with flavor, culture, and connection. So gather your loved ones, share the stories behind each ingredient, and let the spirit of exploration guide your dining experience. Bon appétit!

Easy Garlic Herb Lamb Chops

Prep Time 15 minutes
Cook Time 8 minutes
Total Time 23 minutes
Servings 4 pieces
Calories 350
Delight in tender, flavorful lamb chops infused with fresh herbs and garlic, perfect for a quick and elegant meal.

Ingredients

Meat

  • 8 pieces lamb chops (About 1 inch thick)
  • 4 cloves garlic (Minced)
  • 0.25 cup olive oil
  • 2 tablespoons fresh rosemary (Chopped)
  • 2 tablespoons fresh parsley (Chopped)
  • 1 tablespoon fresh thyme (Chopped)
  • 1 teaspoon salt
  • 0.5 teaspoon black pepper
  • 1 piece lemon (Juiced)

Instructions 

  • Combine garlic, olive oil, herbs, salt, pepper, and lemon juice to make a marinade.
  • Pour marinade over lamb chops, cover, and marinate for at least 15 minutes.
  • Preheat grill to medium-high heat and lightly oil grates.
  • Remove lamb from marinade, discard excess marinade, and grill 3-4 minutes per side for medium-rare.
  • Let lamb rest for 5 minutes before serving.

Notes

Ensure not to over-marinate to keep the lamb tender.
Calories: 350kcal
Cost: $15
Course: Main Course
Cuisine: International
Keyword: garlic, herbs, Lamb

Welcome to the vibrant world of Healthy Morning Glory Muffins, where wholesome ingredients meet delightful flavors! Imagine waking up to the enticing aroma of freshly baked muffins that are not only delicious but also packed with nutrition. This recipe combines the sweetness of carrots and apples with the crunch of walnuts and the zestiness of orange, creating a breakfast treat that is perfect for busy mornings or leisurely brunches. Dive in, and embrace a healthier lifestyle with every bite!

Why You’ll Love This Recipe

These Morning Glory Muffins are more than just a tasty treat; they come with a host of benefits that make them a go-to breakfast option:

  • Nutrient-dense goodness: Made with whole wheat flour, these muffins are rich in fiber and essential nutrients.
  • Easy to prepare: With simple steps and minimal prep time, you can whip up a batch in no time!
  • Versatile and customizable: Feel free to experiment with different add-ins like nuts, seeds, or dried fruits.
  • Perfect for meal prep: These muffins store well for days, making them an ideal grab-and-go breakfast option.
  • A family favorite: Kids and adults alike will love the moist texture and delightful flavors!

Ingredients Breakdown and Substitutions

To make these delicious muffins, you’ll need the following ingredients:

  • Whole Wheat Flour: 2 cups (for a gluten-free option, use almond flour or a gluten-free blend).
  • Baking Powder: 1 teaspoon.
  • Baking Soda: 1 teaspoon.
  • Cinnamon: 1 1/2 teaspoons (adds warmth and flavor).
  • Salt: 1/4 teaspoon (enhances sweetness).
  • Vegetable Oil: 1/2 cup (can substitute with melted coconut oil).
  • Unsweetened Apple Sauce: 1/4 cup (for moisture and sweetness).
  • Maple Syrup: 2/3 cup (honey or agave syrup can be used as alternatives).
  • Eggs: 3 large, at room temperature (for a vegan option, use flax eggs).
  • Orange Zest: from 1 orange (adds a refreshing citrus note).
  • Orange Juice: 1/4 cup.
  • Vanilla Extract: 1 teaspoon.
  • Grated Carrots: 2 cups (about 2 medium carrots).
  • Grated Green Apple: 1 cup (about 1 medium apple).
  • Chopped Walnuts: 2/3 cup (you can replace with pecans or omit altogether).
  • Raisins: 2/3 cup (feel free to substitute with dried cranberries or dates).

How to Make Healthy Morning Glory Muffins

Follow these simple steps to create your muffins:

  1. Preheat your oven to 375°F (190°C). Line a muffin pan with cupcake liners and set aside.
  2. In a medium-sized mixing bowl, whisk together the whole wheat flour, baking powder, baking soda, cinnamon, and salt. Set aside.
  3. In a large mixing bowl, combine the wet ingredients: vegetable oil, apple sauce, maple syrup, eggs, orange zest, orange juice, and vanilla extract. Whisk until well blended.
  4. Gradually add the dry ingredients to the wet ingredients, folding gently with a spatula. Do not overmix.
  5. Fold in the grated carrots, grated apple, chopped walnuts, and raisins until just combined.
  6. Using a 3-tablespoon ice cream scoop, fill the muffin liners all the way to the top with the batter.
  7. Bake for 20-25 minutes, or until a toothpick inserted into the center comes out clean.
  8. Allow the muffins to cool in the pan for 5-7 minutes, then transfer them to a wire rack to cool completely.

Pro Tips for the Best Muffins

To ensure your muffins turn out perfectly every time, consider these expert tips:

  • Don’t overmix: Overmixing can lead to dense muffins. Mix just until combined.
  • Room temperature eggs: Using eggs at room temperature helps the batter mix more evenly.
  • Fresh ingredients: Make sure your baking powder and baking soda are fresh for optimal rise.
  • Cool completely: Allow muffins to cool completely on a wire rack to avoid sogginess.
  • Adjust sweetness: Feel free to adjust the amount of maple syrup according to your taste preference.
  • Mix add-ins wisely: If adding extra ingredients, keep the total dry ingredient amount in mind to maintain the balance.
  • Experiment with spices: Try adding nutmeg or ginger for a different flavor profile.
  • Use a cookie scoop: For even muffin sizes, a cookie scoop can be very handy!

Common Mistakes and Troubleshooting

Ensure your baking success with these troubleshooting tips:

  • Muffins are too dry: This could be due to overbaking. Make sure to check for doneness with a toothpick.
  • Muffins don’t rise: Ensure your leavening agents (baking powder and baking soda) are fresh.
  • Too crumbly: This may happen if there’s too much flour. Make sure to measure accurately.
  • Muffins are too dense: Overmixing the batter can lead to a dense texture; mix just until combined.

Delicious Variations to Try

Get adventurous with these muffin variations!

  • Chocolate Chip Glory Muffins: Add 1 cup of dark chocolate chips for a decadent twist.
  • Spiced Pumpkin Muffins: Swap out grated apple for pumpkin puree and add pumpkin spice.
  • Nut-Free Muffins: Omit the walnuts and replace with sunflower seeds for a nut-free option.
  • Berry Burst Muffins: Incorporate 1 cup of mixed berries (fresh or frozen) for a fruity twist.

How to Store and Make Ahead

Storing your muffins properly ensures they stay fresh and delicious:

  • Room temperature: Store muffins in an airtight container at room temperature for up to 3 days.
  • Refrigerate: For longer storage, keep them in the fridge for up to a week.
  • Freeze: Muffins can be frozen for up to 3 months. Thaw in the fridge or at room temperature before serving.

Frequently Asked Questions

Here are some common queries about our Healthy Morning Glory Muffins:

  • Can I use all-purpose flour instead of whole wheat? Yes, but the muffins will be less nutritious.
  • How do I keep muffins from drying out? Avoid overbaking and store them in an airtight container.
  • Can I freeze these muffins? Absolutely! They freeze well and are perfect for a quick breakfast.
  • Can I substitute the maple syrup? Yes, honey or agave syrup are great alternatives.
  • Are these muffins gluten-free? Use a gluten-free flour blend for a gluten-free version.
  • How can I make these muffins even healthier? Add flaxseeds or chia seeds for extra fiber.
  • What can I serve with these muffins? Enjoy with yogurt, fresh fruits, or nut butter for a complete meal.
  • How many muffins does this recipe make? This recipe yields about 16 muffins.

Nutritional Tips and Dietary Adaptations

For those mindful of their dietary choices, here are some tips:

  • Low-sugar option: Reduce the amount of maple syrup or use a sugar substitute.
  • Vegan adaptation: Replace eggs with flax eggs (1 tablespoon of ground flaxseed mixed with 2.5 tablespoons of water per egg).
  • Nut-free option: Omit nuts and use seeds instead to maintain the crunch.
  • High-protein muffins: Add a scoop of protein powder to the dry ingredients for an extra boost.

Equipment Recommendations

To make your baking experience seamless, here’s what you’ll need:

  • Muffin Pan: A standard 12-cup muffin pan or silicone muffin trays work best.
  • Mixing Bowls: Have a set of mixing bowls in various sizes for efficient ingredient handling.
  • Whisk: A sturdy whisk for mixing wet and dry ingredients smoothly.
  • Ice Cream Scoop: For portioning batter evenly into muffin liners.

Serving Suggestions

Enjoy these muffins as a breakfast treat or snack, and feel free to pair them with:

  • Greek yogurt: A dollop adds creaminess and protein.
  • Fresh fruit: Serve with berries or sliced bananas for extra flavor.
  • Nut butter: Spread almond or peanut butter for a satisfying crunch.
  • Tea or coffee: Enjoy a warm drink alongside for a cozy morning experience.

In conclusion, these Healthy Morning Glory Muffins are a delightful way to start your day. With their vibrant flavors and nutritious ingredients, they not only fuel your body but also bring joy to your mornings. So grab your mixing bowl, and let’s bake some wonderful memories together!

Healthy Morning Glory Muffins Recipe

Prep Time 10 minutes
Cook Time 20 minutes
Total Time 30 minutes
Servings 16 muffins
Calories 180
Start your day with these nutritious and flavorful muffins packed with carrots, apples, and walnuts for a healthy breakfast option.

Ingredients

Dry Ingredients

  • 2 cups whole wheat flour
  • 1 teaspoon baking powder
  • 1 teaspoon baking soda
  • 0.5 teaspoon cinnamon
  • 0.25 teaspoon salt

Wet Ingredients

  • 0.5 cup vegetable oil
  • 0.25 cup unsweetened apple sauce
  • 0.67 cup maple syrup
  • 3 large eggs (room temperature)
  • 1 orange orange zest (from 1 orange)
  • 0.25 cup orange juice
  • 1 teaspoon vanilla extract

Add-ins

  • 2 cups grated carrots (about 2 carrots)
  • 1 cup grated apple (about 1 apple)
  • 0.67 cup raisins
  • 0.67 cup chopped walnuts

Instructions 

  • Preheat oven to 375°F (190°C). Line muffin pans with liners.
  • Mix dry ingredients in a bowl. Whisk wet ingredients in a large bowl.
  • Combine wet and dry ingredients, then fold in carrots, apple, raisins, and walnuts.
  • Divide batter into 16 muffin liners using a 3 tbsp scoop. Bake for 20-25 minutes.
  • Cool muffins on a wire rack for 5-7 minutes before serving.

Notes

For best results, do not overmix the batter to keep muffins light and fluffy.
Calories: 180kcal
Cost: $15
Course: Breakfast
Keyword: carrots, healthy, Muffins

Embark on a Culinary Journey with 20 Minute Meal-Prep Chicken, Rice, and Broccoli

Welcome to a whirlwind dinner adventure that whisks you away into the heart of flavor and culture! This 20 Minute Meal-Prep Chicken, Rice, and Broccoli recipe is not just a meal; it’s a passport to the world of quick, delicious, and healthy eating. Perfectly seasoned chicken, fluffy jasmine rice, and vibrant broccoli come together for a meal that is not only quick to prepare but also packed with flavor and nutrition. So, let’s dive into this culinary escapade!

Why You’ll Love This Recipe

This recipe is a game-changer for anyone looking to simplify their meal prep while maximizing flavor. Here are a few reasons why this dish deserves a spot in your weekly rotation:

  • Quick Cooking Time: Ready in just 20 minutes, making it perfect for busy weeknights.
  • Balanced Nutrition: Combines lean protein from the chicken, healthy carbs from the rice, and vitamins from the broccoli.
  • Meal Prep Friendly: Great for making in bulk, allowing you to enjoy lunch or dinner throughout the week.
  • Flavorful Seasoning: The blend of spices adds depth to the chicken, transforming a simple meal into a culinary delight.
  • Customizable: Easily adaptable to suit various dietary preferences and available ingredients.

Ingredient Breakdown

Let’s explore the ingredients that make this dish a standout:

  • 2 cups water: Essential for cooking the rice to fluffy perfection.
  • 1 cup jasmine rice: A fragrant variety that complements the chicken beautifully.
  • 3/4 teaspoon salt: Enhances the flavors of the dish.
  • 4 boneless, skinless chicken breasts or thighs (about 4-6 oz each): The star protein of the dish.
  • 1 teaspoon brown or granulated sugar: Adds a hint of sweetness that balances the spices.
  • 1/2 teaspoon paprika: Provides a warm, smoky flavor.
  • 1/2 teaspoon cumin: Adds earthiness to the seasoning mix.
  • 1/2 teaspoon garlic powder: A flavor powerhouse that enhances the chicken.
  • Salt and pepper to taste: Essential for seasoning.
  • 1 tablespoon olive oil: For cooking the chicken and adding richness.
  • 2-3 cups broccoli florets: Packed with vitamins and a delightful crunch.

Feel free to make substitutions based on your preferences or what’s available. For instance, you can swap jasmine rice for brown rice or quinoa for a different flavor profile.

Pro Tips for Perfect Meal Prep

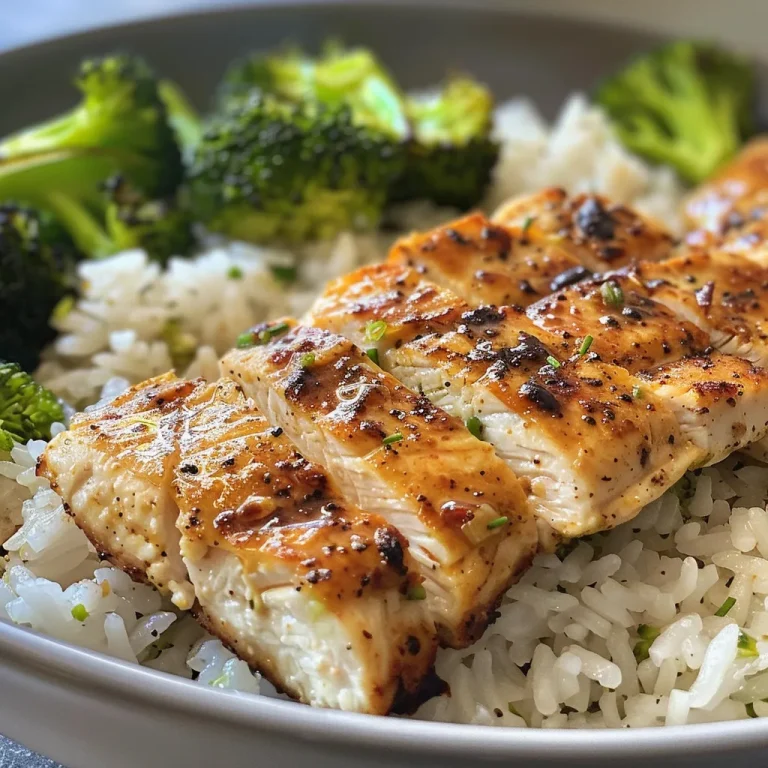
Side view of a colorful meal prep dish with tender chicken, fluffy rice, and fresh broccoli.

To ensure your chicken, rice, and broccoli turn out perfectly every time, consider these expert insights:

  • Prep Ahead: Chop your broccoli and marinate the chicken a day before to save time.
  • Use a Rice Cooker: If you have one, it can take the guesswork out of cooking rice.
  • Don’t Overcrowd the Pan: Cook chicken in batches if necessary to achieve a nice sear.
  • Rest the Chicken: Allowing it to rest before slicing keeps it juicy.
  • Season Well: Taste and adjust seasoning before serving to ensure maximum flavor.
  • Use Fresh Ingredients: Fresh broccoli and spices will elevate the dish significantly.
  • Consider Leftovers: This meal keeps well in the fridge for up to four days, perfect for grab-and-go lunches.
  • Experiment with Spices: Don’t hesitate to try different spice blends for a unique twist.

Common Mistakes and Troubleshooting

Avoid these common pitfalls to ensure your meal prep is a success:

  • Overcooking the Rice: Follow the water-to-rice ratio closely to prevent mushy rice.
  • Undercooking the Chicken: Ensure the chicken reaches an internal temperature of 165°F (75°C).
  • Skipping the Resting Time: Cutting the chicken too soon can result in dry meat.
  • Not Using Enough Seasoning: Flavor can diminish if not seasoned adequately; taste and adjust.

Recipe Variations

Make this meal your own with these exciting variations:

  • Spicy Option: Add cayenne pepper or sriracha for a kick.
  • Vegetarian Twist: Replace chicken with chickpeas or tofu for a plant-based meal.
  • Different Veggies: Swap broccoli for bell peppers, snap peas, or carrots to switch up the flavor.
  • Curry Flavor: Use curry powder instead of paprika and cumin for an Indian-inspired dish.

Storage and Make-Ahead Instructions

To maximize freshness and flavor:

  • Refrigerate: Store in airtight containers in the fridge for up to 4 days.
  • Freeze for Later: This meal can be frozen for up to 3 months. Just reheat in the microwave or on the stovetop.
  • Reheating Tips: Add a splash of water when reheating to keep the rice moist.

Comprehensive FAQ

Here are answers to some common questions regarding this recipe:

  • Can I use brown rice instead of jasmine rice? Yes! Just increase the cooking time and water according to package instructions.
  • How do I know when the chicken is cooked? Use a meat thermometer; it should read 165°F (75°C).
  • Can I meal prep this for more than a week? For best quality, consume within 4 days; freezing is recommended for longer storage.
  • Is this recipe gluten-free? Yes, all ingredients are gluten-free!
  • What can I serve with this dish? Consider a side salad or some whole grain bread.
  • How do I make this dish spicier? Incorporate hot sauce or add diced jalapeños while cooking.
  • Can I cook the chicken in the oven? Absolutely! Bake at 400°F (200°C) for 20-25 minutes.
  • What other vegetables can I use? Feel free to experiment with asparagus, green beans, or zucchini.

Nutrition Tips and Dietary Adaptations

Making healthier choices is easy with this recipe:

  • Low-Calorie Option: Skip the oil and use a non-stick pan to reduce calories.
  • Increase Fiber: Opt for brown rice or quinoa for added fiber.
  • Protein Boost: Add a hard-boiled egg or a scoop of Greek yogurt for extra protein.

Equipment Recommendations

Make your cooking experience easier with these tools:

  • Non-stick skillet: Ideal for searing chicken without sticking.
  • Medium saucepan: Perfect for cooking rice to fluffy perfection.
  • Meat thermometer: Ensures chicken is cooked safely and thoroughly.
  • Airtight containers: Essential for storing leftovers effectively.

Serving Suggestions

Enhance your meal with these serving ideas:

  • Fresh herbs: Garnish with chopped parsley or cilantro for a fresh touch.
  • Lemon wedge: A squeeze of lemon juice brightens up the flavors.
  • Hot sauce: Serve with your favorite hot sauce for added heat.

In conclusion, this 20 Minute Meal-Prep Chicken, Rice, and Broccoli recipe is more than just a dish—it’s an adventure waiting to be explored. Whether you’re new to meal prepping or a seasoned pro, this recipe will undoubtedly become a staple in your kitchen. So, gather your ingredients, unleash your culinary creativity, and let’s make mealtime a delightful experience. Happy cooking, my friends!

20 Minute Meal-Prep Chicken, Rice, and Broccoli

Prep Time 5 minutes
Cook Time 20 minutes
Total Time 25 minutes
Servings 4 servings
Calories 450
A quick and healthy meal prep featuring tender chicken, fluffy jasmine rice, and steamed broccoli, perfect for busy weeknights.

Ingredients

Water and Rice

  • 2 cups water
  • 1 cup jasmine rice

Seasonings

  • 3/4 teaspoon salt
  • 1 teaspoon brown or granulated sugar
  • 1/2 teaspoon paprika
  • 1/2 teaspoon cumin
  • 1/2 teaspoon garlic powder

Chicken

  • 4 oz boneless, skinless chicken breasts or thighs

Cooking Oil

  • 1 tablespoon olive oil

Broccoli

  • 2-3 cups broccoli florets (for steaming)

Water for steaming

  • 3 tablespoons water (for microwave steaming)

Instructions 

  • Bring 2 cups water to a boil, add rice, cover, and simmer for 15 minutes until water is absorbed.
  • Rub chicken with sugar, paprika, cumin, garlic powder, salt, and pepper. Heat 1-2 tbsp oil in a skillet over medium-high heat.
  • Cook chicken 5-6 minutes per side until browned. Rest for 5 minutes before slicing.
  • Steam broccoli by boiling water and blanching for 1 minute or microwave with 3 tbsp water for 3 minutes.
  • Slice chicken, measure 2/3 cup rice into bowls, top with chicken and broccoli, then refrigerate. Reheat in microwave for 2 minutes before serving.

Notes

For best results, prepare ingredients in advance and store in airtight containers.
Calories: 450kcal
Cost: $15
Course: Main Course
Cuisine: American
Keyword: broccoli, Chicken, rice

Discover the Magic of Banana Bliss Muffins

Welcome to the world of culinary adventures where every recipe tells a story! Today, we’re embarking on a delightful journey to create Chocolate Banana Muffins that whisk you away to a cozy café with just one bite. These muffins are a perfect blend of rich chocolate and ripe bananas, making them a favorite for breakfast or as a sweet snack. Join me as we explore the joy of baking, the warmth of shared flavors, and the comfort of home.

Why You’ll Love This Recipe

There’s something enchanting about baking muffins; they fill your kitchen with an irresistible aroma while promising a delightful treat. Here are five reasons why you will adore this recipe:

  • Easy to Make: With simple ingredients and straightforward steps, you can whip up these muffins in no time, making them perfect for busy mornings or spontaneous baking sessions.
  • Perfectly Moist: Thanks to the overripe bananas and a touch of oil, these muffins stay wonderfully moist and tender, ensuring every bite is a melt-in-your-mouth experience.
  • Rich Chocolate Flavor: The addition of cocoa powder and chocolate chips creates a decadent treat that chocolate lovers won’t be able to resist.
  • Versatile Treat: Whether you enjoy them for breakfast, a snack, or dessert, these muffins fit any occasion. They’re also great for sharing with friends and family!
  • Customizable: This recipe allows for various substitutions and add-ins, so you can tailor it to your taste preferences or dietary needs.

Ingredient Breakdown

Let’s gather our ingredients and get ready to bake! Below is a detailed breakdown of what you’ll need, along with some substitution options to suit your pantry and preferences.

  • Overripe Bananas (3 medium): The star of the show! Use bananas that are brown and spotty for maximum sweetness and flavor. If you don’t have ripe bananas, you can speed up the ripening process by placing them in a brown paper bag for a day or two.
  • All-Purpose Flour (1.5 cups): This provides the structure for your muffins. For a gluten-free option, substitute with a 1:1 gluten-free flour blend.
  • Cocoa Powder (0.5 cups): Use unsweetened cocoa powder for a rich chocolate flavor. You can also try using Dutch-processed cocoa for a deeper color and taste.
  • Granulated Sugar (0.75 cups): This adds sweetness. For a healthier alternative, consider coconut sugar or a sugar substitute like Stevia.
  • Vegetable Oil (0.5 cups): Helps keep the muffins moist. You can use melted coconut oil or unsweetened applesauce as a lighter substitute.
  • Large Egg (1): Acts as a binder. For a vegan option, replace it with a flax egg (1 tablespoon ground flaxseed mixed with 2.5 tablespoons water).
  • Vanilla Extract (1 teaspoon): Enhances the flavor profile. Feel free to use pure vanilla extract for the best results.
  • Baking Soda (1 teaspoon): This is your leavening agent, helping the muffins rise. Ensure it’s fresh for the best results.
  • Salt (0.5 teaspoon): A crucial ingredient that enhances the overall flavor.
  • Semi-Sweet Chocolate Chips (1 cup): Add a delightful burst of chocolate in every bite! You can substitute with dark chocolate or even white chocolate chips for a twist.

Pro Tips for Perfect Muffins

Want to bake muffins like a pro? Here are some expert insights to elevate your baking game:

  • Don’t Overmix the Batter: Gently fold the dry ingredients into the wet mixture until just combined. Overmixing can lead to tough muffins.
  • Use Room Temperature Ingredients: Allow your eggs and any dairy to come to room temperature for better incorporation and texture.
  • Check for Doneness: Insert a toothpick into the center of a muffin; it should come out clean or with a few moist crumbs (not wet batter).
  • Cool Properly: Let your muffins cool in the pan for five minutes before transferring them to a wire rack to cool completely. This prevents sogginess.
  • Experiment with Add-Ins: Consider adding nuts, dried fruit, or even a swirl of peanut butter in the batter for added flavor and texture.
  • Store Correctly: Keep your muffins in an airtight container at room temperature for up to three days, or freeze them for longer storage.
  • Use Fresh Ingredients: Ensure your baking soda and other ingredients are fresh for optimal results.
  • Customize Your Sweetness: Feel free to adjust the sugar according to your taste or dietary needs.

Common Mistakes and Troubleshooting

Even the best bakers encounter hiccups. Here’s how to avoid common pitfalls:

  • Too Dry Muffins: This can happen if you overbake or use too much flour. Make sure to measure your flour correctly by spooning it into the measuring cup and leveling it off.
  • Flat Muffins: If your muffins don’t rise, check the freshness of your baking soda. Also, ensure your oven is preheated.
  • Uneven Baking: Make sure to rotate your muffin tin halfway through baking for even heat distribution.
  • Fallen Muffins: This may occur due to opening the oven door too early. Avoid checking on them until at least two-thirds of the baking time is complete.

Delicious Variations to Try

Looking to switch things up? Here are four scrumptious variations to explore:

  • Nutty Banana Bliss: Add 1/2 cup of chopped walnuts or pecans to the batter for a delightful crunch.
  • Spiced Banana Muffins: Incorporate 1 teaspoon of cinnamon or nutmeg into the dry ingredients for a warm, spiced flavor.
  • Peanut Butter Swirl: Add dollops of creamy peanut butter into the batter before baking for a rich, nutty twist.
  • Fruit Fusion: Toss in 1/2 cup of blueberries or raspberries along with the chocolate chips for a fruity surprise.

Storage and Make-Ahead Instructions

These muffins are perfect for meal prep! Here’s how to store them:

  • Room Temperature: Keep in an airtight container for up to 3 days.
  • Refrigerator: Store for up to a week. Just be aware that refrigeration can alter the texture slightly.
  • Freezing: Wrap each muffin individually and store in a freezer-safe bag for up to 3 months. Thaw at room temperature or warm them in the microwave for a quick treat.

Frequently Asked Questions

Here are some questions you might have about making these delightful muffins:

  • Can I use frozen bananas? Yes! Just thaw them beforehand and drain excess moisture.
  • How do I know when my muffins are done? A toothpick inserted in the center should come out clean or with a few moist crumbs.
  • Can I make these muffins vegan? Absolutely! Use a flax egg and substitute non-dairy milk for a vegan-friendly version.
  • What should I do if my batter is too thick? Add a splash of milk or water to reach your desired consistency.
  • Can I use whole wheat flour? Yes, but the texture will be denser. Consider using half whole wheat and half all-purpose flour for balance.
  • How can I make these muffins healthier? Substitute half the sugar with unsweetened applesauce or reduce the sugar amount altogether.
  • Can I add protein powder? Yes! Just replace a portion of the flour with protein powder to boost the nutrition.
  • What toppings can I add? Top with a sprinkle of oats, nuts, or a drizzle of chocolate before baking for added texture and flavor.

Nutrition Tips and Dietary Adaptations

These muffins can be enjoyed by various dietary preferences:

  • Gluten-Free: Substitute all-purpose flour with a gluten-free blend.
  • Lower Sugar: Reduce sugar or use natural sweeteners like honey or maple syrup.
  • Dairy-Free: Use non-dairy milk and oil in place of dairy ingredients.
  • Nut-Free: Omit nuts and ensure any chocolate chips used are nut-free.

Essential Equipment Recommendations

Before you start baking, make sure you have the following tools:

  • Muffin Tin: A standard 12-cup muffin tin works best for this recipe.
  • Mixing Bowls: Use large mixing bowls for combining ingredients.
  • Whisk: A good whisk helps combine wet ingredients smoothly.
  • Rubber Spatula: Ideal for folding ingredients without overmixing.
  • Measuring Cups and Spoons: Accurate measurements are key to successful baking.

Serving Suggestions

Serve your Chocolate Banana Muffins warm with a pat of butter, a drizzle of honey, or a scoop of your favorite nut butter. They also pair wonderfully with a steaming cup of coffee or tea, making for a cozy afternoon treat. Share them with friends, family, or keep them all to yourself—either way, these muffins are sure to bring smiles!

In conclusion, baking Chocolate Banana Muffins is not just about creating a delicious treat; it’s about sharing joy, warmth, and a slice of adventure right from your kitchen. So gather your ingredients, unleash your inner baker, and let the aroma of these delightful muffins fill your home. Happy baking!

Chocolate Banana Muffins

Prep Time 10 minutes
Cook Time 20 minutes
Total Time 30 minutes
Servings 12 muffins
Calories 210
Deliciously moist muffins packed with ripe bananas and rich chocolate flavor, perfect for a quick snack or breakfast.

Ingredients

Bananas

  • 1.5 cups all-purpose flour
  • 0.5 cup unsweetened cocoa powder
  • 0.75 cup granulated sugar
  • 0.5 cup vegetable oil
  • 1 large egg
  • 1 teaspoon vanilla extract
  • 1 teaspoon baking soda
  • 0.5 teaspoon salt
  • 1 cup semi-sweet chocolate chips

Instructions 

  • Preheat oven to 350°F (175°C) and line a muffin tin with paper liners.
  • Mash bananas in a large bowl, then whisk in egg, oil, sugar, and vanilla.
  • Sift in flour, cocoa powder, baking soda, and salt; fold into wet ingredients.
  • Stir in 3/4 cup chocolate chips, divide batter into muffin cups, and sprinkle remaining chips on top.
  • Bake for 18-22 minutes, cool for 5 minutes before transferring to a wire rack.

Notes

Use overripe bananas for best flavor and moisture.
Calories: 210kcal
Cost: $10
Course: Breakfast, Snack
Cuisine: American
Keyword: banana, chocolate

A Flavorful Journey into Strawberry Muffins

Welcome to the world of baking, where every ingredient tells a story and every bite is a memory waiting to happen. Today, we’re diving into the delightful realm of strawberry muffins—a treat that’s not just a feast for the taste buds but also a celebration of fresh, seasonal produce. These muffins are fluffy, moist, and bursting with the sweet flavor of strawberries, making them perfect for breakfast, brunch, or an afternoon snack. Let’s embark on this delicious adventure together!

Why You’ll Love This Recipe

These strawberry muffins are a delightful blend of flavor, texture, and nutrition. Here are just a few reasons why you’ll adore this recipe:

  • Fresh Ingredients: Each muffin is packed with juicy strawberries, giving a burst of flavor that’s simply irresistible.
  • Versatile Options: You can customize the muffins by substituting with applesauce, mashed bananas, or Greek yogurt for a personal touch.
  • Healthy Twist: Made with whole wheat flour and natural sweeteners, these muffins are a wholesome choice without sacrificing taste.
  • Quick and Easy: With simple steps, you can whip up a batch in under 30 minutes, perfect for busy days.
  • Freezer Friendly: Make extra muffins and store them in the freezer for quick breakfasts or snacks later on.

Ingredient Breakdown

Let’s take a closer look at the ingredients you’ll need to create these mouthwatering strawberry muffins. Each ingredient plays a crucial role in ensuring you get the best flavor and texture.

  • Fresh Strawberries: 1 ½ cups chopped fresh strawberries is the star of the show. You can also use frozen strawberries if fresh ones aren’t available. Just be sure to thaw and drain them first.
  • Flours: A mix of 1 cup white whole wheat flour and ½ cup all-purpose flour offers a perfect balance of nutrition and texture. For gluten-free options, substitute with almond flour or a gluten-free blend.
  • Sweeteners: Use ½ cup pure maple syrup or honey for natural sweetness. This can be adjusted based on your taste preference.
  • Fats: 4 tablespoons of unsalted butter or coconut oil add moisture and richness. You can use unsweetened applesauce instead for a lower-fat version.
  • Binding Ingredients: 2 eggs provide structure, while ¼ cup milk of your choice keeps the batter moist. You can substitute non-dairy milk for a vegan option.
  • Leavening Agents: 1 teaspoon baking powder and ½ teaspoon baking soda ensure your muffins rise beautifully.
  • Flavor Enhancer: 1 teaspoon vanilla extract adds a hint of warmth and depth to the flavor.
  • Salt: Just ½ teaspoon balances out the sweetness and enhances the flavors.

Pro Tips for Perfect Muffins

Side view of a strawberry muffin, highlighting the fluffy texture and juicy strawberries inside.

To ensure your strawberry muffins turn out perfectly every time, keep these expert tips in mind:

  • Room Temperature Ingredients: Allow your eggs and dairy to come to room temperature for better mixing.
  • Don’t Overmix: Stir the batter until just combined to avoid dense muffins. A few lumps are perfectly fine!
  • Strawberry Coating: Tossing chopped strawberries in flour before adding them to the batter helps prevent them from sinking.
  • Check Doneness: Use a toothpick to check for doneness; it should come out clean or with a few crumbs attached.
  • Cool Properly: Let muffins cool in the pan for a few minutes before transferring to a wire rack to maintain their texture.
  • Experiment with Spices: Add a pinch of cinnamon or nutmeg for an extra layer of flavor.
  • Use a Cookie Scoop: For evenly sized muffins, use a cookie scoop to fill the muffin tin.
  • Top with Sugar: Sprinkle a little sugar on top before baking for a sweet crunch.

Common Mistakes to Avoid

Even the most experienced bakers can encounter hiccups. Here are some common mistakes to watch out for:

  • Using Cold Ingredients: Cold ingredients can lead to uneven mixing and texture. Always use room temperature ingredients.
  • Overbaking: Keep an eye on your muffins as they bake; overbaking can lead to dry muffins.
  • Ignoring the Recipe: Baking is a science! Follow the measurements and methods closely for the best results.
  • Not Testing for Doneness: Don’t just rely on baking time; always test with a toothpick.
  • Skipping the Cooling Period: Muffins need time to set. Skipping this can lead to gummy centers.

Variations to Try

Feeling adventurous? Here are some fun variations to customize your strawberry muffins:

  • Chocolate Chip Strawberry Muffins: Add ½ cup of chocolate chips for a decadent twist.
  • Nutty Banana Strawberry Muffins: Stir in ½ cup of chopped walnuts or pecans for added crunch.
  • Vegan Strawberry Muffins: Substitute eggs with flaxseed meal and use non-dairy milk and yogurt.
  • Spiced Strawberry Muffins: Add 1 teaspoon of cinnamon or a pinch of cardamom to the batter for a warm flavor.

Storage and Make-Ahead Instructions

Planning ahead? Here’s how to store your muffins and keep them fresh:

  • Room Temperature: Store muffins in an airtight container for up to 3 days.
  • Refrigeration: For longer freshness, keep them in the fridge for up to a week.
  • Freezing: Wrap muffins individually in plastic wrap and place in a freezer bag. They can be frozen for up to 3 months. Thaw at room temperature or warm them in the microwave.

Frequently Asked Questions

Here are some common questions you might have about making and enjoying strawberry muffins:

  • Can I use frozen strawberries? Yes! Just thaw and drain them before using to avoid excess moisture in the batter.
  • How do I make these muffins gluten-free? Substitute the flours with a gluten-free flour blend or almond flour.
  • Can I replace the eggs? Yes! Use flaxseed meal or applesauce as a substitute for a vegan option.
  • What’s the best way to enjoy these muffins? These muffins are delicious warm with a pat of butter or a drizzle of honey.
  • How can I make these muffins less sweet? Reduce the amount of maple syrup or honey to suit your taste.
  • Can I add other fruits? Absolutely! Blueberries or raspberries can also be delicious in this recipe.
  • What should I do if my muffins are too dense? Make sure not to overmix the batter, and check that your baking powder is fresh.
  • How can I enhance the flavor? Adding a splash of lemon zest or a hint of almond extract can brighten the flavor profile.

Nutritional Tips and Dietary Adaptations

Want to make your strawberry muffins even healthier? Here are some tips:

  • Reduce Sugar: Use less sweetener or substitute with stevia or monk fruit for a lower-calorie option.
  • Increase Fiber: Add a tablespoon of chia seeds or flaxseeds for an extra boost of fiber and omega-3s.
  • Lower Carbs: Substitute with almond flour and erythritol for a keto-friendly version.

Equipment Recommendations

To make your baking experience smooth and enjoyable, here are some essential tools:

  • Muffin Tin: A standard 12-cup muffin tin is essential.
  • Mixing Bowls: Use a large bowl for mixing wet ingredients and a smaller bowl for dry ingredients.
  • Whisk: A sturdy whisk is perfect for blending dry and wet ingredients.
  • Measuring Cups and Spoons: Accurate measurements are key to successful baking.
  • Cooling Rack: Helps to cool your muffins evenly after baking.

Serving Suggestions

These strawberry muffins are delightful on their own, but here are some fun serving ideas:

  • With Yogurt: Serve warm muffins with a dollop of Greek yogurt for a protein-packed breakfast.
  • With Jam: Spread your favorite fruit jam on top for an extra sweet treat.
  • As a Dessert: Enjoy them with a scoop of vanilla ice cream for a delicious dessert.
  • Accompanied by Coffee: Pair with a hot cup of coffee or tea for a cozy afternoon break.

Conclusion

There you have it—your ultimate guide to creating deliciously fluffy and fruity strawberry muffins! With endless variations and adaptations, these muffins are sure to become a staple in your baking repertoire. So gather your ingredients, preheat your oven, and let’s bake something wonderful together. Remember, every muffin carries the essence of adventure and connection, one delightful bite at a time!

Strawberry Muffins

Prep Time 10 minutes
Cook Time 18 minutes
Total Time 28 minutes
Servings 12 muffins
Calories 150
Delicious and moist strawberry muffins perfect for breakfast or a snack, combining fresh fruit with wholesome ingredients.

Ingredients

Fruits

  • 1.5 cups chopped fresh strawberries

Dry ingredients

  • 0.25 cup all-purpose flour
  • 1 cup white whole wheat flour
  • 4 tablespoons unsalted butter or coconut oil

Wet ingredients

  • 1 cup unsweetened applesauce or mashed ripe banana or plain Greek yogurt
  • 0.5 cup pure maple syrup or honey
  • 0.25 cup milk of choice
  • 1 teaspoon vanilla extract
  • 2 eggs eggs

Leavening agents

  • 1 teaspoon baking powder
  • 0.5 teaspoon baking soda
  • 0.5 teaspoon salt

Instructions 

  • Preheat oven to 375°F (190°C). Prepare muffin tin with spray or liners.
  • Toss chopped strawberries with ¼ cup flour to coat.
  • Melt butter, then mix with applesauce, maple syrup, milk, vanilla, and eggs.
  • Whisk in baking powder, baking soda, and salt. Add flours and fold in strawberries.
  • Fill muffin cups ¾ full and bake 16-18 minutes. Cool before serving.

Notes

Use fresh strawberries for best flavor and texture.
Calories: 150kcal
Cost: $8
Course: Breakfast
Cuisine: American
Keyword: Strawberries

Embark on a Flavorful Adventure with Homemade Soft Flatbread

Welcome to the world of homemade flatbread, where every bite takes you on a journey through warmth and flavor! This simple recipe not only fills your kitchen with delightful aromas but also serves as a versatile companion to countless dishes, from savory curries to fresh salads. Flatbreads are a staple in many cultures, and making them from scratch allows you to connect with those traditions while adding your personal touch. Join me, Jack, as we dive into the delightful process of creating soft flatbread that will make any meal feel like a celebration!

Why You’ll Love This Recipe

Here are just a few reasons why this soft flatbread recipe is a must-try:

  • Quick and Easy: With minimal ingredients and straightforward steps, you can whip up these flatbreads in no time!
  • Customizable: Feel free to experiment with different herbs and spices to make these flatbreads uniquely yours.
  • Perfect Texture: The dough produces soft, pillowy flatbreads that are perfect for wrapping or dipping.
  • Fresh and Healthy: Homemade means no preservatives, just wholesome ingredients you can feel good about.
  • Versatile Pairing: Enjoy them with your favorite dishes—curries, stews, or even as a base for pizzas!

Essential Ingredients for Homemade Soft Flatbread

Before we get started, let’s gather the essential ingredients. This recipe is not only simple but also allows for substitutions based on what you have at home.

  • All-Purpose Flour (3 cups / 375 grams): The backbone of our flatbread, providing structure. You can substitute with whole wheat flour for a richer flavor.
  • Baking Powder (1 teaspoon): Our leavening agent that helps create a light texture without yeast.
  • Salt (1 teaspoon): Enhances all the flavors and balances the dough.
  • Vegetable Oil (1/3 cup / 80 ml): Adds moisture and richness. Olive oil or melted butter can be great alternatives!
  • Warm Water (1 cup / 235 ml): Essential for bringing the dough together. Ensure it’s warm, not hot, to activate the ingredients properly.

Step-by-Step Guide to Making Flatbread

Let’s turn these ingredients into delicious flatbreads! Follow these steps for the best results:

  1. Mix the Ingredients: In a mixing bowl, combine the all-purpose flour, baking powder, salt, vegetable oil, and warm water. Stir until the ingredients come together.
  2. Knead the Dough: Transfer the mixture onto a floured surface and knead the dough for about 5-7 minutes. You want to achieve a lovely elastic dough ball that is smooth and pliable.
  3. Rest the Dough: Divide the dough ball into 16 equal portions. Flatten each slightly with your hand, cover with a towel, and let them rest for 15 minutes. This helps relax the gluten for easier rolling.
  4. Roll into Disks: Using a rolling pin, roll each piece into 7-inch disks. Aim for a thickness of about 1/8 inch.
  5. Cook the Flatbreads: Heat a griddle or non-stick pan over medium heat. Cook each flatbread for about 1-2 minutes on each side, or until brown spots appear and they puff up slightly. Flip using tongs and keep an eye on them to prevent burning.

Expert Tips for Perfect Flatbreads

To ensure your flatbreads turn out perfectly every time, here are some expert insights:

  • Check Your Dough: If the dough feels too sticky, add a little more flour. If it’s too dry, incorporate a bit more warm water.
  • Heat Matters: Ensure your pan is hot before adding the flatbreads; this helps them puff up beautifully.
  • Thickness is Key: Roll the dough a bit thicker if you want more air pockets, which create a fluffier texture.
  • Stay Close: Keep an eye on the flatbreads as they cook; they can burn quickly!
  • Cover After Cooking: Keep cooked flatbreads warm by covering them with a clean towel.
  • Experiment: Try adding spices like garlic powder or herbs directly into the dough for an extra flavor boost.
  • Use a Dough Scraper: This handy tool can help you divide and shape the dough with precision.
  • Storage Tips: Store any leftover flatbreads in an airtight container at room temperature for up to 2 days.

Troubleshooting Common Issues

Don’t worry if things don’t go perfectly at first! Here are some common issues and solutions:

  • Tough or Dense Flatbreads: This can happen if the dough is over-kneaded. Aim for a soft, elastic texture instead.
  • Flatbreads Not Puffing Up: Ensure your pan is hot enough and try rolling the dough a bit thicker.
  • Burning Before Cooking Through: Lower the heat slightly to allow for even cooking.
  • Dough Too Sticky: Dust with flour while kneading, but avoid adding too much flour, as it can dry out the dough.

Delicious Variations to Try

Once you master the basic recipe, here are some fun variations to explore:

  • Garlic Herb Flatbread: Add minced garlic and your choice of herbs to the dough for a fragrant twist.
  • Spicy Flatbread: Incorporate chili powder or cumin into the dough for a delicious kick.
  • Cheese-Stuffed Flatbreads: Place cheese in the center before rolling for a cheesy surprise.
  • Sweet Cinnamon Flatbread: Sprinkle cinnamon and sugar on the rolled-out dough for a sweet treat.

Storage and Make-Ahead Instructions

You can make flatbreads ahead of time for easy meals later. Here’s how:

  • Make Ahead: Prepare the dough a day in advance and refrigerate it. Allow it to come to room temperature before rolling.
  • Freezing Flatbreads: Cooked flatbreads can be frozen. Place parchment paper between them and store in an airtight bag for up to 3 months.
  • Reheating: To reheat, place the flatbreads in a dry skillet over medium heat or wrap them in foil and warm them in the oven.

Frequently Asked Questions (FAQs)

Let’s address some common queries you might have:

  • Can I use whole wheat flour? Yes! Whole wheat flour can be used, but the texture may be denser.
  • What can I serve with flatbread? Flatbreads are fantastic with dips like hummus, or paired with stews and curries.
  • How do I store leftovers? Keep them covered at room temperature for up to 2 days or refrigerate for longer freshness.
  • Can I add yeast instead of baking powder? You can, but the process and texture will differ. Yeast requires time to rise.
  • What if I don’t have a rolling pin? You can use a wine bottle or any cylindrical object to roll out the dough.
  • Will these flatbreads be soft? Yes! This recipe yields soft, stretchy flatbreads when cooked properly.
  • Can I make gluten-free flatbread? Yes! Use a gluten-free flour blend designed for baking.
  • How do I know when they are done? Look for brown spots on both sides and a slight puffing up of the flatbread.

Nutrition Tips and Dietary Adaptations

This recipe is naturally vegan and can easily be adapted to meet different dietary preferences:

  • Low-Carb Version: Consider using almond flour or coconut flour, but note the texture will differ.
  • Nut-Free: Ensure your flour choice is free from cross-contamination with nuts.
  • Gluten-Free: Use a certified gluten-free flour blend for safe, delicious flatbreads.

Equipment Recommendations

To make your flatbread journey smoother, here are some handy tools:

  • Large Mixing Bowl: For combining ingredients easily.
  • Rolling Pin: Essential for rolling out the dough into flat disks.
  • Non-Stick Skillet or Griddle: Ideal for cooking the flatbreads evenly.
  • Dough Scraper: Useful for dividing and handling the dough.

Serving Suggestions

Now that you’ve made your delicious flatbreads, here are some ideas for serving:

  • Wrap It Up: Fill them with grilled chicken, veggies, or falafel for a tasty wrap.
  • Dip and Enjoy: Pair with tzatziki, guacamole, or your favorite salsa for a snack.
  • Make a Flatbread Pizza: Top with sauce, cheese, and your favorite toppings before baking in the oven!

With this comprehensive guide, you’re now ready to create your own homemade soft flatbreads that are sure to impress family and friends. Remember, every flatbread carries a story, and with each bite, you’re not just tasting food—you’re savoring a piece of culture and connection. So roll up your sleeves, gather those ingredients, and start your flatbread adventure today!

Homemade Soft Flatbread

Prep Time 20 minutes
Cook Time 10 minutes
Total Time 30 minutes
Servings 16 pieces
Calories 150
Enjoy soft, warm flatbreads made from simple ingredients, perfect for any meal or snack.

Ingredients

Dough

  • 375 grams all purpose flour
  • 1 teaspoon baking powder
  • 1 teaspoon salt
  • 80 ml vegetable oil
  • 235 ml warm water

Instructions 

  • Mix all ingredients and knead into an elastic dough ball.
  • Divide dough into 16 balls, flatten slightly, cover, and rest for 15 minutes.
  • Roll each dough ball into 7-inch disks.
  • Heat a griddle and cook each flatbread without oil, flipping with tongs until puffed and golden.
  • Serve immediately or store covered for up to 2 days.

Notes

Ensure the griddle is properly heated for best results.
Calories: 150kcal
Cost: $3
Course: Bread
Cuisine: homemade
Keyword: Flatbread

Embark on a Flavorful Journey with the Röda bär Vaniljprotein Smoothie

If you’re looking to kickstart your mornings with a burst of energy and a taste of nature’s sweetness, then this Röda bär Vaniljprotein Smoothie is the perfect recipe for you! This smoothie is not just a drink; it’s an experience that blends the vibrant flavors of frozen berries with the creaminess of almond milk and a hint of vanilla, creating a delicious concoction that tantalizes your taste buds. Join me, Jack, as we explore the delightful world of this berry smoothie that celebrates the simplicity and beauty of wholesome ingredients.

Why You’ll Love This Recipe

  • Quick and Easy: This smoothie takes just 5 minutes to whip up, making it an ideal choice for busy mornings.
  • Nutrient-Rich: Packed with antioxidants from berries and protein from vanilla powder, this smoothie is a powerhouse of nutrition.
  • Customizable: Feel free to substitute ingredients to suit your dietary preferences, ensuring everyone can enjoy it!
  • Deliciously Creamy: The addition of coconut yogurt gives this smoothie a rich, creamy texture that you’ll love.
  • Perfect for Meal Prep: Make a batch ahead of time and store it for a quick grab-and-go breakfast option!

Ingredient Breakdown

Understanding the ingredients in your smoothie is essential for mastering this recipe. Here’s what you’ll need:

  • 250 ml of plant milk: I recommend almond milk for its subtle nutty flavor, but you can use oat, soy, or coconut milk as alternatives.
  • 1 frozen banana: This adds natural sweetness and creaminess. If you’re avoiding bananas, consider using avocado for a similar texture.
  • 150 g of frozen berry mix: I used strawberries, raspberries, and red currants, but feel free to mix it up with blueberries, blackberries, or even tropical fruits!
  • 2 tbsp of coconut yogurt: This contributes to the creaminess and adds a touch of tartness. Greek yogurt is a great alternative if you prefer something thicker.
  • 1 scoop of vanilla protein powder: I used Rawnice Vanilla Caramel Protein Powder, but any plant-based protein will do.

Pro Tips for the Perfect Smoothie

Close-up of a Röda bär & Vaniljprotein Smoothie, highlighting its creamy consistency and colorful ingredients.

To elevate your smoothie-making game, consider these expert insights:

  • Chill Your Ingredients: Ensure your fruits are frozen for a frosty texture. Fresh fruits can be used, but they may require extra ice.
  • Blend in Stages: Start by blending the liquid and powders first, then add the fruits. This ensures a smoother consistency.
  • Taste and Adjust: Blend and taste your smoothie. If it’s not sweet enough, add a drizzle of honey or maple syrup.
  • Use a High-Powered Blender: This ensures a silky smooth texture, especially with fibrous ingredients like bananas.
  • Experiment with Add-Ins: Superfoods like chia seeds or spinach can be added for an extra nutritional boost.
  • Don’t Skip the Yogurt: This ingredient not only enhances the creaminess but also packs probiotics for gut health.
  • Garnish for Presentation: Top your smoothie with a few whole berries or a sprinkle of granola for a beautiful finish.
  • Serving Size: This recipe yields approximately two servings, perfect for sharing or saving for later.

Avoid Common Mistakes

Even the best recipes can have hiccups! Here are common mistakes to watch out for:

  • Too Much Liquid: Adding excessive milk can make your smoothie too thin. Start with less and adjust as needed.
  • Not Blending Long Enough: Ensure you blend until completely smooth. Chunky smoothies are less enjoyable!
  • Using Overripe Bananas: While bananas add flavor, too ripe can lead to an overly sweet smoothie. Choose bananas that are just ripe.
  • Ignoring Texture: If your smoothie is gritty, it might be due to insufficient blending or low-quality protein powder.

Delicious Variations to Try

Feeling adventurous? Here are some exciting variations you can try:

  • Tropical Twist: Substitute berries with mango and pineapple for a refreshing tropical experience.
  • Green Smoothie: Add a handful of spinach or kale for a nutritional kick without altering the taste significantly.
  • Cacao Delight: Mix in a tablespoon of cocoa powder for a chocolatey twist that pairs beautifully with the vanilla.
  • Nutty Flavor: Include a tablespoon of almond butter or peanut butter for added creaminess and protein.

Storage and Make-Ahead Instructions

Planning ahead is key to a smooth morning routine:

  • Refrigeration: You can store your smoothie in an airtight container in the fridge for up to 24 hours, but the freshness is best enjoyed immediately.
  • Freezing: Prepare smoothie packs by portioning out the ingredients and freezing them. Just blend with your choice of liquid when ready!

Frequently Asked Questions

Here are some common questions about this smoothie:

  • Can I use fresh berries instead of frozen? Yes, but you might need to add ice to achieve that frosty texture.
  • Is this smoothie vegan? Absolutely! All ingredients can be plant-based.
  • How can I make it sugar-free? Use unsweetened plant milk and avoid added sweeteners; the banana and berries should provide enough natural sweetness.
  • Can I use a different flavor of protein powder? Yes, any flavor you enjoy can be substituted, but keep in mind it will alter the overall flavor profile.
  • What’s the best time to drink this smoothie? It’s perfect for breakfast, but also a great snack or post-workout recovery drink!
  • How can I make it thicker? Add more frozen fruit or a scoop of oats for a thicker consistency.
  • Can I add greens without changing the flavor? Yes! Spinach or kale blends well without overpowering the taste.
  • What’s the nutritional value of this smoothie? It’s rich in vitamins, antioxidants, and protein, making it a balanced choice for any meal.

Nutritional Tips and Dietary Adaptations

To cater to various dietary needs, consider these adaptations:

  • For Gluten-Free: This recipe is naturally gluten-free, ensuring it’s safe for those with gluten sensitivities.
  • For Dairy-Free: All ingredients can be substituted with plant-based options for a completely dairy-free smoothie.
  • For High-Protein: Increase the protein powder or add Greek yogurt for an extra protein boost.
  • For Low-Carb: Reduce the banana and use fewer berries; consider using avocado for creaminess without the carbs.

Equipment Recommendations

Having the right tools makes all the difference:

  • High-Powered Blender: A quality blender will ensure a smooth and creamy texture.
  • Measuring Cups: Accurate measurements help maintain consistency in your smoothies.
  • Storage Containers: Use glass or BPA-free plastic containers for meal prep and storage.

Serving Suggestions

Here are some ideas to enhance your smoothie experience:

  • Top with Granola: A sprinkle of granola adds crunch and a delightful texture.
  • Pair with Toast: Enjoy your smoothie alongside whole-grain toast topped with avocado or nut butter.
  • Create a Smoothie Bowl: Pour into a bowl and top with sliced fruits, nuts, and seeds for a beautiful presentation.

In conclusion, the Röda bär Vaniljprotein Smoothie is more than just a refreshing beverage; it’s an exploration of flavor and nutrition that invites you to savor every sip. With its vibrant colors and delicious taste, this smoothie embodies the essence of what it means to eat well and feel good. So grab your blender, gather your ingredients, and embark on this culinary adventure. Cheers to your health and happiness!

Röda bär Vaniljprotein Smoothie

Prep Time 5 minutes
Total Time 5 minutes
Servings 1 serving
Calories 250
Enjoy a delicious and nutritious berry vanilla protein smoothie perfect for a quick breakfast or snack.

Ingredients

Liquid

  • 250 ml växtmjölk (mandel)
  • 1 piece fryst banan
  • 150 g fryst bärmix (jordgubbar, hallon, röda vinbär)
  • 2 msk kokosyoghurt
  • 1 skopa Rawnice Vanilla Caramel Protein Pulver

Instructions 

  • Place all ingredients in a blender and blend until smooth and creamy.

Notes

Use frozen berries for a thicker, colder smoothie.
Calories: 250kcal
Cost: $8
Course: Smoothie
Cuisine: Swedish
Keyword: berries, Protein, vanilla

Welcome to the World of Banana Nut Bread

Ah, the aroma of freshly baked banana nut bread wafting through the kitchen—it’s a scent that tugs at the heartstrings and evokes memories of family gatherings and cozy mornings. This classic recipe is more than just a way to use up ripe bananas; it’s a journey into the warmth of Grandma’s kitchen, where every slice tells a story. Whether you’re a novice baker or a seasoned pro, this comprehensive guide will ensure your banana nut bread is the talk of the table.

Why You’ll Love This Recipe

Banana nut bread isn’t just delicious; it’s also versatile and comforting. Here are five reasons why this recipe will become a staple in your home:

  • Easy to Make: With simple ingredients and straightforward steps, this recipe is perfect for bakers of all skill levels.
  • Customizable: Add your favorite nuts, spices, or even chocolate chips to create a unique twist on the classic.
  • Great for Breakfast or Snack: Enjoy a slice with your morning coffee or as a midday treat—it’s perfect for any time of day.
  • Incredibly Moist: Thanks to the ripe bananas and butter, this bread stays fresh and tender for days.
  • Freezes Well: Make a double batch and freeze half for a quick breakfast option later on.

Ingredient Breakdown

Let’s dive into the magic behind this recipe. Each ingredient plays a pivotal role in creating the perfect banana nut bread.

  • Ripe Bananas: The star of the show! Sweet, overripe bananas not only add flavor but also moisture to the bread. Aim for bananas that are heavily speckled.
  • Melted Butter: Provides richness and helps achieve that soft crumb. You can substitute with vegetable oil for a dairy-free version.
  • Sugar: While granulated sugar is standard, you can reduce it for a less sweet bread or substitute with honey or maple syrup for a natural sweetness.
  • Egg: Acts as a binding agent and adds structure. For a vegan option, use flax eggs.
  • Vanilla Extract: Adds depth and warmth to the flavor profile.
  • Baking Soda: The leavening agent that helps the bread rise.
  • Salt: Enhances the overall flavor of the bread.
  • All-Purpose Flour: Provides the necessary structure. Whole wheat flour can be used for a nuttier flavor and added nutrition.
  • Chopped Walnuts or Pecans: Adds a delightful crunch and nutty flavor. Feel free to substitute with chocolate chips or dried fruit if preferred.

Pro Tips for Baking Success

Ready to bake? Here are some expert insights to ensure your banana nut bread is a hit:

  • Don’t Overmix: Gently fold the wet and dry ingredients together to keep the bread light and airy.
  • Check for Ripeness: Use bananas that are well-spotted and soft; they provide the best flavor.
  • Toast Your Nuts: Toasting walnuts or pecans before adding them enhances their flavor dramatically.
  • Measure Accurately: Use a kitchen scale for precision, especially with flour, to avoid dense bread.
  • Use Room Temperature Ingredients: This helps the batter combine more easily.
  • Cool Properly: Allow the bread to cool in the pan for 10 minutes before transferring to a wire rack to prevent crumbling.
  • Experiment with Spices: A pinch of cinnamon or nutmeg can elevate your banana nut bread to new heights.
  • Don’t Rush the Baking: Every oven is different; check your bread a few minutes before the suggested baking time.
  • Use a Toothpick Test: Insert a toothpick into the center; it should come out clean or with a few moist crumbs.

Avoiding Common Mistakes

Even the best bakers make mistakes! Here’s how to troubleshoot common issues:

  • Dense Bread: This often results from overmixing. Mix just until combined.
  • Too Sweet: Reduce sugar or use ripe bananas for natural sweetness.
  • Dry Texture: Ensure you’re measuring your flour correctly and don’t overbake.
  • Uneven Baking: Rotate the pan halfway through baking for even heat distribution.

Delicious Variations

While the classic banana nut bread is fantastic as is, here are some variations to keep things exciting:

  • Chocolate Chip Banana Nut Bread: Add 1 cup of semi-sweet chocolate chips for a gooey, indulgent twist.
  • Blueberry Banana Nut Bread: Mix in 1 cup of fresh or frozen blueberries for a fruity burst.
  • Maple Pecan Banana Bread: Substitute maple syrup for sugar and add chopped pecans for a warm flavor.
  • Coconut Banana Nut Bread: Add 1 cup of shredded coconut for a tropical flair.

Storage and Make-Ahead Instructions

Want to enjoy this delightful bread later? Here’s how to store and prepare it in advance:

  • Room Temperature: Store the bread in an airtight container for up to 3 days.
  • Refrigerator: If you live in a humid climate, refrigerate for up to a week.
  • Freezer: Wrap the cooled bread tightly in plastic wrap and foil. It can be frozen for up to 3 months. Thaw overnight in the fridge before serving.
  • Make-Ahead: You can prepare the batter a day in advance and bake it when you’re ready.

Frequently Asked Questions

Let’s tackle some common queries about banana nut bread:

  • Can I use frozen bananas? Yes! Just thaw them and drain any excess liquid before mashing.
  • What can I substitute for eggs? Use a flax egg (1 tablespoon ground flaxseed mixed with 2.5 tablespoons water) or unsweetened applesauce.
  • How can I make it gluten-free? Substitute all-purpose flour with a gluten-free flour blend.
  • What nuts are best in banana nut bread? Walnuts and pecans are classic choices, but feel free to experiment!
  • Why is my bread not rising? Check that your baking soda is fresh; expired leavening agents can lead to dense bread.
  • Can I add yogurt or sour cream? Absolutely! They can add moisture and tanginess to the bread.
  • How do I know when my bread is done baking? A toothpick inserted into the center should come out clean or with a few crumbs.
  • Can I make mini loaves? Yes! Adjust baking time to about 25-35 minutes for mini loaves.

Nutrition Tips and Dietary Adaptations

Banana nut bread can be made healthier without sacrificing flavor:

  • Whole Wheat Flour: Substitute half of the all-purpose flour with whole wheat for added fiber.
  • Reduce Sugar: Cut the sugar by a third or use natural sweeteners like honey.
  • Add Seeds: Incorporate chia or flax seeds for extra nutrition.
  • Dairy-Free Option: Use coconut oil instead of butter and almond milk instead of regular milk.

Essential Equipment for Baking

Here’s a quick list of tools to help you bake the perfect banana nut bread:

  • Mixing Bowls: A set of various sizes for combining ingredients.
  • Measuring Cups and Spoons: For accurate measurements.
  • Whisk and Spatula: Essential for mixing and folding ingredients.
  • 9×5-Inch Loaf Pan: The perfect size for this recipe.
  • Cooling Rack: To let your bread cool properly after baking.

Serving Suggestions

Enjoy your banana nut bread in various delightful ways:

  • With Butter: A simple spread of butter enhances the flavor.
  • With Cream Cheese: For a rich and tangy twist, top with cream cheese.
  • Toast It: A quick toast brings out the flavors and adds a satisfying crunch.
  • Pair with Coffee: The perfect accompaniment to your morning cup.

Conclusion

Banana nut bread is more than just a recipe; it’s a comforting hug in food form. Whether you’re enjoying a slice yourself or sharing it with friends and family, this recipe promises warmth, flavor, and a bit of nostalgia. So, gather your ingredients, preheat the oven, and embark on this delicious adventure. Every slice is a reminder that food is indeed a passport to culture and connection. Happy baking!

Grandma s Banana Nut Bread

Prep Time 15 minutes
Cook Time 1 hour 5 minutes
Total Time 1 hour 20 minutes
Servings 8 slices
Calories 250
A delicious and moist banana nut bread with a perfect balance of sweetness and crunch, ideal for breakfast or a snack.

Ingredients

Wet ingredients

  • 3 pieces ripe bananas, mashed
  • 0.5 cup melted butter
  • 0.5 cup sugar (can reduce to 0.25 cup for less sweetness)
  • 1 large egg, beaten
  • 1 teaspoon vanilla extract

Dry ingredients

  • 1.5 cups all purpose flour
  • 0.5 teaspoon baking soda
  • pinch salt

Nuts

  • 0.5 cup chopped walnuts or pecans

Instructions 

  • Preheat oven to 175°C (350°F) and grease a 9x5-inch pan.
  • Mash bananas in a bowl, then stir in melted butter, sugar, egg, and vanilla.
  • Mix flour, baking soda, and salt in a separate bowl, then fold into wet ingredients.
  • Gently fold in chopped nuts, then pour batter into prepared pan.
  • Bake for 60-70 minutes until a toothpick comes out clean, then cool in pan for 10 minutes before transferring to a wire rack.

Notes

For a less sweet bread, reduce sugar to 1/4 cup.
Calories: 250kcal
Cost: $10
Course: Dessert
Cuisine: American
Keyword: banana, bread, nut