Author

Jack

Browsing

Embark on a Flavor Journey with Hot Honey Chicken Wings

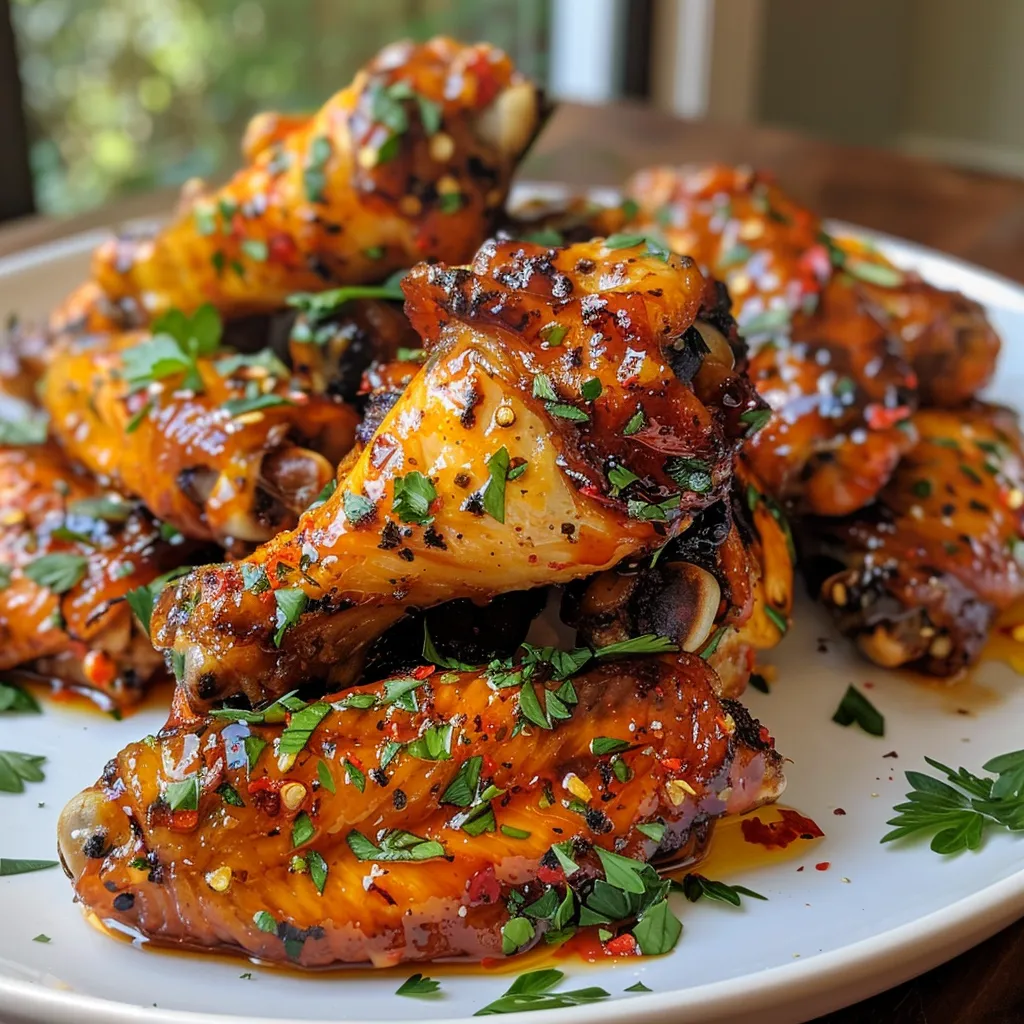
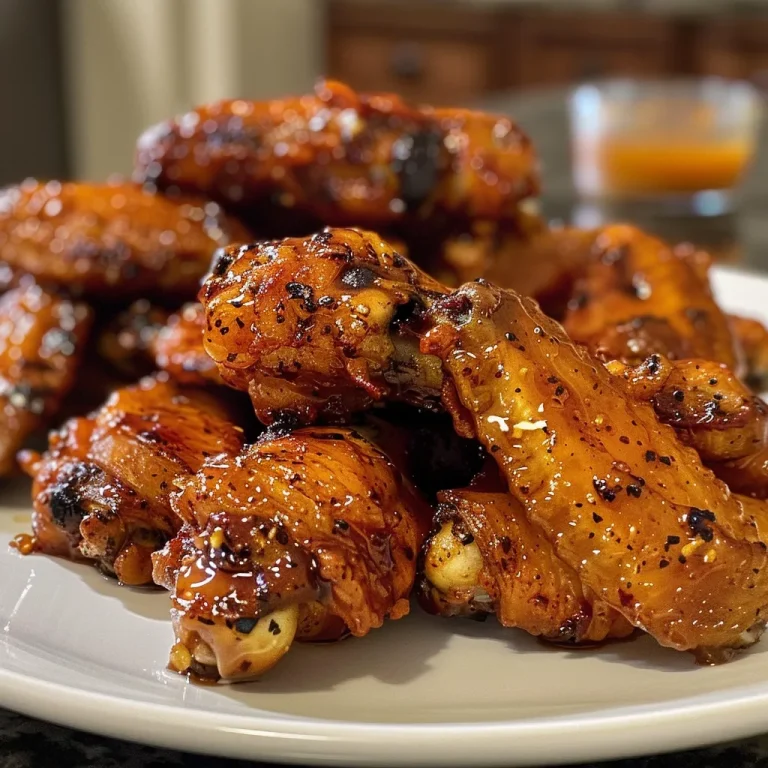
Welcome, fellow culinary explorers! Today, we’re diving into the mouthwatering world of Hot Honey Chicken Wings. This recipe is a delightful fusion of sweet and spicy, perfect for any gathering or a cozy night in. Trust me, these wings are not just a dish; they’re a culinary adventure that brings together the best of flavors, textures, and aromas. Whether you’re a seasoned chef or a curious home cook, this journey will leave your taste buds dancing with joy!

Why You’ll Love This Recipe

Hot Honey Chicken Wings are more than just delicious; they offer a magical blend of flavors and satisfaction. Here are five reasons why this recipe will quickly become a favorite:

  • Perfect Balance of Flavors: The combination of honey and hot sauce creates a sweet yet spicy profile that tantalizes your palate.
  • Versatile Cooking Methods: You can achieve crispy perfection using an air fryer, oven, or even deep frying, ensuring endless possibilities!
  • Easy to Make: With simple ingredients and straightforward steps, this recipe is perfect for both beginners and experienced cooks.
  • Great for Any Occasion: Whether it’s game day, a cookout, or a family dinner, these wings are sure to impress your guests.
  • Customizable: You can easily tweak the heat level or add your favorite spices to make it your own.

Ingredient Breakdown

Before we start cooking, let’s take a look at the star players in this recipe:

  • Avocado Oil: A healthier option for frying that adds a subtle flavor. You can substitute with olive oil if needed.
  • Chicken Wings: Use fresh or frozen wings. If using frozen, make sure to thaw them completely for even cooking.
  • Cornstarch: This ingredient is crucial for achieving that crispy texture. You could use potato starch as an alternative.
  • Spices and Seasonings: A blend of garlic powder, onion powder, smoked paprika, and black pepper adds depth to the flavor.
  • Hot Sauce and Honey: The heart of the sauce! You can adjust the amounts based on your heat preference.

How to Make Hot Honey Chicken Wings
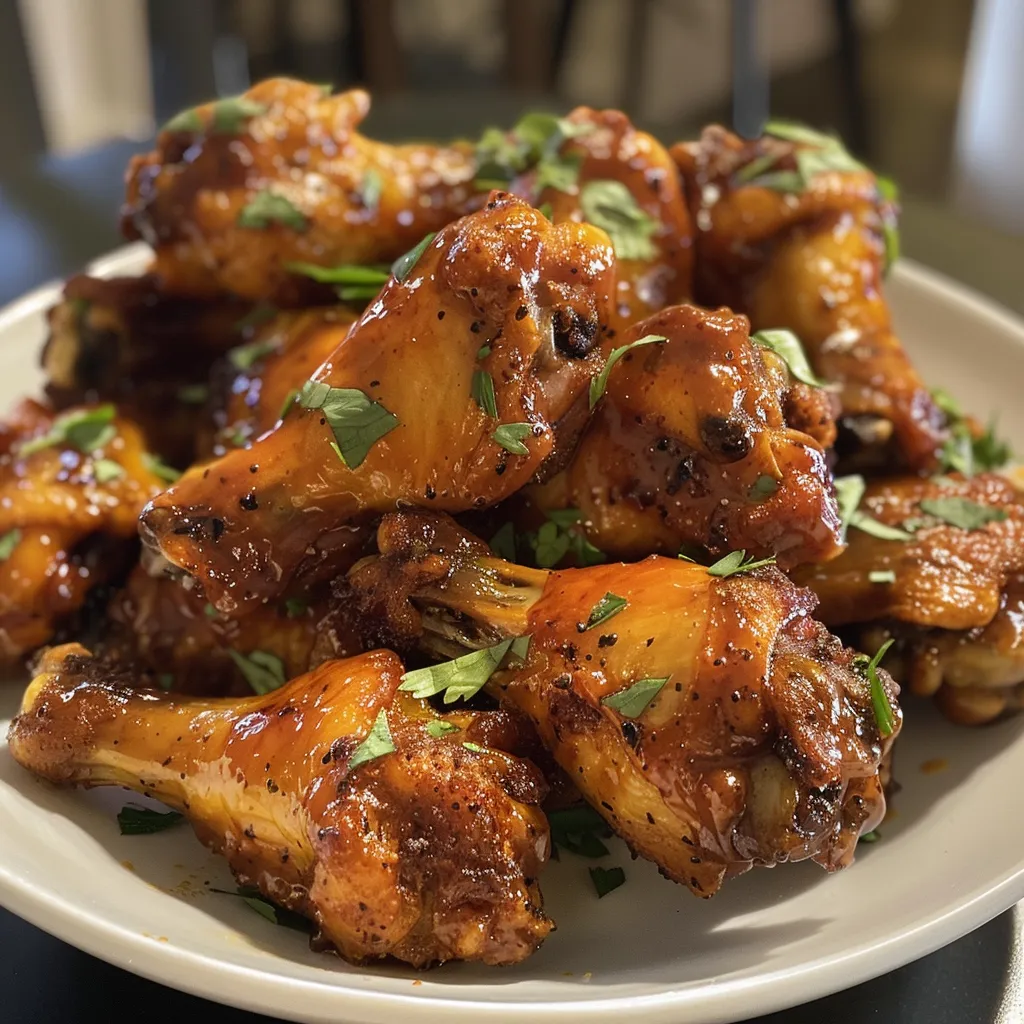
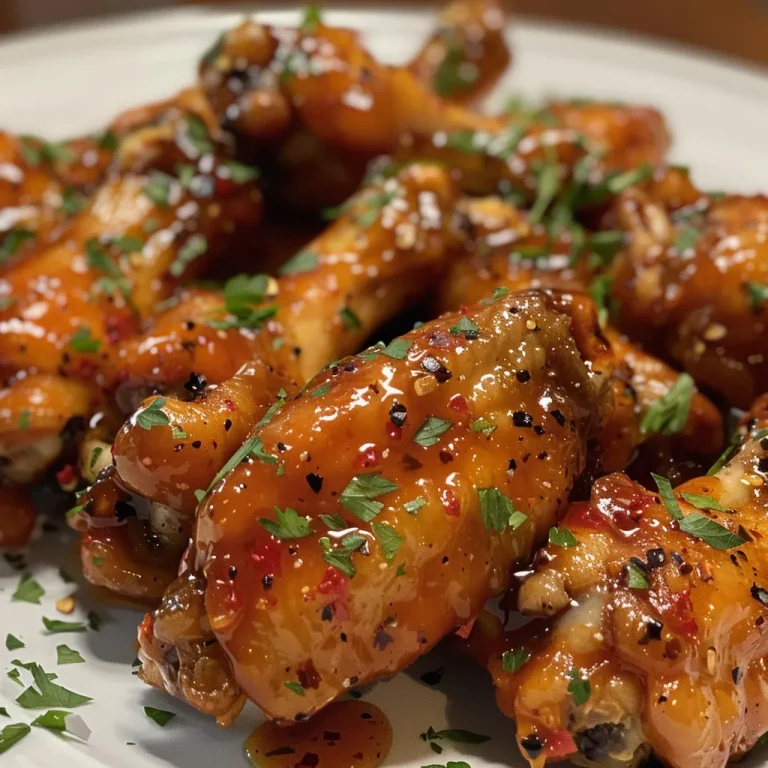
Succulent chicken wings with a crispy exterior and honey drizzle.

Ready to create some culinary magic? Follow these steps to whip up your hot honey chicken wings:

  1. Preheat Your Oven: Preheat to 400°F (200°C). Use a pastry brush to oil a wire rack with avocado oil and place it on a baking sheet.
  2. Prepare the Wings: In a plastic bag, combine cornstarch, baking powder, and seasonings. Pat chicken wings dry and add them to the bag. Seal and shake until coated.
  3. Bake the Wings: Arrange the wings on the prepared rack and bake for 20 minutes.
  4. Add Oil: Remove from the oven and brush both sides of the wings with oil. Bake for another 20 minutes until crispy.
  5. Make the Hot Honey Sauce: In a bowl, mix melted butter, hot sauce, and honey until combined. Divide into two bowls to prevent contamination.
  6. Glaze the Wings: Brush the wings with hot honey sauce from one bowl. Discard the used sauce.
  7. Broil for Crispiness: Broil on high for 5 minutes until juices run clear and wings are crispy. Ensure they reach an internal temperature of 165°F (75°C).
  8. Serve and Enjoy: Baste with the remaining sauce and sprinkle with fresh parsley. Serve with ranch dipping sauce for an extra treat!

Pro Tips for Perfect Wings

To elevate your hot honey chicken wings to the next level, here are some expert insights:

  • Pat Dry: Ensure wings are completely dry before coating to achieve maximum crispiness.
  • Coat Generously: Don’t skimp on the coating; it’s essential for that crispy texture.
  • Monitor Cooking Time: Ovens vary! Keep an eye on your wings to avoid overcooking.
  • Adjust Heat Levels: Add more or less hot sauce depending on your spice tolerance.
  • Experiment with Flavors: Try adding different spices or herbs to the sauce for unique flavor profiles.
  • Rest Before Serving: Let wings rest for a few minutes after broiling; this helps retain juices.
  • Make Ahead: Prepare the wings in advance. Bake them, then freeze before glazing for a quick reheat option.
  • Use Fresh Ingredients: Fresh garlic and herbs can elevate the flavor significantly.

Common Mistakes and Troubleshooting

Even the best chefs make mistakes! Here are some common pitfalls and how to avoid them:

  • Wings Aren’t Crispy: Ensure wings are dry before coating. Avoid overcrowding the baking sheet.
  • Too Spicy: Balance the heat with additional honey or butter in your sauce.
  • Uneven Cooking: Flip wings halfway through cooking for even crispiness.
  • Burnt Sauce: Brush sauce on towards the end of cooking to prevent burning.

Variations on Hot Honey Chicken Wings

Feeling adventurous? Here are some tasty variations to try:

  • Buffalo Hot Honey Wings: Add your favorite buffalo sauce to the honey sauce for an extra kick.
  • Garlic Parmesan Wings: Toss cooked wings with garlic butter and grated parmesan for a rich flavor.
  • Mango Habanero Wings: Mix mango puree with habanero sauce for a tropical twist.
  • Smoky Chipotle Wings: Use chipotle sauce in place of hot sauce for a smoky flavor.

Storage and Make-Ahead Instructions

If you have leftovers (which is rare!), here’s how to store them:

  • Refrigeration: Store in an airtight container for up to 3 days.
  • Freezing: Freeze cooked wings in a single layer, then transfer to a freezer bag for up to 3 months.
  • Reheating: Reheat in the oven at 375°F (190°C) until heated through for best results.

Frequently Asked Questions

Let’s address some common questions about hot honey chicken wings:

  • Can I use frozen chicken wings? Yes, but ensure they are fully thawed before cooking for even results.
  • What if I don’t have an air fryer? No worries! This recipe can be easily adapted for oven baking or frying.
  • How can I make these wings spicier? Increase the amount of hot sauce or add cayenne pepper to the seasoning mix.
  • Can I prepare the sauce in advance? Absolutely! The sauce can be made ahead of time and stored in the fridge.
  • What dipping sauces pair well with these wings? Ranch dressing, blue cheese, or a fiery hot sauce complement these wings perfectly.
  • How do I achieve extra crispy wings? Ensure wings are dry before baking and consider using a broiler at the end for extra crunch.
  • Can I use other types of chicken? This recipe works well with chicken drumsticks or thighs; just adjust cooking times accordingly.
  • Is this recipe gluten-free? Yes, as long as you use gluten-free hot sauce and cornstarch.

Nutritional Tips and Dietary Adaptations

For those mindful of their dietary choices:

  • Low-Carb Option: Skip the sugar and use sugar substitutes in the honey sauce.
  • Dairy-Free: Replace the butter with a plant-based alternative.
  • Spice Variation: Adjust the spices to accommodate different dietary restrictions or preferences.

Equipment Recommendations

To make this recipe a success, here’s what you’ll need:

  • Air Fryer: Ideal for achieving crispy wings with less oil.
  • Baking Sheet: A sturdy baking sheet is essential for oven baking.
  • Wire Rack: Elevates wings for air circulation and crispiness.
  • Pastry Brush: Perfect for applying oil and sauce evenly.

Serving Suggestions

These wings are best enjoyed hot and fresh! Here are some serving ideas:

  • Pair with Dipping Sauces: Serve alongside ranch or blue cheese dressing for a creamy contrast.
  • Add Side Dishes: Pair with celery sticks, carrot sticks, or a refreshing salad to balance the meal.
  • Craft a Meal: Serve as part of a larger feast with grilled vegetables, fries, or cornbread.

Conclusion

And there you have it—the ultimate recipe for Hot Honey Chicken Wings! I hope this culinary adventure inspires you to step into your kitchen and create something delicious. Remember, cooking is about discovery, connection, and a sprinkle of joy. So gather your friends, fire up the oven, and let the flavor journey begin! Happy cooking!

Hot Honey Chicken Wings

Prep Time 10 minutes
Cook Time 40 minutes
Total Time 50 minutes
Servings 4 servings
Calories 650
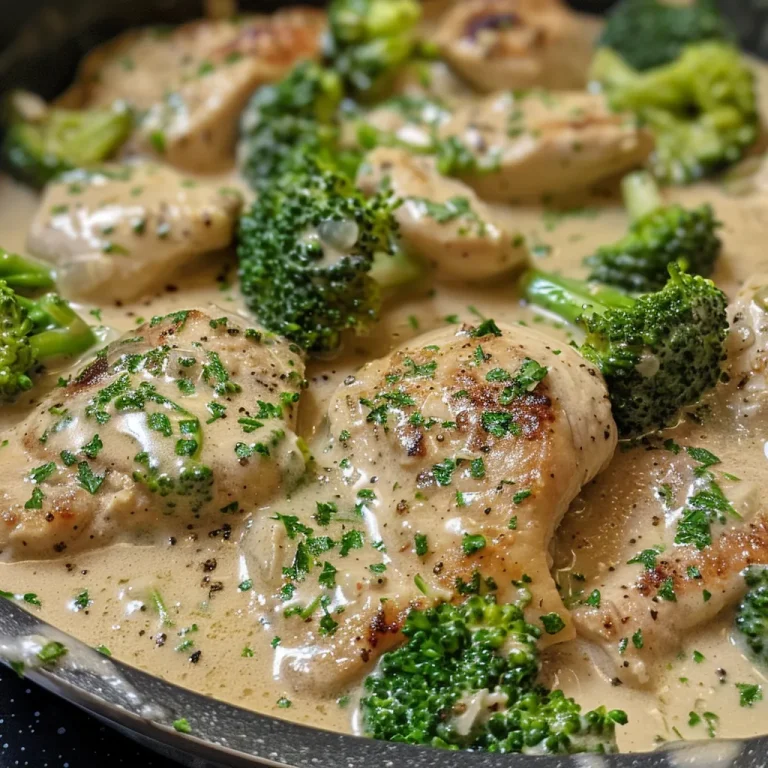
Deliciously crispy chicken wings coated in a spicy honey glaze, perfect for a flavorful appetizer or main dish.

Ingredients

Dry Ingredients

  • 2 tablespoons Avocado Oil
  • 1/3 cup Cornstarch
  • 1 tablespoon Brown Sugar
  • 2 teaspoons Baking Powder
  • 1 teaspoon Smoked Paprika
  • 1 teaspoon Garlic Powder
  • 1 teaspoon Onion Powder
  • 1 teaspoon coarse Kosher Salt
  • 1 teaspoon Black Pepper

Sauce

  • 6 tablespoons Franks Hot Sauce
  • 1/4 cup unsalted Butter; melted
  • 1/4 cup Honey
  • 2 tablespoons fresh Parsley; chopped
  • 1 teaspoon Smoked Paprika
  • 1 teaspoon Onion Powder
  • 1 teaspoon Garlic Powder
  • 1/2 teaspoon Red Chili Flakes

Instructions 

  • Preheat oven to 400°F. Oil wire rack with avocado oil and set on baking sheet.
  • Mix cornstarch, baking powder, and seasonings in a bag. Coat chicken wings and place on rack.
  • Bake wings at 400°F for 20 minutes, then brush with oil and bake another 20 minutes until crispy.
  • Combine hot sauce ingredients in a bowl. Brush wings with hot honey sauce, then broil for 5 minutes.
  • Remove wings, baste with remaining sauce, sprinkle with parsley, and serve.
Notes

Ensure internal temperature reaches 165°F for safety.
Calories: 650kcal
Cost: $15
Course: Appetizer, main
Cuisine: American
Keyword: chicken wings

Embark on a Flavorful Journey with Buffalo Chicken Stuffed Peppers

Welcome, fellow culinary adventurers! Today, we’re diving into a dish that perfectly encapsulates the bold flavors of comfort food: Buffalo Chicken Stuffed Peppers. These vibrant, colorful peppers are not just a feast for the eyes but also a delightful explosion of spicy, savory, and creamy elements. Whether you’re feeding a hungry family or hosting friends, this dish is sure to ignite your palate and create memorable moments around the table.

In this comprehensive guide, we’ll explore everything you need to know about preparing these sensational stuffed peppers, from ingredient breakdowns to expert tips and variations. Let’s savor the journey together!

Why You’ll Love This Recipe

Buffalo Chicken Stuffed Peppers are not just delicious; they come with a plethora of benefits that make them a must-try. Here’s why you’ll love this recipe:

  • Balanced Nutrition: With lean protein from shredded chicken and the health benefits of bell peppers, this dish is a nutritious choice for any meal.
  • Flexibility: This recipe can easily be modified to fit dietary preferences, making it suitable for everyone at the table.
  • Quick Preparation: With simple steps and basic ingredients, you can have this dish ready in about 45 minutes.
  • Make-Ahead Friendly: Prepare the stuffed peppers in advance and simply bake them when ready to serve, perfect for busy weeknights!
  • Flavor Explosion: The combination of hot sauce, creamy Greek yogurt, and melted cheese delivers a satisfying taste experience that will leave you wanting more.

Ingredient Breakdown

Understanding your ingredients is key to mastering any recipe. Here’s what you’ll need for your Buffalo Chicken Stuffed Peppers:

  • Bell Peppers: Choose vibrant red and green peppers for a colorful presentation. Each pepper is halved and filled with a delicious mixture.
  • Shredded Chicken: Use rotisserie chicken for convenience or cook your chicken breasts to perfection. The chicken should be tender and juicy.
  • Hot Sauce: Choose your favorite brand to achieve the desired level of heat. Frank’s RedHot is a classic choice for authenticity.
  • Greek Yogurt: This ingredient adds creaminess and a tangy flavor, making it a healthier alternative to sour cream.
  • Cheeses: Provolone and feta cheese provide a rich, melty topping that complements the spicy filling beautifully.
  • Butter: Used to sauté the seasonings and enhance the flavor of the chicken.
  • Seasonings: Garlic powder, onion powder, and pepper add depth to the dish.
  • Green Onions: Chopped for garnish, they add a fresh crunch that balances the richness of the filling.
  • Water: Added to the baking dish to keep the peppers moist as they cook.

Pro Tips for Perfect Stuffed Peppers

To elevate your Buffalo Chicken Stuffed Peppers to the next level, consider these expert insights:

  • Preheat Properly: Always preheat your oven to 375°F to ensure even baking.
  • Customize Your Heat: Adjust the amount of hot sauce based on your spice tolerance. Mix in some extra cheese for a milder flavor.
  • Don’t Overstuff: While it’s tempting to fill the peppers to the brim, leave a little space for the cheese to melt beautifully.
  • Use Fresh Ingredients: Fresh vegetables and quality chicken will significantly enhance the flavor of your dish.
  • Let Them Rest: After baking, let the stuffed peppers rest for a few minutes. This allows the filling to set and makes for easier serving.
  • Experiment with Cheese: Try different types of cheese such as Monterey Jack or cheddar for a unique twist.
  • Herb It Up: Fresh herbs like cilantro or parsley can be added to the filling for an extra burst of flavor.
  • Batch Cook: Double the recipe and freeze half for a quick meal later.

Common Mistakes and Troubleshooting

Even the best chefs can encounter hiccups. Here are some common mistakes to avoid:

  • Undercooking the Peppers: Ensure the peppers are tender by baking them long enough. They should not be crunchy.
  • Using Too Much Liquid: Avoid adding excess hot sauce or yogurt to prevent a soggy filling.
  • Neglecting Seasoning: Always taste your filling before stuffing the peppers and adjust seasonings as needed.
  • Skipping the Water in the Baking Dish: This is essential for keeping the peppers moist during baking.

Variations to Explore

Feeling adventurous? Here are some fun variations to personalize your stuffed peppers:

  • BBQ Chicken Stuffed Peppers: Swap buffalo sauce for your favorite BBQ sauce for a smoky flavor.
  • Vegetarian Version: Replace chicken with quinoa, black beans, and corn for a hearty vegetarian option.
  • Cheesy Spinach Stuffed Peppers: Mix in cooked spinach and more cheese for a creamy, savory twist.
  • Mexican Style: Use taco seasoning and add black beans and corn for a zesty Mexican flavor.

Storage and Make-Ahead Instructions

Need to prep ahead? Here’s how to store and reheat your stuffed peppers:

  • Refrigerator: Store baked stuffed peppers in an airtight container for up to 3 days.
  • Freezer: Freeze unbaked stuffed peppers for up to 3 months. Just assemble them and place them in a freezer-friendly container.
  • Reheating: To reheat, place in a preheated oven at 375°F for 15-20 minutes or until heated through.

Frequently Asked Questions

Let’s address some common questions about Buffalo Chicken Stuffed Peppers:

  • Can I use other types of peppers? Yes! Feel free to experiment with jalapeños or poblano peppers for added heat.
  • Is this recipe gluten-free? Yes, the ingredients used are naturally gluten-free, but always check labels.
  • What can I serve with stuffed peppers? They pair well with a side salad, rice, or even a cooling yogurt dip.
  • Can I make this dish ahead of time? Absolutely! Prep the peppers and store them in the refrigerator or freezer until ready to bake.
  • What if I don’t have Greek yogurt? Sour cream or regular yogurt can be substituted without losing much flavor.
  • How can I make this recipe lower in calories? Use less cheese, leaner chicken, and skip the butter for a healthier option.
  • Can I use leftover chicken? Yes, leftover chicken works great in this recipe!
  • How do I know when the peppers are done? They should be tender and the cheese should be bubbly and golden brown.

Nutrition Tips and Dietary Adaptations

Buffalo Chicken Stuffed Peppers can be easily adapted to fit various dietary needs:

  • Keto-Friendly: Use low-carb sauces and cheeses to keep the dish keto-friendly.
  • Low-Fat Option: Choose lean chicken and reduced-fat cheese to decrease the overall fat content.
  • Dairy-Free: Use dairy-free cheese and substitute Greek yogurt with a plant-based alternative.

Equipment Recommendations

Here’s what you’ll need to whip up these flavorful stuffed peppers:

  • Baking Dish: A 9×13 inch baking dish works perfectly for this recipe.
  • Medium Saucepan: For combining the hot sauce and chicken mixture.
  • Mixing Bowl: To mix the filling ingredients together seamlessly.
  • Knife and Cutting Board: Essential for preparing the bell peppers and chopping toppings.

Serving Suggestions

When it comes to serving your Buffalo Chicken Stuffed Peppers, creativity can add flair:

  • Garnish: Top with chopped green onions or fresh herbs for color and flavor.
  • Side Dishes: Pair with a crisp salad, homemade coleslaw, or roasted vegetables for a balanced meal.
  • Dip Options: Serve with ranch or blue cheese dressing for a classic buffalo flavor complement.

There you have it! A complete guide to making Buffalo Chicken Stuffed Peppers that are sure to impress. This dish not only tantalizes your taste buds but also brings a sense of community as you share delicious meals with loved ones. So roll up your sleeves, grab your ingredients, and let’s get cooking!

Happy cooking, my adventurous friends! Remember, every bite tells a story, and your kitchen is the stage for countless delicious adventures.

Buffalo Chicken Stuffed Peppers

Prep Time 15 minutes
Cook Time 35 minutes
Total Time 50 minutes
Servings 4 servings
Calories 350
Enjoy a flavorful and healthy twist on buffalo chicken with these stuffed peppers, perfect for a quick dinner or appetizer.

Ingredients

Vegetables

  • 4 large Bell peppers (red and green) (halved and seeded)
  • 0.25 cup Hot sauce
  • 2 tbsp Butter
  • 1 tsp Seasonings (e.g., garlic powder, paprika)
  • 2 cups Shredded chicken
  • 0.25 cup Greek yogurt
  • 0.5 cup Provolone cheese (shredded)
  • 0.25 cup Feta cheese (crumbled)
  • 2 green onions Green onions (sliced)
  • 0.5 cup Water

Instructions 

  • Preheat oven to 375°F (190°C). Slice peppers vertically, remove seeds, and arrange cut-side up in a greased baking dish.
  • Combine hot sauce, butter, and seasonings in a saucepan over medium heat. Stir until butter melts.
  • Add shredded chicken to sauce, mix well. Stir in Greek yogurt and ¼ cup provolone cheese until combined.
  • Fill pepper halves with buffalo mixture. Top with remaining cheese. Add water to dish bottom.
  • Bake uncovered for 30-35 minutes until peppers are tender and cheese is melted. Garnish with feta and green onions.

Notes

For extra flavor, add a dash of garlic powder to the buffalo mixture.
Calories: 350kcal
Cost: $15
Course: Main Course
Cuisine: American
Keyword: Buffalo Chicken

Embark on a Culinary Adventure with Creamy Garlic Chicken & Broccoli

Welcome to a delightful journey of flavors! Today, we’re diving into a dish that not only tantalizes the taste buds but also transports you to cozy dinners filled with laughter and connection. This Low Carb Creamy Garlic Chicken & Broccoli recipe is packed with tender chicken, vibrant broccoli, and a rich garlic cream sauce that keeps your carb count low while satisfying your cravings. With every bite, you’ll savor the warmth of home-cooked meals and the joy of sharing food with loved ones. Let’s explore why this dish deserves a spot on your dinner table!

Why You’ll Love This Recipe

  • Low Carb Delight: Perfect for those following a low-carb or keto diet, this dish keeps your carbohydrate intake in check while delivering rich flavors.
  • Quick & Easy Preparation: In about 30 minutes, you can transform simple ingredients into a delicious meal, making it ideal for busy weeknights.
  • Flavorful Sauce: The creamy garlic sauce is a combination of heavy cream, Parmesan cheese, and fresh garlic, creating a mouthwatering experience that elevates the chicken and broccoli.
  • Customizable Ingredients: This recipe allows for various substitutions and additions, accommodating different dietary preferences and ingredient availability.
  • Meal Prep Friendly: Prepare this dish ahead of time, making it a fantastic option for meal prep enthusiasts or for those who enjoy leftovers!

Ingredients Breakdown

Let’s gather our ingredients for the Low Carb Creamy Garlic Chicken & Broccoli. Here’s what you’ll need:

  • 1 pound boneless skinless chicken breasts: The star of the dish, providing juicy protein that soaks up the garlic cream sauce.
  • 2 tablespoons olive oil: Essential for searing the chicken to golden perfection and adding healthy fats.
  • 1 tablespoon butter: Enhances the flavor when sautéing garlic and creates a luscious base for the sauce.
  • 4 cloves garlic, minced: The key ingredient that infuses the dish with a fragrant aroma and rich taste.
  • 1 cup heavy cream: For that velvety texture and richness in the sauce.
  • 1/2 cup chicken broth: Adds depth of flavor to the creamy sauce.
  • 1/2 cup grated Parmesan cheese: A savory touch that thickens the sauce and adds a cheesy goodness.
  • 1 teaspoon Italian seasoning: An aromatic blend that complements the garlic and chicken beautifully.
  • 1/4 teaspoon red pepper flakes: For a touch of heat that balances the creaminess.
  • 8 ounces broccoli florets: Adds color, nutrition, and a tender-crisp texture.
  • Salt and black pepper to taste: Enhances all the flavors in the dish.
  • 2 tablespoons chopped fresh parsley for garnish: A vibrant touch that brightens the presentation.

Pro Tips for Perfect Creamy Garlic Chicken

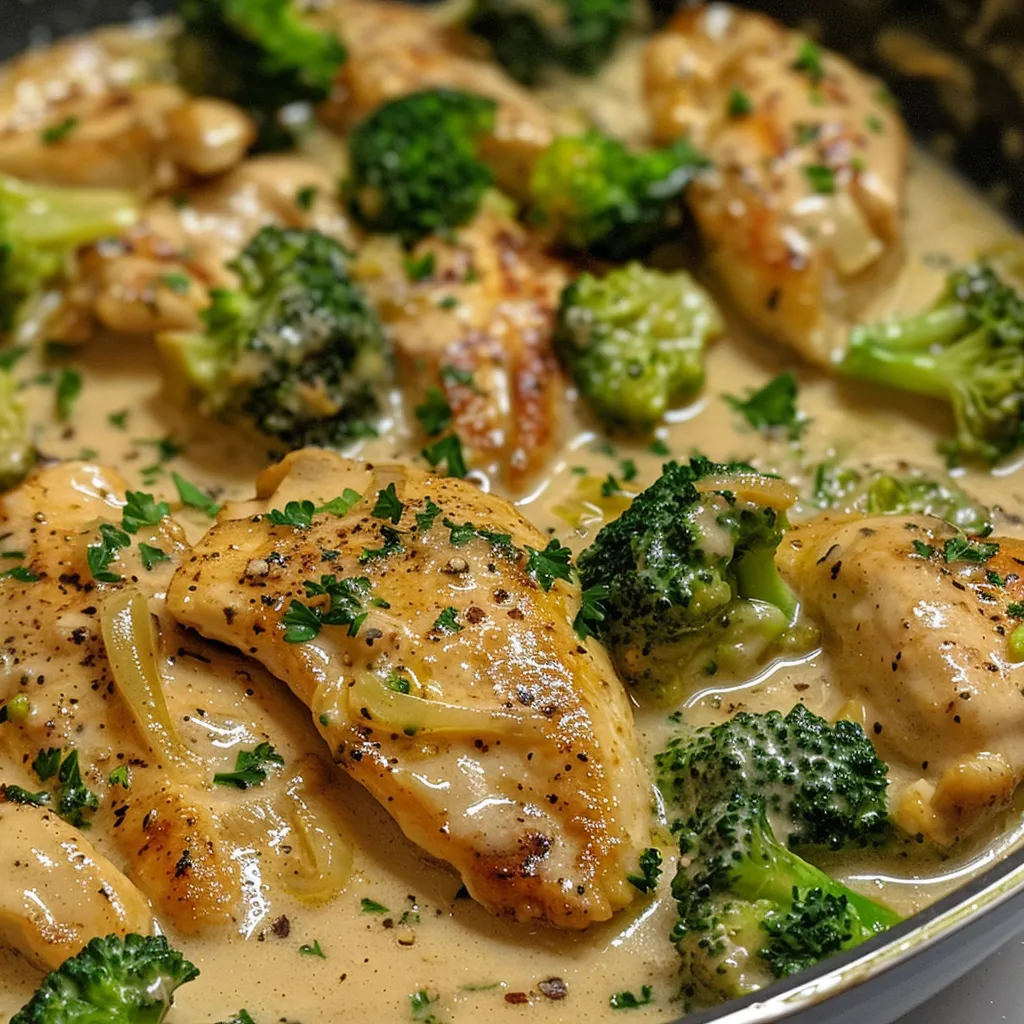
Delicious low carb creamy garlic chicken with broccoli, beautifully presented.

Before we dive into the cooking process, here are some expert tips to ensure your dish turns out perfectly:

  • Use Fresh Ingredients: Fresh garlic and high-quality chicken will significantly enhance the flavor of your dish.
  • Don’t Overcook the Chicken: Cook the chicken until it reaches an internal temperature of 165°F (75°C) to keep it juicy and tender.
  • Adjust the Consistency: If the sauce is too thick, add more chicken broth or cream until the desired consistency is reached.
  • Experiment with Cheese: Try different types of cheese like mozzarella or cheddar for a unique twist!
  • Mind the Heat: Avoid cooking the garlic on high heat to prevent it from burning and turning bitter.
  • Let It Rest: Allow the chicken to rest for a few minutes after cooking to retain its juices.
  • Balance the Flavors: Taste and adjust seasoning before serving to ensure the perfect flavor profile.
  • Garnish Generously: Fresh herbs not only add flavor but also enhance the dish’s visual appeal.

Common Mistakes and Troubleshooting

Even seasoned cooks can run into hiccups. Here’s how to avoid common pitfalls:

  • Overcooked Broccoli: To maintain its bright color and tender-crisp texture, add broccoli to the skillet during the final cooking stages.
  • Thin Sauce: If your sauce isn’t thickening, let it simmer longer or add a bit more Parmesan cheese.
  • Burnt Garlic: If your garlic turns brown too quickly, lower the heat immediately and add it to the pan later in the cooking process.
  • Flavorless Chicken: Always season your chicken well before cooking to ensure it’s flavorful.
  • Too Salty: If your sauce turns out too salty, balance it with a splash of lemon juice or additional cream.

Variations to Explore

This dish is versatile, allowing for numerous variations. Here are some ideas:

  • Vegetarian Option: Replace chicken with tofu or chickpeas for a hearty vegetarian meal.
  • Different Vegetables: Swap broccoli with spinach, asparagus, or cauliflower for a twist.
  • Add Nuts: Top with toasted almonds or walnuts for an added crunch.
  • Spice It Up: Introduce more heat by adding diced jalapeños or cayenne pepper.

Storage and Make-Ahead Instructions

This Low Carb Creamy Garlic Chicken & Broccoli recipe is perfect for meal prep! Here’s how to store it:

  • Refrigeration: Store in an airtight container in the fridge for up to 3 days.
  • Freezing: Freeze in a freezer-safe container for up to 2 months. Thaw in the fridge overnight before reheating.
  • Reheating: Microwave or reheat in a skillet over low heat, adding a splash of chicken broth or cream to loosen the sauce.

Frequently Asked Questions

Let’s address some common queries that might pop up while making this dish:

  • Can I use chicken thighs instead of breasts? Yes, chicken thighs will add more flavor and remain moist.
  • Is this dish suitable for meal prep? Absolutely! It stores well and reheats beautifully.
  • Can I make this dairy-free? Yes, substitute heavy cream with coconut cream and omit the cheese or use a dairy-free alternative.
  • How can I make the sauce thicker? Simmer it longer or add a bit more cheese to thicken the sauce.
  • What can I serve with this dish? It pairs well with cauliflower rice, zoodles, or a simple green salad.
  • How spicy is this dish? It has a mild kick from the red pepper flakes; adjust to your taste!
  • Can I use frozen broccoli? Fresh is best, but frozen can work; just adjust the cooking time.
  • What’s the best way to serve it? Garnish with fresh parsley and serve warm for the best experience.

Nutritional Tips and Dietary Adaptations

This recipe is not only delicious but also nutritious. Here’s how you can adapt it for various dietary needs:

  • Keto Friendly: The low-carb ingredients make this an ideal keto option.
  • Gluten-Free: All ingredients are naturally gluten-free, making it suitable for those with gluten sensitivities.
  • High Protein: With chicken as the main ingredient, this dish is rich in protein, perfect for muscle building.
  • Low Calorie: Adjust the cream quantity to lower the calorie count further.

Equipment Recommendations

To make your cooking experience seamless, here’s a list of recommended tools:

  • Non-stick Skillet: Perfect for sautéing chicken and preventing sticking.
  • Meat Thermometer: Ensures your chicken is cooked to perfection.
  • Cutting Board: Essential for prepping your ingredients safely.
  • Chef’s Knife: A sharp knife makes chopping garlic and vegetables easier and safer.

Serving Suggestions

Finally, let’s talk about how to plate this beautiful dish:

  • Garnish with Fresh Herbs: A sprinkle of chopped parsley adds a pop of color and freshness.
  • Serve with a Side: Complement the meal with a light salad or some cauliflower rice for a complete dining experience.
  • Pair with a Refreshing Drink: A glass of sparkling water with lemon or your favorite low-carb beverage works perfectly!

Now that you have all the tools and tips to create this Low Carb Creamy Garlic Chicken & Broccoli, get ready to enjoy a meal that not only delights the palate but also nourishes the soul. Remember, cooking is all about exploration, so feel free to make it your own. Happy cooking, and bon appétit!

Low Carb Creamy Garlic Chicken & Broccoli

Prep Time 10 minutes
Cook Time 20 minutes
Total Time 30 minutes
Servings 4 servings
Calories 550
A delicious low-carb dish featuring tender chicken and broccoli in a creamy garlic Parmesan sauce, perfect for a quick and satisfying meal.

Ingredients

Protein

  • 1 pound boneless skinless chicken breasts
  • 2 tablespoons olive oil
  • 1 tablespoon butter
  • 4 cloves garlic minced
  • 1 cup heavy cream
  • 1/2 cup chicken broth
  • 1/2 cup grated Parmesan cheese
  • 1 teaspoon Italian seasoning
  • 1/4 teaspoon red pepper flakes
  • 8 ounces broccoli florets
  • to taste Salt
  • to taste Black pepper
  • 2 tablespoons chopped fresh parsley for garnish

Instructions 

  • Season chicken with salt, pepper, and Italian seasoning.
  • Cook chicken in olive oil 5–7 minutes per side until golden; set aside.
  • Sauté garlic in butter 1 minute, then add heavy cream and chicken broth; simmer.
  • Stir in Parmesan and red pepper flakes; cook 2–3 minutes until thickened.
  • Add broccoli and chicken back; cover and cook 5 minutes. Garnish with parsley.

Notes

Adjust seasoning to taste and serve hot.
Calories: 550kcal
Cost: $15
Course: Main Course
Cuisine: American
Keyword: broccoli, Chicken, creamy

Embark on a Culinary Adventure with Buttermilk Brined Hot Honey Wings

Welcome to your next flavor exploration! Imagine sinking your teeth into crispy, juicy wings drenched in a sweet and spicy hot honey glaze. This recipe for Buttermilk Brined Hot Honey Wings isn’t just about food; it’s about connecting with cultures, memories, and experiences that make every bite a journey. In this definitive guide, we’ll dive deep into this delightful dish, explore its origins, and equip you with all the knowledge you need to create an unforgettable dining experience.

Why You’ll Love This Recipe

Before we dive into the nitty-gritty, let’s talk about why these wings will become a staple in your kitchen:

  • Perfectly Juicy: The buttermilk brine tenderizes the chicken, ensuring every bite is succulent and flavorful.
  • Sweet and Spicy Balance: The hot honey glaze offers a delightful contrast, making these wings a hit for both sweet and savory lovers.
  • Easy to Customize: Whether you like it mild or fiery, you can adjust the heat level to suit your palate.
  • Great for Any Occasion: Perfect for game days, family gatherings, or a casual dinner, these wings are versatile and crowd-pleasing.
  • Make Ahead Option: You can marinate the wings in advance, making dinner planning a breeze!

Ingredient Breakdown

Let’s take a closer look at the ingredients that make this dish a standout. Here’s what you’ll need:

  • 2 lbs chicken wings
  • 3 cups buttermilk
  • 1 tablespoon salt
  • 1 1/2 tablespoons black pepper
  • 1 tablespoon paprika
  • 1 tablespoon onion powder
  • 1 tablespoon garlic powder
  • 1 tablespoon dried oregano
  • 2 teaspoons cayenne powder
  • 3 cups all-purpose flour
  • Vegetable oil (for frying)
  • 1/2 cup honey
  • 2 teaspoons cayenne

Ingredient Substitutions

If you’re missing some ingredients or looking to make swaps, here are a few options:

  • Buttermilk: Substitute with a mixture of milk and vinegar (1 cup milk + 1 tablespoon vinegar) to create a similar tangy flavor.
  • Cayenne: Swap with chili powder or paprika for a milder flavor.
  • All-purpose flour: Use almond flour or a gluten-free flour blend for a gluten-free option.
  • Honey: Maple syrup or agave nectar can be used for a different sweetness profile.

Pro Tips for Perfect Wings

Appetizing buttermilk brined hot honey wings presented on a plate, garnished and ready to eat.

Now, let’s ensure you nail this recipe with expert insights:

  • Marinate Overnight: For the best flavor, let the wings soak in the buttermilk brine overnight.
  • Temperature Control: Maintain your oil temperature around 325°F (160°C) for perfectly crispy wings.
  • Double Dredge: For extra crispy wings, double coat in flour after dipping in buttermilk.
  • Resting Period: Allow wings to rest on a wire rack after frying to keep them crispy.
  • Check Internal Temperature: Ensure wings are cooked through by checking they reach an internal temperature of 165°F (74°C).
  • Glaze Techniques: Toss wings in hot honey while still warm for a sticky, flavorful coating.
  • Flavor Infusion: Add garlic or herbs to the buttermilk for an extra flavor boost.
  • Serve Fresh: Wings are best enjoyed immediately after frying for maximum crunchiness.

Avoiding Common Mistakes

Even the best chefs make mistakes! Here are some common pitfalls and how to avoid them:

  • Undercooked Wings: Always use a meat thermometer to ensure they’re cooked through.
  • Soggy Coating: Ensure the oil is hot enough before frying; test with a small piece of bread.
  • Too Thick Glaze: If your hot honey is too thick, warm it slightly to make it easier to drizzle.
  • Overcrowding the Pan: Fry wings in batches to maintain oil temperature and crispiness.

Delicious Variations

Why stick to one recipe? Here are some exciting variations to try:

  • Buffalo Style: Toss wings in classic buffalo sauce after frying for a spicy kick.
  • Garlic Parmesan: After frying, toss with melted butter, minced garlic, and freshly grated Parmesan.
  • Asian Glaze: Mix honey with soy sauce and sesame oil for an Asian-inspired twist.
  • Lemon Herb: Add lemon zest and dried herbs to the buttermilk for a fresh flavor.

Storage & Make-Ahead Instructions

Want to prepare in advance or store leftovers? Here’s how:

  • Make Ahead: Marinate wings the night before and fry them just before serving.
  • Storage: Store leftover wings in an airtight container in the fridge for up to 3 days.
  • Reheating: Reheat in the oven at 375°F (190°C) for 10-15 minutes until heated through.

Frequently Asked Questions

Got questions? I’ve got answers! Here are some FAQs about Buttermilk Brined Hot Honey Wings:

  • Can I use frozen wings? Yes, just ensure they are fully thawed before marinating and frying.
  • How do I make them spicier? Increase the amount of cayenne in the brine or add hot sauce to the honey glaze.
  • Can I bake these wings instead of frying? Yes, bake at 400°F (200°C) for 40-45 minutes for a healthier option.
  • What dipping sauces pair well? Blue cheese dressing, ranch, or even a spicy aioli are excellent choices.
  • Can I use a different protein? Yes! Try this recipe with drumsticks or even cauliflower for a vegetarian option.
  • How long should I brine the wings? At least 2 hours, but overnight is best for maximum flavor.
  • What is the best oil for frying? Vegetable oil or peanut oil works best due to their high smoke points.
  • Can I make the hot honey in advance? Yes, just store in a sealed container in the fridge for up to two weeks.

Nutritional Tips and Dietary Adaptations

Looking out for your health? Here’s how to adapt this recipe:

  • Low-Calorie Version: Use skinless chicken wings or bake instead of frying.
  • Gluten-Free: Ensure flour is gluten-free and use gluten-free sauces.
  • Lower Sugar: Reduce honey in the glaze or use a sugar alternative.
  • Protein Alternatives: Swap chicken wings for tofu or tempeh for a plant-based option.

Essential Equipment Recommendations

Here’s what you’ll need to get cooking:

  • Deep Fryer or Heavy Pot: For frying the wings, a deep fryer or large cast iron pot works best.
  • Cooking Thermometer: Essential for checking the oil temperature and ensuring wings are cooked through.
  • Wire Rack: Place fried wings on a wire rack to let excess oil drip off.
  • Mixing Bowls: For marinating and coating the wings.

Serving Suggestions

Make your wings the star of the meal with these serving ideas:

  • Platter Style: Serve on a large platter with dipping sauces on the side for sharing.
  • Pair with Sides: Coleslaw, potato wedges, or a fresh salad complement the wings perfectly.
  • Garnish: Add fresh herbs or sliced green onions for a pop of color.

Conclusion

Your culinary adventure with Buttermilk Brined Hot Honey Wings awaits! This recipe is not just about satisfying cravings; it’s about sharing stories, creating memories, and enjoying the simple joys of good food with loved ones. So gather your ingredients, invite some friends over, and transform your kitchen into a flavor-packed escape. Bon appétit!

Buttermilk Brined Hot Honey Wings

Prep Time 20 minutes
Cook Time 15 minutes
Total Time 35 minutes
Servings 4 servings
Calories 450
Juicy, flavorful chicken wings brined in buttermilk and coated with a spicy honey glaze, perfect for a delicious appetizer or main dish.

Ingredients

Spice Mix

  • 1 tablespoon salt
  • 1.5 tablespoons black pepper
  • 1 tablespoon paprika
  • 1 tablespoon onion powder
  • 1 tablespoon garlic powder
  • 1 tablespoon dried oregano
  • 2 teaspoons cayenne powder

Chicken

  • 2 lbs chicken wings

Buttermilk

  • 3 cups buttermilk
  • 3 cups all-purpose flour

Vegetable Oil

  • for frying vegetable oil (for frying)
  • 1/2 cup honey
  • 2 teaspoons cayenne

Instructions 

  • Season chicken wings with salt, pepper, paprika, onion powder, garlic powder, cayenne, and oregano.
  • Pour buttermilk over seasoned wings and refrigerate for at least 2 hours.
  • Mix flour with salt, pepper, paprika, onion powder, garlic powder, cayenne, and oregano to make coating.
  • Heat oil to 325°F (160°C). Dredge wings in flour, dip in buttermilk, then coat again in flour. Fry until golden and cooked through, about 7-8 minutes.
  • Mix honey with cayenne. Toss fried wings in hot honey or drizzle over them.

Notes

Ensure oil temperature is correct for crispy wings. Adjust cooking time if needed.
Calories: 450kcal
Cost: $15
Course: Appetizer, main
Cuisine: American
Keyword: brine, chicken wings, hot honey

Embark on a Culinary Adventure with Chicken Stroganoff

Welcome to a dish that transcends borders and tantalizes taste buds—Chicken Stroganoff! This creamy, savory delight is not just a meal; it’s a passport to comfort and a story of culinary exploration. Join me as we whisk up memories from my travels, blending flavors and cultures into a delightful homage to one of the world’s favorite comfort foods. Whether you’re a seasoned chef or a curious novice, this Chicken Stroganoff recipe will inspire you to gather around the table, share stories, and savor every bite.

Why You’ll Love This Recipe

Chicken Stroganoff is a dish that brings warmth and joy to any dining experience. Here are just a few reasons why this recipe will become a staple in your culinary repertoire:

  • Comfort food classic: Its creamy texture and rich flavors make it the ultimate comfort food, perfect for cozy evenings.
  • Quick and easy: With just 30 minutes of prep and cooking time, you can whip up this delicious meal in no time!
  • Versatile ingredients: The recipe can be easily adapted with different proteins and vegetables, making it suitable for various tastes and dietary preferences.
  • Perfect for leftovers: Chicken Stroganoff tastes even better the next day, making it ideal for meal prep.
  • Family-friendly: Kids and adults alike will love the flavors and creamy sauce, making it a hit at the dinner table.

Ingredients Breakdown

To create this delectable Chicken Stroganoff, you’ll need the following ingredients. Let’s also explore some substitutions to tailor the recipe to your taste:

  • 2 chicken breasts: You can substitute with turkey or tofu for a vegetarian option.
  • 1/2 teaspoon garlic powder: Fresh garlic can be used instead for a stronger flavor.
  • Salt & pepper (to taste): Season generously to enhance the dish’s flavor.
  • Flour (for dredging): Use gluten-free flour if you prefer a gluten-free dish.
  • 3 tablespoons olive oil (divided): Any neutral oil works well, such as canola or vegetable oil.
  • 1 tablespoon butter: For a dairy-free option, use vegan butter or omit entirely.
  • 8 ounces cremini mushrooms (sliced): Button mushrooms or shiitake can be substituted for different flavors.
  • 1/2 medium onion (chopped): Shallots are a great alternative if you prefer a milder onion flavor.
  • 1 tablespoon Dijon mustard: Yellow mustard can be used, but the flavor will be slightly different.
  • 1 tablespoon Worcestershire sauce: For a vegetarian option, use soy sauce or a vegan Worcestershire sauce.
  • 3 cloves garlic (minced): More garlic can be added if you love that aromatic flavor!
  • 2/3 cup chicken broth: Vegetable broth is a suitable substitute for a vegetarian version.
  • 1/2 cup full-fat sour cream: Greek yogurt or a dairy-free sour cream alternative can be used.

Pro Tips for Success

To ensure your Chicken Stroganoff turns out perfectly, consider these expert insights:

  • Don’t overcrowd the pan: Cook the chicken in batches to achieve that beautiful golden crust.
  • Adjust heat as needed: If the pan gets too hot, turn down the heat to avoid burning the garlic and onions.
  • Let the sauce simmer: Allow the sauce to bubble gently to combine flavors without curdling the sour cream.
  • Use freshly ground black pepper: This enhances the flavor more than pre-ground pepper.
  • Serve hot: Chicken Stroganoff is best enjoyed right after cooking to savor its creamy richness.
  • Garnish with fresh herbs: Adding parsley or chives just before serving brightens the dish.
  • Pair with the right sides: Egg noodles, rice, or crusty bread are perfect companions for this dish.
  • Leftovers are a delight: Store in an airtight container for up to three days; reheat gently on the stove.

Common Mistakes and Troubleshooting

Even the most experienced cooks can run into a few bumps. Here’s how to troubleshoot:

  • Too thick sauce?: Add a splash of chicken broth or water to thin it out.
  • Not enough flavor?: Adjust seasoning with more salt, pepper, or Worcestershire sauce.
  • Curdled sour cream?: Ensure the sauce isn’t too hot when adding the sour cream—stir in off the heat.
  • Mushrooms too rubbery?: Sauté them longer to achieve a nice sear and enhance flavors.

Delicious Variations to Explore

Feeling adventurous? Here are a few variations to spice up your Chicken Stroganoff experience:

  • Vegetarian Stroganoff: Replace chicken with hearty vegetables like zucchini, bell peppers, and eggplant.
  • Spicy Stroganoff: Add red pepper flakes or diced jalapeños for a kick.
  • Mushroom Medley Stroganoff: Use a mix of wild mushrooms for a complex flavor profile.
  • One-Pan Stroganoff: Cook everything in one pan for easy cleanup—just add your noodles directly to the sauce!

Storage and Make-Ahead Instructions

Planning ahead? Here’s how to store and prepare Chicken Stroganoff for future meals:

  • Refrigerate: Store in an airtight container for up to 3 days.
  • Freeze: For longer storage, freeze portions in airtight containers for up to 2 months. Thaw in the refrigerator before reheating.
  • Make ahead: Prepare the chicken and sauce a day in advance, then reheat and stir in the sour cream just before serving.

Comprehensive FAQ

Here are some common questions about Chicken Stroganoff:

  • Can I use other meats? Absolutely! Beef, turkey, or even shrimp can be delicious alternatives.
  • Is this recipe gluten-free? Yes, simply use gluten-free flour and ensure your broth is gluten-free.
  • What can I serve with Chicken Stroganoff? Egg noodles, rice, mashed potatoes, or crusty bread pair beautifully.
  • Can I make this dish dairy-free? Yes, substitute sour cream with a dairy-free alternative and omit butter.
  • How do I reheat leftovers? Gently reheat on the stove over low heat for best results.
  • Can I prepare this in a slow cooker? Yes, sauté the chicken and vegetables, then transfer to a slow cooker with the sauce for 4-6 hours on low.
  • Is Chicken Stroganoff suitable for meal prep? Absolutely! It holds up well in the fridge and reheats nicely.
  • Can I add vegetables? Yes! Spinach, peas, or carrots can be added for extra nutrition and flavor.

Nutrition Tips and Dietary Adaptations

For health-conscious cooks, consider these adaptations:

  • Lower fat: Use low-fat sour cream and reduce oil for a lighter version.
  • Increase veggies: Add a variety of vegetables to boost fiber and nutrients.
  • Protein swaps: Use lean chicken cuts or plant-based proteins to reduce calories.

Essential Equipment Recommendations

To make your cooking experience smoother, gather these essential tools:

  • Deep skillet or sauté pan: A must-have for browning chicken and sautéing vegetables.
  • Measuring cups and spoons: Accurate measurements ensure the best results.
  • Wooden spoon or spatula: Perfect for stirring and scraping those delicious browned bits!
  • Cutting board and knife: For chopping vegetables and preparing chicken.

Serving Suggestions

When it comes to enjoying Chicken Stroganoff, presentation matters. Here are some delightful serving ideas:

  • Serve over egg noodles: The traditional pairing that soaks up the creamy sauce perfectly.
  • Garnish with fresh herbs: A sprinkle of parsley or chives adds a pop of color and freshness.
  • Accompany with a fresh salad: A light green salad complements the richness of the stroganoff.
  • Offer crusty bread: Perfect for mopping up any leftover sauce!

Conclusion: Your Culinary Journey Awaits

As you embark on this culinary adventure with Chicken Stroganoff, remember that every dish tells a story. This recipe is more than just a meal; it’s a connection to cultures, memories, and flavors from around the world. Gather your loved ones, share your stories, and savor this comforting dish that warms both the heart and the soul. With each bite, you’re not just tasting food; you’re experiencing a piece of my journey. Enjoy!

Chicken Stroganoff

Prep Time 10 minutes
Cook Time 20 minutes
Total Time 30 minutes
Servings 4 servings
Calories 450
A creamy and savory Chicken Stroganoff perfect for a comforting meal. Quick to prepare with tender chicken and flavorful mushrooms.

Ingredients

Protein

  • 2 pieces chicken breasts
  • 1/2 teaspoon garlic powder
  • to taste Salt & pepper (Season as desired)
  • for dredging Flour (For coating chicken)
  • 3 tablespoons olive oil (Divided)
  • 1 tablespoon butter
  • 8 ounces cremini mushrooms (Sliced)
  • 1/2 medium onion (Chopped)
  • 1 tablespoon Dijon mustard (Or more to taste)
  • 1 tablespoon Worcestershire sauce (Or more to taste)
  • 3 cloves garlic (Minced)
  • 2/3 cup chicken broth
  • 1/2 cup full fat sour cream

Instructions 

  • Cut chicken into 1" pieces, season with garlic powder, salt, pepper, and dredge in flour.
  • Cook chicken in 2 tablespoons of oil in a skillet until browned and cooked through, then set aside.
  • In the same pan, melt butter, add mushrooms and onions, and sauté until browned and water evaporated.
  • Stir in Dijon mustard, Worcestershire sauce, and garlic; cook for 1 minute.
  • Add broth, scrape browned bits, return chicken, and cook for 2 minutes. Stir in sour cream and heat through.

Notes

Serve immediately for best flavor and texture.
Calories: 450kcal
Cost: $15
Course: Main Course
Cuisine: Russian
Keyword: Chicken

Embark on a Flavorful Journey with Zaxby’s Hot Honey Mustard

Are you ready to elevate your culinary game? Welcome to the world of Zaxby’s Hot Honey Mustard! This delightful sauce is not just a condiment; it’s a culinary adventure that transforms simple dishes into extraordinary meals. From crispy chicken wings to fresh salads, the magic of hot honey mustard lies in its perfect balance of sweetness and heat. In this article, we’ll dive deep into the recipe, explore its origins, and share tips that will make your cooking experience enjoyable and rewarding. Let’s get cooking!

Why You’ll Love This Recipe

  • Quick and Easy: This hot honey mustard sauce can be whipped up in just 10 minutes, perfect for those busy weeknights when you want to impress without the stress.
  • Versatile Uses: Use it as a marinade, dipping sauce, or salad dressing. It pairs beautifully with wings, chicken, and even veggies!
  • Healthy Ingredients: Made with wholesome ingredients, you can feel good about what you’re serving your family.
  • Customize to Taste: Adjust the sweetness or spice level to suit your preference, making it a truly personal creation.
  • Perfect for Gatherings: Whether it’s a game day or a family dinner, this sauce is sure to be a crowd-pleaser.

Ingredients You’ll Need

Let’s gather our ingredients before we start cooking! This Zaxby’s Hot Honey Mustard Recipe requires a mix of pantry staples and a few fresh items. Here’s what you’ll need:

  • 3 lbs chicken breast (cut into strips or bite-sized chunks)
  • 4 large eggs
  • 1/2 cup all-purpose flour
  • 1/2 tsp baking powder (instead of baking soda)
  • 1/4 cup buttermilk
  • 2 Tbsp mayonnaise
  • 3 cups all-purpose flour (for breading)
  • 1/2 tsp baking powder
  • 1/2 tsp smoked paprika
  • 1 Tbsp seasoned salt
  • 1 Tbsp regular salt
  • 1 tsp garlic powder
  • 1 tsp onion powder
  • 1 tsp dried thyme
  • 1 Tbsp brown sugar
  • 1/2 tsp white pepper
  • 1 tsp cumin

Step-by-Step Instructions

Ready to create this culinary masterpiece? Follow these simple steps to make your very own Zaxby’s Hot Honey Mustard.

  • Step 1: Gather all your ingredients and prepare your workspace. This will make the process smoother and more enjoyable!
  • Step 2: In a mixing bowl, combine the base ingredients: mustard, honey, and any additional spices you desire.
  • Step 3: Adjust the sweetness by adding more honey or a pinch of brown sugar, depending on your taste.
  • Step 4: Mix thoroughly and taste. Adjust seasoning with salt and pepper as needed.
  • Step 5: For optimal flavor, let the sauce chill in the fridge for at least 30 minutes before serving. This allows the flavors to meld beautifully.

How Does It Taste?

Imagine biting into a juicy piece of chicken coated in a sweet and tangy sauce with a hint of spice. This hot honey mustard is a dance of flavors that will make your taste buds sing! The combination of mustard and honey offers a delightful balance of sweetness and heat, making every bite an adventure.

Common Mistakes and Troubleshooting

Even seasoned cooks can encounter hiccups. Here are some common mistakes to watch out for:

  • Too Sweet: If your sauce is overly sweet, add a splash of vinegar or a pinch of salt to balance the flavors.
  • Too Spicy: To tone down the heat, mix in a bit more honey or mayonnaise.
  • Inconsistent Texture: Make sure to whisk your ingredients thoroughly to achieve a creamy consistency.
  • Not Chilling: Don’t skip the chilling step! It enhances the flavor profile significantly.

Tips for Making Zaxby’s Hot Honey Mustard

To ensure your sauce comes out perfect every time, consider these expert tips:

  • Use Fresh Ingredients: Always opt for fresh mustard and honey for the best flavor.
  • Experiment with Flavors: Try adding spices like cayenne pepper or smoked paprika for added depth.
  • Adjust Consistency: If you prefer a thicker sauce, reduce the amount of buttermilk.
  • Make it Ahead: This sauce can be made a day in advance, allowing the flavors to deepen.
  • Serve with Style: Present your sauce in a decorative bowl for a beautiful table display.

Variations of Zaxby’s Hot Honey Mustard

Feeling adventurous? Here are some fun variations you can try:

  • Spicy Jalapeño Version: Add finely chopped jalapeños for an extra kick.
  • Herb-Infused: Incorporate fresh herbs like dill or parsley for a refreshing twist.
  • Smoky BBQ: Mix in a spoonful of your favorite BBQ sauce for a smoky flavor.
  • Citrus Zing: Add a splash of lemon or lime juice to brighten the sauce.

How to Store Zaxby’s Hot Honey Mustard

Proper storage is key to maintaining the quality of your hot honey mustard. Here’s how to keep it fresh:

  • Refrigeration: Store in an airtight container in the fridge for up to two weeks.
  • Freezing: For longer storage, freeze in ice cube trays and transfer cubes to a zip-top bag. Thaw as needed.

Frequently Asked Questions (FAQ)

  • Can I use different types of mustard? Yes, feel free to use spicy brown, Dijon, or even yellow mustard based on your preference!
  • Is this sauce kid-friendly? Absolutely! You can adjust the heat level to suit your children’s tastes.
  • What can I serve with hot honey mustard? It pairs wonderfully with chicken, fish, salads, or even as a veggie dip.
  • Can I make this sauce vegan? Yes! Substitute honey with maple syrup and mayonnaise with a vegan alternative.
  • How long does it take to make? You can have this delicious sauce ready in just 10 minutes!
  • Can I use this sauce for grilling? Definitely! It makes a fantastic marinade for grilled meats.
  • What’s the best way to serve it? Serve it chilled as a dip or drizzle over your favorite dishes.
  • How do I know if it’s gone bad? If you notice an off smell or unusual texture, it’s best to discard it.

Nutrition Tips and Dietary Adaptations

This hot honey mustard recipe is not only delicious but can also fit into various dietary needs:

  • Gluten-Free: Substitute regular flour with a gluten-free blend.
  • Low-Sugar: Use sugar-free honey or a sugar substitute to reduce calories.
  • Low-Carb: Skip the sugar and serve it with low-carb veggies.

Equipment Recommendations

To make the process easier, here are some essential tools you might need:

  • Mixing Bowl: A good-sized bowl for combining ingredients.
  • Whisk: For achieving a smooth and creamy texture.
  • Airtight Containers: For storing your delicious sauce.

Serving Suggestions

Now that you’ve made your Zaxby’s Hot Honey Mustard, how do you serve it? Here are some ideas:

  • As a Dip: Perfect for chicken tenders or veggies.
  • Drizzled: On salads for a flavorful dressing.
  • Marinade: Use it to marinate chicken or pork before grilling.
  • With Appetizers: Serve as a tangy sauce for appetizers at parties.

With this comprehensive guide to Zaxby’s Hot Honey Mustard, you’re well-equipped to create a sauce that will not only tantalize your taste buds but also become a staple in your kitchen. Dive into this culinary adventure, and remember—cooking is about exploration, creativity, and joy. Enjoy your flavorful journey!

Zaxby’s Hot Honey Mustard Recipe

Prep Time 15 minutes
Cook Time 20 minutes
Total Time 35 minutes
Servings 4 servings
Calories 450
Enjoy a flavorful homemade version of Zaxby’s hot honey mustard, perfect for dipping crispy chicken.

Ingredients

Chicken

  • 3 lbs chicken breast (cut into strips or bite-sized chunks)

Eggs

  • 4 large large eggs

Flour

  • 0.5 cup all-purpose flour

Baking Powder

  • 0.5 tsp baking powder (instead of baking soda)

Buttermilk

  • 0.25 cup buttermilk

Mayonnaise

  • 2 Tbsp mayonnaise

All-purpose Flour

  • 3 cups all-purpose flour

Baking Powder

  • 0.5 tsp baking powder

Smoked Paprika

  • 0.5 tsp smoked paprika

Seasoned Salt

  • 1 Tbsp seasoned salt

Regular Salt

  • 1 Tbsp regular salt

Garlic Powder

  • 1 tsp garlic powder

Onion Powder

  • 1 tsp onion powder

Dried Thyme

  • 1 tsp dried thyme

Brown Sugar

  • 1 Tbsp brown sugar

White Pepper

  • 0.5 tsp white pepper

Cumin

  • 1 tsp cumin

Instructions 

  • Prepare chicken by cutting into strips or chunks.
  • Mix dry ingredients and coat chicken pieces.
  • Dip chicken in beaten eggs, then coat with flour mixture.
  • Fry chicken until golden and cooked through, about 10-12 minutes.
  • Serve with hot honey mustard sauce.

Notes

Adjust seasoning to taste and ensure chicken is fully cooked.
Calories: 450kcal
Cost: $15
Course: Main Course
Cuisine: American
Keyword: Chicken, honey mustard

Embark on a Flavorful Journey with Chicken Alfredo Pizza

Welcome to a culinary adventure that brings the rich, creamy flavors of Italy right to your kitchen! My Chicken Alfredo Pizza recipe is not just a meal; it’s a passport to taste, combining tender chicken, a luscious sauce, and a perfectly baked crust. Whether you are planning a family dinner, hosting a party, or simply craving something delicious, this dish is sure to impress. Let’s dive into the world of flavor and discover why this pizza is a must-try!

Why You’ll Love This Recipe

This Chicken Alfredo Pizza is more than just a recipe; it is an experience. Here are five reasons why you will absolutely adore it:

  • Deliciously Creamy Sauce: The homemade alfredo sauce is rich and creamy, elevating your pizza to a gourmet level.
  • Quick and Easy to Prepare: With simple ingredients and straightforward steps, you can have this pizza ready in under 30 minutes!
  • Customizable Toppings: Feel free to personalize your pizza with your favorite toppings like spinach, mushrooms, or even bacon!
  • Perfect for Any Occasion: Whether it’s a casual weeknight dinner or a festive gathering, this pizza fits right in.
  • Kid-Friendly and Adult-Approved: The flavors appeal to both kids and adults, making it a hit for the whole family!

Essential Ingredients and Substitutions

Now, let’s break down the ingredients you’ll need to create this mouthwatering Chicken Alfredo Pizza. Each ingredient plays a vital role in achieving the perfect balance of flavors and textures.

  • Homemade Pizza Crust: The foundation of your pizza. You can use store-bought dough for convenience or make your own for that fresh touch.
  • Unsalted Butter: Adds richness to the alfredo sauce. If you prefer, you can substitute with olive oil.
  • Minced Garlic: Provides a fragrant base for the sauce. Fresh garlic is recommended, but garlic powder can work in a pinch.
  • Cream Cheese: This ingredient makes the sauce extra creamy. If you want a lighter version, use Greek yogurt instead.
  • Milk: Helps achieve the desired sauce consistency. You can opt for almond or oat milk for a dairy-free alternative.
  • Freshly Grated Parmesan Cheese: Essential for that authentic flavor. Grate your cheese fresh for the best results.
  • Salt and Black Pepper: Basic seasonings that enhance the overall taste.
  • Cooked Chicken: Use rotisserie chicken for convenience or grill your own for added flavor.
  • Shredded Mozzarella Cheese: The melty cheese that ties your pizza together. Feel free to mix it with provolone for a unique twist.

Step-by-Step Instructions: Crafting Your Masterpiece

Creating your Chicken Alfredo Pizza is as simple as following these clear steps. Let’s transform those ingredients into a delicious masterpiece!

Step 1: Prepare the Alfredo Sauce

Melt the butter in a saucepan over medium heat. Add the minced garlic and sauté for about 30 seconds until fragrant. Next, incorporate the cream cheese, stirring until the mixture is smooth and creamy. Gradually whisk in the milk, ensuring the sauce remains velvety. Finally, mix in the parmesan cheese, salt, and black pepper. Remove from heat and set aside.

Step 2: Prepare the Pizza Crust

Roll or stretch your pizza dough into a large circle suitable for your baking tray or stone. For a standard crust, pre-bake the dough at 425°F (220°C) for 4 to 5 minutes. This helps achieve that crispy crust. If you’re using very thin crust, you can skip this step.

Step 3: Assemble the Pizza

Spread an even layer of the prepared Alfredo sauce over the pre-baked crust. Sprinkle a thin layer of shredded mozzarella cheese over the sauce, followed by the chopped cooked chicken. Add another layer of mozzarella cheese and finish with a sprinkle of extra parmesan cheese on top.

Step 4: Bake to Perfection

Place the assembled pizza in the oven preheated to 425°F (220°C). Bake for 8 to 12 minutes, or until the cheese is melted, bubbly, and starting to turn golden brown. Once it’s done, remove from the oven and let it cool slightly before slicing and serving.

Pro Tips for the Perfect Chicken Alfredo Pizza

To ensure your Chicken Alfredo Pizza turns out perfectly every time, keep these expert tips in mind:

  • Use Fresh Ingredients: Fresh ingredients make a noticeable difference in flavor and texture.
  • Don’t Skip the Pre-Baking: This crucial step prevents a soggy crust and ensures a crispy base.
  • Experiment with Cheese: Don’t be afraid to mix different types of cheese for a unique flavor profile.
  • Let the Pizza Cool: Allowing your pizza to cool slightly before slicing helps maintain the melted cheese and toppings.
  • Try Different Proteins: Swap out the chicken for shrimp, sausage, or even a vegetarian option like roasted vegetables.
  • Keep Your Oven Hot: A preheated oven is essential for achieving that golden crust.
  • Use a Pizza Stone: If you have one, a pizza stone can help evenly distribute heat for a perfectly baked crust.
  • Make It Ahead: You can prepare the alfredo sauce in advance for a quicker assembly later.

Common Mistakes and Troubleshooting

Even the best chefs can make mistakes sometimes! Here are some common issues and how to avoid them:

  • Soggy Crust: Ensure you pre-bake the crust and don’t overload it with sauce.
  • Too Much Sauce: Less is more! A thin layer of sauce will prevent sogginess.
  • Burnt Cheese: Keep an eye on the pizza while baking, especially towards the end.
  • Uneven Cooking: Rotate your pizza halfway through baking for even heat distribution.

Delicious Variations to Try

Feeling adventurous? Here are some scrumptious variations to elevate your Chicken Alfredo Pizza:

  • Buffalo Chicken Alfredo Pizza: Add buffalo sauce to the chicken for a spicy kick.
  • Vegetarian Alfredo Pizza: Substitute the chicken with sautéed spinach, mushrooms, and bell peppers.
  • BBQ Chicken Alfredo Pizza: Use BBQ sauce instead of alfredo sauce for a smoky flavor.
  • Four Cheese Alfredo Pizza: Mix mozzarella, parmesan, gouda, and cheddar for a cheesy delight.

Storage and Make-Ahead Instructions

If you have leftovers (though I doubt you will!), here’s how to store them:

  • Refrigerator: Store in an airtight container for up to 3 days. Reheat in the oven for best results.
  • Freezer: You can freeze the assembled pizza before baking. Wrap it tightly in plastic wrap and foil. Bake directly from frozen, adding a few extra minutes to the cooking time.

Frequently Asked Questions

Here are some common questions you might have about this Chicken Alfredo Pizza:

  • Can I use store-bought Alfredo sauce? Absolutely! While homemade sauce is delicious, store-bought can save time.
  • What can I substitute for chicken? You can use shrimp, sausage, or go vegetarian with roasted vegetables.
  • How do I prevent the crust from getting soggy? Pre-baking the crust is key to achieving a crispy base.
  • Can I make this pizza gluten-free? Yes! Use gluten-free pizza dough for a delicious alternative.
  • What sides pair well with Chicken Alfredo Pizza? A fresh salad or garlic bread complements this dish perfectly.
  • How long does it take to make this pizza? From start to finish, it takes about 30 minutes!
  • Can I add more cheese? Absolutely! Feel free to layer on your favorite cheeses for extra flavor.
  • Is this pizza suitable for kids? Yes! Its creamy flavors and familiar ingredients make it a kid-friendly option.

Nutritional Tips and Dietary Adaptations

For those mindful of nutritional content, consider the following adaptations:

  • Lower Calorie Option: Use low-fat cream cheese and milk for a lighter alfredo sauce.
  • Gluten-Free Version: Choose a gluten-free crust to accommodate dietary restrictions.
  • Dairy-Free Alternative: Replace dairy products with almond milk and coconut cream for a vegan twist.

Equipment Recommendations

To make your cooking experience seamless, here are some essential tools:

  • Pizza Stone: For an evenly cooked, crispy crust.
  • Rolling Pin: For stretching your dough to the desired thickness.
  • Sharp Chef’s Knife: For slicing your delicious pizza.
  • Mixing Bowls: Ideal for preparing your ingredients and sauce.

Serving Suggestions

To elevate your dining experience, consider these serving ideas:

  • Garnish with Fresh Herbs: Sprinkle chopped parsley or basil on top for a fresh finish.
  • Accompany with a Salad: A light Caesar or mixed greens salad complements the richness of the pizza.
  • Serve with Wine: Pair with a crisp white wine like Pinot Grigio for a perfect meal.

Conclusion

Your culinary adventure with Chicken Alfredo Pizza awaits! This recipe is not just about cooking; it’s about sharing flavors, stories, and creating memories around the table. So roll up your sleeves, gather your ingredients, and embark on this delicious journey. Let every slice tell a story, and may your kitchen be filled with laughter and joy. Happy cooking!

Chicken Alfredo Pizza Recipe

Prep Time 15 minutes
Cook Time 10 minutes
Total Time 25 minutes
Servings 4 pieces
Calories 650
A delicious fusion of creamy Alfredo sauce and classic pizza, topped with tender chicken and melted cheese.

Ingredients

Dough

  • 1 piece homemade pizza crust

Sauce

  • 1 Tablespoon unsalted butter
  • 1 clove garlic, minced
  • 2 ounces cream cheese, softened and cut into small pieces
  • 1/2 cup milk
  • 1/3 cup freshly grated parmesan cheese, plus extra for topping
  • 1/4 teaspoon salt
  • 1/4 teaspoon freshly ground black pepper

Toppings

  • 1 cup cooked chicken, chopped
  • 1 cup shredded mozzarella cheese

Instructions 

  • Melt butter, cook garlic for 30 seconds, then stir in cream cheese until smooth.
  • Whisk in milk, then add parmesan, salt, and pepper; set aside.
  • Pre-bake crust at 425°F (220°C) for 4-5 minutes, then spread sauce over it.
  • Top with mozzarella, chicken, then more cheese and parmesan.
  • Bake at 425°F (220°C) for 8-12 minutes until golden and bubbly.

Notes

For a crispier crust, pre-bake longer or use a pizza stone.
Calories: 650kcal
Cost: $15
Course: Main Course
Cuisine: Italian-American
Keyword: Alfredo, Chicken, Pizza

Discover the Zesty World of Chili Lime Chicken

Welcome to a flavor-packed journey where culinary traditions meet bold, zesty tastes! Chili Lime Chicken is more than just a dish; it’s a vibrant celebration of spices and citrus that invites you to savor every bite. This recipe embodies the spirit of adventure, combining rich cultural influences with simple, accessible ingredients. Whether you’re cooking for a casual dinner or a special occasion, this dish promises to bring joy and excitement to your table.

Why You’ll Love This Recipe

Chili Lime Chicken isn’t just about flavor—it’s a culinary experience that offers numerous benefits:

  • Quick and Easy: With a prep time of just 15 minutes and cooking time under 30, you can have a delicious meal on the table in less than an hour.
  • Flavor Explosion: The combination of chili and lime creates a mouthwatering dish that tantalizes your taste buds with every bite.
  • Versatile: Perfect for weeknight dinners, BBQs, or meal prep; this dish adapts beautifully to any occasion.
  • Healthy Choice: Packed with lean protein from chicken and the zesty goodness of lime, it’s a nutritious option for any meal.
  • Customizable: With simple substitutions and variations, you can tailor this dish to suit your taste preferences or dietary needs.

Ingredients Breakdown with Substitutions

To create this tantalizing Chili Lime Chicken, you’ll need the following ingredients:

  • 4 boneless, skinless chicken breasts: You can substitute with chicken thighs for a richer flavor.
  • 1 tablespoon olive oil: Any neutral oil like avocado or canola works well.
  • 3 cloves garlic, minced: Fresh garlic offers the best flavor, but garlic powder can be used in a pinch.
  • 1 teaspoon chili powder: Adjust the spice level by opting for smoked or chipotle chili powder for a smoky kick.
  • 1 teaspoon cumin: This adds warmth; coriander can be used for a different flavor profile.
  • 1 teaspoon smoked paprika: Regular paprika is fine, but smoked offers a deeper taste.
  • 1 teaspoon salt: Season to taste; use kosher salt for better flavor control.
  • ½ teaspoon black pepper: Freshly ground pepper enhances the dish’s overall flavor.
  • Zest of 1 lime: Provides aromatic oils; if unavailable, lemon zest can be a good substitute.
  • Juice of 2 limes: Fresh lime juice is essential for that zesty kick; bottled lime juice lacks the same brightness.
  • Fresh cilantro, for garnish (optional): Parsley or green onions can also make for a beautiful garnish.

Step-by-Step Instructions

Follow these simple steps to create your Chili Lime Chicken:

  1. Prepare the Marinade: In a bowl, whisk together olive oil, minced garlic, chili powder, cumin, smoked paprika, salt, black pepper, lime zest, and lime juice.
  2. Marinate the Chicken: Place the chicken breasts in a resealable bag or a shallow dish and pour the marinade over them. Seal or cover and refrigerate for at least 30 minutes, preferably 2 hours for maximum flavor.
  3. Cook the Chicken: Preheat your grill or skillet over medium-high heat. Remove the chicken from the marinade, letting excess drip off. Cook for 6-7 minutes per side, or until the internal temperature reaches 165°F (75°C).
  4. Rest and Serve: Let the chicken rest for 5 minutes before slicing. Garnish with fresh cilantro and serve with lime wedges.

Pro Tips for Perfect Chili Lime Chicken

  • Marinate Longer: For deeper flavor, marinate the chicken overnight—just avoid exceeding 24 hours to prevent mushiness.
  • Grill Marks: If grilling, ensure your grill is hot before placing the chicken on it to achieve those beautiful grill marks.
  • Use a Meat Thermometer: To avoid overcooking, use a meat thermometer to check for doneness at 165°F.
  • Resting Time: Allowing the chicken to rest post-cooking helps retain its juices, making it more tender.
  • Experiment with Heat: If you love heat, consider adding a pinch of cayenne pepper or diced jalapeños to the marinade.
  • Serving Suggestions: Pair the chicken with a fresh salad, rice, or grilled vegetables for a complete meal.
  • Leftovers: Store any leftovers in an airtight container in the fridge for up to 3 days.
  • Reheating: Gently reheat in the oven or on the stovetop to maintain moisture.

Common Mistakes and Troubleshooting

Here are some common pitfalls to watch out for when making Chili Lime Chicken:

  • Over-Marinating: Leaving chicken in an acidic marinade for too long can result in a mushy texture. Stick to the recommended time.
  • Underseasoning: Don’t skimp on seasoning; it’s key to enhancing the flavors of the chicken.
  • Cooking at Too High Heat: Cooking too quickly can lead to burnt outsides and raw insides. Medium heat is ideal.
  • Skipping the Resting Period: Cutting into the chicken immediately after cooking can cause juices to escape. Always let it rest.

Delicious Variations

Get creative with these delightful variations of Chili Lime Chicken:

  • Chili Lime Chicken Tacos: Shred the chicken and serve it in warm tortillas with avocado, salsa, and lime crema.
  • Grilled Chili Lime Chicken Skewers: Cut chicken into cubes, marinate, and thread onto skewers for a fun grilling experience.
  • Chili Lime Chicken Salad: Slice the cooked chicken over a bed of mixed greens, avocado, and cherry tomatoes, drizzled with a lime vinaigrette.
  • Chili Lime Chicken Stir-Fry: Dice the chicken and stir-fry with bell peppers and broccoli, finishing with a splash of soy sauce.

Storage and Make-Ahead Instructions

Planning ahead? Here’s how to store and prepare your Chili Lime Chicken in advance:

  • Refrigeration: Store cooked chicken in an airtight container in the refrigerator for up to 3 days.
  • Freezing: Freeze marinated chicken for up to 3 months. Thaw overnight in the fridge before cooking.
  • Meal Prep: Prepare the marinade and marinate the chicken the night before for a quick dinner option.

Comprehensive FAQ

Got questions? Here are some common inquiries about Chili Lime Chicken:

  • Can I use frozen chicken? Yes, but make sure to thaw it completely before marinating and cooking.
  • What can I serve with Chili Lime Chicken? Great options include rice, quinoa, grilled vegetables, or a fresh salad.
  • How do I know when the chicken is cooked? Use a meat thermometer; the internal temperature should reach 165°F (75°C).
  • Can I make this recipe gluten-free? Absolutely! All listed ingredients are naturally gluten-free.
  • What if I don’t have lime juice? Lemon juice can be used as a substitute, but the flavor will be slightly different.
  • How spicy is this dish? The spice level can be adjusted by modifying the amount of chili powder or adding fresh chilies.
  • Can I grill the chicken? Yes! Grilling adds a wonderful smoky flavor to the chicken.
  • How do I store leftovers? Store in an airtight container in the fridge for up to 3 days or freeze for longer storage.

Nutrition Tips and Dietary Adaptations

This Chili Lime Chicken can be adapted to suit various dietary needs:

  • Low-Carb: Enjoy this dish with a side of sautéed greens instead of rice.
  • Dairy-Free: The recipe is naturally dairy-free, making it perfect for lactose intolerant individuals.
  • Paleo-Friendly: Stick with whole, unprocessed foods, and this recipe fits right in.

Essential Equipment Recommendations

For best results, consider these kitchen tools:

  • Grill or Grill Pan: For achieving perfect char and flavor.
  • Meat Thermometer: To ensure your chicken is cooked to perfection.
  • Mixing Bowl: For combining marinade ingredients easily.
  • Resealable Bags: Ideal for marinating chicken without mess.

Serving Suggestions

When it comes to serving your Chili Lime Chicken, consider these delightful pairings:

  • Quinoa Salad: A refreshing side that complements the zesty flavors of the chicken.
  • Grilled Corn on the Cob: Adds a sweet crunch that balances the spice.
  • Avocado Slices: Creamy avocado provides a rich texture that pairs well with the chicken.
  • Fresh Salsa: A burst of freshness that enhances the overall flavor profile.

Final Thoughts

Chili Lime Chicken is more than just a recipe; it’s an invitation to explore, connect, and share flavors from around the world. With its vibrant combination of spices and citrus, this dish is sure to become a favorite in your home. So gather your ingredients, unleash your culinary creativity, and let the adventure of flavor begin!

Chili Lime Chicken: An Incredible Ultimate Recipe for Amazing Flavor

Prep Time 10 minutes
Cook Time 15 minutes
Total Time 25 minutes
Servings 4 pieces
Calories 250
This vibrant and flavorful chili lime chicken is perfect for a quick, healthy, and delicious meal that bursts with citrus and spice.

Ingredients

Protein

  • 4 pieces boneless, skinless chicken breasts
  • 1 tablespoon olive oil
  • 3 cloves garlic, minced
  • 1 teaspoon chili powder
  • 1 teaspoon cumin
  • 1 teaspoon smoked paprika
  • 1 teaspoon salt
  • ½ teaspoon black pepper
  • 1 piece lime zest
  • 2 limes juice of limes

Garnish

  • to taste Fresh cilantro, for garnish (optional)

Instructions 

  • Mix lime juice, lime zest, garlic, chili powder, cumin, smoked paprika, salt, and black pepper in a bowl.
  • Marinate chicken breasts with the mixture for at least 10 minutes.
  • Heat olive oil in a skillet over medium-high heat and cook chicken for 6-8 minutes per side until cooked through.
  • Remove chicken from skillet and let rest for a few minutes.
  • Slice and serve garnished with fresh cilantro if desired.

Notes

For extra flavor, marinate the chicken longer or add a splash of honey for sweetness.
Calories: 250kcal
Cost: $12
Course: Main Course
Cuisine: Mexican
Keyword: Chicken, Lime, spicy

A Culinary Exploration of Chicken & Mushroom Pasta

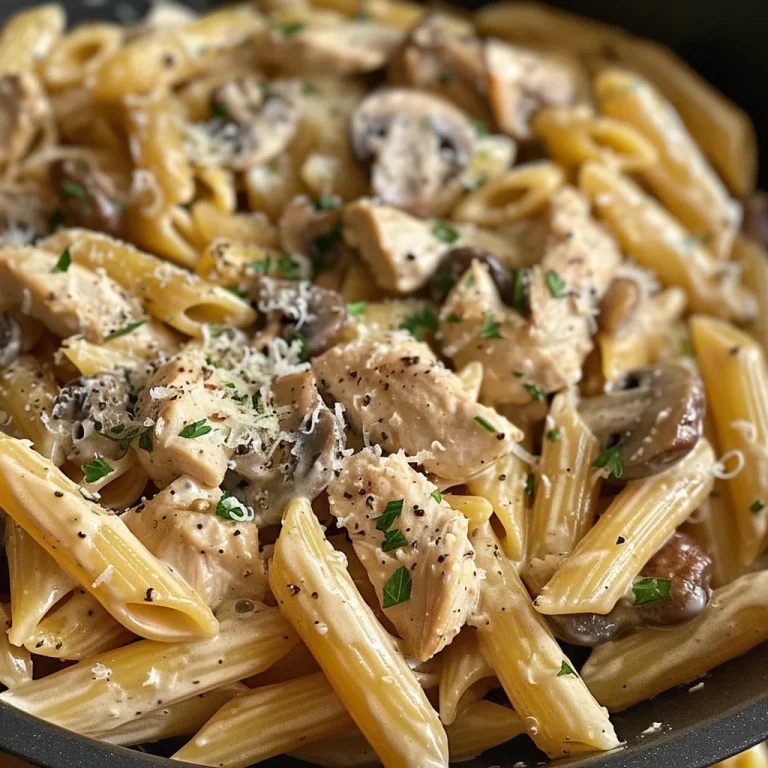
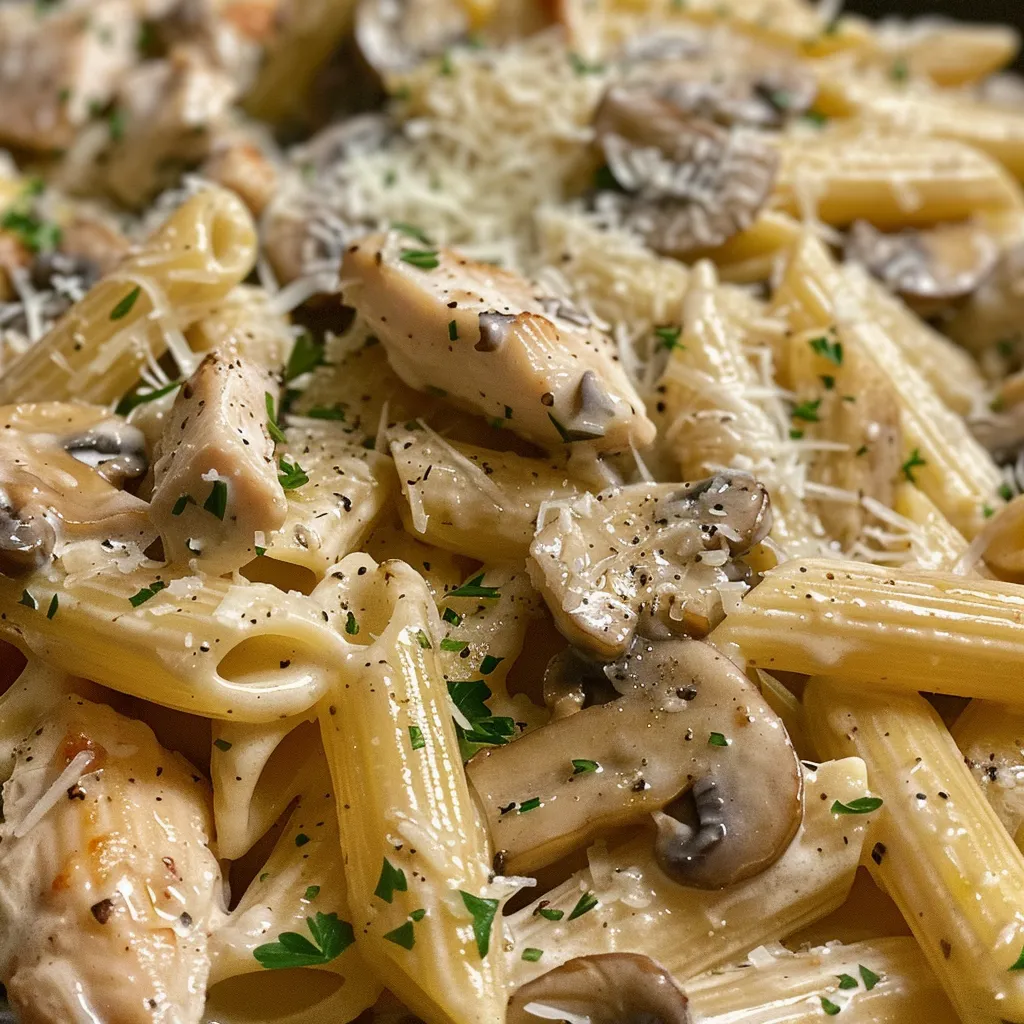
Welcome to a culinary adventure where comfort meets sophistication! Today, we embark on a journey through flavors, textures, and delightful aromas with Chicken & Mushroom Pasta in Decadent Cream Sauce. This dish is not just a meal; it’s an experience that brings stories from kitchens around the world to your table. Imagine tender chicken, earthy mushrooms, and a luscious cream sauce enveloping perfectly cooked pasta, creating a symphony of taste that warms the heart and ignites the senses.

In this comprehensive guide, we’ll delve deep into why this recipe deserves a place in your kitchen, explore the ingredients you’ll need, and share expert tips and variations that will elevate your cooking game. So, grab your apron and let’s dive into this delicious world!

Why You’ll Love This Recipe

  • Quick and Easy: Perfect for weeknight dinners, this dish can be whipped up in just 30 minutes, making it ideal for busy schedules.
  • Rich Flavor Profile: The combination of juicy chicken, savory mushrooms, and creamy sauce creates a rich and satisfying flavor that will leave you wanting more.
  • Versatile Ingredients: This recipe allows for substitutions and variations, so you can adapt it based on what you have on hand or your personal preferences.
  • Impressive Presentation: Serve this dish to guests and watch them marvel at your culinary skills. The vibrant colors and creamy texture make it a feast for the eyes!
  • Comfort Food at Its Best: Whether it’s a cozy family dinner or a gathering with friends, this pasta dish brings warmth and happiness to any occasion.

Ingredients for Chicken & Mushroom Pasta

Let’s gather our ingredients for this delightful dish! Here’s what you’ll need:

  • 8 oz Penne Pasta: Can substitute with fusilli, rigatoni, or farfalle for a different texture.
  • 2 pieces Chicken Breasts: Trim and slice into 1/2-inch strips for even cooking.
  • 2 tbsp Butter: Choose salted or unsalted based on your taste preference.
  • 8 oz Mushrooms: Opt for cremini or button mushrooms for a delicious earthiness.
  • 4 cloves Garlic: Freshly minced garlic adds depth of flavor.
  • 1 cup Heavy Cream: Use cold or at room temperature for a silky sauce.
  • 1/2 cup Parmesan Cheese: Freshly grated is highly recommended for the best flavor.
  • 1 tsp Thyme: Fresh or dried, this herb complements the dish beautifully.
  • Salt & Pepper: To taste, use fresh cracked pepper for an aromatic touch.

How to Make Chicken & Mushroom Pasta

A vibrant plate of chicken and mushroom pasta, emphasizing the creamy texture and garnished with herbs.

Ready to create this culinary masterpiece? Follow these simple steps:

  1. Cook the Pasta: In a large pot, bring salted water to a boil. Add the penne pasta and cook according to package instructions until al dente. Reserve a cup of pasta water, then drain and set aside.
  2. Sauté the Chicken: In a large skillet, melt the butter over medium heat. Add the sliced chicken breast, season with salt and pepper, and cook for about 5-7 minutes until golden brown and cooked through. Remove from the skillet and set aside.
  3. Cook the Mushrooms: In the same skillet, add the minced garlic and sauté for 1 minute until fragrant. Add the mushrooms and cook until they are browned and tender, about 5 minutes.
  4. Make the Cream Sauce: Pour in the heavy cream and bring to a gentle simmer. Stir in the grated Parmesan cheese and thyme, mixing well until the cheese is melted and the sauce is creamy.
  5. Combine Everything: Return the cooked chicken to the skillet, add the drained pasta, and toss everything together. If the sauce is too thick, add a splash of reserved pasta water until desired consistency is reached.
  6. Serve and Enjoy: Plate the pasta, garnishing with more Parmesan and freshly cracked pepper if desired. Dive into this creamy delight!

Pro Tips for Perfect Chicken & Mushroom Pasta

  • Use Fresh Ingredients: Fresh herbs and quality ingredients elevate the dish’s flavor. Don’t skimp on the garlic or cheese!
  • Don’t Overcook the Chicken: Ensure the chicken is cooked just right to maintain its juiciness. Overcooked chicken can become dry.
  • Experiment with Mushrooms: Try different types of mushrooms like shiitake or portobello for unique flavors and textures.
  • Adjust the Creaminess: For a lighter sauce, mix half-and-half with cornstarch instead of heavy cream.
  • Herb Variations: Add fresh basil or parsley for a fresh twist on the classic recipe.
  • Make It Spicy: If you enjoy heat, sprinkle in some red pepper flakes while cooking.
  • Save Pasta Water: The starchy pasta water can help thicken and bind the sauce to the pasta.
  • Let It Rest: Allow the dish to sit for a few minutes after cooking; this helps the flavors meld together.

Common Mistakes and Troubleshooting

Even the best of us can stumble in the kitchen! Here are some common missteps and how to avoid them:

  • Overcooking the Pasta: Always follow package instructions for cooking times. Al dente pasta holds up better in the sauce.
  • Too Much Salt: Taste as you go! It’s easier to add salt than to remove it.
  • Thick Sauce: If your sauce is too thick, add more pasta water gradually until it reaches a creamy consistency.
  • Not Enough Flavor: Always season at each stage of cooking. A pinch of salt, a dash of pepper, and the right herbs make a huge difference.

Variations to Elevate Your Dish

Want to mix things up? Here are some delicious variations:

  • Vegetarian Version: Swap chicken for sautéed zucchini or spinach for a lighter, veggie-packed meal.
  • Seafood Twist: Replace chicken with shrimp or scallops for a delightful seafood pasta option.
  • Cheesy Delight: Add a blend of cheeses, such as mozzarella or gouda, for an extra cheesy experience.
  • Herbed Cream Sauce: Infuse the cream sauce with fresh herbs like dill or tarragon for a refreshing herbal note.

Storage Tips and Make-Ahead Instructions

Planning ahead? Here’s how to store and prepare this dish:

  • Refrigeration: Store leftovers in an airtight container in the fridge for up to 3 days.
  • Freezing: While not ideal for cream sauces, you can freeze the pasta (without the sauce) for up to 2 months. Reheat and add fresh sauce when ready to serve.
  • Make-Ahead: Prepare the chicken and mushroom mixture in advance. When ready to serve, cook the pasta and combine with your prepped sauce.

Frequently Asked Questions

  • Can I use different types of pasta? Yes! Any pasta shape you prefer works well with this recipe.
  • How can I make this dish gluten-free? Use gluten-free pasta and ensure all other ingredients are gluten-free.
  • What can I serve with Chicken & Mushroom Pasta? A fresh garden salad or garlic bread complements this dish beautifully.
  • Can I make this dish dairy-free? Substitute heavy cream with coconut cream and use vegan cheese for a dairy-free option.
  • How do I reheat leftovers? Reheat gently in a skillet with a splash of cream or pasta water to restore creaminess.
  • Can I add more vegetables? Absolutely! Peas, bell peppers, or asparagus make great additions.
  • What’s the best way to prevent the sauce from separating? Ensure the sauce is kept at a low simmer and stir frequently.
  • Can I use pre-cooked chicken? Yes! Just add it in at the end to warm through.

Nutritional Tips and Dietary Adaptations

Looking to make this dish healthier? Consider these tips:

  • Add Greens: Incorporate spinach, kale, or broccoli for added nutrients and fiber.
  • Lean Protein: Opt for skinless chicken breasts or turkey for a leaner protein source.
  • Whole Wheat Pasta: Choose whole wheat or legume-based pasta for a fiber boost.

Equipment Recommendations

Here’s what you’ll need to make this dish:

  • Large Pot: For boiling pasta.
  • Skillet: A large skillet for sautéing and creating the sauce.
  • Wooden Spoon: For stirring and mixing ingredients.
  • Measuring Cups and Spoons: For accurate ingredient measurements.

Serving Suggestions

Time to enjoy your culinary creation! Consider these serving ideas:

  • Garnish: Top with freshly grated Parmesan and cracked black pepper for an elegant finish.
  • Pairing: Serve with a crisp white wine, such as Chardonnay, to complement the creamy flavors.
  • Fresh Herbs: Sprinkle chopped parsley or basil for a pop of color and freshness.

Conclusion

Chicken & Mushroom Pasta is more than just a recipe; it’s a journey through flavors and cultures that invites you to explore the world of cooking. With its easy preparation, rich taste, and endless variations, this dish is destined to become a favorite in your household. So, gather your ingredients, invite your loved ones to the table, and savor every delicious bite. Bon appétit!

Indulge in Chicken & Mushroom Pasta in Decadent Cream Sauce

Prep Time 10 minutes
Cook Time 20 minutes
Total Time 30 minutes
Servings 4 servings
Calories 650
Enjoy a rich and creamy pasta dish featuring tender chicken and savory mushrooms, perfect for a comforting meal.

Ingredients

Pasta

  • 8 oz Penne Pasta (Can substitute with fusilli, rigatoni, or farfalle.)

Chicken

  • 2 pieces Chicken Breasts (Trim and slice into 1/2-inch strips.)

Dairy & Fats

  • 2 tbsp Butter (Salted or unsalted based on preference.)
  • 8 oz Mushrooms (Opt for cremini or button.)
  • 4 cloves Garlic (Freshly minced for best results.)
  • 1 cup Heavy Cream (Use cold or at room temperature.)
  • 1/2 cup Parmesan Cheese (Freshly grated recommended.)
  • 1 tsp Thyme (Fresh or dried based on availability.)

To taste

  • to taste Salt
  • to taste Pepper (Freshly cracked.)

Instructions 

  • Cook the pasta according to package instructions until al dente. Drain and set aside.
  • In a large skillet, melt butter over medium heat. Add sliced chicken and cook until browned and cooked through, about 5-7 minutes.
  • Add minced garlic and sliced mushrooms to the skillet. Sauté until fragrant and mushrooms are tender, about 5 minutes.
  • Pour in heavy cream, add Parmesan cheese and thyme. Stir well and simmer for 3-5 minutes until sauce thickens. Season with salt and pepper to taste.
  • Combine cooked pasta with the sauce. Toss to coat evenly and serve hot.

Notes

For a lighter version, use half-and-half instead of heavy cream.
Calories: 650kcal
Cost: $15
Course: Main Course
Cuisine: Italian
Keyword: Chicken, Cream Sauce, Pasta

Embark on a Flavorful Journey with Slow Cooker Hot Honey Wings

Welcome to a culinary adventure that transcends borders and ignites your taste buds! In this article, we’ll explore the vibrant world of Slow Cooker Hot Honey Wings, a dish that beautifully blends the sweetness of honey with the fiery kick of hot sauce. Whether you’re preparing for a game day feast, a cozy family dinner, or a festive gathering, these wings are sure to become a favorite. Let’s dive into how to make these mouthwatering wings, and learn why they’re a must-try!

Why You’ll Love This Recipe

Here are just a few reasons why these hot honey wings will steal the spotlight:

  • Effortless Preparation: With the slow cooker doing all the work, you can enjoy more time with your guests and less time in the kitchen.
  • Flavor Explosion: The combination of sweet honey, spicy hot sauce, and aromatic spices creates a flavor profile that is both bold and irresistible.
  • Versatile Dish: Perfect as an appetizer, main course, or even as a party snack, these wings fit any occasion beautifully.
  • Healthier Cooking Method: Slow cooking means no frying, resulting in tender, juicy wings without the added oil and mess.
  • Customizable Heat: You can adjust the level of spice by varying the amount of hot sauce and cayenne pepper, perfect for both mild and adventurous palates.

Ingredients Breakdown

Let’s gather what you’ll need to create these heavenly wings:

  • 4 Pounds chicken wings: You can use fresh or frozen wings; just remember to thaw them if they’re frozen.
  • 1 ½ Cups hot sauce: Choose your favorite brand for a personal touch.
  • 1 Teaspoon salt: Enhances the overall flavor of the wings.
  • ½ Teaspoon black pepper: Adds a subtle kick.
  • 4 Tablespoons butter: Melted for a rich flavor.
  • 2 Teaspoons cayenne pepper: Adjust to taste for extra heat.
  • 1 Teaspoon garlic powder: For a delicious aromatic depth.
  • 1 Cup honey: The star ingredient that sweetens the sauce.
  • Nonstick cooking spray: To grease the slow cooker and prevent sticking.
  • Red pepper flakes: Optional, for extra garnish and heat.
  • Parsley (freshly chopped): A touch of freshness for serving.

How to Make Slow Cooker Hot Honey Wings

Delicious chicken wings coated in a sticky hot sauce, served with red pepper flakes.

Now, let’s get cooking! Follow these simple steps to prepare your wings:

  1. Add your wings to a slow cooker.
  2. In a separate bowl, whisk together the hot sauce, melted butter, honey, garlic powder, cayenne pepper, salt, and black pepper.
  3. Reserve 1 cup of the sauce for later, and pour the remaining sauce over the chicken wings in the slow cooker.
  4. Cover and cook on low for 6-8 hours or high for 3-4 hours, until the wings are tender and fully cooked.
  5. If you prefer crispy wings, preheat your oven to broil. Transfer the cooked wings to a baking sheet, brush with reserved sauce, and broil for 2-3 minutes until crispy.
  6. Garnish with red pepper flakes and chopped parsley before serving.

Pro Tips for Perfect Hot Honey Wings

Here are some expert insights to ensure your wings turn out perfectly:

  • Don’t Overcrowd: Ensure there’s enough space between the wings in the slow cooker for even cooking.
  • Use Fresh Ingredients: Fresh garlic powder and spices will elevate the flavor significantly.
  • Adjust the Spice Level: Feel free to add more cayenne or hot sauce if you love heat!
  • Let Them Rest: Allow the wings to sit for a few minutes after cooking; this helps the flavors meld.
  • Double the Recipe: If you’re hosting a crowd, make a double batch—they’ll disappear quickly!
  • Experiment with Sauces: Try mixing different hot sauces to find your perfect flavor combination.
  • Make Ahead: You can prepare the sauce in advance and store it in the fridge until you’re ready to cook.
  • Serve Warm: These wings are best enjoyed fresh from the slow cooker or oven.

Common Mistakes and Troubleshooting

Even the best chefs make mistakes! Here’s how to avoid some common pitfalls:

  • Wings are too soggy: Ensure you don’t add too much liquid. If you’re using frozen wings, thaw them first to avoid excess moisture.
  • Too spicy?: If you accidentally overdo the spice, balance it with more honey or butter in the sauce.
  • Not enough flavor?: Make sure to season the wings well with salt and pepper before cooking.

Delicious Variations of Hot Honey Wings

Feeling adventurous? Here are some tasty variations to try:

  • Teriyaki Hot Honey Wings: Mix equal parts teriyaki sauce and honey for a sweet twist.
  • Garlic Parmesan Wings: After cooking, toss wings in melted butter and garlic, then sprinkle with Parmesan cheese.
  • Smoky Chipotle Wings: Add chipotle powder or sauce for a smoky flavor.
  • Sweet and Tangy BBQ Wings: Substitute half the honey with BBQ sauce for a tangy sweetness.

Storage and Make-Ahead Instructions

You can easily make these wings ahead of time:

  • Refrigeration: Store leftovers in an airtight container in the fridge for up to 3 days.
  • Freezing: These wings freeze well! Place in freezer-safe bags for up to 3 months; thaw before reheating.
  • Reheating: Reheat in the oven at 350°F (175°C) for about 15 minutes or until heated through.

Frequently Asked Questions

Here are some common questions about making hot honey wings:

  • Can I use other meats?: Yes! This recipe works well with chicken thighs or drumsticks.
  • What’s the best type of hot sauce?: It’s all about personal preference! Choose one that matches your taste.
  • Can I use a different sweetener?: Absolutely! Maple syrup or agave can be great substitutes for honey.
  • How can I make these wings crispy without broiling?: You can also use an air fryer after the slow cooker for a crispy finish.
  • What sides pair well with hot honey wings?: Try serving them with celery sticks, carrot sticks, or a creamy dip.
  • Can I make these wings in advance?: Yes! Prepare the wings and sauce a day ahead and store them in the fridge.
  • Are hot honey wings gluten-free?: Yes, as long as your hot sauce is gluten-free!
  • What can I do with leftover sauce?: Use it as a marinade for other proteins or drizzle it over roasted vegetables.

Nutritional Tips and Dietary Adaptations

For those watching their diet, here are some helpful tips:

  • Lower-Calorie Option: Use skinless chicken wings or substitute honey with a low-calorie sweetener.
  • Gluten-Free: Ensure all ingredients, especially hot sauce, are gluten-free.
  • Dairy-Free: This recipe is dairy-free; just ensure any sauces you use are also dairy-free.

Essential Equipment for Success

Here’s what you’ll need to make these wings:

  • Slow Cooker: A 6-quart or larger slow cooker is ideal for this recipe.
  • Whisk: For mixing the sauce thoroughly.
  • Baking Sheet: If you choose to broil for crispiness.
  • Spatula: For transferring the wings to plates.

Serving Suggestions

These wings shine on their own, but consider these serving ideas:

  • Dip Options: Serve with ranch or blue cheese dressing for a rich contrast.
  • Fresh Veggies: Celery and carrot sticks add a refreshing crunch.
  • Side Dishes: Pair with coleslaw or potato salad for a complete meal.
  • Garnish: Sprinkle with fresh herbs or additional red pepper flakes for an extra kick.

Conclusion: Your Culinary Adventure Awaits

There you have it—a definitive guide to crafting the most mouthwatering Slow Cooker Hot Honey Wings. Cooking is an adventure, and with each recipe, you’re transported to new flavors and experiences. So gather your ingredients, fire up your slow cooker, and get ready to savor the sweet and spicy journey of these wings. Bon appétit!

Slow Cooker Hot Honey Wings

Prep Time 10 minutes
Cook Time 4 hours
Total Time 4 hours 10 minutes
Servings 4 servings
Calories 450
Enjoy tender, spicy, and sweet chicken wings cooked effortlessly in a slow cooker for a flavorful appetizer or main dish.

Ingredients

Chicken Wings

  • 4 pounds chicken wings (fresh or frozen)
  • 1.5 cups hot sauce
  • 1 teaspoon salt
  • 0.5 teaspoon black pepper
  • 4 tablespoons butter (melted)
  • 2 teaspoons cayenne pepper
  • 1 teaspoon garlic powder
  • 1 cup honey
  • nonstick cooking spray for greasing
  • red pepper flakes for garnish
  • parsley (freshly chopped) for garnish

Instructions 

  • Add the wings to a slow cooker.
  • Whisk together hot sauce, melted butter, honey, garlic powder, cayenne pepper, salt, and black pepper.
  • Reserve 1 cup of sauce for later and pour the rest over the chicken in the slow cooker.

Notes

Serve garnished with red pepper flakes and chopped parsley for extra flavor and presentation.
Calories: 450kcal
Cost: $15
Course: Appetizer, Main Course
Cuisine: American
Keyword: chicken wings, hot honey