Author

Jack

Browsing

Discover the Joy of Avocado Smoothies

Welcome to a world where creamy, luscious flavors meet nutritional powerhouse ingredients! This avocado smoothie is not just a drink; it’s a celebration of health and taste. With its vibrant green color and deliciously smooth texture, this smoothie can brighten up your day in more ways than one. In just a few minutes, you can blend a refreshing drink that’s perfect for breakfast, a mid-day snack, or even dessert. Let’s dive into why you’ll love this recipe and how to make the most of it!

Why You’ll Love This Recipe

This avocado smoothie is a delightful blend of flavors and nutrition. Here are five reasons to whip up this refreshing drink today:

  • Nutrient-Rich Ingredients: Packed with healthy fats from avocado, this smoothie provides essential nutrients that support overall well-being.
  • Versatile Flavor Combinations: Customize your smoothie with various fruits and sweeteners to create a flavor profile that suits your taste.
  • Quick and Easy Preparation: With just a few ingredients, you can have a delicious smoothie ready in under 10 minutes—perfect for busy mornings!
  • Refreshing Texture: The creamy consistency of the avocado paired with cold milk creates a smoothie that feels indulgent yet healthy.
  • Energy Boost: This smoothie can provide a quick energy boost, making it a fantastic choice for pre- or post-workout nourishment.

Ingredients Breakdown

Let’s explore the ingredients that make this smoothie a nutritional gem:

  • Sweetener of choice: Use 2 tablespoons of pure maple syrup or stevia to taste for a hint of sweetness without the guilt.
  • Milk of choice: Opt for 1 1/2 cups of cold milk—dairy or plant-based (like almond or oat milk) work beautifully.
  • Avocado: A 1/2 of a large avocado brings creaminess and healthy fats to the mix.
  • Vanilla extract: Add scant 1 teaspoon of pure vanilla extract for a subtle depth of flavor.
  • Salt: Just a pinch of 1/8 teaspoon salt can enhance the overall flavor.
  • Protein powder (optional): For an extra boost, consider adding a scoop of protein powder to fuel your day.

Step-by-Step Instructions
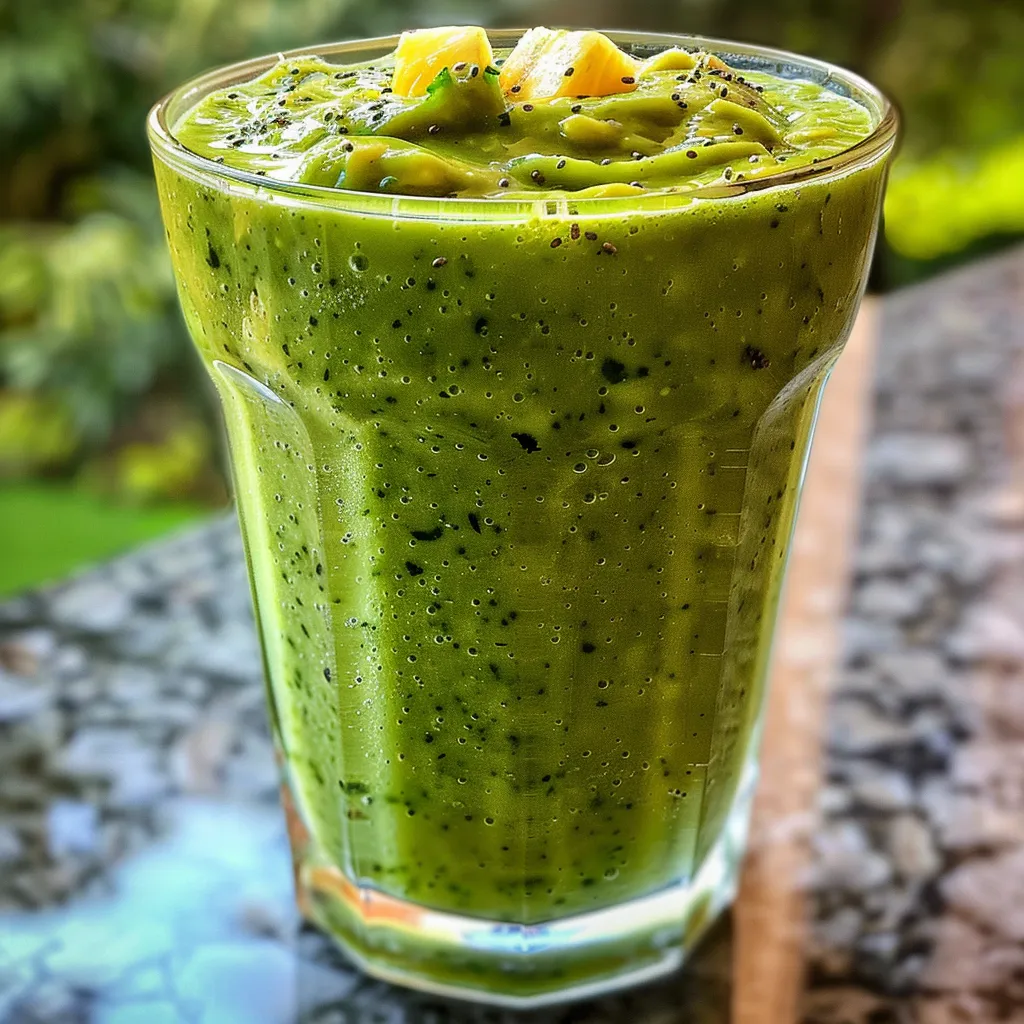
Refreshing avocado smoothie in a glass, emphasizing its smooth texture and creamy appearance.

Ready to make your avocado smoothie? Follow these easy steps:

  1. First, peel the avocado and remove the pit.
  2. Combine all ingredients in a blender.
  3. Blend until the mixture is completely smooth.
  4. For an extra thick, ice-cream-like shake, blend in a few coconut milk ice cubes. To make these, simply freeze canned coconut milk in an ice cube tray.
  5. Avoid using regular ice cubes as they will dilute the smoothie’s flavor.
  6. Serve the shake cold. Any leftovers can be covered and stored in the refrigerator for up to three days. This recipe yields approximately 2 cups of smoothie.

Pro Tips for the Perfect Avocado Smoothie

To elevate your avocado smoothie game, consider these expert insights:

  • Chill Your Ingredients: Use cold ingredients to enhance the refreshing quality of the smoothie.
  • Choose Ripe Avocados: Ensure the avocado is ripe for the best creamy texture and flavor.
  • Experiment with Spices: Try adding a pinch of cinnamon or nutmeg for an exciting flavor twist.
  • Use Frozen Ingredients: Incorporating frozen fruits can create a thicker, more satisfying texture.
  • Balance Your Flavor: If the smoothie tastes too sweet, add a squeeze of lemon juice to brighten it up.
  • Blend Thoroughly: Ensure all ingredients are well-blended for a smooth finish without any chunks.
  • Adjust Consistency: If the smoothie is too thick, add a splash more milk to achieve your desired consistency.
  • Store Leftovers Properly: Keep in an airtight container in the fridge to maintain freshness.

Avoid Common Mistakes

Even the best recipes can hit a snag. Here are some common pitfalls to avoid:

  • Using Unripe Avocados: This can result in a bitter taste and grainy texture. Choose avocados that yield slightly when gently squeezed.
  • Overloading with Sweeteners: Too much sweetener can overpower the natural flavors; start with less and adjust to taste.
  • Skipping the Salt: A tiny bit of salt helps to enhance the flavors. Don’t omit it!
  • Not Blending Enough: Aim for a smooth consistency; blend longer if needed.
  • Using Regular Ice Cubes: They dilute the flavor; use frozen coconut milk cubes instead.

Delicious Variations of the Avocado Smoothie

Mix things up with these exciting variations:

  • Chocolate Avocado Smoothie: Add 2 tablespoons of cocoa powder for a rich, chocolatey twist.
  • Tropical Mango Avocado Smoothie: Blend in 1 ripe mango for a fruity, tropical flavor.
  • Green Goddess Smoothie: Incorporate a handful of spinach or kale for an extra nutrient boost.
  • Berry Avocado Smoothie: Toss in 1/2 cup of mixed berries for a burst of antioxidants and sweetness.

Storage and Make-Ahead Instructions

Want to prep ahead? Here’s how:

  • Refrigeration: Store in an airtight container in the fridge for up to 3 days. Stir well before consuming.
  • Freezing: Freeze in ice cube trays for easy portioning; blend with fresh milk when ready to enjoy.

Nutritional Insights and Dietary Adaptations

This avocado smoothie is not just delicious; it’s also packed with health benefits:

  • Healthy Fats: Avocado provides monounsaturated fats that are beneficial for heart health.
  • Protein Power: Add protein powder for a satisfying post-workout snack.
  • Low-Carb Option: Use unsweetened almond milk and stevia to create a low-carb version.
  • Dairy-Free Alternative: Substitute dairy milk with coconut or almond milk for a vegan-friendly option.

Essential Equipment for Making Smoothies

To create your perfect avocado smoothie, you’ll need:

  • High-Speed Blender: A powerful blender ensures a smooth and creamy consistency.
  • Measuring Cups and Spoons: For accurate ingredient measurements.
  • Ice Cube Tray: To freeze coconut milk for a thicker shake.

Serving Suggestions

This avocado smoothie is versatile; here are some ways to serve it:

  • Breakfast Boost: Enjoy it alongside whole-grain toast topped with avocado for a filling breakfast.
  • Post-Workout Refuel: Pair with a handful of nuts or a protein bar for a balanced recovery meal.
  • Refreshing Snack: Serve in a large glass with a colorful straw for an afternoon pick-me-up.

Frequently Asked Questions

Here are some common questions about avocado smoothies:

  • Can I use frozen avocado?: Yes, frozen avocado works well and can provide a creamier texture.
  • Is this smoothie vegan?: Yes, simply use a plant-based milk and avoid dairy protein powders.
  • How do I make it sweeter?: Adjust sweetness with honey, maple syrup, or your preferred sweetener.
  • Can I add greens?: Absolutely! Spinach or kale can be blended in for added nutrients.
  • What if I don’t have coconut milk ice cubes?: You can use regular ice cubes; just remember they will dilute the flavor.
  • How long will it last?: Store in the fridge for up to 3 days, but it’s best enjoyed fresh.
  • Can I add protein powder?: Yes, it’s a great way to make your smoothie more filling and nutritious.
  • What should I serve it with?: It pairs well with whole-grain snacks, fruit, or yogurt parfaits.

In conclusion, this avocado smoothie is not just a drink; it’s a journey into the heart of nutritious flavors. Whether you’re enjoying it for breakfast, as a snack, or a refreshing dessert, each sip will transport you to sunny destinations filled with vibrant tastes. So grab your blender, and let’s sip sunshine together!

Avocado Smoothie Recipe

Prep Time 5 minutes
Total Time 5 minutes
Servings 2 cups
Calories 250
A creamy and nutritious avocado smoothie perfect for a quick breakfast or snack. Customize with your favorite sweetener and optional protein boost.

Ingredients

Sweetener of choice

  • 1.5 cups cold milk of choice
  • 0.5 large avocado avocado (half of a large avocado)
  • 1 tsp pure vanilla extract (scant 1 tsp)
  • 0.125 tsp salt (1/8 tsp)
  • 1 scoop protein powder (optional)

Instructions 

  • Peel the avocado and remove the pit.
  • Combine all ingredients in a blender.
  • Blend until smooth, adding coconut milk ice cubes for extra thickness if desired.
  • Serve immediately or store in the refrigerator for up to three days.

Notes

For a creamier texture, freeze coconut milk in ice cubes before blending.
Calories: 250kcal
Cost: $8
Course: Breakfast, Snack
Cuisine: fusion
Keyword: Avocado

Embark on a Culinary Journey with Mini Chicken Wraps

Every bite of these mini chicken wraps transports you to a world bursting with flavors and stories. As a culinary explorer, I believe that food is more than just sustenance; it’s an experience that connects us to diverse cultures and traditions. This recipe embodies that philosophy, combining convenience with the joy of discovery. Whether you’re hosting a birthday party or simply craving a quick meal, these wraps are the perfect option for adventurous taste buds.

Why You’ll Love This Recipe

Mini chicken wraps are not just a delightful treat; they offer a multitude of benefits that make them a must-try!

  • Quick and Easy: With just a few ingredients and simple steps, you can whip up these wraps in no time—perfect for busy weeknights or last-minute gatherings.
  • Versatile: This recipe serves as a blank canvas! Feel free to customize with your favorite ingredients or sauces, making them a unique experience every time.
  • Kid-Friendly: Mini wraps are a hit with children and adults alike. You can involve your kids in the preparation, making it a fun family activity.
  • Perfect for Parties: These bite-sized delights are ideal for catering wraps at birthdays or other celebrations, allowing guests to enjoy a variety of flavors without the mess.
  • Healthy Option: With the right ingredients, you can create a nutritious snack or meal that doesn’t compromise on taste.

Ingredient Breakdown

Let’s dive into the essential ingredients that make up these delicious wraps:

  • 12 frozen chicken tenders: The star of the show! You can substitute with grilled chicken or even plant-based tenders for a vegetarian option.
  • 12 mini flour tortillas: These street-taco-sized tortillas provide the perfect wrap. Consider using whole wheat or corn tortillas for a healthier twist.
  • 12 small pieces of lettuce: Crisp lettuce adds freshness. You can also use spinach or kale for an extra nutrient boost.
  • 3 slices cheese (quartered): Cheese adds creaminess. Try pepper jack for a spicy kick or omit it for a dairy-free option.
  • 3 tablespoons mustard (optional): This adds tang. Dijon or honey mustard works well, or you can skip it if you prefer.
  • 3 tablespoons mayonnaise: For a creamy texture; substitute with avocado or Greek yogurt for a healthier alternative.

Step-by-Step Instructions

A delicious assortment of mini chicken wraps, featuring visible chicken tenders and fresh vegetables.

Now that we have our ingredients, let’s get cooking! Follow these simple steps:

  1. Cook the frozen chicken tenders according to the package instructions. Let cool slightly.
  2. Heat the tortillas for 10-15 seconds on a hot pan or in the microwave to make them pliable.
  3. On the top half of the tortilla, spread mustard. Place the lettuce leaf on top, then the chicken, and finally the cheese. Spread the mayo on the bottom half of the tortilla.
  4. Fold up the mayo-covered edge over the cheese. Then fold the ends in. Wrap each in deli paper or food-safe newspaper.

Pro Tips for Perfect Mini Chicken Wraps

To make your wraps even more amazing, keep these expert tips in mind:

  • Prep Ahead: Make the chicken tenders in advance and store them in an airtight container to save time.
  • Experiment with Fillings: Don’t hesitate to try different proteins like shredded rotisserie chicken or even black beans for a vegetarian alternative.
  • Warm Tortillas: Warming your tortillas keeps them soft and pliable, reducing the risk of tearing when you wrap them.
  • Flavor Boost: Enhance the flavor by adding herbs or spices to your chicken before cooking.
  • Presentation Counts: Serve your wraps with a side of dipping sauce like ranch or barbecue for an extra touch!
  • Storage: These wraps can be stored wrapped in the fridge for up to 3 days, making them a great make-ahead option.
  • Personal Touch: Add a squeeze of lime or squeeze of sriracha for a zesty kick.
  • Size Matters: Ensure your tortillas are small enough to hold the filling without overwhelming each bite.

Common Mistakes and Troubleshooting

Avoid these pitfalls to ensure your mini chicken wraps are a hit:

  • Overstuffing: Less is more! Overfilling can lead to messy wraps. Stick to a balanced filling ratio.
  • Skipping the Heat: Cold tortillas are prone to tearing. Always warm them up before wrapping.
  • Choosing the Wrong Chicken: Opt for chicken tenders that are crispy and flavorful. Homemade fried chicken works too!
  • Neglecting to Let Chicken Cool: Wrapping hot chicken can cause the tortillas to become soggy. Let them cool first.

Variations to Explore

These mini chicken wraps can easily be adapted to suit your taste and dietary preferences:

  • BBQ Chicken Wraps: Swap the mustard for your favorite barbecue sauce and add some coleslaw for crunch.
  • Spicy Buffalo Wraps: Use buffalo sauce instead of mustard, paired with blue cheese dressing for a kick.
  • Greek Chicken Wraps: Add cucumber, feta, and tzatziki sauce for a Mediterranean twist.
  • Veggie-Loaded Wraps: Substitute chicken with a mix of grilled vegetables for a delicious vegan option.

Storage and Make-Ahead Instructions

To keep your mini chicken wraps fresh:

  • Refrigeration: Store wrapped in plastic or an airtight container for up to 3 days.
  • Freezing: These wraps can be frozen for up to a month. Thaw in the fridge overnight before serving.
  • Make-Ahead: Prepare all components in advance and assemble just before serving for optimal freshness.

Frequently Asked Questions

Here are some common queries about mini chicken wraps:

  • Can I use leftover chicken? Absolutely! Leftover rotisserie chicken works perfectly.
  • What’s a good dipping sauce? Ranch, honey mustard, or homemade sriracha mayo are great options!
  • Can I make these gluten-free? Yes! Use gluten-free tortillas and ensure your chicken is gluten-free.
  • How do I keep them from getting soggy? Ensure your ingredients are dry and wrap them tightly.
  • What other fillings can I use? Get creative! Try avocado, bell peppers, or even fruit for sweetness.
  • How long do they last in the fridge? They can last up to 3 days when stored properly.
  • Are they suitable for kids? Yes! Mini wraps are perfect for little hands and picky eaters!
  • Can I heat them up later? Yes! Microwave for a few seconds to warm them up without losing texture.

Nutritional Tips and Dietary Adaptations

Make your mini chicken wraps healthier by considering the following:

  • Whole Grain Tortillas: Opt for whole wheat or spinach tortillas for added fiber.
  • Lean Proteins: Choose grilled chicken or baked alternatives to reduce fat content.
  • Load Up on Veggies: Incorporate more vegetables to boost nutrients and fiber.
  • Low-Fat Dressings: Use low-fat mayo or Greek yogurt instead of regular mayo to cut calories.

Essential Equipment for Making Mini Chicken Wraps

To create the perfect mini chicken wraps, here’s what you’ll need:

  • Frying Pan: Ideal for heating tortillas and cooking chicken.
  • Sharp Knife: For slicing ingredients and making clean cuts.
  • Cutting Board: A safe surface to prepare your ingredients.
  • Food Storage Containers: To keep your wraps fresh if preparing in advance.

Serving Suggestions

When it comes to serving your mini chicken wraps, consider these delightful ideas:

  • Platter Style: Arrange them on a large platter for a beautiful presentation, garnished with fresh herbs.
  • Pair with Sides: Serve alongside a fresh salad or crispy veggie sticks for a balanced meal.
  • Dip it Up: Offer a variety of dipping sauces for guests to explore different flavor profiles.

Conclusion

These mini chicken wraps are more than just a meal; they are a culinary passport that invites you to explore flavors from around the world. With their versatility, ease of preparation, and the joy they bring, they are bound to become a staple in your kitchen. So gather your ingredients, unleash your creativity, and let each wrap tell a story of adventure and connection. Happy cooking!

Mini Chicken Wraps

Prep Time 10 minutes
Cook Time 15 minutes
Total Time 25 minutes
Servings 12 pieces
Calories 350
These delicious mini chicken wraps are quick to make and perfect for a snack or light meal. Filled with tender chicken, crisp lettuce, and cheese, they are sure to please.

Ingredients

Protein

  • 12 pieces frozen chicken tenders (Cook according to package instructions)

Wraps

  • 12 pieces mini flour tortillas (Street-taco size)

Vegetables

  • 12 small pieces lettuce

Cheese

  • 3 slices cheese (Quartered)

Condiments

  • 3 tablespoons mustard (Optional)
  • 3 tablespoons mayonnaise

Instructions 

  • Cook chicken tenders as per package instructions and let cool slightly.
  • Warm tortillas for 10-15 seconds to make them pliable.
  • Spread mustard on the top half of each tortilla. Place lettuce, chicken, and cheese on top. Spread mayo on the bottom half.
  • Fold the mayo side over the cheese, then fold in the ends. Wrap in deli paper or food-safe paper.

Notes

Feel free to add your favorite toppings or sauces for extra flavor.
Calories: 350kcal
Cost: $12
Course: Appetizer, Snack
Cuisine: American
Keyword: Chicken, Wraps

Welcome, fellow food enthusiasts! If you’re on the hunt for a delightful recipe that brings together the vibrancy of fresh ingredients and the comfort of home-cooked meals, then you’re in for a treat. This Chicken and Vegetables Skillet is not just a dish; it’s a passport to a world of flavors, all packed into one convenient pan. Perfect for busy weeknights or when you want to impress your friends with minimal effort, this dish captures the essence of culinary exploration. Let’s dive into the heart of this recipe, where every bite tells a story and every ingredient plays a vital role.

Why You’ll Love This Recipe

  • Quick and Easy: This recipe takes less than 30 minutes from start to finish, making it perfect for busy evenings.
  • One-Pan Wonder: With everything cooked in a single skillet, cleanup is a breeze, letting you spend more time enjoying your meal.
  • Nutritious and Wholesome: Packed with lean protein and fresh vegetables, this dish is a balanced option for a hearty dinner.
  • Versatile Ingredients: You can easily swap in your favorite vegetables or proteins, making it adaptable to what you have on hand.
  • Flavor Explosion: The combination of spices and fresh ingredients creates a dish that’s bursting with flavor, sure to impress even the pickiest eaters.

Ingredients That Bring This Chicken and Vegetables Skillet to Life

Let’s break down the essential ingredients that make this dish not just good, but truly great:

  • Olive Oil: Two tablespoons in total—one for the chicken and one for the veggies—ensure everything cooks perfectly while adding a rich flavor.
  • Boneless, Skinless Chicken Breasts: A pound of chicken, cut into strips, serves as the main protein, providing a satisfying base for the dish.
  • Spices: One teaspoon of paprika and half a teaspoon of garlic powder lend warmth and depth to the chicken.
  • Salt and Pepper: Essential for seasoning, adjust to your taste to enhance the overall flavor.
  • Yellow Onion: One small onion, sliced, adds sweetness and aroma.
  • Zucchini: One medium zucchini, chopped, brings a lovely texture and freshness.
  • Broccoli Florets: Two cups of broccoli not only add color but are also packed with nutrients.
  • Grape or Cherry Tomatoes: One cup, halved, for a burst of juiciness and acidity.
  • Garlic: Three cloves, finely minced, infuse the dish with a beloved aromatic flavor.
  • Fresh Parsley: For garnish, this adds a pop of color and a hint of freshness.

How to Make This Chicken and Vegetables Skillet Sing

Ready to whip up this culinary delight? Follow these simple steps to create your Chicken and Vegetables Skillet:

  1. Warm 1 tablespoon of olive oil in a large skillet set over medium-high heat.
  2. In a bowl, combine the chicken strips with paprika, garlic powder, salt, and pepper, tossing to coat evenly.
  3. Add the seasoned chicken to the skillet and cook for about 5 to 7 minutes, turning as needed until browned and fully cooked through.
  4. Remove the chicken from the pan and set it aside on a plate.
  5. In the same skillet, pour in the remaining tablespoon of olive oil.
  6. Stir in the sliced onion and sauté for 2 minutes, until slightly softened.
  7. Add zucchini, broccoli, and tomatoes. Cook, stirring frequently, for 6 to 8 minutes, until vegetables are crisp-tender and lightly browned in spots.
  8. Mix in the minced garlic and cook for 30 seconds, just until fragrant.
  9. Return the cooked chicken to the skillet and toss everything together, allowing it to heat through for 1 to 2 minutes.
  10. Sprinkle with chopped parsley before serving, and enjoy your meal!

Pro Tips for Perfecting Your Skillet Dish

To elevate your cooking game, here are some expert insights:

  • Uniform Pieces: Cut your chicken and vegetables into uniform sizes to ensure even cooking throughout.
  • Add a Kick: For those who enjoy a bit of heat, consider incorporating red pepper flakes or a dash of your favorite hot sauce.
  • Experiment with Veggies: Don’t be afraid to swap in other veggies like bell peppers, spinach, or even asparagus for variety.
  • Meal Prep Friendly: Cook a larger batch and store leftovers for quick lunches or dinners throughout the week.
  • Garnish Wisely: A sprinkle of feta cheese or a squeeze of lemon juice can add a lovely finishing touch.
  • Perfect Timing: Keep an eye on your vegetables; you want them tender but still crisp for the best texture.
  • Flavor Development: Allow the chicken to rest before slicing to retain its juices, ensuring every bite is succulent.
  • Use High Heat: A hot skillet is key to achieving that delicious golden crust on your chicken.

Common Mistakes and Troubleshooting

We all make mistakes in the kitchen; here’s how to avoid common pitfalls:

  • Overcrowding the Pan: Avoid adding too much chicken or vegetables at once, which can lead to steaming instead of sautéing.
  • Insufficient Seasoning: Don’t skimp on the spices; flavor is crucial for a satisfying dish.
  • Not Letting Ingredients Rest: Allowing cooked ingredients to rest helps flavors meld together.
  • Skipping the Garnish: A garnish can elevate your dish visually and add a fresh flavor contrast.

Variations to Explore

Feel like mixing things up? Here are some variations you can try:

  • Pesto Chicken and Veggies: Stir in a scoop of pesto for a fresh, herby twist.
  • Asian-Inspired Skillet: Use soy sauce and sesame oil, adding bok choy and snap peas for a different flavor profile.
  • Curry Chicken and Vegetables: Incorporate curry powder and coconut milk for a creamy, exotic dish.
  • Italian Style: Toss in Italian herbs and serve with a side of pasta for a comforting meal.

Storage and Make-Ahead Instructions

Planning ahead? Here’s how to store and prepare your skillet meal:

  • Refrigeration: Store leftovers in an airtight container in the refrigerator for up to 3 days.
  • Freezing: This dish can be frozen for up to 2 months. Thaw in the refrigerator overnight before reheating.
  • Reheating: Warm in the microwave or on the stove until heated through, adding a splash of broth if it feels dry.

Comprehensive FAQ

Got questions? We’ve got answers! Here are some common queries:

  • Can I use frozen chicken? Yes, just ensure it’s fully thawed before cooking for even results.
  • What if I don’t have fresh vegetables? Frozen veggies work well too; just adjust cooking times accordingly.
  • Can I make this dish dairy-free? Absolutely, this recipe is naturally dairy-free as written.
  • How can I make it spicier? Add cayenne pepper or fresh chilies to the chicken seasoning.
  • Is this recipe gluten-free? Yes, as long as you ensure any added sauces are gluten-free.
  • How do I know when the chicken is cooked? Chicken should reach an internal temperature of 165°F (75°C).
  • Can I add rice or pasta to the skillet? Yes, add pre-cooked rice or pasta in the final step to warm through.
  • What can I serve with this dish? It pairs beautifully with crusty bread, rice, or a fresh salad.

Nutrition Tips and Dietary Adaptations

This Chicken and Vegetables Skillet is highly nutritious! Here are some tips for dietary adaptations:

  • Low-Carb Option: Skip the starchy sides and serve with a simple green salad instead.
  • High-Protein Version: Add chickpeas or quinoa to boost the protein content further.
  • Plant-Based Twist: Substitute chicken with tofu or tempeh for a vegan option.

Equipment Recommendations

To make your cooking experience seamless, here’s what you’ll need:

  • Large Skillet: A good-quality, non-stick skillet is essential for even cooking.
  • Sharp Knife: For easy slicing of chicken and vegetables.
  • Cutting Board: A sturdy board helps with the prep work.
  • Measuring Spoons: Accurate measurements ensure the right balance of flavors.

Serving Suggestions: Making Your Meal Complete

To round out your meal, consider these serving suggestions:

  • With a Side Salad: A mixed greens salad with a light vinaigrette complements the dish nicely.
  • With Crusty Bread: Perfect for soaking up any delicious juices left on your plate.
  • With Quinoa: A protein-packed side that adds a nutty flavor and complements the dish.

In conclusion, this Chicken and Vegetables Skillet isn’t just a meal; it’s an experience, a celebration of simple, wholesome cooking that brings people together. So gather your loved ones around the table, share stories, and enjoy the flavors of your culinary adventure. Happy cooking, and don’t forget to savor every bite!

Chicken and Vegetables Skillet

Prep Time 10 minutes
Cook Time 15 minutes
Total Time 25 minutes
Servings 4 servings
Calories 350
A quick and healthy one-pan meal combining tender chicken with colorful vegetables, perfect for a weeknight dinner.

Ingredients

Main

  • 1 tablespoon olive oil
  • 1 pound boneless, skinless chicken breasts, cut into strips
  • 1 teaspoon paprika
  • 0.5 teaspoon garlic powder
  • to taste Salt and black pepper Salt and freshly ground black pepper
  • 1 tablespoon olive oil (for vegetables)
  • 1 small yellow onion, sliced
  • 1 medium zucchini, chopped
  • 2 cups broccoli florets
  • 1 cup grape or cherry tomatoes, halved
  • 3 cloves garlic, finely minced
  • 1 tablespoon chopped fresh parsley, for garnish

Instructions 

  • Heat 1 tablespoon of olive oil in a skillet over medium-high heat.
  • Season chicken with paprika, garlic powder, salt, and pepper; cook until browned and cooked through, about 5-7 minutes.
  • Remove chicken; in the same skillet, sauté onion for 2 minutes, then add zucchini, broccoli, and tomatoes; cook for 6-8 minutes.
  • Add garlic and cook for 30 seconds, then return chicken to skillet and heat through for 1-2 minutes. Garnish with parsley before serving.

Notes

Feel free to customize with your favorite vegetables or herbs.
Calories: 350kcal
Cost: $15
Course: Main Course
Cuisine: American
Keyword: Chicken, Vegetables

Embark on a Flavorful Journey: Discover the Magic of Garlic Herb Cheese Log

Welcome, culinary adventurers! If you’re looking to impress friends and family with a delightful appetizer that combines rich creaminess with the freshness of herbs, you’re in the right place. This Garlic Herb Cheese Log is not just a treat for your taste buds but also a wonderful way to create connections and share stories over food. In this article, we will explore the ins and outs of crafting this delightful dish, including tips, variations, and much more!

Why You’ll Love This Recipe

This garlic herb cheese log is more than just another appetizer; it’s a celebration of flavors and a perfect addition to any gathering. Here’s why you’ll adore this recipe:

  • Easy Preparation: With simple steps and minimal ingredients, making this cheese log is a breeze, even for beginner cooks.
  • Make-Ahead Friendly: You can prepare this dish up to three days in advance, making it a stress-free option for parties.
  • Versatile Serving Options: Whether served with crackers, vegetables, or as part of a cheese board, it fits seamlessly into any menu.
  • Crowd-Pleasing Flavor: The combination of creamy cheeses, fresh herbs, and a hint of garlic creates a taste that appeals to everyone.
  • Elegant Presentation: The rolled nut coating adds a gourmet touch that will impress your guests and elevate any gathering.

Ingredient Breakdown

Let’s dive into the ingredients that make this dish shine:

  • 8 oz cream cheese, softened: The base of our cheese log, providing a rich and creamy texture.
  • 4 oz goat cheese: Adds a tangy flavor; feel free to substitute with more cream cheese if preferred.
  • 1 garlic clove, finely minced: The aromatic kick that elevates the overall flavor.
  • 2 tbsp fresh parsley, chopped: Brightens the dish with fresh notes.
  • 1 tbsp fresh chives, chopped: Introduces a mild onion flavor.
  • 1/2 tsp dried oregano: Brings a touch of earthiness.
  • 1/4 tsp black pepper: Adds subtle heat.
  • 1/4 tsp salt: Enhances all the flavors.
  • 1 cup mixed chopped nuts: Choose from pecans, walnuts, or almonds for a crunchy coating.
  • 1 tbsp finely chopped herbs: For garnish and additional flavor in the nut coating.

Step-by-Step Directions

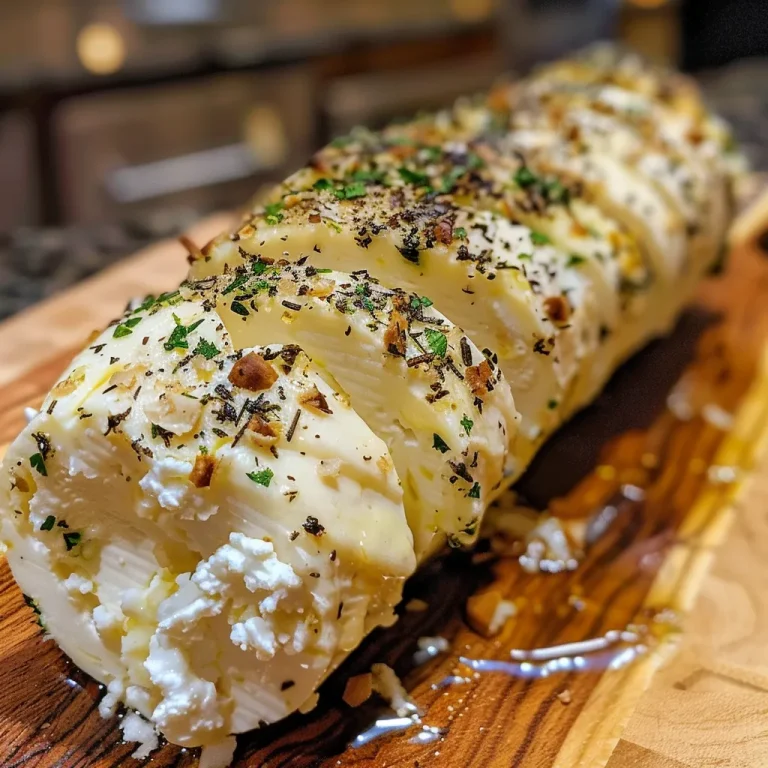
Close-up of a cheese log featuring garlic and herbs, with nut coating visible.

Ready to get cooking? Follow these simple steps to create your garlic herb cheese log:

  1. In a medium mixing bowl, combine the cream cheese and goat cheese. Mix until smooth and fluffy.
  2. Stir in the garlic, parsley, chives, oregano, salt, and pepper until well incorporated.
  3. Place a sheet of plastic wrap on the counter. Spoon the cheese mixture into the center and shape it into a log. Wrap tightly.
  4. Refrigerate for at least 1 hour or until firm.
  5. On a plate, mix the chopped nuts with 1 tbsp of fresh herbs.
  6. Unwrap the chilled cheese log and roll it in the nut mixture, pressing gently to coat evenly.
  7. Serve with crackers, toasted baguette slices, or vegetable sticks.

Pro Tips for Perfecting Your Cheese Log

To make the most of your garlic herb cheese log, consider these expert tips:

  • Chill Time: Ensure the cheese log is chilled for at least an hour to help it retain its shape when serving.
  • Nut Coating: Feel free to get creative with your nut mixture; try adding seeds or spices for extra flavor.
  • Herb Substitutions: Experiment with different fresh herbs like basil or dill to customize the taste to your liking.
  • Texture Matters: For a smoother texture, consider using a food processor to blend the cheeses.
  • Freezing Tip: If you plan to make this in advance, you can freeze the cheese log for up to a month. Just thaw in the fridge before serving.
  • Flavor Infusion: Letting the log sit in the refrigerator overnight allows the flavors to meld beautifully.
  • Serving Style: Garnish the platter with additional fresh herbs or edible flowers for a stunning presentation.
  • Pairing Suggestions: This cheese log pairs wonderfully with a crisp white wine or a refreshing sparkling water.

Common Mistakes and Troubleshooting

Even the best chefs can run into issues. Here are some common mistakes and how to avoid them:

  • Too Soft: If your cheese log is too soft, ensure it’s adequately chilled before rolling in nuts.
  • Nut Coating Falling Off: For better adhesion, press the nuts firmly into the cheese log.
  • Flavor Lacking: Always taste your cheese mixture before chilling. Adjust the seasoning as needed.
  • Log Shape Issues: If the log isn’t holding its shape, try shaping it on a piece of wax paper or using a mold.

Variations to Try

Here are some delicious variations to inspire your culinary creativity:

  • Spicy Cheese Log: Add red pepper flakes or diced jalapeños for a kick.
  • Sweet & Savory: Mix in dried cranberries or apricots alongside the nuts for a sweet touch.
  • Herbed Feta: Substitute goat cheese with feta for a tangy twist.
  • Italian Style: Incorporate sun-dried tomatoes and Italian herbs for a Mediterranean flair.

Storage & Make-Ahead Instructions

Planning ahead? Here’s how to store your cheese log:

  • Wrap the cheese log tightly in plastic wrap and store it in the refrigerator for up to 3 days.
  • For longer storage, freeze the cheese log in an airtight container for up to 1 month. Thaw in the fridge before serving.
  • Always ensure to keep the cheese log covered to prevent it from drying out in the fridge.

Frequently Asked Questions

Got questions? Here are some common inquiries about the garlic herb cheese log:

  • Can I make this cheese log ahead of time? Yes, you can prepare it up to 3 days in advance.
  • What can I substitute for goat cheese? You can use more cream cheese or even feta for a different flavor profile.
  • How do I keep the log from sticking to the wrap? Make sure to wrap it tightly and refrigerate it well before unwrapping.
  • Can I make it vegan? Yes, use vegan cream cheese and nuts without dairy.
  • What’s the best way to serve it? Serve it with crackers, toasted bread, or fresh vegetables for dipping.
  • How do I know when it’s done? The cheese log should be firm to the touch and hold its shape when sliced.
  • What if I don’t have fresh herbs? Dried herbs can be used, but fresh herbs provide the best flavor.
  • Can I freeze the cheese log? Yes, it can be frozen for up to a month. Just ensure it’s well wrapped.

Nutritional Tips and Dietary Adaptations

This garlic herb cheese log can easily fit into various dietary preferences. Here are some tips:

  • Low-Carb Option: Serve with vegetable sticks instead of crackers for a keto-friendly snack.
  • Gluten-Free: Ensure the crackers or bread you serve are gluten-free.
  • Calorie-Conscious: Use low-fat cream cheese to reduce calories without sacrificing taste.
  • Nut-Free: Omit the nuts or use seeds for those with nut allergies.

Essential Equipment Recommendations

To craft your garlic herb cheese log, here’s what you’ll need:

  • Mixing Bowl: For combining the cheese and herbs.
  • Plastic Wrap: Essential for shaping and chilling your cheese log.
  • Plate: For rolling the cheese log in the nut mixture.
  • Knife: For slicing your cheese log into perfect rounds.

Serving Suggestions

As you prepare to serve your creation, here are some ideas to make it even more delightful:

  • Garnish: Add fresh herbs or edible flowers to elevate the visual appeal.
  • Pairings: Consider serving with a selection of wines or craft beers for an adult gathering.
  • Cheese Board: Integrate the cheese log into a larger cheese board with a variety of cheeses, fruits, and charcuterie.

In conclusion, the Garlic Herb Cheese Log is not just a recipe; it’s an invitation to share and connect over food. Whether you’re hosting a gathering or enjoying a cozy night in, this dish brings people together with every creamy, herb-infused bite. So roll up your sleeves, gather your ingredients, and embark on this flavorful journey. Happy cooking, friends!

Garlic Herb Cheese Log

Prep Time 15 minutes
Total Time 15 minutes
Servings 8 pieces
Calories 250
A delicious and elegant cheese log coated with chopped nuts and herbs, perfect for entertaining.

Ingredients

Dairy

  • 8 oz cream cheese, softened
  • 4 oz goat cheese (or substitute with more cream cheese)
  • 1 clove garlic, finely minced
  • 2 tbsp fresh parsley, chopped
  • 1 tbsp fresh chives, chopped
  • 1/2 tsp dried oregano
  • 1/4 tsp black pepper
  • 1/4 tsp salt
  • 1 cup mixed chopped nuts (pecans, walnuts, or almonds)
  • 1 tbsp finely chopped herbs (for garnish in coating)

Instructions 

  • Mix cream cheese and goat cheese until smooth.
  • Stir in garlic, herbs, oregano, salt, and pepper.
  • Shape the mixture into a log using plastic wrap and refrigerate for 1 hour.
  • Mix chopped nuts with chopped herbs on a plate.
  • Unwrap the cheese log and roll in the nut mixture to coat.
  • Serve with crackers, baguette slices, or vegetables.

Notes

For best flavor, let the cheese sit at room temperature for 15 minutes before serving.
Calories: 250kcal
Cost: $15
Course: Appetizer
Keyword: cheese, Herb, Nuts

Embark on a Culinary Adventure with Garlic Lamb Chops

If you’re looking to tantalize your taste buds and elevate your dining experience, look no further than this exquisite recipe for Garlic Lamb Chops with Rosemary. This dish not only embodies the essence of rustic flavors but also transports you to the lush highlands where lamb grazing is as natural as breathing. With a medley of aromatic herbs and a hint of garlic, these lamb chops are the perfect centerpiece for any meal, especially on special occasions.

Why You’ll Love This Recipe

Here are just a few reasons why this recipe will become a staple in your kitchen:

  • Flavor Explosion: The combination of garlic and fresh rosemary creates a savory delight that enhances the natural flavors of the lamb.
  • Easy to Prepare: With simple ingredients and straightforward steps, you can whip this up in no time—even on busy weeknights.
  • Versatile Pairing: These lamb chops go beautifully with a variety of sides, from roasted vegetables to creamy mashed potatoes, making them perfect for any occasion.
  • Health Benefits: Lamb is a great source of protein, vitamins, and minerals, plus the herbs add their own health properties.
  • Impressive Presentation: Serve these chops for an elegant dinner party, and your guests will be raving about them long after the meal is over.

Ingredients Breakdown

To create these succulent Garlic Lamb Chops, you’ll need the following ingredients:

  • ½ cup olive oil: A rich base that carries the flavors.
  • 2 teaspoons minced garlic: Adds depth and aroma.
  • 1 shallot (minced): For a hint of sweetness.
  • 1 ½ tablespoons apple cider vinegar: Balances the richness of the lamb.
  • 2 teaspoons honey mustard: A touch of sweetness and tanginess.
  • 1 tablespoon chopped fresh rosemary: Essential for flavor.
  • 1 tablespoon chopped fresh thyme leaves: Complements the lamb beautifully.
  • 1 tablespoon lemon zest: Brightens up the dish.
  • ½ teaspoon sea salt: Enhances all the flavors.
  • ¼ teaspoon coarse black pepper: Adds a bit of spice.
  • 2 ½ pounds lamb chops: The star of the show!
  • 1 tablespoon vegetable oil: For cooking.

Substitutions

A side view of flavorful garlic lamb chops, highlighted by aromatic herbs.

Don’t have all the ingredients? Here are some substitutions:

  • Olive oil: Can be replaced with avocado oil for a different flavor.
  • Shallots: Yellow or white onion works in a pinch.
  • Apple cider vinegar: Balsamic vinegar can also work, but it will impart a sweeter flavor.
  • Fresh herbs: Dried herbs are a great alternative—use 1/3 of the amount.

Cooking Techniques: Skillet vs. Grill

When it comes to cooking lamb chops, you have a couple of options:

  • Skillet Cooking: Use a cast-iron skillet to achieve a nice sear. Heat the skillet over medium-high heat and cook the chops for about 3-4 minutes on each side.
  • Grilling: Preheat your grill to medium-high. Cook the lamb chops for approximately the same time, ensuring you get those perfect grill marks.

Pro Tips for Perfect Lamb Chops

To take your lamb chops to the next level, consider these expert insights:

  • Marinate Overnight: For deeper flavor and tender meat, marinate the lamb chops overnight.
  • Bring to Room Temperature: Let your lamb chops sit out for about 30 minutes before cooking to ensure even cooking.
  • Use a Meat Thermometer: Aim for an internal temperature of 145°F for medium-rare. Trust me, this is the sweet spot!
  • Resting Time: Allow the cooked lamb chops to rest for about 5 minutes before serving. This helps retain juices.
  • Fresh Herbs Matter: Always use fresh herbs for the best flavor.
  • Season Generously: Don’t skimp on salt and pepper; they’re essential for bringing out the flavors.
  • Try Different Cuts: Rib chops are popular, but try shoulder chops for a more budget-friendly option.
  • Experiment with Marinades: Dive into flavors like mint or orange zest for a twist on the traditional.

Common Mistakes and Troubleshooting

Even the best cooks can make mistakes. Here are some common pitfalls and how to avoid them:

  • Overcooking: Keep an eye on the internal temperature. Overcooked lamb can become tough and dry.
  • Skipping the Marinade: Don’t skip marinating! It’s key for flavor and tenderness.
  • Not Letting it Rest: Skipping the resting period can lead to dry meat.

Variations to Explore

Want to switch things up? Here are some variations you might enjoy:

  • Mint and Garlic: Add fresh mint to the marinade for a refreshing twist.
  • Spicy Harissa Lamb Chops: Incorporate harissa paste for some heat.
  • Asian-Inspired: Use soy sauce, ginger, and sesame oil in the marinade.
  • Herb-Crusted: Coat the lamb chops in a mixture of breadcrumbs and herbs before cooking for extra texture.

Storage and Make-Ahead Instructions

If you want to prepare ahead, here’s how:

  • Make-Ahead: Marinate the lamb chops up to 24 hours in advance.
  • Storage: Cooked lamb chops can be stored in an airtight container in the refrigerator for 3-4 days.
  • Freezing: You can freeze uncooked marinated lamb chops for up to 3 months. Thaw in the refrigerator before cooking.

Frequently Asked Questions

Here are some common questions about lamb chops:

  • What’s the best cut of lamb for this recipe? Rib chops are ideal for tenderness and flavor, but shoulder chops work too.
  • How long should I marinate lamb chops? A minimum of 2 hours is recommended, but overnight is best.
  • Can I cook lamb chops in the oven? Yes! Preheat the oven to 400°F and cook for about 20 minutes, flipping halfway through.
  • What sides go well with lamb chops? Pair with roasted vegetables, couscous, or a fresh salad for a balanced meal.
  • How do I know when lamb chops are done? Use a meat thermometer to check for 145°F for medium-rare.
  • Can I use dried herbs instead of fresh? Yes, but use about 1/3 of the amount as dried herbs are more potent.
  • What is the best way to reheat lamb chops? Gently reheat in a skillet over medium-low heat to prevent drying out.
  • Are lamb chops healthy? Lamb is a good source of protein and important nutrients such as iron and zinc.

Nutritional Tips and Dietary Adaptations

For those considering nutrition, here are some tips:

  • Lean Cuts: Opt for leaner cuts of lamb to reduce fat content.
  • Portion Control: Keep serving sizes to about 3-4 ounces for a balanced meal.
  • Pair with Veggies: Serve with plenty of vegetables to increase fiber intake.

Recommended Equipment

For this recipe, you’ll need:

  • Cast Iron Skillet: Perfect for searing and retaining heat.
  • Meat Thermometer: An essential tool for perfect doneness.
  • Mixing Bowl: For marinating and mixing ingredients.

Serving Suggestions

To truly impress, consider these serving ideas:

  • Garnish: Fresh sprigs of rosemary or thyme add a beautiful touch.
  • Accompaniments: Serve with mint jelly or a tangy yogurt sauce for added flavor.
  • Wine Pairing: A full-bodied red wine such as Cabernet Sauvignon pairs beautifully with lamb.

In conclusion, these Garlic Lamb Chops with Rosemary are not just a meal; they’re an experience waiting to unfold. Each bite tells a story of culinary adventure and the rich traditions of cooking. So roll up your sleeves, gather your ingredients, and let’s create something unforgettable together. Happy cooking!

Garlic Lamb Chops with Rosemary

Prep Time 20 minutes
Cook Time 10 minutes
Total Time 30 minutes
Servings 4 servings
Calories 450
Enjoy tender, flavorful lamb chops marinated with garlic, herbs, and a tangy vinegar mixture, perfect for a sophisticated dinner.

Ingredients

Marinade

  • 0.5 cup olive oil
  • 2 teaspoons minced garlic
  • 1 shallot shallot (minced)
  • 1.5 tablespoons apple cider vinegar
  • 2 teaspoons honey mustard
  • 1 tablespoon chopped fresh rosemary
  • 1 tablespoon chopped fresh thyme leaves
  • 1 tablespoon lemon zest
  • 0.5 teaspoon sea salt
  • 0.25 teaspoon coarse black pepper
  • 2.5 pounds lamb chops
  • 1 tablespoon vegetable oil

Instructions 

  • Whisk olive oil, garlic, shallot, vinegar, mustard, herbs, lemon zest, salt, and pepper. Set aside 1/4 cup for later.
  • Marinate lamb chops in remaining mixture for 2-6 hours, then drain.
  • Pat dry, season with salt and pepper, then cook in hot oil 3-4 minutes per side until desired doneness.
  • Rest for 5 minutes, then serve with reserved marinade.

Notes

Ensure lamb reaches an internal temperature of 145°F for safety and optimal flavor.
Calories: 450kcal
Cost: $20
Course: Main Course
Cuisine: International
Keyword: garlic, herbs, Lamb

Embark on a Flavorful Journey

Welcome, culinary adventurers! Today, we’re diving into a dish that captures the essence of comfort and excitement—Chicken Fried Rice. This dish isn’t just a meal; it’s a passport to flavors that transport you straight to a bustling Asian street market. With tender chicken, vibrant vegetables, and a rich blend of flavors, this recipe will turn your kitchen into a haven of culinary exploration. Let’s embark on this journey together!

Why You’ll Love This Recipe

This Chicken Fried Rice recipe is not just another meal—it’s a delightful experience that brings people together. Here are some reasons why you’ll adore it:

  • Quick and Easy: This recipe can be whipped up in under 30 minutes, making it perfect for busy weeknights.
  • Customizable: You can easily adjust the ingredients to suit your taste or dietary needs. Add more veggies, switch up the protein, or even make it vegetarian!
  • One-Pan Wonder: All the cooking happens in one pan, making cleanup a breeze. Less time scrubbing means more time savoring!
  • Restaurant-Quality Taste: Recreate that delicious restaurant-style chicken fried rice right in your home kitchen, impressing family and friends.
  • Healthy Ingredients: Packed with vegetables and lean protein, this dish is a wholesome choice for any meal.

Ingredient Breakdown

Let’s take a closer look at the ingredients that make this Chicken Fried Rice shine:

  • 1 ½ teaspoons sesame oil: Adds a nutty flavor that enhances the overall taste.
  • 4 teaspoons neutral oil (like avocado or canola; 1 tablespoon + 1 teaspoon, divided): Used for cooking the chicken and vegetables.
  • ¾ pound chicken breasts: Cut into very small pieces for quick cooking and even flavor distribution.
  • 5 tablespoons low-sodium soy sauce: Provides the necessary umami kick while keeping the sodium levels in check.
  • 4 tablespoons butter: Adds richness and depth of flavor.
  • 2 teaspoons fresh lemon juice: Brightens the dish and balances the savory elements.
  • Salt and pepper: To taste, enhancing the overall flavor profile.
  • ½ cup diced white onion: Adds sweetness and texture.
  • 1 cup frozen mixed vegetables (peas, carrots): Provides color, nutrition, and ease of preparation.
  • 2 large eggs: Adds protein and a creamy texture that ties everything together.
  • 4 cups cooked rice (cool to touch, see Notes): The star of the show; using leftover rice is best for achieving that perfect fried texture.
  • Sesame seeds (optional, for garnish): For a touch of crunch and presentation.

Pro Tips for Perfect Fried Rice

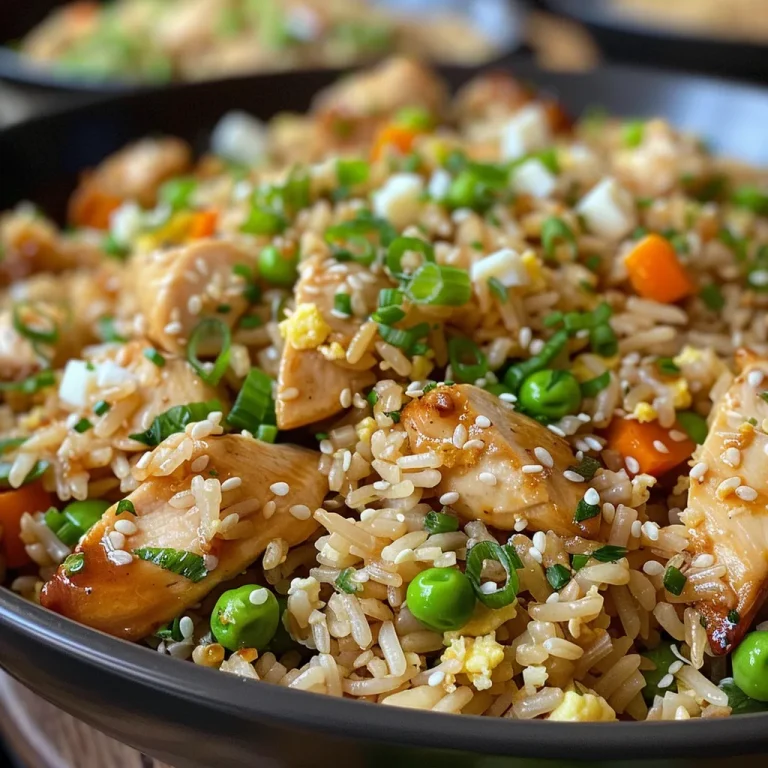
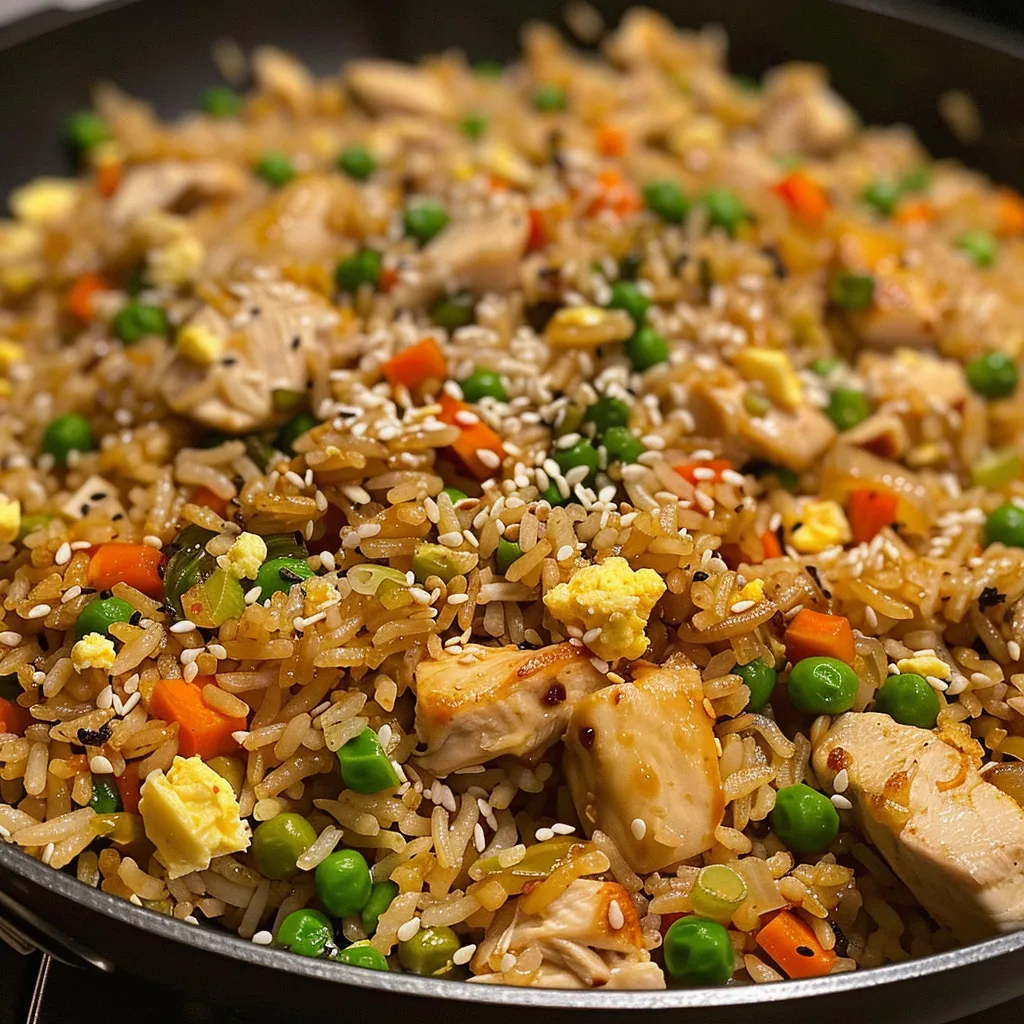
Vibrant photograph of easy chicken fried rice, highlighting the ingredients and appealing colors.

Here are some expert insights to elevate your Chicken Fried Rice game:

  • Use Day-Old Rice: If possible, use leftover rice that’s been refrigerated overnight. This helps the grains firm up, preventing mushiness.
  • Don’t Overcrowd the Pan: Fry the chicken and vegetables in batches if necessary to ensure even cooking and browning.
  • High Heat is Key: Cooking on high heat allows for a nice char, emulating that authentic wok-fried taste.
  • Pre-Mix the Sauce: Combine the soy sauce, sesame oil, and lemon juice beforehand for an even distribution of flavor.
  • Add Ingredients in Phases: Start with proteins, then veggies, and finish with rice to ensure everything is cooked perfectly.
  • Experiment with Proteins: Don’t limit yourself to chicken—try shrimp, tofu, or even beef for different flavor profiles.
  • Infuse with Fresh Herbs: Adding fresh cilantro or green onions at the end can enhance freshness.
  • Garnish Creatively: A sprinkle of sesame seeds or sliced green onions can elevate presentation and flavor.

Avoid Common Mistakes

To ensure your Chicken Fried Rice turns out perfectly, here are some pitfalls to avoid:

  • Using Too Much Soy Sauce: This can lead to overly salty fried rice; stick to the recommended amounts.
  • Cooking with Cold Rice: Cold rice can clump together; ensure it’s at room temperature or slightly warmed.
  • Not Prepping Ingredients: Have all your ingredients chopped and ready to go before you start cooking, as this dish cooks quickly.
  • Skipping the Scramble: Make sure to scramble the eggs well; they should be fully cooked and incorporated into the rice.
  • Neglecting to Taste: Always taste as you go to adjust flavors to your liking.

Delicious Variations

Don’t hesitate to get creative! Here are some variations to explore:

  • Vegetable Fried Rice: Omit the chicken and add extra vegetables like bell peppers, broccoli, or zucchini.
  • Spicy Chicken Fried Rice: Add a dash of sriracha or chili flakes for a kick.
  • Pineapple Chicken Fried Rice: Incorporate diced pineapple for a sweet and savory twist.
  • Kimchi Fried Rice: Mix in some chopped kimchi for a tangy and spicy flavor profile.

Storage and Make-Ahead Instructions

Planning ahead? Here’s how to store your Chicken Fried Rice:

  • Refrigerate: Store in an airtight container for up to 4 days.
  • Freeze: For longer storage, freeze in portions for up to 3 months. Thaw overnight in the fridge before reheating.
  • Reheat: Warm in a skillet over medium heat, adding a splash of water or soy sauce to prevent drying out.

Frequently Asked Questions

Here are some common questions about making Chicken Fried Rice:

  • Can I use brown rice instead of white? Yes, but it may require additional cooking time.
  • What’s the best type of chicken to use? Chicken thighs are juicier, but breasts work well too.
  • How can I make this dish vegetarian? Substitute chicken with tofu or tempeh and add more vegetables.
  • Is it necessary to use sesame oil? While it adds great flavor, you can substitute it with more neutral oil if needed.
  • Can I add more vegetables? Absolutely! Feel free to add any veggies you love.
  • How do I prevent my rice from getting mushy? Make sure it’s cooked and cooled properly before frying.
  • What if I don’t have soy sauce? You can use tamari or coconut aminos as a gluten-free alternative.
  • Can I make chicken fried rice without eggs? Yes, simply omit the eggs or replace them with scrambled silken tofu.

Nutritional Tips and Dietary Adaptations

This dish can easily be adapted to fit various dietary needs:

  • Low-Carb Option: Substitute rice with cauliflower rice for a low-carb version.
  • Gluten-Free: Use tamari instead of soy sauce to keep it gluten-free.
  • Lower-Calorie Option: Reduce the amount of butter and oil used, and increase the vegetable content.

Essential Equipment Recommendations

To make the best Chicken Fried Rice, consider having the following equipment:

  • Wok or Large Skillet: For even cooking and achieving that perfect stir-fry.
  • Spatula: A sturdy spatula helps with stirring and flipping ingredients.
  • Measuring Cups and Spoons: Ensuring accurate ingredient amounts can make a difference.
  • Cutting Board and Knife: For chopping ingredients quickly and efficiently.

Serving Suggestions

This Chicken Fried Rice is a versatile dish that pairs beautifully with:

  • Spring Rolls: Crisp and savory, they make a delightful appetizer.
  • Asian Salad: A refreshing salad with sesame dressing complements the fried rice perfectly.
  • Grilled Chicken Skewers: Add extra protein and flavor with these delicious skewers.

In conclusion, this Chicken Fried Rice recipe invites you to explore a world of flavors and textures. It’s a dish that not only satiates hunger but also nourishes connections through shared meals. So gather your ingredients, fire up that skillet, and let the adventure begin! Happy cooking!

Easy Chicken Fried Rice (Restaurant-Style)

Prep Time 10 minutes
Cook Time 15 minutes
Total Time 25 minutes
Servings 4 servings
Calories 520
A quick and flavorful homemade chicken fried rice that mimics restaurant quality with simple ingredients.

Ingredients

Sauces and Oils

  • 1.5 teaspoons sesame oil
  • 4 teaspoons neutral oil (like avocado or canola) (divided)

Chicken

  • 0.75 pound chicken breasts (cut into very small pieces)

Sauces

  • 5 tablespoons low-sodium soy sauce (divided)
  • 4 tablespoons butter (divided)
  • 2 teaspoons fresh lemon juice

Vegetables and Aromatics

  • to taste salt
  • to taste pepper
  • 0.5 cup diced white onion
  • 1 cup frozen mixed vegetables (peas, carrots)
  • 2 large eggs
  • 4 cups cooked rice (cool to touch)

Garnish

  • optional sesame seeds (for garnish)

Instructions 

  • Heat 1 teaspoon of neutral oil in a large skillet or wok over medium-high heat.
  • Add chicken pieces and cook until browned, then remove and set aside.
  • In the same pan, add remaining oil, sauté onions and vegetables until tender.
  • Push vegetables to side, scramble eggs in the empty space, then mix with vegetables.
  • Add cooked rice, chicken, soy sauce, lemon juice, and butter; stir-fry until heated through.

Notes

Use day-old rice for best results and ensure all ingredients are prepped before cooking.
Calories: 520kcal
Cost: $15
Course: Main Course
Cuisine: Asian
Keyword: Chicken, Fried Rice

Welcome to the World of Garlic Butter Dinner Rolls

Imagine walking into a warm kitchen filled with the comforting aroma of freshly baked bread, where each roll is a soft, buttery delight infused with the rich essence of garlic. This is more than just a recipe; it’s a culinary journey that takes you back to cozy family dinners and festive gatherings. Join me, Jack, as we explore the art of making Easy Garlic Butter Dinner Rolls—a dish that transforms any meal into a delightful experience. In this guide, you will discover the secrets to creating fluffy, flavorful rolls that will have everyone asking for seconds!

Why You’ll Love This Recipe

  • Irresistibly Fluffy: These rolls rise beautifully, creating a light and airy texture that melts in your mouth.
  • Garlic Butter Bliss: Each roll is brushed with a luscious garlic butter glaze, enhancing the flavor and providing an aromatic finish.
  • Beginner-Friendly: With simple, step-by-step instructions, even novice bakers can achieve bakery-quality results.
  • Perfect for Any Occasion: Whether it’s a holiday feast, family dinner, or brunch with friends, these rolls are sure to impress.
  • Make Ahead and Freeze: Prepare the dough in advance and freeze it, allowing you to enjoy fresh rolls on short notice.

Gather Your Ingredients

Before diving into the baking process, let’s gather our ingredients. Each component plays a crucial role in ensuring your rolls turn out perfectly fluffy and full of flavor.

  • 1 cup whole milk (240g), warm (around 110°F): Warm milk activates the yeast, ensuring a good rise.
  • 3 teaspoons active dry yeast or instant yeast: The leavening agent that gives the rolls their fluffiness.
  • 1/3 cup sugar (70g): Adds sweetness and feeds the yeast for better activation.
  • 3 3/4 cup all-purpose flour (490g): The base for our rolls that provides structure.
  • 1 large egg: Adds richness and helps bind the ingredients.
  • 1.5 teaspoon salt: Enhances flavor and controls yeast activity.
  • 6 tbsp unsalted butter, softened at room temperature (85g): Adds moisture and flavor to the dough.
  • Egg wash: 1 egg yolk and 1 tbsp milk for a beautiful golden crust.
  • 1/4 cup salted butter (57g): For the garlic butter topping.
  • 2-3 garlic cloves, finely chopped: Infuses the rolls with irresistible garlic flavor.
  • 1-2 tbsp freshly chopped parsley: Adds a fresh, vibrant touch to the garlic butter.

Step-by-Step Guide: Crafting Your Garlic Butter Dinner Rolls

Juicy garlic butter rolls placed on a rustic wooden surface, showcasing their texture.

Now that we have our ingredients, let’s embark on the journey of creating these delightful rolls. Follow these steps closely, and you’ll be rewarded with rolls that are fluffy and flavorful.

  • Step 1: Activate the Yeast: In a large bowl, stir together the warm milk with the yeast. Allow it to sit for 5-10 minutes until it becomes frothy.
  • Step 2: Combine Ingredients: Add the sugar, flour, egg, salt, and softened butter to the yeast mixture. Stir until a shaggy dough forms.
  • Step 3: Knead the Dough: Transfer the dough to a clean surface and knead with a push-pull motion using your palms for 15 minutes. The dough will be sticky at first but will become smooth and stretchy. It’s ready when it passes the window-pane test.
  • Step 4: First Rise: Place the dough in a large, oiled bowl, cover with cling wrap, and let it rise in a warm, humid spot until it doubles in size (around 90 minutes).
  • Step 5: Shape the Rolls: Once risen, punch down the dough and turn it out onto a clean surface. Divide it into 12 equal pieces and roll each piece into a tight, smooth ball.
  • Step 6: Second Rise: Line a 9×13″ baking sheet with parchment paper and place the rolls on the sheet. Cover and let them rise again for 30-45 minutes until puffy.
  • Step 7: Preheat the Oven: In the last 20 minutes of rising, preheat your oven to 350°F (175°C).
  • Step 8: Egg Wash: Mix the egg yolk and milk for the egg wash. Brush the rolls generously just before baking.
  • Step 9: Bake: Bake for 20-22 minutes until golden brown and the rolls sound hollow when tapped.
  • Step 10: Prepare Garlic Butter: In a saucepan, melt the salted butter. Add the chopped garlic and sauté for 1-2 minutes. Remove from heat and stir in the parsley.
  • Step 11: Brush and Serve: Brush the hot rolls with the garlic butter. Serve warm and enjoy!

Pro Tips for Baking Success

To elevate your baking game and ensure perfect rolls every time, consider these pro tips:

  • Use Fresh Ingredients: Check the expiration dates on your yeast and flour for optimal results.
  • Monitor Dough Temperature: Ensure your milk is at the right temperature to activate the yeast—too hot can kill it!
  • Don’t Rush the Rising: Allow the dough to rise fully; this is where the magic happens!
  • Perfect Dough Consistency: The dough should be slightly tacky but smooth. Avoid adding too much flour during kneading.
  • Experiment with Flavors: Add herbs or spices to your dough for a unique twist on flavor.
  • Keep Your Workspace Clean: A tidy kitchen helps you focus on the baking process without distractions.
  • Check Oven Temperature: Use an oven thermometer to ensure your oven is at the correct temperature.
  • Brush Generously: Don’t skimp on the garlic butter—it enhances flavor and creates a beautiful finish.

Common Mistakes and Troubleshooting

Baking can be tricky, but don’t worry! Here are some common mistakes to avoid and troubleshooting tips:

  • Dough Not Rising: Ensure yeast is fresh and that the milk is warm but not hot. A drafty environment can also hinder rising.
  • Dense Rolls: This can happen if the dough is overworked or if it didn’t rise enough. Be gentle and patient!
  • Too Much Flour: Adding too much flour can lead to dry rolls. Always measure carefully and avoid adding flour during kneading.
  • Burnt Tops: If the tops are browning too quickly, cover them with foil halfway through baking.

Delicious Variations to Try

Feeling adventurous? Here are some creative variations to customize your garlic butter dinner rolls:

  • Herb-Infused Rolls: Add dried herbs like rosemary or thyme to the dough for an aromatic twist.
  • Cheesy Garlic Rolls: Fold in shredded mozzarella or cheddar cheese into the dough for a gooey surprise.
  • Spicy Garlic Rolls: Add a pinch of red pepper flakes to the garlic butter for a spicy kick.
  • Sweet Garlic Rolls: Incorporate a bit of honey into the dough for a sweet and savory flavor profile.

Storage and Make-Ahead Instructions

These garlic butter dinner rolls are not only delicious fresh out of the oven but they can also be stored and enjoyed later:

  • Room Temperature: Store baked rolls in an airtight container at room temperature for up to 2 days.
  • Refrigerate: For longer storage, keep them in the fridge for up to a week. Reheat in the oven before serving.
  • Freeze Dough: Prepare the dough and shape the rolls, then freeze them before the second rise. Thaw in the fridge overnight and let them rise before baking.
  • Freeze Baked Rolls: Freeze baked rolls in a resealable bag for up to 3 months. Reheat in the oven until warm.

Frequently Asked Questions

  • Can I use whole wheat flour? Yes, but you may need to adjust the liquid and rising time. Whole wheat flour absorbs more moisture.
  • What if my dough is too sticky? Don’t add more flour! Knead it longer, and it will come together. It should be tacky but not overly sticky.
  • Can I make these rolls vegan? Absolutely! Substitute the milk with plant-based milk, use flax eggs instead of a regular egg, and replace the butter with vegan alternatives.
  • How can I tell when the rolls are done? They should be golden brown and sound hollow when tapped on the bottom.
  • What can I serve with these rolls? They pair beautifully with soups, salads, and roasted meats, or can be enjoyed on their own with a pat of butter.
  • Can I add more garlic? Of course! Adjust the garlic amount in the butter mixture to suit your taste.
  • Can I use instant yeast instead of active dry yeast? Yes, you can! Just mix it directly with the dry ingredients without activating it first.
  • How do I keep the rolls warm for serving? Place them in a bread basket lined with a cloth to keep them warm and cozy.

Nutritional Tips and Dietary Adaptations

These garlic butter dinner rolls can be enjoyed by everyone, but here are some tips for those with dietary considerations:

  • Gluten-Free: Use a 1:1 gluten-free flour blend to make these rolls gluten-free.
  • Dairy-Free: Substitute milk with almond or oat milk and use dairy-free butter alternatives.
  • Lower Sugar: Reduce the sugar in the dough for a less sweet roll, or use a sugar substitute.
  • Extra Fiber: Add ground flaxseed or chia seeds to increase the fiber content.

Essential Equipment for Success

To create perfect garlic butter dinner rolls, here are some essential tools you might need:

  • Large Mixing Bowl: For mixing and kneading the dough.
  • Measuring Cups and Spoons: For accurate ingredient measurements.
  • Kitchen Scale: Optional, but helpful for precise measurements, especially in baking.
  • Pastry Brush: For applying the egg wash and garlic butter.
  • Parchment Paper: To line your baking sheet for easy cleanup.
  • Oven Thermometer: To ensure your oven is at the correct temperature for baking.

Serving Suggestions

These rolls are versatile and can accompany a variety of meals. Here are some serving suggestions:

  • Pair with Soups: Serve alongside creamy tomato soup or hearty vegetable soup.
  • Accompany Salads: Perfect with a fresh green salad or a tangy Caesar salad.
  • Enjoy as a Snack: Spread with butter or your favorite jam for a delightful snack.
  • Use for Dipping: Great for sopping up sauces from pasta dishes or gravies.

As we conclude this culinary journey, I hope you feel inspired to create your own batch of Easy Garlic Butter Dinner Rolls. Remember, cooking is about connection, and these rolls are sure to bring people together around the table. So gather your ingredients, roll up your sleeves, and let the magic happen! Thank you for joining me, and happy baking!

Easy Garlic Butter Dinner Rolls

Prep Time 30 minutes
Cook Time 20 minutes
Total Time 50 minutes
Servings 12 pieces
Calories 210
Delight in soft, buttery dinner rolls infused with garlic and parsley, perfect for any meal or special occasion.

Ingredients

Dough

  • 1 cup whole milk (warm (around 110F))
  • 3 teaspoons active dry yeast or instant yeast
  • 1/3 cup sugar (70g)
  • 3 3/4 cups all purpose flour (490g)
  • 1 large egg
  • 1.5 teaspoons salt
  • 6 tbsp unsalted butter (softened at room temperature (85g))
  • 1 egg yolk egg wash (with 1 tbsp milk)
  • 1/4 cup salted butter (57g)
  • 2-3 cloves garlic (finely chopped)
  • 1-2 tbsp freshly chopped parsley

Instructions 

  • Mix warm milk and yeast until combined, then add remaining ingredients and stir to form a shaggy dough.
  • Knead the dough for 15 minutes until smooth and elastic, then let it rise in a greased bowl until doubled in size (~90 minutes).
  • Punch down the dough, divide into 12 pieces, shape into balls, and place on a parchment-lined baking sheet.
  • Brush the rolls with egg wash, let rise for 30-45 minutes, then brush again and bake at 350°F (175°C) for 20-22 minutes until golden.
  • Prepare garlic butter by melting butter, sautéing garlic for 1-2 minutes, then mixing in parsley. Brush hot rolls with garlic butter before serving.

Notes

For best results, ensure the dough is kneaded until it passes the window-pane test and rises in a warm, humid environment.
Calories: 210kcal
Cost: $10
Course: Side Dish
Cuisine: American
Keyword: Dinner Rolls

Discover the Vibrant Flavors of Greek Chicken Skewers and Zesty Lemon Rice

Welcome to a culinary journey that will transport you to the sun-soaked shores of Greece! Today, we delve into the delightful world of Greek Chicken Skewers paired with zesty lemon rice. This dish is more than just a meal; it’s a vibrant exploration of Mediterranean flavors that will bring warmth and joy to your kitchen. So, if you’re ready to tantalize your taste buds and impress your friends and family, let’s embark on this flavorful adventure!

Why You’ll Love This Recipe

There are countless reasons to adore this recipe, but here are just a few:

  • Easy to Prepare: The marinade is simple, and the cooking process is straightforward, making it perfect for both novice and experienced cooks.
  • Flavor Explosion: The combination of lemon, oregano, and garlic creates a mouthwatering taste that is truly unforgettable.
  • Perfect for Any Occasion: Whether it’s a casual family dinner or a festive gathering, these skewers are sure to impress.
  • Healthy Option: Using skinless chicken thighs ensures a lean protein source packed with flavor.
  • Meal Prep Friendly: The skewers can be marinated ahead of time, making them ideal for busy weeknights.

Ingredients for Greek Chicken Skewers with Lemon Rice

Let’s gather our ingredients! Here’s what you’ll need:

  • 2 pounds boneless skinless chicken thighs: Cut into 1-inch pieces for optimal marination.
  • 1/4 cup olive oil: A staple that adds richness and depth.
  • 3 tablespoons lemon juice: Freshly squeezed for the best flavor.
  • 2 teaspoons dried oregano: A herb that embodies Greek cuisine.
  • 2 teaspoons garlic powder: Adds a savory kick.
  • 1 teaspoon salt: Essential for enhancing flavors.
  • 1/2 teaspoon black pepper: For a subtle heat.
  • 1/4 teaspoon red pepper flakes (optional): For those who like it spicy!
  • 1 cup long-grain white rice: The foundation for our lemon rice.
  • 2 cups chicken broth: For extra flavor in the rice.
  • 1 tablespoon butter: To add richness to the rice.
  • Zest of 1 lemon: For an aromatic touch.
  • Fresh parsley, chopped: Optional garnish for a pop of color and freshness.

How to Make Greek Chicken Skewers with Lemon Rice

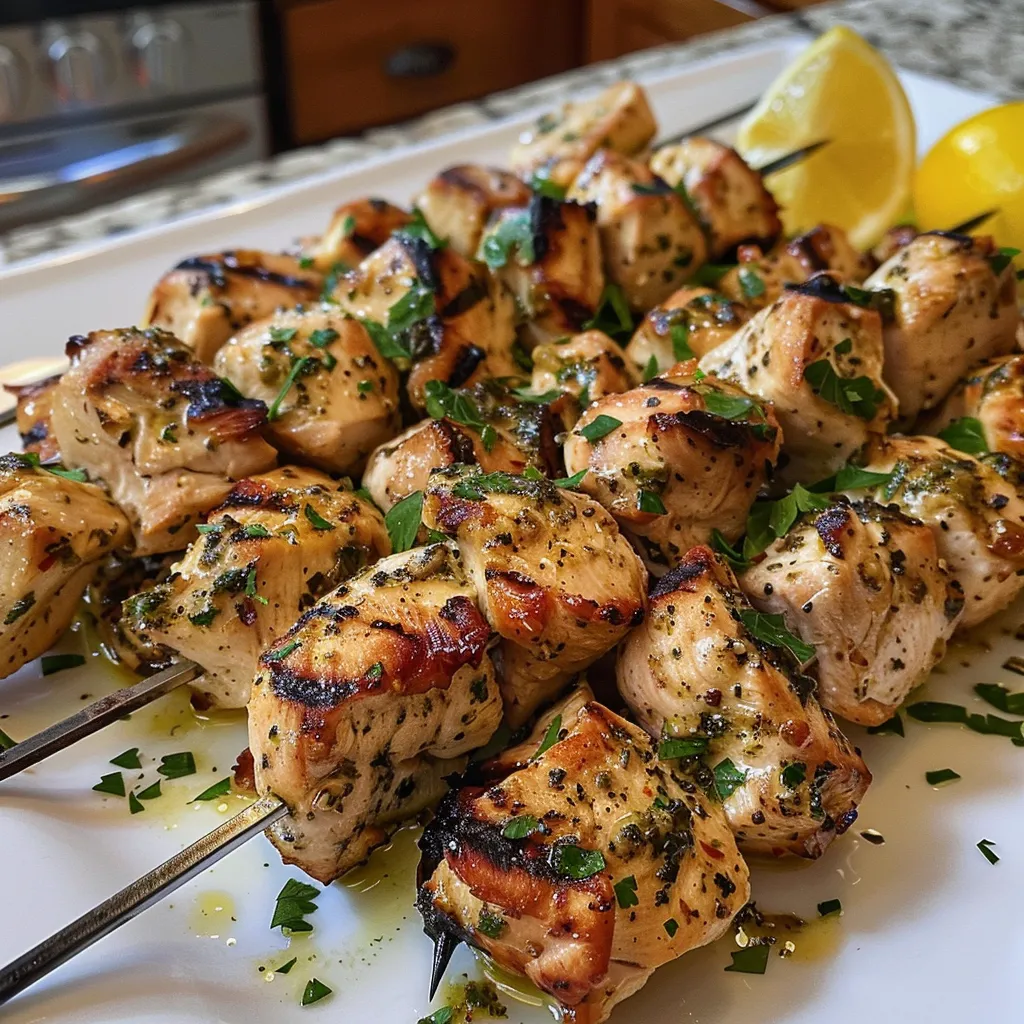
Delicious chicken skewers with a side of lemon rice and sprinkled parsley.

Now that we have everything, let’s dive into the cooking process!

Step 1: Marinate the Chicken

In a large bowl, combine the olive oil, lemon juice, oregano, garlic powder, salt, black pepper, and red pepper flakes. Add the chicken pieces and toss to coat. Cover and marinate in the refrigerator for at least 30 minutes, or up to 2 hours for more flavor.

Step 2: Prepare the Lemon Rice

While the chicken is marinating, let’s prepare the lemon rice. In a medium saucepan, bring the chicken broth to a boil. Add the rice and butter, then reduce heat to low, cover, and simmer for 15 minutes or until the rice is tender and the liquid is absorbed. Remove from heat, stir in the lemon zest, and let it sit covered for 5 minutes.

Step 3: Grill the Chicken Skewers

Preheat your grill or grill pan to medium-high heat. Thread the marinated chicken onto skewers, leaving a little space between each piece. Grill the chicken skewers for about 10-12 minutes, turning occasionally, until the chicken is cooked through and has nice grill marks.

Step 4: Serve and Enjoy

Serve the chicken skewers over the lemon rice, garnished with chopped parsley. Enjoy the vibrant flavors of this delightful dish!

Pro Tips for Perfect Greek Chicken Skewers

To ensure your Greek Chicken Skewers turn out perfectly, here are some expert insights:

  • Use Fresh Ingredients: Whenever possible, opt for fresh herbs and spices to enhance the flavor.
  • Let It Marinate: Allowing the chicken to marinate longer intensifies the flavors.
  • Skewer with Vegetables: Feel free to add bell peppers, onions, or zucchini for added flavor and nutrition.
  • Don’t Overcrowd the Skewers: Leave space between the chicken pieces for even cooking.
  • Check for Doneness: Ensure the chicken reaches an internal temperature of 165°F for safety.
  • Use Soaked Wooden Skewers: If using wooden skewers, soak them in water for 30 minutes to prevent burning on the grill.
  • Experiment with Marinades: Try adding yogurt or different herbs to the marinade for a unique twist.
  • Serve with Tzatziki: For an authentic touch, serve your skewers with homemade tzatziki sauce.

Common Mistakes and Troubleshooting

Here are some frequent pitfalls to avoid and how to troubleshoot them:

  • Chicken Is Tough: This usually happens if the chicken is overcooked. Use a meat thermometer to check doneness.
  • Flavor Is Lacking: Ensure you marinate the chicken long enough, and don’t skip the salt!
  • Rice Is Sticky: Rinse the rice before cooking to remove excess starch.
  • Grill Marks Are Light: Make sure your grill is preheated adequately before placing the skewers on it.

Variations on Greek Chicken Skewers

If you’re feeling adventurous, here are some exciting variations you can try:

  • Spicy Greek Chicken Skewers: Add more red pepper flakes or a dash of hot sauce to the marinade for a fiery kick.
  • Herb-Infused Rice: Substitute chicken broth with vegetable broth and add herbs like dill or mint to the rice for a fresh twist.
  • Vegetarian Option: Replace chicken with marinated tofu or halloumi cheese for a delicious vegetarian alternative.
  • Grilled Fruits: Add pineapple or peach slices to the skewers for a sweet contrast to the savory chicken.

Storage and Make-Ahead Instructions

If you’re prepping ahead of time, here’s how to store and reheat your dish:

  • Make-Ahead: Marinate the chicken up to 2 hours in advance. You can also prepare the lemon rice a day ahead and reheat it.
  • Storage: Store any leftovers in an airtight container in the refrigerator for up to 3 days.
  • Reheating: Reheat the chicken skewers on the grill or in the oven to maintain their texture.

Frequently Asked Questions

Curious about this recipe? Here are some common questions:

  • Can I use chicken breasts instead of thighs?
    Yes, but keep in mind that chicken thighs are juicier and more flavorful.
  • What kind of skewers should I use?
    Both wooden and metal skewers work well. Just remember to soak wooden ones!
  • Can I make this dish gluten-free?
    Yes, this recipe is naturally gluten-free; just ensure your chicken broth is certified gluten-free.
  • How do I know when the chicken is done?
    Use a meat thermometer; it should read 165°F in the thickest part of the chicken.
  • What sides go well with this dish?
    Greek salad, tzatziki sauce, or grilled vegetables are perfect companions.
  • Can I freeze the marinated chicken?
    Absolutely! Freeze it before cooking for up to 2 months. Just thaw in the refrigerator overnight before grilling.
  • Is this recipe kid-friendly?
    Yes! The flavors are mild and delicious, making it a hit with children.
  • How can I add more flavor to the rice?
    Try adding sautéed onions, garlic, or fresh herbs to the rice while cooking.

Nutrition Tips and Dietary Adaptations

This dish is not only delicious but also packed with nutrition:

  • Lean Protein: Chicken thighs provide essential protein while being lower in fat compared to other cuts.
  • Healthy Fats: Olive oil is rich in monounsaturated fats which are great for heart health.
  • Carbohydrates from Rice: Long-grain rice offers a source of energy, making this a well-rounded meal.
  • Dairy-Free Option: To make this dish dairy-free, simply omit the butter in the rice preparation.

Equipment Recommendations

Here are some tools that will make your cooking experience smoother:

  • Grill or Grill Pan: Essential for achieving those beautiful grill marks and smoky flavor.
  • Metal or Wooden Skewers: Choose according to your preference, just remember to soak wooden ones in water!
  • Medium Saucepan: For cooking the lemon rice perfectly.
  • Meat Thermometer: To ensure your chicken is cooked to perfection.

Serving Suggestions

Ready to serve? Here are some delightful ideas:

  • Garnish with Fresh Herbs: Top with chopped parsley or dill for a burst of color and flavor.
  • Pair with Tzatziki Sauce: This tangy yogurt sauce complements the skewers beautifully.
  • Serve with Greek Salad: A fresh salad with cucumbers, tomatoes, and feta adds a refreshing contrast.
  • Offer Pita Bread: Warm pita is perfect for wrapping around the skewers for a delicious handheld meal.

In conclusion, Greek Chicken Skewers with Lemon Rice are not just a dish; they are a celebration of flavors, culture, and connection. As you savor each bite, remember that every meal is an opportunity to explore the world around you. So grab your apron, fire up the grill, and let’s create something wonderful together! Bon appétit!

Greek Chicken Skewers with Lemon Rice

Prep Time 20 minutes
Cook Time 30 minutes
Total Time 50 minutes
Servings 4 servings
Calories 550
Enjoy flavorful grilled chicken skewers paired with zesty lemon rice for a delicious Mediterranean-inspired meal.

Ingredients

Meat

  • 2 pounds boneless skinless chicken thighs, cut into 1-inch pieces
  • 1/4 cup olive oil
  • 3 tablespoons lemon juice
  • 2 teaspoons dried oregano
  • 2 teaspoons garlic powder
  • 1 teaspoon salt
  • 1/2 teaspoon black pepper
  • 1/4 teaspoon red pepper flakes (optional)

Rice

  • 1 cup long-grain white rice
  • 2 cups chicken broth
  • 1 tablespoon butter
  • Zest of 1 lemon lemon zest
  • Fresh parsley, chopped (for garnish) parsley (for garnish)

Instructions 

  • Mix olive oil, lemon juice, oregano, garlic powder, salt, black pepper, and red pepper flakes. Marinate chicken for 30 minutes.
  • Cook rice in chicken broth with butter until tender, then stir in lemon zest.
  • Thread chicken onto skewers and grill for 10-12 minutes until cooked and charred.
  • Serve skewers over lemon rice, garnished with chopped parsley.

Notes

Marinate the chicken for at least 30 minutes for best flavor.
Calories: 550kcal
Cost: $15
Course: Main Course
Cuisine: Greek
Keyword: Chicken, lemon, rice

Embark on a Flavorful Journey with Orange Ginger Juice

Welcome, fellow culinary adventurers! Today, we’re diving into a vibrant world of flavors with a recipe that’s not only delicious but also packed with wellness benefits. Orange ginger juice is the perfect fusion of zesty oranges and spicy ginger, delivering a refreshing drink that’s sure to awaken your senses. Whether you’re looking for a morning boost or a midday refresher, this drink is your passport to flavor and health!

Why You’ll Love This Recipe

Here are five compelling reasons to add this delightful drink to your repertoire:

  • Immune Booster: Thanks to the vitamin C from oranges and the anti-inflammatory properties of ginger, this juice helps keep your immune system strong.
  • Refreshing Hydration: Perfect for hot days, the juice is hydrating and invigorating, making it an excellent choice for summer.
  • Easy to Prepare: With just a few simple ingredients, you can whip up this juice in under 10 minutes, making it an ideal option for busy mornings.
  • Customizable Flavors: This recipe serves as a base, allowing you to experiment with additional flavors like turmeric or lemon for extra zing and health benefits.
  • Elevate Your Wellness: This drink is not only refreshing but also contributes to your overall wellness with its natural ingredients.

Ingredients You’ll Need

Let’s gather our ingredients for this delightful orange ginger juice. Here’s what you need:

  • 4 fresh oranges (approximately 1½ cups of juice) – Valencia or Navel varieties work best.
  • 1-inch piece of fresh ginger root – gives that spicy kick!
  • ½ lemon (optional, for extra zing) – brightens the flavor.
  • 1 tablespoon raw honey (optional, for sweetness) – adds natural sweetness.
  • Pinch of turmeric (optional, for additional anti-inflammatory benefits) – a golden spice known for its health perks.
  • Ice cubes (for serving) – to keep your drink cool and refreshing.

Preparation Time

Juicy orange ginger juice displayed in a glass, highlighting its golden-orange color.

Wondering about the time commitment? Here’s the breakdown:

  • Preparation Time: 5 minutes (includes peeling and cutting)
  • Processing Time: 3 minutes
  • Total Time: 8 minutes

Step-by-Step Instructions

Follow these easy steps to create your delicious orange ginger juice:

  • Step 1: Prepare Your Oranges – Wash your oranges thoroughly under cool water. Using a sharp knife, remove the peels and as much of the white pith as possible (the pith can make your juice bitter). Segment the oranges over a bowl to catch any juice that escapes and remove any seeds you encounter. Pro tip: Room temperature oranges yield up to 30% more juice than cold ones. If your oranges are refrigerated, place them in warm water for 10 minutes before juicing.
  • Step 2: Prepare Your Ginger – Peel the ginger using the edge of a spoon. This technique removes just the skin while preserving the flavorful flesh beneath. Slice the ginger into thin coins to help your juicer or blender process it more efficiently. Pro tip: For maximum anti-inflammatory compounds, choose ginger with tight, firm skin that’s slightly shiny. The fresher your ginger, the more powerful its health benefits.
  • Step 3: Juice Everything Together – If using a juicer: Feed the orange segments and ginger pieces through your juicer, alternating them for optimal extraction. If using a blender: Add orange segments, ginger, and 1/4 cup of water to your blender. Blend on high for 60 seconds, then strain through a fine-mesh sieve or cheesecloth to remove pulp. Personalized adjustment: If you’re sensitive to ginger’s heat, start with half the amount and gradually work your way up in future batches.
  • Step 4: Add Optional Ingredients – Squeeze in fresh lemon juice if desired, then stir in honey and/or turmeric if using. Mix thoroughly until honey dissolves completely. Pro tip: Adding a pinch of black pepper with turmeric increases curcumin absorption by up to 2,000%, maximizing anti-inflammatory benefits.
  • Step 5: Serve and Enjoy – Pour your freshly made juice over ice, garnish with a slice of orange or crystallized ginger if desired, and consume immediately to preserve the most nutrients.

Pro Tips for Maximum Flavor and Benefits

Enhance your orange ginger juice experience with these expert insights:

  • Fresh Ingredients: Always opt for the freshest oranges and ginger to maximize flavor and health benefits.
  • Experiment with Sweetness: Adjust the honey to your taste. You can also try agave syrup or stevia for a lower-calorie option.
  • Blend for Texture: If you enjoy a thicker juice, blending rather than juicing retains more fiber, making it even more nutritious.
  • Chill Before Serving: For an extra refreshing drink, chill your ingredients ahead of time or add ice cubes while blending.
  • Mix with Other Juices: Combine with carrot or pineapple juice for a tropical twist.
  • Add Herbs: Fresh mint or basil can elevate the flavor and add a unique twist to your juice.
  • Use a Fine Mesh Strainer: Straining your juice helps achieve a smoother texture, especially if using a blender.
  • Store Properly: If you have leftovers, store your juice in an airtight container in the fridge for up to 24 hours.

Common Mistakes to Avoid

Ensure your juice is perfect by avoiding these common pitfalls:

  • Using Cold Oranges: Cold oranges yield less juice. Opt for room temperature for maximum extraction.
  • Not Removing Pith: Leaving too much pith can make your juice bitter. Be sure to peel thoroughly.
  • Over-Processing: Juicing for too long can generate heat, which may diminish nutrients. Keep it short and sweet.
  • Skipping the Strainer: If you dislike pulp, don’t skip straining your juice for a smoother finish.

Variations for Orange Ginger Juice

Feel free to get creative with these fun variations:

  • Tropical Twist: Add a cup of pineapple chunks for a sweet, tropical flavor.
  • Spicy Kick: Incorporate a small piece of jalapeño for an unexpected heat.
  • Herbal Infusion: Blend in a handful of fresh mint or basil leaves for a refreshing herbal note.
  • Berry Boost: Add a cup of mixed berries for an antioxidant-rich version that adds color and flavor.

Storage and Make-Ahead Instructions

If you want to prepare in advance:

  • Refrigerate: Store your juice in an airtight container in the refrigerator for up to 24 hours. Shake well before serving.
  • Freeze: Pour your juice into ice cube trays and freeze. These cubes can be blended into smoothies or added to water for a quick flavor boost.

Comprehensive FAQ

Here are some frequently asked questions about orange ginger juice:

  • Can I use bottled orange juice? – While it’s best to use fresh oranges for flavor and nutrients, you can substitute bottled juice in a pinch.
  • Is this juice good for weight loss? – Yes, the juice is low in calories and packed with nutrients, making it a great addition to a weight-loss plan.
  • Can I make this juice without a juicer? – Absolutely! A blender works just fine; just strain the mixture afterward.
  • How can I sweeten my juice without honey? – Try maple syrup or agave nectar for a vegan-friendly option.
  • What are the health benefits of ginger? – Ginger has anti-inflammatory properties, aids digestion, and can help soothe nausea.
  • Can I add more ginger? – Yes, feel free to adjust the amount of ginger to suit your taste preference.
  • How long does this juice last? – Freshly made juice is best consumed within 24 hours to enjoy the maximum nutrients.
  • Can I use other citrus fruits? – Absolutely! Feel free to mix in grapefruit or lime for added flavor.

Nutritional Information

Here’s a quick look at the nutritional benefits of this refreshing drink:

  • Calories: Approximately 120 per serving, depending on added sweeteners.
  • Vitamin C: A powerhouse for your immune system.
  • Antioxidants: Both oranges and ginger are rich in antioxidants that help combat free radicals.
  • Anti-inflammatory Benefits: Ginger contains gingerol, a compound known for its anti-inflammatory properties.

Equipment Recommendations

Here’s what you’ll need to make this juice:

  • Juicer or Blender: Either will work; a juicer is ideal for pure juice, while a blender allows for more fiber.
  • Fine Mesh Strainer: Essential if you’re using a blender to remove pulp.
  • Sharp Knife: For peeling and segmenting your oranges and ginger.
  • Cutting Board: A stable surface to prepare your ingredients.

Serving Suggestions

To elevate your orange ginger juice experience:

  • Garnish: Add a slice of orange or a sprig of mint for a beautiful presentation.
  • Pair with Breakfast: Enjoy alongside oatmeal or a smoothie bowl for a nutritious breakfast.
  • Creative Cocktails: Use this juice as a mixer for cocktails or mocktails for a delightful twist.

Conclusion

There you have it! A delightful and invigorating recipe for orange ginger juice that not only tantalizes your taste buds but also provides a wealth of health benefits. Remember, the kitchen is your playground, so feel free to experiment and make this recipe your own. Cheers to your health and happiness, and may every sip take you on a flavorful journey!

Orange ginger juice

Prep Time 10 minutes
Total Time 10 minutes
Servings 2 glasses
Calories 120
A refreshing and health-boosting juice combining the tang of oranges and lemon with the zing of ginger and optional anti-inflammatory spices.

Ingredients

Fruits

  • 4 pieces oranges (Valencia or Navel) (Approximately 1½ cups of juice)
  • 1 inch fresh ginger root (Peel and slice into coins)
  • 0.5 piece lemon (Optional, for extra zing)
  • 1 tablespoon raw honey (Optional, for sweetness)
  • Pinch turmeric (Optional, anti-inflammatory)
  • Ice cubes for serving

Instructions 

  • Wash oranges, remove peels and seeds, then segment over a bowl.
  • Peel ginger with a spoon, slice into coins.
  • Juice oranges and ginger using a juicer or blender, then strain if blended.
  • Add lemon juice, honey, and turmeric; stir until dissolved.
  • Pour over ice, garnish if desired, and serve immediately.

Notes

For maximum juice yield, use room temperature oranges and fresh ginger.
Calories: 120kcal
Cost: $10
Course: Beverage
Keyword: Ginger, Juice, Orange

Embark on a Flavorful Journey with the Vitality Citrus Elixir

Welcome to a refreshing adventure that celebrates the vibrant world of natural juices! Are you ready to sip your way to health and happiness? The Vitality Citrus Elixir is not just any juice; it’s a delightful blend that invigorates your senses and lifts your spirits. With a harmonious mix of oranges, lime, fresh ginger, and an optional apple, this elixir is your new go-to natural drink for rejuvenation. Join me on this flavor-filled journey, as we explore the myriad benefits and delightful variations of this liquid sunshine!

Why You’ll Love This Recipe

Here’s why the Vitality Citrus Elixir will quickly become your favorite drink:

  • Boosts Immune Health: Packed with vitamin C from oranges and lime, this elixir helps strengthen your immune system, keeping common colds at bay.
  • Natural Energy Booster: Fresh ginger not only adds a zing but also naturally boosts your energy levels, making it a perfect pick-me-up any time of the day.
  • Detoxifying Properties: The combination of citrus and ginger aids digestion and detoxification, helping your body eliminate toxins effectively.
  • Hydration Hero: With its high water content, this elixir keeps you hydrated while providing essential nutrients.
  • Customizable Flavor: The optional apple adds a sweet twist, allowing you to tailor the taste to your preference.

Ingredient Breakdown

Let’s dive into the ingredients of this vibrant elixir. Here’s what you need:

  • 2 Oranges: Freshly squeezed for the best flavor. Substitute with tangerines for a sweeter taste.
  • 1 Lime: Adds a zesty kick. You can replace it with lemon if lime isn’t available.
  • 1-inch Fresh Ginger: Provides warmth and spice. If you prefer a milder flavor, reduce the amount or use powdered ginger.
  • 1 Apple (optional): Adds sweetness and depth. Try a Granny Smith for tartness or a Fuji for sweetness.

Pro Tips for the Perfect Elixir

Detailed shot of a fresh juice blend with orange, lime, and ginger.

To ensure your Vitality Citrus Elixir is bursting with flavor and health benefits, consider these expert tips:

  • Use organic produce: Whenever possible, choose organic fruits to avoid pesticides and maximize health benefits.
  • Juice immediately: Fresh juice is best consumed right after making it to preserve nutrients and flavor.
  • Experiment with sweetness: Adjust the sweetness by adding honey or agave if desired, but remember the apple may already provide natural sweetness.
  • Chill before serving: For a refreshing drink, chill your ingredients or serve over ice.
  • Add herbs: Consider adding fresh mint or basil for an aromatic twist.
  • Blend for a smoothie: If you enjoy a thicker texture, blend the ingredients instead of juicing.
  • Ginger preparation: Peel ginger with a spoon for easy removal of the skin, making it less wasteful.
  • Store properly: If you have leftovers, store in an airtight container in the fridge for up to 24 hours.

Common Mistakes and Troubleshooting

Even the best recipes can go awry. Here are some common mistakes to avoid:

  • Over-juicing: Don’t press too hard when juicing; this can make the juice bitter. A gentle squeeze is sufficient.
  • Ignoring freshness: Use the freshest ingredients possible; old produce affects flavor negatively.
  • Incorrect ratios: Adjust the amounts of ginger and lime to suit your taste; too much can overpower the citrus.
  • Skipping refrigeration: If not chilled, the juice may lose its refreshing quality; always serve cold.

Variations to Try

Feeling adventurous? Here are some exciting variations of the Vitality Citrus Elixir:

  • Berry Citrus Elixir: Add a handful of fresh berries for an antioxidant boost.
  • Spicy Citrus Elixir: Add a pinch of cayenne pepper for a spicy kick that enhances metabolism.
  • Green Citrus Elixir: Blend in a handful of spinach or kale for added nutrients and a vibrant green color.
  • Herbal Citrus Elixir: Infuse with fresh basil or mint for a refreshing herbal note.

Storage and Make-Ahead Instructions

If you want to prepare your Vitality Citrus Elixir in advance, here’s how to store it:

  • Refrigeration: Store in a sealed container in the refrigerator for up to 24 hours. Shake before serving to mix the ingredients.
  • Freezing: Pour the juice into ice cube trays for easy portioning. Blend the cubes into smoothies later!
  • Prepping ingredients: You can pre-squeeze the citrus juices and grate the ginger, storing them separately until you’re ready to mix.

Frequently Asked Questions

Here are some common questions about the Vitality Citrus Elixir:

  • Can I use bottled juice? While fresh juice is recommended for the best flavor and nutrients, bottled juice can work in a pinch.
  • Is this recipe vegan? Yes, all the ingredients are plant-based.
  • Can I make it without ginger? Absolutely! If you don’t enjoy ginger, feel free to omit it.
  • How often can I drink this elixir? You can enjoy it daily as a refreshing health boost!
  • What if I don’t have a juicer? You can use a blender and strain the mixture through a fine mesh sieve.
  • Can I add more fruits? Yes! Feel free to experiment with other citrus fruits like grapefruit or pomelo.
  • Is it okay to drink on an empty stomach? Many people find it refreshing and energizing to drink in the morning!
  • Can I customize the ingredients? Yes! The recipe is flexible, so adjust it based on your taste preferences.

Nutrition Tips and Dietary Adaptations

This elixir is naturally low in calories and packed with nutrients. Here are some tips to enhance its nutritional profile:

  • Fiber boost: Consider blending the ingredients instead of juicing to retain the fiber found in the fruits.
  • Protein addition: Add a scoop of protein powder if you want to make it more filling.
  • Low sugar option: Skip the apple if you’re watching your sugar intake.
  • Gluten-free: The recipe is naturally gluten-free, making it suitable for those with sensitivities.

Equipment Recommendations

To prepare your Vitality Citrus Elixir, here’s a list of essential tools:

  • Juicer: A quality juicer will make extracting the juice easier and more efficient.
  • Blender: If you prefer a smoothie consistency, a good blender is key.
  • Fine mesh sieve: Useful for straining if blending instead of juicing.
  • Measuring cups: For accurate ingredient measuring.
  • Glass jars: Perfect for storing your elixir in the fridge.

Serving Suggestions

Serve your Vitality Citrus Elixir in style! Here are some ideas:

  • Chilled glasses: Serve in chilled glasses for an extra refreshing experience.
  • Garnish: Add a slice of lime or orange on the rim for a beautiful presentation.
  • Pair with snacks: Enjoy alongside healthy snacks like nuts or a light salad for a wholesome snack time.
  • Brunch drink: This elixir makes an excellent addition to brunch menus, alongside eggs or avocado toast.

So there you have it! The Vitality Citrus Elixir is not just a drink; it’s an experience that brings the zest of life to your day. With its health benefits, versatility, and delightful flavors, you can enjoy a taste of sunshine, no matter the season. Grab your ingredients, and let’s make some magic happen in the kitchen!

Vitality Citrus Elixir

Prep Time 10 minutes
Total Time 10 minutes
Servings 2 cups
Calories 120
A refreshing and invigorating citrus drink packed with vitamin C to boost your energy and immunity.

Ingredients

Fruits

  • 2 pieces Oranges (Freshly squeezed)
  • 1 piece Lime (Juiced)
  • 1 inch Fresh Ginger (Grated)
  • 1 piece Apple (optional) (For added sweetness)

Instructions 

  • Juice the oranges and lime into a pitcher.
  • Add grated ginger and stir well.
  • If desired, blend in chopped apple for extra flavor.
  • Serve over ice or chilled.

Notes

Use fresh citrus for the best flavor and vitamin C boost.
Calories: 120kcal
Cost: $8
Course: Beverage
Cuisine: fusion
Keyword: citrus