Author

Jack

Browsing

Embark on a Culinary Journey with Air Fryer Spicy Cauliflower Bites

Welcome to a vibrant exploration of flavors! If you’re seeking a dish that’s quick, delicious, and packed with a punch, then you’ve arrived at the right place. These Air Fryer Spicy Cauliflower Bites are not just a recipe; they are a passport to the world of spices, textures, and culinary creativity. In just 25 minutes, you can transform humble cauliflower into a sensational treat that will ignite your taste buds. Let’s dive into the magic of these bites!

Why You’ll Love This Recipe

This recipe is more than just a side dish; it’s an experience! Here are five reasons you’ll adore these spicy cauliflower bites:

  • Quick and Easy: With only a few ingredients and 25 minutes of your time, you can whip up a snack that’s perfect for any occasion.
  • Health-Conscious Indulgence: Low in calories and rich in nutrients, these bites provide a guilt-free way to enjoy a flavorful snack.
  • Customizable Spice Levels: Whether you’re a spice enthusiast or prefer a milder flavor, you can easily adjust the heat to suit your palate.
  • Perfect for Sharing: These bites are great for gatherings, game nights, or simply enjoying alone while binge-watching your favorite series.
  • Versatile Pairings: Serve them with dips, salads, or as a side to your main course; they complement a variety of dishes beautifully.

Ingredients You’ll Need

To embark on this flavor journey, gather the following ingredients:

  • 1 head of cauliflower: Cut into florets, this is the star of the show!
  • 2 tablespoons olive oil: For that perfect golden-brown crispiness.
  • 1 teaspoon garlic powder: Adds a savory depth to each bite.
  • 1 teaspoon paprika: Gives a smoky flavor and vibrant color.
  • 1 teaspoon cayenne pepper: The secret ingredient for a spicy kick!
  • Salt to taste: Essential for enhancing all the flavors.

Step-by-Step Preparation

Detailed image of vibrant cauliflower bites with a crunchy texture and spices.

Ready to make your Air Fryer Spicy Cauliflower Bites? Follow these simple steps:

  1. Preheat: Preheat your air fryer to 400°F (200°C).
  2. Toss: In a large bowl, combine the cauliflower florets with olive oil, garlic powder, paprika, cayenne pepper, and salt. Toss until evenly coated.
  3. Air Fry: Place the cauliflower in the air fryer basket in a single layer to ensure even cooking.
  4. Cook: Air fry for 15 minutes, shaking the basket halfway through for perfect crispiness.
  5. Check for Crispiness: If needed, cook for an additional 2-3 minutes until the desired texture is reached.
  6. Serve: Remove from the air fryer and serve hot, perhaps with a zesty dipping sauce!

Pro Tips for Success

Here are some expert insights to elevate your cooking experience:

  • Don’t overcrowd the basket: For the best results, avoid overcrowding the air fryer basket. This ensures even cooking and crispiness.
  • Experiment with spices: Feel free to switch up the spices! Try adding cumin or chili powder for a different flavor profile.
  • Adjust the spice: If you’re sensitive to heat, reduce the cayenne pepper or omit it entirely.
  • Make it gluten-free: This recipe is inherently gluten-free, making it a fantastic option for those with dietary restrictions.
  • Save leftovers: If you have leftovers, store them in an airtight container in the fridge for up to 3 days.
  • Try different dips: Pair your bites with avocado dip, ranch dressing, or a spicy mayo for a delightful flavor contrast.
  • Make it a meal: Add these bites to a salad or grain bowl for a complete meal that’s full of flavor.

Common Mistakes and Troubleshooting

Even the best cooks face challenges. Here are some common pitfalls and how to avoid them:

  • Cauliflower too soggy: Make sure to coat the florets lightly with olive oil, as too much can lead to sogginess.
  • Uneven cooking: If some pieces are overcooked while others are underdone, it could be due to overcrowding. Always keep the basket slightly empty.
  • Not crispy enough: If the bites aren’t crispy to your liking, add a few extra minutes to the cooking time and monitor closely.

Delicious Variations

Want to spice things up even more? Here are four variations you can try:

  • Buffalo Cauliflower Bites: Toss the cooked cauliflower in buffalo sauce for a fiery twist!
  • Asian-Inspired Bites: Add soy sauce, sesame oil, and ginger for an Asian flavor profile.
  • Cheesy Cauliflower Bites: Sprinkle nutritional yeast or grated Parmesan before air frying for a cheesy flavor.
  • Herb-Infused Bites: Mix in dried herbs like oregano or thyme for a fragrant twist.

Storage and Make-Ahead Instructions

You can easily make these bites ahead of time:

  • Make Ahead: Prepare the cauliflower and coat with spices the night before. Store in the fridge until you’re ready to air fry.
  • Storage: Store leftovers in an airtight container in the fridge. They can be reheated in the air fryer for about 5 minutes at 350°F (175°C).
  • Freezing: You can freeze uncooked, coated cauliflower bites. Lay them flat on a baking sheet, freeze until solid, then transfer to a freezer bag. Cook from frozen, adding a few extra minutes to the cooking time.

Nutrition Tips and Dietary Adaptations

This recipe is not only tasty but also nutritional. Here are some tips:

  • Low-Carb Option: Perfect for keto diets, cauliflower is a fantastic low-carb substitute.
  • Vegan-Friendly: Naturally vegan, this dish fits perfectly into a plant-based diet.
  • High in Fiber: Cauliflower is a great source of dietary fiber, aiding digestion and promoting fullness.

Equipment Recommendations

To achieve the best results, consider using the following tools:

  • High-Quality Air Fryer: Invest in a reliable air fryer with adjustable temperature settings for optimal cooking.
  • Mixing Bowls: Use large mixing bowls for easy tossing of ingredients.
  • Measuring Spoons: Accurate measurements ensure the perfect balance of flavors.

Serving Suggestions

These spicy cauliflower bites can be enjoyed in various ways:

  • As an appetizer: Serve them at your next gathering with a selection of dipping sauces.
  • On a salad: Toss them into a fresh salad for added texture and flavor.
  • With a grain bowl: Incorporate them into quinoa or rice bowls for a satisfying meal.

Frequently Asked Questions

Got questions? We’ve got answers! Here are some common inquiries:

  • Can I use frozen cauliflower? Yes! Just ensure they are thawed and well-drained before coating.
  • How do I make these bites spicier? Increase the amount of cayenne pepper or add some hot sauce to the mixture.
  • What can I serve with these bites? They pair well with dips like ranch, blue cheese, or a creamy avocado dip.
  • Can I bake these instead of using an air fryer? Absolutely! Bake them in a preheated oven at 425°F (220°C) for 20-25 minutes.
  • How do I know when they’re done? They should be golden brown and crispy on the outside.
  • Can I prepare a larger batch? Yes! Simply double the recipe and cook in batches.
  • Are they gluten-free? Yes! This recipe is naturally gluten-free.
  • Can I add other vegetables? Yes! Try adding bell peppers or broccoli for a veggie medley.

In conclusion, these Air Fryer Spicy Cauliflower Bites are not just a recipe; they are a celebration of flavor, health, and culinary creativity. With their bold taste and easy preparation, they are sure to become a staple in your kitchen. So grab your apron, fire up that air fryer, and let’s get cooking!

Air Fryer Spicy Cauliflower Bites That Wow in 25 Minutes

Prep Time 5 minutes
Cook Time 20 minutes
Total Time 25 minutes
Servings 4 servings
Calories 150
Enjoy crispy, spicy cauliflower bites cooked quickly in the air fryer for a flavorful snack or appetizer.

Ingredients

Vegetables

  • 1 head cauliflower (cut into florets)
  • 2 tablespoons olive oil
  • 1 teaspoon garlic powder
  • 1 teaspoon paprika
  • 1 teaspoon cayenne pepper
  • Salt to taste salt

Instructions 

  • Preheat the air fryer to 400°F (200°C).
  • Toss cauliflower with olive oil, garlic powder, paprika, cayenne, and salt.
  • Place in air fryer basket in a single layer.
  • Cook for 15 minutes, shaking halfway.
  • Check crispiness; cook 2-3 minutes more if needed.
  • Serve hot.

Notes

Adjust seasoning to taste and enjoy!
Calories: 150kcal
Cost: $10
Course: Appetizer
Keyword: Cauliflower

A Flavorful Journey with Rosemary Garlic Lamb Chops

Welcome to a culinary adventure that invites you to explore the rich, aromatic world of Rosemary Garlic Lamb Chops. This dish not only tantalizes your taste buds but also transports you to a sun-drenched Mediterranean kitchen, where the vibrant flavors of garlic and rosemary mingle with the tender, juicy meat. In this comprehensive guide, we’ll delve into everything you need to know about preparing these delightful lamb chops, ensuring that you create a meal that is both delicious and memorable.

Why You’ll Love This Recipe

  • Impressive Flavor: The combination of garlic and rosemary infuses the lamb with a depth of flavor that is simply irresistible.
  • Quick and Easy: With minimal preparation time, this recipe is perfect for a healthy dinner on busy weeknights.
  • Nutritious Meal: Lamb is a great source of protein and iron, making it a nutritious choice for any meal.
  • Versatile Pairings: These lamb chops pair beautifully with a variety of sides, from roasted vegetables to fresh salads.
  • Perfect for Entertaining: Impress your guests with this elegant yet simple dish that looks and tastes gourmet.

Ingredient Breakdown

Before diving into the cooking process, let’s take a closer look at the ingredients you’ll need to make these Rosemary Garlic Lamb Chops:

  • 4 bone-in lamb chops: Look for chops that are well-marbled for the best flavor and tenderness.
  • 2 tbsp olive oil: This helps to keep the meat moist and adds richness.
  • 3 garlic cloves, minced: Fresh garlic is a must for that bold flavor.
  • 2 tbsp fresh rosemary, chopped: Use fresh rosemary for a more vibrant taste; dried can be used in a pinch.
  • Zest of 1 lemon: Adds a refreshing brightness to the dish.
  • Salt and pepper, to taste: Simple seasonings that enhance the natural flavors of the lamb.

Substitutions

  • Herbs: If you don’t have rosemary, thyme or oregano can work as alternatives.
  • Oil: Feel free to substitute olive oil with avocado oil or melted butter for a different flavor profile.
  • Lemon Zest: Lime zest can be used for a unique twist.

Cooking Instructions

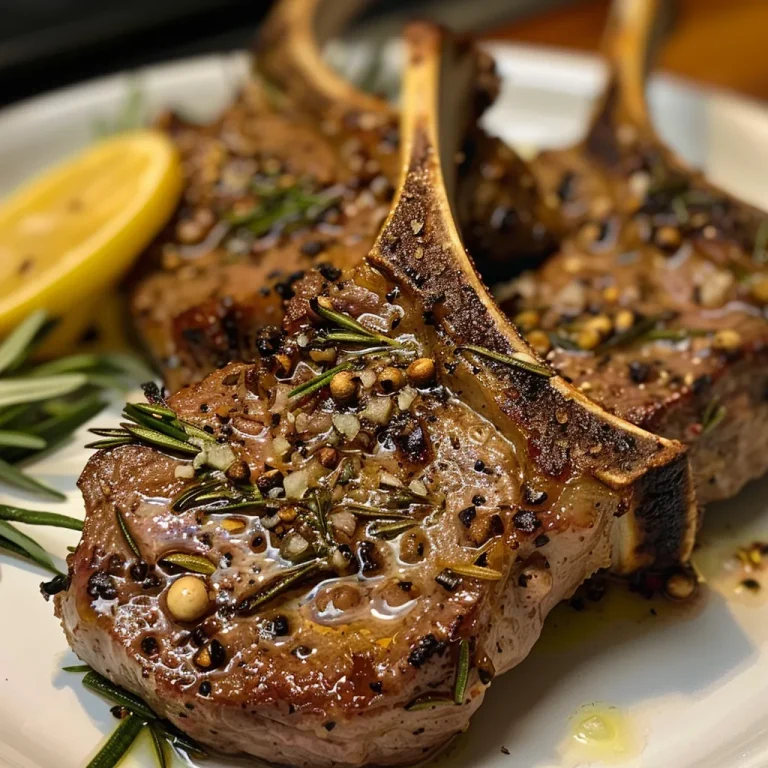
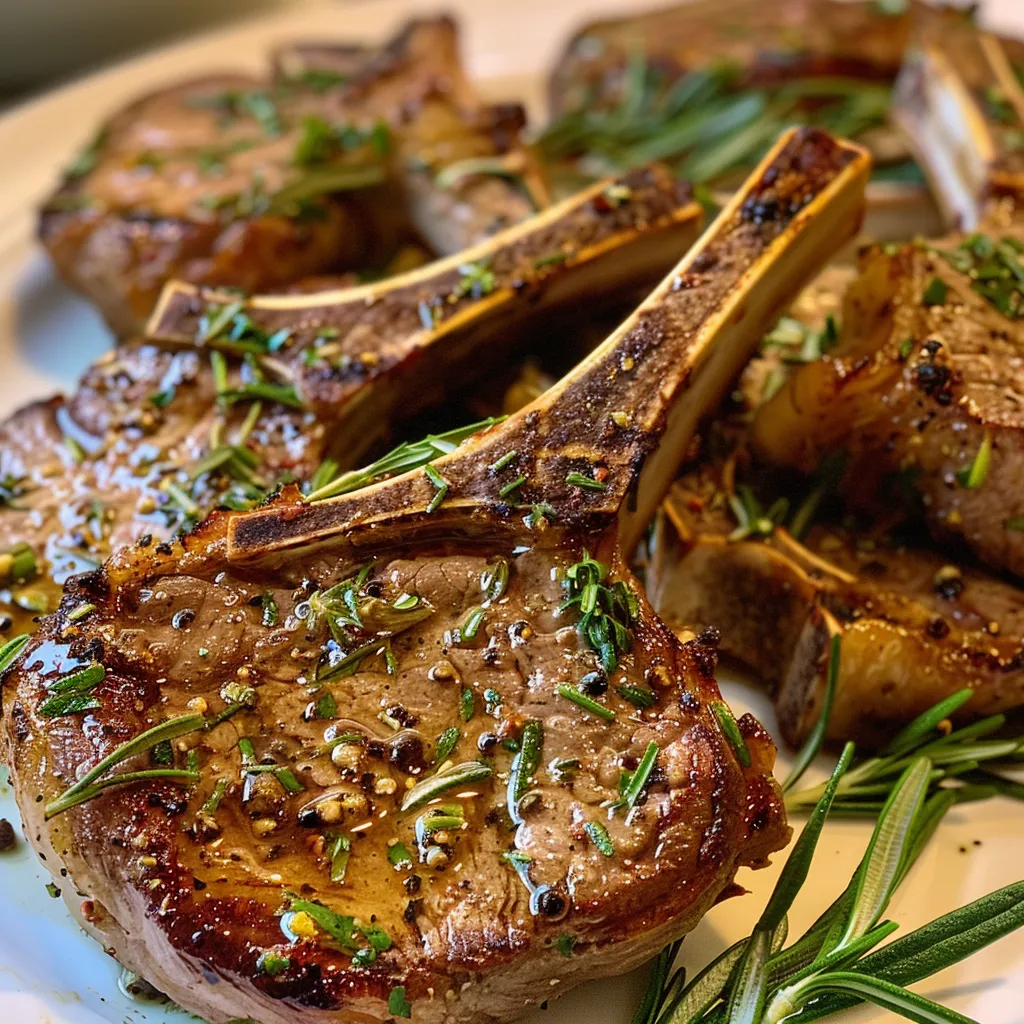
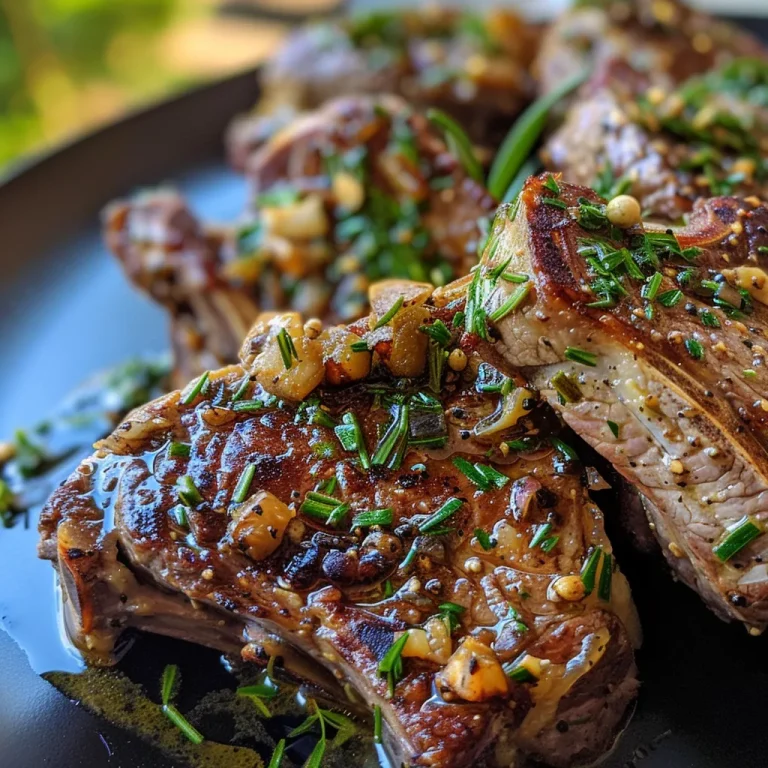
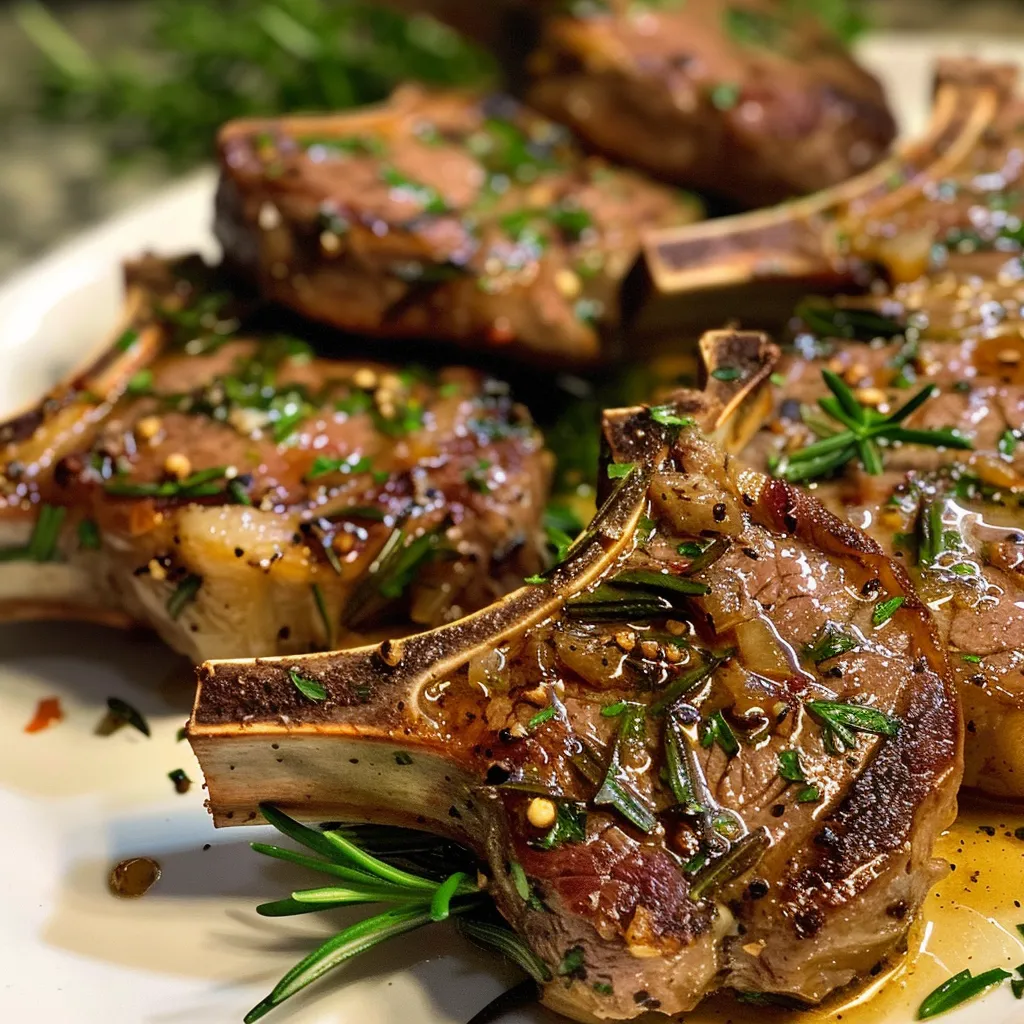
Deliciously cooked lamb chops with a rich golden-brown crust and herbs.

Ready to bring this recipe to life? Follow these simple steps:

  1. Marinate the Lamb: In a bowl, combine olive oil, minced garlic, chopped rosemary, lemon zest, salt, and pepper. Rub this mixture onto the lamb chops and marinate for at least an hour (overnight for more flavor).
  2. Preheat the Grill or Pan: Preheat your grill or a large skillet over medium-high heat.
  3. Cook the Lamb: Once the grill is hot, place the lamb chops on it. Cook for 4-5 minutes per side for medium-rare, or 6-7 minutes for medium.
  4. Rest the Meat: Once cooked, let the lamb chops rest for 5 minutes before serving to ensure the juices are locked in.
  5. Serve: Serve with a side of roasted vegetables or a light salad for a complete meal.

Expert Pro Tips

  • Marinate Longer: For deeper flavor, let the lamb marinate overnight. The longer it sits, the more the flavors meld.
  • Room Temperature: Allow the lamb chops to come to room temperature before cooking for more even cooking.
  • Use a Meat Thermometer: Aim for an internal temperature of 145°F for medium-rare lamb. This ensures perfect doneness.
  • Don’t Skip the Resting Step: Resting helps redistribute the juices, making every bite juicy and tender.
  • Experiment with Cooking Methods: Try these lamb chops in an air fryer for a different cooking method that yields crispy edges.
  • Pair with Sides: Consider serving with garlic mashed cauliflower or a refreshing cucumber salad for a balanced meal.
  • Watch for Overcooking: Lamb can become tough if overcooked, so keep an eye on the cook time.
  • Sear for Flavor: Searing the lamb chops locks in flavor and creates a delicious crust.

Common Mistakes and Troubleshooting

Even the most seasoned cooks can face challenges. Here are some common mistakes to avoid:

  • Over-marinating: While marinating is crucial, overdoing it can lead to a mushy texture. Stick to the recommended time.
  • Not Preheating: Always preheat your grill or pan. Starting with a hot surface creates a nice sear.
  • Skipping the Resting Period: Don’t skip the resting step; it’s essential for juicy lamb chops.
  • Using Cold Lamb: Cooking cold lamb can lead to uneven cooking. Bring it to room temperature before cooking.

Variations to Try

Want to mix things up? Here are some creative variations:

  • Spicy Garlic Lamb Chops: Add red pepper flakes to the marinade for a spicy kick.
  • Mint and Garlic: Swap out rosemary for fresh mint in the marinade for a refreshing twist.
  • Asian-Inspired: Use soy sauce, ginger, and sesame oil instead of olive oil for an Asian flavor profile.
  • Herb Crust: Coat the lamb chops in a mix of breadcrumbs and herbs before cooking for added texture.

Storage and Make-Ahead Instructions

If you’re planning ahead, here’s how to store and reheat your lamb chops:

  • Refrigeration: Store cooked lamb chops in an airtight container in the refrigerator for up to 3 days.
  • Freezing: Freeze cooked lamb chops in freezer-safe bags for up to 3 months. Thaw overnight in the fridge before reheating.
  • Reheating: Reheat in the oven at 350°F until warmed through, or use a microwave for quick reheating.

Nutrition Tips and Dietary Adaptations

This recipe is not only delicious but can also be adapted to meet various dietary needs:

  • Gluten-Free: Naturally gluten-free, perfect for those with dietary restrictions.
  • Paleo-Friendly: This dish fits well into a paleo diet, making it a great choice for health-conscious eaters.
  • Keto Option: Low in carbs, making it an excellent choice for a keto meal.

Equipment Recommendations

To make the process smoother, here’s what you’ll need:

  • Grill or Skillet: A high-quality grill or skillet is essential for achieving that perfect sear.
  • Meat Thermometer: A reliable thermometer will help you check for doneness without cutting into the meat.
  • Mixing Bowl: For combining your marinade ingredients.
  • Plastic Wrap or Ziplock Bags: Ideal for marinating your lamb chops.

Serving Suggestions

To complete your meal, consider these delicious pairings:

  • Roasted Vegetables: A medley of seasonal veggies roasted to perfection complements the lamb beautifully.
  • Garlic Mashed Cauliflower: This creamy, low-carb side is a fantastic alternative to traditional mashed potatoes.
  • Greek Salad: A fresh salad with cucumbers, tomatoes, olives, and feta brings a Mediterranean flair.

Frequently Asked Questions

  • Can I use boneless lamb chops? Yes, boneless chops will work well; adjust cooking time as needed.
  • What’s the best way to tell if lamb is cooked? Use a meat thermometer to check for an internal temperature of 145°F for medium-rare.
  • Can I marinate lamb chops overnight? Absolutely! Overnight marination enhances the flavor.
  • What sides pair well with lamb chops? Consider roasted vegetables, garlic mashed potatoes, or a fresh salad.
  • Can I grill these lamb chops? Yes, grilling adds a wonderful smoky flavor.
  • How do I prevent lamb chops from being tough? Avoid overcooking and allow the meat to rest before serving for optimal tenderness.
  • Is lamb healthy? Yes, lamb is rich in protein and essential nutrients, making it a healthy choice.
  • Can I use dried herbs instead of fresh? Yes, but use less, as dried herbs are more concentrated in flavor.

In conclusion, these Rosemary Garlic Lamb Chops are not just a meal; they’re an experience. Whether you’re hosting a dinner party or enjoying a quiet evening at home, this dish will surely impress. So grab your apron, gather your ingredients, and embark on this delicious culinary journey. Happy cooking!

Rosemary Garlic Lamb Chops

Prep Time 10 minutes
Cook Time 10 minutes
Total Time 20 minutes
Servings 4 pieces
Calories 350
Enjoy tender, flavorful lamb chops infused with fresh rosemary and garlic, perfect for a quick yet elegant meal.

Ingredients

Meat

  • 4 pieces bone-in lamb chops
  • 2 tbsp olive oil
  • 3 cloves garlic, minced
  • 2 tbsp fresh rosemary, chopped
  • Zest of 1 lemon lemon zest
  • Salt and pepper to taste salt and pepper

Instructions 

  • Combine olive oil, garlic, rosemary, lemon zest, salt, and pepper. Rub onto lamb chops and marinate for at least an hour.
  • Preheat grill or skillet over medium-high heat.
  • Cook lamb chops 4-5 minutes per side for medium-rare, or 6-7 minutes for medium.
  • Let rest for 5 minutes before serving.
  • Serve with vegetables or salad.

Notes

Ensure not to overcook for tender, juicy lamb.
Calories: 350kcal
Cost: $15
Course: Main Course
Cuisine: Mediterranean
Keyword: garlic, Lamb, Rosemary

Welcome, fellow culinary adventurers! If you’ve ever craved the nostalgic warmth of homemade cookies but thought gluten-free meant sacrificing flavor or texture, I’m here to take you on a delightful journey. These Gluten-Free Chocolate Chip Cookies are not just a recipe; they’re an exploration of taste that bridges cultures and memories. Each bite is a tribute to my culinary travels, where I learned that cookies can be both comforting and exciting. So, grab your apron, and let’s dive into this sweet adventure!

Why You’ll Love This Recipe

These cookies are more than just gluten-free; they are a celebration of flavor and texture. Here’s why you’ll fall in love with this recipe:

  • Perfectly Chewy: The combination of gluten-free flour and almond flour creates a delightful chewiness that will keep you coming back for more.
  • Rich Flavor: Using brown butter not only enhances the taste but also adds a nutty aroma that elevates the cookies.
  • Simple Ingredients: With just a handful of pantry staples, making these cookies is both easy and satisfying.
  • Versatile: Whether you want to make them dairy-free or add your favorite mix-ins, this recipe adapts beautifully.
  • Quick Prep Time: With minimal waiting time, you’ll be enjoying fresh-baked cookies in no time!

Ingredients That Make Magic Happen

Let’s break down the ingredients that make these Gluten-Free Chocolate Chip Cookies so special:

  • 1 1/3 cups (200g) gluten-free measure-for-measure flour: This is the base of your cookies, providing structure without the gluten.
  • 1/4 cup (25g) almond flour: Adds a depth of flavor and contributes to the chewy texture.
  • 1 teaspoon baking soda: Helps the cookies rise and achieve that perfect texture.
  • 1/2 teaspoon kosher salt: Enhances the sweetness and balances flavors.
  • 1/2 cup (113g) butter: The star ingredient, especially when browned, for a rich, nutty flavor.
  • 1 tablespoon milk of choice: Ensures the dough stays moist and pliable.
  • 3/4 cup (160g) brown sugar: Imparts moisture and a deeper flavor profile.
  • 1/4 cup (50g) granulated sugar: Adds sweetness and helps with the cookie’s structure.
  • 1 large egg: Binds all the ingredients together for a cohesive dough.
  • 2 teaspoons vanilla extract: For that lovely aromatic sweetness.
  • 1 cup (170g) chocolate chips: The heart of the cookie, choose your favorite type (dark, semi-sweet, or even dairy-free).
  • Sea salt for sprinkling (optional): A pinch on top enhances flavor and adds a gourmet touch.

How to Make Your Gluten-Free Chocolate Chip Cookies

Creating these cookies is as delightful as eating them! Follow these simple steps:

  1. In a medium bowl, whisk together the gluten-free flour, almond flour, baking soda, and salt. Set aside.
  2. Melt the butter in a medium skillet over medium-low heat, stirring occasionally.
  3. Once the butter is melted and begins to foam, stir continuously. The butter will change from yellow to golden brown quickly with a nutty aroma. Remove from the heat and pour into a medium bowl.
  4. Add the milk, brown sugar, and granulated sugar to the brown butter. Whisk to combine.
  5. Whisk in the egg and vanilla until smooth and creamy.
  6. Using a rubber spatula, mix in the dry ingredients until well-combined. Fold in the chocolate chips.
  7. Cover the bowl and let the dough sit at room temperature for 30 minutes, or refrigerate for up to 5 days.
  8. Preheat the oven to 350°F. Line large baking sheets with parchment paper or silicone baking mats.
  9. Scoop the cookie dough into round balls, about 2 tablespoons per ball. Place on the prepared baking sheet, about 2 inches apart.
  10. Bake for 10-12 minutes or until the edges are golden brown and the center is set.
  11. Remove from the oven and cool on the baking sheet for 5 minutes. Sprinkle with flaky salt, if desired. Transfer to a wire rack to cool completely.

Pro Tips for the Best Cookies

Before you dive into the kitchen, here are some expert tips to ensure your cookies turn out perfectly:

  • Chill the dough: For even richer flavor and better texture, chill the dough for at least 30 minutes.
  • Use room temperature ingredients: This ensures a smoother batter and better incorporation.
  • Don’t overmix: Mix until just combined to keep your cookies tender.
  • Experiment with chocolate: Try different chocolate types or even add dried fruits for a unique twist.
  • Check for doneness: Every oven is different; start checking a minute or two before the time is up.
  • Store properly: Keep cookies in an airtight container to maintain freshness.
  • Make them smaller: For mini cookies, adjust the baking time and enjoy bite-sized treats.
  • Use a cookie scoop: This ensures uniform size and even baking.

Common Mistakes and Troubleshooting

Even the most seasoned bakers can run into issues. Here are common mistakes and how to troubleshoot:

  • Cookies spread too much: Make sure your butter isn’t too warm when mixing, and chill the dough if necessary.
  • Cookies are too dry: Ensure accurate measurements, especially with the flour. Too much flour can lead to dryness.
  • Burnt bottoms: Use parchment paper to prevent sticking and burning. Check the oven temperature, as some ovens run hotter than others.

Delicious Variations

Want to switch things up? Here are some tasty variations to try:

  • Double Chocolate Chip: Add 1/4 cup of cocoa powder to the dry ingredients for a rich chocolatey flavor.
  • Nutty Delight: Fold in chopped nuts like walnuts or pecans for added crunch.
  • Dried Fruit: Incorporate dried cranberries or cherries for a tart contrast to the sweetness.
  • Spiced Cookies: Add a teaspoon of cinnamon or nutmeg for a warm, spiced flavor.

Storage and Make-Ahead Instructions

These cookies can be made ahead of time or stored for later:

  • Storage: Keep cooled cookies in an airtight container at room temperature for up to 5 days, or in the fridge for up to a week.
  • Freezing: Freeze baked cookies in a single layer, then transfer to a freezer-safe bag for up to 3 months. Thaw at room temperature.
  • Make-Ahead Dough: You can prepare the dough ahead of time and refrigerate it for up to 5 days, or freeze it for up to 3 months. Just scoop and bake straight from the freezer, adding a minute or two to the baking time.

Frequently Asked Questions

Curious about gluten-free baking? Here are some answers to common questions:

  • Can I use all almond flour? While you can use almond flour, it’s best to stick to a blend for structure and texture.
  • How can I make these cookies dairy-free? Substitute the butter with coconut oil or a dairy-free butter alternative.
  • What is the best gluten-free flour? A measure-for-measure blend works best, ensuring a good balance of texture.
  • Why do I need to chill the dough? Chilling helps the flavors develop and prevents excessive spreading during baking.
  • Can I use vegan substitutes? Yes! Replace the egg with a flax egg and use dairy-free substitutes for butter and milk.
  • What if my dough is too dry? If the dough seems dry, add a splash of milk until it reaches a workable consistency.
  • How can I make these cookies healthier? Consider reducing the sugar slightly or using dark chocolate chips for a less sweet, more nutritious option.
  • What’s the secret to perfect cookies? Accurate measurements and not overmixing are key to achieving the best texture!

Nutritional Tips and Dietary Adaptations

These cookies can fit into various dietary needs:

  • Low Sugar: Reduce the granulated sugar by half for a less sweet option.
  • Protein Boost: Add protein powder to the dry ingredients for extra nutrition.
  • Fiber-rich: Incorporate oats or use oat flour for more fiber.

Essential Equipment Recommendations

To bake these cookies, here’s what you’ll need:

  • Mixing Bowls: A set of various sizes for mixing and prep.
  • Whisk: For blending dry and wet ingredients smoothly.
  • Rubber Spatula: To fold in ingredients gently without overmixing.
  • Baking Sheets: Use heavy-duty sheets for even baking.
  • Parchment Paper: To prevent sticking and ensure easy cleanup.

Serving Suggestions

Now that your cookies are baked to perfection, here are some fun serving ideas:

  • Warm with Ice Cream: Serve fresh cookies warm with a scoop of your favorite ice cream for a decadent dessert.
  • With a Cup of Tea: Pair your cookies with a warm cup of tea for a cozy afternoon snack.
  • Gift Them: Package them in a lovely box for a thoughtful homemade gift.
  • Cookie Sandwiches: Use two cookies to sandwich a layer of frosting or ice cream for a delightful treat.

As we wrap up this culinary adventure, I hope you’re inspired to create these delicious Gluten-Free Chocolate Chip Cookies. Each bite is a reminder that food is not just about sustenance; it’s about connection, culture, and the joy of sharing moments with those you love. So, gather your ingredients, unleash your inner baker, and embark on a journey of flavor that brings the world to your kitchen!

Gluten-Free Chocolate Chip Cookies (5-Star Recipe!)

Prep Time 15 minutes
Cook Time 12 minutes
Total Time 27 minutes
Servings 24 cookies
Calories 150
Enjoy these delicious gluten-free chocolate chip cookies that are crispy on the edges and chewy in the center, perfect for any occasion.

Ingredients

Dried ingredients

  • 1 1/3 cups gluten-free measure-for-measure flour
  • 1/4 cup almond flour
  • 1 teaspoon baking soda
  • 1/2 teaspoon kosher salt
  • 1/2 cup butter
  • 1 tablespoon milk of choice
  • 3/4 cup brown sugar
  • 1/4 cup granulated sugar
  • 1 large egg
  • 2 teaspoons vanilla extract
  • 1 cup chocolate chips

Optional topping

  • sea salt for sprinkling sea salt for sprinkling (optional)

Instructions 

  • Mix dry ingredients in a bowl.
  • Melt butter, then pour into a bowl and add milk, sugars, egg, and vanilla. Whisk until smooth.
  • Stir in dry ingredients and chocolate chips. Chill dough for 30 minutes.
  • Preheat oven to 350°F (175°C). Scoop dough onto baking sheets and bake for 10-12 minutes.
  • Cool cookies, sprinkle with sea salt if desired, then serve.

Notes

For best results, refrigerate dough before baking.
Calories: 150kcal
Cost: $15
Course: Dessert
Cuisine: American
Keyword: chocolate chips, gluten-free

Are you ready to elevate your game day experience with a mouthwatering treat that blends the spicy kick of jalapenos with the creamy indulgence of cheese? These Jalapeno Popper Twists are not just another appetizer; they are a culinary journey that promises to delight your taste buds and spark conversations around the table. With their flaky puff pastry wrap and a rich, cheesy filling, these twists are perfect for any gathering—whether it’s a game day party, a cozy family get-together, or a casual night in with friends. In this article, we’ll explore everything you need to know about making these delicious popper twists, from ingredients to expert tips, ensuring you impress your guests with every bite.

As we dive into this adventure, prepare to discover unique variations, storage tips, and answers to all your burning questions about these delectable snacks. Let’s make your next gathering unforgettable!

Why You’ll Love This Recipe

There are countless reasons to love these Jalapeno Popper Twists! Here are just a few:

  • Easy to Make: With just a few simple steps, you can whip up these tasty twists in no time, making them a stress-free option for your gatherings.
  • Flavor Explosion: Each twist bursts with flavor, combining spicy jalapenos, creamy cheese, and a hint of garlic that will keep your guests coming back for more.
  • Versatile Ingredients: This recipe allows for several substitutions, ensuring that you can cater to various dietary preferences and tastes.
  • Perfect for Sharing: Whether served as an appetizer or snack, these twists are easy to share and enjoy, making them great for social occasions.
  • Customizable Heat Levels: You control the spice! Use fresh jalapenos for more heat or opt for pickled jalapenos for a milder flavor.

Ingredients for Jalapeno Popper Twists

To create these delicious Jalapeno Popper Twists, gather the following ingredients:

  • 1 sheet Puff Pastry (Ensure it’s fully thawed.)
  • 8 oz Cream Cheese (Can substitute with Neufchâtel for a lighter option.)
  • 1 cup Shredded Sharp Cheddar Cheese (Monterey Jack is a great mild alternative.)
  • 1/2 cup Sliced Jalapenos (Fresh for more heat or pickled for milder flavor.)
  • 1 tsp Garlic Powder (Fresh garlic can be used as a substitute for a more robust flavor.)
  • 1 large Egg (Egg wash for golden color; use non-dairy milk for a vegan version.)
  • 1/2 cup Ranch Dressing (Complements the flavors wonderfully.)
  • 1/4 cup Sriracha Mayo (Perfect for an extra kick of heat.)
  • 1/4 cup Honey Mustard (Provides a sweet and tangy contrast to the spices.)

Instructions for the Best Jalapeno Popper Twists

Now let’s get into the nitty-gritty of how to make these mouthwatering twists:

  1. Preheat your oven to 400°F (200°C) and line a baking sheet with parchment paper.
  2. In a mixing bowl, combine the cream cheese, shredded cheddar, sliced jalapenos, garlic powder, ranch dressing, sriracha mayo, and honey mustard. Mix until well combined.
  3. Roll out the thawed puff pastry on a lightly floured surface until it’s about 1/4 inch thick.
  4. Cut the pastry into rectangles (approximately 3×5 inches) and spoon a generous amount of the filling into the center of each rectangle.
  5. Fold the pastry over to create a pocket, sealing the edges by pressing with a fork or your fingers. Brush the tops with the beaten egg for a golden finish.
  6. Place the twists on the prepared baking sheet, leaving some space between them.
  7. Bake in the preheated oven for 15-20 minutes or until golden brown and puffed up.
  8. Remove from the oven, let cool slightly, and serve warm with additional dipping sauces if desired.

Expert Tips for Success

A side view of freshly baked Jalapeno Popper Twists with jalapenos peeking out.

To ensure your Jalapeno Popper Twists turn out perfect every time, consider these expert tips:

  • Thaw Puff Pastry Properly: Ensure your puff pastry is fully thawed before use to make rolling and shaping easier.
  • Don’t Overfill: While it’s tempting to add a lot of filling, overfilling can cause the twists to burst open while baking.
  • Experiment with Cheeses: Feel free to mix different cheeses for a unique flavor profile—try adding mozzarella for extra stretch!
  • Adjust Spice Levels: Use mild cheeses and pickled jalapenos for a milder taste or fresh jalapenos for a spicier kick.
  • Keep an Eye on the Oven: Baking times can vary, so monitor your twists closely to prevent burning.
  • Cool Before Serving: Allow the twists to cool slightly before serving to avoid burning your mouth!
  • Serve with Dipping Sauces: Offer a variety of sauces like ranch, salsa, or guacamole to enhance the flavor experience.

Common Mistakes and Troubleshooting

Even the best chefs can make mistakes! Here are some common pitfalls and how to avoid them:

  • Pastry Sticking: If your puff pastry is sticking, try using more flour on your work surface or chilling the pastry before rolling it out.
  • Filling Leaking: Ensure you seal the edges well to prevent filling from leaking during baking.
  • Underbaking: If you find your twists are not fully cooked inside, bake them a few minutes longer, keeping a watchful eye on the exterior.
  • Too Much Heat: If the jalapenos are too spicy for your guests, consider mixing in some diced bell peppers to balance the heat.

Variations to Try

Want to mix things up? Here are some creative variations of Jalapeno Popper Twists:

  • Buffalo Chicken Twists: Add shredded cooked chicken and buffalo sauce to the filling for a spicy twist.
  • Vegetarian Twists: Replace jalapenos with chopped bell peppers, spinach, and artichoke hearts for a different flavor profile.
  • Southwestern Style: Incorporate black beans, corn, and taco seasoning into the cheese mixture for a Southwestern flair.
  • Cheesy Bacon Twists: Mix in crispy bacon bits for a savory crunch that complements the creamy filling.

Storing and Make-Ahead Instructions

If you want to prepare these twists in advance, here’s how to store and reheat them:

  • Make Ahead: You can prepare the twists, assemble them, and refrigerate them for up to 24 hours before baking.
  • Freezing: Assemble the twists and freeze them unbaked. Once frozen, transfer them to a zip-lock bag for up to 2 months. Bake from frozen, adding a few extra minutes to the baking time.
  • Storage: Leftover baked twists can be stored in an airtight container in the refrigerator for up to 3 days.
  • Reheating: To reheat, place them in a preheated oven at 350°F (175°C) for about 10-15 minutes or until warmed through.

Frequently Asked Questions

Got questions? We’ve got answers! Here are some FAQs about Jalapeno Popper Twists:

  • What are Jalapeno Popper Twists?: They are flaky pastry filled with a creamy cheese mixture and jalapenos, baked until golden.
  • Can I make these twists gluten-free?: Yes! Use gluten-free puff pastry for a delightful alternative.
  • How spicy are these twists?: The spice level can be adjusted based on the type of jalapenos used and your personal preference!
  • Can I use different cheeses?: Absolutely! Feel free to mix and match your favorite cheeses.
  • How do I know when they’re done?: They should be golden brown and puffed up when done baking.
  • Can I bake from frozen?: Yes! Just add a few extra minutes to the baking time.
  • What should I serve with them?: These twists pair wonderfully with a variety of dips like ranch, salsa, or guacamole.
  • Are they suitable for meal prep?: Yes! They can be made ahead of time and reheated, making them great for meal prep.

Nutritional Tips and Dietary Adaptations

Here are some nutritional considerations and adaptations for your Jalapeno Popper Twists:

  • Low-Calorie Option: Use low-fat cream cheese and reduced-fat cheese to cut down on calories.
  • Vegan Adaptation: Substitute cream cheese with a plant-based alternative and use non-dairy milk.
  • Whole Grain Twist: If available, use whole grain puff pastry for added fiber.
  • Portion Control: Serve smaller portions to keep servings within dietary goals.

Equipment Recommendations

To make your cooking experience smooth and enjoyable, here are a few essential tools:

  • Baking Sheet: A sturdy baking sheet is crucial for even cooking.
  • Parchment Paper: This helps prevent sticking and makes cleanup a breeze.
  • Mixing Bowls: Have a few sizes on hand for mixing your filling and dough.
  • Rolling Pin: For rolling out the puff pastry evenly.
  • Fork: Essential for sealing the edges of the twists.

Serving Suggestions

Ready to serve your delicious Jalapeno Popper Twists? Here are some serving ideas:

  • Serve Warm: These twists are best enjoyed fresh out of the oven while they’re warm and flaky.
  • Accompany with Dips: Provide a variety of dips like ranch dressing, guacamole, and spicy salsa for guests to enjoy.
  • Garnish: Consider garnishing with fresh cilantro or chopped green onions for a pop of color and freshness.
  • Pair with Drinks: They pair perfectly with refreshing drinks like iced tea, beer, or cocktails.

In conclusion, these Jalapeno Popper Twists are more than just a recipe; they’re an invitation to gather friends and family around the table, share stories, and create lasting memories. With their irresistible flavor and delightful crunch, they are sure to become a favorite at your next gathering. So grab your ingredients, put on your apron, and let’s make some culinary magic happen!

Delicious Jalapeno Popper Twists for Epic Game Day Fun

Prep Time 15 minutes
Cook Time 20 minutes
Total Time 35 minutes
Servings 8 pieces
Calories 250
These spicy and cheesy jalapeno popper twists are perfect for game day snacking, combining creamy filling with a flaky puff pastry crust.

Ingredients

Dough

  • 1 sheet Puff Pastry (Ensure it’s fully thawed.)

Filling

  • 8 oz Cream Cheese (Can substitute with Neufchâtel.)
  • 1 cup Shredded Sharp Cheddar Cheese (Monterey Jack is a great mild alternative.)
  • 0.5 cup Sliced Jalapenos (Use fresh for more heat or pickled for milder.)
  • 1 tsp Garlic Powder (Fresh garlic can be used as a substitute.)
  • 1 large Egg (Use non-dairy milk for a vegan version.)
  • 0.5 cup Ranch Dressing (Complements the flavors wonderfully.)
  • 0.25 cup Sriracha Mayo (Perfect for an extra kick of heat.)
  • 0.25 cup Honey Mustard (Provides a sweet and tangy contrast.)

Instructions 

  • Preheat oven to 375°F (190°C). Roll out puff pastry and cut into strips.
  • Mix cream cheese, cheddar, jalapenos, garlic powder, and ranch dressing to make the filling.
  • Spread filling on pastry strips, roll into twists, and brush with beaten egg.
  • Bake for 20 minutes until golden brown. Serve with sriracha mayo and honey mustard.

Notes

For extra heat, add more jalapenos or a dash of hot sauce.
Calories: 250kcal
Cost: $15
Course: Appetizer
Cuisine: American
Keyword: cheese, Jalapeno, Snack

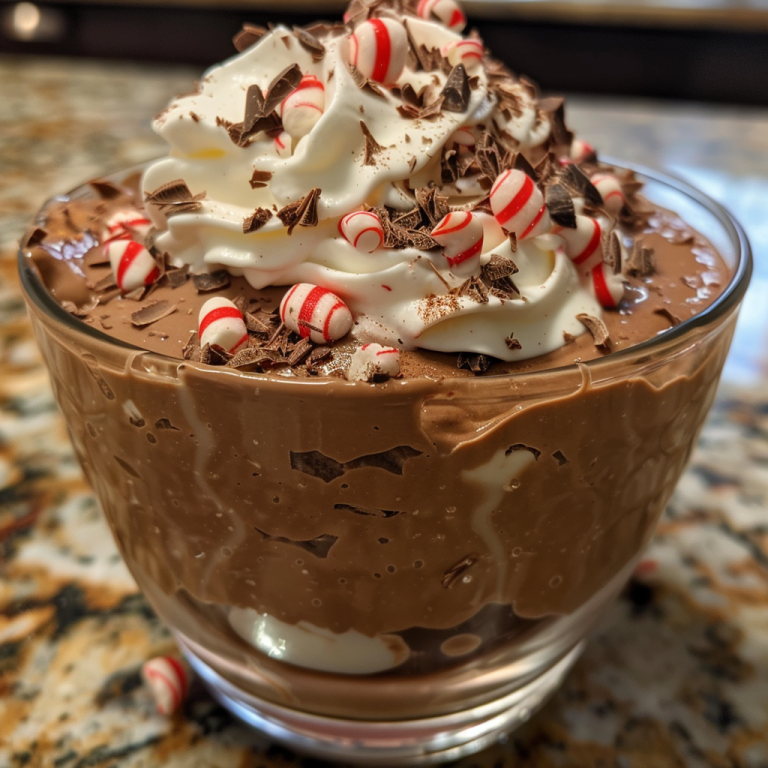
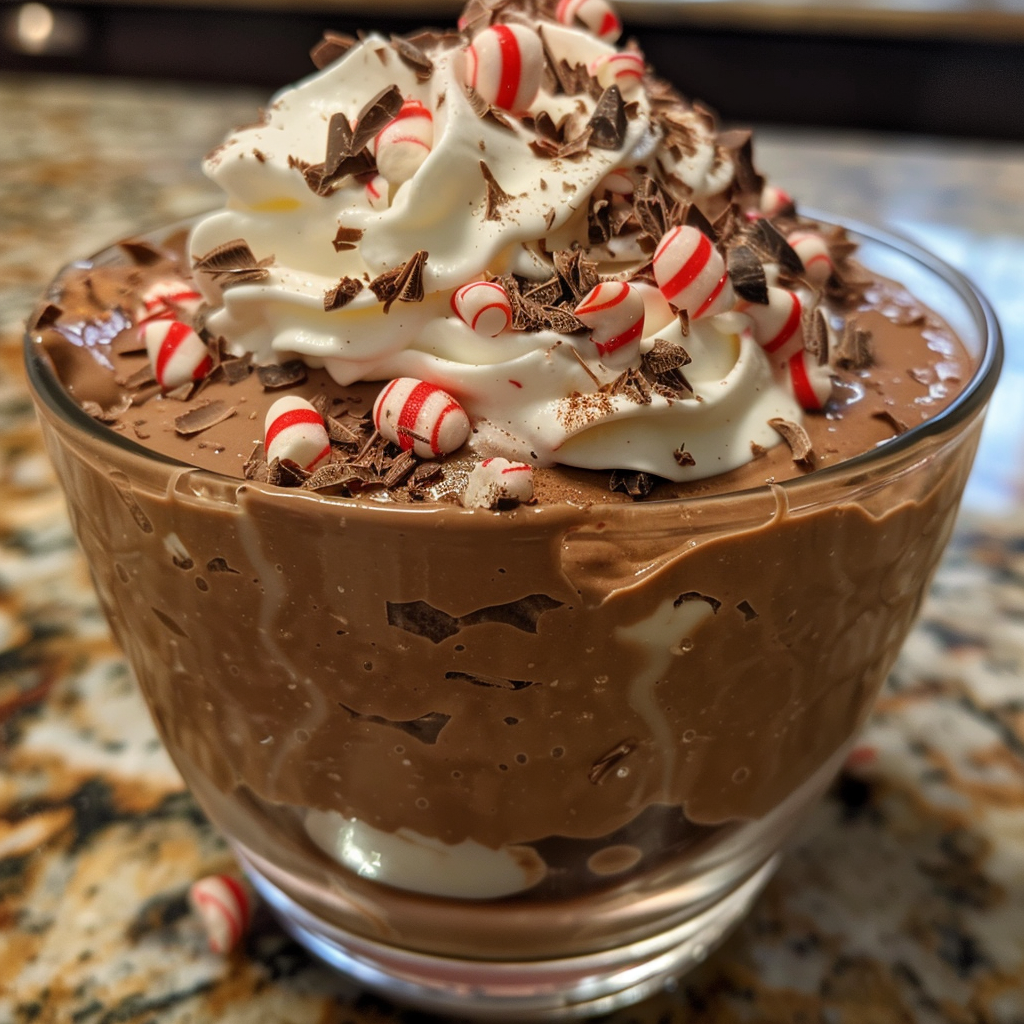
Indulge in the Art of Chocolate Mousse Cups

Welcome to a delicious journey where the rich flavors of chocolate meet the airy lightness of whipped cream! In this guide, we’ll explore the enchanting world of chocolate mousse cups—a **5-ingredient dessert** that’s perfect for any occasion. Whether it’s a romantic dinner or a festive gathering, these mousse cups are a delightful treat that promises to transport you to a place of sweet memories. Let’s dive into the magic of this recipe!

Why You’ll Love This Recipe

  • Quick and Easy: With just five ingredients, this recipe is not only simple to follow but also perfect for those last-minute dessert cravings.
  • Make-Ahead Convenience: These chocolate mousse cups can be prepared ahead of time, making them ideal for entertaining or busy weeknights.
  • Impressive Presentation: Serve them in elegant cups for a stunning dessert that looks gourmet but requires minimal effort.
  • Versatile Flavor: Customize your mousse with various toppings or flavors, allowing you to create a unique dessert every time.
  • Decadent Taste: Experience the rich, velvety texture of chocolate paired with the lightness of whipped cream—truly a dessert that satisfies!

Ingredient Breakdown

Understanding the ingredients is key to mastering chocolate mousse cups. Here’s what you’ll need:

  • 8 oz (225g) semi-sweet chocolate (60-70% cocoa): Choose high-quality chocolate for the best flavor. Feel free to swap with dark chocolate for a more intense experience.
  • 2 cups (480ml) heavy whipping cream: This gives the mousse its creamy texture. For a lighter option, consider using coconut cream.
  • 3 tbsp unsalted butter: This helps the chocolate melt smoothly. Substitute with coconut oil for a dairy-free version.
  • ¼ cup (50g) granulated sugar: Adjust sweetness to your preference. You can use powdered sugar for a smoother incorporation.
  • 1 tsp vanilla extract: Elevate the flavor profile with a splash of vanilla, but feel free to experiment with other extracts like almond.

Step-by-Step Instructions for Making Chocolate Mousse Cups

Let’s walk through the process of creating these delightful mousse cups:

  1. Melt the chocolate: Over a double boiler, combine the chocolate and butter. Stir gently until melted and smooth. Allow it to cool slightly.
  2. Whip the cream: In a separate bowl, whip 1½ cups of heavy cream, sugar, and vanilla until soft peaks form. Be cautious not to overwhip.
  3. Combine mixtures: Gently fold the cooled chocolate mixture into the whipped cream, ensuring not to deflate the cream.
  4. Portion the mousse: Spoon the mixture into serving cups, filling them about three-quarters full.
  5. Chill: Cover and refrigerate the mousse cups for at least **4 hours** to set.
  6. Garnish: Just before serving, whip the remaining cream to stiff peaks and dollop on top of the mousse. Feel free to add chocolate shavings, fresh berries, or mint leaves for an extra touch!

Expert Tips for Perfect Chocolate Mousse

  • Use room temperature ingredients: Ensure your chocolate and cream are at room temperature for better integration.
  • Fold gently: When combining the chocolate and whipped cream, use a gentle folding motion to maintain the airy texture.
  • Chill thoroughly: Be patient! Allow the mousse to chill adequately for the best texture and flavor.
  • Experiment with flavors: Add a splash of liqueur or espresso to the chocolate for a unique twist.
  • Invest in quality chocolate: The chocolate is the star! Choose a brand you love for the best taste.
  • Watch for over-whipping: Keep an eye on your whipped cream; stop at soft peaks to ensure the mousse remains light.
  • Temperature matters: If you’re in a warm area, consider chilling your mixing bowl before whipping.
  • Customize toppings: Get creative with toppings—try crushed cookies, caramel drizzle, or candied nuts!

Common Mistakes and Troubleshooting

Even the best can encounter hiccups. Here are solutions to common issues:

  • Grainy texture: This can happen if chocolate is overheated. Always melt gently over low heat.
  • Deflated mousse: Over-whipping can lead to a dense mousse. Aim for soft peaks when whipping cream.
  • Separation: If the chocolate and cream separate, gently re-whip to bring it back together.

Delicious Variations of Mousse Cups

Looking to switch things up? Here are a few variations to try:

  • Dark Chocolate Raspberry: Fold in fresh raspberries for a tart contrast to the rich chocolate.
  • Mint Chocolate: Add a few drops of peppermint extract to the chocolate for a refreshing twist.
  • Nutella Mousse: Substitute half the chocolate with Nutella for a hazelnut flavor.
  • Spicy Chocolate: Incorporate a pinch of cayenne or chili powder for a surprising kick!

Storage and Make-Ahead Instructions

Chocolate mousse cups are perfect for **make-ahead** desserts. Here’s how to store them:

  • Refrigeration: Store covered in the refrigerator for up to 3 days. The mousse will maintain its texture and flavor.
  • Freezing: You can freeze the mousse cups, but they are best enjoyed fresh. If frozen, allow to thaw in the fridge before serving.

Comprehensive FAQ

  • Can I use different types of chocolate? Yes! Feel free to experiment with white or milk chocolate for different flavors.
  • How long do chocolate mousse cups last? They are best consumed within 3 days when stored in the fridge.
  • Can I make this dairy-free? Absolutely! Use dairy-free chocolate and coconut cream as substitutes.
  • What if I don’t have a double boiler? You can melt chocolate in a heatproof bowl set over a pot of simmering water or in the microwave in short bursts.
  • Can I add alcohol to the mousse? Yes! A splash of liqueur can enhance the flavor—just be mindful of the total liquid content.
  • What’s the best way to serve chocolate mousse? Serve in individual cups or glasses, topped with whipped cream and fresh fruit.
  • Can I use powdered sugar instead of granulated? Yes, powdered sugar can be used for a smoother texture.
  • What are some good toppings for chocolate mousse? Consider fresh fruits, crushed cookies, chocolate shavings, or toasted nuts.

Nutritional Tips and Dietary Adaptations

To keep your chocolate mousse cups both indulgent and mindful, here are some tips:

  • Sweetener alternatives: Use natural sweeteners like honey or maple syrup to reduce refined sugar intake.
  • Low-fat options: For a lighter mousse, substitute some heavy cream with Greek yogurt.
  • Dairy-free swaps: As mentioned, coconut cream and dairy-free chocolate can make this dessert accessible for all diets.

Recommended Equipment

To make your chocolate mousse cups, you’ll need:

  • Double boiler: Essential for melting chocolate gently.
  • Mixing bowls: Use one for melting chocolate and another for whipping cream.
  • Electric mixer: A handheld or stand mixer makes whipping cream a breeze.
  • Serving cups: Elegant glasses or small cups enhance the presentation and make serving easy.

Serving Suggestions

When it comes to serving, presentation is everything! Here are some creative serving ideas:

  • Layered dessert: Create a layered dessert by alternating mousse with crushed cookies or fruit.
  • Miniature versions: Use shot glasses for a fun, bite-sized treat perfect for parties.
  • Garnishes: Consider edible flowers or chocolate curls for a sophisticated touch.

Conclusion

Chocolate mousse cups are more than just a dessert; they are a celebration of flavor and creativity! With this comprehensive guide, you have all the tools needed to craft these delightful treats. Whether you’re making them for a special occasion or simply to satisfy your sweet tooth, these mousse cups will undoubtedly bring joy to your table. So roll up your sleeves, gather your ingredients, and let the magic of chocolate whisk you away!

5-Ingredient Chocolate Mousse Cups – A Perfect Make-Ahead Dessert

Prep Time 15 minutes
Cook Time 10 minutes
Total Time 25 minutes
Servings 4 cups
Calories 350
This rich and creamy chocolate mousse is easy to make with just five ingredients and can be prepared ahead of time for a delightful treat.

Ingredients

Main

  • 8 oz oz semi-sweet chocolate (60-70% cocoa)
  • 2 cups ml heavy whipping cream
  • 3 tbsp tbsp unsalted butter
  • ¼ cup cup granulated sugar
  • 1 tsp tsp vanilla extract

Instructions 

  • Melt chocolate and butter over a double boiler; cool slightly.
  • Whip 1½ cups cream with sugar and vanilla to soft peaks.
  • Fold melted chocolate into whipped cream gently.
  • Spoon mousse into cups and chill for 4 hours.
  • Whip remaining cream to stiff peaks; garnish before serving.

Notes

For a richer flavor, use high-quality chocolate.
Calories: 350kcal
Cost: $15
Course: Dessert
Keyword: chocolate

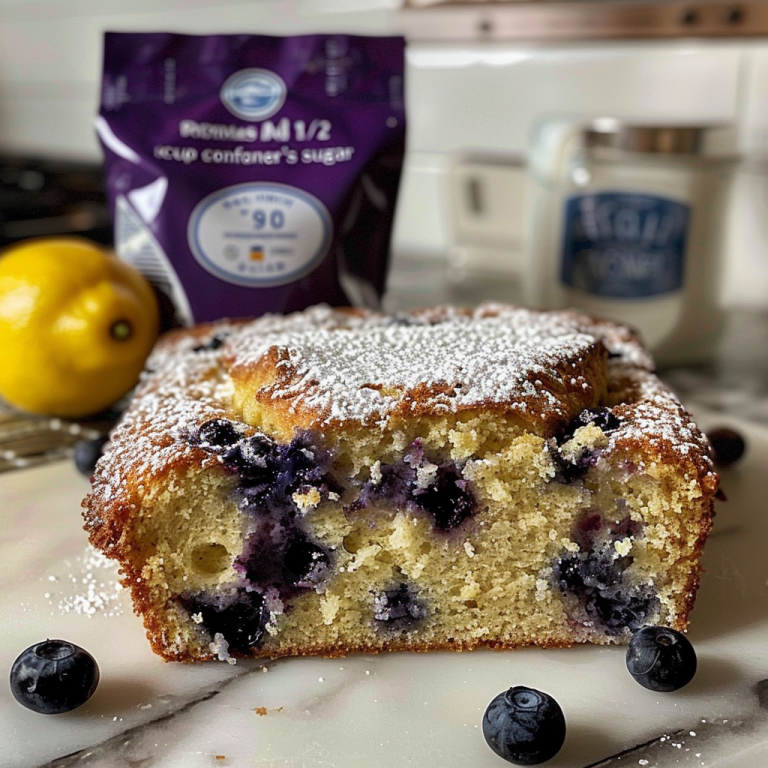
Welcome to a Burst of Flavor: Your Guide to Lemon Blueberry Bread

If you’re searching for a delightful treat that captures the essence of sunny days and sweet moments, look no further than Lemon Blueberry Bread. This recipe marries the zesty brightness of lemons with the juicy goodness of blueberries, creating a harmonious blend that’s perfect for breakfast, a snack, or even dessert. Join me, Jack, as we embark on a culinary adventure filled with flavor, culture, and connection. Let’s dive into this delicious recipe that will have you feeling like you’re basking in the sunshine with every bite!

Why You’ll Love This Recipe

This Lemon Blueberry Bread isn’t just delicious; it’s a versatile delight that can brighten any occasion. Here are some reasons why it’s a must-try:

  • Bright Flavor: The combination of zesty lemon and sweet blueberries creates a refreshing taste that is both uplifting and satisfying.
  • Easy to Make: With straightforward steps, this recipe is perfect for both novice bakers and seasoned pros looking for a quick bread fix.
  • Perfect for Any Meal: Enjoy it for breakfast, as an afternoon snack, or even serve it as dessert with a dollop of whipped cream.
  • Customizable: Add your favorite nuts or spices to make it uniquely yours; the possibilities are endless!
  • Freezer-Friendly: This bread freezes well, so you can always have a slice of sunshine ready to enjoy!

Gather Your Ingredients

Let’s break down the ingredients for this delicious loaf. Each component plays a crucial role in creating that perfect taste and texture.

  • 1 cup white sugar: Provides sweetness that balances the tartness of the lemon.
  • 1/3 cup melted butter (cooled): Adds moisture and richness to the bread.
  • 2 large eggs: Acts as a binding agent, helping to create a tender loaf.
  • 3 tablespoons lemon juice: The secret ingredient that packs a citrus punch!
  • 1 1/2 cups all-purpose flour: The base of the bread, providing structure.
  • 1 teaspoon baking powder: Ensures the loaf rises beautifully.
  • 1 teaspoon salt: Enhances flavor and balances sweetness.
  • 1/2 cup milk: Keeps the batter moist and helps it rise.
  • 1 cup fresh or frozen blueberries: The star of the show that adds sweetness and color.
  • 2 tablespoons grated lemon zest: Intensifies the lemon flavor for a bright, fresh taste.
  • 1/2 cup chopped walnuts (optional): Adds crunch and nuttiness (feel free to omit if nut-free).
  • 1/2 – 1 cup powdered sugar: For the glaze that adds a sweet finish.
  • 2-3 tablespoons lemon juice: To make the glaze tangy and delicious.

Crafting Your Lemon Blueberry Bread

Now that you have your ingredients, let’s get into the step-by-step process of creating this delightful bread!

Step 1: Preheat and Prepare

Preheat your oven to 350°F (175°C) and lightly grease an 8×4-inch loaf pan.

Step 2: Mix the Wet Ingredients

In a large bowl, combine the melted butter, white sugar, eggs, and lemon juice. Whisk until smooth, either by hand or with an electric mixer on low.

Step 3: Combine the Dry Ingredients

In a separate bowl, mix the flour, salt, and baking powder until well blended.

Step 4: Mix Wet and Dry Ingredients

Gradually add 1/3 of the dry ingredients to the wet mixture, stirring gently until mostly combined. Then add half of the milk, repeating the process until all ingredients are combined, making sure to stop mixing when no streaks of flour are visible.

Step 5: Fold in Blueberries and Walnuts

Toss the blueberries, lemon zest, and w chopped walnuts (if using) in the last 1/3 of the flour mixture, then gently fold into the batter.

Step 6: Bake Your Bread

Pour the batter into your prepared loaf pan and bake for 60-70 minutes, or until a toothpick inserted into the center comes out clean.

Step 7: Make the Lemon Glaze

While the bread cools in the pan for 10 minutes, prepare the glaze by mixing 1/2 cup powdered sugar with 2 tablespoons lemon juice. Stir until smooth, adding more sugar to reach your desired thickness.

Step 8: Glaze and Cool

Remove the bread from the pan and pour the glaze over the top. Allow it to cool completely before slicing.

Pro Tips for Perfect Lemon Blueberry Bread

To ensure your bread turns out perfectly every time, consider these expert tips:

  • Use Room Temperature Ingredients: This helps the batter mix more evenly and leads to a tender loaf.
  • Don’t Overmix: Stop mixing once the flour is incorporated to avoid a tough texture.
  • Fresh Blueberries: Use fresh blueberries for the best flavor, but frozen can work too—just don’t thaw them first!
  • Check for Doneness: Ovens can vary, so check your bread a few minutes before the time is up.
  • Let it Cool: Allow the bread to cool completely for the best flavor and texture.
  • Adjust Sweetness: If you prefer a sweeter bread, feel free to increase the sugar slightly.
  • Experiment with Zest: Try adding more lemon zest for an extra burst of flavor!
  • Storage Tips: Wrap the cooled bread tightly in plastic wrap or store in an airtight container.

Common Mistakes and Troubleshooting

Even the best bakers can run into hiccups. Here are some common issues and how to troubleshoot them:

  • Dense Bread: This often results from overmixing or using cold ingredients. Remember to mix gently and let your eggs and butter come to room temperature.
  • Too Sweet: If your bread turns out too sweet, consider reducing the sugar next time or balancing it with a bit more lemon juice.
  • Blueberries Sinking: To prevent this, dust the blueberries with a bit of flour before adding them to the batter.
  • Uneven Baking: Ensure your oven is preheated properly and rotate the pan halfway through baking.

Delicious Variations to Try

Feeling adventurous? Here are some fun twists on the classic Lemon Blueberry Bread:

  • Lemon Blueberry Muffins: Use the same batter in a muffin tin for individual servings.
  • Healthy Swap: Substitute half of the all-purpose flour with whole wheat flour for added nutrients.
  • Gluten-Free Option: Use a gluten-free flour blend to cater to dietary needs.
  • Spiced Version: Add a pinch of cinnamon or nutmeg for a warm flavor twist.

Storage and Make-Ahead Instructions

This bread can be made ahead of time and stored for later enjoyment:

  • Room Temperature: Store in an airtight container for up to 2 days.
  • Refrigerator: Keep in the fridge for up to a week; just be sure to wrap it well.
  • Freezing: Wrap slices in plastic wrap and freeze for up to 3 months. Thaw at room temperature before enjoying.

Frequently Asked Questions

Here are some common questions about Lemon Blueberry Bread:

  • Can I use frozen blueberries? Yes, but do not thaw them before adding to the batter; they may turn the batter purple.
  • How do I know when the bread is done? A toothpick inserted into the center should come out clean or with a few moist crumbs.
  • Can I make this bread without eggs? Yes, you can substitute with flax eggs or applesauce for a vegan version.
  • What can I serve with Lemon Blueberry Bread? It pairs wonderfully with cream cheese, butter, or a drizzle of honey.
  • How long does it take to cool? Let it cool in the pan for 10 minutes, then remove and cool completely before slicing.
  • Can I add other fruits? Absolutely! Try raspberries or strawberries for a delightful twist.
  • How do I make the glaze thicker? Add more powdered sugar until you reach your desired consistency.
  • Is this recipe adaptable for mini loaves? Yes, adjust the baking time; mini loaves typically bake for about 30-40 minutes.

Nutritional Tips and Dietary Adaptations

This Lemon Blueberry Bread can be adapted to fit various dietary preferences:

  • Lightened Up Version: Reduce the sugar and use Greek yogurt instead of butter for a healthier option.
  • Vegan Option: Replace eggs with flaxseed meal mixed with water or applesauce.
  • Low-Carb Adaptation: Use almond flour and a sugar substitute for a lower-carb loaf.

Essential Equipment for Success

Having the right tools can make all the difference in your baking experience. Here’s what you’ll need:

  • Mixing Bowls: A set of mixing bowls in various sizes will help you stay organized.
  • Whisk or Mixer: A whisk for hand mixing or an electric mixer for a quicker process.
  • Loaf Pan: A good quality 8×4-inch loaf pan ensures even baking.
  • Measuring Cups and Spoons: Accurate measurements are key to success.
  • Cooling Rack: Allows your bread to cool evenly and prevents sogginess.

Serving Suggestions: Enjoy a Slice of Sunshine!

Once your Lemon Blueberry Bread is ready, it’s time to enjoy! Here are some serving ideas:

  • With Butter: Spread a little butter on a warm slice for a comforting treat.
  • With Cream Cheese: A layer of cream cheese adds a rich, tangy flavor.
  • As Toast: Toast slices for a delightful breakfast option.
  • With a Cup of Tea: Pair it with your favorite tea for a soothing afternoon snack.

With its delicious flavors and delightful texture, this Lemon Blueberry Bread is sure to become a favorite in your home. So gather your ingredients, embrace your inner baker, and let’s create something truly special together. Happy baking!

Lemon Blueberry Bread

Prep Time 15 minutes
Cook Time 1 hour 5 minutes
Total Time 1 hour 20 minutes
Servings 8 slices
Calories 250
A moist and flavorful bread bursting with fresh blueberries and zesty lemon, perfect for breakfast or a snack.

Ingredients

Dough

  • 1 cup white sugar
  • 1/3 cup melted butter, cooled
  • 2 large eggs
  • 3 tablespoons lemon juice
  • 1.5 cups all-purpose flour
  • 1 teaspoon baking powder
  • 1 teaspoon salt
  • 1/2 cup milk
  • 1 cup fresh or frozen blueberries
  • 2 tablespoons grated lemon zest
  • 1/2 cup chopped walnuts (optional)
  • 1/2 cup powdered sugar
  • 2-3 tablespoons lemon juice (for glaze)

Instructions 

  • Preheat oven to 350°F (175°C). Grease an 8×4-inch loaf pan.
  • Mix melted butter, sugar, eggs, and lemon juice. In a separate bowl, combine flour, salt, and baking powder.
  • Add 1/3 of the flour to wet ingredients, then half of the milk. Repeat with remaining flour and milk, mixing gently.
  • Toss blueberries, lemon zest, and walnuts (if using) with the last 1/3 of flour, then fold into batter.
  • Pour batter into pan and bake for 60-70 minutes. Cool for 10 minutes before glazing.
  • Mix powdered sugar with lemon juice to make glaze. Pour over cooled bread and let set.

Notes

For extra flavor, add more lemon zest or blueberries.
Calories: 250kcal
Cost: $15
Course: Breakfast, Snack
Cuisine: American
Keyword: blueberry, bread, lemon

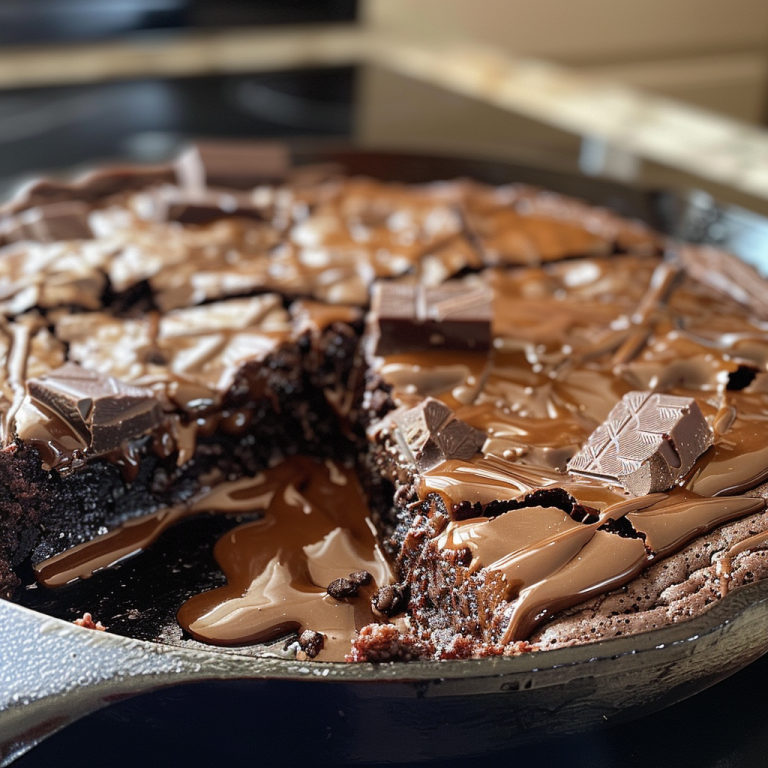
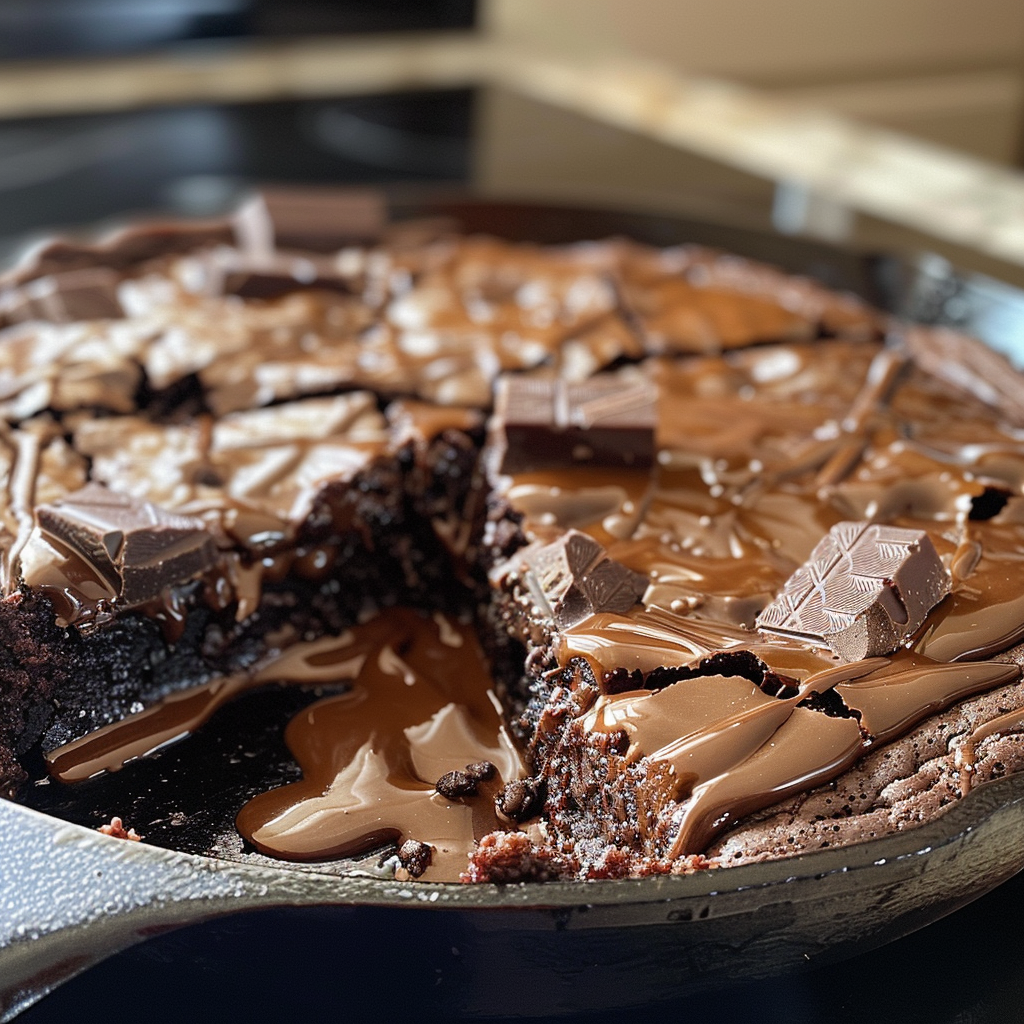
Discover the Art of Skillet Brownies

Join me, Jack, on an indulgent journey to create the most decadent skillet brownies topped with a rich chocolate ganache frosting. This simple yet luxurious dessert is not just a treat; it’s an experience that evokes cherished memories and brings people together around the table. In just a few steps, you’ll be able to whip up a batch that will leave your guests swooning and asking for seconds!

Why You’ll Love This Recipe

There are countless reasons to fall in love with this skillet brownie recipe, but let’s highlight a few that stand out:

  • Easy One-Pan Wonder: Minimal cleanup is required since everything is made in a single skillet, making it perfect for busy days.
  • Rich and Fudgy Texture: These brownies are perfectly fudgy, thanks to the combination of chocolate and butter.
  • Customizable Toppings: You can personalize your brownies with various toppings like nuts, marshmallows, or fruit.
  • Quick to Prepare: With a prep time of just 15 minutes, you can have these delicious brownies ready in no time.
  • Perfect for Sharing: They’re an ideal dessert for gatherings, bringing friends and family together to share a delicious moment.

Ingredients for Skillet Brownie With Chocolate Ganache Frosting

Let’s gather what you need for this delightful recipe. Here’s a detailed breakdown of the ingredients along with some substitution suggestions:

  • 1 cup unsalted butter: This is the base of our brownies, adding richness. If you’re out of butter, you can substitute with coconut oil.
  • 2 cups granulated sugar: Sweetness is essential! Try using brown sugar for a deeper flavor.
  • 4 large eggs: These provide structure. For an egg-free version, use 1/4 cup of unsweetened applesauce per egg.
  • 1 teaspoon vanilla extract: Enhances flavor; consider using almond extract for a twist.
  • 1 cup all-purpose flour: This gives the brownies their structure. Gluten-free flour can be used as a substitute.
  • 1 cup unsweetened cocoa powder: The star ingredient for that chocolate flavor; ensure it’s unsweetened for the best results.
  • 1 teaspoon salt: Balances sweetness and enhances flavors.
  • 1 cup chocolate chips (optional): For extra chocolatey goodness; feel free to mix in white chocolate or butterscotch chips.
  • 1 cup heavy cream: Used for the ganache; you can substitute with coconut cream for a dairy-free option.
  • 8 ounces semi-sweet chocolate, chopped: The key to a luscious ganache; dark chocolate can be used for a richer flavor.
  • 1 tablespoon unsalted butter: Adds shine and richness to your ganache.

How to Make Skillet Brownie With Chocolate Ganache Frosting

Now that we have our ingredients ready, let’s dive into the step-by-step process of making these heavenly skillet brownies.

  1. Preheat the oven to 350°F (175°C).
  2. Melt the butter: In a large oven-safe skillet, melt the butter over low heat, keeping an eye on it to prevent burning.
  3. Mix in the sugar: Remove the skillet from the heat and stir in the sugar. It’s important to mix well.
  4. Add the eggs: Incorporate the eggs one at a time, mixing thoroughly after each addition.
  5. Introduce vanilla: Add the vanilla extract, blending it into the mixture.
  6. Combine dry ingredients: In a separate bowl, sift together the flour, cocoa powder, and salt. Gradually fold these dry ingredients into the wet mixture until just combined.
  7. Pour and bake: Pour the brownie batter back into the skillet and spread it evenly. Bake for about 25-30 minutes until the top looks set and a toothpick inserted comes out with a few moist crumbs.
  8. Prepare the ganache: In a small saucepan, heat the heavy cream over medium heat until it starts to simmer. Remove from heat and add the chopped chocolate. Let it sit for a couple of minutes to melt.
  9. Finish the ganache: Stir in the butter and vanilla until smooth and glossy.
  10. Top your brownies: Let the brownies cool for 10-15 minutes, then pour the ganache over the warm brownies and spread it evenly.

Pro Tips for Perfect Skillet Brownies

Elevate your brownie game with these expert insights:

  • Use fresh ingredients: Ensure all your ingredients are fresh for the best flavor.
  • Don’t overmix: When combining wet and dry ingredients, mix just until combined to maintain a fudgy texture.
  • Check for doneness: Every oven is different; start checking for doneness at the 25-minute mark.
  • Cool before slicing: Allow the brownies to cool slightly for cleaner cuts and to let the flavors meld.
  • Experiment with flavors: Add coffee or espresso powder for a deeper chocolate flavor.
  • Use high-quality chocolate: The better the chocolate, the richer your ganache will be.
  • Let the ganache set: Allow the ganache to cool and set a bit before serving for a perfect pour.
  • Store them properly: Keep your brownies in an airtight container to maintain freshness.

Common Mistakes and Troubleshooting

Even the best chefs can encounter hiccups in the kitchen. Here are some common mistakes and how to troubleshoot them:

  • Brownies are too dry: This could be due to overbaking. Make sure to check them a few minutes before the suggested baking time.
  • Too gooey in the center: If they seem undercooked, return them to the oven for a few more minutes.
  • Ganache is too thin: If your ganache is runny, add a bit more chopped chocolate to thicken it up.
  • Uneven baking: Make sure to position your skillet in the center of the oven for even heat distribution.

Delicious Variations to Try

Feel free to mix it up with these fun variations:

  • Oreo Cheesecake Brownies: Swirl in cream cheese and crushed Oreos for a delightful twist.
  • Peanut Butter Swirl Brownies: Fold in dollops of peanut butter before baking for a nutty flavor.
  • Mint Chocolate Brownies: Add a few drops of mint extract to the batter for a refreshing minty taste.
  • Fruit-Topped Brownies: Top with fresh strawberries or raspberries for a fruity finish.

Storage and Make-Ahead Instructions

Want to enjoy these brownies later? Here’s how to store them and make them ahead of time:

  • Room temperature: Store in an airtight container for up to 3 days.
  • Refrigeration: For longer storage, keep them in the fridge for up to a week.
  • Make-ahead option: Bake the brownies a day in advance and store them at room temperature. Add ganache just before serving.

Frequently Asked Questions

Here are some common questions about skillet brownies:

  • Can I use a different type of pan? Yes, but ensure it’s oven-safe. Cast iron skillets work best.
  • How do I know when my brownies are done? The top should look set, and a toothpick should come out with a few moist crumbs.
  • Can I freeze skillet brownies? Absolutely! Wrap them tightly and freeze for up to 3 months.
  • What if I don’t have heavy cream? You can substitute with milk, but the ganache will be less rich.
  • Can I add nuts? Yes! Chopped nuts are a great addition to the batter or as a topping.
  • How can I make these brownies healthier? Use whole wheat flour and reduce sugar. You can also add applesauce for moisture.
  • Can I double the recipe? Yes! Just ensure your skillet is large enough to accommodate the extra batter.
  • What toppings do you recommend? Apart from ganache, whipped cream, ice cream, or fresh fruit work wonderfully!

Nutritional Tips and Dietary Adaptations

For those mindful of their dietary choices, here are some tips:

  • Gluten-free option: Substitute all-purpose flour with a gluten-free blend.
  • Lower sugar option: Use coconut sugar or a sugar alternative to reduce overall sugar content.
  • Vegan adaptation: Replace eggs with flaxseed meal and use plant-based butter and milk.
  • Nut-free option: Ensure chocolate chips and toppings are free from nuts if allergies are a concern.

Essential Equipment for Making Skillet Brownies

Before starting, make sure you have the following tools on hand:

  • Oven-safe skillet: A cast iron skillet works best for even heat distribution.
  • Mixing bowls: For combining your wet and dry ingredients.
  • Whisk and spatula: Essential for mixing and folding ingredients together.
  • Measuring cups and spoons: Accurate measurements are key to success.

Serving Suggestions

These skillet brownies are best enjoyed fresh out of the oven. Here are some serving ideas:

  • With ice cream: Serve warm brownies with a scoop of vanilla ice cream for the ultimate treat.
  • With whipped cream: A dollop of whipped cream on top adds a delightful touch.
  • Garnished with fruits: Fresh berries or banana slices can enhance the flavor profile.
  • Drizzled with caramel sauce: For an extra sweet touch, drizzle caramel over your brownies.

In conclusion, making skillet brownies topped with chocolate ganache is not just about baking; it’s about creating moments and memories. Whether you’re celebrating a special occasion or just want to indulge in a treat, this recipe offers a delightful escape into the world of flavors. So gather your ingredients, invite your friends, and let’s bake some magic together!

Skillet Brownie With Chocolate Ganache Frosting

Prep Time 15 minutes
Cook Time 30 minutes
Total Time 45 minutes
Servings 8 pieces
Calories 420
A rich and fudgy skillet brownie topped with a smooth chocolate ganache, perfect for chocolate lovers.

Ingredients

Batter

  • 1 cup unsalted butter
  • 2 cups granulated sugar
  • 4 large eggs
  • 1 teaspoon vanilla extract
  • 1 cup all-purpose flour
  • 1 cup unsweetened cocoa powder
  • 1 teaspoon salt
  • 1 cup chocolate chips (optional)

Ganache

  • 1 cup heavy cream
  • 8 ounces semi-sweet chocolate, chopped
  • 1 tablespoon unsalted butter
  • 1 teaspoon vanilla extract

Instructions 

  • Preheat oven to 350°F (175°C). Melt butter in skillet, then stir in sugar and eggs. Mix in vanilla, fold in dry ingredients, and bake for 25-30 minutes.
  • Heat heavy cream until simmering, then add chopped chocolate. Let sit, then stir in butter and vanilla to make ganache. Cool slightly.
  • Pour ganache over cooled brownies and spread evenly before serving.

Notes

For extra flavor, sprinkle with sea salt or add nuts to the batter.
Calories: 420kcal
Cost: $15
Course: Dessert
Cuisine: American
Keyword: chocolate

As the sun shines brightly and the days grow longer, there’s something undeniably refreshing about a glass of Sparkling Berry Lemonade. This vibrant drink captures the essence of summer, blending the sweetness of fresh berries with the zing of lemonade and the effervescence of sparkling water. Beyond being just a drink, it’s a celebration in a glass, perfect for family gatherings, sunny picnics, or simply enjoying a moment of relaxation. In this article, we’ll dive deep into the world of Sparkling Berry Lemonade, exploring its delightful components, the joy of crafting it, and much more!

Why You’ll Love This Recipe

This Sparkling Berry Lemonade isn’t just another beverage; it’s an experience! Here are five reasons to whip up this delightful drink:

  • Refreshing Flavor: The combination of tangy lemonade and sweet berries creates a balanced flavor profile that quenches thirst on hot days.
  • Visually Stunning: The vibrant colors of mixed berries make it not just tasty but also a feast for the eyes, perfect for impressing guests.
  • Versatile for Any Occasion: Whether it’s a summer barbecue, a birthday party, or a quiet afternoon, this drink fits right in.
  • Kid-Friendly: With no alcohol involved, it’s a perfect treat for kids, making them feel special with a drink of their own.
  • Easy to Customize: With various fruits and flavors to choose from, you can make it uniquely yours every time.

Ingredient Breakdown

Let’s explore the key ingredients that make this Sparkling Berry Lemonade so special. Each component plays a vital role in creating the perfect drink.

  • Mixed Berries: Use a mix of fresh or frozen strawberries, blueberries, and raspberries for a burst of flavor. If using frozen berries, allow them to thaw slightly before use.
  • Lemonade: You can use store-bought lemonade or make your own from freshly squeezed lemons for the best taste.
  • Sparkling Water: This adds the fizz! Choose plain or flavored sparkling water to enhance the taste.
  • Fresh Mint Leaves: Use for garnish; they not only look pretty but add a refreshing aroma.
  • Ice Cubes: Essential for serving; they keep your drink cool and refreshing.

Pro Tips for the Perfect Sparkling Berry Lemonade

Creating a perfect Sparkling Berry Lemonade is all about the details. Here are some expert tips to elevate your beverage:

  • Quality Ingredients: Use the freshest fruits and high-quality lemonade for the best flavor.
  • Adjust Sweetness: Taste your lemonade before serving; you can always add sugar or honey to adjust the sweetness.
  • Chill Your Ingredients: For the best refreshing experience, chill your berries, lemonade, and sparkling water beforehand.
  • Layering the Drink: To create a visually appealing drink, layer the ingredients by adding lemonade first, followed by the berries, and then top with sparkling water.
  • Make Ahead: Prepare the berry mixture in advance and store it in the fridge, adding sparkling water just before serving.
  • Garnish Creatively: Experiment with garnishes like lemon slices or additional berries for that extra flair.
  • Use Citrus Zest: Adding a sprinkle of lemon zest can enhance the citrus flavor and aroma.
  • Experiment with Herbs: Try adding basil or rosemary for a unique twist on the classic flavor.

Common Mistakes and Troubleshooting

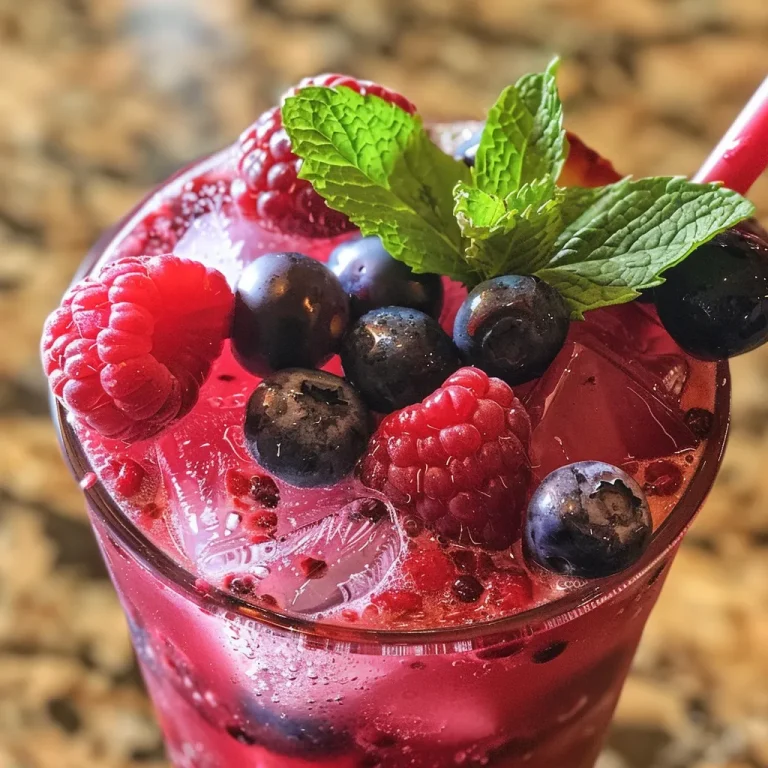
Juicy Sparkling Berry Lemonade with fresh berries and mint, captured in a close-up photo.

Even the best chefs encounter hiccups. Here’s how to troubleshoot common issues:

  • Too Sweet: If your drink turns out too sweet, add a splash of lemon juice or more sparkling water to balance it out.
  • Berries Sink: If berries sink to the bottom, try freezing them beforehand; they’ll float better in the drink.
  • Flat Sparkling Water: Ensure your sparkling water is freshly opened to maintain its fizz.

Variations of Sparkling Berry Lemonade

Want to mix things up? Here are four delicious variations to try:

  • Citrus Berry Blend: Add slices of orange and lime for a zesty twist.
  • Berry Basil Lemonade: Incorporate fresh basil leaves for an herbaceous touch.
  • Peach Berry Lemonade: Substitute some of the berries with fresh peaches for a sweet, summer flavor.
  • Spicy Berry Lemonade: Add a hint of jalapeño or ginger for a spicy kick.

Storage and Make-Ahead Instructions

Preparing ahead can save time during gatherings. Here’s how to store your Sparkling Berry Lemonade:

  • Berry Mixture Storage: Store the mixed berries and lemonade in the fridge for up to 3 days.
  • Sparkling Water: Keep it separate until ready to serve to maintain its fizz.
  • Make-Ahead Tip: Prepare the berry syrup a day in advance; it can be kept in an airtight container.

Comprehensive FAQ on Sparkling Berry Lemonade

Got questions? Here are answers to some frequently asked inquiries:

  • Can I use frozen berries? Yes, frozen berries work great; just let them thaw slightly before muddling.
  • How can I make this an alcoholic beverage? Add a splash of vodka or gin for a refreshing cocktail version.
  • How long can I store the berry syrup? It can be stored in the fridge for up to a week.
  • Can I adjust the sweetness of the lemonade? Absolutely! Adjust the sugar or sweetener to your liking.
  • What type of sparkling water should I use? You can use plain or flavored sparkling water based on your preference.
  • How many servings does this recipe make? The recipe serves about 4-6 people, depending on glass size.
  • Can I use other fruits? Yes, feel free to experiment with other fruits like kiwi or mango!
  • Is this drink kid-friendly? Definitely! It’s a delightful non-alcoholic drink for kids and adults alike.

Nutrition Tips and Dietary Adaptations

Staying health-conscious while enjoying this drink is easy with a few adaptations:

  • Low Sugar: Use a sugar substitute like stevia or erythritol to lower the calorie count.
  • Fresh Ingredients: Opt for organic fruits and homemade lemonade for a healthier option.
  • Hydration Boost: Adding cucumber slices can enhance hydration and freshness.

Equipment Recommendations

Having the right tools can make the process smoother. Here’s what you need:

  • Pitcher: A large pitcher is essential for mixing your lemonade and berries.
  • Muddler: Use a muddler to gently crush the berries and release their juices.
  • Measuring Cups: Accurate measurements will help you replicate the recipe perfectly every time.
  • Glassware: Choose tall glasses for serving to showcase the beautiful layers of your drink.

Serving Suggestions

How you serve your Sparkling Berry Lemonade can enhance the experience:

  • Serve Chilled: Always serve the drink over ice for maximum refreshment.
  • Garnish Creatively: Use mint leaves, lemon slices, or additional berries for decoration.
  • Pair with Snacks: This drink pairs wonderfully with light snacks like veggie platters or fruit salads.

In conclusion, Sparkling Berry Lemonade is more than just a drink; it’s a celebration of summer, flavor, and creativity. With its refreshing taste, vibrant colors, and endless variations, it’s the perfect companion for any occasion. So gather your ingredients, invite some friends over, and let the magic of this delightful beverage bring joy to your summer days. Cheers to new flavors and cherished memories!

Sparkling Berry Lemonade

Prep Time 10 minutes
Total Time 10 minutes
Servings 4 glasses
Calories 80
A refreshing and fizzy beverage perfect for summer gatherings, combining fresh berries, lemonade, and sparkling water.

Ingredients

Fruits

  • 1 cup fresh or frozen mixed berries (strawberries, blueberries, raspberries)
  • 2 cups lemonade (store-bought or homemade)
  • 1 cup sparkling water
  • to taste Fresh mint leaves (for garnish)
  • Ice cubes Ice cubes

Instructions 

  • Wash and slice fresh berries or thaw frozen ones.
  • Combine berries and lemonade in a pitcher; muddle slightly.
  • Fill glasses with ice and pour berry mixture over.
  • Top with sparkling water and garnish with mint leaves.
  • Serve immediately and enjoy the fizz!

Notes

Use fresh berries for the best flavor, and adjust sweetness as desired.
Calories: 80kcal
Cost: $12
Course: Beverage
Cuisine: American
Keyword: Berry, lemonade, Sparkling

Indulge in the Magic of Chocolate Peppermint Mousse Cups

As the holidays approach, the quest for the perfect dessert begins. Imagine a dessert that captures the essence of festive cheer—a delightful blend of rich chocolate and refreshing peppermint, all whipped into a light, airy mousse. Welcome to your new favorite holiday treat: Chocolate Peppermint Mousse Cups! These luscious cups are not only a feast for the eyes but also a celebration of flavors that will leave your guests wanting more. Whether you’re hosting a holiday party or simply indulging in a quiet evening at home, this recipe is your ticket to culinary bliss.

Why You’ll Love This Recipe

There are countless reasons to fall in love with these Chocolate Peppermint Mousse Cups. Here are just a few:

  • Irresistibly Decadent: Each spoonful offers a luxurious blend of chocolate and peppermint that’s perfect for the holidays.
  • Easy to Make: With straightforward steps and minimal ingredients, you can whip these up in no time, making them ideal for last-minute gatherings.
  • Make-Ahead Friendly: Prepare these cups a day in advance and store them in the fridge, allowing the flavors to meld beautifully.
  • Customizable: Adjust the minty flavor or chocolate richness to suit your personal taste, ensuring a dessert that’s just right for you.
  • Stunning Presentation: Serve these mousse cups in elegant glassware, garnished with whipped cream and crushed peppermint candies for a festive touch.

Ingredients Breakdown

To create the perfect Chocolate Peppermint Mousse Cups, you’ll need the following ingredients. Each plays a crucial role in achieving that delightful balance of flavors and textures:

  • 8 oz Semi-Sweet Chocolate, chopped: High-quality chocolate enhances richness and provides the base flavor for your mousse.
  • 2 tablespoons Unsalted Butter: Adds creaminess; feel free to swap with coconut oil for a dairy-free option.
  • 3 large Eggs, separated: Essential for structure; consider using pasteurized eggs if you’re concerned about raw egg consumption.
  • 1/4 cup Granulated Sugar: Adjust based on sweetness preference; this helps to balance the bitterness of the chocolate.
  • 1 teaspoon Vanilla Extract: For depth of flavor; don’t substitute this for optimal taste.
  • 1/4 teaspoon Peppermint Extract: Adjust to your preference for a more or less intense minty flavor.
  • 1 cup Heavy Whipping Cream: The key to achieving that light, fluffy texture; can use dairy alternatives if desired.
  • Whipped Cream: For a touch of freshness on top.
  • Crushed Peppermint Candies or Candy Canes: For festive garnish and added crunch.
  • Chocolate Shavings: Optional for extra visual appeal and richness.

How to Make Chocolate Peppermint Mousse Cups

Creating these mousse cups is a simple yet rewarding process. Follow these steps to craft the perfect dessert:

Step 1: Melt the Chocolate

In a heatproof bowl, combine the chopped chocolate and butter. Melt over a double boiler, stirring until smooth. Allow it to cool slightly.

Step 2: Whip the Egg Whites

In a clean mixing bowl, beat the egg whites until soft peaks form. Gradually add the granulated sugar and continue beating until stiff peaks form.

Step 3: Mix Egg Yolks and Chocolate

In another bowl, whisk the egg yolks until pale. Stir in the melted chocolate mixture and vanilla extract. Mix until well combined.

Step 4: Combine Ingredients

Gently fold the whipped egg whites into the chocolate mixture. In a separate bowl, whip the heavy cream until soft peaks form. Carefully fold the whipped cream into the chocolate until fully incorporated.

Step 5: Chill and Serve

Pour the mousse mixture into serving cups or glasses. Refrigerate for at least 2 hours or until set. Just before serving, top with whipped cream, crushed peppermint, and chocolate shavings.

Pro Tips for Perfect Mousse Cups

To ensure your Chocolate Peppermint Mousse Cups are a resounding success, consider these expert tips:

  • Use Quality Ingredients: High-quality chocolate and fresh eggs make a noticeable difference in flavor.
  • Chill Everything: Ensure your mixing bowl, beaters, and heavy cream are cold for better whipping results.
  • Fold Gently: When incorporating whipped cream and egg whites, use a gentle folding motion to maintain airiness.
  • Adjust Peppermint Extract: Start with a small amount and taste as you go to avoid overpowering the chocolate.
  • Prep Ahead: These mousse cups can be made a day in advance—just cover them well to prevent any fridge odors.
  • Consider Serving Size: Use small cups for individual servings to make them feel extra special.
  • Decorate with Flair: Get creative with garnishes, such as chocolate curls or festive sprinkles, to enhance visual appeal.
  • Experiment with Flavors: Try adding a dash of espresso powder for a mocha twist!

Common Mistakes and Troubleshooting

Even the best chefs can run into issues. Here are some common pitfalls and how to avoid them:

  • Grainy Texture: This can happen if the chocolate is overheated. Always melt it slowly and stir consistently.
  • Deflated Mousse: Overmixing when combining whipped cream or egg whites can cause the mousse to lose its airy texture.
  • Too Sweet or Not Sweet Enough: Adjust the sugar to your taste, especially considering the sweetness of the chocolate used.
  • Peppermint Overload: Start with less peppermint extract and gradually add more to taste.

Delicious Variations

Looking to mix things up? Here are a few delightful variations you can try:

  • Dark Chocolate Peppermint Mousse: Swap semi-sweet chocolate for dark chocolate for a richer flavor.
  • Vegan Peppermint Mousse: Use dairy-free chocolate, coconut cream, and flax eggs as substitutes.
  • Mocha Peppermint Mousse: Add 1 tablespoon of instant espresso powder to the chocolate mixture for a coffee twist.
  • Layered Mousse Cups: Alternate layers of chocolate mousse with layers of peppermint whipped cream for a stunning presentation.

Storage and Make-Ahead Instructions

These mousse cups not only taste great but can also be prepared ahead of time. Here’s how to store them:

  • Refrigeration: Store the mousse cups in the fridge, covered with plastic wrap, for up to 3 days.
  • Freezing: While mousse can be frozen, it’s best served fresh. If you must freeze, allow them to thaw overnight in the fridge before serving.

Frequently Asked Questions (FAQs)

If you have questions about making Chocolate Peppermint Mousse Cups, you’re not alone! Here are some common queries:

  • Can I make this mousse without raw eggs? Yes, you can use pasteurized eggs or find recipes that use whipped aquafaba instead.
  • How long does it last in the fridge? The mousse can be stored for up to 3 days, but it’s best enjoyed fresh.
  • Can I freeze these mousse cups? Yes, but the texture may change slightly upon thawing.
  • What if I don’t like peppermint? Feel free to omit the peppermint extract and use just vanilla for a classic chocolate mousse.
  • How do I prevent the mousse from being too sweet? Adjust the sugar based on the sweetness of your chocolate and your personal taste.
  • Can I use a different type of chocolate? Absolutely! Dark, milk, or even white chocolate can be used, depending on your preference.
  • What’s the best way to serve these cups? Serve them chilled, garnished with whipped cream and crushed peppermint, in individual glasses or cups.
  • Is this recipe gluten-free? Yes, all the ingredients are naturally gluten-free, making it a safe choice for gluten-sensitive guests.

Nutritional Tips and Dietary Adaptations

For those mindful of dietary needs, here are some tips:

  • Lower Sugar Option: Use sugar substitutes like erythritol or stevia for a lower-calorie option.
  • Dairy-Free Adaptation: Use coconut cream and dairy-free chocolate to make a delicious vegan version.
  • Protein Boost: Add a scoop of protein powder to the mousse for a healthier dessert option.

Essential Equipment Recommendations

To make the process easier, here’s a list of essential tools you’ll need:

  • Mixing Bowls: Use both large and medium-sized bowls for mixing different components.
  • Electric Mixer: A hand or stand mixer is perfect for whipping egg whites and cream.
  • Rubber Spatula: Essential for folding ingredients without deflating the mixture.
  • Serving Cups or Glasses: Choose clear glassware to show off the beautiful layers of your mousse.

Serving Suggestions

Presenting your Chocolate Peppermint Mousse Cups with flair will leave a lasting impression. Here are some ideas:

  • Festive Garnishes: Top with whipped cream, crushed peppermint, and a sprinkle of cocoa powder for an elegant touch.
  • Serve with Cookies: Pair with peppermint-flavored or chocolate cookies for a delightful dessert platter.
  • Creative Glassware: Use unique cups or jars to add a personal touch to your dessert presentation.

In conclusion, Chocolate Peppermint Mousse Cups are the perfect way to celebrate the season’s joys with family and friends. Their rich flavors and elegant presentation make them a standout dessert that anyone can master. So, gather your ingredients, channel your inner chef, and embark on this delicious adventure. Let each bite transport you to a world of holiday magic, where every morsel is a reminder of the joy of sharing good food with loved ones. Happy cooking!

Decadent Chocolate Peppermint Mousse Cups Recipe for the Holidays

Prep Time 15 minutes
Cook Time 10 minutes
Total Time 25 minutes
Servings 4 cups
Calories 350
Celebrate the holidays with these rich and festive chocolate peppermint mousse cups, perfect for sharing and impressing guests.

Ingredients

Chocolate and Butter

  • 8 oz Semi-Sweet Chocolate, chopped (High-quality chocolate enhances richness.)
  • 2 tablespoons Unsalted Butter (Can substitute with coconut oil for dairy-free.)

Eggs and Sugar

  • 3 large Eggs, separated (Consider pasteurized eggs if concerned about raw.)
  • 0.25 cup Granulated Sugar (Adjust based on sweetness preference.)

Flavorings

  • 1 teaspoon Vanilla Extract (Do not substitute for optimal flavor.)
  • 0.25 teaspoon Peppermint Extract (Adjust to preference.)

Cream and Garnishes

  • 1 cup Heavy Whipping Cream (Can use dairy alternatives.)

Whipped Cream

  • to taste Whipped Cream (For a touch of freshness.)

Garnish

  • as needed Crushed Peppermint Candies or Candy Canes (For festive garnish.)
  • as needed Chocolate Shavings (Optional for extra visual appeal.)

Instructions 

  • Melt the chocolate and butter together until smooth.
  • Whisk egg yolks with sugar, then combine with melted chocolate mixture.
  • Whip the heavy cream until soft peaks form, then fold into the chocolate mixture.
  • In a separate bowl, beat egg whites until stiff peaks form and gently fold into the mousse.
  • Spoon the mousse into cups, garnish with whipped cream, crushed candies, and chocolate shavings. Chill before serving.

Notes

Ensure the mousse is chilled for the best texture and flavor.
Calories: 350kcal
Cost: $15
Course: Dessert
Cuisine: holiday
Keyword: chocolate, peppermint

Unlock the Flavors of the World with Keto Rosemary and Garlic Infused Lamb Chops

Welcome to a culinary adventure that takes you straight to the heart of flavor! Today, we dive into a dish that celebrates the richness of nature: Keto Rosemary and Garlic Infused Lamb Chops. As a chef and culinary explorer, I believe that food is not just about sustenance; it’s about stories, culture, and connection. This recipe encapsulates all that is wonderful about lamb—its tender meat, its ability to absorb flavors, and its role in diverse cuisines around the globe. Join me as we embark on this delicious journey!

Why You’ll Love This Recipe

  • Flavor Explosion: The combination of rosemary and garlic creates a savory profile that elevates the lamb, making each bite a delight.
  • Keto-Friendly: Perfect for those following a ketogenic diet, these lamb chops are low in carbohydrates while being rich in healthy fats and protein.
  • Quick and Easy: With minimal prep and cook time, you can whip up this luxurious dish in under 30 minutes!
  • Versatile Pairing: These lamb chops pair beautifully with a variety of sides—from roasted vegetables to creamy cauliflower mash, enhancing every meal.
  • Impressive Presentation: Whether it’s a weeknight dinner or a special occasion, these lamb chops are sure to impress your guests with their gourmet flair.

Ingredient Breakdown

This recipe requires a few simple ingredients that come together to create a feast for your senses.

  • 4 lamb chops (1 inch thick): About 1.5 lbs or 680 grams, preferably grass-fed for the best flavor and nutrients.
  • 2 tablespoons olive oil: A healthy fat that enhances the richness of the lamb.
  • 4 cloves garlic, minced: Infuses the meat with a robust flavor.
  • 1 tablespoon fresh rosemary, finely chopped: Provides a fragrant, earthy note that perfectly complements the lamb.
  • 1 teaspoon sea salt: Essential for enhancing flavors.
  • 1/2 teaspoon black pepper: Adds a subtle kick.
  • 1 tablespoon butter: Gives a rich finish to the dish.

Substitutions and Variations

Tender lamb chops arranged on a plate, highlighting their rich flavors.

If you’re missing an ingredient or want to experiment, here are some great substitutions and variations:

  • Avocado Oil: Swap olive oil for avocado oil for a higher smoke point and different flavor.
  • Dried Herbs: If fresh rosemary isn’t available, use dried rosemary—just reduce the amount to 1 teaspoon.
  • Ghee: For a dairy-free option, substitute butter with ghee for a rich, nutty flavor.
  • Marinade Variations: Try adding lemon zest or balsamic vinegar to the marinade for a citrusy twist.

Pro Tips for Perfect Lamb Chops

  • Room Temperature is Key: Allow your lamb chops to come to room temperature before cooking to ensure even cooking.
  • Don’t Overcrowd the Pan: Cook the lamb chops in batches if necessary; overcrowding can steam them instead of searing.
  • Use a Meat Thermometer: For perfect doneness, aim for an internal temperature of 130°F (54°C) for medium-rare.
  • Let Them Rest: After cooking, allow the chops to rest for 5 minutes to let the juices redistribute.
  • Experiment with Marinades: Feel free to play with different herbs and spices in the marinade to suit your taste!
  • Choose Quality Meat: Always opt for high-quality, grass-fed lamb for the best flavor and nutrition.
  • Use Cast Iron: A cast-iron skillet gives the chops a beautiful crust and retains heat well.
  • Butter Basting: Baste the lamb with melted butter while cooking for an extra layer of flavor.

Common Mistakes and Troubleshooting

Even the best of us can make a mistake in the kitchen. Here are some common pitfalls and how to avoid them:

  • Cooking from Cold: Always let your lamb chops sit out for 30 minutes before cooking. Cooking cold meat can lead to uneven cooking.
  • Not Seasoning Enough: Don’t skimp on salt and pepper; they’re crucial for enhancing the natural flavors of the lamb.
  • Overcooking: Lamb can become tough if overcooked. Use a thermometer to check doneness.
  • Skipping the Resting Period: Letting the meat rest is essential for juicy, tender chops.

How to Make Keto Rosemary and Garlic Infused Lamb Chops

Now that you have the essential ingredients and tips, let’s dive into making this delightful dish!

  • Step 1: Pat the lamb chops dry with paper towels to ensure proper searing.
  • Step 2: In a small bowl, combine olive oil, minced garlic, chopped rosemary, sea salt, and black pepper to create the marinade.
  • Step 3: Rub the marinade evenly over both sides of the lamb chops and let them rest at room temperature for about 10 minutes to absorb the flavors.
  • Step 4: Preheat a cast-iron skillet or grill pan over medium-high heat. Once hot, add the lamb chops to the pan without overcrowding.
  • Step 5: Sear the lamb chops for about 3 to 4 minutes on one side, until a golden crust forms.
  • Step 6: Flip the chops and add butter to the pan, spooning the melted butter over the chops as they cook for another 3 to 4 minutes for medium-rare, or longer to your desired doneness.
  • Step 7: Transfer the lamb chops to a plate and let them rest for 5 minutes before serving to allow the juices to redistribute.

Storage and Make-Ahead Instructions

Want to make this dish ahead of time? Here’s how:

  • Refrigeration: Store cooked lamb chops in an airtight container in the fridge for up to 3 days.
  • Freezing: You can freeze cooked lamb chops for up to 3 months. Thaw in the fridge before reheating.
  • Reheating: Reheat gently in a skillet over low heat to prevent drying out.

Frequently Asked Questions

  • Can I use other cuts of lamb? Absolutely! Other cuts like lamb loin or rib chops work well.
  • Is this recipe gluten-free? Yes, all ingredients are naturally gluten-free.
  • Can I grill these lamb chops? Yes, grilling will add a wonderful smoky flavor.
  • What should I serve with lamb chops? Roasted vegetables, a fresh salad, or creamy mashed cauliflower are great options.
  • How do I know when lamb is done? Use a meat thermometer; medium-rare is 130°F (54°C).
  • Can I use dried rosemary instead of fresh? Yes, just use less since dried herbs are more concentrated.
  • Is this dish suitable for meal prep? Yes, it’s excellent for meal prepping and reheats well.
  • What’s the best way to season lamb? Simple seasonings like salt, pepper, garlic, and herbs work best to enhance the natural flavor.

Nutritional Information and Dietary Adaptations

This recipe not only delights your palate but also aligns with a healthy lifestyle. Here’s a brief overview:

  • Calories: Approximately 350 per serving.
  • Protein: Rich in protein, making it excellent for muscle repair and growth.
  • Low Carb: Ideal for those following a ketogenic or low-carb diet.
  • Healthy Fats: Consists of healthy fats from olive oil and butter, supporting heart health.

Equipment Recommendations

To create the perfect lamb chops, here’s what you’ll need:

  • Cast-Iron Skillet: Ideal for achieving a beautiful sear and heat retention.
  • Meat Thermometer: Essential for checking doneness accurately.
  • Mixing Bowl: For combining your marinade ingredients.
  • Sharp Knife: For trimming any excess fat from the lamb chops.

Serving Suggestions

When it comes to serving, the presentation can elevate your dish:

  • Garnish: Fresh rosemary sprigs or a drizzle of balsamic reduction can add a lovely touch.
  • Side Dishes: Consider serving with steamed asparagus or a refreshing cucumber salad.
  • Wine Pairing: A robust red wine, such as Cabernet Sauvignon, complements the rich flavors beautifully.

In conclusion, these Keto Rosemary and Garlic Infused Lamb Chops are not just a meal; they are an experience. They invite you to explore the world of flavors and connect with the culinary traditions that shape our dining experiences. So, grab your apron, gather your ingredients, and let’s create something delicious together. Bon appétit!

Keto Rosemary and Garlic Infused Lamb Chops

Prep Time 10 minutes
Cook Time 8 minutes
Total Time 18 minutes
Servings 4 servings
Calories 450
Enjoy tender, flavorful lamb chops infused with rosemary and garlic, perfect for a keto-friendly meal.

Ingredients

Meat

  • 1.5 lbs lamb chops (1 inch thick)
  • 2 tablespoons olive oil
  • 4 cloves garlic, minced
  • 1 tablespoon fresh rosemary, finely chopped
  • 1 teaspoon sea salt
  • 0.5 teaspoon black pepper
  • 1 tablespoon butter

Instructions 

  • Pat lamb chops dry and prepare marinade with olive oil, garlic, rosemary, salt, and pepper.
  • Rub marinade on chops and rest at room temperature for 10 minutes.
  • Preheat skillet over medium-high heat and sear chops 3-4 minutes per side.
  • Add butter, flip, and cook for another 3-4 minutes for medium-rare.
  • Rest for 5 minutes before serving.

Notes

Ensure not to overcook for best tenderness.
Calories: 450kcal
Cost: $15
Course: Main Course
Cuisine: Keto
Keyword: garlic, Lamb, Rosemary