Author

Jack

Browsing

Embark on a Flavorful Journey with Slow Cooker Beef Roast

Welcome, culinary adventurers! Today, we’re diving into the savory secrets of a dish that wraps you in warmth and comfort—the Slow Cooker Beef Roast. This is not just a recipe; it’s a passport to a world of flavors, a celebration of culture, and a heartwarming meal that brings people together around the table. Whether you’re a seasoned chef or just starting your culinary journey, this recipe is perfect for you. With the magic of slow cooking, you’ll discover how simple ingredients can transform into a feast that melts in your mouth, making it a must-try for any occasion.

Why You’ll Love This Recipe

This slow cooker beef roast is more than just a meal; it’s an experience. Here are five compelling reasons to embrace this dish:

  • Tender and Juicy: Cooking low and slow allows the beef to become incredibly tender, with each bite bursting with flavor.
  • Minimal Effort: Just season, sear, and set your slow cooker. Let it do the magic while you go about your day!
  • Perfect for Gatherings: This hearty dish serves a crowd, making it ideal for family dinners, holidays, or potlucks.
  • Versatile Ingredients: The recipe accommodates various vegetables and spices, allowing you to customize it to your taste.
  • Leftover Heaven: Enjoy the savory goodness in sandwiches, salads, or as a base for other meals throughout the week.

Ingredient Breakdown

Let’s explore the essentials you’ll need for this culinary delight:

  • 1 Chuck Roast (3-4 lbs): This cut is perfect for slow cooking due to its marbling, which keeps the meat juicy. If unavailable, you can substitute with a brisket.
  • 2 Cups Low-Sodium Beef Broth: This provides a robust flavor base. For a twist, try using vegetable broth or red wine.
  • 1 Large Onion: Adds depth to the dish. You can also use shallots or leeks for a milder flavor.
  • 2 Carrots: Sweet and earthy, they complement the beef beautifully. Feel free to replace with parsnips for a different taste.
  • 1 tbsp Olive Oil: For searing the roast. You can substitute with avocado oil for a higher smoke point.
  • 1 tsp Rosemary: Fresh or dried, this herb enhances the flavor. Thyme or oregano can be great alternatives.
  • Salt and Black Pepper: Essential for seasoning. Experiment with smoked salt for an extra layer of flavor.

Pro Tips for Perfecting Your Roast
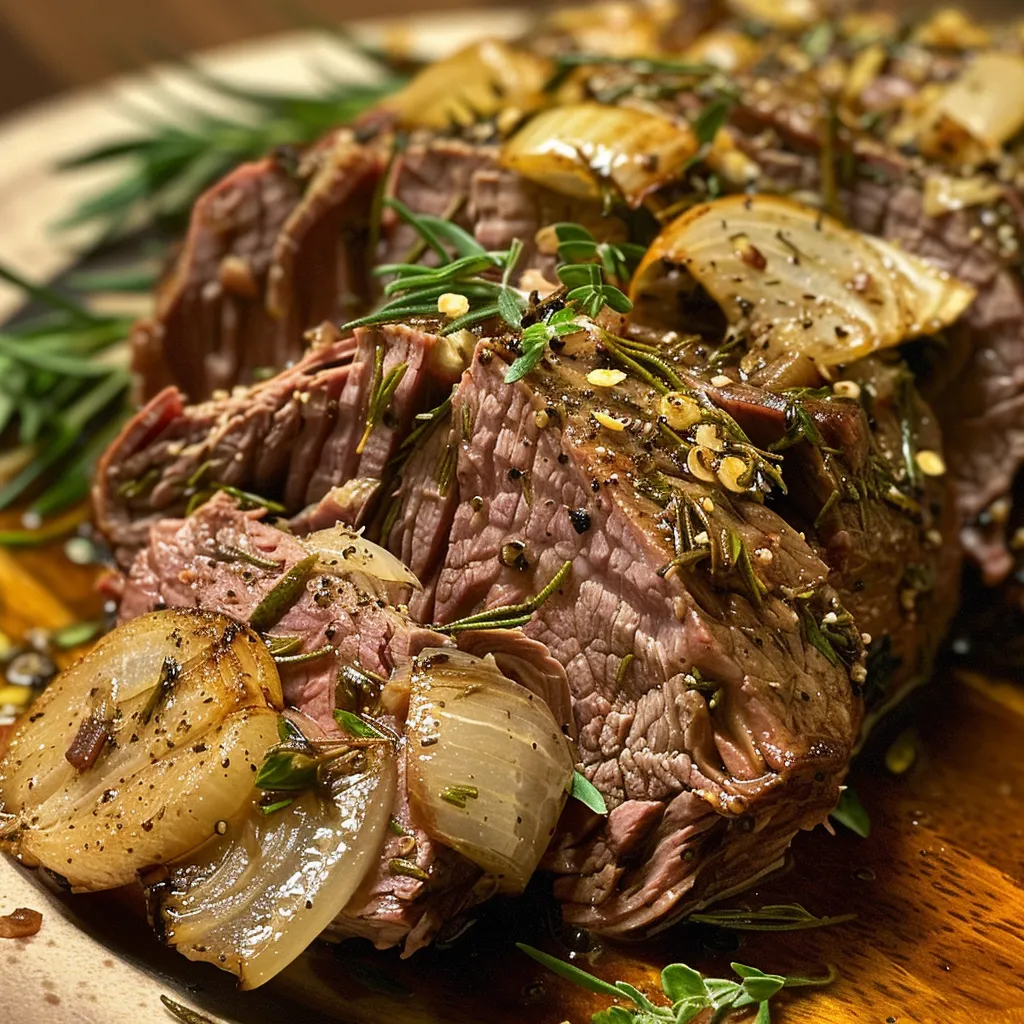
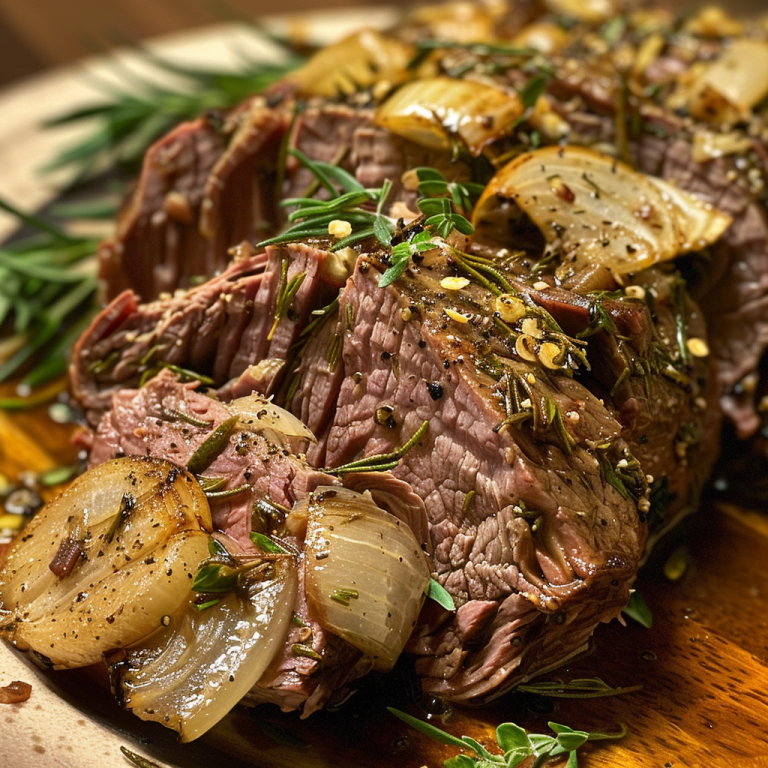
Mouthwatering beef roast with visible spices and vegetables, ready to serve.

To elevate your slow cooker beef roast, consider these expert insights:

  • Choose Quality Meat: Look for well-marbled cuts of beef; this ensures tenderness and rich flavor.
  • Sear the Roast: Browning the meat before slow cooking adds depth to the overall flavor.
  • Don’t Overcrowd the Slow Cooker: Ensure there’s enough space for heat circulation for even cooking.
  • Experiment with Spices: Add garlic powder, paprika, or even a dash of cayenne for a unique twist.
  • Let It Rest: After cooking, allow the roast to rest before shredding for maximum juiciness.
  • Use Fresh Herbs: Fresh rosemary, thyme, or parsley can enhance the dish’s aroma and flavor.
  • Check for Doneness: The roast should shred easily with a fork. If not, give it more time.
  • Save the Juices: The leftover broth is perfect for gravies or soups—don’t waste it!

Avoiding Common Mistakes

Even the best recipes can go awry without care. Here are common pitfalls and how to sidestep them:

  • Skipping the Sear: Avoid this step if you want maximum flavor. Searing creates a rich crust that enhances taste.
  • Using Too Much Liquid: Stick to the recipe’s liquid measurements to prevent a watery dish.
  • Not Enough Seasoning: Don’t shy away from seasoning; taste as you go!
  • Pushing Cook Times: Resist the urge to rush the cooking process; low and slow is key for tenderness.
  • Ignoring Leftovers: Don’t forget to repurpose leftovers creatively. Shredded beef can be used in tacos, sandwiches, or salads!

Creative Variations

Feeling adventurous? Here are some fun variations to keep your taste buds dancing:

  • Mexican Beef Roast: Add cumin, chili powder, and a can of diced tomatoes for a southwestern flair.
  • Italian Classic: Incorporate marinara sauce, bell peppers, and Italian herbs for a hearty Italian-inspired dish.
  • Asian Infusion: Use soy sauce, ginger, garlic, and sesame oil for an Asian twist.
  • Herb-Infused Roast: Elevate with fresh herbs like thyme, sage, and basil for a fragrant touch.

Storage and Make-Ahead Instructions

This beef roast can be prepared ahead of time and stored easily:

  • Refrigeration: Store leftovers in an airtight container for up to 4 days.
  • Freezing: Shred and freeze the beef with juices for up to 3 months. Thaw in the refrigerator before reheating.
  • Make-Ahead Tip: Prepare the roast the night before, refrigerate, and set it in the slow cooker in the morning for a hassle-free dinner.

FAQs About Slow Cooker Beef Roast

Got questions? We’ve got answers. Here are some frequently asked questions:

  • Can I cook the roast on high instead of low? Yes, cook for 4-6 hours on high, but low is recommended for maximum tenderness.
  • What if my beef roast is too tough? It may need more cooking time. Keep it in the slow cooker until it shreds easily.
  • Can I add other vegetables? Absolutely! Potatoes, parsnips, or even green beans work wonderfully.
  • Is there a way to make this recipe healthier? Use lean cuts of beef and load up on vegetables to reduce calories.
  • How can I enhance the flavor? Consider marinating the beef overnight or adding a splash of balsamic vinegar for depth.
  • Can I use frozen beef roast? It’s best to thaw first for even cooking, but you can cook from frozen—just adjust the cooking time.
  • What sides pair well with this dish? Mashed potatoes, steamed vegetables, or a fresh salad are fantastic choices.
  • Can I make this recipe in an Instant Pot? Yes, use the sauté function to sear the meat, then pressure cook on low for 60-70 minutes.

Nutritional Tips and Dietary Adaptations

Cooking is about balance. Here are some tips for adapting this recipe to various dietary needs:

  • Gluten-Free: Ensure broth and any added sauces are gluten-free.
  • Paleo Friendly: Stick to root vegetables and avoid grains for a paleo-approved meal.
  • Low-Carb Option: Replace potatoes with cauliflower for a low-carb alternative.
  • Heart-Healthy Adjustments: Use lean cuts of beef and limit added salt; focus on fresh herbs for flavor.

Essential Equipment for Success

To achieve the best results with your slow cooker beef roast, here’s what you’ll need:

  • Slow Cooker: A reliable slow cooker with adjustable settings is essential for even cooking.
  • Heavy-Duty Skillet: For searing the roast before slow cooking.
  • Meat Thermometer: To check the doneness of your roast for perfect results.
  • Sharp Chef’s Knife: For chopping vegetables and shredding the finished meat.

Serving Suggestions

When it’s time to serve, consider these delicious accompaniments:

  • Crusty Bread: Perfect for soaking up the savory juices.
  • Side Salads: A fresh green salad adds a nice contrast to the richness of the roast.
  • Mashed Potatoes: Creamy mashed potatoes are a classic pairing that complements the dish beautifully.
  • Pickled Vegetables: A touch of acidity from pickles can brighten the rich flavors of the roast.

In conclusion, this Slow Cooker Beef Roast is more than just a recipe; it’s an invitation to create lasting memories around your table. With its simple ingredients and exquisite flavor, it’s sure to become a staple in your home. So grab your slow cooker, let your culinary adventure begin, and savor every bite as you connect with the universal love of comfort food. Bon appétit!
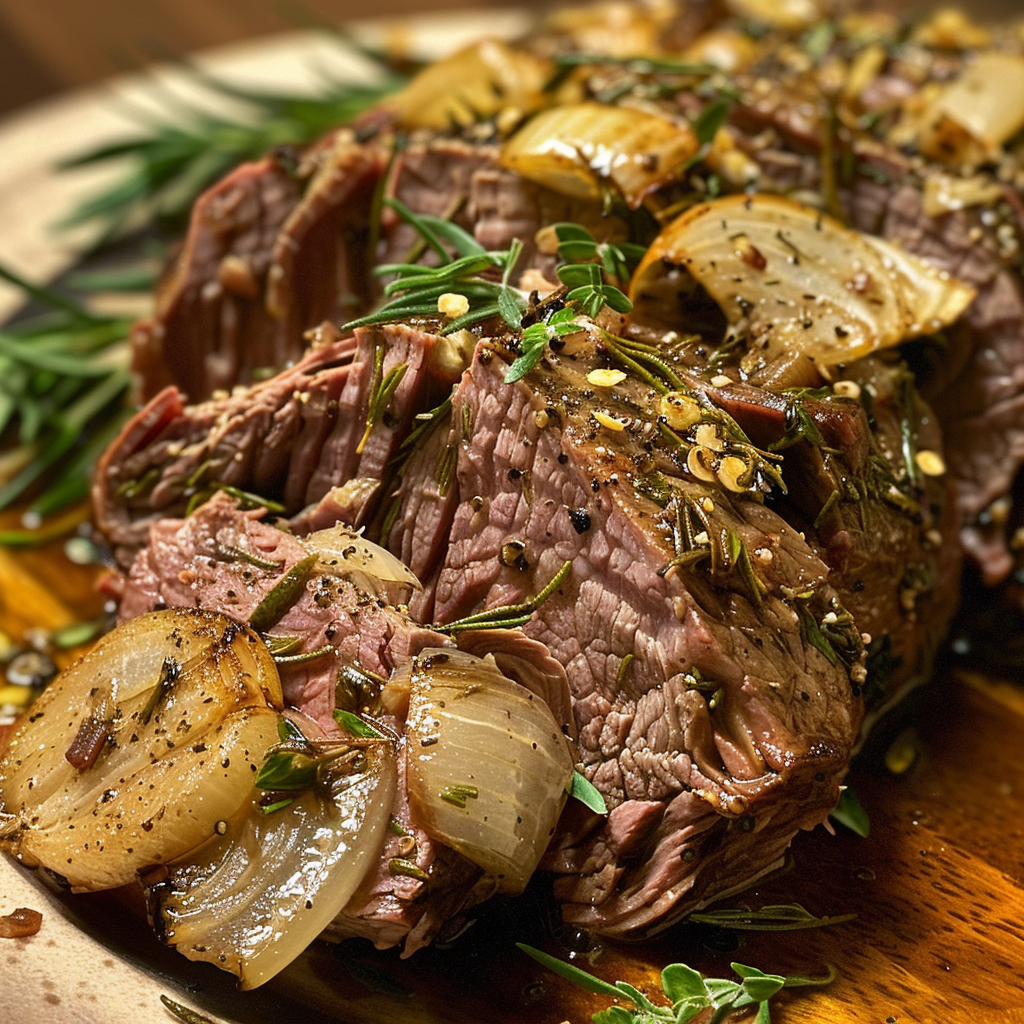
Mouthwatering Slow Cooker Beef Roast

Prep Time 15 minutes
Cook Time 8 hours
Total Time 8 hours 15 minutes
Servings 6 servings
Calories 650
This tender and flavorful beef roast is cooked slowly to perfection, resulting in a melt-in-your-mouth meal that’s perfect for any occasion.

Ingredients

Spices and Seasonings

  • 0.5 tsp black pepper
  • 1 large onion
  • 1 tbsp olive oil
  • 1 tsp rosemary
  • 1 tsp salt
  • 2 cups low-sodium beef broth

Main Ingredient

  • 3 lb chuck roast

Instructions 

  • Season the chuck roast with salt and pepper.
  • Heat olive oil and sear the roast 3-4 minutes per side until browned. Transfer to slow cooker.
  • Chop carrots, potatoes, and onion. Place around the roast in the slow cooker.
  • Add garlic and beef broth, then sprinkle rosemary. Cover and cook on low 8-10 hours.
  • Shred the meat, mix with juices, and let sit 10 minutes to thicken.
Notes

For extra flavor, add fresh herbs or vegetables of your choice.
Calories: 650kcal
Cost: $15
Course: Main Course
Cuisine: American
Keyword: beef

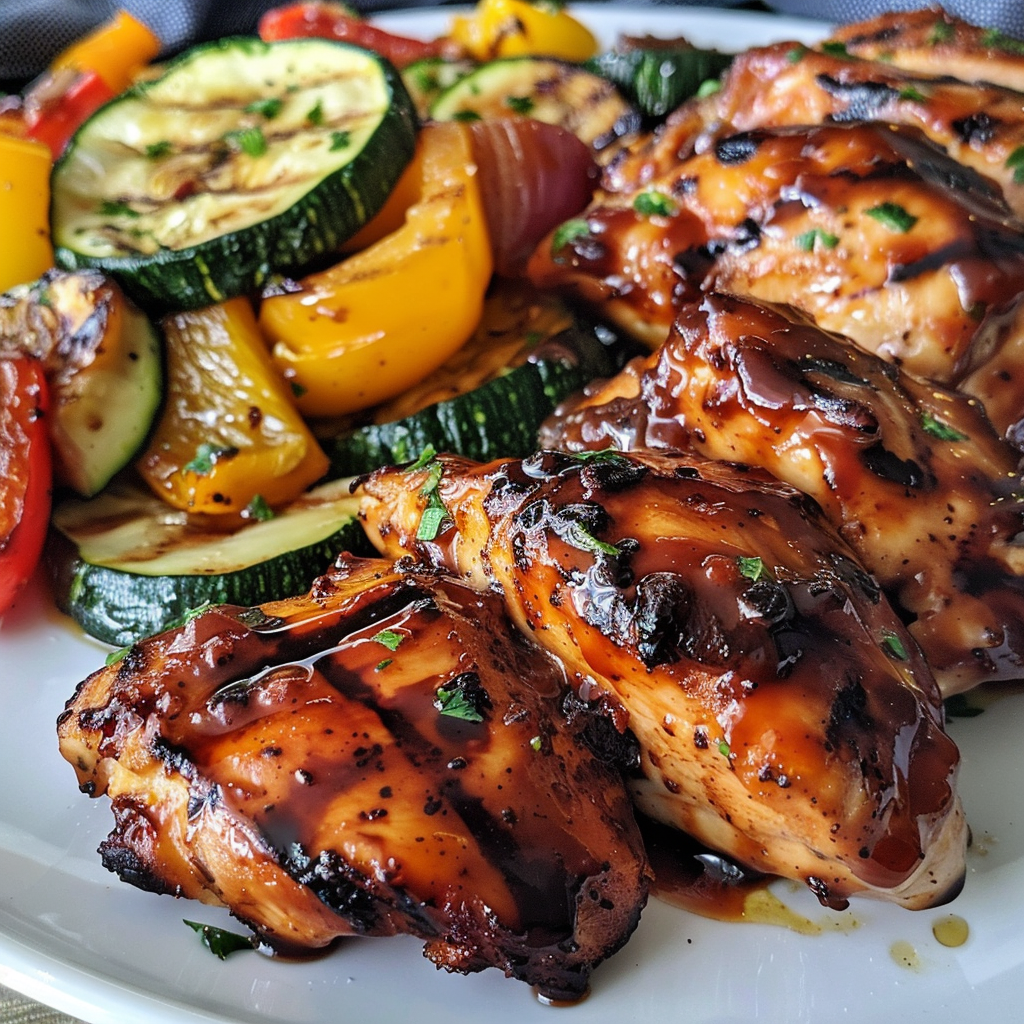
Embark on a Culinary Voyage with Honey BBQ Chicken

Welcome to a delightful adventure where the sweet and smoky essence of honey BBQ chicken meets vibrant grilled veggies. This dish isn’t just a recipe; it’s a celebration of summer, flavors, and memories shared around a grill. Join me, Jack, as we explore how to make this honey BBQ chicken recipe that’s bound to impress your friends and family, bringing a taste of adventure right to your backyard.

In a world where food connects us, let’s dive into the details of this fantastic dish. You’ll discover insider tips, expert advice, and fun variations that will make your grilling experience unforgettable. Are you ready? Let’s fire up the grill!

Why You’ll Love This Recipe

  • Deliciously Sweet & Smoky: The perfect balance of honey and BBQ sauce creates a flavor profile that’s both sweet and savory, making this chicken an instant crowd-pleaser.
  • Easy to Prepare: With minimal prep time, you’ll be grilling in no time. Just marinate, grill, and enjoy!
  • Healthy & Wholesome: This recipe uses lean chicken breasts and fresh veggies, making it a nutritious option for any meal.
  • Versatile Pairing: The grilled veggie medley complements the chicken beautifully, but you can pair it with any side you love.
  • Family-Friendly: Kids and adults alike will enjoy this dish, perfect for family gatherings or casual dinners.

Ingredients Breakdown

Let’s gather our ingredients for this honey BBQ chicken and grilled veggie medley. Here’s what you’ll need:

  • Chicken: 4 pieces boneless, skinless chicken breasts (about 1.5 lbs total).
  • BBQ Sauce: 1 cup of your favorite BBQ sauce (homemade or store-bought).
  • Honey: 1/4 cup of pure honey for that sweet glaze.
  • Olive Oil: 1 tablespoon for the marinade and 2 tablespoons for the veggies.
  • Spices: 1 teaspoon each of garlic powder and onion powder for depth of flavor.
  • Salt & Pepper: to taste, enhances the overall taste.
  • Veggies: 2 medium zucchini, 1 red bell pepper, 1 yellow bell pepper, and 1 red onion for a colorful medley.
  • Herbs: 1 teaspoon dried Italian herbs (optional) to add an aromatic touch.

Steps to Culinary Perfection

Now, let’s get cooking! Follow these simple steps to create your delicious honey BBQ chicken and veggie medley:

  • Preheat the Grill: Start by preheating your grill to medium-high heat. This ensures that your chicken and veggies get that perfect char.
  • Make the Marinade: In a mixing bowl, combine the BBQ sauce, honey, olive oil, garlic powder, onion powder, salt, and pepper. Mix well until fully blended.
  • Marinate the Chicken: Add the chicken breasts to the marinade, ensuring they are well-coated. Let them marinate for at least 10 minutes; this allows the flavors to penetrate the meat.
  • Prep the Veggies: Meanwhile, slice the zucchini, bell peppers, and onion. In another bowl, toss them with olive oil, salt, pepper, and optional dried herbs.
  • Grill the Chicken: Place the marinated chicken on the preheated grill. Grill for about 6-7 minutes per side, or until the internal temperature reaches 165°F (75°C).
  • Grill the Veggies: While the chicken is grilling, place the prepared vegetables on the grill. Cook for about 8-10 minutes, turning occasionally, until they are tender and slightly charred.
  • Rest and Serve: Once cooked, remove the chicken and veggies from the grill. Allow the chicken to rest for a few minutes before slicing. Serve your honey BBQ chicken alongside the vibrant grilled veggie medley.

Expert Tips for Perfect BBQ Chicken

  • Marinate Longer: For even more flavor, marinate the chicken for up to 2 hours.
  • Don’t Overcrowd the Grill: Give each piece space to cook evenly; overcrowding can lead to steaming instead of grilling.
  • Use a Meat Thermometer: Ensure the chicken is cooked perfectly by checking the internal temperature.
  • Rest the Chicken: Letting the chicken rest before slicing allows juices to redistribute, resulting in moister meat.
  • Experiment with Sauces: Try different BBQ sauces or homemade blends to customize the flavor.
  • Grill Seasonal Veggies: Use whatever veggies are in season for the best taste and freshness.
  • Try Skewering: For a fun twist, cut the chicken and veggies into bite-sized pieces and skewer them for kabobs.
  • Monitor Cooking Times: Cooking times can vary based on your grill type; keep an eye on your food!

Common Mistakes and Troubleshooting

Even the best chefs can make mistakes! Here are some common pitfalls and tips to avoid them:

  • Overcooking the Chicken: This leads to dry meat. Always check the internal temperature!
  • Under-seasoning: Don’t be shy with salt and pepper! Taste as you go.
  • Skipping the Marinade: Marinating is crucial for flavor. Don’t rush this step!
  • Not Preheating the Grill: Skipping this step can lead to sticking and uneven cooking.
  • Ignoring Veggie Prep: Ensure your veggies are cut evenly for consistent cooking.

Delicious Variations to Try

  • Spicy Honey BBQ Chicken: Add a teaspoon of cayenne pepper or hot sauce to the marinade for a kick.
  • Honey Mustard Chicken: Substitute half of the BBQ sauce with honey mustard for a tangy twist.
  • Herb-Infused Chicken: Add fresh herbs like rosemary or thyme to the marinade for an aromatic flavor.
  • Vegetarian Version: Substitute chicken with firm tofu or tempeh marinated in the same sauce for a plant-based option.

Storage and Make-Ahead Instructions

This honey BBQ chicken is perfect for meal prep!

  • Make Ahead: Marinate the chicken up to 24 hours in advance for extra flavor.
  • Storage: Store leftovers in an airtight container in the fridge for up to 3 days.
  • Freezing: You can freeze the marinated chicken for up to 3 months. Just thaw and grill when ready!

Nutritional Benefits and Dietary Adaptations

Nutrition is key! Here’s a quick glance at the benefits:

  • Lean Protein: Chicken breasts are an excellent source of lean protein, essential for muscle repair and growth.
  • Healthy Fats: Olive oil provides healthy monounsaturated fats beneficial for heart health.
  • Vitamins & Minerals: The colorful veggies provide essential vitamins, minerals, and antioxidants.
  • Gluten-Free Option: Ensure your BBQ sauce is gluten-free if needed.
  • Low-Carb Adaptation: Skip the honey and use a low-carb BBQ sauce for a sugar-free option.

Essential Equipment Recommendations

Having the right tools can elevate your grilling experience:

  • Grill: A reliable gas or charcoal grill is essential for achieving that perfect char.
  • Meat Thermometer: An instant-read thermometer ensures your chicken is cooked to perfection.
  • Grilling Tongs: Long tongs help maneuver your chicken and veggies safely.
  • Mixing Bowls: Use these for marinating and preparing your ingredients.
  • Basting Brush: Perfect for applying extra marinade or sauces while grilling.

Serving Suggestions

Now that your honey BBQ chicken and veggies are ready, here are some serving suggestions to make the meal even more delightful:

  • Serve with Rice or Quinoa: A side of rice or quinoa pairs beautifully with the chicken and veggies.
  • Fresh Salad: A light garden salad can complement the grilled flavors.
  • Wrap in Tortillas: For a fun twist, wrap the chicken and veggies in tortillas for delicious tacos.
  • Pair with Cold Drinks: Refreshing beverages like iced tea or lemonade balance the meal perfectly.

Frequently Asked Questions

  • Can I use bone-in chicken? Yes, but cooking time will be longer. Ensure it reaches the right internal temperature.
  • What BBQ sauce is best? Use your favorite sauce! A tangy, not too sweet sauce works best for balance.
  • Can I grill frozen chicken? It’s best to thaw chicken before grilling for even cooking.
  • How do I know when the chicken is done? Use a meat thermometer; chicken is safe at 165°F (75°C).
  • Can I make this recipe ahead of time? Yes! Marinate and store the chicken in the fridge for up to 24 hours.
  • What can I substitute for honey? Maple syrup or agave nectar works well as a substitute.
  • How can I make it spicier? Add more cayenne pepper or some diced jalapeños to the marinade.
  • Is this recipe suitable for meal prep? Absolutely! Grilled chicken and veggies store well for future meals.

In conclusion, this honey BBQ chicken recipe is not just a meal; it’s a way to bring people together. With its delightful flavors and vibrant colors, it’s sure to become a favorite at your grilling gatherings. So gather your ingredients, fire up the grill, and let the adventure begin!

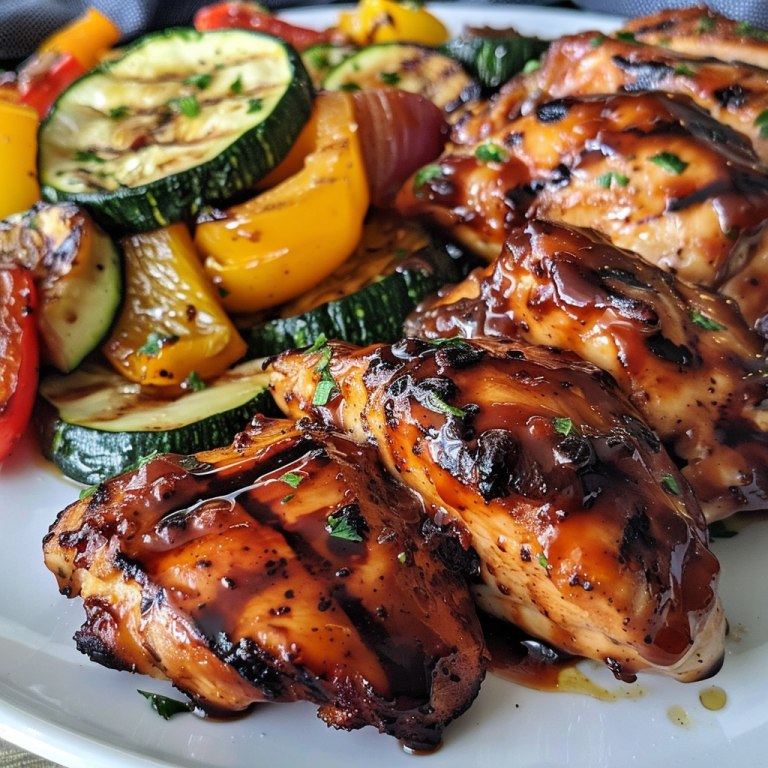
Honey Bbq Chicken Served With Grilled Veggie Medley

Prep Time 15 minutes
Cook Time 20 minutes
Total Time 35 minutes
Servings 4 servings
Calories 450
Enjoy tender grilled chicken glazed with sweet and smoky honey BBQ sauce, served alongside a colorful medley of grilled vegetables.

Ingredients

Protein

  • 4 pieces boneless, skinless chicken breasts (About 1.5 lbs total)
  • 1 cup BBQ sauce
  • 1/4 cup honey
  • 1 tablespoon olive oil
  • 1 teaspoon garlic powder
  • 1 teaspoon onion powder
  • to taste salt salt
  • to taste pepper pepper
  • 2 medium zucchini (Sliced into rounds)
  • 1 piece red bell pepper (Sliced into strips)
  • 1 piece yellow bell pepper (Sliced into strips)
  • 1 piece red onion (Cut into wedges)
  • 2 tablespoons olive oil
  • 1 teaspoon dried Italian herbs (Optional)

Instructions 

  • Preheat grill to medium-high heat.
  • Mix BBQ sauce, honey, olive oil, garlic powder, onion powder, salt, and pepper to make marinade. Marinate chicken for at least 10 minutes.
  • Grill chicken for 6-7 minutes per side until cooked through. Grill vegetables for 8-10 minutes until tender and charred.
  • Remove chicken and vegetables, let chicken rest, then slice and serve with grilled veggies.

Notes

Adjust salt and pepper to taste. Dried herbs are optional but add flavor.
Calories: 450kcal
Cost: $15
Course: Main Course
Cuisine: American
Keyword: BBQ, Chicken, Grilled

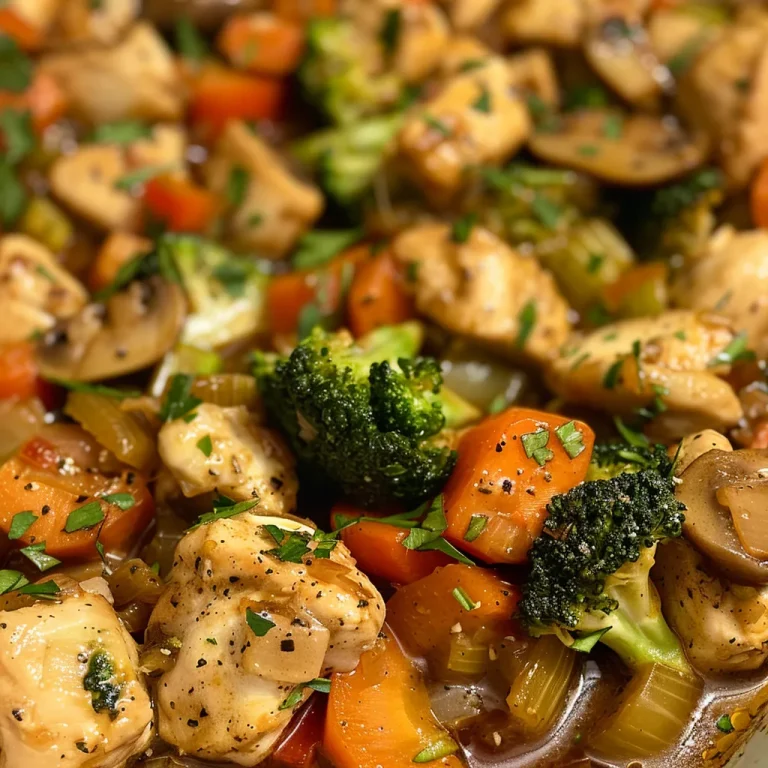
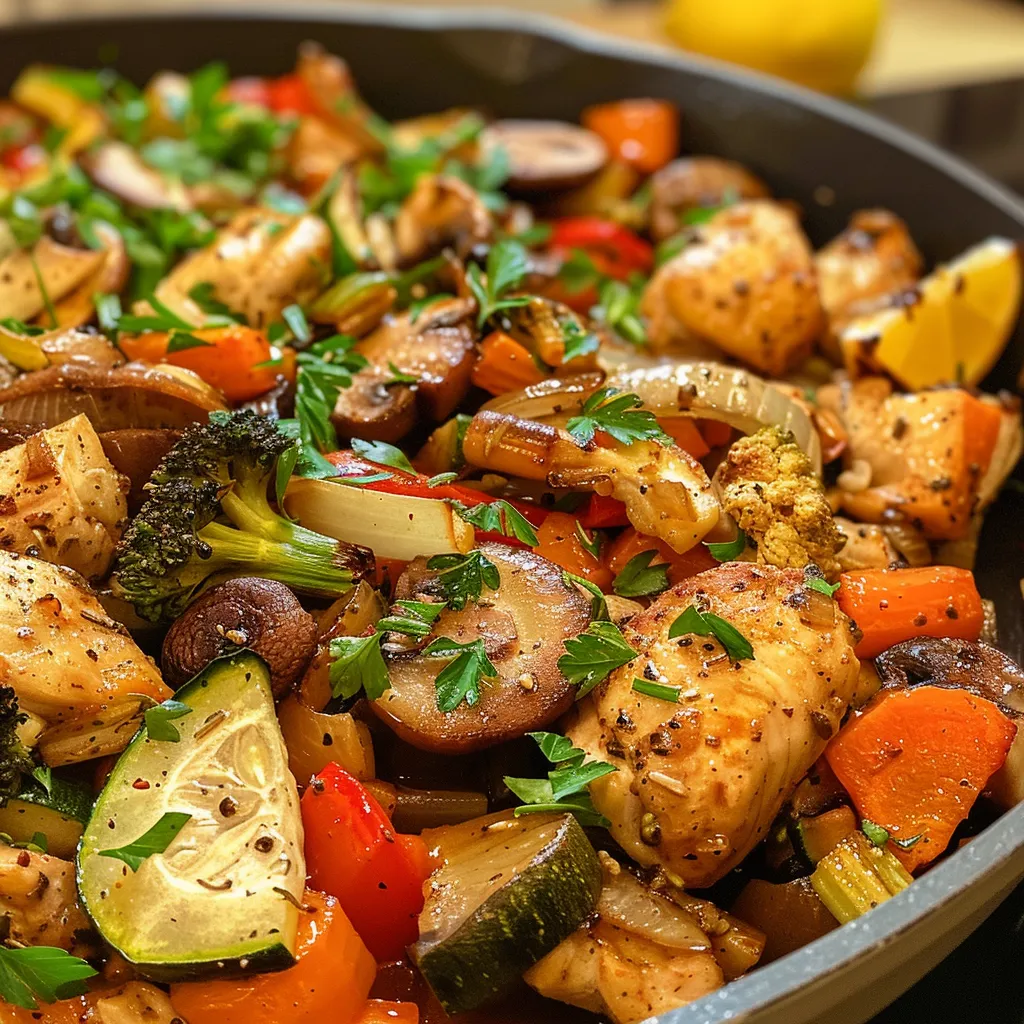
The Comfort of Homemade Chicken and Vegetable Casserole

Welcome to a culinary adventure that brings together the warmth of home cooking and the vibrant flavors of fresh ingredients. In this article, we’ll explore the delightful layers of a Chicken and Vegetable Casserole, a dish that not only satisfies your hunger but also warms your soul. This recipe is a beautiful blend of tender chicken and colorful vegetables, evoking memories of shared meals and family gatherings.

Join me, Jack, as I guide you through this comforting dish that is perfect for any occasion—whether it’s a cozy family dinner or a gathering with friends. Let’s dive into the details!

Why You’ll Love This Recipe

  • Quick Preparation: This recipe is designed for busy weeknights, allowing you to prepare a delicious meal in under an hour.
  • Nutritious Ingredients: Packed with vegetables like broccoli, carrots, and bell peppers, this casserole is a healthy choice that the whole family will love.
  • Versatile and Customizable: Whether you’re looking for a low-carb option or want to add your favorite veggies, this recipe adapts easily to your preferences.
  • Comforting Flavors: The combination of chicken, herbs, and creamy sauce provides a comforting and satisfying flavor profile that makes everyone feel at home.
  • Perfect for Leftovers: This casserole reheats beautifully, making it a great option for meal prep or using up leftover rotisserie chicken.

Ingredients You’ll Need

Gather these ingredients to create your Chicken and Vegetable Casserole:

  • 1.5 lbs Chicken breasts (Cut into 1-inch pieces)
  • 2 tbsp Olive oil (Divided)
  • 1 medium Onion (Diced)
  • 3 cloves Garlic (Minced)
  • 2 medium Carrots (Sliced into rounds)
  • 2 stalks Celery (Chopped)
  • 1 medium Bell pepper (Diced)
  • 2 cups Broccoli florets (Fresh or frozen)
  • 1 medium Zucchini (Halved and sliced)
  • 1 cup Mushrooms (Sliced)
  • 1 cup Chicken broth (Low-sodium)
  • 2 tbsp Lemon juice (Freshly squeezed)
  • 1 tsp Dried thyme
  • 1 tsp Dried oregano
  • ½ tsp Smoked paprika
  • ¼ tsp Red pepper flakes (Optional)
  • Salt and pepper (To taste)
  • 2 tbsp Fresh parsley (Chopped for garnish)

If you’re looking for substitutions, consider using turkey instead of chicken for a lighter option, or swap out vegetables based on what’s in season. Feel free to experiment with herbs or add some cheese for a creamy finish!

How to Make Chicken and Vegetable Casserole

Close-up image of Chicken and Vegetable Casserole, highlighting the golden-brown top and fresh herbs.

Step 1: Preheat and Prepare

Preheat your oven to 375°F (190°C). While the oven heats, take a moment to cut your chicken into 1-inch pieces and chop all vegetables evenly. This ensures even cooking and a delightful presentation.

Step 2: Brown the Chicken

In a skillet, heat 1 tablespoon of olive oil over medium heat. Add the chicken pieces and brown them for about 2-3 minutes on each side until they are golden brown. Remove the chicken from the skillet and set aside.

Step 3: Sauté the Vegetables

In the same skillet, add the remaining tablespoon of olive oil. Sauté the diced onion, minced garlic, sliced carrots, chopped celery, and diced bell pepper until the vegetables start to soften, about 5-7 minutes. This step builds the foundational flavors of the dish.

Step 4: Add Remaining Vegetables

Add the zucchini, mushrooms, and broccoli to the skillet, continuing to cook until all the veggies are tender and vibrant. Stir in the chicken broth, lemon juice, and your dried herbs (thyme, oregano, smoked paprika, red pepper flakes). Mix everything well to combine.

Step 5: Combine and Transfer

Return the browned chicken to the skillet and mix it thoroughly with the vegetable mixture. Transfer this delicious medley to a baking dish or leave it in an oven-safe skillet.

Step 6: Bake to Perfection

Place your casserole in the preheated oven and bake for about 25 minutes. The chicken should be cooked through, and the flavors will meld beautifully. Once done, remove the casserole and let it sit for about 5 minutes. Garnish with fresh parsley before serving.

Pro Tips for Making Chicken and Vegetable Casserole

  • Prep Ahead: Chop your vegetables and chicken in advance to save time. You can store them in the fridge until you’re ready to cook.
  • Use Fresh Ingredients: Whenever possible, opt for fresh vegetables for more vibrant flavors and textures.
  • Experiment with Spices: Don’t hesitate to customize the seasoning. A dash of curry powder or Italian herbs can add a unique twist!
  • Check for Doneness: Always ensure the chicken reaches an internal temperature of 165°F (75°C) for safety.
  • Make It Creamy: For a richer casserole, stir in a cup of sour cream or cream of mushroom soup before baking.
  • Serving Size: This recipe serves about 4-6 people. Adjust the ingredient quantities if you’re hosting a larger gathering.
  • Use Leftovers Wisely: Transform leftover casserole into a delicious quesadilla filling or mix it with pasta for a new meal.
  • Garnish Creatively: Consider adding crispy fried onions or cheese on top for an extra layer of flavor and texture.

Common Mistakes and Troubleshooting

Even seasoned cooks can make mistakes. Here are some common issues and how to avoid them:

  • Overcooking Chicken: Keep an eye on the cooking time to prevent the chicken from becoming dry. If you’re unsure, use a meat thermometer.
  • Underseasoned Vegetables: Don’t be shy with your spices! Taste and adjust as needed during cooking.
  • Too Much Liquid: If your casserole seems watery, let it bake a bit longer uncovered to allow some moisture to evaporate.
  • Uneven Cooking: Make sure to chop your ingredients to a uniform size to ensure even cooking.

Variations to Try

Here are some delicious twists on the classic Chicken and Vegetable Casserole:

  • Low-Carb Delight: Swap out traditional vegetables for lower-carb options like cauliflower or spinach.
  • Cheesy Chicken Casserole: Top with shredded cheese before baking for an ooey-gooey layer of goodness.
  • Vegan Version: Use plant-based chicken alternatives and substitute vegetable broth for a vegan-friendly option.
  • Spicy Kick: Add diced jalapeños or a splash of hot sauce for those who enjoy a little heat in their meals.

Storage and Make-Ahead Instructions

This casserole can be made ahead of time and stored in the refrigerator for up to 24 hours before baking. To store leftovers, allow the casserole to cool completely before transferring it to an airtight container. It will keep well in the fridge for 3-4 days or can be frozen for up to 3 months. If freezing, make sure to label the container with the date.

Frequently Asked Questions

  • Can I freeze Chicken and Vegetable Casserole? Yes! Just ensure it’s fully cooled before freezing.
  • How can I make this casserole gluten-free? Use gluten-free broth and check the labels of any sauces or toppings.
  • Can I use frozen vegetables? Absolutely! Frozen vegetables work well and save prep time.
  • What can I serve with this casserole? A fresh green salad or crusty bread pairs perfectly with this dish.
  • How do I reheat leftovers? Reheat in the oven at 350°F (175°C) for about 20 minutes or until warmed through.
  • Is this recipe suitable for meal prep? Yes! It’s perfect for meal prep and can be portioned out for quick lunches.
  • What if I don’t have chicken broth? You can use vegetable broth or even water in a pinch, but broth adds more flavor.
  • Can I add other proteins? Certainly! Feel free to mix in leftover turkey or even chickpeas for a protein boost.

Nutritional Tips and Dietary Adaptations

This Chicken and Vegetable Casserole is a heart-healthy option, especially when using lean chicken breasts and low-sodium broth. Here are some tips to enhance its nutritional profile:

  • Increase Fiber: Add more beans or lentils to the mix for a fiber boost.
  • Reduce Sodium: Opt for low-sodium broth and limit added salt, focusing on herbs for flavor.
  • Control Portions: Serve with a side of whole grains, such as quinoa or brown rice, to round out your meal.

Equipment Recommendations

To make this dish, you’ll need the following kitchen tools:

  • Skillet: A large skillet for browning chicken and sautéing vegetables.
  • Baking Dish: An oven-safe baking dish to hold the casserole.
  • Chopping Board and Knife: Essential for prepping your ingredients efficiently.
  • Meat Thermometer: Helps ensure your chicken is cooked through safely.

Serving Suggestions

To serve, dish out generous portions of the casserole and consider garnishing with:

  • Fresh herbs: Such as parsley or basil for a pop of color and flavor.
  • Grated cheese: For those who enjoy a cheesy touch.
  • Crushed crackers or breadcrumbs: For added crunch on top.

Enjoy this comforting Chicken and Vegetable Casserole with your loved ones, and let the flavors transport you to the heart of home-cooked goodness. Happy cooking!

Chicken and Vegetable Casserole

Prep Time 15 minutes
Cook Time 25 minutes
Total Time 40 minutes
Servings 4 servings
Calories 350
A hearty and healthy chicken casserole packed with colorful vegetables and flavorful spices, perfect for a comforting meal.

Ingredients

Protein

  • 1.5 lbs Chicken breasts (Cut into 1-inch pieces)

Oils

  • 2 tbsp Olive oil (Divided)

Vegetables

  • 1 medium Onion (Diced)
  • 3 cloves Garlic (Minced)
  • 2 medium Carrots (Sliced into rounds)
  • 2 stalks Celery (Chopped)
  • 1 medium Bell pepper (Diced)
  • 2 cups Broccoli florets (Fresh or frozen)
  • 1 medium Zucchini (Halved and sliced)
  • 1 cup Mushrooms (Sliced)
  • 1 cup Chicken broth (Low-sodium)
  • 2 tbsp Lemon juice (Freshly squeezed)
  • 1 tsp Dried thyme
  • 1 tsp Dried oregano
  • ½ tsp Smoked paprika
  • ¼ tsp Red pepper flakes (Optional)
  • to taste Salt and pepper

Garnish

  • 2 tbsp Fresh parsley (Chopped for garnish)

Instructions 

  • Preheat oven to 375°F (190°C).
  • Cut chicken into 1-inch pieces and chop vegetables.
  • Brown chicken in 1 tbsp olive oil, then sauté vegetables in remaining oil.
  • Add broth, lemon juice, and spices; return chicken, then transfer to oven and bake for 25 minutes.
  • Garnish with parsley and let sit for 5 minutes before serving.

Notes

For extra flavor, add a pinch of red pepper flakes or fresh herbs.
Calories: 350kcal
Cost: $15
Course: Main Course
Cuisine: American
Keyword: Chicken, Vegetables

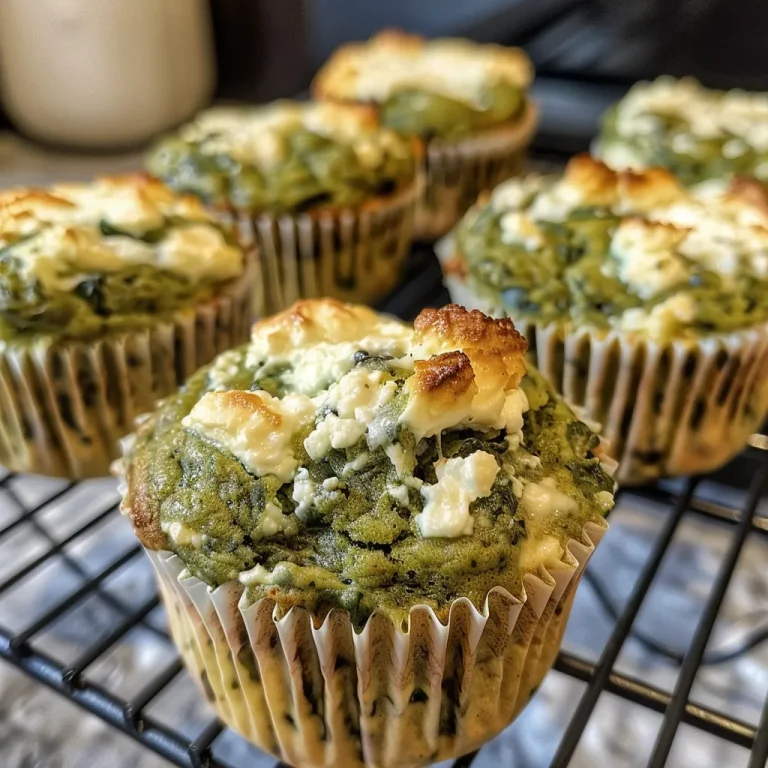
Unlocking the Comfort: Spinach-Feta Muffins

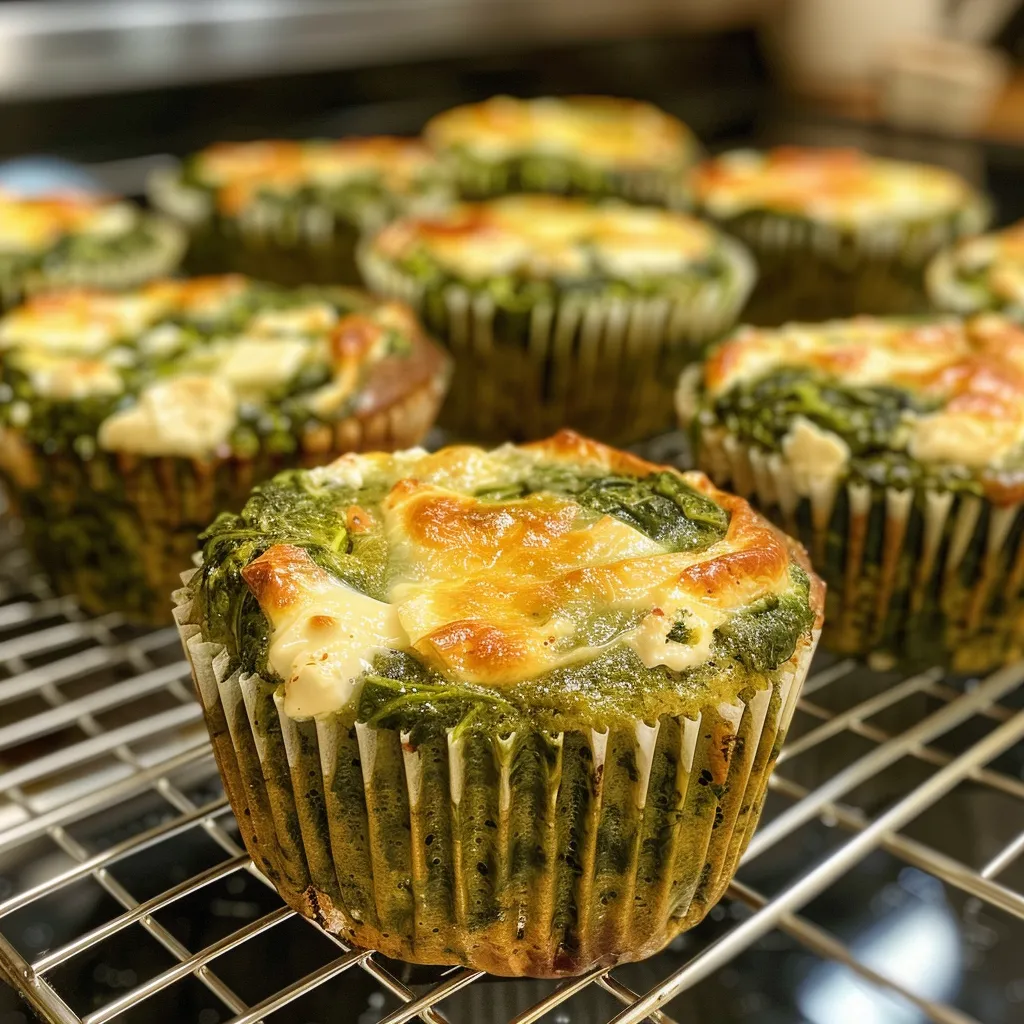
Welcome, fellow food explorers! Today, we’re diving into a recipe that lovingly transports me to cozy cafés where the aroma of freshly baked goods fills the air—the Spinach-Feta Muffins. These delightful treats are not just muffins; they are a celebration of flavors and cultures, combining the creamy richness of feta cheese with the earthy goodness of spinach. Perfect for breakfast, brunch, or a quick snack, this recipe is your passport to culinary exploration. So, roll up your sleeves, and let’s get whisking!

Why You’ll Love This Recipe

These muffins are not only delicious, but they also come with a plethora of benefits that make them a must-try. Here are five reasons why you will absolutely adore this recipe:

  • Quick and Easy Preparation: In just about 30 minutes, you can whip up a batch of these muffins, making them perfect for busy mornings or last-minute gatherings.
  • Nutritious Ingredients: Packed with spinach and feta, these muffins are a wholesome choice that provides essential vitamins and minerals.
  • Meal Prep Friendly: They store well in the refrigerator for several days, making them a fantastic option for meal prep or grab-and-go snacks.
  • Versatile Flavor Profile: The combination of salty feta and fresh spinach creates a flavor explosion that pairs well with various dishes or can be enjoyed on their own.
  • Customizable: Feel free to mix in your favorite ingredients or adapt the recipe to suit your dietary preferences!

Ingredient Breakdown

Let’s take a closer look at what you’ll need for these scrumptious Spinach-Feta Muffins, along with some handy substitutions:

  • Flour (2 cups / 300 gm): All-purpose flour works best, but you can substitute with whole wheat or gluten-free flour for healthier options.
  • Baking Powder (1 teaspoon): This is essential for that lovely rise.
  • Milk (1 cup): Any milk will do! You can use dairy or plant-based alternatives like almond or oat milk.
  • Oil (1/2 cup): A neutral oil is recommended. Olive oil or melted coconut oil add a nice flavor.
  • Eggs (2): These bind the ingredients together. If you’re vegan, try flax eggs or applesauce as a substitute.
  • Sugar (2 teaspoons): Just a hint to balance the flavors; feel free to omit it if you prefer.
  • Salt (1 teaspoon): Adjust based on your dietary needs.
  • Frozen Spinach (250 gm): Let it thaw and drain well before using. Fresh spinach can also be used but might require a bit more prep.
  • Feta Cheese (100 gm): Crumbled feta gives these muffins their signature flavor. You can substitute with goat cheese or omit for a dairy-free option.
  • Herbal Cream Cheese (200 gm): Adds creaminess; feel free to use regular cream cheese or a vegan alternative.
  • Milk for Frosting (4 tablespoons): This creates a delightful topping, but it’s optional!

Step-by-Step Instructions

Juicy spinach-feta muffin with a crumbly top, highlighting the vibrant green spinach.

Ready to embark on your muffin-making adventure? Follow these simple steps:

  1. Preheat your oven: Set it to 180°C (350°F) and prepare your muffin tin by placing 12 cupcake liners inside.
  2. Prepare the Spinach: Thaw the spinach and press it in a sieve to remove any excess water.
  3. Cut the Feta: Dice the feta cheese into small cubes for easy mixing.
  4. Mix the Batter: In a large mixing bowl, combine all ingredients except the spinach and feta. Using an electric mixer, blend until smooth.
  5. Add Spinach and Feta: Gently fold in the spinach and feta using a spoon to keep the texture fluffy.
  6. Fill the Muffin Liners: Divide the batter evenly among the 12 muffin liners.
  7. Bake: Place the muffin tin in the preheated oven and bake for approximately 20-25 minutes or until golden brown.
  8. Prepare the Frosting: While the muffins are baking, mix the herbal cream cheese with milk until smooth, then fill a piping bag.
  9. Decorate: Once the muffins have cooled slightly, pipe some frosting on top and garnish with parsley for a beautiful finish!

Pro Tips for Perfect Spinach-Feta Muffins

Want to elevate your muffin game? Check out these expert tips:

  • Freshness Counts: Use fresh spinach when possible to enhance both flavor and texture.
  • Don’t Overmix: Gently fold ingredients to keep your muffins light and fluffy.
  • Check for Doneness: A toothpick inserted into the center should come out clean; avoid opening the oven door too early!
  • Experiment with Herbs: Add dried herbs like dill or oregano for an extra flavor boost.
  • Customize Your Fillings: Mix in other ingredients like sun-dried tomatoes or olives for a unique twist.
  • Let Them Cool: Allow muffins to cool in the tin for a few minutes before transferring them to a wire rack.
  • Storage Matters: Store in an airtight container in the fridge for up to 4 days, or freeze for longer shelf life.
  • Reheat Responsibly: Warm in the oven or microwave before serving to bring back that fresh-baked taste.

Common Mistakes and Troubleshooting

Even the best bakers face challenges! Here’s how to avoid common pitfalls:

  • Dry Muffins: Overbaking is usually the culprit. Keep an eye on your muffins as they near the end of baking time.
  • Dense Texture: This can happen if the batter is overmixed. Make sure to fold gently!
  • Too Salty: Adjust the feta cheese based on your salt preference—some brands can be saltier than others.
  • Sticking to the Pan: Ensure your liners are in place and consider using non-stick spray for extra precaution.

Variations to Explore

Feeling adventurous? Here are some fun variations you can try:

  • Cheesy Spinach Muffins: Add shredded mozzarella for an extra cheesy delight.
  • Sun-Dried Tomato and Feta: Toss in chopped sun-dried tomatoes for a Mediterranean twist.
  • Herb-Infused Muffins: Mix in fresh herbs like basil or parsley for enhanced flavor.
  • Spicy Spinach Muffins: Add a pinch of red pepper flakes for a kick!

Storage and Make-Ahead Instructions

These muffins are perfect for meal prep! Here’s how to store them properly:

  • Room Temperature: Store in an airtight container for up to 2 days.
  • Refrigerator: Keep in the fridge for up to 4 days—just reheat before serving!
  • Freezing: Freeze muffins individually wrapped in plastic wrap and placed in a freezer bag for up to 3 months. Thaw overnight in the fridge before reheating.

FAQs About Spinach-Feta Muffins

Got questions? I’ve got answers! Here are some frequently asked questions:

  • Can I use fresh spinach instead of frozen? Absolutely! Just be sure to sauté it first to remove excess moisture.
  • What can I substitute for eggs? Flax eggs or applesauce work wonderfully as egg replacements.
  • Can I make these muffins gluten-free? Yes, simply use a gluten-free flour blend!
  • How do I know when the muffins are done? A toothpick inserted in the center should come out clean.
  • Can I add other cheeses? Yes, feel free to experiment with goat cheese or cheddar!
  • How do I reheat muffins? Warm them in the oven at 180°C (350°F) for about 5-10 minutes.
  • What’s the best way to store leftover muffins? Store them in an airtight container in the fridge or freeze for longer storage.
  • Can I double the recipe? Definitely! Just make sure to adjust your baking time as needed.

Nutrition Tips and Dietary Adaptations

When it comes to nutrition, these muffins can fit various dietary needs:

  • Low-Carb Option: Use almond flour instead of regular flour for a lower-carb version.
  • Dairy-Free: Substitute all dairy products with plant-based alternatives.
  • Higher Fiber: Incorporate ground flaxseed or chia seeds into the batter.
  • Reduced Fat: Use Greek yogurt instead of oil for a lighter option.

Equipment Recommendations

Here’s the essential equipment you’ll need:

  • Muffin Tin: A standard 12-cup muffin tin is perfect for this recipe.
  • Cupcake Liners: These make for easy cleanup and prevent sticking.
  • Mixing Bowls: A large bowl for the batter and a smaller one for mixing the frosting.
  • Electric Mixer: This helps achieve a smooth batter effortlessly.
  • Piping Bag: For those beautiful frosting decorations—though a ziplock bag with a corner cut works too!

Serving Suggestions

These muffins are versatile and can be enjoyed in various ways:

  • With a Side Salad: Pair these muffins with a fresh green salad for a complete meal.
  • As a Snack: They make for a perfect mid-afternoon snack, especially with a cup of tea or coffee.
  • At Brunch: Serve alongside other brunch favorites like eggs or smoked salmon.
  • With Dips: Try serving with a yogurt dip or hummus for added flavor.

In conclusion, the Spinach-Feta Muffins are not just a recipe; they’re an adventure waiting to happen! With every bite, you’ll taste the love and care put into these delightful treats. Whether you’re whipping them up for a busy breakfast or a cozy brunch gathering, they’re sure to impress. So grab your apron, gather your ingredients, and let’s make magic happen in the kitchen!

Spinach-Feta Muffins

Prep Time 15 minutes
Cook Time 25 minutes
Total Time 40 minutes
Servings 12 muffins
Calories 250
Delicious savory muffins packed with spinach and feta, perfect for breakfast or snacks.

Ingredients

Dry ingredients

  • 2 cups Flour (300 gm)
  • 1 teaspoon Baking powder
  • 2 teaspoons sugar
  • 1 teaspoon Salt

Wet ingredients

  • 1 cup Milk
  • 1/2 cup Oil
  • 2 eggs Eggs
  • 2 tablespoons sugar

Spinach and Feta

  • 250 gm Frozen Spinach (thawed and drained)
  • 100 gm Feta cheese (cut into small cubes)

Frosting

  • 200 gm Herbal cream cheese
  • 4 tablespoons Milk (for frosting)

Instructions 

  • Preheat oven to 180°C and prepare a muffin tin with 12 liners.
  • Thaw spinach, drain well, and cut feta into small cubes.
  • Mix dry ingredients, then add wet ingredients and blend until smooth.
  • Fold in spinach and feta, then divide batter into liners.
  • Bake for 20-25 minutes. For frosting, mix cream cheese with milk until smooth, pipe over muffins, and decorate.

Notes

Ensure spinach is well drained to prevent soggy muffins.
Calories: 250kcal
Cost: $12
Course: Breakfast
Cuisine: Mediterranean
Keyword: Feta, Muffins, Spinach

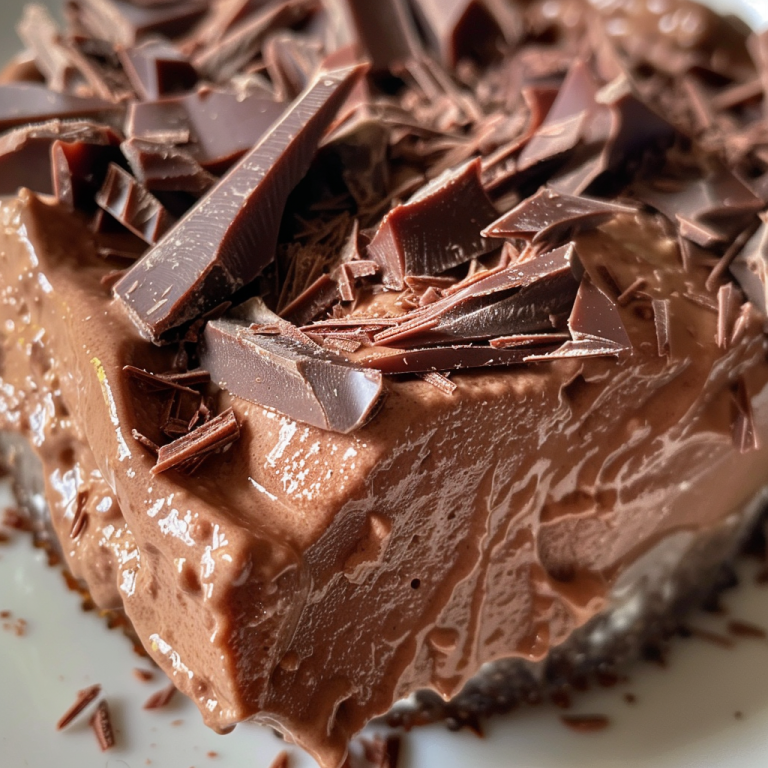
Embark on a Decadent Journey: The Allure of Chocolate Mousse

Welcome to a world where rich flavors and velvety textures collide, creating a dessert that is nothing short of a culinary masterpiece. This chocolate mousse recipe invites you to indulge your senses and explore the magic of chocolate in its most luxurious form. Whether you’re hosting a dinner party or simply treating yourself, this mousse is your passport to a delightful experience. With its airy texture and intense chocolate flavor, you’ll soon discover why this classic dessert has captured hearts around the globe.

Why You’ll Love This Recipe

Chocolate mousse is not just a dessert; it’s an experience. Here are five compelling reasons to whip up this delightful treat:

  • Unmatched Richness: The combination of heavy cream and bittersweet chocolate creates a decadent flavor that melts in your mouth.
  • Versatile Dessert: Whether served in elegant cups or layered in a cake, chocolate mousse adapts beautifully to any presentation.
  • Make-Ahead Marvel: This mousse can be prepared in advance, freeing you up to enjoy the company of your guests.
  • Easy to Customize: With various flavor variations and toppings, you can personalize this dessert to your liking.
  • Impressive Yet Simple: Despite its sophisticated appearance, this mousse is surprisingly easy to make, perfect for both novice and seasoned chefs.

Ingredients Breakdown

Let’s dive into the essential ingredients that make this chocolate mousse a timeless classic:

  • 4 large egg yolks: These add richness and help create a custard-like base. For a vegan alternative, consider using silken tofu.
  • 1/4 cup (50g) granulated sugar: This sweetness balances the bitterness of the chocolate. Feel free to adjust according to your taste.
  • 2 cups (475ml) heavy cream: Divided for whipping and folding, this cream gives the mousse its light and fluffy texture. You can substitute with coconut cream for a dairy-free version.
  • 1 pinch sea salt: Enhances the flavors of the chocolate. Omit if you prefer.
  • 2 tsp (10ml) vanilla extract: Adds a warm depth; use pure vanilla for the best flavor.
  • 7 oz. bittersweet chocolate: The star of the show! Use high-quality chocolate for the best results; dark chocolate can be used for a more intense flavor.

Step-by-Step Instructions to Create Chocolate Mousse

Follow these easy steps to create your very own chocolate mousse:

  1. In a medium mixing bowl, using an electric hand mixer, whip together the egg yolks and granulated sugar on high speed until pale and fluffy, about 2 minutes.
  2. Warm 3/4 cup of the heavy cream and a pinch of salt in a 2-quart saucepan over low heat—do not let it boil.
  3. While whisking the egg mixture, slowly pour in the warm cream to temper the egg yolks. Then, pour the combined mixture back into the saucepan.
  4. Cook over low heat, whisking constantly, until the mixture thickens slightly and reaches 160°F (70°C) on an instant-read thermometer, about 3 – 5 minutes. If any small lumps form, strain through a sieve and return to the saucepan.
  5. Off the heat, add in the chopped chocolate and vanilla extract. Stir well until the chocolate is fully melted and integrated.
  6. Pour the mixture into a clean medium bowl, cover, and chill, stirring every 10 – 15 minutes until it reaches 70°F (about 30 – 40 minutes total).
  7. While the chocolate mixture cools, whip the remaining heavy cream until very stiff peaks form.
  8. Gently fold the whipped cream into the cooled chocolate mixture until well combined.
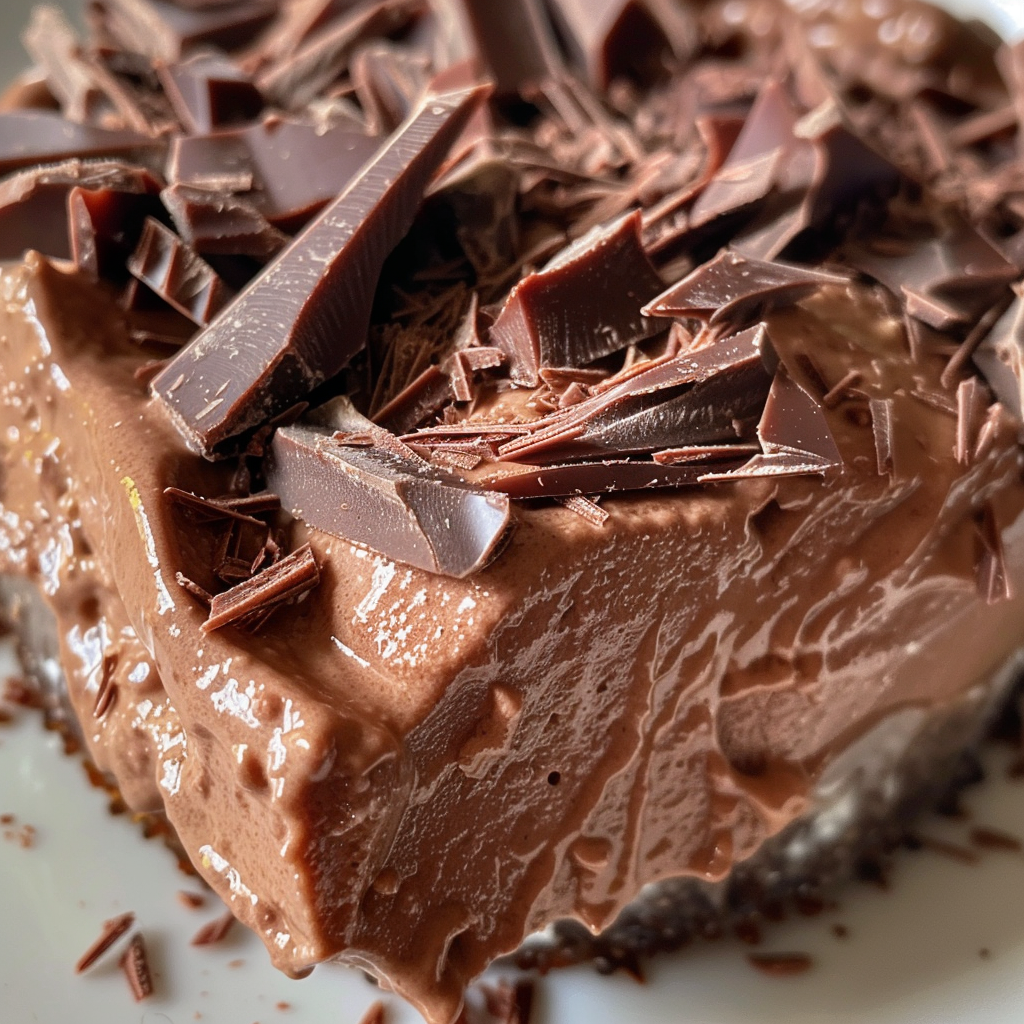
  9. Pipe or spoon the mousse into dessert cups. Chill for at least 2 hours. Top with sweetened whipped cream and garnish with shaved chocolate if desired.

Pro Tips for the Perfect Chocolate Mousse

Elevate your mousse-making skills with these expert tips:

  • Temperature Matters: Ensure your ingredients are at room temperature for better emulsification.
  • Whip Wisely: Be careful not to overwhip the cream; you want it fluffy, not grainy.
  • Chill Out: Allow the mousse to chill adequately; this enhances its texture and flavor.
  • Garnish Creatively: Fresh berries or a drizzle of caramel can add an exciting twist to your presentation.
  • Experiment with Flavors: Add a splash of liqueur or espresso to deepen the taste profile.
  • Quality Ingredients: Use the best chocolate and cream you can find; it makes all the difference!
  • Gentle Folding: When combining mixtures, fold carefully to maintain the mousse’s airy texture.
  • Use a Thermometer: Investing in an instant-read thermometer ensures perfect cooking without guessing.

Common Mistakes and Troubleshooting

Even seasoned cooks can encounter hiccups. Here’s how to troubleshoot common issues:

  • Grainy Texture: This may occur if the chocolate is not melted properly. Make sure to melt it gently and mix thoroughly.
  • Overwhipped Cream: If your cream becomes grainy, it can’t be salvaged. Start with fresh cream and whip carefully next time.
  • Eggy Flavor: If the mousse has a strong egg taste, ensure you cook it to the correct temperature to eliminate raw egg flavor.
  • Too Sweet: If it’s overly sweet, balance it with an unsweetened chocolate or a pinch of salt.

Variations to Explore

Get adventurous with these delicious variations:

  • Mint Chocolate Mousse: Add a few drops of peppermint extract for a refreshing twist.
  • Espresso Chocolate Mousse: Incorporate a shot of espresso for a boost of coffee flavor.
  • Orange Zest Chocolate Mousse: Infuse with fresh orange zest for a citrusy brightness.
  • Spicy Chocolate Mousse: Add a pinch of cayenne pepper or chili powder for a kick.

Storage and Make-Ahead Instructions

This chocolate mousse is perfect for make-ahead preparation:

  • Refrigeration: Store covered in the refrigerator for up to 3 days to maintain freshness.
  • Freezing: For longer storage, freeze for up to a month. Thaw in the refrigerator overnight before serving.

Frequently Asked Questions (FAQs)

Here are some common questions about chocolate mousse:

  • Can I use milk instead of cream? Milk won’t provide the same richness; stick with heavy cream for best results.
  • What can I use instead of eggs? Silken tofu or aquafaba can be substituted for a vegan version.
  • How do I know when the mousse is set? It should be firm to the touch but still slightly jiggly in the center.
  • Can I make this mousse without chocolate? You can create a fruit mousse using pureed fruit and gelatine instead.
  • What type of chocolate is best? Bittersweet chocolate offers the best balance of sweetness and richness.
  • Can I serve this mousse warm? It’s best served chilled for the ideal texture.
  • How can I enhance the presentation? Top with whipped cream, chocolate shavings, or fresh fruit for visual appeal.
  • Is this recipe gluten-free? Yes, all ingredients used are naturally gluten-free.

Nutritional Tips and Dietary Adaptations

For those considering dietary needs:

  • Low Sugar: Use a sugar substitute or dark chocolate with a higher cocoa content.
  • Dairy-Free: Substitute heavy cream with coconut cream or any non-dairy alternative.
  • Protein Boost: Add a scoop of protein powder for an extra nutritional punch.

Equipment Recommendations

Ensure you have the right tools for success:

  • Electric Hand Mixer: Essential for achieving fluffy cream and well-whipped egg yolks.
  • Instant-Read Thermometer: Helps ensure your egg mixture reaches the perfect temperature.
  • Mixing Bowls: Use a variety of sizes for mixing and chilling your mousse.
  • Spoon or Piping Bag: For serving, a piping bag allows for elegant presentation.

Serving Suggestions

Transform your mousse into a showstopper with these serving ideas:

  • Mini Dessert Cups: Serve in small cups or jars for individual servings that are perfect for parties.
  • Layered Desserts: Layer mousse with crumbled cookies or fruit for added texture and flavor.
  • Chocolate Sauce Drizzle: A drizzle of chocolate sauce can enhance the indulgence.
  • Fresh Berries: Top with raspberries or strawberries for a pop of color and freshness.

Conclusion

Chocolate mousse is more than just a dessert; it’s a celebration of flavors, textures, and shared moments. With this definitive recipe, you’ll not only create a dish that dazzles the palate but also a story that connects you to the rich tapestry of culinary delight. So, gather your ingredients, invite friends over, and let the magic of chocolate unfold in your kitchen. Remember, every spoonful is an invitation to explore the world of flavors, one delightful bite at a time!

Chocolate Mousse

Prep Time 20 minutes
Cook Time 10 minutes
Total Time 30 minutes
Servings 4 servings
Calories 350
A rich and creamy chocolate mousse perfect for satisfying your sweet tooth with minimal effort.

Ingredients

Eggs

  • 4 large egg yolks
  • 1/4 cup granulated sugar

Heavy Cream

  • 2 cups heavy cream (divided, plus more for topping if desired)
  • 1 pinch sea salt (optional)
  • 2 tsp vanilla extract
  • 7 oz bittersweet chocolate (chopped small)

Instructions 

  • Whip egg yolks and sugar until pale and fluffy, about 2 minutes.
  • Warm half of the cream with salt, then slowly temper egg mixture by pouring in warm cream while whisking.
  • Return mixture to saucepan, cook until thickened and reaches 160°F, then remove from heat and add chocolate and vanilla, stirring until smooth.
  • Chill mixture until cool, then whip remaining cream to stiff peaks and fold into chocolate mixture.
  • Divide into cups, chill for 2 hours, then top with whipped cream and garnish with grated chocolate.

Notes

For a richer flavor, use high-quality chocolate and chill the mousse thoroughly before serving.
Calories: 350kcal
Cost: $15
Course: Dessert
Cuisine: French
Keyword: chocolate

Welcome to a culinary journey where every bite tells a story! Today, we’re diving into the vibrant world of Buffalo Cauliflower Bites. More than just a recipe, these bites are a celebration of flavor, texture, and the joy of sharing delicious food with friends and family. With their crispy exterior and zesty buffalo sauce, these air fryer creations are not just a healthy alternative to wings—they’re a passport to flavor-packed adventures. Ready to explore? Let’s get cooking!

Why You’ll Love This Recipe

These Crispy Air Fryer Buffalo Cauliflower Bites are more than just a delightful snack; they come with a plethora of benefits:

  • Quick Preparation: Ready in under 30 minutes, perfect for spontaneous cravings.
  • Healthier Alternative: Enjoy the flavors of traditional buffalo wings without the guilt—it’s all about the cauliflower!
  • Vegan-Friendly Option: Easily adaptable for plant-based diets without sacrificing taste.
  • Customizable Heat Levels: Adjust the buffalo sauce to suit your spice tolerance.
  • Crowd-Pleaser: Whether at a party or a family dinner, these bites are sure to impress.

Essential Ingredients for Air Fryer Buffalo Cauliflower Bites

Creating these delicious bites starts with the right ingredients. Here’s what you’ll need:

  • 1 head cauliflower: Cut into florets for that perfect bite-sized piece.
  • 1 tablespoon olive oil: For a light coating that helps the batter stick.
  • 1/2 cup all-purpose flour: This forms the base of your batter.
  • 1/2 teaspoon salt: Enhances the flavors of the cauliflower.
  • 1/4 teaspoon black pepper: Adds a subtle kick.
  • 1/4 cup buffalo sauce: The star of the show, delivering that bold flavor.
  • 2 tablespoons unsalted butter, melted: Helps to achieve that rich taste.
  • 1 tablespoon honey (optional): Balances out the heat of the buffalo sauce.
  • Ranch or blue cheese dressing: For dipping, a must-have for any buffalo dish!
  • Celery sticks: A refreshing side to complement the heat.

Step-by-Step Instructions for Perfect Air Fryer Buffalo Cauliflower Bites

Now that you have your ingredients, let’s dive into the preparation:

  1. In a large bowl, toss cauliflower florets with olive oil, flour, salt, and pepper until evenly coated.
  2. Place the coated cauliflower in the air fryer basket in a single layer to ensure even cooking.
  3. Air fry at 400°F (200°C) for 10-12 minutes, or until crispy and golden brown, flipping halfway through for even crispiness.
  4. While the cauliflower is cooking, whisk together buffalo sauce, melted butter, and honey (if using) in a medium bowl.
  5. Once the cauliflower is cooked, add it to the bowl with the buffalo sauce mixture. Toss gently to coat.
  6. Return the coated cauliflower to the air fryer basket and air fry for an additional 2-3 minutes until the sauce thickens slightly.
  7. Serve immediately with ranch or blue cheese dressing and celery sticks for that classic touch.

Pro Tips for Perfect Air Fryer Buffalo Cauliflower Bites

Appetizing dish of buffalo cauliflower bites with a side of dipping sauce and fresh vegetables.

To take your buffalo cauliflower bites to the next level, consider these expert insights:

  • Double-Coat for Extra Crispiness: For those who love a crunch, you can double-coat the cauliflower by repeating the batter process.
  • Choose the Right Flour: For a gluten-free option, substitute all-purpose flour with almond or chickpea flour.
  • Experiment with Sauces: If you’re feeling adventurous, try different sauces like teriyaki or garlic parmesan for a unique twist.
  • Don’t Overcrowd the Basket: Giving your cauliflower room to breathe ensures even cooking and crispiness.
  • Adjust Cooking Time as Needed: Depending on your air fryer model, you may need to tweak the cooking time slightly.
  • Use Panko Breadcrumbs: For an even crunchier texture, consider adding panko breadcrumbs to your coating.
  • Make Ahead: You can prepare the cauliflower ahead of time and store it in the fridge until ready to cook.
  • Serve with Fresh Veggies: Pairing these bites with fresh veggies not only adds color but also balances the flavors.

Common Mistakes and Troubleshooting

Even the best cooks face challenges! Here are some common pitfalls and how to avoid them:

  • Too Soggy?: If your bites come out soggy, ensure they’re evenly coated but not overloaded with batter.
  • Not Crispy Enough?: Air fry at a higher temperature and make sure to flip them halfway through cooking.
  • Burnt Bites?: Check your air fryer settings; different models may cook at different rates.
  • Flavor Lacking?: Always taste the batter before cooking; adjust seasoning as needed.

Creative Variations to Try

Once you’ve mastered the classic buffalo version, why not experiment with these variations?

  • BBQ Cauliflower Bites: Swap out buffalo sauce for your favorite barbecue sauce.
  • Garlic Parmesan Cauliflower Bites: Use garlic powder and parmesan cheese in the batter for a savory twist.
  • Buffalo Ranch Bites: Mix ranch seasoning into the batter for a creamy flavor.
  • Spicy Sriracha Cauliflower Bites: Add sriracha to the buffalo sauce for an extra kick.

Storage and Make-Ahead Instructions

Here’s how to keep your buffalo cauliflower bites fresh:

  • Storing Leftovers: Keep leftover bites in an airtight container in the fridge for up to 3 days.
  • Reheating: For the best results, reheat in the air fryer at 350°F (175°C) for 5-7 minutes.
  • Make Ahead: Prepare the cauliflower and batter a day in advance; store in the fridge until ready to cook.

Nutrition Tips and Dietary Adaptations

These buffalo cauliflower bites can be tailored to fit various dietary needs:

  • Low-Carb Option: Replace the flour with almond flour to cut carbs while keeping the crunch.
  • Vegan-Friendly: Omit the butter and honey; substitute with plant-based alternatives.
  • Gluten-Free: Use gluten-free flour for those with sensitivities while still enjoying this tasty treat.

Equipment Recommendations

To create the perfect buffalo cauliflower bites, having the right tools is essential:

  • Air Fryer: A quality air fryer ensures even cooking; consider brands like Philips or Ninja.
  • Mixing Bowls: Use large bowls for tossing ingredients easily.
  • Measuring Cups and Spoons: Accurate measurements lead to flavorful results.
  • Spatula: A good spatula will help you toss and coat the cauliflower without breaking it apart.

Serving Suggestions

To enhance your dining experience, consider these serving ideas:

  • Classic Dips: Serve with ranch or blue cheese dressing for that authentic buffalo experience.
  • Veggie Platter: Include fresh celery, carrots, and bell peppers for a colorful and healthy side.
  • Garnish with Fresh Herbs: Chopped parsley or green onions can brighten up the presentation.
  • Perfect Pairings: These bites pair wonderfully with a cold beer or sparkling water for a refreshing drink.

Frequently Asked Questions About Air Fryer Buffalo Cauliflower Bites

Let’s address some common queries regarding this delightful dish:

  • Can I use frozen cauliflower? Yes, but make sure to thaw and pat dry to avoid excess moisture.
  • How do I make them spicier? Increase the amount of buffalo sauce or add cayenne pepper to your batter.
  • What if I don’t have an air fryer? These can also be baked in the oven at 425°F (220°C) for about 20-25 minutes.
  • Can I double the recipe? Absolutely! Just ensure you adjust the cooking time and don’t overcrowd the air fryer.
  • Are these suitable for meal prep? Yes, they hold up well in the fridge and can be reheated easily.
  • Can I add cheese? Yes, sprinkle some shredded cheese on top during the last few minutes of cooking for a cheesy twist.
  • How do I know when they are done? They should be golden brown and crispy on the outside.
  • What’s the best way to serve them? Hot and fresh, with dipping sauces on the side!

These Crispy Air Fryer Buffalo Cauliflower Bites are not just a recipe; they’re an adventure waiting to be savored. With their crispy texture and bold flavors, they encapsulate the essence of culinary exploration. So gather your friends, whip up a batch, and let every bite transport you to a world of flavor. Happy cooking!

Crispy Air Fryer Buffalo Cauliflower Bites

Prep Time 10 minutes
Cook Time 12 minutes
Total Time 22 minutes
Servings 4 servings
Calories 180
Enjoy these crispy, spicy cauliflower bites made effortlessly in the air fryer, perfect for a snack or appetizer.

Ingredients

Cauliflower

  • 1 head cauliflower, cut into florets
  • 1 tablespoon olive oil
  • 1/2 cup all-purpose flour
  • 1/2 teaspoon salt
  • 1/4 teaspoon black pepper
  • 1/4 cup buffalo sauce
  • 2 tablespoons unsalted butter, melted
  • 1 tablespoon honey (optional)
  • Ranch or blue cheese dressing, for serving
  • Celery sticks, for serving

Instructions 

  • Toss cauliflower with olive oil, flour, salt, and pepper.
  • Air fry at 400°F (200°C) for 10-12 minutes, flipping halfway.
  • Mix buffalo sauce, melted butter, and honey in a bowl.
  • Coat cooked cauliflower with sauce mixture.
  • Return to air fryer for 2-3 minutes, then serve with dressing and celery.

Notes

For extra crispiness, spray cauliflower lightly with cooking spray before air frying.
Calories: 180kcal
Cost: $10
Course: Appetizer
Cuisine: American
Keyword: Cauliflower

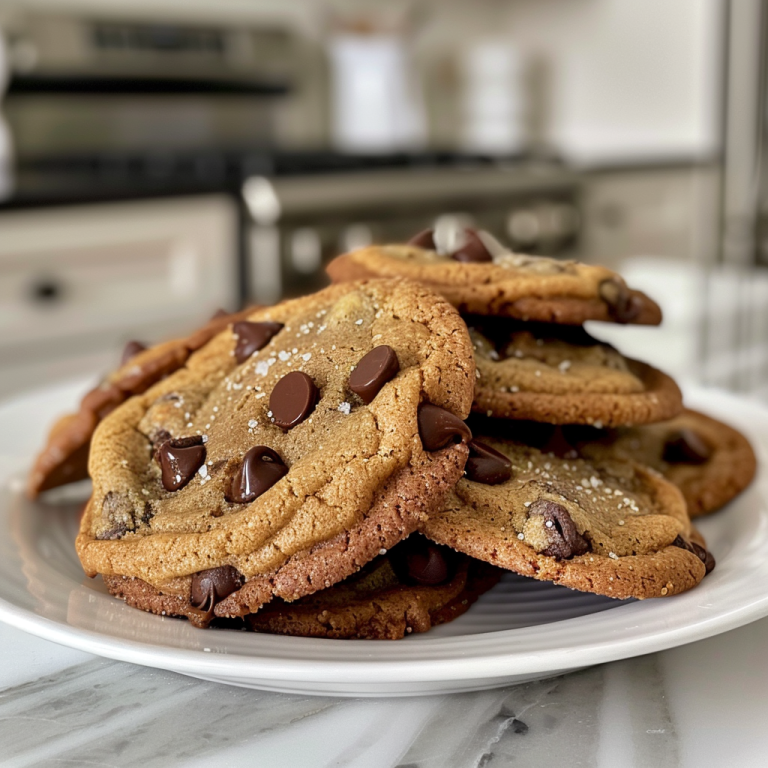
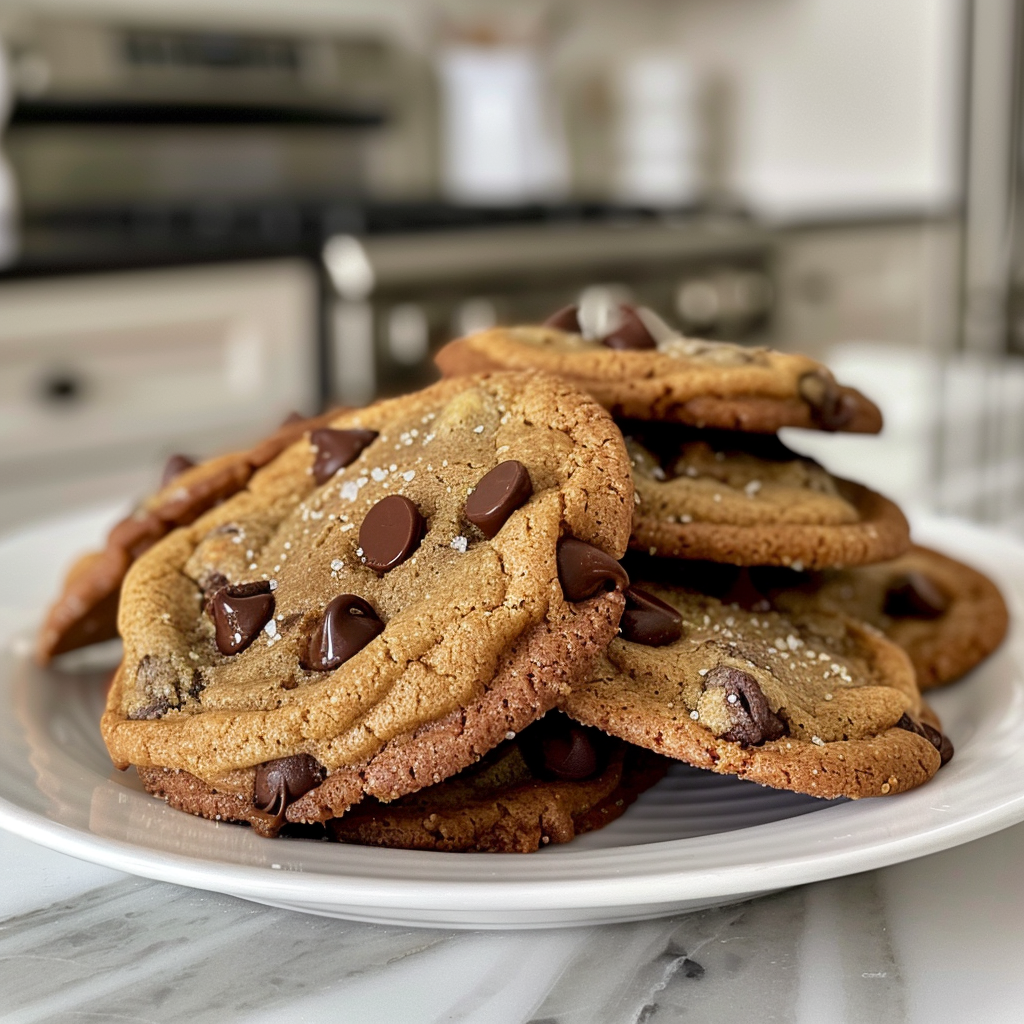
Join me on a delightful journey as we bake the most scrumptious Gluten Free Chewy Chocolate Chip Cookies. With melted chocolate chips and a perfect chewy texture, these cookies are a passport to flavor and nostalgia. Let’s create sweet memories together!

Why You’ll Love This Recipe

This recipe isn’t just about baking cookies; it’s about creating moments of joy and connection. Here’s why you’ll fall in love with these gluten free chocolate chip cookies:

  • Easy to make: With simple ingredients and straightforward steps, even novice bakers can whip these up!
  • Chewy texture: These cookies boast a perfect chewy consistency, with crisp edges and soft centers.
  • Adaptable recipe: You can easily modify ingredients to cater to your dietary preferences, making them dairy-free or vegan.
  • Rich chocolate flavor: The generous amount of chocolate chips ensures every bite is packed with rich, decadent flavor.
  • Freezer-friendly: Make a double batch and freeze the dough for spontaneous baking sessions on busy days!

Ingredients Breakdown

Let’s dive into the essentials for making the best gluten free chewy chocolate chip cookies. Understanding each ingredient helps you appreciate the magic behind this recipe.

  • Butter: 1/2 cup softened butter creates the rich base. For a vegan option, use coconut oil or vegan butter.
  • Sugars: 1/2 cup white granulated sugar and 1/2 cup brown sugar add sweetness and moisture. Brown sugar enhances chewiness.
  • Vanilla extract: 2 tsp of vanilla extract is key for depth of flavor. Try using pure vanilla for the best results.
  • Egg: 1 large egg binds the ingredients. For an egg-free version, substitute with 1/4 cup unsweetened applesauce.
  • Gluten free flour blend: 1 3/4 cups of all-purpose gluten free flour provides structure. Ensure your blend contains xanthan gum for the best texture.
  • Baking soda and salt: 1 tsp baking soda and 1/2 tsp sea salt balance the flavors and promote rising.
  • Hot water: 1 tbsp hot water helps activate the baking soda, contributing to the cookie’s perfect rise.
  • Chocolate chips: 1.5 cups of chocolate chips are the stars of the show! Use semi-sweet, dark, or milk chocolate according to your preference.

Expert Tips for Cookie Perfection

To elevate your cookie game, keep these expert tips in mind:

  • Chill the dough: For thicker cookies, chill the dough for at least 30 minutes before baking.
  • Don’t overmix: Mix until just combined to maintain a tender texture in the cookies.
  • Use a cookie scoop: This ensures even-sized cookies that bake uniformly.
  • Keep an eye on baking time: Check your cookies around the 8-minute mark; they should be golden around the edges but soft in the center.
  • Experiment with add-ins: Try adding nuts, dried fruit, or even a sprinkle of sea salt on top for an extra flavor boost.
  • Store correctly: Keep cookies in an airtight container at room temperature to maintain freshness.
  • Batch it up: Make extra dough and freeze it for a quick treat later.

Common Mistakes and Troubleshooting

Even the best bakers make mistakes! Here are common pitfalls and how to avoid them:

  • Cookies spreading too much: This can happen if the butter is too warm or if you don’t chill the dough. Always start with softened but not melted butter.
  • Dry cookies: This often results from overbaking or using too much flour. Measure flour accurately—spoon it into the cup and level it off.
  • Flat cookies: If your cookies turn out flat, check your baking soda’s freshness and ensure you’re using the right gluten free flour blend.

Variations to Explore

Feeling adventurous? Here are some delightful variations to try:

  • Double chocolate chip cookies: Add 1/4 cup cocoa powder to the flour mix for a chocolatey twist!
  • Nutty chocolate chip cookies: Incorporate 1/2 cup chopped walnuts or pecans for added crunch.
  • Salted caramel chocolate chip cookies: Fold in caramel bits along with the chocolate chips and sprinkle sea salt on top before baking.
  • Spiced chocolate chip cookies: Add a pinch of cinnamon and nutmeg to the dry ingredients for a warm, cozy flavor.

Storage and Make-Ahead Instructions

Want to enjoy your cookies later? Here’s how to store and prepare them:

  • Room temperature storage: Keep baked cookies in an airtight container at room temperature for up to one week.
  • Freezing dough: Shape dough into balls, freeze on a baking sheet, and transfer to a zip-top bag for up to three months.
  • Baking from frozen: Bake frozen cookie dough balls directly from the freezer, adding an extra minute or two to the baking time.

Frequently Asked Questions

Here are some common questions about gluten free chocolate chip cookies:

  • Can I use regular flour instead of gluten free flour? No, this recipe is specifically designed for gluten free flour blends, which are essential for the best results.
  • How do I know when the cookies are done baking? They should be golden brown around the edges and look slightly underbaked in the center; they will continue to firm up as they cool.
  • What if I don’t have baking soda? You can substitute with baking powder, but use three times the amount (3 tsp) and omit the salt.
  • Can I make these cookies vegan? Yes! Substitute the egg with applesauce and use vegan butter.
  • How do I enhance the chocolate flavor? Consider using dark chocolate chips or adding a teaspoon of espresso powder to the dough.
  • Are these cookies safe for people with celiac disease? Ensure all ingredients are certified gluten free to avoid cross-contamination.
  • Can I add other flavors? Absolutely! Try adding peanut butter or almond extract for a unique twist.
  • How long do the cookies last? They can last up to a week at room temperature and longer if frozen.

Nutrition Tips and Dietary Adaptations

These cookies can be enjoyed as part of a balanced diet. Consider these nutritional adaptations:

  • Lower sugar option: Reduce the sugar by 25% or use a sugar substitute to cut calories.
  • Healthy fats: Substitute half the butter with unsweetened applesauce to reduce fat content.
  • High-protein option: Use a protein-rich gluten free flour blend for an added nutritional boost.

Equipment Recommendations

To make this recipe a breeze, here are some kitchen tools I recommend:

  • Mixing bowls: A set of various sizes will help you combine ingredients efficiently.
  • Cookie scoop: This tool ensures consistent cookie sizes for even baking.
  • Parchment paper: Essential for lining your baking sheets and preventing sticking.
  • Cooling rack: Allows cookies to cool evenly, preventing sogginess.

Serving Suggestions

These cookies are perfect on their own, but you can elevate your experience with these serving ideas:

  • Pair with milk: A classic combination that never fails!
  • Serve with ice cream: Create an indulgent ice cream sandwich with your favorite flavor.
  • Enjoy with coffee or tea: The perfect afternoon treat to accompany your favorite beverage.

Final Thoughts

Creating these gluten free chewy chocolate chip cookies is more than just baking; it’s about embracing the flavors and stories that food brings into our lives. With their delightful chewy texture and rich chocolate flavor, these cookies will transport you to a world of warmth and nostalgia with every bite. So, gather your ingredients, channel your inner chef, and let’s create sweet memories together!

The Best Gluten Free Chewy Chocolate Chip Cookies

Prep Time 10 minutes
Cook Time 10 minutes
Total Time 20 minutes
Servings 24 cookies
Calories 150
Enjoy these irresistibly chewy gluten-free chocolate chip cookies, perfect for satisfying your sweet tooth with a healthier twist.

Ingredients

Dough

  • 1/2 cup softened butter
  • 1/2 cup white granulated sugar
  • 1/2 cup brown sugar
  • 2 tsp vanilla extract
  • 1 large egg
  • 1 3/4 cups all purpose Gluten free flour
  • 1/2 tsp sea salt
  • 1 tsp baking soda
  • 1 tbsp hot water
  • 1.5 cups chocolate chips

Instructions 

  • Preheat oven to 375°F (190°C) and line a baking sheet with parchment paper.
  • Cream together butter, white sugar, and brown sugar. Add egg and vanilla, mix well.
  • Mix flour, baking soda, and salt. Gradually add to wet ingredients, then stir in hot water and chocolate chips.
  • Scoop dough onto baking sheet, spacing 2 inches apart. Bake for 8-9 minutes.
  • Cool cookies on sheet for 2 minutes, then transfer to wire rack.

Notes

For extra chewy cookies, slightly underbake and let sit for a few minutes before transferring.
Calories: 150kcal
Cost: $12
Course: Dessert
Cuisine: American
Keyword: chocolate, gluten-free

Embark on a Culinary Adventure with Skillet Chicken and Gravy

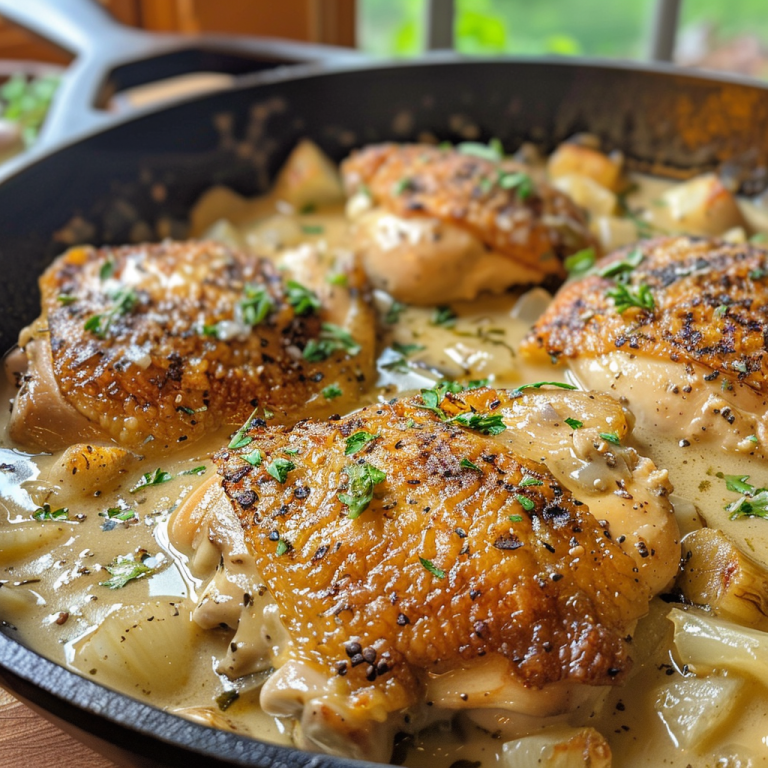
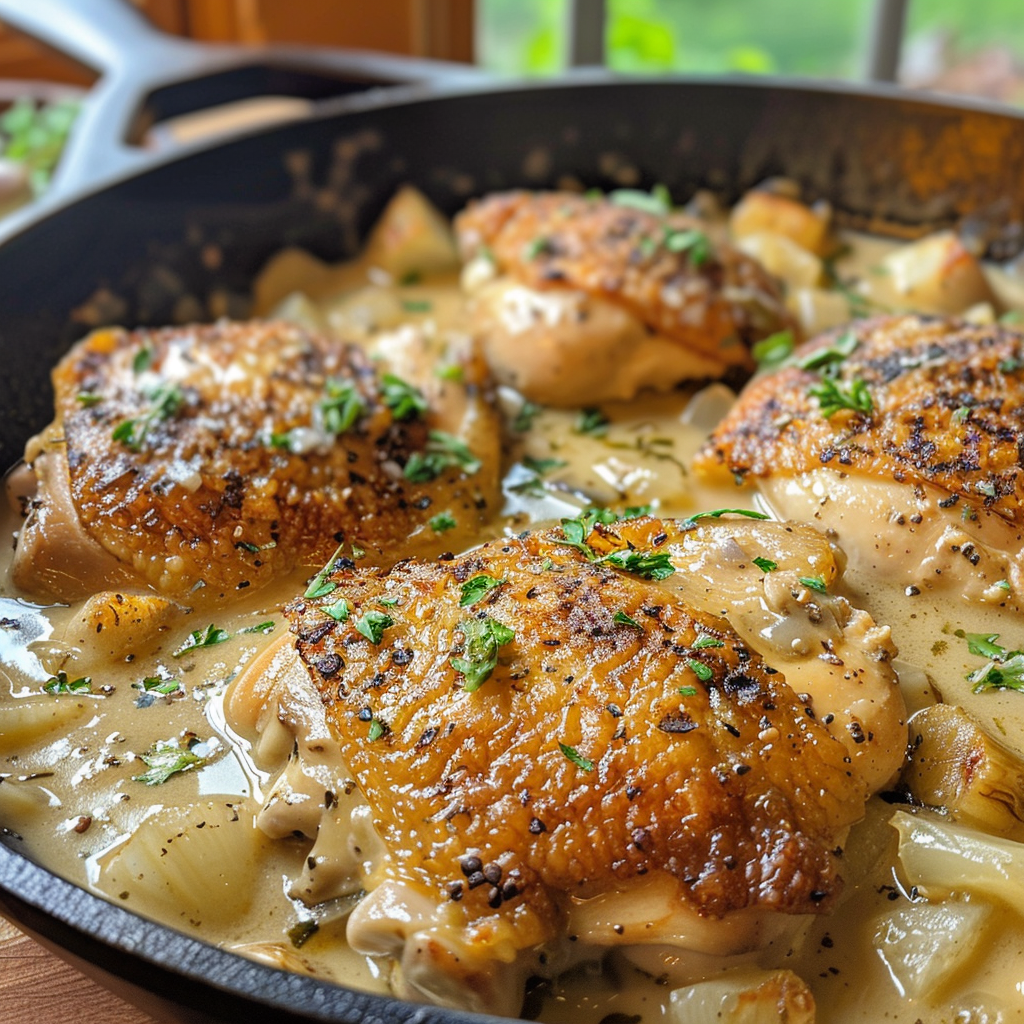
Welcome, flavor seekers! Today, we’re diving into a dish that’s not just a recipe, but a warm embrace from the kitchen—Skillet Chicken and Gravy. This comfort food classic combines tender chicken, a rich and savory gravy, and a sprinkle of love that transforms your meal into an experience. If you’re ready to explore this hearty dish and its delightful variations, grab your apron and let’s get cooking!

Why You’ll Love This Recipe

This Skillet Chicken and Gravy recipe is a staple in many households, and for good reason! Here are just a few reasons why you’ll fall head over heels for this dish:

  • Quick and Easy: Perfect for busy weeknights, this dish can be on your table in less than 30 minutes, allowing you to savor home-cooked goodness without the long prep time.
  • Hearty Ingredients: With simple staples like chicken and broth, this recipe allows the flavors to shine, making it easy to whip up without a trip to the grocery store.
  • Comforting Flavor: The creamy, savory gravy pairs perfectly with the succulent chicken, creating a dish that warms your heart and satisfies your taste buds.
  • Versatile: Enjoy it over mashed potatoes, rice, or even pasta. This dish adapts to what you have on hand, making it a flexible option for any meal.
  • Family-Friendly: Even the pickiest eaters will love this dish! Its mild flavors and creamy texture make it a hit for everyone, from kids to adults.

Ingredient Breakdown

Let’s take a closer look at the ingredients that make this Skillet Chicken and Gravy so special. Each component plays a vital role in creating that unforgettable flavor.

  • 3 tablespoons unsalted butter (or oil): This is your base for sautéing, adding rich flavor to the dish.
  • 1 pound boneless and skinless chicken breasts or thighs: Choose chicken breasts for a leaner option or thighs for more flavor and juiciness.
  • 1 onion, diced: Adds sweetness and depth to the gravy.
  • 2 cloves garlic, chopped: Infuses the dish with aromatic goodness.
  • Herbs (thyme, rosemary, sage): Fresh or dried, these herbs bring an earthy quality that elevates the dish.
  • 3 tablespoons flour: Essential for thickening the gravy. Use gluten-free flour if needed.
  • 2 cups chicken broth: The foundation of your gravy, providing moisture and flavor.
  • Optional spices (onion powder, garlic powder): Enhance the flavor profile, adding depth and complexity.
  • Salt and pepper to taste: Season to your preference for a balanced, flavorful dish.

Pro Tips for Perfect Skillet Chicken and Gravy

Want to ensure your dish turns out perfectly every time? Check out these expert tips!

  • Prep Ahead: Dice your onion and chop your garlic in advance to save time during cooking.
  • Use a Meat Thermometer: Ensure your chicken reaches an internal temperature of 165°F (73.9°C) for safe eating.
  • Let the Chicken Rest: After cooking, let your chicken rest for a few minutes before slicing to maintain its juices.
  • Whisk the Gravy: As you add the flour to the pan, whisk continuously to prevent lumps for a smooth gravy.
  • Adjust Thickness: If your gravy is too thick, add a splash more broth; if too thin, simmer a bit longer to reduce.
  • Experiment with Flavors: Feel free to add a splash of cream for richness or a bit of mustard for a tangy twist!
  • Season Gradually: Taste as you go to ensure the perfect balance of flavors.
  • Pair with Sides: Think about what to serve alongside—mashed potatoes, steamed veggies, or crusty bread all work wonderfully.

Common Mistakes and Troubleshooting

Even the best cooks make mistakes! Here are some common pitfalls and how to avoid them:

  • Overcooking the Chicken: Keep an eye on your cooking time to prevent dry chicken; use a meat thermometer for accuracy.
  • Gravy Lumps: Ensure you whisk the flour into the pan well before adding the broth to avoid lumps.
  • Skimpy Flavor: If your gravy lacks flavor, consider adding more herbs or spices to enhance the taste.
  • Too Salty: If your gravy turns out too salty, add a small amount of sugar or cream to balance the flavors.

Delicious Variations

Once you’ve mastered the basic recipe, explore these delightful variations to keep things exciting!

  • Mushroom Chicken and Gravy: Add sliced mushrooms to the pan when cooking the onions for an earthy depth.
  • Garlic Herb Chicken: Increase the garlic and herbs for a more aromatic experience.
  • Spicy Chicken and Gravy: Kick up the heat with some cayenne pepper or crushed red pepper flakes.
  • Vegetable-Loaded Gravy: Stir in some frozen peas or carrots for added nutrition and color.

Storage and Make-Ahead Instructions

This dish is perfect for meal prep! Here’s how to store and reheat:

  • Refrigeration: Store leftovers in an airtight container in the fridge for up to 3 days.
  • Freezing: You can freeze the chicken and gravy for up to 3 months; just ensure it’s in a freezer-safe container.
  • Reheating: Thaw overnight in the fridge before reheating on the stove or in the microwave, adding a splash of broth to maintain moisture.
  • Make-Ahead: Prepare the gravy and chicken in advance and combine just before serving for a quick meal!

Frequently Asked Questions

Here are some common questions about Skillet Chicken and Gravy:

  • Can I use frozen chicken? Yes! Just ensure to cook it thoroughly until it reaches 165°F (73.9°C).
  • How can I make this dish gluten-free? Substitute all-purpose flour with a gluten-free blend and check your broth for gluten content.
  • What can I serve with this dish? Mashed potatoes, rice, or crusty bread are all excellent choices.
  • Can I add vegetables? Absolutely! Sauté some veggies like carrots or peas into the gravy for added flavor and nutrition.
  • Is this recipe spicy? No, but you can add crushed red pepper if you enjoy some heat!
  • How can I make it creamier? Stir in some heavy cream or sour cream at the end for a richer gravy.
  • Can I use bone-in chicken? Yes, adjust cooking time accordingly to ensure it’s fully cooked.
  • How long does this take to prepare? The total time is around 30 minutes, making it a quick and satisfying meal!

Nutritional Tips and Dietary Adaptations

This dish can be adapted for different dietary needs:

  • Low-Carb: Serve with cauliflower mash instead of potatoes.
  • Dairy-Free: Use olive oil instead of butter and skip the cream.
  • Paleo-Friendly: Swap the flour for almond flour or coconut flour.
  • High-Protein: Add extra chicken or serve with a side of beans.

Essential Equipment Recommendations

Ensure you have the right tools to make your cooking experience enjoyable:

  • Large Skillet: A sturdy skillet is essential for even cooking.
  • Meat Thermometer: An invaluable tool for ensuring perfectly cooked chicken.
  • Whisk: For mixing the gravy smoothly and avoiding lumps.
  • Spatula: Great for flipping chicken and stirring ingredients.

Serving Suggestions

To elevate your dining experience, consider these serving ideas:

  • Garnish: Finish with fresh herbs like parsley or chives for a pop of color and freshness.
  • Side Salads: A crisp green salad pairs perfectly to balance the richness of the gravy.
  • Beverage Pairing: Enjoy with a glass of white wine or a refreshing iced tea to complement the meal.

As we wrap up our culinary journey with this Skillet Chicken and Gravy, remember that cooking is all about exploration and connection. Each dish tells a story, and I hope this recipe inspires you to create your own delicious memories. Don’t forget to share your experiences, variations, and love for cooking with family and friends. Happy cooking, fellow adventurers!

Skillet Chicken and Gravy

Prep Time 10 minutes
Cook Time 20 minutes
Total Time 30 minutes
Servings 4 servings
Calories 350
A comforting and flavorful dish featuring tender chicken cooked in a rich gravy, perfect for a hearty meal.

Ingredients

Dairy and Oils

  • 3 tablespoons unsalted butter (or oil)

Protein

  • 1 pound boneless and skinless chicken breasts or thighs (pounded thin or butterflied)

Vegetables

  • 1 onion diced onion
  • 2 cloves garlic, chopped

Spices and Herbs

  • 1/2 teaspoon dried thyme (or 1 teaspoon fresh thyme, chopped)
  • 1/2 teaspoon dried rosemary (or 1 teaspoon fresh rosemary, chopped)
  • 1/2 teaspoon ground sage (or 1 teaspoon fresh sage, chopped)

Thickening Agent

  • 3 tablespoons flour (gluten-free for gluten-free)

Broth and Seasonings

  • 2 cups chicken broth
  • 1/2 teaspoon onion powder (optional)
  • 1/2 teaspoon garlic powder (optional)

Salt and Pepper

  • to taste salt and pepper

Instructions 

  • Melt butter in a skillet, cook chicken until golden and cooked through, then set aside.
  • Cook diced onion until tender, then add garlic, herbs, and flour; cook for 1 minute.
  • Pour in broth, add seasonings, bring to a boil, then simmer until gravy thickens, about 3 minutes.
  • Season with salt and pepper, add chicken back to skillet, and cook for 5 minutes.

Notes

For extra flavor, use fresh herbs and adjust seasoning to taste.
Calories: 350kcal
Cost: $15
Course: Main Course
Cuisine: American
Keyword: Chicken

Welcome to the World of Garlic Parmesan Pull-Apart Rolls!

Imagine the warm aroma of freshly baked bread wafting through your kitchen, beckoning friends and family to gather around. Garlic Parmesan Pull-Apart Rolls are not just a side dish; they are a culinary experience that brings people together. In this article, we’ll delve deep into the art of making these delightful rolls, sharing tips, variations, and everything you need to know to create the perfect soft, fluffy, and flavorful rolls that will elevate your gatherings. This recipe is a celebration of flavors, culture, and connection, making it a must-try for any culinary explorer!

Why You’ll Love This Recipe

  • Unforgettable Flavor: The combination of garlic, butter, and Parmesan creates a savory profile that will leave everyone asking for seconds.
  • Easy to Share: These rolls are designed for pulling apart and sharing, making them perfect for family dinners or parties.
  • Simple Ingredients: With everyday ingredients, you can whip up a batch of rolls that taste like they came from a gourmet bakery.
  • Versatile: Whether as a side for your favorite pasta or a star at brunch, these rolls fit into any meal seamlessly.
  • Memorable Moments: Baking these rolls can be a fun activity to do with family or friends, creating delicious memories together.

Ingredients You’ll Need

Before we dive into the preparation, let’s gather our ingredients. Here’s what you’ll need for these scrumptious Garlic Parmesan Pull-Apart Rolls:

  • 1/3 cup (80g) whole milk: Adds richness and moisture to the dough.
  • 2 tablespoons (16g) bread flour: Used for the tangzhong, ensuring a soft texture.
  • 1/3 cup plus 1 tablespoon (100ml) whole milk: For proofing the yeast and enriching the dough.
  • 1 1/2 teaspoons (5.4g) active dry yeast: The magic ingredient that makes the dough rise beautifully.
  • 2 1/3 cups (314g) bread flour: The backbone of our dough, providing structure and chewiness.
  • 2 large eggs (114g) at room temperature, divided: Adds richness and helps bind the ingredients.
  • 1 teaspoon (6g) kosher salt: Enhances the overall flavor of the rolls.
  • 4 teaspoons (16g) sugar: A touch of sweetness to balance the savory flavors.
  • 3 tablespoons (42g) unsalted butter at room temperature, cut into 1/2-inch pieces: Ensures a rich, buttery flavor.
  • Neutral oil, for greasing: To prevent sticking.
  • A pinch of flaky salt, for topping: Adds a delightful crunch and enhances flavor.
  • 1/4 cup (56g) unsalted butter at room temperature: For making the compound butter.
  • 1/2 teaspoon garlic powder: Infuses the rolls with garlicky goodness.
  • 1 tablespoon fresh parsley, minced: Adds freshness and a pop of color.
  • 2 tablespoons grated Parmigiano-Reggiano cheese, plus more for topping: The star of the show, providing cheesy, nutty flavor.

How to Make Garlic Parmesan Pull-Apart Rolls

Stack of delicious pull-apart rolls, garnished with parsley and flaky salt.

Now that we have our ingredients ready, let’s walk through the steps to create these mouthwatering rolls. Follow along closely for the best results!

Step 1: Prepare the Tangzhong

In a small saucepan, whisk together 1/3 cup (80g) whole milk and 2 tablespoons (16g) bread flour until smooth. Set the saucepan over medium heat and whisk constantly until the mixture thickens to a paste-like consistency, resembling mashed potatoes (around 149°F if using a thermometer). Remove from heat and let cool to room temperature.

Step 2: Proof the Yeast

In a microwave-safe measuring cup, heat an additional 1/3 cup plus 1 tablespoon (100ml) whole milk for about 20 seconds until warm but not hot (less than 110°F). Whisk in 1 1/2 teaspoons (5.4g) active dry yeast and let it sit for 5-10 minutes, until foamy. This step is crucial for activating the yeast.

Step 3: Mix the Dough

In the bowl of a stand mixer, combine 2 3/4 cups (314g) bread flour, 1 large egg, 1 teaspoon (6g) kosher salt, 4 teaspoons (16g) sugar, and 3 tablespoons (42g) unsalted butter. Add the cooled tangzhong and the proofed yeast mixture. Attach the dough hook and mix on low speed for about 30 seconds until a shaggy dough forms. Don’t worry if it’s not smooth yet!

Step 4: Knead the Dough

Increase the mixer speed to medium and knead for 8-10 minutes, until the dough becomes elastic and passes the windowpane test. To perform the test, pinch off a small piece of dough, flatten it, and stretch it gently between your fingers. It should stretch thinly without tearing.

Step 5: First Rise

Lightly grease the mixing bowl with oil. Form the dough into a ball and place it back in the bowl, covering it with a kitchen towel or plastic wrap. Let it proof at room temperature for about 1 1/2 hours, until doubled in size.

Step 6: Prepare the Baking Pan

Grease a baking pan on all sides and line it with parchment paper, leaving some overhang. This will create a sling for easy removal later. If you don’t have parchment, generously grease the pan.

Step 7: Shape the Rolls

Gently deflate the dough and divide it into nine equal portions (about 65g each). Take each piece, gather the corners to the center, and seal tightly. Roll it into a ball by cupping it with your hands and spinning it on the counter. Place the shaped rolls seam-side down in the prepared baking pan, leaving a little space for expansion.

Step 8: Second Rise

Cover the rolls and let them rise again for about 45 minutes to 1 hour, until they double in size. To check, gently press your fingertip into the dough; it should slowly fill back halfway.

Step 9: Preheat and Egg Wash

As the rolls proof, preheat your oven to 375°F (190°C). In a small bowl, whisk the remaining 1 egg with a teaspoon of water. Once the rolls are ready, brush the tops lightly with the egg wash and sprinkle with flaky salt.

Step 10: Bake the Rolls

Bake the rolls in the oven for about 20 minutes, rotating the pan halfway through. They should be puffed and golden brown on top.

Step 11: Make the Compound Butter

While the rolls bake, prepare the compound butter by mashing together 1/4 cup (56g) unsalted butter, 1/2 teaspoon garlic powder, 1 tablespoon fresh parsley, and 2 tablespoons grated Parmigiano-Reggiano cheese in a small bowl.

Step 12: Serve and Enjoy

If serving immediately, brush the warm rolls with the compound butter. Let them cool in the pan for about 10 minutes before transferring to a wire rack. If storing for later, let them cool completely, then wrap in foil and warm in a 350°F oven for 10 minutes before brushing with butter and serving.

Expert Tips for Perfect Pull-Apart Rolls

  • Use bread flour: Its higher protein content helps create the ideal chewy texture for these pull-apart rolls.
  • Check yeast freshness: Always ensure your yeast is fresh for the best rise.
  • Don’t rush the rising process: Allow ample time for the dough to rise; this is crucial for flavor and texture.
  • Control the temperature: If your kitchen is too cold, consider proofing the dough in a warm spot or even the oven with the light on.
  • Experiment with flavors: Feel free to add herbs or spices to the dough for an extra flavor kick.
  • Brush with melted butter: For that extra touch, brush the rolls with melted butter when they come out of the oven.
  • Store properly: Keep leftover rolls in an airtight container to maintain freshness.
  • Warm before serving: Reheat the rolls before serving to revive their soft texture.

Common Mistakes and Troubleshooting

Even the best chefs can run into issues! Here are some common mistakes and how to troubleshoot them:

  • Rolls are dense: This can happen if the yeast wasn’t activated properly. Always check the yeast before starting.
  • Dry rolls: Ensure you’re measuring your flour correctly and not over-kneading the dough.
  • Not rising enough: If your rolls didn’t rise sufficiently, the environment may have been too cold. Try placing them in a warmer spot next time.
  • Burned tops: If the rolls brown too quickly, cover them with foil and continue baking.

Delicious Variations to Try

Why stop at garlic and Parmesan? Here are some fun variations you can try:

  • Cheesy Herb Rolls: Add cheddar cheese and fresh herbs like rosemary or thyme to the dough for a fragrant twist.
  • Sweet Cinnamon Rolls: Replace the garlic and cheese with cinnamon and sugar for a delightful dessert roll.
  • Spicy Jalapeño Rolls: Incorporate diced jalapeños and pepper jack cheese for a spicy kick.
  • Garden Veggie Rolls: Add finely chopped spinach, bell peppers, and olives to the dough for a veggie-packed option.

Storage and Make-Ahead Instructions

Prepared rolls can be stored in an airtight container at room temperature for up to three days. If you want to make them ahead:

  • Freezing: Allow baked rolls to cool completely, then wrap them tightly in foil or plastic wrap and freeze for up to a month. To serve, thaw and warm in the oven.
  • Prepping dough ahead: You can prepare the dough and shape the rolls, then refrigerate them overnight. Let them come to room temperature and rise before baking.

Frequently Asked Questions

  • Can I use instant yeast instead of active dry yeast? Yes, you can use instant yeast. Skip the proofing step; just mix it directly with the dry ingredients.
  • Can these rolls be made gluten-free? Absolutely! Substitute the bread flour with a gluten-free blend, ensuring that it contains xanthan gum for structure.
  • What if my dough is too sticky? If the dough feels overly sticky, add a small amount of flour, a tablespoon at a time, until it reaches the right consistency.
  • How do I know when my rolls are done baking? The rolls should be golden brown on top and sound hollow when tapped on the bottom.
  • Can I add different herbs or spices? Yes! Feel free to customize with your favorite herbs, spices, or cheese.
  • How do I reheat leftover rolls? Wrap rolls in foil and warm in a 350°F oven for about 10 minutes.
  • Can I make these rolls without a stand mixer? Yes, you can knead the dough by hand; it may take a bit longer, but it’s just as effective!
  • What can I serve with these rolls? Pair them with soups, salads, or as a side for pasta dishes for a delightful meal.

Nutritional Tips and Dietary Adaptations

If you’re looking to adapt this recipe for dietary needs, consider the following:

  • Low-calorie option: Substitute half of the butter with unsweetened applesauce in the dough.
  • Dairy-free version: Use almond or coconut milk and a dairy-free butter alternative.
  • Low-carb adaptation: Replace flour with almond flour or coconut flour, adjusting the liquid accordingly.

Essential Equipment Recommendations

To achieve the best results, ensure you have the following equipment:

  • Stand mixer: Makes kneading the dough effortless and consistent.
  • Measuring cups and spoons: Accurate measurements are key in baking.
  • Baking pan: A light-colored metal pan is ideal for even baking.
  • Thermometer: Useful for checking the temperature of liquids and the dough.
  • Parchment paper: Prevents sticking and makes for easy cleanup.

Serving Suggestions

These Garlic Parmesan Pull-Apart Rolls are best served warm, fresh out of the oven! Here are a few ideas to enhance your serving:

  • Dip in marinara sauce: Perfect for a savory side.
  • Pair with soups: Great alongside creamy tomato or minestrone soup.
  • Use as sliders: Slice in half and fill with meats or cheeses for a delicious meal.

Conclusion

Garlic Parmesan Pull-Apart Rolls are more than just a recipe; they are a way to create connection and share love through food. With this comprehensive guide, you’re now equipped to make the best rolls possible. So, gather your ingredients, invite your friends, and let the aroma of baking bread fill your home. Happy baking!

Garlic Parmesan Pull-Apart Rolls

Prep Time 30 minutes
Cook Time 20 minutes
Total Time 50 minutes
Servings 9 pieces
Calories 250
Soft, buttery rolls infused with garlic and Parmesan, perfect for sharing. These pull-apart rolls are easy to make and irresistibly delicious.

Ingredients

Dough

  • 1/3 cup whole milk
  • 2 tablespoons bread flour
  • 1/3 cup whole milk (additional milk)
  • 1 1/2 teaspoons active dry yeast
  • 2 1/3 cups bread flour
  • 2 large eggs (divided)
  • 1 teaspoon kosher salt
  • 4 teaspoons sugar
  • 3 tablespoons unsalted butter (at room temperature, cut into pieces)

Greasing

  • Neutral oil (for greasing)
  • Flaky salt (for topping)
  • 1/4 cup unsalted butter (at room temperature)
  • 1/2 teaspoon garlic powder
  • 1 tablespoon fresh parsley (minced)
  • 2 tablespoons Parmigiano-Reggiano cheese (plus more for topping)

Instructions 

  • Whisk milk and flour, cook until thickened, then cool.
  • Warm milk, add yeast, and let foam for 5-10 minutes.
  • Mix flour, eggs, salt, sugar, butter, cooled tangzhong, and yeast in a mixer; knead until smooth and elastic.
  • Let dough rise until doubled, then divide into nine portions, shape into balls, and place in a greased pan.
  • Proof the rolls until doubled, brush with egg wash, sprinkle with flaky salt, and bake for 20 minutes until golden.
  • Make garlic butter by mixing butter, garlic powder, parsley, and Parmesan. Brush over hot rolls before serving.

Notes

For best results, ensure proper proofing times and do not overbake.
Calories: 250kcal
Cost: $15
Course: Bread
Cuisine: American
Keyword: bread, garlic, Parmesan

Discover the Magic of Hot Chocolate Mousse Cups

Welcome, culinary adventurers! If you’ve ever dreamed of indulging in a dessert that envelops your senses in creamy chocolate bliss, look no further. Our Hot Chocolate Mousse Cups are the epitome of comfort and decadence, perfect for cozy gatherings or a sweet escape after a long day. With every velvety spoonful, you’ll be transported to a winter wonderland, making it a must-have on your Christmas dessert table. Let’s dive into why you’ll fall in love with this recipe!

Why You’ll Love This Recipe

Here are several irresistible reasons to whip up these delightful mousse cups:

  • Decadent Flavor: Experience the rich, velvety taste of chocolate combined with a touch of cocoa, creating a chocolate mousse that’s both indulgent and satisfying.
  • Easy to Prepare: This recipe is straightforward, requiring minimal ingredients and steps, making it perfect for both novice and seasoned chefs.
  • Versatile Presentation: Serve them in elegant glasses or fun ramekins for a festive touch, ideal for any gathering.
  • Make Ahead: Prepare these mousse cups a day in advance, allowing the flavors to meld and freeing up your time on the day of your event.
  • Customizable Toppings: Top with whipped cream, mini marshmallows, or even a sprinkle of peppermint for a unique twist!

A Deep Dive into Ingredients

Understanding your ingredients is key to mastering the art of mousse. Here’s a breakdown of what you’ll need, along with some substitutions:

  • 1 ½ cups heavy whipping cream: Cold, for whipping into soft peaks. Substitute with coconut cream for a dairy-free option.
  • 1 cup semi-sweet chocolate chips: Truly the star of the show! You can also use dark chocolate for a richer flavor.
  • 3 tablespoons unsweetened cocoa powder: Enhances the chocolate flavor; try Dutch-processed for a smoother taste.
  • 3 tablespoons powdered sugar: Adds sweetness; can be reduced if you prefer a less sweet mousse.
  • ½ teaspoon vanilla extract: For depth of flavor; replace with almond extract for a nutty twist.
  • Pinch of salt: Balances sweetness and enhances chocolate flavor.

Pro Tips for Perfect Mousse

To ensure your mousse turns out perfectly every time, consider these expert insights:

  • Chill Your Equipment: For the best whipped cream, chill your mixing bowl and beaters for about 15 minutes before whipping.
  • Be Patient with Folding: Gently fold the melted chocolate into the whipped cream to maintain airiness and achieve the perfect texture.
  • Check Your Chocolate: Use high-quality chocolate for the richest flavor. Avoid chocolate chips that contain stabilizers.
  • Experiment with Flavors: Add a splash of espresso or a hint of orange zest for an exciting flavor twist!
  • Watch the Chill Time: Ensure you chill the mousse for at least 2 hours for the best results; overnight is even better.
  • Top Wisely: Add toppings just before serving to keep them fresh and visually appealing.
  • Use a Spatula: When folding, a rubber spatula is preferable for scraping the sides and ensuring all ingredients are well combined.
  • Make It a Layered Dessert: Layer the mousse with crushed cookies or cake pieces for a delightful texture contrast.

Common Mistakes and Troubleshooting

Even the best chefs encounter hiccups. Here are common pitfalls and how to avoid them:

  • Overwhipping Cream: If the whipped cream becomes grainy, you’ve gone too far. Stop just as you see soft peaks forming.
  • Chocolate Seizing: If your chocolate becomes grainy when melting, it’s likely too hot or came into contact with water. Melt slowly and mix gently.
  • Too Much Air: Be careful not to over-fold the mixture; this will deflate the airiness that gives mousse its light texture.

Delicious Variations to Try

Feeling experimental? Here are some variations that will take your mousse cups to the next level:

  • Peppermint Hot Chocolate Mousse: Add peppermint extract to your mousse for a festive flavor.
  • Spicy Chocolate Mousse: Incorporate a dash of cayenne or chili powder for a surprising kick.
  • White Chocolate Mousse: Swap semi-sweet chocolate for white chocolate for a sweeter, creamy alternative.
  • Fruit-Infused Mousse: Fold in pureed raspberries or strawberries for a fruity twist that complements the chocolate beautifully.

Storage and Make-Ahead Instructions

Planning ahead? Here’s how to store your mousse cups:

  • Chill: Store the mousse in the fridge for up to 3 days in an airtight container. Cover with plastic wrap to prevent drying.
  • Make Ahead: Prepare the mousse up to 24 hours in advance. Simply cover and refrigerate until ready to serve.

Frequently Asked Questions

Here are some common queries about our Hot Chocolate Mousse Cups:

  • Can I use non-dairy milk? Absolutely! Substitute heavy cream with non-dairy alternatives like coconut cream for a dairy-free version.
  • How do I store leftovers? Keep any leftover mousse cups covered in the refrigerator, but they are best enjoyed fresh.
  • Can I freeze the mousse? While it’s best fresh, you can freeze it for up to a month. Thaw in the refrigerator overnight before serving.
  • What if I don’t have heavy cream? You can use full-fat coconut milk or a non-dairy heavy cream alternative.
  • How can I enhance the flavor? Adding a splash of coffee or liqueur can elevate the chocolate flavor remarkably.
  • Is it safe for pregnant women? Yes, as long as you use pasteurized eggs and dairy.
  • Can I make this mousse without eggs? Yes, this recipe does not require eggs, making it lighter and easier to prepare.
  • What should I serve with the mousse? Pair with fresh berries, shortbread cookies, or a drizzle of caramel sauce for a delightful contrast.

Nutrition Tips and Dietary Adaptations

Keep your dessert indulgent yet mindful with these tips:

  • Reduce Sugar: Adjust the sugar content to your taste; you can use less powdered sugar for a less sweet mousse.
  • Opt for Dark Chocolate: Choose dark chocolate for a richer flavor with less sugar.
  • Incorporate Healthy Fats: Consider using avocado in place of some cream for added nutrition and a creamy texture.

Essential Equipment for Success

Here’s what you’ll need to make the best mousse:

  • Mixing Bowls: Use both large and small bowls for mixing and preparing ingredients.
  • Hand Mixer or Stand Mixer: Essential for whipping cream to perfection.
  • Spatula: A rubber spatula helps in gentle folding and scraping bowls clean.
  • Serving Glasses: Opt for clear glasses to showcase your beautiful mousse layers.

Serving Suggestions

Finally, let’s talk presentation! Here are some ideas:

  • Layered Dessert: Layer mousse with crushed cookies or cake for added texture and flavor.
  • Garnish Elegantly: Use a piping bag to create beautiful swirls of whipped cream, topped with chocolate shavings.
  • Seasonal Touch: Add festive sprinkles or edible glitter for that holiday sparkle.

In conclusion, your journey to creating the perfect Hot Chocolate Mousse Cups is just a recipe away. Dive into this delightful treat that not only satisfies your sweet tooth but also brings joy and warmth to your gatherings. Remember, food is a passport to culture and connection, and each mousse cup tells a story of indulgence and creativity. Happy cooking, and here’s to your culinary adventures!

Hot Chocolate Mousse Cups

Prep Time 15 minutes
Cook Time 10 minutes
Total Time 25 minutes
Servings 4 cups
Calories 350
Indulge in rich, creamy chocolate mousse topped with delightful garnishes for a perfect treat.

Ingredients

FOR THE MOUSSE

  • 1 ½ cups heavy whipping cream (cold)
  • 1 cup semi-sweet chocolate chips or chopped chocolate
  • 3 tablespoons unsweetened cocoa powder
  • 3 tablespoons powdered sugar
  • ½ teaspoon vanilla extract

Pinch of salt

  • to taste salt

FOR THE TOPPINGS

  • as needed Whipped cream (homemade or store-bought)
  • as needed Mini marshmallows
  • as needed Chocolate curls or shavings
  • optional a light dusting of cocoa powder or cinnamon

Instructions 

  • Melt the chocolate in 30-second intervals, stirring until smooth. Let cool slightly.
  • Whip the cold heavy cream until soft peaks form. Add sugar, cocoa, vanilla, and salt; beat until stiff peaks.
  • Gently fold the cooled melted chocolate into the whipped cream until blended.
  • Spoon into glasses, cover, and refrigerate for at least 2 hours.
  • Top with whipped cream, marshmallows, chocolate curls, and dust with cocoa or cinnamon before serving.

Notes

Ensure the cream is well chilled for best whipping results.
Calories: 350kcal
Cost: $15
Course: Dessert
Cuisine: American
Keyword: chocolate