Author

Jack

Browsing

Embark on a Culinary Journey with Roasted Garlic Herb Chicken

Welcome to a delightful culinary adventure where we dive deep into the flavors of Roasted Garlic Herb Chicken with Potatoes. This dish is not just a meal; it’s a passport to a world of rich aromas and savory experiences. Perfect for cozy family dinners or impressing guests, this recipe ensures that every bite is filled with warmth and connection. Join me as we explore how to create this mouthwatering dish that is sure to become a staple in your kitchen.

Why You’ll Love This Recipe

  • Flavor explosion: The combination of garlic, herbs, and lemon creates a flavorful symphony that will tantalize your taste buds.
  • Simple and quick: With straightforward steps, you’ll have a delicious dinner on the table in under an hour!
  • Healthy and hearty: Packed with protein and nutrients, this meal is perfect for nourishing your body without sacrificing taste.
  • One-pan wonder: Save on cleanup time as everything roasts together, infusing each ingredient with flavor.
  • Customizable: Easily adapt the recipe with your favorite herbs or vegetables to suit your taste.

Ingredient Breakdown

Let’s take a closer look at what you’ll need to create this culinary masterpiece, along with some handy substitutions:

  • 4 bone-in, skin-on chicken thighs: For juicy, flavorful meat. You can substitute with breasts or a whole chicken, but adjust cooking times accordingly.
  • 6 medium potatoes: Peeled and cubed. Sweet potatoes or carrots can be great alternatives.
  • 4 garlic cloves, minced: Fresh garlic is key for aroma; however, garlic powder can be used in a pinch.
  • 2 tbsp olive oil: A healthy fat choice, but avocado oil works too.
  • 1 tsp dried rosemary: Fresh rosemary is even more aromatic, but dried works well.
  • 1 tsp dried thyme: Again, fresh can elevate the dish.
  • Salt and pepper to taste: Essential for seasoning; feel free to experiment with other spices.
  • 1 lemon, halved: Adds brightness; lime can be a fun alternative.
  • Fresh parsley (optional, for garnish): It adds a pop of color and freshness.

Step-by-Step Instructions
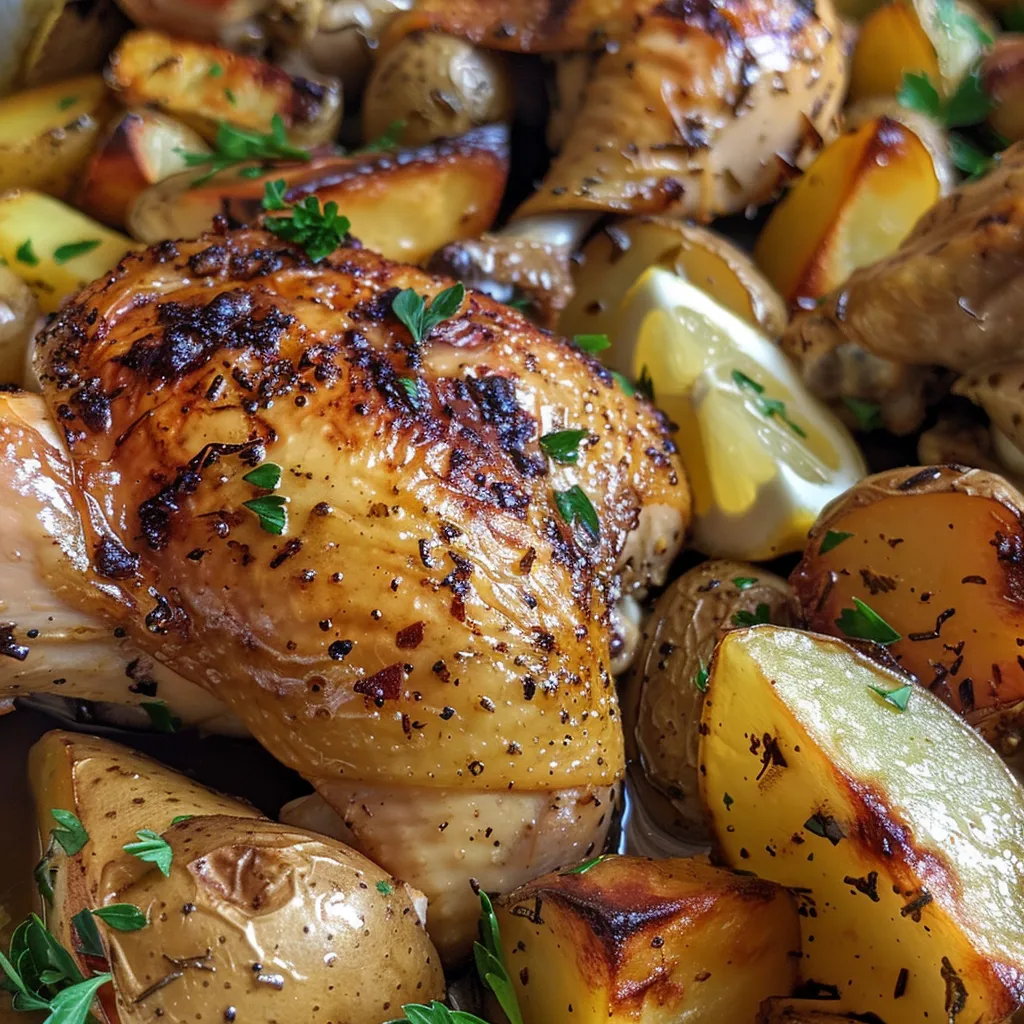
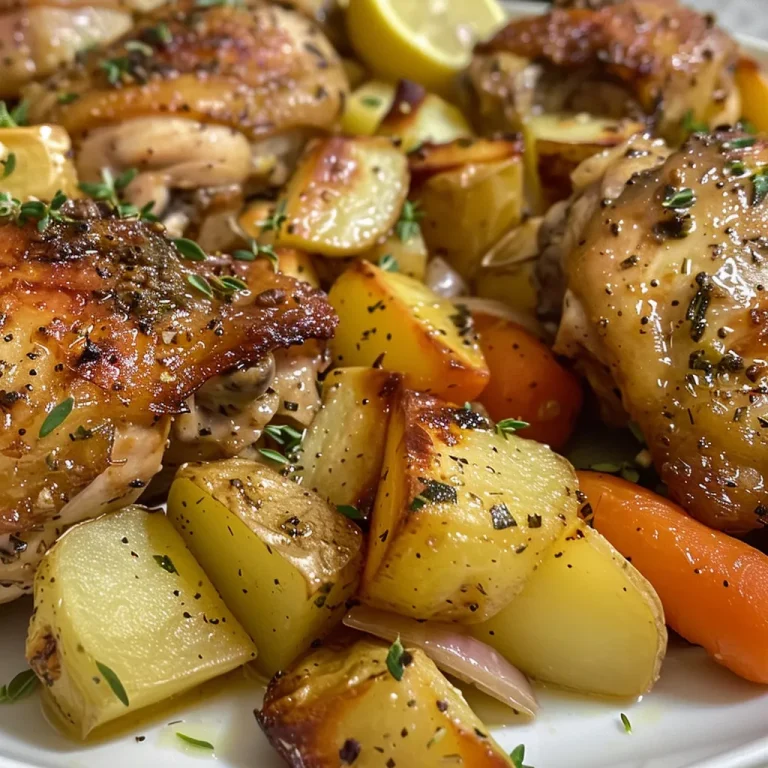
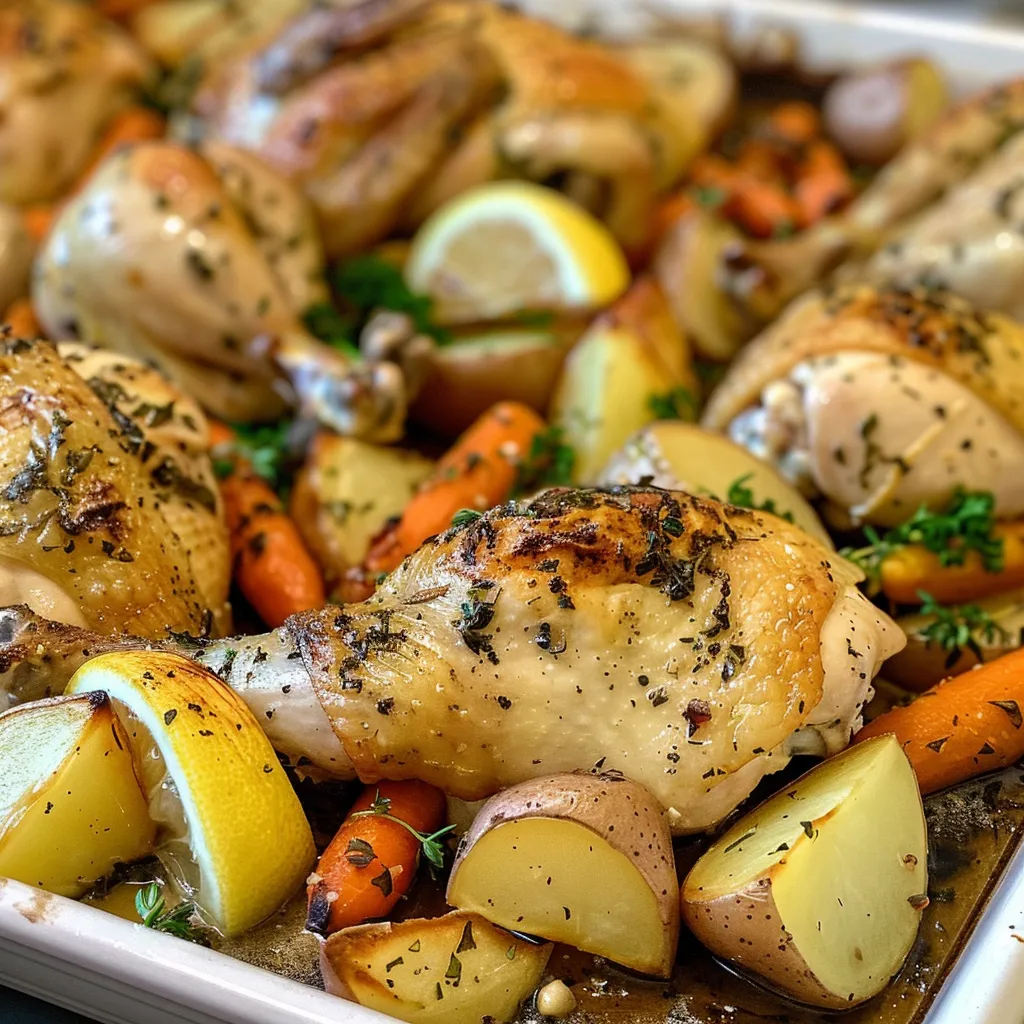
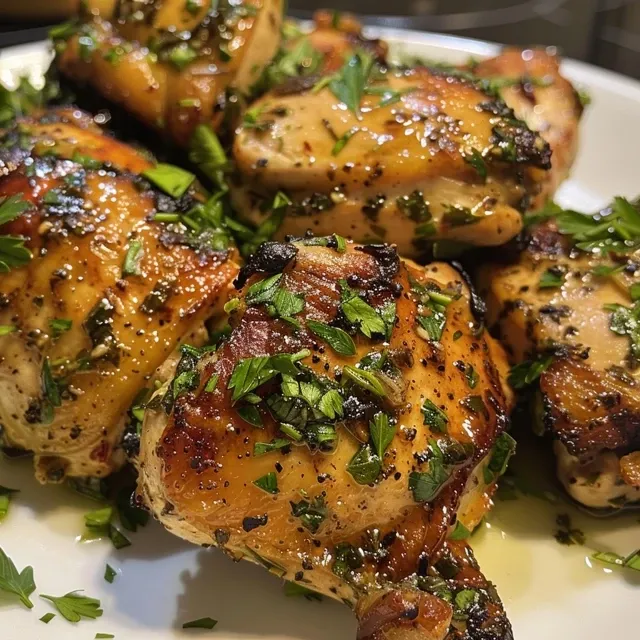
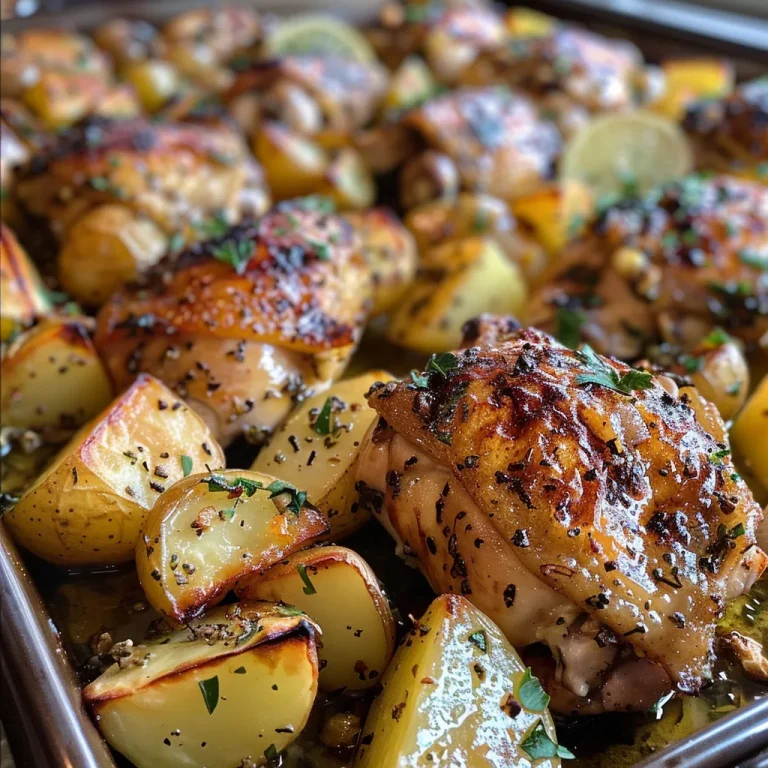
Plate of roasted chicken thighs garnished with rosemary and lemon, accompanied by crispy potato pieces.

Now, let’s roll up our sleeves and get cooking!

  • Preheat the oven to 400°F (200°C).
  • Toss the potato cubes with 1 tbsp olive oil, salt, pepper, and half of the garlic. Arrange them on a baking sheet.
  • Rub the chicken thighs with the remaining olive oil, garlic, rosemary, thyme, salt, and pepper. Place them on the baking sheet with the potatoes.
  • Squeeze lemon halves over the chicken and potatoes, then place them in the oven.
  • Roast for 40-45 minutes until the chicken is golden and cooked through (internal temperature should reach 165°F).
  • Remove from oven and let the chicken rest for 5 minutes.
  • Garnish with fresh parsley before serving.

Pro Tips for Perfect Roasted Chicken

  • Patience is key: Allow the chicken to come to room temperature before roasting for even cooking.
  • Don’t overcrowd: Ensure there’s space between chicken and potatoes for optimal roasting.
  • Use a meat thermometer: This ensures your chicken is perfectly cooked without being dry.
  • Rest your chicken: Letting it rest allows juices to redistribute, making for a more tender bite.
  • Experiment with herbs: Feel free to mix and match herbs based on what you have or prefer.
  • Add veggies: Include seasonal vegetables like carrots or Brussels sprouts for added nutrition and flavor.
  • Leftover magic: Use leftover chicken in salads, sandwiches, or soups.
  • Save the bones: Make a delicious broth with leftover bones and vegetable scraps.

Avoiding Common Mistakes

Cooking can be an adventure, but sometimes, things don’t go as planned. Here are some common pitfalls and how to avoid them:

  • Overcooking: Always check the internal temperature; overcooked chicken can be dry and unappetizing.
  • Insufficient seasoning: Don’t be shy with herbs and spices; they are key to elevating the dish.
  • Skipping the resting period: Cutting into the chicken too soon can result in lost juices.
  • Piling on the veggies: Too many veggies can steam rather than roast, leading to sogginess.

Delicious Variations

Feel like switching things up? Here are some variations to try:

  • Spicy twist: Add red pepper flakes or a spicy marinade to the chicken for a kick.
  • Herbaceous delight: Try different herbs like oregano, basil, or tarragon for unique flavors.
  • One-pot meal: Incorporate rice or quinoa in the baking dish for a complete meal.
  • Asian-inspired: Marinate the chicken in soy sauce, ginger, and sesame oil for a different flavor profile.

Storage and Make-Ahead Instructions

Planning ahead can make your life easier. Here’s how to store and prep your roasted chicken:

  • Storing leftovers: Keep leftovers in an airtight container in the fridge for up to 4 days.
  • Freezing: You can freeze cooked chicken for up to 3 months. Thaw in the refrigerator before reheating.
  • Make-ahead tips: Marinate the chicken the night before for deeper flavors or chop veggies in advance.

Nutritional Insights and Dietary Adaptations

This dish is not only delicious but also offers several nutritional benefits:

  • High protein: Chicken thighs are a great source of protein, essential for muscle repair and growth.
  • Rich in vitamins: Garlic and herbs provide antioxidants and essential vitamins.
  • Gluten-free: This recipe is naturally gluten-free, making it suitable for those with gluten sensitivities.

Essential Equipment

To successfully create this roasted chicken masterpiece, here’s what you’ll need:

  • Baking sheet: A sturdy baking sheet is essential for even roasting.
  • Meat thermometer: This tool guarantees perfectly cooked chicken.
  • Mixing bowl: For prepping your marinade and tossing veggies.
  • Sharp knife: Necessary for chopping ingredients with ease.

Serving Suggestions

Serving this dish can be as much fun as cooking it! Here are some ideas:

  • Pair with a salad: A fresh green salad with a tangy vinaigrette complements the richness of the chicken.
  • Serve with crusty bread: Perfect for soaking up the delicious juices.
  • Wine pairing: A glass of white wine, like Chardonnay, enhances the flavors beautifully.

Frequently Asked Questions

  • Can I use boneless chicken? Yes, boneless chicken cooks faster; adjust your cooking time accordingly.
  • What sides go well with this dish? Roasted vegetables, rice, or a light salad are great options.
  • Is it necessary to brown the chicken first? No, roasting without browning works fine, but browning can add extra flavor.
  • Can I make this recipe in an air fryer? Yes, you can; adjust the temperature and cooking time.
  • How do I know when the chicken is done? Use a meat thermometer to ensure it reaches 165°F internally.
  • Is it okay to marinate overnight? Absolutely! Marinating enhances the flavors.
  • What herbs can I substitute? Feel free to use any fresh or dried herbs you enjoy.
  • Can I cook this dish in advance? Yes, just reheat gently to maintain tenderness.

In conclusion, this Roasted Garlic Herb Chicken with Potatoes is not just food; it’s an experience that brings joy to your table and warmth to your heart. So gather your ingredients, unleash your inner chef, and savor each bite of this beautiful dish. Here’s to culinary adventures that feed both the body and the soul!

Roasted Garlic Herb Chicken with Potatoes

Prep Time 10 minutes
Cook Time 45 minutes
Total Time 55 minutes
Servings 4 servings
Calories 550
A flavorful and easy-to-make roasted chicken with crispy potatoes infused with garlic and herbs, perfect for a comforting meal.

Ingredients

Protein

  • 4 pieces bone-in, skin-on chicken thighs

Vegetables

  • 6 medium potatoes (peeled and cubed)

Aromatics & Oils

  • 4 cloves garlic, minced
  • 2 tbsp olive oil
  • 1 tsp dried rosemary
  • 1 tsp dried thyme
  • to taste Salt and pepper Salt and pepper
  • 1 lemon lemon, halved

Garnish

  • optional Fresh parsley (for garnish)

Instructions 

  • Preheat oven to 400°F (200°C).
  • Toss potatoes with 1 tbsp olive oil, salt, pepper, and half of the garlic. Arrange on a baking sheet.
  • Rub chicken with remaining olive oil, garlic, rosemary, thyme, salt, and pepper. Place on the sheet with potatoes.
  • Squeeze lemon over chicken and potatoes, then roast for 40-45 minutes.
  • Let rest for 5 minutes, then garnish with parsley before serving.
Notes

Ensure chicken reaches an internal temperature of 165°F for safety.
Calories: 550kcal
Cost: $15
Course: Main Course
Cuisine: American
Keyword: Chicken, garlic, Potatoes

A Culinary Adventure: The Secrets to Perfect Roast Beef

Welcome, fellow culinary explorers! Today, we dive deep into the art of crafting the perfect roast beef in the oven. This isn’t just any roast beef; it’s a journey through flavors that brings generations together around the dinner table. With a few simple ingredients and expert techniques, you’ll learn how to create a succulent roast that’s tender and juicy. Let’s embark on this savory adventure together!

Why You’ll Love This Recipe

Here are five compelling reasons to embrace this roast beef recipe:

  • Flavorful Experience: This roast beef promises a rich and savory flavor that envelops your senses and transports you to cozy family gatherings.
  • Versatile Cut of Meat: With various cuts available, you can choose the one that suits your taste and budget best, whether it’s ribeye or top round.
  • Effortless Cooking: Minimal preparation is needed, allowing you to focus on other dishes or simply enjoy time with loved ones while it cooks.
  • Perfect for Any Occasion: Whether it’s a Sunday dinner or a festive holiday feast, this roast beef is sure to impress your guests.
  • Leftover Magic: Enjoy delicious leftovers that can be transformed into sandwiches, salads, or stir-fries, extending the joy of your meal.

Ingredients Breakdown

To create this masterpiece, gather the following ingredients:

  • 3 to 4 pound roast: A ribeye roast is my favorite for its tenderness and flavor.
  • 1 tablespoon kosher salt: Essential for enhancing the meat’s natural flavors.
  • 1 to 2 teaspoons black pepper: Adds a delightful kick and depth to the dish.
  • Optional: Olive oil: If your roast is lean, a drizzle will help achieve a crispy crust.

Ingredient Substitutions

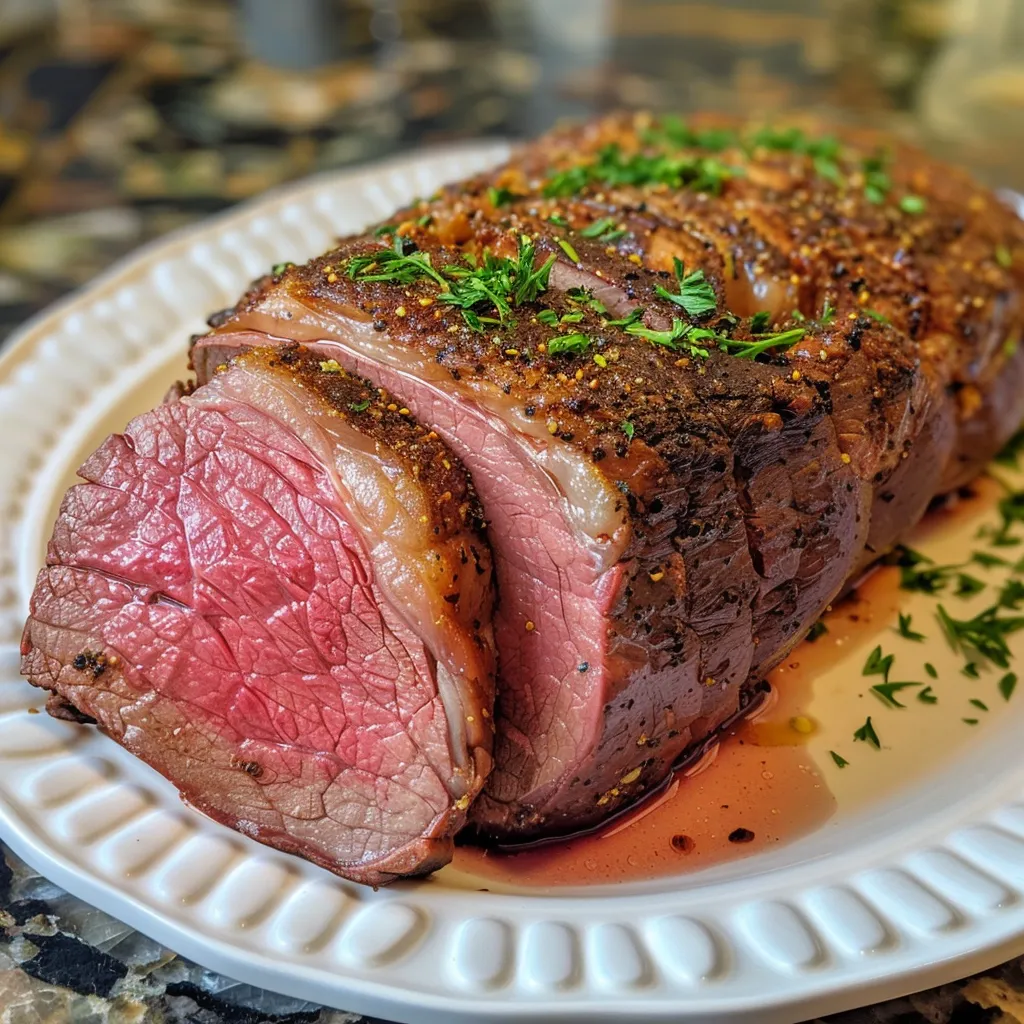
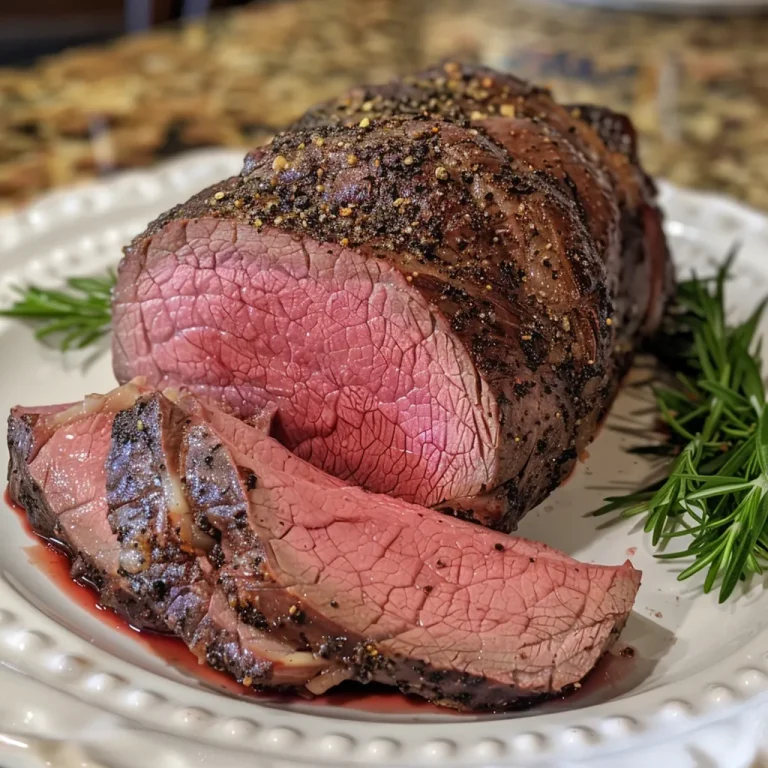
A golden-brown roast beef with seasoning, ready to serve.

If you’re missing an ingredient or two, don’t fret! Consider these substitutions:

  • Salt: Sea salt or garlic salt can work in a pinch for seasoning.
  • Black pepper: Use white pepper if you prefer a milder flavor.
  • Olive oil: Can be replaced with canola or avocado oil for a different twist.

Step-by-Step Instructions

Let’s get cooking! Follow these steps to achieve roast beef perfection:

  1. Take the roast out of the refrigerator 60 minutes before cooking to let it reach room temperature.
  2. Preheat your oven to 325 degrees Fahrenheit.
  3. If the roast is very lean, drizzle one or two tablespoons of olive oil over it. Sprinkle the roast with salt and pepper. Place the roast on a wire rack on a baking sheet for even cooking.
  4. Bake the roast for about 25 to 30 minutes per pound for a medium-cooked roast. Adjust the time for your preferred level of doneness.
  5. Use a meat thermometer to check for doneness. Insert it into the center of the roast. Remove from the oven when the internal temperature is about 10 degrees less than your desired doneness; it will rise as it rests.
  6. Let the roast rest for at least 15 minutes, tented in aluminum foil to keep warm, before carving and serving.

For Doneness:

Understanding doneness is crucial for achieving the perfect roast. Here’s a quick guide:

  • Rare: 120 – 130 degrees – bright purple-red, tender, and juicy.
  • Medium Rare: 130-135 degrees – bright red, warm, tender, and very juicy.
  • Medium: 135 -145 degrees – rich pink, slightly juicy.
  • Medium Well: 145 – 155 degrees – tan with slight pink, firm, slight juice.
  • Well Done: 155 and above – tan to brown, very little juice, meat can become tough.

Pro Tips for Roast Beef Mastery

To elevate your roast beef game, keep these expert insights in mind:

  • Resting Period: Allowing the roast to rest is crucial; this allows the juices to redistribute, ensuring a juicy bite.
  • Marinade Magic: For added flavor, consider marinating your roast overnight with herbs and spices.
  • Pan Sauce: Don’t discard those drippings! Use them to make a delicious gravy or sauce.
  • Carving Technique: Always slice against the grain for maximum tenderness.
  • Experiment with Herbs: Rosemary, thyme, or garlic can be added for an aromatic twist.
  • Oven Thermometer: Ensure your oven is accurate; an oven thermometer can help maintain consistent temperatures.
  • Invest in Quality Tools: A sharp chef’s knife and a good meat thermometer are worth their weight in gold.
  • Cook to Temperature: Always prioritize internal temperature over cooking time for best results.

Common Mistakes and Troubleshooting

Even experienced cooks can stumble. Here are common pitfalls and how to avoid them:

  • Skipping the Rest: Not allowing the roast to rest will lead to dry meat as the juices escape.
  • Overcooking: Use a meat thermometer to avoid this common mistake; trust it over time.
  • Uneven Cooking: Ensure your roast is at room temperature before cooking to promote even doneness.
  • Ignoring the Drippings: Many home cooks disregard the flavorful drippings; use them to enhance your meal!

Delicious Variations

Want to switch things up? Here are some variations to try:

  • Herb-Crusted Roast: Blend fresh herbs with olive oil and garlic for a flavorful crust.
  • Spicy Roast: Add crushed red pepper flakes or chili powder to the seasoning for a spicy kick.
  • Asian-Inspired Roast: Use soy sauce, ginger, and garlic for a unique twist.
  • BBQ Glazed Roast: Brush with your favorite BBQ sauce during the last 30 minutes of cooking for a tangy finish.

Storage and Make-Ahead Instructions

Planning ahead? Here’s how to store your roast:

  • Refrigeration: Store leftover roast in an airtight container in the fridge for up to 4 days.
  • Freezing: Wrap tightly in plastic wrap and foil for up to 3 months; defrost in the refrigerator before reheating.
  • Make-Ahead: You can prepare the seasoning rub the day before and apply it to the roast before cooking.

Comprehensive FAQ

Here are some frequently asked questions about roast beef:

  • Can I use a different cut of beef for this recipe? Yes, cuts like sirloin or chuck can also work well.
  • How can I tell if my roast is done without a meat thermometer? It’s tricky, but you can use the touch test; the meat should feel firm yet springy.
  • What should I do if my roast is overcooked? Serve with gravy to help moisten the meat.
  • Can I prepare the roast beef ahead of time? Yes, you can season it the night before and refrigerate it.
  • Is it necessary to let the roast rest after cooking? Absolutely! This step is crucial for a juicy roast.
  • Can I use this recipe for a boneless roast? Yes, the same principles apply to boneless cuts.
  • What side dishes pair well with roast beef? Consider mashed potatoes, green beans, or a fresh salad.
  • How do I reheat leftover roast beef? Gently reheat in the oven at a low temperature or in a skillet with a splash of broth.

Nutritional Tips and Dietary Adaptations

For those mindful of dietary needs, here are some tips:

  • Lean Cuts: Opt for leaner cuts like eye of round for lower fat content.
  • Low-Sodium Options: Use low-sodium salt or herbs to reduce sodium intake.
  • Gluten-Free: This recipe is naturally gluten-free, making it suitable for celiac-friendly meals.

Equipment Recommendations

To achieve the best results, consider these essential tools:

  • Sharp Chef’s Knife: Invest in a quality knife for precise carving.
  • Meat Thermometer: A digital probe thermometer is the most accurate for checking doneness.
  • Roasting Pan: A sturdy roasting pan with a rack ensures even cooking.

Serving Suggestions

Once your roast beef is ready, here’s how to serve it:

  • Slice thinly and arrange on a platter for an inviting presentation.
  • Serve with a side of gravy or horseradish sauce for added flavor.
  • Pair with seasonal vegetables or a refreshing salad for a complete meal.

In conclusion, the journey to perfect roast beef is not just about the meal; it’s about bringing people together, sharing stories, and savoring every bite. With this comprehensive guide, you’re now equipped to create a roast beef that’s not only delicious but also a centerpiece for cherished memories. Happy cooking, and may your culinary adventures continue!

Perfect Roast Beef in the Oven

Prep Time 1 hour
Cook Time 2 hours 30 minutes
Total Time 3 hours 30 minutes
Servings 6 servings
Calories 600
This classic roast beef recipe yields tender, flavorful meat with perfect doneness every time. Ideal for special occasions or a hearty family dinner.

Ingredients

Meat

  • 3 to 4 pounds roast (like a ribeye roast)
  • 1 tablespoon kosher salt
  • 1 to 2 teaspoons black pepper (crushed or ground)

Instructions 

  • Take the roast out of the refrigerator 60 minutes before cooking to reach room temperature.
  • Preheat oven to 325°F (163°C).
  • If lean, drizzle with olive oil. Season with salt and pepper. Place on a wire rack on a baking sheet.
  • Bake for 25-30 minutes per pound for medium. Use a meat thermometer; remove when internal temp is about 10°F below desired doneness. Rest for 15 minutes tented in foil.
  • Carve and serve. For medium rare, remove at 120°F; it will rise during resting.

Notes

Use a meat thermometer for best results and adjust cooking time based on roast size and desired doneness.
Calories: 600kcal
Cost: $15
Course: Main Course
Cuisine: American
Keyword: beef

A Culinary Adventure: The Roasted Chicken That Invites Flavor Exploration

Welcome, fellow food lovers! If there’s one dish that brings together families and friends around the dinner table, it’s the humble yet majestic roasted chicken. This Savory Garlic and Herb Roasted Chicken isn’t just a meal; it’s an experience that tantalizes your taste buds and creates memories. From the irresistible aroma that fills your kitchen to the golden, crispy skin that beckons you to dig in, this recipe promises to transform a simple gathering into an adventure of flavors. So, grab your apron and let’s embark on this culinary journey!

Why You’ll Love This Recipe

This roasted chicken recipe is more than just a cooking method; it’s a celebration of flavor, texture, and community. Here’s why you’ll fall in love with it:

  • Aromatic Bliss: The combination of garlic and fresh herbs creates a mouthwatering aroma that fills your home, making it impossible to resist.
  • Juicy and Tender: Proper roasting techniques ensure the chicken remains moist and flavorful, making every bite a delight.
  • Versatile Dish: Perfect for special occasions, weeknight dinners, or meal prep, this chicken adapts to any situation.
  • Simple Ingredients: With just a handful of fresh ingredients, you can create a dish that feels gourmet without the fuss.
  • Sharing is Caring: This dish is perfect for serving family-style, making it a centerpiece that encourages connection and conversation.

Ingredient Breakdown and Substitutions

Before we dive into the cooking process, let’s take a closer look at the ingredients that make this roasted chicken so special. Understanding each component not only enhances your cooking but also allows you to make substitutions when needed.

  • Whole Chicken: Aim for a chicken weighing about 4-5 lbs. If you prefer, you can use parts like thighs or breasts, adjusting cooking times accordingly.
  • Olive Oil: This adds richness and helps crisp the skin. Feel free to substitute with melted butter for a different flavor profile.
  • Garlic: Fresh garlic is a must for that robust flavor. You can use garlic powder in a pinch, but fresh is always best.
  • Fresh Herbs: Rosemary and thyme are classic choices. You can also experiment with herbs like sage or oregano for different flavor notes.
  • Lemon: This adds brightness. If you don’t have lemon, lime or even orange can provide a unique twist.

Step-by-Step Instructions for Roasting

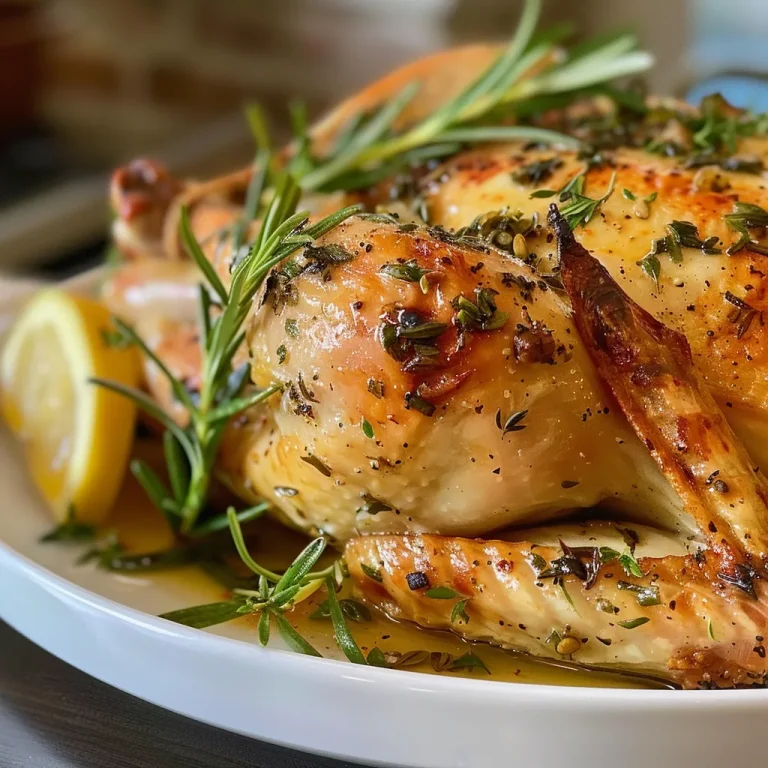
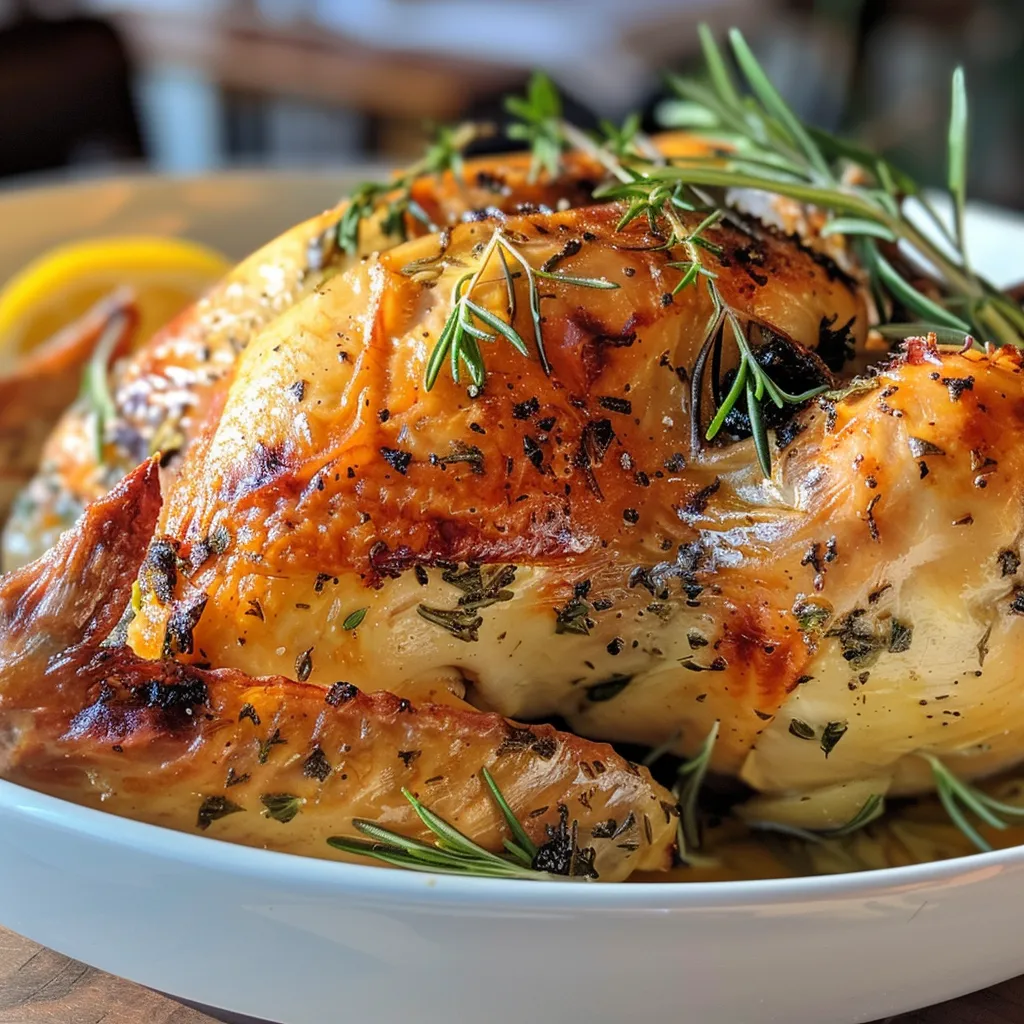
Detailed image of a whole roasted chicken, featuring herbs and a vibrant lemon for decoration.

Now that we have our ingredients ready, let’s get down to the nitty-gritty of roasting the perfect chicken!

  1. Preheat the Oven: Set your oven to 425°F (220°C). A high temperature ensures crispy skin.
  2. Prepare the Chicken: Pat the chicken dry with paper towels—this helps achieve that coveted crispy skin. Place it in a roasting pan.
  3. Make the Herb Mixture: In a bowl, combine olive oil, minced garlic, chopped rosemary, chopped thyme, salt, and pepper. This mixture is your flavor bomb!
  4. Season the Chicken: Rub the herb mixture all over the chicken, making sure to get under the skin for maximum flavor. Stuff the cavity with lemon quarters.
  5. Roast: Place the chicken in the preheated oven and roast for about 1 hour and 15 minutes, or until the internal temperature reaches 165°F (75°C) at the thickest part of the thigh.
  6. Rest: Let the chicken rest for 10-15 minutes before carving. This allows the juices to redistribute, ensuring every bite is moist and flavorful.
  7. Garnish and Serve: Garnish with fresh herbs if desired and serve warm. Enjoy the fruits of your labor!

Pro Tips for the Perfect Roast

To elevate your roasted chicken game, consider these expert insights:

  • Don’t Skip Drying: Patting the chicken dry is crucial for crispy skin. Moisture is the enemy of crispiness!
  • Use a Meat Thermometer: This ensures perfect doneness without the guesswork. Chicken is cooked when it reaches 165°F (75°C).
  • Let It Rest: This is key! Resting the chicken allows the juices to settle, so don’t rush this step.
  • Experiment with Flavors: Feel free to add spices like paprika or cumin for a twist on the classic flavor profile.
  • Add Vegetables: Consider roasting carrots, potatoes, or onions alongside the chicken for a complete meal. Just toss them in olive oil and seasonings!

Common Mistakes to Avoid

Even seasoned cooks can run into pitfalls. Here are some common mistakes and how to troubleshoot:

  • Overcrowding the Pan: This can lead to steaming rather than roasting. Ensure there’s enough space for air to circulate around the chicken.
  • Skipping the Resting Time: Cutting into the chicken too soon can result in dry meat. Always let it rest!
  • Not Using Enough Seasoning: Don’t be shy with the salt and herbs. They are essential for flavor!
  • Ignoring Internal Temperature: Always check the thickest part of the chicken with a thermometer to ensure safety and optimal juiciness.

Variations to Try

Feeling adventurous? Here are some creative variations to inspire your next roast:

  • Spicy Citrus: Add chili flakes and orange instead of lemon for a zesty kick.
  • Herb-Infused Butter: Mix softened butter with fresh herbs and garlic, then spread it under the skin for an extra rich flavor.
  • Asian Twist: Use soy sauce, ginger, and sesame oil in your marinade for an Asian-inspired roast.
  • Maple Glaze: Brush the chicken with a mixture of maple syrup and mustard for a sweet and tangy finish.

Storage and Make-Ahead Instructions

Got leftovers? Here’s how to store your roasted chicken for maximum freshness:

  • Refrigeration: Store leftovers in an airtight container in the fridge for up to 4 days.
  • Freezing: You can freeze cooked chicken for up to 3 months. Just ensure it’s well-wrapped to prevent freezer burn.
  • Make-Ahead: You can prepare the herb mixture a day in advance and store it in the fridge for easy seasoning on the day of roasting.

Frequently Asked Questions

Have questions? You’re not alone! Here are some common queries about roasted chicken:

  • Can I use frozen chicken? Yes, but be sure to thaw it completely in the fridge before roasting.
  • What’s the best way to carve a roasted chicken? Use a sharp knife to separate the legs and wings before slicing the breast meat.
  • Can I roast vegetables with the chicken? Absolutely! Just ensure they’re cut evenly and seasoned well.
  • How do I know when the chicken is done? The best way is to use a meat thermometer; it should read 165°F (75°C).
  • What if my chicken skin isn’t crispy? Next time, ensure the chicken is completely dry before seasoning, and roast it uncovered.
  • Can I use dried herbs instead of fresh? Yes, but use about one-third the amount since dried herbs are more concentrated.
  • How can I add more flavor to the chicken? Consider brining it beforehand or marinating it in advance for a deeper flavor.
  • What side dishes go well with roasted chicken? Classic pairings include mashed potatoes, roasted vegetables, or a fresh salad.

Nutritional Information and Dietary Adaptations

This roasted chicken is not only delicious but can also fit into various dietary preferences. Here are some nutritional insights:

  • Protein-Packed: Chicken is an excellent source of lean protein, essential for muscle growth and repair.
  • Low Carb: This dish is naturally low in carbs, making it ideal for low-carb diets.
  • Gluten-Free: This recipe has no gluten-containing ingredients, suitable for gluten-sensitive individuals.
  • Healthy Fats: Using olive oil provides heart-healthy monounsaturated fats.

Essential Equipment Recommendations

To achieve the best results, consider using the following kitchen tools:

  • Roasting Pan: A sturdy roasting pan will ensure even cooking and browning.
  • Meat Thermometer: This is crucial for checking doneness without cutting into the meat.
  • Sharp Knife: A good chef’s knife will make carving easy and precise.
  • Cutting Board: Use a large cutting board to catch juices and provide a stable surface for carving.

Serving Suggestions

Now that you’ve made the perfect roasted chicken, here are some delightful serving ideas to impress your guests:

  • Family Style: Serve the chicken whole on a platter surrounded by roasted vegetables for a rustic presentation.
  • Sandwiches: Use leftover chicken for delicious sandwiches or wraps, paired with your favorite condiments and fresh veggies.
  • Salads: Shred leftover chicken and toss it into salads for a protein boost.
  • With Sides: Pair with classic sides like mashed potatoes, green beans, or a fresh garden salad.

In conclusion, this Savory Garlic and Herb Roasted Chicken is more than just a recipe; it’s an invitation to explore flavors and share moments. So, gather your loved ones, enjoy the process, and remember that every meal is an opportunity for connection. Happy cooking!

Savory Garlic and Herb Roasted Chicken

Prep Time 15 minutes
Cook Time 1 hour 15 minutes
Total Time 1 hour 30 minutes
Servings 4 servings
Calories 250
A flavorful roasted chicken infused with garlic and fresh herbs, perfect for a hearty meal.

Ingredients

Main

  • 1 whole chicken (about 4-5 lbs)
  • 4 tablespoons olive oil
  • 4 cloves garlic, minced
  • 1 tablespoon fresh rosemary, chopped
  • 1 tablespoon fresh thyme, chopped
  • 1 teaspoon salt, adjust to taste
  • 0.5 teaspoon black pepper
  • 1 lemon quartered

Instructions 

  • Preheat oven to 425°F (220°C). Pat chicken dry and place in a roasting pan.
  • Mix olive oil, garlic, rosemary, thyme, salt, and pepper. Rub all over the chicken and stuff lemon quarters inside.
  • Roast for 75 minutes until internal temperature reaches 165°F (75°C) and skin is golden.
  • Rest for 10-15 minutes, garnish with herbs, and serve warm.

Notes

Ensure the chicken reaches the proper internal temperature for safety.
Calories: 250kcal
Cost: $15
Course: Main Course
Cuisine: American
Keyword: Chicken

Discover the Secrets to a Perfect Garlic Herb Roasted Chicken

Welcome to my culinary adventure, where today we embark on a journey to master the art of creating a perfect Garlic Herb Roasted Chicken that will not only tantalize your taste buds but also bring warmth and connection to your dining table. This recipe is all about celebrating flavors, and I promise, you’re in for a treat! In the following sections, we will explore the one mistake you must avoid to ensure your chicken is juicy, flavorful, and has that golden crispy skin we all love.

Why You’ll Love This Recipe

This Garlic Herb Roasted Chicken and potatoes dish is not just a meal; it’s an experience! Here are five reasons why this recipe will become a go-to for your weeknight dinners:

  • One-Pot Wonder: Enjoy the convenience of a one-pot meal that minimizes cleanup while maximizing flavor. Less time washing dishes means more time enjoying your meal!
  • Flavor Explosion: The combination of garlic, herbs, and lemon creates a flavor profile that dances on your palate, ensuring every bite is a delight.
  • Easy to Prepare: With simple ingredients and straightforward steps, this recipe is perfect for both novice and seasoned chefs. You don’t need to be a culinary expert to impress your guests!
  • Perfect for Any Occasion: Whether it’s a cozy family dinner or a special gathering with friends, this dish will impress everyone at the table.
  • Healthier Comfort Food: Packed with wholesome ingredients like fresh vegetables and herbs, this dish is a guilt-free indulgence.

Ingredients for Your Garlic Herb Roasted Chicken

Let’s dive into the ingredients that will bring this dish to life. Here’s what you’ll need:

  • 5 bone-in chicken thighs
  • 2 pounds creamer potatoes, cut into 1 1/2 inch chunks
  • 5 carrots, peeled and chopped into chunks
  • 1 medium onion, roughly chopped
  • 6 cloves garlic, diced
  • 3 teaspoons Herbes de Provence
  • 3 tablespoons olive oil
  • 1 lemon, sliced
  • 1 1/2 teaspoons kosher salt
  • 1 teaspoon pepper
  • Fresh chopped parsley for garnish
  • 4 tablespoons butter
  • 1 garlic clove, minced
  • 1 teaspoon Herbes de Provence
  • 1/2 teaspoon salt
  • 1/4 teaspoon pepper

Feel free to mix and match these ingredients based on what you have at home! For instance, if you don’t have Herbes de Provence, a blend of rosemary, thyme, and basil will work beautifully.

How to Make Garlic Herb Roasted Chicken: Step-by-Step Instructions

Colorful presentation of Garlic Herb Roasted Chicken with chunks of potatoes and carrots.

Now, let’s get cooking! Follow these steps to create your delicious Garlic Herb Roasted Chicken:

  • Preheat the oven: Preheat your oven to 425 degrees Fahrenheit.
  • Prepare the vegetables: In a Dutch oven, combine the potatoes, carrots, onions, garlic, olive oil, salt, and pepper. Mix until well combined.
  • Bake the base: Cover the Dutch oven and bake the vegetable mixture for 20 minutes to allow the flavors to meld.
  • Create the herb butter: In a small microwavable bowl, melt the butter and minced garlic for about 30 seconds. Mix in the Herbes de Provence, salt, and pepper.
  • Prepare the chicken: While the potatoes are cooking, pat the chicken thighs dry with a paper towel. Brush the herb butter mixture generously onto the chicken, making sure to get some under the skin.
  • Combine and bake: Remove the Dutch oven from the oven, place the chicken thighs on top of the potatoes, pour any remaining butter over the potatoes, and add the lemon slices.
  • Roast: Bake uncovered for 40-45 minutes, or until the internal temperature reaches 164 degrees Fahrenheit. If the skin isn’t crispy enough, place it under the broiler for an additional 3-5 minutes.
  • Rest and serve: Remove the Dutch oven from the oven and let the chicken rest for 5-10 minutes. Garnish with fresh parsley before serving.
Pro Tips for Perfect Garlic Herb Roasted Chicken

Want to elevate your cooking game? Here are some expert insights to ensure your chicken turns out perfectly every time:

  • Patience is key: Allowing the chicken to rest after cooking helps retain its juices, resulting in tender meat.
  • Use a meat thermometer: This tool ensures your chicken is cooked to perfection. Aim for an internal temperature of 164 degrees Fahrenheit.
  • Don’t skip the broiler: If you crave that crispy skin, a few minutes under the broiler can work wonders!
  • Customize your herbs: Feel free to experiment with different herbs based on your personal preference or what you have on hand.
  • Vegetable options: Add your favorite veggies like zucchini or bell peppers for a colorful and nutritious meal.
  • Make it spicy: A pinch of red pepper flakes can add a delightful kick if you enjoy heat.
  • Plan for leftovers: This dish keeps well, so consider making extra for easy lunches throughout the week.
  • Marinate overnight: For enhanced flavor, marinate the chicken in the herb butter mixture overnight before cooking.

Common Mistakes and Troubleshooting

Even the best chefs encounter hiccups. Here are some common mistakes to avoid:

  • Not drying the chicken: Moisture on the skin can prevent it from getting crispy. Always pat the chicken dry before seasoning.
  • Overcrowding the pan: Ensure there’s enough space between chicken pieces for even cooking and browning.
  • Skipping the rest: Cutting into the chicken too soon can lead to dry meat. Let it rest!
  • Ignoring the temperature: Always use a meat thermometer to check doneness.
  • Using dull knives: A sharp knife makes cutting easier and safer, ensuring you don’t tear the meat.

Variations to Try

Mix things up and keep your meals exciting with these variations:

  • Herb Citrus Chicken: Add orange slices along with lemon for a sweet and tangy flavor.
  • Pesto Chicken: Swap the butter for pesto for a different flavor profile.
  • Spicy Garlic Chicken: Add chili flakes to the butter mixture for a spicy kick.
  • Vegetarian Option: Substitute the chicken with hearty vegetables like eggplant or mushrooms for a delicious vegetarian dish.

Storage and Make-Ahead Instructions

Want to prep ahead of time? Here’s how to store and reheat your Garlic Herb Roasted Chicken:

  • Refrigeration: Store leftovers in an airtight container in the refrigerator for up to 4 days.
  • Freezing: You can freeze cooked chicken for up to 3 months. Just ensure it’s well-wrapped to avoid freezer burn.
  • Reheating: For best results, reheat in the oven at 350 degrees Fahrenheit until warmed through. This helps preserve the chicken’s texture.

Frequently Asked Questions

Here are some common questions about this recipe:

  • Can I use chicken breasts instead of thighs? Yes, but adjust the cooking time as breasts cook faster.
  • What can I serve with this chicken? This dish pairs beautifully with steamed vegetables, rice, or a fresh salad.
  • How do I know when the chicken is done? Use a meat thermometer—aim for 164 degrees Fahrenheit.
  • Can I make this recipe in advance? Yes! You can prep the chicken and vegetables a day ahead and store them in the fridge.
  • Is this recipe gluten-free? Yes, all the ingredients used are naturally gluten-free.
  • Can I use other herbs? Absolutely! Feel free to experiment with your favorite herbs and spices.
  • What if I don’t have a Dutch oven? You can use any oven-safe pot with a lid.
  • How long does it take to cook? Total cook time is about 60-70 minutes, including prep.

Nutrition Tips and Dietary Adaptations

This recipe is not only delicious but also nutritious. Here are a few tips to enhance its health benefits:

  • Use skinless chicken: For a lower fat option, use skinless chicken thighs or breasts.
  • Increase veggies: Add more colorful vegetables to boost the nutritional content.
  • Whole grains: Serve with quinoa or brown rice for added fiber.

Equipment Recommendations

To make this recipe a breeze, here’s a list of essential kitchen tools:

  • Meat Thermometer: Ensures perfect doneness every time.
  • Dutch Oven: Ideal for roasting and retaining moisture.
  • Sharp Chef’s Knife: For easy chopping and preparation.

Serving Suggestions

Finally, let’s talk about how to present your masterpiece:

  • Garnish: Fresh chopped parsley adds a pop of color and freshness.
  • Pairing: Serve with a light white wine like Sauvignon Blanc for a delightful dining experience.
  • Display: Arrange the chicken and vegetables on a large platter for an inviting presentation.

In conclusion, this Garlic Herb Roasted Chicken recipe is not just about the food; it’s about creating memories around the table. As you savor each bite, remember that cooking is a journey, and every meal is an opportunity to explore new flavors and foster connections. So grab your apron and let’s make this culinary adventure together!

Garlic Herb Roasted Chicken: Avoid This One Mistake

Prep Time 15 minutes
Cook Time 1 hour 5 minutes
Total Time 1 hour 20 minutes
Servings 4 servings
Calories 650
This flavorful roasted chicken with herbs and vegetables is a perfect family dinner. Be sure to avoid overcooking the chicken to keep it juicy and tender.

Ingredients

Meat

  • 5 pieces bone-in chicken thighs
  • 2 pounds creamer potatoes (cut into 1.5 inch chunks)
  • 5 pieces carrots (peeled and chopped)
  • 1 medium onion (roughly chopped)
  • 6 cloves garlic (diced)
  • 3 teaspoons Herbes de Provence
  • 3 tablespoons olive oil
  • 1 whole lemon (sliced)
  • 1.5 teaspoons kosher salt
  • 1 teaspoon pepper

Garnish

  • 4 tablespoons butter
  • 1 clove garlic (minced)
  • 1 teaspoon Herbes de Provence
  • 0.5 teaspoon salt
  • 0.25 teaspoon pepper

Instructions 

  • Preheat oven to 425°F (220°C).
  • Mix potatoes, carrots, onions, garlic, olive oil, salt, and pepper; cover and bake for 20 minutes.
  • Melt butter with garlic and herbs; pat chicken dry and brush with butter mixture.
  • Place chicken on vegetables, add lemon slices, and bake uncovered for 40-45 minutes until internal temp reaches 164°F.
  • Let rest for 5-10 minutes, then garnish with parsley and serve.

Notes

Ensure chicken skin is crispy by broiling for a few minutes if needed.
Calories: 650kcal
Cost: $20
Course: Main Course
Cuisine: American
Keyword: Chicken

A Culinary Adventure: Discovering the Magic of Slow Cooker Balsamic Glazed Roast Beef

If you’re on a quest for a dish that encapsulates warmth, flavor, and the joy of sharing with loved ones, look no further than the Slow Cooker Balsamic Glazed Roast Beef. This heartwarming recipe transforms simple ingredients into a culinary masterpiece, perfect for any gathering or cozy night in. The rich, tangy glaze paired with the tender roast creates an unforgettable experience at the dinner table. Join me, Jack, as I share not just a recipe, but a story of connection through food!

Why You’ll Love This Recipe

This recipe isn’t just about the delicious flavors; it’s about the moments you’ll create around the dinner table. Here are some reasons why this balsamic glazed roast beef will make your heart sing:

  • Effortless Preparation: With minimal prep time, you can set it and forget it. Just let your slow cooker do the magic!
  • Flavor Explosion: The combination of balsamic vinegar, honey, and soy sauce creates a glaze that’s sweet, tangy, and utterly addictive.
  • Perfect for Gatherings: Whether it’s a family dinner or a holiday feast, this dish impresses and feeds a crowd.
  • Versatile Leftovers: Enjoy the roast as a main dish or repurpose it in sandwiches, salads, or tacos.
  • Heartwarming Experience: Each bite tells a story, making it a perfect dish to share with friends and family.

Ingredients You’ll Need

Gathering the right ingredients is key to making this dish shine. Here’s what you’ll need:

  • 4 pounds (1.9 kg) beef chuck roast: A well-marbled cut for tenderness.
  • 1 cup (250 ml) beef broth: To keep the meat moist and flavorful.
  • 1/3 cup (80 ml) balsamic vinegar: The star of the glaze.
  • 2 tablespoons soy sauce: Adds depth and umami flavor.
  • 1/2 pound (240 g) mushrooms: For an earthy complement to the beef.
  • 2 tablespoons honey: Balances the acidity of the vinegar.
  • 1/4 teaspoon red pepper flakes: For a hint of spice.
  • 4 cloves garlic, peeled and chopped: Aromatic and flavorful.
  • 1/4 teaspoon freshly ground black pepper: To taste.
  • 1½ cups (375 ml) cooking liquid from the roast, strained: For the glaze.
  • 2 tablespoons cornstarch: To thicken the sauce.
  • 2 tablespoons water: To mix with cornstarch.
  • 3 tablespoons balsamic vinegar: For the glaze.
  • 1/4 cup brown sugar: Adds sweetness and richness.
  • 1 tablespoon soy sauce: Enhances flavor.
  • Salt and freshly ground black pepper, to taste.

Step-by-Step Instructions

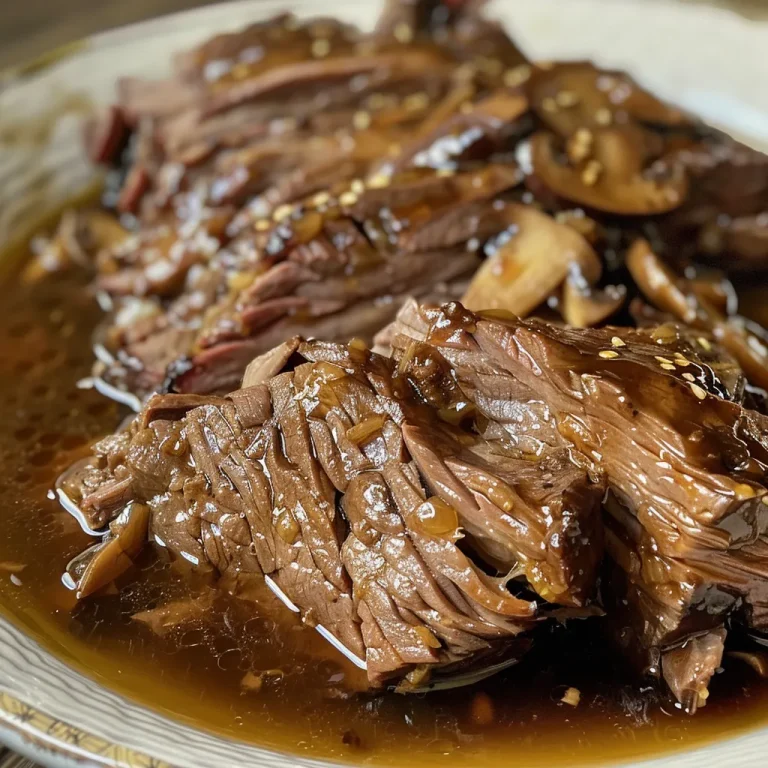
Mouthwatering roast beef with a dark glossy glaze and surrounding vegetables.

Let’s dive into the cooking process! Follow these steps for a perfectly cooked balsamic glazed roast beef:

  • Prep the Slow Cooker: Lightly grease the slow cooker with nonstick cooking spray. Place the beef roast and mushrooms inside.
  • Mix the Glaze: In a mixing bowl, combine beef broth, balsamic vinegar, soy sauce, honey, red pepper flakes, garlic, and black pepper. Pour this mixture over the roast.
  • Cook Low and Slow: Cover the slow cooker and cook on a low heat setting for 6-8 hours, or until the meat is tender.
  • Slice the Roast: Once done, remove the roast from the pot and slice it onto a plate.
  • Prepare the Glaze: Strain 1½ cups of cooking liquid into a saucepan. Whisk in cornstarch and water, along with additional balsamic vinegar, brown sugar, and soy sauce. Bring to a boil, whisking until thickened. Season with salt and pepper.
  • Serve and Enjoy: Pour the glaze over the sliced roast and mushrooms. Serve hot and enjoy the delightful flavors!

Pro Tips for Perfect Roast Beef

Want to take your cooking game to the next level? Here are some expert insights:

  • Use a Meat Thermometer: Ensure perfect doneness by checking the internal temperature. Aim for 135°F (57°C) for medium-rare.
  • Choose the Right Cut: While chuck roast is excellent, you can also use brisket or round roast for different textures.
  • Don’t Skimp on Searing: If you have time, sear the beef before placing it in the slow cooker for added flavor.
  • Consider Adding Veggies: Carrots, potatoes, or celery can be added for a complete meal.
  • Rest the Meat: Allow the roast to rest for about 15 minutes before slicing to retain juices.
  • Make Ahead: Prepare the glaze the day before to enhance flavors.
  • Experiment with Spices: Feel free to add herbs like rosemary or thyme for extra depth.
  • Use a Good Quality Balsamic Vinegar: It makes a significant difference in flavor.

Common Mistakes and Troubleshooting

Even seasoned cooks can hit a snag! Here are some common pitfalls to avoid:

  • Overcooking the Beef: Keep an eye on cooking times; overcooked meat can become dry.
  • Skipping the Searing Step: Searing adds a layer of flavor that slow cooking alone can’t achieve.
  • Not Using Enough Liquid: Ensure there’s enough liquid in the slow cooker to keep the meat moist.
  • Ignoring Resting Time: Resting the beef is crucial for juicy slices.

Variations to Try

Don’t hesitate to get creative! Here are a few variations you can try:

  • Herbed Balsamic Glazed Roast: Add fresh herbs like thyme or rosemary for aromatic depth.
  • Spicy Balsamic Glaze: Increase the red pepper flakes or add a dash of hot sauce for heat.
  • Mushroom Medley: Use a variety of mushrooms like shiitake or portobello for different flavors.
  • Honey Mustard Glaze: Substitute honey with a honey mustard blend for a tangy twist.

Storage and Make-Ahead Instructions

Planning ahead? Here’s how to store and prepare this dish:

  • Storage: Store leftovers in an airtight container in the refrigerator for up to 4 days.
  • Freezing: You can freeze the sliced roast and glaze separately for up to 3 months.
  • Reheating: Reheat in the microwave or on the stovetop over low heat until warmed through.
  • Make-Ahead: Prepare the glaze a day in advance and refrigerate; this enhances the flavors.

Comprehensive FAQs

Have questions? Let’s answer some common queries:

  • Can I use other cuts of beef? Yes! Brisket or round roast works too, though cooking time may vary.
  • How do I know when the roast is done? Use a meat thermometer; aim for 135°F (57°C) for medium-rare.
  • Can I make this recipe gluten-free? Substitute soy sauce with a gluten-free version or tamari.
  • What can I serve with this roast? Pair it with mashed potatoes, steamed veggies, or a simple salad.
  • Is it okay to add vegetables? Absolutely! Carrots and potatoes can be added for a one-pot meal.
  • Can I cook this on high heat? Yes, but cooking times will be reduced to about 4-5 hours.
  • How do I thicken the glaze? Whisking cornstarch and water into the cooking liquid is effective.
  • Can I use a different vinegar? While balsamic adds a unique flavor, red wine vinegar could be a substitute.

Nutritional Tips and Dietary Adaptations

This dish can be enjoyed while being mindful of nutrition:

  • Low-Carb Option: Serve with roasted vegetables instead of bread or rice.
  • Leaner Meat: Opt for a round roast for lower fat content.
  • Reduced Sugar: Substitute honey with a sugar-free alternative if needed.

Equipment Recommendations

To achieve the best results, consider these essential tools:

  • Slow Cooker: A programmable slow cooker makes timing a breeze.
  • Meat Thermometer: For perfect doneness every time.
  • Sharp Knife: Ensures clean, even slices of roast.
  • Mixing Bowls: For preparing the glaze and other ingredients.

Serving Suggestions

Elevate your dining experience with these serving ideas:

  • Garnishes: Fresh parsley or basil can add a pop of color and flavor.
  • Side Dishes: Serve with creamy mashed potatoes or a fresh garden salad.
  • Creative Presentation: Arrange sliced roast on a platter with the glaze drizzled over the top.

Enjoy the journey of flavors and the connections that come with sharing this Slow Cooker Balsamic Glazed Roast Beef. It’s not just a meal; it’s a celebration of culture, family, and the stories we create together. So gather your loved ones, set the table, and let the feast begin!

Slow Cooker Balsamic Glazed Roast Beef

Prep Time 15 minutes
Cook Time 8 hours
Total Time 8 hours 15 minutes
Servings 6 servings
Calories 450
A tender and flavorful roast beef glazed with a rich balsamic sauce, perfect for a comforting meal.

Ingredients

Meat and Vegetables

  • 4 pounds beef chuck roast
  • 1 cup beef broth
  • 1/3 cup balsamic vinegar
  • 2 tablespoons soy sauce
  • 1/2 pound mushrooms
  • 2 tablespoons honey
  • 1/4 teaspoon red pepper flakes
  • 4 cloves garlic, peeled and chopped
  • 1/4 teaspoon black pepper, freshly ground
  • cups cooking liquid from the roast, strained
  • 2 tablespoons cornstarch
  • 2 tablespoons water
  • 3 tablespoons balsamic vinegar
  • 1/4 cup brown sugar
  • 1 tablespoon soy sauce
  • to taste salt and black pepper

Instructions 

  • Grease slow cooker and add beef and mushrooms.
  • Mix beef broth, balsamic vinegar, soy sauce, honey, red pepper flakes, garlic, and black pepper; pour over beef and mushrooms.
  • Cook on low for 6-8 hours until tender.
  • Remove beef, slice, and set aside. Strain cooking liquid and prepare glaze with cornstarch, balsamic vinegar, brown sugar, and soy sauce; simmer until thickened.
  • Pour glaze over sliced beef and serve hot.

Notes

For extra flavor, marinate the beef overnight.
Calories: 450kcal
Cost: $15
Course: Main Course
Cuisine: American
Keyword: beef

Embark on a Culinary Adventure with Spring Garlic Herb Chicken

Spring is a season of renewal and vibrancy, bringing fresh flavors and lively aromas to our kitchens. Among the many delicious offerings of this season, Spring Garlic Herb Chicken stands out as a dish that not only captivates the palate but also whispers tales of adventure and exploration. With a medley of fragrant herbs and the zest of fresh lemon, this chicken dish is like a passport to the lush landscapes of springtime. Let’s dive into this flavorful journey that beckons you to taste the world!

Why You’ll Love This Recipe

This dish is more than just a meal; it’s an experience that celebrates the essence of spring. Here are five reasons why you’ll adore this garlic herb chicken recipe:

  • Quick and Easy Preparation: This dish comes together in under an hour, making it perfect for busy weeknights or spontaneous gatherings.
  • Fresh Ingredients: Utilizing seasonal herbs like parsley, basil, and thyme brings a burst of flavor that elevates the chicken to new heights.
  • Versatile Cooking Methods: Whether you choose to grill or bake, this recipe adapts beautifully to your preferred cooking style.
  • Health-Conscious Flavor: Marinated with olive oil and fresh herbs, it’s a dish that satisfies your cravings without compromising on health.
  • Impressive Presentation: Serve it on a bed of greens or alongside roasted vegetables, and watch it become the star of your table.

Essential Ingredients

Let’s gather the ingredients that will bring this spring garlic herb chicken to life. Here’s what you need:

  • 4 boneless, skinless chicken breasts (approximately 1.5 lbs)
  • 4 cloves fresh garlic, minced
  • 1/4 cup fresh parsley, chopped
  • 1/4 cup fresh basil, chopped
  • 2 tsp fresh thyme leaves
  • Juice of 1 lemon (about 2 tbsp)
  • 3 tbsp extra virgin olive oil
  • Salt and pepper to taste

If you’re missing any of these ingredients, here are some substitutions:

  • Chicken Breasts: You can use thighs for a juicier option or even tofu for a vegetarian alternative.
  • Fresh Herbs: If fresh herbs are unavailable, dried herbs can substitute; just use one-third the amount.
  • Olive Oil: Avocado oil or melted butter can also work well in this recipe.
  • Lemon Juice: Lime juice offers a different yet delightful zing.

Let’s Make it Together

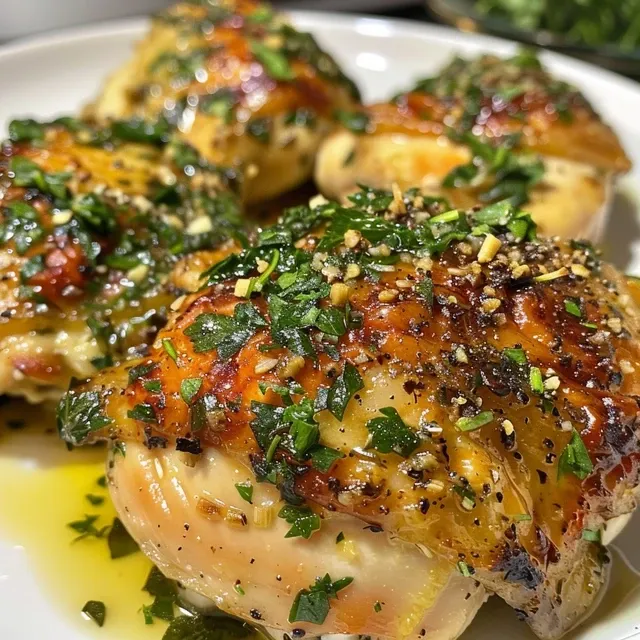
Appetizing chicken dish with minced garlic and fresh herbs.

Now that we have our ingredients ready, it’s time to create this mouthwatering dish. Follow these steps for a successful cooking experience:

  1. Prepare the marinade by mixing minced garlic, chopped herbs, lemon juice, olive oil, salt, and pepper in a bowl.
  2. Marinate the chicken breasts in a resealable bag or shallow dish for at least 30 minutes in the refrigerator (up to 4 hours for more flavor).
  3. Preheat your grill to medium-high heat (375°F) or oven to 400°F.
  4. Grill the chicken for 6-7 minutes per side until it reaches an internal temperature of 165°F. If baking, transfer to a prepared dish and bake for approximately 25-30 minutes.
  5. Allow the chicken to rest for 5 minutes before slicing. Serve on a bed of greens or alongside roasted vegetables.

Perfecting the Cooking Process

Here are some pro tips to ensure your garlic herb chicken comes out perfectly every time:

  • Marination Matters: Letting the chicken marinate for at least 30 minutes allows the flavors to infuse deeply.
  • Temperature Check: Always use a meat thermometer to check for doneness; the chicken should reach 165°F.
  • Resting Time: Allowing the chicken to rest is essential for juicy results, as it lets the juices redistribute.
  • Grill Marks: For those beautiful grill marks, avoid flipping the chicken too often.
  • Herb Variations: Experiment with different herbs like oregano or dill for unique flavor profiles.
  • Oil Choice: Using high-quality extra virgin olive oil enhances the overall taste.
  • Flavor Boosting: Adding a splash of white wine to the marinade can introduce a lovely depth of flavor.
  • Color and Texture: Searing the chicken initially at a higher temperature can create a delicious crust.

Common Mistakes and Troubleshooting

Even the best chefs make mistakes! Here’s how to troubleshoot common issues:

  • Chicken is Dry: This often occurs when overcooked. Use a meat thermometer to monitor internal temperature.
  • Flavorless Chicken: Ensure you marinate long enough and use sufficient seasoning.
  • Sticking to the Grill: Make sure your grill is preheated and oiled before cooking.
  • Not Enough Sauce: Reserve some marinade before adding it to the chicken for a tasty finishing drizzle.

Variations to Try

This recipe is versatile! Here are four delicious variations to consider:

  • Spicy Garlic Herb Chicken: Add red pepper flakes or chili powder to the marinade for an extra kick.
  • Lemon Herb Chicken Skewers: Cut the chicken into cubes and thread onto skewers for a fun grilling experience.
  • Herbed Chicken with Honey Glaze: Drizzle honey on the chicken during the last few minutes of cooking for a sweet twist.
  • Stuffed Herb Chicken: Create a pocket in the chicken breasts and stuff with cheese and herbs for a decadent treat.

Storage and Make-Ahead Instructions

If you want to prepare this dish ahead of time, here’s how to store it properly:

  • Refrigeration: Store cooked chicken in an airtight container in the refrigerator for up to 4 days.
  • Freezing: You can freeze marinated chicken for up to 3 months; just thaw in the fridge before cooking.
  • Make-Ahead Meals: Marinate chicken the night before for a quick, flavorful dinner the next day.

Comprehensive FAQ

Still have questions? Here are answers to some common queries:

  • Can I use frozen chicken? Yes, but ensure it’s completely thawed before marinating and cooking.
  • Can I bake this instead of grilling? Absolutely! Baking works well; just adjust the time as needed.
  • What can I serve with garlic herb chicken? It pairs beautifully with salads, roasted vegetables, or grains like quinoa or rice.
  • How can I make this dish gluten-free? This recipe is naturally gluten-free. Just ensure any additional sauces you use are also gluten-free.
  • Can I prepare this chicken in advance? Yes! Marinate it the night before or cook it ahead of time and reheat.
  • What other herbs can I use? Feel free to experiment with dill, cilantro, or even mint for a fresh twist.
  • Can I grill vegetables alongside the chicken? Definitely! Just make sure they have similar cooking times for even results.
  • How spicy can I make this? Adjust the heat to your preference by adding more or less chili powder or red pepper flakes.

Nutritional Tips and Dietary Adaptations

This garlic herb chicken recipe is not only delicious but also adaptable to various dietary needs:

  • Low-Carb Option: Serve with steamed vegetables instead of starches for a keto-friendly meal.
  • Nut-Free: This recipe is naturally nut-free, making it safe for those with nut allergies.
  • Paleo-Friendly: Use coconut aminos instead of soy sauce to keep this dish compliant with paleo diets.
  • Vegan Adaptation: Substitute chicken with firm tofu or tempeh, adjusting cooking times accordingly.

Equipment Recommendations

To create the perfect spring garlic herb chicken, here’s some equipment I recommend:

  • Grill or Grill Pan: Essential for achieving that smoky flavor and beautiful grill marks.
  • Meat Thermometer: A must-have to ensure your chicken reaches the perfect internal temperature.
  • Mixing Bowls: Use for marinating and mixing ingredients.
  • Resealable Bags: Great for marinating the chicken while saving space in your refrigerator.

Serving Suggestions

Once your garlic herb chicken is ready, think about how to serve it:

  • Bed of Greens: Place sliced chicken over a salad of fresh greens, cherry tomatoes, and a light vinaigrette.
  • Roasted Vegetables: Pair with seasonal roasted veggies like asparagus, zucchini, or bell peppers for a balanced meal.
  • Grain Side Dish: Serve with quinoa, brown rice, or couscous to soak up the delicious flavors.
  • Herb Butter: Top the chicken with a dollop of herb-infused butter for extra richness.

In conclusion, this Spring Garlic Herb Chicken recipe is not just a dish; it’s a celebration of flavors, a journey through spring’s bounty, and a delightful way to gather friends and family around the table. Each bite tells a story, weaving together the fresh essence of herbs and the warmth of home-cooked goodness. So grab your apron, unleash your culinary spirit, and let’s make magic in your kitchen!

Spring Garlic Herb Chicken

Prep Time 10 minutes
Cook Time 30 minutes
Total Time 40 minutes
Servings 4 servings
Calories 250
A flavorful and healthy chicken dish infused with fresh herbs and garlic, perfect for a quick weeknight dinner.

Ingredients

Protein

  • 4 pieces boneless, skinless chicken breasts (approximately 1.5 lbs)
  • 4 cloves fresh garlic, minced
  • 0.25 cup fresh parsley, chopped
  • 0.25 cup fresh basil, chopped
  • 2 tsp fresh thyme leaves
  • 2 tbsp lemon juice (juice of 1 lemon)
  • 3 tbsp extra virgin olive oil
  • to taste Salt and pepper

Instructions 

  • Mix garlic, herbs, lemon juice, olive oil, salt, and pepper to make marinade.
  • Marinate chicken for at least 30 minutes in the refrigerator.
  • Preheat grill to medium-high or oven to 400°F (200°C).
  • Grill chicken 6-7 minutes per side or bake for 25-30 minutes until cooked through.
  • Rest for 5 minutes, then serve.

Notes

Use fresh herbs for the best flavor and marinate for at least 30 minutes for tender, flavorful chicken.
Calories: 250kcal
Cost: $15
Course: Main Course
Cuisine: American
Keyword: Chicken, garlic, herbs

Discover the Joy of Cottage Cheese Egg Scramble

Imagine waking up to a breakfast that not only tantalizes your taste buds but also fuels your day with wholesome goodness. The Cottage Cheese Egg Scramble is more than just a meal; it’s an adventure that brings together creamy cottage cheese and vibrant vegetables, creating a delightful dish that is both nutritious and satisfying. Whether you’re a busy professional, a health enthusiast, or someone simply looking to elevate your morning routine, this recipe is your ticket to a delicious start. Let’s dive into the world of flavors and learn how to make this scrumptious scramble!

Why You’ll Love This Recipe

  • High Protein Boost: With cottage cheese and eggs, this meal packs a significant protein punch, perfect for muscle recovery and satiety.
  • Quick and Easy: This recipe comes together in under 15 minutes, making it ideal for those rushed mornings.
  • Customizable Flavors: Infuse your scramble with different vegetables and spices to suit your taste preferences.
  • Low-Carb Delight: For those watching their carb intake, this dish is a fantastic low-carb breakfast option.
  • Healthy Fats: Incorporating eggs and cheese adds healthy fats that keep you full longer and provide energy for your busy day.

Gather Your Ingredients

Before we embark on our culinary adventure, let’s gather the essential ingredients for our Cottage Cheese Egg Scramble. Here’s what you’ll need:

  • 3 large eggs: The foundation of our scramble, providing richness and protein.
  • ½ cup cottage cheese: This is the star ingredient! Any fat percentage works, but blending it can give a smoother texture.
  • ½ cup fresh spinach: Adds a pop of color and nutrients. Feel free to substitute with kale, arugula, or fresh herbs.
  • ¼ cup shredded cheese: Choose between cheddar, mozzarella, or feta for added creaminess.
  • Salt & freshly cracked black pepper: Essential for flavor enhancement.
  • ½ tsp butter or drizzle of olive oil: For cooking and adding richness.
  • Optional toppings: Avocado slices, cherry tomatoes, red pepper flakes, or hot sauce for extra flair.

How to Make the Cottage Cheese Egg Scramble

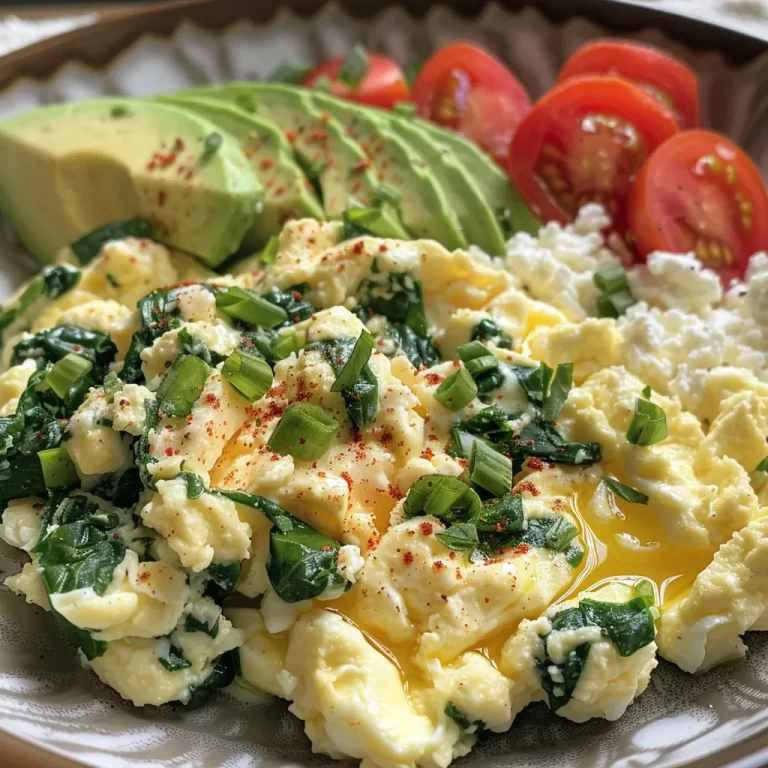
Creamy egg scramble with cottage cheese and herbs, shown in detail.

Let’s get cooking! Follow these simple steps to create your delicious scramble:

  1. Prep Ingredients
    Crack the eggs into a bowl and whisk until pale yellow and smooth. Measure the cottage cheese, shred your cheese, and wash/dry the spinach.
  2. Heat Your Pan
    Warm a non-stick skillet over medium heat. Add butter or oil to coat the pan.
  3. Cook the Eggs
    Pour the eggs into the pan. Allow them to set for about 15–20 seconds around the edges.
  4. Scramble Gently
    Using a spatula, gently push cooked eggs from the edges to the center, tilting the pan to let uncooked egg flow into the space. Repeat until soft, large curds form.
  5. Add Cottage Cheese & Spinach
    When the eggs are halfway set, fold in the cottage cheese and spinach gently.
  6. Finish & Serve
    Cook for an additional 1–2 minutes until the eggs are just set but still glossy. Remove from heat and sprinkle shredded cheese on top, allowing it to melt with the residual heat. Season to taste with salt and pepper. Serve immediately, optionally with toast, avocado, or hot sauce.

Pro Tips for the Perfect Scramble

  • Use Fresh Ingredients: Fresh eggs and cottage cheese will enhance the flavor and texture of your scramble.
  • Don’t Overcook: Remove the eggs from heat while they’re still slightly undercooked; they will continue to cook with residual heat.
  • Experiment with Herbs: Fresh herbs like basil or chives can add an exciting twist to your dish.
  • Blend for Smoothness: If you prefer a creamier texture, blend the cottage cheese before adding it to the eggs.
  • Season Smart: Add salt and pepper at the end to avoid drawing out moisture from the eggs too early.
  • Cook on Low Heat: Cooking on medium to low heat prevents rubbery eggs and allows for a soft scramble.
  • Try Different Cheeses: Experimenting with various cheeses can change the flavor profile significantly.
  • Make It a Meal: Serve with whole-grain toast or a side of fruit for a balanced meal.

Common Mistakes and Troubleshooting

Even the best chefs can encounter hiccups in the kitchen. Here are some common mistakes to avoid and solutions to ensure your scramble is perfect:

  • Rubbery Eggs: This usually happens from overcooking. Keep the heat low and remove from the pan while still slightly underdone.
  • Watery Scramble: If your scramble turns out watery, it may be due to excess moisture in the cottage cheese or spinach. Drain excess liquid or use less.
  • Too Salty: If your scramble is too salty, add a splash of milk or unsalted butter to balance the flavors.
  • Not Fluffy Enough: Ensure to whisk the eggs thoroughly to incorporate air, which contributes to fluffiness.

Delicious Variations to Try

Feeling adventurous? Here are some fun variations to keep your breakfasts exciting:

  • Mexican Twist: Add diced tomatoes, jalapeños, and cilantro. Serve with avocado and a sprinkle of queso fresco.
  • Italian Style: Mix in sun-dried tomatoes, spinach, and basil, finished with a sprinkle of Parmesan cheese.
  • Mediterranean Delight: Incorporate olives, feta cheese, and diced bell peppers for a fresh, zesty flavor.
  • Protein Power-Up: Add cooked bacon, sausage, or turkey for an extra protein boost.

Storage and Make-Ahead Instructions

If you want to prepare this dish in advance or store leftovers, follow these guidelines:

  • Refrigerate Leftovers: Store any leftovers in an airtight container in the refrigerator for up to 3 days.
  • Reheat Gently: Reheat in a non-stick skillet over low heat, adding a splash of milk to restore creaminess.
  • Make Ahead: You can whisk the eggs and prepare the cottage cheese mixture the night before to save time in the morning.

Your Cottage Cheese Egg Scramble Questions Answered

Got questions? Here are some frequently asked questions about the Cottage Cheese Egg Scramble:

  • Can I use egg whites instead of whole eggs?
    Yes! You can substitute whole eggs with egg whites for a lower-calorie option, though the texture will be different.
  • Is this recipe suitable for meal prep?
    Absolutely! Just store in portions and reheat when ready to eat.
  • Can I use frozen spinach?
    Yes, just make sure to thaw and drain it well before adding to the scramble.
  • What if I’m lactose intolerant?
    You can use lactose-free cottage cheese or substitute with silken tofu for a dairy-free option.
  • How can I make this recipe vegetarian?
    This recipe is already vegetarian! Just be mindful of the cheese you choose.
  • Can I add other vegetables?
    Definitely! Bell peppers, onions, or mushrooms also work great.
  • What can I serve with this dish?
    Pair with whole-grain toast, a side of fresh fruit, or a smoothie for a complete breakfast.
  • Can kids enjoy this dish?
    Yes! It’s a fun and nutritious way to get kids involved in breakfast preparation.

Nutritional Insights and Dietary Adaptations

This recipe not only tastes great but also offers a variety of nutritional benefits:

  • Protein Power: Packed with protein from both the eggs and cottage cheese, this dish supports muscle growth and repair.
  • Rich in Vitamins: Spinach contributes vitamins A, C, and K, along with essential minerals like iron and calcium.
  • Low-Carb Option: Perfect for low-carb diets, helping you feel full without excess carbs.
  • Customizable for Dietary Needs: Easily adaptable for gluten-free, vegetarian, or lactose-free diets.

Equipment Recommendations

Here’s what you’ll need to make this scrumptious scramble:

  • Non-Stick Skillet: Essential for easy cooking and cleanup.
  • Mixing Bowl: For whisking the eggs and mixing ingredients.
  • Spatula: A silicone or wooden spatula is great for gently scrambling the eggs without scratching your pan.

Serving Suggestions to Elevate Your Breakfast

To create a well-rounded breakfast experience, consider these serving suggestions:

  • Whole-Grain Toast: Serve alongside a slice of whole-grain toast topped with avocado or your favorite spread.
  • Fresh Fruit: A side of seasonal fruits adds natural sweetness and color to your plate.
  • Smoothie: Pair with a refreshing smoothie for a nutrient-rich start to your day.
  • Herbed Yogurt: A dollop of herbed yogurt can add creaminess and flavor to your meal.

In conclusion, the Cottage Cheese Egg Scramble is not just a dish; it’s a passport to culinary adventure! Each bite is a reminder of the cultures and flavors that shape our world. So, whether you’re cooking it for yourself or sharing it with loved ones, this recipe invites connection, creativity, and a taste of joy. Enjoy your culinary journey, and remember, every meal tells a story—what will yours say?

Cottage Cheese Egg Scramble

Prep Time 5 minutes
Cook Time 5 minutes
Total Time 10 minutes
Servings 2 servings
Calories 250
A quick and nutritious breakfast scramble combining eggs, cottage cheese, and fresh greens for a protein-packed start to your day.

Ingredients

Eggs

  • 3 large eggs
  • 0.5 cup cottage cheese (any fat %)
  • 0.5 cup fresh spinach (or kale/arugula/herbs)
  • 0.25 cup shredded cheese (cheddar, mozzarella, or feta)
  • to taste Salt & freshly cracked black pepper
  • 0.5 tsp butter or olive oil (for cooking)
  • optional Optional toppings (avocado slices, cherry tomatoes, red pepper flakes, hot sauce)

Instructions 

  • Whisk eggs until smooth. Prepare cottage cheese, shred cheese, and wash spinach.
  • Heat a non-stick skillet over medium heat and add butter or oil.
  • Pour eggs into the pan; cook until edges set, then gently stir to form large curds.
  • When eggs are halfway cooked, fold in cottage cheese and spinach.
  • Cook for 1-2 more minutes, then top with shredded cheese and season with salt and pepper. Serve immediately.

Notes

For a creamier texture, blend cottage cheese before adding.
Calories: 250kcal
Cost: $8
Course: Breakfast
Keyword: Cottage Cheese, Eggs, Spinach

Embark on a Flavorful Journey with Perfect Medium-Rare Roast Beef

Welcome, my dears! Today, let’s talk about a culinary masterpiece that transcends borders and brings the warmth of home into your kitchen—the Perfect Medium-Rare Roast Beef. This dish is not just a feast for the palate; it’s a celebration of flavor, tradition, and the stories that make us who we are. With its juicy, tender texture and rich, beefy flavor, this roast is sure to impress your family and friends during any gathering or holiday feast. So, grab your apron, and let’s get cooking!

Why You’ll Love This Recipe

  • Flavor Explosion: Each bite of this roast beef is a symphony of rich flavors from the seasoning and herbs, making it a standout dish at any dinner table.
  • Perfectly Cooked: You’ll achieve a beautifully medium-rare roast with a juicy center, ensuring that the meat remains tender and flavorful.
  • Simple Techniques: The preparation and cooking methods are straightforward, making it accessible for both novice and experienced cooks.
  • Versatile Pairing: This roast pairs beautifully with a variety of sides, from classic mashed potatoes to fresh green beans, making it a versatile choice for any occasion.
  • Impressive Presentation: Serve your roast whole for a stunning centerpiece, and watch your guests’ eyes light up in anticipation!

Ingredients Breakdown

Let’s dive into the essentials for crafting this magnificent roast beef. Here’s what you’ll need:

  • 1 (3-4 pound) boneless beef roast: Ribeye roast, Top Sirloin, or Tri-Tip are wonderful choices. Each cut offers a unique flavor profile and tenderness.
  • 2 tablespoons coarse kosher salt: This is essential for seasoning and helps enhance the natural flavors of the meat.
  • 1 tablespoon olive oil: A light coating of oil helps the seasoning stick and promotes a beautiful crust.
  • 1 teaspoon black pepper: Freshly ground for optimal flavor.
  • 1 tablespoon fresh rosemary, chopped: Adds a fragrant, earthy note.
  • 1 tablespoon fresh thyme leaves: Complements the beef perfectly with its subtle, sweet flavor.

Preparation Steps: Crafting Your Roast

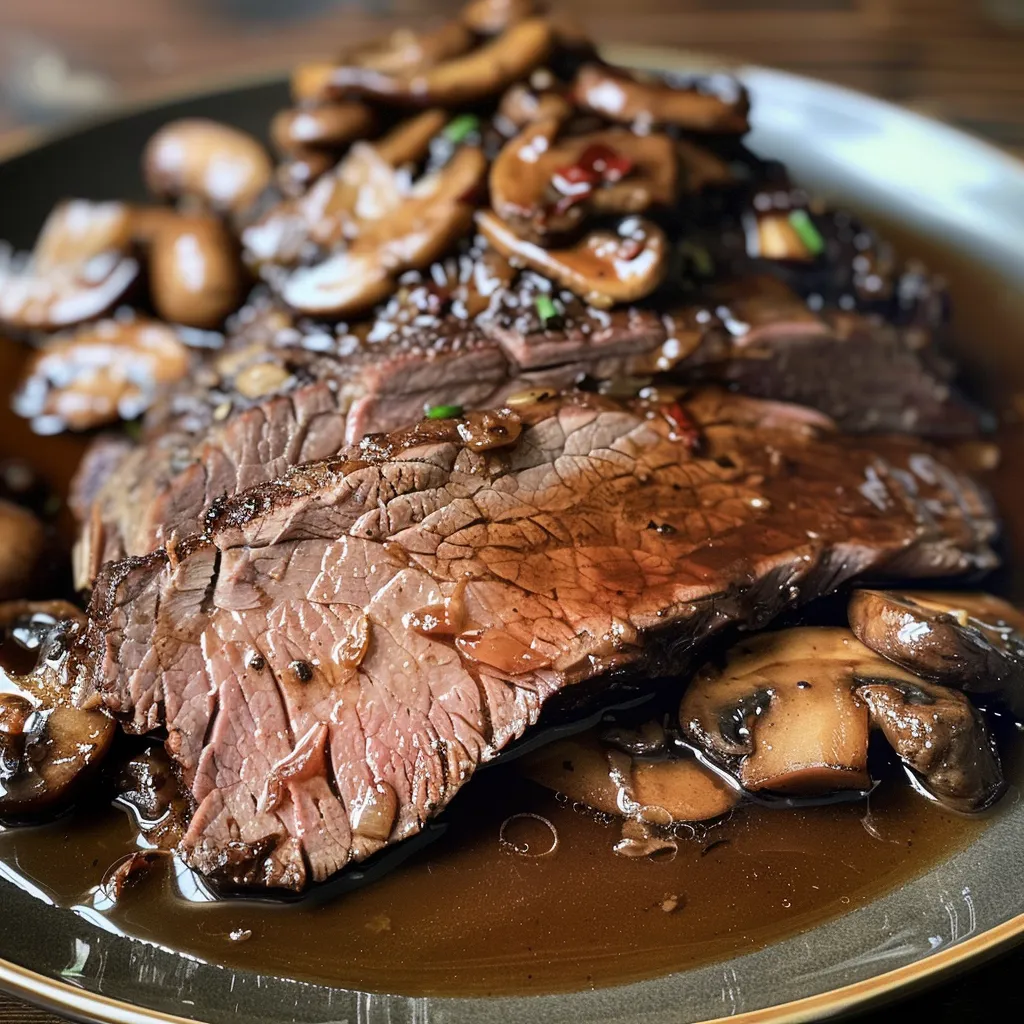
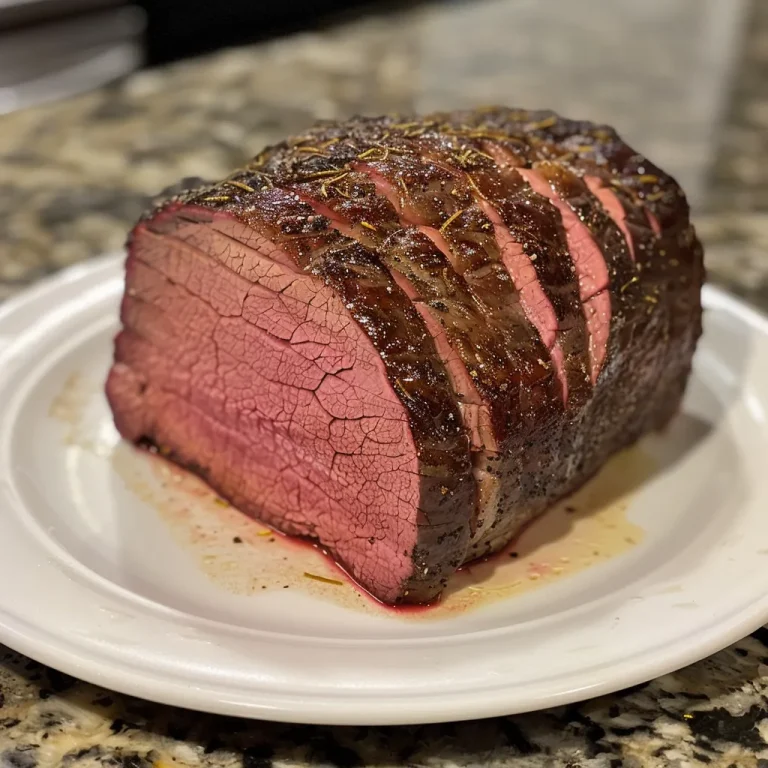
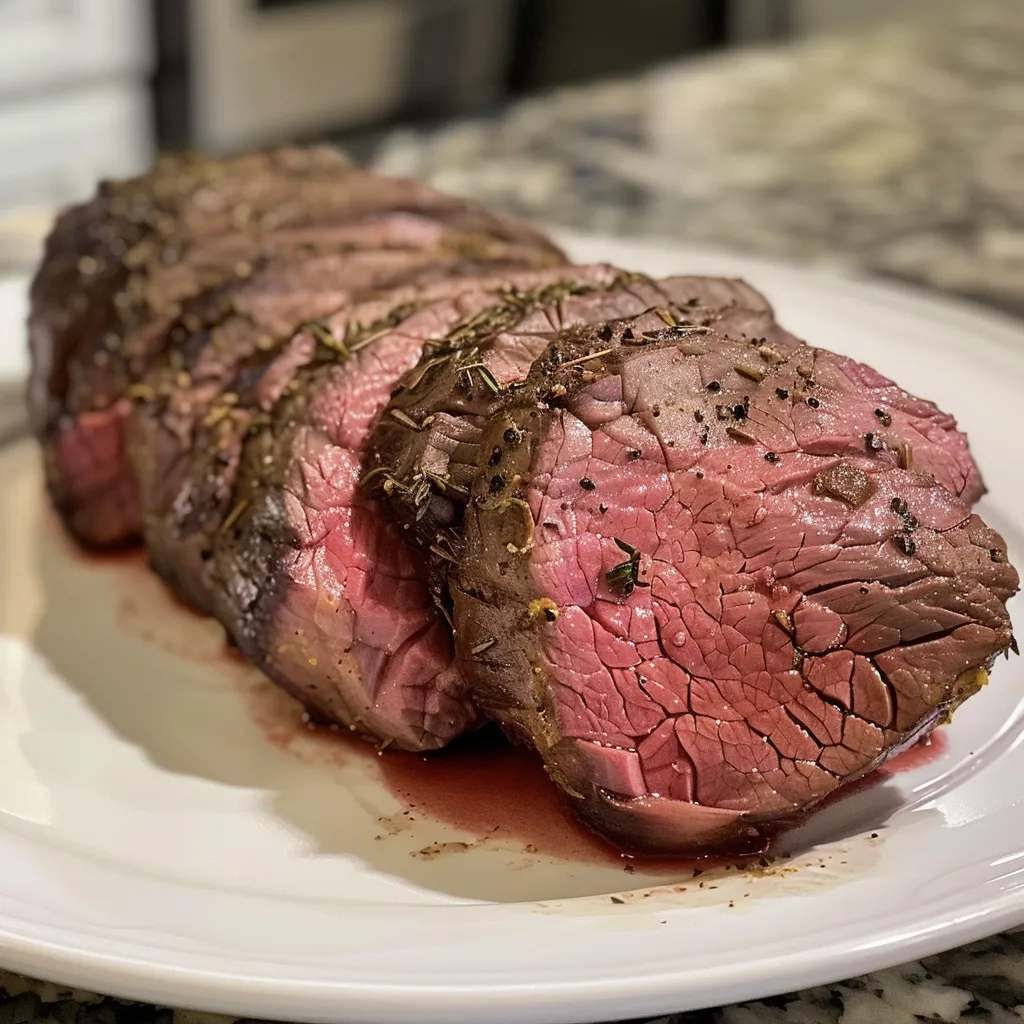
Detailed shot of medium-rare roast beef featuring herbs and seasoning.

Now that we have our ingredients, let’s walk through the steps to create the Perfect Medium-Rare Roast Beef. Trust me, it’s easier than you think!

  1. At least 24 hours (and up to 48 hours) before cooking, rub the entire roast generously with the kosher salt. Place the roast, uncovered, on a wire rack set inside a rimmed baking sheet. This step allows the meat to dry-brine, enhancing its flavor and tenderness.
  2. One hour before cooking, remove the roast from the refrigerator. Pat it completely dry with paper towels. This is crucial for achieving that beautiful crust. Rub it with olive oil, pepper, rosemary, and thyme. Preheat your oven to a high 450°F (230°C).
  3. Place the roast in the preheated oven and cook for 15 minutes. This high-heat blast creates a beautiful, dark crust that seals in those juices, oh my dears!
  4. After 15 minutes, reduce the oven temperature immediately to 300°F (150°C). Do not open the door more than necessary. Continue roasting until the internal temperature reaches 125°F (52°C) for rare or 130°F (54°C) for medium-rare—usually about 45-60 minutes after the temperature drop.
  5. Remove the roast from the oven. Tent it loosely with aluminum foil and let it rest on the counter for a full 20 minutes before slicing. Resting allows the juices to redistribute, ensuring every slice is moist and delicious.

Pro Tips for Success

To elevate your roast beef game, consider these expert insights:

  • Room Temperature Matters: Bring your roast to room temperature before cooking to ensure even cooking throughout.
  • Use a Meat Thermometer: For precision, invest in a good meat thermometer. This tool will help you achieve the perfect doneness without guesswork.
  • Experiment with Herbs: Feel free to mix and match your herbs. Fresh sage or oregano can add delightful twists to the flavor profile.
  • Don’t Rush the Resting: While it’s tempting to dig in right away, resting the meat is vital for juicy results.
  • Save the Drippings: Use the drippings to make a rich gravy or sauce to serve alongside your roast.
  • Adjust Cooking Time: Cooking times may vary based on your oven and the size of your roast, so keep an eye on that thermometer!
  • Cover If Necessary: If the roast is browning too quickly, tent it with foil to prevent burning.
  • Slice Against the Grain: This small but crucial step will ensure each bite is tender and easy to chew.

Common Mistakes to Avoid

Even the best cooks can make mistakes. Here are some common pitfalls to steer clear of:

  • Skipping the Dry-Brining: It might take time, but dry-brining is essential for flavor and tenderness.
  • Not Preheating the Oven: Failing to preheat your oven can lead to uneven cooking.
  • Overcooking: This is the enemy of a perfect roast. Keep a close eye on your internal temperature.
  • Neglecting to Rest: Cutting into the roast too soon results in a flood of juices on your cutting board.
  • Using the Wrong Cut: While any cut can technically work, certain cuts yield better results for roast beef.

Delicious Variations to Try

Want to put a twist on your roast? Here are a few variations to consider:

  • Herb-Crusted Roast: Add a mixture of fresh herbs like parsley and dill to the seasoning for a fresh flavor.
  • Garlic-Infused Roast: Rub minced garlic into the meat for an aromatic touch. Add whole garlic cloves around the roast for extra flavor.
  • Spicy Rub Roast: Incorporate chili powder or cayenne pepper into your seasoning for a little kick.
  • Balsamic Glaze Roast: Drizzle a balsamic reduction over the roast during the last 15 minutes of cooking for a sweet and tangy finish.

Storage and Make-Ahead Instructions

Planning ahead? Here’s how to store your roast or make it in advance:

  • Storing Leftovers: Once completely cooled, wrap leftovers tightly in plastic wrap or aluminum foil. Refrigerate for up to 3 days.
  • Freezing: For longer storage, slice the roast and freeze in airtight containers or freezer bags for up to 3 months.
  • Reheating: To reheat, place slices in a covered dish in a 300°F (150°C) oven until warmed through, or use the microwave on low power.

Frequently Asked Questions

Here are some common questions about roast beef preparation:

  • What is the ideal internal temperature for medium-rare roast beef? The target temperature is 130°F (54°C).
  • Can I use a slow cooker for roast beef? Yes, but the texture will differ. It won’t achieve the same crust as oven roasting.
  • How do I know when my roast is ready? Use a meat thermometer to check the internal temperature.
  • What should I serve with roast beef? Classic sides include mashed potatoes, roasted vegetables, or a fresh salad.
  • Can I marinate the roast overnight? Absolutely! A marinade can add extra flavor.
  • What is the best cut of beef for roasting? Ribeye, Sirloin, and Tenderloin are all excellent choices.
  • How can I add flavor to leftovers? Reheat with a bit of broth or gravy for added moisture and flavor.
  • Can I refrigerate or freeze cooked roast beef? Yes, you can refrigerate for up to 3 days or freeze for up to 3 months.

Nutritional Tips and Dietary Adaptations

This dish can be adapted for various dietary needs:

  • Gluten-Free: This recipe is naturally gluten-free—just ensure your seasoning blends are free of gluten.
  • Low-Carb: Roast beef is a great choice for low-carb diets, especially when paired with non-starchy vegetables.
  • Healthy Fats: Olive oil adds healthy fats, but you can substitute with avocado oil for a different flavor profile.

Equipment Recommendations

To achieve the best results, here’s a list of tools you’ll need:

  • Meat Thermometer: Essential for checking doneness accurately.
  • Wire Rack: Helps with even cooking and air circulation.
  • Roasting Pan: A sturdy pan that can hold the roast and any drippings.
  • Sharp Chef’s Knife: Ensures clean slices for serving.

Serving Suggestions

Let’s bring it all together! Consider these delightful serving ideas:

  • Classic Gravy: Use the drippings to create a rich gravy to drizzle over the slices.
  • Herb Butter: Top the roast with a dollop of herb-infused butter for extra richness.
  • Accompanying Sides: Pair with roasted potatoes, sautéed green beans, or a fresh garden salad.

Conclusion: A Roast That Tells a Story

And there you have it, my dears! The Perfect Medium-Rare Roast Beef, a dish that combines simplicity with sophistication, flavor with technique. As you gather around the table, sharing stories and laughter, remember that food is not just about nourishment; it’s about connection and tradition. So, go ahead, embrace your culinary adventure, and watch as this roast becomes a beloved centerpiece in your home for years to come. Happy cooking!

Perfect Medium-Rare Roast Beef

Prep Time 1 day
Cook Time 1 hour
Total Time 1 day 1 hour
Servings 8 servings
Calories 600
This recipe guides you through creating a perfectly cooked medium-rare roast beef with a flavorful crust and tender interior.

Ingredients

Meat

  • 3-4 pounds boneless beef roast (Ribeye, Top Sirloin, or Tri-Tip)
  • 2 tablespoons coarse kosher salt
  • 1 tablespoon olive oil
  • 1 teaspoon black pepper
  • 1 tablespoon fresh rosemary, chopped
  • 1 tablespoon fresh thyme leaves

Instructions 

  • Rub the roast with salt and refrigerate uncovered for 24-48 hours.
  • One hour before cooking, dry the roast, then rub with oil, pepper, rosemary, and thyme. Preheat oven to 450°F (230°C).
  • Roast at high heat for 15 minutes, then reduce temperature to 300°F (150°C) and roast until internal temp reaches 125°F (52°C).
  • Remove from oven, tent with foil, and rest for 20 minutes before slicing.

Notes

Ensure the roast rests before slicing for maximum juiciness.
Calories: 600kcal
Cost: $20
Course: Main Course
Cuisine: American
Keyword: beef

Unleash Your Inner Chef with BBQ Ranch Chicken Quinoa Bowls

Have you ever dreamt of a dish that brings together the smoky flavors of summer BBQ and the wholesome goodness of quinoa? Well, dream no more! Introducing BBQ Ranch Chicken Quinoa Bowls—a vibrant fusion that’s not just a meal, but a culinary adventure that transports you straight to a sunny picnic or a festive gathering. These bowls are packed with marinated chicken, fresh veggies, and zesty sauces, making them a delightful choice for any season. Let’s dive into the world of flavors!

Why You’ll Love This Recipe

  • Flavor Explosion: The combination of tangy BBQ sauce and creamy ranch dressing creates a symphony of flavors that tantalize your taste buds.
  • Simple & Quick: Perfect for busy weeknights, this recipe is not only easy to prepare but also takes less than 30 minutes from start to finish.
  • Healthy & Wholesome: Packed with protein from chicken and nutrients from fresh veggies, these bowls are a guilt-free indulgence.
  • Meal Prep Friendly: Prepare the chicken and quinoa ahead of time, making it easy to assemble delicious meals throughout the week.
  • Customizable: With a variety of toppings and substitutions, you can tailor these bowls to suit your taste and dietary needs.

Ingredients Breakdown

To create these flavorful BBQ Ranch Chicken Quinoa Bowls, you’ll need the following ingredients:

  • 1½ pounds (680g) boneless, skinless chicken breasts: Opt for thighs if you prefer a juicier cut.
  • 2 tablespoons olive oil, divided: This adds flavor and helps with cooking.
  • 1 tablespoon paprika: For that smoky flavor which complements the BBQ sauce.
  • 1 teaspoon garlic powder: Adds depth and aroma.
  • 1 teaspoon onion powder: Enhances the savory notes.
  • ½ teaspoon salt: Essential for seasoning.
  • ¼ teaspoon black pepper: For a slight kick.
  • ¾ cup (145g) uncooked quinoa, rinsed: A fantastic source of protein and fiber.
  • 1½ cups (355ml) chicken broth: For cooking the quinoa to fluffy perfection.
  • ½ cup (120ml) BBQ sauce: Use your favorite store-bought or homemade sauce.
  • ½ cup (120ml) ranch dressing: Creamy and tangy, it balances the BBQ flavor.
  • 1 cup (150g) cherry tomatoes, halved: Adds freshness and color.
  • 1 medium avocado, diced: Creamy texture that pairs beautifully.
  • ½ cup (75g) corn kernels: Adds sweetness and crunch.
  • ¼ cup (40g) red onion, finely diced: For a hint of sharpness.
  • 2 tablespoons fresh cilantro, chopped: For garnish and flavor.
  • 1 lime, cut into wedges: A splash of lime juice elevates the flavors.

Step-by-Step Instructions

Detailed look at a quinoa bowl topped with cherry tomatoes and ranch dressing.

Let’s get cooking! Follow these easy steps to prepare your BBQ Ranch Chicken Quinoa Bowls:

  1. Season the Chicken: In a small bowl, combine paprika, garlic powder, onion powder, salt, and pepper. Drizzle chicken breasts with 1 tablespoon olive oil, then rub with the spice mixture. Let sit for 15-20 minutes to absorb the flavors.
  2. Prepare the Quinoa: Rinse quinoa thoroughly under cold water. In a medium saucepan, heat 1 tablespoon olive oil over medium heat. Add quinoa and toast for 1-2 minutes until fragrant.
  3. Cook the Quinoa: Add chicken broth to quinoa, bring to a boil, then reduce heat to low. Cover and simmer for 15-18 minutes until liquid is absorbed. Remove from heat, keep covered for 5 minutes, then fluff with a fork.
  4. Grill the Chicken: Preheat grill or grill pan to medium-high heat. Grill chicken for 5-7 minutes per side. During the last 2 minutes, brush with half the BBQ sauce.
  5. Rest and Slice: Remove chicken when internal temperature reaches 165°F (74°C). Let rest for 5 minutes before slicing against the grain.
  6. Assemble the Bowls: Divide quinoa among four bowls. Top with sliced chicken, cherry tomatoes, avocado, corn, and red onion.
  7. Finish with Sauce: Drizzle with remaining BBQ sauce and ranch dressing. Garnish with cilantro and serve with lime wedges.

Pro Tips for Perfect BBQ Ranch Chicken Quinoa Bowls

  • Marination Time: Let the chicken marinate longer if possible—up to 2 hours—for deeper flavor.
  • Quinoa Cooking: Ensure to rinse quinoa thoroughly to remove bitterness; it’s a game-changer!
  • Grilling Tips: Preheat your grill well to get beautiful grill marks and lock in moisture.
  • Temperature Check: Use a meat thermometer to ensure chicken is cooked through without drying out.
  • Vegetable Variety: Feel free to add or swap any veggies you love, like bell peppers or cucumbers.
  • Cheese Lovers: Add crumbled feta or shredded cheese on top for an extra layer of flavor.
  • Leftover Utilization: Use leftover chicken in salads or sandwiches to minimize waste.
  • Meal Prep: Store components separately to keep quinoa fluffy and veggies crisp.

Common Mistakes & Troubleshooting

  • Overcooking Quinoa: Keep an eye on the cooking time; overcooked quinoa can become mushy.
  • Dry Chicken: Ensure you don’t overcook the chicken; using a meat thermometer can help!
  • Unbalanced Flavors: Adjust BBQ sauce and ranch dressing to your taste for balanced flavors.

Variations to Try

Get creative with these variations of BBQ Ranch Chicken Quinoa Bowls:

  • Spicy BBQ Chicken: Add cayenne pepper to the spice mix for a kick!
  • Vegetarian Option: Replace chicken with grilled portobello mushrooms or chickpeas.
  • Southwestern Twist: Incorporate black beans and corn with a chipotle ranch dressing.
  • Asian Flair: Use teriyaki sauce instead of BBQ and add sesame seeds and green onions.

Storage & Make-Ahead Instructions

These bowls are perfect for meal prep! Here’s how to store:

  • Store cooked quinoa and chicken in airtight containers in the fridge for up to 4 days.
  • Keep veggies fresh by adding them just before serving.
  • Reheat quinoa and chicken gently in the microwave, ensuring they don’t dry out.

Frequently Asked Questions

  • Can I use other grains instead of quinoa? Yes! Brown rice or farro work great as alternatives.
  • Is this recipe gluten-free? Yes, as long as your BBQ sauce and ranch dressing are gluten-free.
  • Can I make this vegan? Absolutely! Use tofu or tempeh instead of chicken and a vegan ranch dressing.
  • How do I reheat leftovers? Microwave them in short bursts, stirring occasionally to ensure even heating.
  • What if I don’t have BBQ sauce? You can make a quick homemade sauce using ketchup, vinegar, and spices.
  • Can I freeze these bowls? Yes, but it’s best to freeze components separately for optimal texture upon thawing.
  • How can I make this dish spicier? Add sliced jalapeños or a drizzle of hot sauce on top before serving.
  • What are the best toppings? Try avocado, shredded cheese, or crispy tortilla strips for added texture!

Nutritional Insights & Dietary Adaptations

This dish not only satisfies your taste buds but also nourishes your body. Here are some insights:

  • Protein Power: Each serving provides a healthy dose of protein from chicken and quinoa, essential for muscle repair and energy.
  • Fiber-Rich: With quinoa and fresh veggies, this dish is high in fiber, promoting digestive health.
  • Customizable Calories: Adjust the amount of BBQ sauce to manage calorie intake without losing flavor.
  • Low-Carb Option: Substitute quinoa with cauliflower rice for a low-carb version.

Essential Equipment

Here’s what you’ll need to whip up these delicious bowls:

  • Grill or Grill Pan: For that perfect grilled chicken.
  • Medium Saucepan: To cook your quinoa to fluffy perfection.
  • Meat Thermometer: To ensure your chicken is cooked safely.
  • Bowls for Serving: Choose vibrant, fun bowls to showcase your creation!

Serving Suggestions

These BBQ Ranch Chicken Quinoa Bowls are perfect as a main dish, but you can elevate your meal with these ideas:

  • Serve with a side of crispy baked tortilla chips for crunch.
  • Pair with a refreshing cucumber salad to balance the richness of the ranch dressing.
  • Top with pickled jalapeños for an extra kick!

In conclusion, BBQ Ranch Chicken Quinoa Bowls are more than just a meal; they are a celebration of flavors, textures, and the joy of cooking. Whether you’re serving them for a cozy family dinner or a vibrant get-together with friends, this dish promises satisfaction and smiles all around. So grab your apron, unleash your inner chef, and let the flavors of this delightful dish transport you to BBQ paradise—any day of the year!

BBQ Ranch Chicken Quinoa Bowls

Prep Time 15 minutes
Cook Time 30 minutes
Total Time 45 minutes
Servings 4 bowls
Calories 650
Enjoy a flavorful and healthy bowl combining grilled chicken, quinoa, fresh vegetables, and tangy sauces for a satisfying meal.

Ingredients

Protein

  • 1.5 pounds boneless, skinless chicken breasts
  • 2 tablespoons olive oil, divided
  • 1 tablespoon paprika
  • 1 teaspoon garlic powder
  • 1 teaspoon onion powder
  • 0.5 teaspoon salt
  • 0.25 teaspoon black pepper

Grains

  • ¾ cup uncooked quinoa, rinsed
  • 1.5 cups chicken broth

Vegetables & Sauces

  • 0.5 cup BBQ sauce (store-bought or homemade)
  • 0.5 cup ranch dressing
  • 1 cup cherry tomatoes, halved
  • 1 medium avocado, diced
  • 0.5 cup corn kernels (fresh, frozen or canned)
  • 0.25 cup red onion, finely diced
  • 2 tablespoons fresh cilantro, chopped
  • 1 lime cut into wedges

Instructions 

  • Mix spices, rub on chicken, and let sit 15-20 minutes.
  • Toast quinoa in a saucepan, then cook with chicken broth for 15-18 minutes.
  • Grill chicken until cooked through, brushing with BBQ sauce in last 2 minutes. Rest and slice.
  • Divide quinoa into bowls, top with chicken, tomatoes, avocado, corn, and onion.
  • Drizzle with remaining BBQ sauce and ranch, garnish with cilantro, serve with lime wedges.

Notes

For extra flavor, marinate chicken longer or add your favorite toppings.
Calories: 650kcal
Cost: $15
Course: Main Course
Cuisine: American
Keyword: BBQ, Chicken, Quinoa

Unlock the Secrets to a Perfect Spatchcocked Grilled Chicken

Welcome to a culinary adventure that promises to elevate your grilling game! If you’re ready to explore the world of flavor, you’ve come to the right place. Today, we’ll dive into the art of preparing a spatchcocked grilled chicken—an impressive yet surprisingly simple technique that transforms a whole chicken into a beautifully cooked dish. By flattening the bird, you can achieve a crispy skin and juicy meat, all while infusing it with a zesty marinade. Join me as I take you through every step, share expert tips, and unveil the magic behind this delightful recipe!

Why You’ll Love This Recipe

  • Flavor Explosion: The marinade, featuring zesty lime and savory Dijon, infuses the chicken with vibrant flavors that will tantalize your taste buds.
  • Quick Cooking Time: Spatchcocking allows for even cooking, reducing the total grilling time—perfect for busy weeknights or last-minute gatherings.
  • Juicy Perfection: The technique ensures that the chicken retains moisture while achieving that coveted crispy skin.
  • Versatile Serving Options: This dish pairs wonderfully with a variety of sides, making it perfect for any occasion, from casual cookouts to elegant dinners.
  • Easy for Everyone: Even if you’re new to grilling, spatchcocking is straightforward and guarantees a show-stopping result!

Ingredient Breakdown

Let’s explore the ingredients that make this spatchcocked grilled chicken so special. Having a thorough understanding of what goes into your dish not only enhances your culinary skills but also allows you to make substitutions to cater to your taste.

  • Whole Chicken: A 3-4 pound whole chicken is ideal for grilling. Feel free to choose organic or free-range for a richer flavor.
  • Limes: Use both the zest and juice of 2 limes for a bright, citrusy punch. You can substitute with lemons if limes aren’t available.
  • Dijon Mustard: Adds depth and tang. If you don’t have Dijon, yellow mustard works in a pinch, though the flavor will differ slightly.
  • Garlic: Fresh garlic is best; however, minced garlic from a jar can be a time-saver.
  • Honey: This balances the acidity of the lime. Maple syrup can be a great vegan alternative.
  • Soy Sauce: Provides umami flavor. For a gluten-free option, use tamari or coconut aminos.
  • Red Pepper Flakes: For a hint of heat. Adjust to your preference or omit if you prefer a milder taste.
  • Olive Oil: Helps the marinade cling to the chicken and adds richness. Avocado oil is a good substitute.
  • Parsley: Optional for garnish, but it adds a lovely fresh touch to the final dish.

Pro Tips for Grilling Success

Deliciously charred spatchcocked chicken with visible spices and a side of lime slices.

To ensure your spatchcocked chicken turns out perfectly every time, keep these expert tips in mind:

  • Marinate for Flavor: Allow the chicken to marinate for at least 3 hours, but overnight is even better for deeper flavor.
  • Preheat Your Grill: Make sure your grill is hot before adding the chicken to achieve that beautiful sear.
  • Use a Meat Thermometer: Ensure the chicken reaches an internal temperature of 165°F for safe consumption.
  • Let it Rest: After grilling, let the chicken rest for at least 10 minutes before carving to maintain juiciness.
  • Experiment with Spices: Feel free to add your favorite herbs and spices to the marinade for a unique twist.
  • Use Indirect Heat: This technique helps cook the chicken evenly without burning the skin.
  • Flip Carefully: Use tongs to flip the chicken to prevent tearing the skin.
  • Utilize the Backbone: Don’t throw away the backbone! Save it for making a rich chicken stock.

Common Mistakes and Troubleshooting

Even the best chefs encounter hurdles. Here are some common mistakes to avoid:

  • Skipping the Marinade: Don’t rush past marinating! It’s crucial for flavor development.
  • Not Preparing the Grill Properly: Ensure even heat distribution or your chicken may cook unevenly.
  • Overcooking: Monitor the temperature closely. Overcooked chicken can result in dryness.
  • Ignoring Rest Time: Cutting into the chicken too soon can release juices and lead to a dry dish.

Variations to Try

Add your own twist with these creative variations:

  • Herb-Infused Marinade: Add fresh herbs like rosemary or thyme to the marinade for an aromatic flavor.
  • Spicy Chipotle Marinade: Incorporate chipotle peppers for a smoky kick.
  • Citrus-Herb Butter: Spread a mixture of butter, herbs, and citrus zest under the skin for added richness.
  • Asian-Inspired Glaze: Use sesame oil, ginger, and scallions for a delicious Asian twist on the marinade.

Storage and Make-Ahead Instructions

Planning ahead? Here’s how to store your spatchcocked chicken:

  • Refrigeration: Store cooked chicken in an airtight container in the fridge for up to 4 days.
  • Freezing: Wrap grilled chicken tightly in plastic wrap and foil, then freeze for up to 2 months.
  • Make-Ahead Marinade: Prepare the marinade a day in advance and refrigerate; just add it to the chicken before grilling.

Frequently Asked Questions

Here are some common questions about spatchcocked grilled chicken:

  • What is spatchcocking? Spatchcocking involves removing the backbone of the chicken so it can lie flat for even cooking.
  • Can I use a frozen chicken? It’s best to use a thawed chicken for spatchcocking to ensure even cooking.
  • How do I know when the chicken is done? The internal temperature should reach 165°F in the thickest part of the breast.
  • Can I cook this chicken in the oven? Yes, you can roast the spatchcocked chicken in the oven at 425°F for similar results.
  • What sides pair well with grilled chicken? Consider serving with grilled vegetables, a fresh salad, or roasted potatoes.
  • Can I make this recipe ahead of time? Yes, you can marinate the chicken the night before for enhanced flavor.
  • What are some common marinades I can try? Feel free to experiment with different flavors, such as teriyaki, lemon garlic, or barbecue!
  • Is there a vegetarian option? For a vegetarian twist, try marinating and grilling whole bell peppers or eggplants!

Nutrition Tips and Dietary Adaptations

This spatchcocked grilled chicken can easily fit into various dietary lifestyles:

  • Low-Carb: This recipe is low in carbs, making it suitable for keto and paleo diets.
  • Gluten-Free: Simply use gluten-free soy sauce or tamari in the marinade.
  • High-Protein: It’s a great source of protein, perfect for those looking to increase their intake.
  • Dairy-Free: All ingredients in this recipe are dairy-free, making it suitable for lactose-intolerant individuals.

Equipment Recommendations

Here are some essential tools to make your spatchcocked grilled chicken a success:

  • Poultry Shears: A must-have for easily cutting through the chicken’s backbone.
  • Meat Thermometer: Ensures you cook the chicken to the perfect temperature for safety and flavor.
  • Grill: Whether gas or charcoal, make sure your grill is well-maintained for optimal cooking.
  • Mixing Bowl: For combining your marinade ingredients.

Serving Suggestions

Now that your spatchcocked grilled chicken is ready, consider these delightful serving options:

  • Garnish with Fresh Herbs: A sprinkle of parsley or cilantro adds a fresh touch.
  • Serve with Grilled Vegetables: Zucchini, bell peppers, and corn complement the chicken beautifully.
  • Pair with a Light Salad: A crisp green salad balances the richness of the grilled chicken.
  • Offer Dipping Sauces: A zesty chimichurri or garlic yogurt sauce can elevate the meal even further.

In conclusion, learning how to spatchcock a grilled chicken is not just about the technique—it’s about bringing people together over a meal filled with flavor and joy. I hope this guide inspires you to fire up the grill, enjoy the cooking process, and share your creation with loved ones. Remember, every dish you prepare carries the story of your culinary journey. Happy grilling!

Spatchcocked Grilled Chicken Recipe with How-to Video

Prep Time 20 minutes
Cook Time 45 minutes
Total Time 1 hour 5 minutes
Servings 4 servings
Calories 350
This flavorful grilled chicken is spatchcocked for even cooking and infused with a zesty marinade, perfect for a summer cookout.

Ingredients

Main

  • 1 whole chicken (whole chicken)
  • 2 limes limes (zest & juice)
  • 2 tbsp Dijon mustard
  • 2 cloves garlic (roughly chopped)
  • 1 tbsp honey
  • 1/4 cup soy sauce
  • 1 tsp red pepper flakes
  • 1/4 cup olive oil
  • 2 tbsp parsley, chopped (optional garnish)

Instructions 

  • Spatchcock the chicken by cutting along the backbone with poultry shears and flattening it.
  • Mix all marinade ingredients, coat the chicken, and refrigerate for 3-12 hours.
  • Preheat the grill to high heat, then remove chicken from marinade and season with salt and pepper.
  • Grill the chicken on indirect heat for 35 minutes, then flip and cook on direct heat for 5-7 minutes until internal temperature reaches 150°F.
  • Rest the chicken for 10 minutes, then carve, garnish with herbs, and serve.

Notes

Ensure the chicken reaches an internal temperature of 150°F for safe and juicy results.
Calories: 350kcal
Cost: $15
Course: Main Course
Cuisine: American
Keyword: Chicken, Grilled