Author

Jack

Browsing

Experience the Warmth of Autumn with Cinnamon Apple Cake

Welcome to a delightful journey of flavors! This easy cinnamon apple cake is not just a dessert; it’s a celebration of the cozy, comforting tastes that autumn brings to your table. Picture yourself sharing a slice with loved ones, the sweet aroma of cinnamon and baked apples wafting through the air, making it impossible to resist. Whether you’re looking to impress guests or simply indulge in a slice of happiness, this cake is your ticket to culinary bliss. Let’s dive into the details that make this cake a must-bake!

Why You’ll Love This Cinnamon Apple Cake

This cake isn’t just another recipe; it’s a masterpiece that combines simplicity with delightful flavors. Here’s why this cake will become your go-to recipe:

  • Seasonal Flavors: It brings the essence of autumn right to your table with fresh apples and warm spices.
  • Easy to Make: With straightforward steps, this recipe is perfect for both novice and experienced bakers.
  • Versatile Delight: Whether served as a dessert, breakfast, or snack, this cake fits perfectly into any occasion.
  • Customizable: Feel free to add your favorite nuts or swap out ingredients to suit your taste.
  • Perfect Pairing: This cake pairs beautifully with a scoop of vanilla ice cream or a drizzle of caramel sauce, elevating it to a new level of deliciousness.

Essential Ingredients for the Perfect Cinnamon Apple Cake

Ingredient Breakdown

Let’s take a closer look at the ingredients that make this cake special:


Silicone Baking Cups Set

★ Recommended Kitchen Tool

Silicone Baking Cups Set

Make this recipe even easier with a quality Silicone Baking Cups Set — a must-have kitchen staple!


🛒 View on Amazon →

As an Amazon Associate, we earn from qualifying purchases.
  • Apples: Use sweet varieties like Honeycrisp or Gala for the best flavor. You’ll need about 1 ¼ cups of chopped apples, which is roughly two medium-sized apples.
  • Butter: ¼ cup of softened butter is crucial for that rich texture.
  • Sugars: A combination of ¼ cup granulated sugar and ¼ cup dark brown sugar adds depth and moisture to the cake.
  • Eggs: Two large eggs help bind the ingredients together and provide structure.
  • Baking Soda: One teaspoon for leavening, giving the cake its delightful rise.
  • Cinnamon: A teaspoon of ground cinnamon is essential for that warm, spicy flavor.
  • Salt: A pinch (¼ teaspoon) enhances all the flavors.
  • Vanilla Extract: A touch of ¼ teaspoon adds a lovely aroma and flavor.
  • All-Purpose Flour: 1 ¼ cups to provide the cake’s structure.
  • Walnuts: Optional, but ½ cup of chopped walnuts adds a delightful crunch.

Ingredient Substitutions

If you have dietary restrictions or preferences, here are some easy substitutions:

  • Gluten-Free: Use a 1:1 gluten-free flour blend instead of all-purpose flour.
  • Nut-Free: Omit the walnuts or replace them with sunflower seeds for crunch.
  • Vegan Option: Substitute eggs with flaxseed meal (1 tablespoon flaxseed meal + 2.5 tablespoons water = 1 egg).
  • Lower Sugar: Reduce sugars by using unsweetened applesauce in place of some of the granulated sugar.

Step-by-Step Instructions for Baking Your Cinnamon Apple Cake
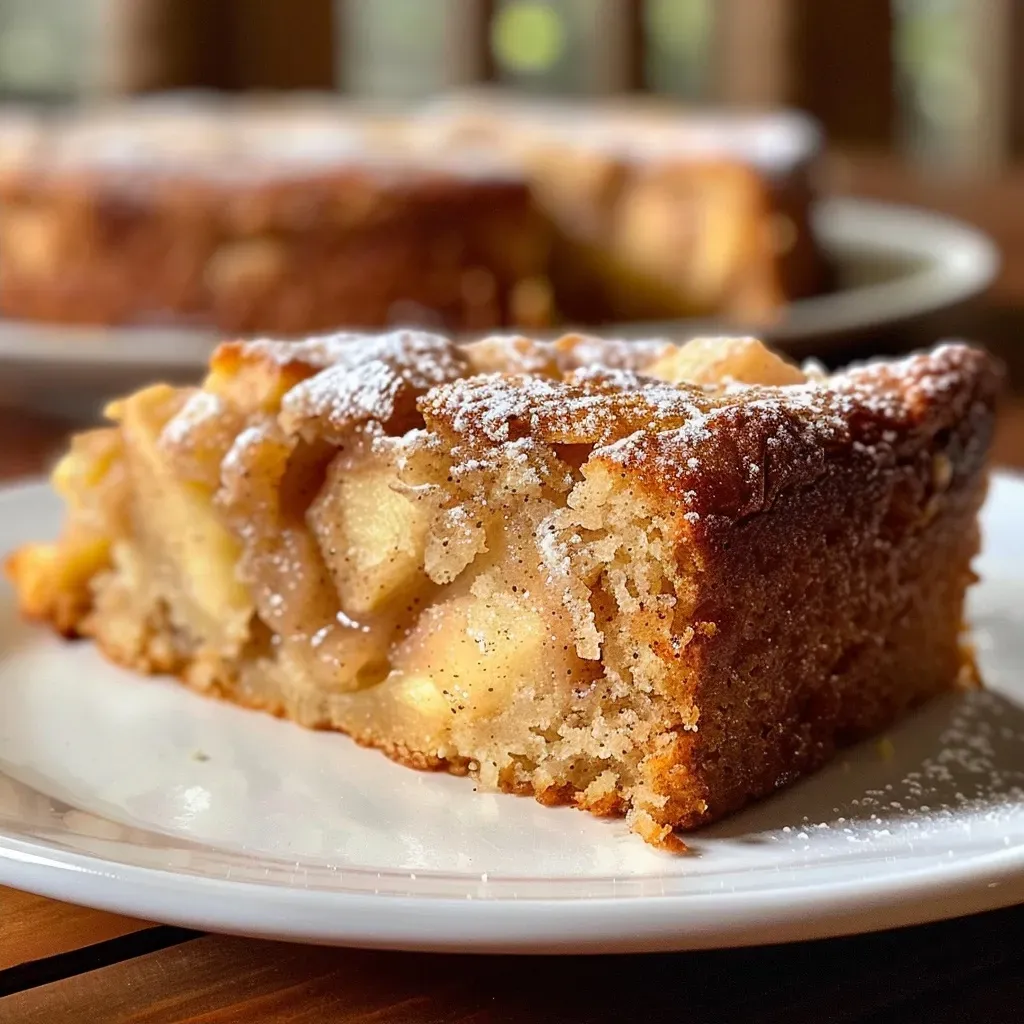
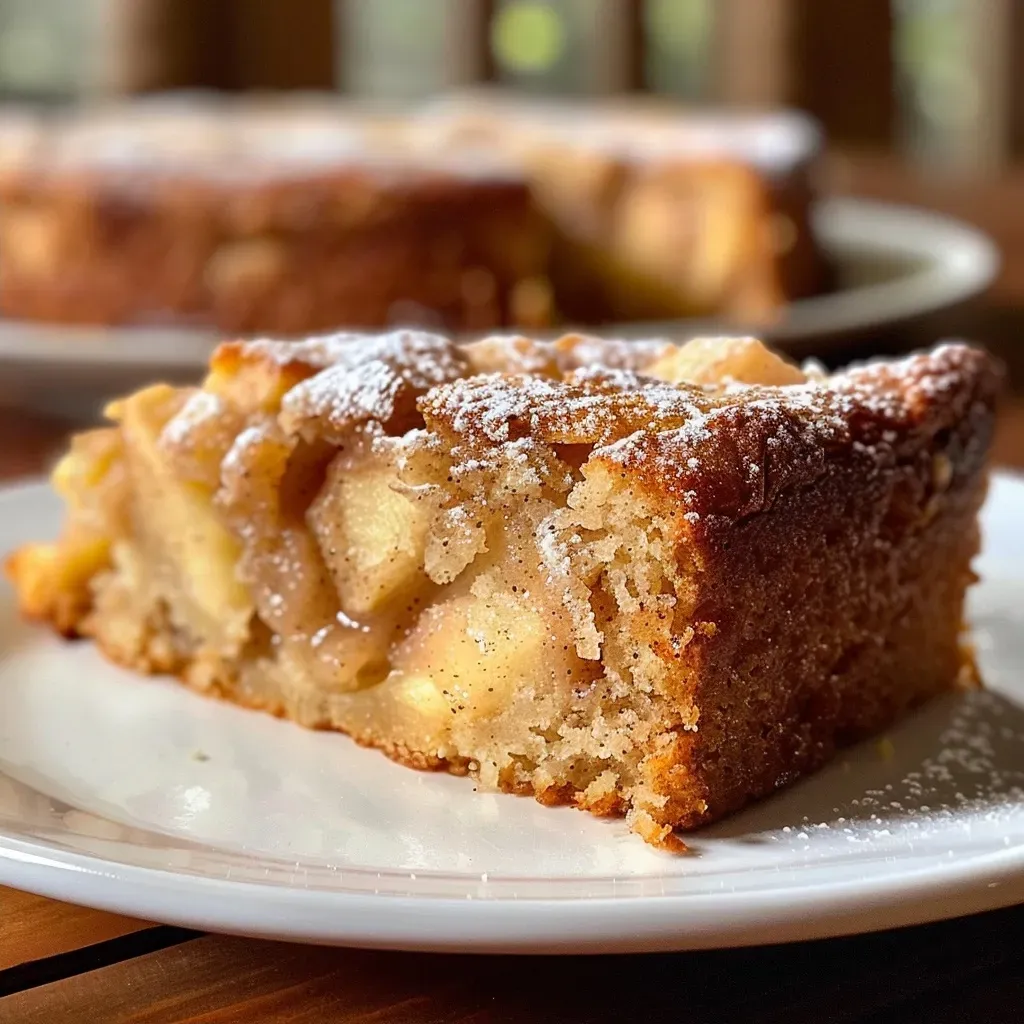
Close-up of a slice of moist Cinnamon Apple Cake with visible apple chunks and walnuts.

Now that you have your ingredients ready, let’s get baking!

Instructions

  1. Preheat the Oven: Start by preheating your oven to 350°F (175°C). Grease a 9-inch round baking pan with non-stick spray or butter for easy release.
  2. Create the Batter: In a large bowl, beat together ¼ cup softened butter, ¼ cup granulated sugar, and ¼ cup dark brown sugar until light and fluffy (about 2-3 minutes). Add in two eggs one at a time, mixing well after each addition, followed by ¼ teaspoon of vanilla extract.
  3. Combine Dry Ingredients: In another bowl, whisk together 1 ¼ cups all-purpose flour, 1 teaspoon baking soda, 1 teaspoon ground cinnamon, and ¼ teaspoon salt. Gradually mix these dry ingredients into the wet mixture until just combined.
  4. Fold in Apples and Nuts: Carefully fold in the chopped apples and walnuts until evenly distributed without overmixing.
  5. Bake the Cake: Pour the batter into the prepared pan, smoothing the top as needed. Bake for 40-45 minutes, or until a toothpick inserted in the center comes out clean.
  6. Cool and Serve: Let the cake cool in the pan for about 10-15 minutes before transferring it to a wire rack to cool completely. Slice and enjoy!

Expert Tips for Perfect Results

Want to elevate your baking skills? Here are some pro tips to ensure your cake turns out perfectly every time:

  • Use Fresh Apples: The fresher the apples, the better the flavor. Look for firm varieties that are in season.
  • Room Temperature Ingredients: Ensure your butter and eggs are at room temperature for a smoother batter.
  • Avoid Overmixing: Mix just until combined to keep the cake tender and light.
  • Check for Doneness: Oven temperatures can vary, so check your cake a few minutes early.
  • Let it Cool: Allow the cake to cool completely before slicing to maintain its shape.
  • Experiment with Spices: Feel free to add nutmeg or allspice for a unique twist.
  • Make it Ahead: This cake stays fresh for days, making it perfect for meal prep.
  • Don’t Skip the Toppings: A sprinkle of powdered sugar or a scoop of ice cream can take your cake to the next level.

Common Mistakes and Troubleshooting

Even the best bakers can run into hiccups. Here are some common mistakes to avoid:

  • Dry Cake: Overbaking can lead to a dry cake. Always check for doneness with a toothpick.
  • Dense Texture: Overmixing can make the cake heavy. Mix only until ingredients are combined.
  • Uneven Baking: Ensure your oven is properly calibrated, and rotate the cake halfway through baking.
  • Apple Soggy: Using overly ripe apples can result in a soggy cake. Choose firm apples.

Delicious Variations to Try

Looking to mix things up? Here are some fun variations to try with your cinnamon apple cake:

  • Caramel Apple Cake: Drizzle caramel sauce over the top before serving for a sweet twist.
  • Spiced Apple Cake: Add additional spices like nutmeg and ginger for a more complex flavor profile.
  • Chocolate Chip Cinnamon Apple Cake: Fold in chocolate chips along with the apples for a decadent treat.
  • Apple and Pear Cake: Substitute half the apples with chopped pears for a delightful flavor combination.

Storage and Make-Ahead Instructions

This easy cinnamon apple cake can be made ahead and stored for later enjoyment:

  • Room Temperature: Store the cake in an airtight container for up to 3 days.
  • Refrigerator: For longer freshness, refrigerate for up to a week.
  • Freezing: Wrap the cooled cake tightly in plastic wrap and then aluminum foil for up to 3 months. Thaw in the refrigerator overnight before serving.

Frequently Asked Questions

Got questions? Here are some common inquiries about this delightful cake:

  • Can I use frozen apples? Yes, but make sure they are thawed and drained of excess moisture.
  • What type of apples work best? Sweet varieties like Honeycrisp, Gala, or Granny Smith are ideal.
  • Can I reduce the sugar? Yes, you can cut down on sugar or use a sugar substitute if desired.
  • Can I make this cake gluten-free? Absolutely! Just use a gluten-free flour blend.
  • How can I make it vegan? Substitute eggs with flaxseed meal and use plant-based butter.
  • What can I serve with this cake? It pairs wonderfully with vanilla ice cream, whipped cream, or a drizzle of caramel sauce.
  • How do I store leftovers? Keep in an airtight container at room temperature or refrigerate for longer freshness.
  • Can I add other fruits? Yes! Feel free to mix in other fruits like pears or cranberries for variety.

Nutritional Tips and Dietary Adaptations

For those mindful of their dietary choices, here are some tips to adapt the recipe:

  • Lower Calorie: Substitute some sugar with applesauce or a sugar substitute.
  • High Fiber: Include whole wheat flour for added fiber and nutrients.
  • Nut-Free: Exclude walnuts if there are nut allergies, or replace them with seeds.

Equipment Recommendations

To make your baking experience smooth, here’s what you’ll need:

  • Mixing Bowls: A set of large mixing bowls for combining ingredients.
  • Measuring Cups: Accurate measuring tools for precise ingredient amounts.
  • Whisk: A whisk for mixing dry ingredients and incorporating air into the batter.
  • Baking Pan: A 9-inch round cake pan, preferably non-stick.
  • Cooling Rack: Essential for letting your cake cool evenly.

Serving Suggestions

When it comes to serving your cinnamon apple cake, the possibilities are endless. Here are a few ideas to elevate your presentation:

  • With Ice Cream: A warm slice with a scoop of vanilla ice cream is heavenly.
  • With Whipped Cream: Top with freshly whipped cream and a sprinkle of cinnamon.
  • As Breakfast: Serve it warm with a drizzle of maple syrup for a delicious breakfast treat.
  • With Tea or Coffee: Pair slices with your favorite hot beverage for a cozy afternoon snack.

This cinnamon apple cake is more than just a dessert; it’s an experience to savor and share. Whether you’re enjoying a quiet evening at home or celebrating with friends, let this cake bring warmth and joy to your table. So gather your ingredients, unleash your inner baker, and embark on this delicious adventure. Happy baking!

Easy Cinnamon Apple Cake: Warm and Perfectly Spiced

Prep Time 15 minutes
Cook Time 45 minutes
Total Time 1 hour
Servings 8 slices
Calories 250
A deliciously moist apple cake infused with cinnamon and walnuts, perfect for cozy gatherings or a sweet treat.

Ingredients

Dried Fruits & Nuts

  • 1 ¼ cups chopped apples (peeled, approximately 2 medium apples)
  • ¼ cup softened butter
  • ¼ cup sugar
  • ¼ cup dark brown sugar
  • 2 large eggs
  • 1 teaspoon baking soda
  • 1 teaspoon ground cinnamon
  • ¼ teaspoon salt
  • ¼ teaspoon vanilla extract
  • 1 ¼ cups all-purpose flour
  • ½ cup chopped walnuts

Instructions 

  • Preheat oven to 350°F (175°C) and prepare a 9-inch pan.
  • Cream butter and sugars, add eggs and vanilla, then mix.
  • Whisk dry ingredients and combine with wet mixture.
  • Fold in apples and walnuts, then pour into pan.
  • Bake for 40-45 minutes, cool before serving.

Notes

For extra flavor, sprinkle with additional cinnamon before baking.
Calories: 250kcal
Cost: $15
Course: Dessert
Cuisine: American
Keyword: Apple, cake, Cinnamon

Discover the Warmth of Bourbon Maple Sweet Potatoes

Welcome to a culinary journey that takes you deep into the heart of comfort food! Bourbon maple sweet potatoes are not just a side dish; they are a celebration of flavors that warm the soul and bring people together. This recipe combines the sweet, earthy notes of sweet potatoes with the rich, smoky undertones of bourbon and the luscious sweetness of maple syrup. Perfect for holidays, family gatherings, or a comforting weeknight dinner, this dish is bound to become a staple on your table. Ready to dive into this delightful experience? Let’s explore why this recipe is a must-try!

Why You’ll Love This Recipe

Here are just a few reasons why bourbon maple sweet potatoes will capture your heart:

  • Incredible Flavor Fusion: The combination of sweet potatoes, bourbon, and maple syrup delivers a complex yet harmonious taste that excites the palate.
  • Simple Preparation: This recipe is straightforward, requiring minimal effort while maximizing flavor, making it perfect for both novice and experienced cooks.
  • Versatile Side Dish: Whether for Thanksgiving, Christmas, or a casual dinner, these sweet potatoes pair beautifully with a variety of main courses.
  • Make-Ahead Friendly: You can prepare this dish in advance, allowing flavors to meld and making your meal prep a breeze.
  • Healthier Comfort Food: Sweet potatoes are packed with vitamins and nutrients, making this dish both indulgent and nutritious.

Ingredient Breakdown

To create these bourbon maple sweet potatoes, you’ll need the following ingredients:


Cake Decorating Set

★ Recommended Kitchen Tool

Cake Decorating Set

Make this recipe even easier with a quality Cake Decorating Set — a must-have kitchen staple!


🛒 See Deals on Amazon →

As an Amazon Associate, we earn from qualifying purchases.
  • 3 pounds sweet potatoes: Choose firm, vibrant sweet potatoes for the best flavor. You can substitute with yams if desired.
  • 1/2 cup bourbon: Adds depth and complexity. Use a good-quality bourbon for the best results.
  • 1/2 cup maple syrup: Opt for pure maple syrup, which enhances the dish’s natural sweetness.
  • 1/4 cup brown sugar: This balances the sweetness and adds a rich, caramel flavor.
  • 1/4 cup butter (melted): Provides richness and helps to create a luscious glaze.
  • 1 1/2 teaspoons cinnamon: A warm spice that complements the sweetness of the potatoes.
  • 1 teaspoon nutmeg: Adds a subtle warmth and depth.
  • 1/4 teaspoon all spice (optional): For those who want an extra kick of flavor.
  • 1 teaspoon cornstarch: Helps thicken the glaze.
  • 1/2 cup chopped pecans (optional): Adds a delightful crunch and nutty flavor.

Feel free to experiment with substitutions! For a vegan option, replace the butter with coconut oil, and for a gluten-free version, ensure all ingredients are certified gluten-free.

Pro Tips for Perfect Bourbon Maple Sweet Potatoes

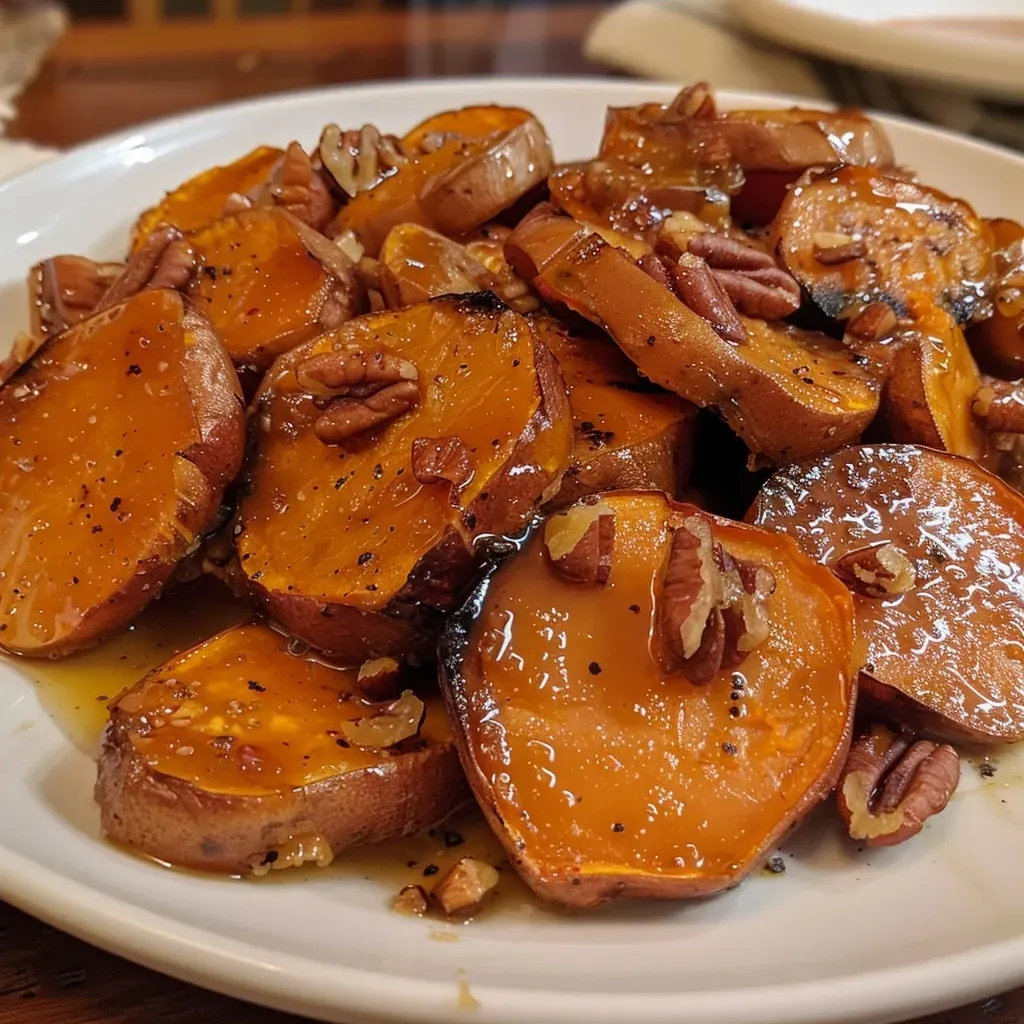
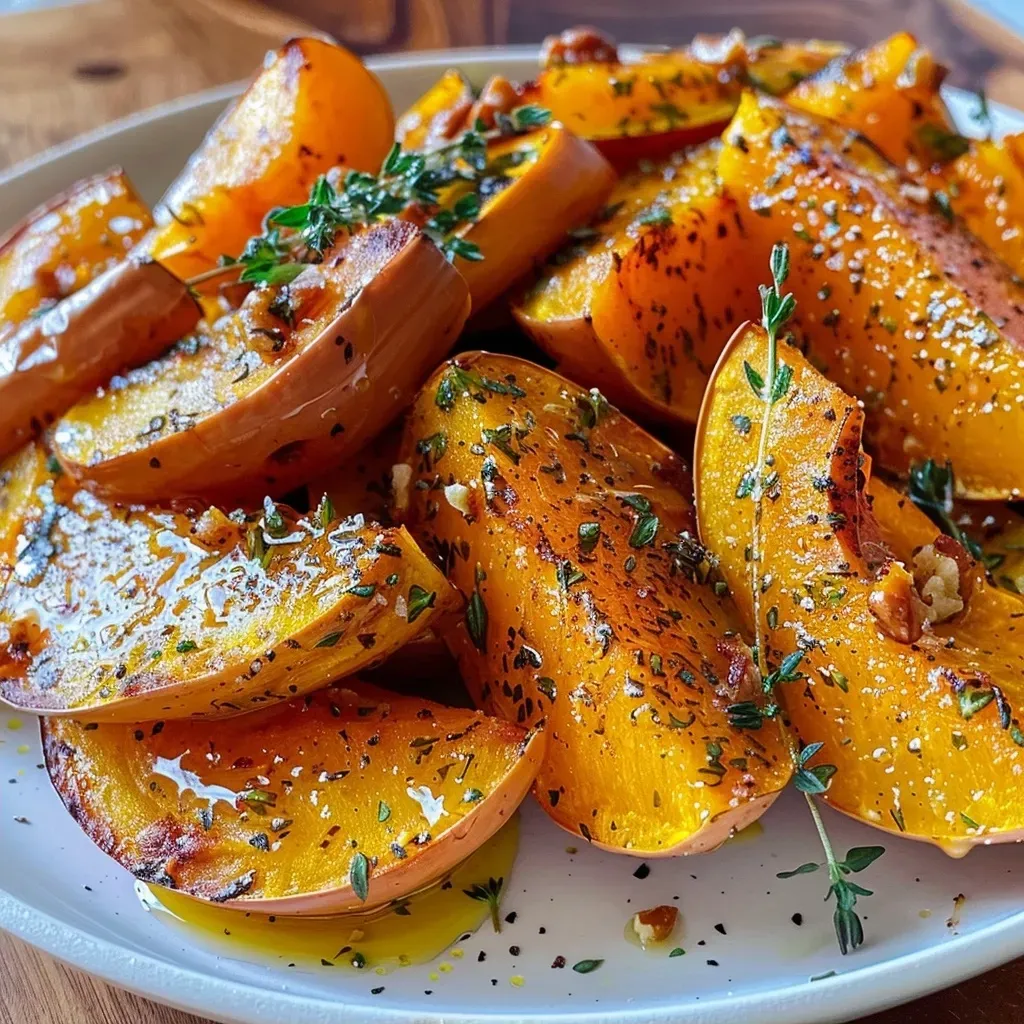
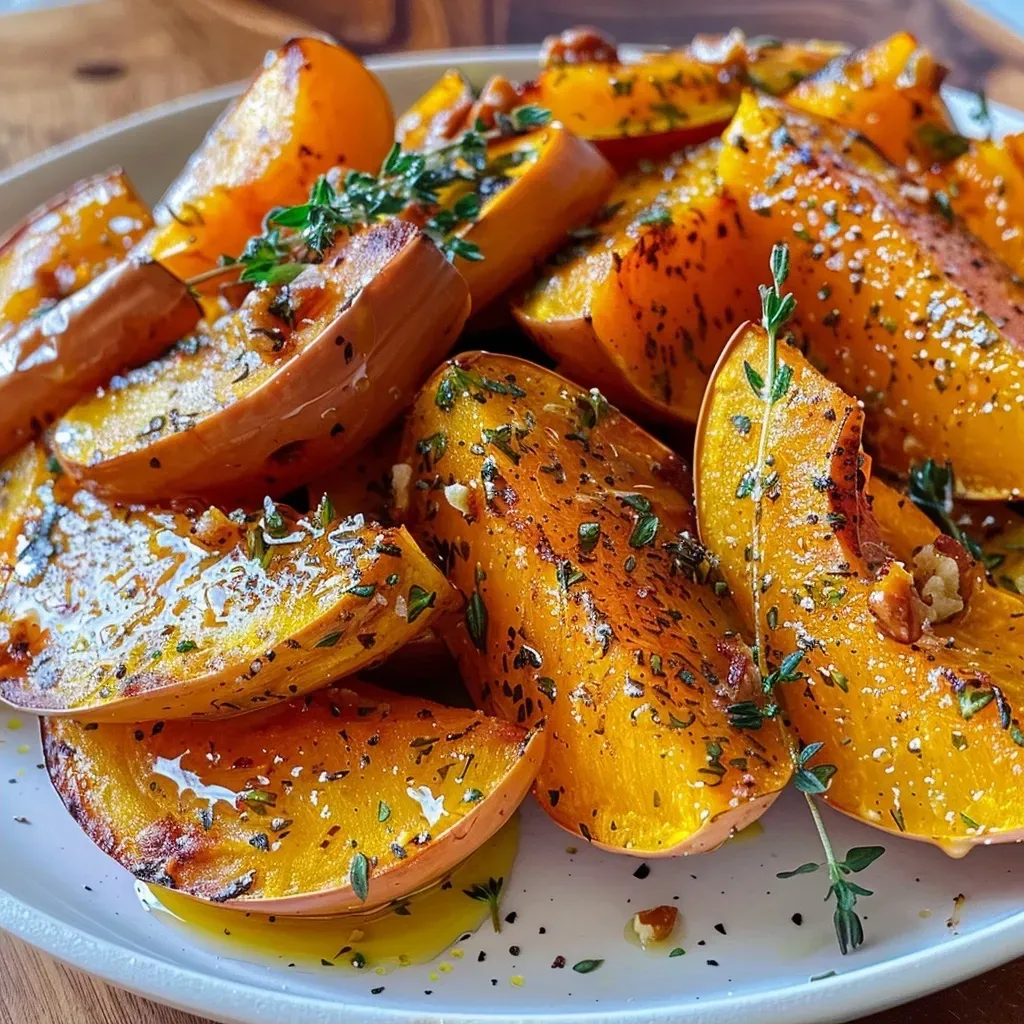
Close-up view of Bourbon Maple Sweet Potatoes with glaze and pecans.

Here are some expert insights to elevate your dish:

  • Uniform Slicing: Cut sweet potatoes into even 1/4-inch slices to ensure they cook evenly.
  • Soak for Flavor: Let the potato slices soak in the bourbon-maple mixture for at least 30 minutes before cooking for maximum flavor absorption.
  • Cover While Baking: Start by covering the baking dish to steam the potatoes, then uncover to caramelize the top.
  • Check for Doneness: The potatoes are done when they are fork-tender. Avoid overbaking, as they can become mushy.
  • Garnish Wisely: Adding fresh herbs like thyme or rosemary as a garnish can enhance presentation and add a fresh element.
  • Storage Solution: Store leftovers in an airtight container in the fridge for up to 3 days. Reheat in the oven for best results.
  • Pair with Protein: This dish goes wonderfully with roasted chicken, turkey, or even grilled pork.
  • Experiment with Spices: Feel free to play with spices like ginger or cardamom for a unique twist.

Common Mistakes and Troubleshooting

Here’s how to avoid some common pitfalls:

  • Overcooking: Keep an eye on the baking time to prevent mushy potatoes.
  • Too Much Liquid: Ensure the glaze isn’t too watery; if it is, add more cornstarch to thicken.
  • Insufficient Flavor: If the dish lacks flavor, consider adjusting the spices or adding a pinch of salt to enhance sweetness.

Delicious Variations

Want to switch things up? Try these variations:

  • Coconut Bourbon Maple Sweet Potatoes: Use coconut milk instead of butter for a tropical twist.
  • Pecan-Crusted Bourbon Sweet Potatoes: Add crushed pecans on top before the final bake for extra crunch.
  • Spicy Bourbon Sweet Potatoes: Incorporate cayenne pepper or chipotle for a kick of heat.
  • Maple Bourbon Sweet Potato Mash: Mash the cooked potatoes with the glaze for a creamy side dish.

Storage and Make-Ahead Instructions

This dish can be made ahead of time, making it perfect for busy days. Here’s how to manage your prep:

  • Prepare Ahead: Assemble the dish, cover tightly with foil, and refrigerate for up to 24 hours before baking.
  • Reheating: To reheat, cover the baking dish with foil and place in a preheated oven at 350°F until warmed through, about 25-30 minutes.

Frequently Asked Questions

Here are answers to common questions about bourbon maple sweet potatoes:

  • Can I use different types of potatoes? Yes! While sweet potatoes are traditional, yams or even regular potatoes could work in a pinch.
  • Is this recipe gluten-free? Yes, all the ingredients can be gluten-free; just ensure to check labels.
  • Can I make this vegan? Absolutely! Substitute the butter with coconut oil or vegan butter.
  • What can I serve with this dish? It pairs well with roasted meats, salads, or even as a standalone vegetarian option.
  • How long will leftovers last? Leftovers can be stored in the refrigerator for up to 3 days.
  • Can I freeze bourbon maple sweet potatoes? Yes, you can freeze them; however, the texture may change slightly upon reheating.
  • Is bourbon necessary for the recipe? While bourbon adds unique flavor, you can substitute with apple cider for a non-alcoholic version.
  • Can I add other toppings? Feel free to experiment with marshmallows, shredded coconut, or even bacon bits for different flavors.

Nutritional Tips and Dietary Adaptations

For those conscious about health, here are some tips:

  • Lower Sugar Option: Reduce the amount of brown sugar and maple syrup to cut down on sweetness.
  • Healthy Fats: Use heart-healthy oils, like olive oil or avocado oil, in place of butter for a healthier version.
  • Boost Nutrients: Add in chopped kale or spinach to the mix for additional vitamins and minerals.

Equipment Recommendations

To make this recipe, here’s what you’ll need:

  • Sharp Knife: For easy slicing of sweet potatoes.
  • Cutting Board: A sturdy surface for prepping ingredients.
  • Casserole Dish: A 10-inch oval or 9×9 baking dish works perfectly.
  • Mixing Bowl: For combining the bourbon-maple mixture.
  • Aluminum Foil: To cover the dish while baking.

Serving Suggestions

To elevate your serving experience, consider:

  • Garnishing with Fresh Herbs: A sprinkle of chopped parsley or thyme adds color and freshness.
  • Serving with a Side Salad: A light salad balances the richness of the sweet potatoes.
  • Offering as Part of a Buffet: This dish shines on a holiday table alongside other festive fare.

In conclusion, bourbon maple sweet potatoes are a delightful journey into flavor, bringing comfort and joy to any meal. So gather your ingredients, embrace the cooking adventure, and enjoy every savory bite. This recipe isn’t just about food; it’s about sharing experiences and creating memories around the table. Bon appétit!

Bourbon Maple Sweet Potatoes

Prep Time 15 minutes
Cook Time 50 minutes
Total Time 1 hour 5 minutes
Servings 6 servings
Calories 250
A deliciously sweet and savory side dish featuring tender sweet potatoes glazed with bourbon and maple syrup, topped with pecans for crunch.

Ingredients

Sweet Potatoes

  • 3 pounds sweet potatoes
  • 1/2 cup bourbon
  • 1/2 cup maple syrup
  • 1/4 cup brown sugar
  • 1/4 cup butter (melted)
  • 1 1/2 teaspoons cinnamon
  • 1 teaspoon nutmeg
  • 1/4 teaspoon all spice (optional)
  • 1 teaspoon cornstarch
  • 1/2 cup chopped pecans (optional)

Instructions 

  • Mix bourbon, maple syrup, brown sugar, melted butter, cinnamon, nutmeg, and all spice. Add cornstarch until sauce thickens. Set aside, reserving 1/4 cup.
  • Scrub and slice sweet potatoes into 1/4-inch slices. Toss with the bourbon-maple mixture.
  • Preheat oven to 400°F (200°C). Spray baking dish. Arrange slices, pour remaining glaze, cover, and bake for 40 minutes.
  • Mix reserved glaze with chopped pecans. Pour over baked sweet potatoes and bake uncovered for 10 minutes.
  • Check tenderness with a fork. Serve warm.

Notes

For extra flavor, toast the pecans before adding.
Calories: 250kcal
Cost: $15
Course: Side Dish
Keyword: Sweet Potatoes

Discover the Comfort of Butternut Squash Soup

Welcome to a culinary journey that warms the soul—Butternut Squash Soup. This delightful dish is more than just a recipe; it’s a story steeped in warmth, simplicity, and the rich culture of home cooking. Join me, Jack, as we dive into the vibrant flavors and comforting textures of this seasonal favorite. Perfect for chilly evenings, each bowl serves as a passport to comfort, inviting friends and family to gather around the table.

Why You’ll Love This Recipe

Butternut squash soup is not only delicious but also packed with benefits. Here are five reasons to fall in love with this recipe:

  • Healthy and Nutritious: Rich in vitamins A and C, this soup supports immune health and promotes glowing skin.
  • Comforting Flavor: The natural sweetness of roasted butternut squash combined with aromatic herbs creates a cozy, satisfying dish.
  • Easy to Make: With simple ingredients and straightforward steps, even beginner cooks can master this recipe.
  • Versatile Dish: This soup is adaptable; you can enjoy it creamy, vegan, or with various toppings to suit your taste.
  • Perfect for Meal Prep: Make a big batch and store it for quick meals throughout the week, saving you time and effort.

Ingredient Breakdown

Let’s take a closer look at the ingredients that make up this delicious butternut squash soup. Each element plays a crucial role in building flavor and texture.


Digital Kitchen Scale

★ Recommended Kitchen Tool

Digital Kitchen Scale

Make this recipe even easier with a quality Digital Kitchen Scale — a must-have kitchen staple!


🛒 Shop This Tool →

As an Amazon Associate, we earn from qualifying purchases.
  • Butternut Squash (2½ pounds): The star of the show, this sweet and nutty squash forms the base of our soup. Choose a medium-sized squash that feels heavy for its size.
  • Carrots (½ pound): Adds a natural sweetness and depth of flavor. Cut into small bite-sized pieces for even cooking.
  • Onion (1 large): A quartered onion brings a savory base to the soup, enhancing its overall taste.
  • Garlic (2 cloves): Crushed with the peel on, garlic infuses the soup with aromatic warmth.
  • Fresh Herbs (5 sprigs thyme, 5 leaves sage): These herbs add layers of flavor; feel free to experiment with your favorites.
  • Extra Virgin Olive Oil (2 tablespoons): Used for roasting, adds richness and helps in flavor absorption.
  • Salt and Black Pepper: Essential for seasoning; adjust according to taste.
  • Vegetable Broth (2 cups): This helps achieve the desired consistency for the soup. You can substitute with chicken broth if preferred.
  • Ginger (1 teaspoon): Grated ginger adds a hint of spice and warmth, elevating the overall flavor profile.
  • Lime Juice (1 squeeze): A touch of acidity brightens the soup, balancing its sweetness.

Substitutions and Variations

Creamy butternut squash soup in a rustic bowl with a sprinkle of herbs.

This recipe is flexible! Here are some substitutions and variations to personalize your soup:

  • Vegan Option: Omit heavy cream and use coconut milk for creaminess without dairy.
  • Additional Veggies: Incorporate sweet potatoes or parsnips for added sweetness and nutritional benefits.
  • Spicy Twist: Add a pinch of cayenne pepper or red pepper flakes for a warming kick.
  • Nutty Flavor: Top with toasted pumpkin seeds or walnuts for texture and flavor contrast.

How to Make Butternut Squash Soup

Now, let’s dive into the steps to create this delectable soup. Follow these detailed instructions for a perfect result.

  • Step 1: Preheat and Prepare: Preheat your oven to 400°F (200°C). Peel, seed, and chop the butternut squash into chunks, placing them on a baking sheet alongside the chopped carrots, quartered onion, crushed garlic, thyme, and sage. Season with olive oil, salt, and black pepper.
  • Step 2: Roast the Vegetables: Toss the vegetables to coat evenly and arrange them in a single layer. Roast for 30 minutes or until the squash and carrots are fork-tender.
  • Step 3: Blend the Soup: Discard the garlic peel. In a blender or using an immersion blender, combine the roasted vegetables with vegetable broth and ginger. Blend until smooth.
  • Step 4: Simmer: Transfer the blended soup back to a pot. Simmer for an additional 5 minutes to allow flavors to meld. Adjust seasoning with salt and spices.
  • Step 5: Serve and Enjoy: Ladle the soup into bowls, adding a squeeze of lime juice, a drizzle of heavy cream or coconut milk, and a sprinkle of toasted nuts or cracked pepper for garnish.

Pro Tips for the Perfect Soup

To ensure your butternut squash soup turns out perfectly every time, consider these expert insights:

  • Choose the Right Squash: Look for a squash that feels heavy and has a smooth skin without blemishes.
  • Roasting is Key: Roasting brings out the natural sweetness of the squash; don’t skip this step!
  • Texture Preference: If you prefer a chunkier soup, reserve some roasted vegetables to stir in after blending.
  • Season Gradually: Taste and adjust seasoning throughout the cooking process for balanced flavors.
  • Garnish Creatively: Experiment with different toppings like croutons, fresh herbs, or a swirl of pesto.
  • Make it Ahead: This soup stores well in the fridge for up to 5 days or freezes beautifully for later enjoyment.
  • Adjust Consistency: If the soup is too thick, add more broth gradually until you reach your desired texture.
  • Flavor Infusion: Letting the soup sit for a while before serving enhances the flavors.

Common Mistakes and Troubleshooting

Here are some common pitfalls to avoid while making your soup:

  • Overcooking Vegetables: Keep an eye on your roasting time to prevent mushiness; fork-tender is the goal.
  • Blending Too Long: Over-blending can make the soup too airy; blend just until smooth.
  • Underseasoning: Always taste your soup before serving to ensure the flavors pop; don’t forget to season!
  • Skipping the Lime: The acidity from lime juice is essential for balancing flavors; don’t omit!

Storage and Make-Ahead Instructions

Making this soup ahead of time? Here’s how to store and reheat it:

  • Refrigeration: Store in an airtight container for up to 5 days.
  • Freezing: Cool completely before transferring to freezer-safe containers. It can be frozen for up to 3 months.
  • Reheating: Warm gently on the stove or in the microwave, adding a splash of broth if needed to restore consistency.

Comprehensive FAQ

Got questions? Here are answers to some common inquiries about butternut squash soup:

  • Can I use frozen butternut squash? Yes, frozen squash can be used; just skip the roasting step.
  • How can I thicken my soup? If your soup is too thin, simmering it longer will help reduce it.
  • Is this soup gluten-free? Absolutely! All ingredients are naturally gluten-free.
  • Can I add cream? Yes, add heavy cream or coconut milk for a creamier texture.
  • What can I substitute for vegetable broth? Chicken broth works well, or you can use water in a pinch.
  • How do I make this recipe spicy? Add red pepper flakes or diced jalapeños during cooking.
  • Can I use other squashes? Yes, acorn or pumpkin can be substituted for butternut squash.
  • How do I know when the squash is ripe? Look for a firm, heavy squash with a matte skin; avoid shiny ones.

Nutrition Tips and Dietary Adaptations

This soup is not only delicious but also nutritious. Here are some tips for adapting it to fit different dietary needs:

  • Low-Carb Option: Substitute squash with cauliflower for a lower-carb version.
  • Vegan-Friendly: Ensure all ingredients are plant-based and use coconut milk for creaminess.
  • Low-Sodium Version: Use low-sodium broth and limit added salt for a healthier option.

Equipment Recommendations

To make your cooking experience smoother, consider using the following equipment:

  • High-Powered Blender: Essential for achieving a silky-smooth texture.
  • Immersion Blender: Great for blending directly in the pot without transferring soup.
  • Roasting Pan: A sturdy pan ensures even roasting of vegetables.

Serving Suggestions

How you present your soup can elevate the dining experience. Here are some delightful ideas:

  • Garnish with Fresh Herbs: A sprinkle of fresh parsley or cilantro adds a pop of color.
  • Serve with Crusty Bread: Pair your soup with a slice of warm, crusty bread or a hearty roll.
  • Accompany with Salad: A fresh green salad can complement the richness of the soup perfectly.

As we wrap up our culinary adventure into the world of butternut squash soup, remember that food is a journey best shared. Each bowl is a chance to connect with loved ones, share stories, and savor the beauty of simple ingredients transformed into something extraordinary. So go ahead, gather your ingredients, and embark on your own delicious adventure today!

Butternut Squash Soup

Prep Time 15 minutes
Cook Time 30 minutes
Total Time 45 minutes
Servings 4 servings
Calories 180
A warm, comforting soup perfect for chilly days, highlighting the sweet richness of roasted butternut squash and carrots with aromatic herbs.

Ingredients

Vegetables

  • 2.5 pounds butternut squash (peeled, seeded, and cut into chunks)
  • 0.5 pounds carrots (cut into small bite-size pieces)
  • 1 large onion (quartered)
  • 2 cloves garlic (crushed with the peel on)
  • 5 sprigs thyme (only the leaves)
  • 5 leaves sage
  • 2 tablespoons extra virgin olive oil
  • 1 teaspoon salt (or more to taste)
  • 1/8 teaspoon black pepper
  • 2 cups vegetable broth (or more if too thick)
  • 1 teaspoon ginger (peeled and grated)
  • 1 squeeze lime juice

Instructions 

  • Preheat oven to 400°F (200°C). Toss squash, carrots, onion, garlic, herbs, oil, salt, and pepper; roast for 30 minutes.
  • Discard garlic peel, then blend roasted vegetables with broth and ginger until smooth.
  • Transfer to a pot and simmer for 5 minutes. Adjust seasoning as needed.
  • Serve hot with a squeeze of lime juice and optional toppings.

Notes

Roasting enhances the natural sweetness of the vegetables, making the soup more flavorful.
Calories: 180kcal
Cost: $15
Course: Soup
Cuisine: American
Keyword: Butternut Squash

Embark on a Culinary Adventure with Our Honey-Roasted Fig and Almond Galette

Welcome to a delightful journey into the world of flavors with this Honey-Roasted Fig and Almond Galette. In this recipe, we’ll explore the sweet embrace of ripe figs and the nutty warmth of almond frangipane, all wrapped in a flaky, buttery crust that carries whispers of tradition and adventure. Imagine slicing into this rustic dessert, the aroma of honey and toasted almonds filling the air, transporting you to sun-kissed orchards and quaint patisseries. Whether you serve it as a centerpiece for a gathering or indulge in a quiet moment, this galette promises to be a star on your dining table.

Let’s dive into the magic of making this rustic fig dessert, perfect for any occasion!

Why You’ll Love This Recipe

  • Simple Yet Elegant: This galette combines easy techniques with sophisticated flavors, making it ideal for both beginners and seasoned bakers.
  • Seasonal Ingredients: Fresh figs are at their peak flavor in late summer and early fall, allowing you to enjoy their lusciousness in every bite.
  • Versatile Delight: Perfect as a dessert or a sweet treat with coffee, this galette fits seamlessly into any meal.
  • Impressive Presentation: The rustic appearance of a galette is inherently charming, making it a stunning addition to any table setting.
  • Make Ahead Friendly: You can prepare the dough and frangipane ahead of time, making assembly and baking quick and easy.

Ingredient Breakdown and Substitutions

Understanding the ingredients is crucial to creating the perfect galette. Here’s a detailed look at what you’ll need:


Professional Chef Knife Set

★ Recommended Kitchen Tool

Professional Chef Knife Set

Make this recipe even easier with a quality Professional Chef Knife Set — a must-have kitchen staple!


🛒 View on Amazon →

As an Amazon Associate, we earn from qualifying purchases.
  • All-purpose flour: 1 1/4 cups (150 g) – This is the base for the crust. If you prefer a gluten-free option, substitute with a gluten-free all-purpose blend.
  • Granulated sugar: 1 tbsp for the dough and 1/4 cup for the frangipane – Sugar adds sweetness and helps with browning. You can use coconut sugar for a healthier alternative.
  • Fine sea salt: 1/2 tsp plus a pinch – Enhances flavor. Always use fine salt for better incorporation.
  • Unsalted butter: 1/2 cup cold (113 g) + 3 tbsp softened (42 g) – Cold butter is key for a flaky crust. For dairy-free, you can use coconut oil or vegan butter.
  • Ice water: 3-5 tbsp (45-75 ml) – Helps to bind the dough without melting the butter.
  • Cider vinegar: 1 tsp (optional) – A splash of acidity helps tenderize the dough.
  • Almond flour: 3/4 cup (75 g) – Adds a rich, nutty flavor. You can use hazelnut or cashew flour as a substitute.
  • Large egg: 1 (plus 1 egg for egg wash) – Binds the frangipane together. For a vegan option, use a flax egg.
  • Almond extract: 1/2 tsp; vanilla extract: 1/2 tsp – These extracts enhance the flavors. Feel free to experiment with other flavors like orange or lemon zest.
  • Fresh figs: 1 lb (450 g) – The star of the dish! If figs are out of season, ripe pears or peaches make excellent alternatives.
  • Honey: 3 tbsp, divided – Adds sweetness and a lovely glaze. Maple syrup can be substituted for a vegan version.
  • Turbinado sugar: 1 tbsp – For a crunchy topping. Brown sugar can be used if unavailable.
  • Sliced almonds: 2 tbsp – Adds texture and flavor. Try using chopped walnuts for a different twist.
  • Flaky salt: Optional – A sprinkle just before serving elevates the flavors.
  • Milk or water: 1 tbsp (for egg wash) – This helps achieve a golden crust.

Step-by-Step Instructions

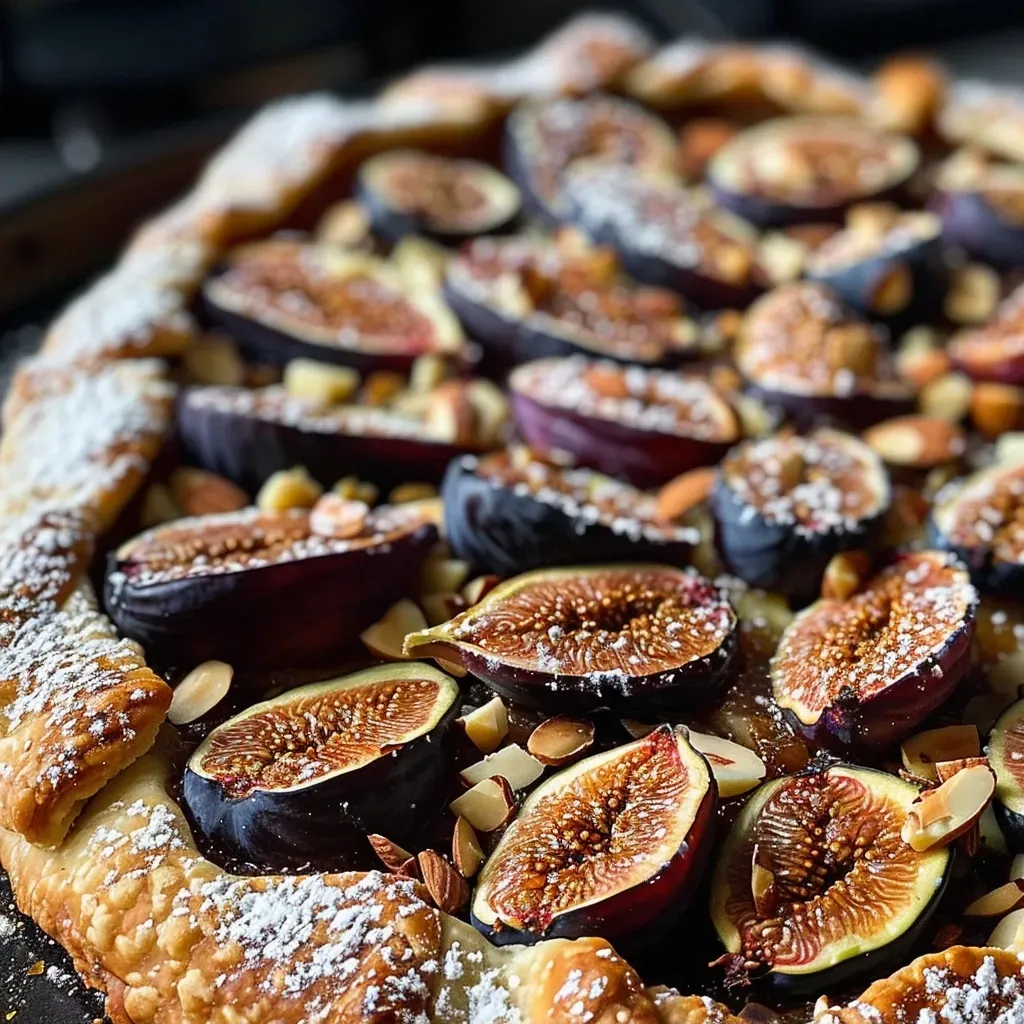
A close-up view of a honey-roasted fig and almond galette, showcasing its golden crust and juicy figs.

Now that we have our ingredients ready, let’s dive into the method of creating this delicious galette.

  1. Make the dough: Start by cutting 1/2 cup of cold butter into the flour, sugar, and salt until the mixture resembles coarse crumbs. Add ice water gradually until the dough starts to clump together. Wrap in plastic and chill for at least 1 hour.
  2. Prepare the frangipane: In a bowl, cream together 3 tbsp of softened butter and 1/4 cup of sugar until fluffy. Beat in the egg, followed by the almond flour, 1 tbsp of all-purpose flour, extracts, and a pinch of salt until well combined.
  3. Prep the figs: Trim the stems of the figs and cut them in half or quarters, depending on size. Toss them in a bowl with 1 tbsp of honey, 1 tsp of lemon juice, and a pinch of salt to enhance their natural sweetness.
  4. Roll out the dough: On a piece of parchment, roll the dough into a 12-inch round, about 1/8 inch thick. Preheat your oven to 400°F (205°C) and place a baking sheet inside to heat.
  5. Assemble the galette: Spread the frangipane evenly over the dough, leaving a 2-inch border. Arrange the prepared figs on top.
  6. Fold the edges: Gently fold the edges of the dough over the figs, creating a rustic border. Brush the exposed dough with the egg wash and sprinkle turbinado sugar and sliced almonds on top.
  7. Chill the galette: Place the galette in the refrigerator for about 10 minutes to firm up before baking.
  8. Bake: Carefully slide the parchment with the galette onto the preheated baking sheet. Bake for 35-40 minutes or until the crust is deeply golden and the figs are bubbling.
  9. Finish: While the galette is still warm, warm 2 tbsp of honey and brush it over the figs for a glossy finish. Allow it to rest for 15 minutes before slicing and serving.

Pro Tips for Perfecting Your Galette

  • Keep Ingredients Cold: Ensure your butter and water are cold to achieve a flaky crust.
  • Don’t Overwork the Dough: Mix just until combined to prevent a tough texture.
  • Experiment with Fruits: While figs are fantastic, try using apples, peaches, or berries for seasonal variations.
  • Use Parchment Paper: Baking on parchment ensures easy transfer and cleanup.
  • Monitor Baking Time: Ovens vary, so keep an eye on the galette to prevent burning.
  • Let It Cool: Allowing the galette to rest helps the flavors meld beautifully.
  • Serve Warm: This galette is best enjoyed warm with a scoop of vanilla ice cream or a dollop of whipped cream.
  • Save Leftovers: Store any leftovers in an airtight container at room temperature for up to 2 days.

Common Mistakes and Troubleshooting

Even the best cooks can run into hiccups. Here are some common mistakes and how to avoid them:

  • Dough Too Crumbly: If your dough is too crumbly, it might need more ice water. Add a tablespoon at a time until it comes together.
  • Filling Too Runny: Ensure your fruit is dry and not overly ripe to avoid excess moisture.
  • Burnt Edges: If the edges are browning too quickly, cover them with foil to prevent burning while the center cooks through.
  • Galette Not Crisp: If the crust isn’t crisp, it might need more time in the oven or could have been overworked.

Variations to Try

Feeling adventurous? Here are some exciting variations of the Honey-Roasted Fig and Almond Galette:

  • Peach and Almond Galette: Replace figs with fresh peaches for a juicy twist, adding a hint of cinnamon.
  • Mixed Berry Galette: Use a combination of fresh berries for a colorful and tart dessert.
  • Chocolate Hazelnut Galette: Add a layer of chocolate spread beneath the frangipane for a decadent treat.
  • Spiced Apple Galette: Swap figs for spiced apples cooked with cinnamon and nutmeg for a cozy dessert.

Storage and Make-Ahead Instructions

This galette can be made ahead for convenience:

  • Make the Dough: Prepare your dough and keep it wrapped in plastic in the fridge for up to 3 days.
  • Prepare the Frangipane: Mix up the frangipane and store it in the refrigerator for up to a week.
  • Baked Galette: Store leftover galette at room temperature for up to 2 days. Reheat in a low oven for a few minutes before serving.

Frequently Asked Questions (FAQs)

  • Can I use frozen figs? Yes, but thaw them and drain excess moisture before using.
  • What’s the best way to serve this galette? It’s delicious served warm with a scoop of vanilla ice cream or a drizzle of cream.
  • How do I know when the galette is done? The crust should be golden brown, and the fruit should be bubbling.
  • Can I make this recipe vegan? Yes, use a flax egg, vegan butter, and maple syrup instead of honey.
  • What if I don’t have almond flour? You can substitute with ground oats or sunflower seed flour.
  • How can I make the crust more flavorful? Consider adding spices like cinnamon or nutmeg to the crust.
  • Can I use other nuts in the frangipane? Absolutely, try walnuts or pistachios for a different flavor profile.
  • What’s the best way to store leftovers? Keep them in an airtight container at room temperature for up to 2 days.

Nutrition Tips and Dietary Adaptations

This galette can be adapted to fit various dietary needs:

  • Low Sugar Option: Reduce the sugar in the frangipane and topping for a healthier version.
  • Gluten-Free: Use a gluten-free flour blend in place of all-purpose flour for the dough.
  • Nut-Free: Replace almond flour with oat flour and skip the nuts in the topping.
  • Increase Fiber: Add ground flaxseed to the dough for a fiber boost.

Equipment Recommendations

To make the process of creating this galette seamless, here’s what you’ll need:

  • Mixing Bowls: Use a variety of sizes for mixing dough and filling.
  • Rolling Pin: A sturdy rolling pin is essential for rolling out the dough evenly.
  • Parchment Paper: Prevents sticking and makes transferring the galette easy.
  • Baking Sheet: A large, flat baking sheet is best for even baking.
  • Sharp Knife: For slicing the figs and the finished galette with precision.

Serving Suggestions

Pair your Honey-Roasted Fig and Almond Galette with:

  • Vanilla Ice Cream: The creamy texture complements the warm fruit beautifully.
  • Whipped Cream: A dollop of freshly whipped cream adds a light, airy touch.
  • Greek Yogurt: A healthy alternative that adds a tangy contrast to the sweetness.
  • Chai Tea: The spices in chai enhance the flavors of the galette, making for a cozy pairing.

As you set this delightful galette on your table, remember that it’s not just a dessert; it’s a story of flavors, culture, and connection. Share it with friends, or savor it on your own, and let the magic of food transport you. Happy baking!

Honey-Roasted Fig and Almond Galette

Prep Time 30 minutes
Cook Time 40 minutes
Total Time 1 hour 10 minutes
Servings 8 slices
Calories 350
A stunning rustic tart combining sweet figs, fragrant almonds, and a flaky crust, perfect for a special occasion or a delightful treat.

Ingredients

Dough

  • 1 1/4 cups All-purpose flour (150 g)
  • 1 tbsp Granulated sugar (for dough)
  • 1/2 tsp Fine sea salt (for dough)
  • 1/2 cup Unsalted butter (113 g, cold)
  • 3 tbsp Unsalted butter (softened, for frangipane)
  • 3–5 tbsp Ice water (45–75 ml, optional cider vinegar)
  • 3/4 cup Almond flour (75 g)
  • 1 tbsp All-purpose flour (for frangipane)
  • 1 large Egg (plus 1 for egg wash)
  • 1/2 tsp Almond extract
  • 1/2 tsp Vanilla extract
  • 1 lb Fresh figs (450 g)
  • 3 tbsp Honey (divided)
  • 1 tsp Lemon juice
  • 1 tbsp Turbinado sugar
  • 2 tbsp Sliced almonds
  • optional Flaky salt
  • 1 tbsp Milk or water (for egg wash)

Instructions 

  • Make dough: cut cold butter into flour, sugar, salt; add ice water until it clumps. Chill 1 hour.
  • Prepare frangipane: cream butter with sugar, beat in egg, almond flour, flour, extracts, and salt.
  • Prep figs: trim, halve or quarter; toss with honey, lemon juice, and salt.
  • Roll dough to 12-inch round on parchment; preheat oven to 400°F (205°C) with sheet pan inside.
  • Spread frangipane over dough, leaving 2-inch border; arrange figs on top.
  • Fold edges over fruit, brush with egg wash, sprinkle sugar and almonds; chill 10 minutes.

Notes

Chill the galette before baking for a flaky crust and better flavor.
Calories: 350kcal
Cost: $15
Course: Dessert
Cuisine: French
Keyword: fig

Discover the Magic of Cranberry-Orange Pumpkin Bread

Welcome, fellow culinary adventurers! If you’re looking for a recipe that not only tantalizes your taste buds but also embodies the essence of the autumn season, you’ve found it. This cranberry-orange pumpkin bread is a delightful blend of flavors that tells a story of cozy gatherings and festive moments. Join me as we embark on a flavorful journey with this cranberry pumpkin bread recipe that merges the warmth of pumpkin, the zing of orange, and the tartness of fresh cranberries. Perfect for any occasion, this bread is not just a treat for the taste buds, but a celebration of the season!

Why You’ll Love This Recipe

  • Unique Flavor Combination: The sweet and tart balance of cranberries and orange zest creates a refreshing flavor that’s perfect for fall.
  • Easy to Make: With simple ingredients and straightforward steps, you can whip this up in no time, making it ideal for busy holiday baking.
  • Perfect for Any Occasion: Whether it’s a festive gathering, a cozy brunch, or a thoughtful gift, this bread fits right in.
  • Moist and Tender Texture: The addition of pumpkin puree ensures each slice is moist and flavorful, making every bite a delight.
  • Customizable: You can easily add your own twist with nuts, chocolate chips, or spices to make it your own.

Ingredients Breakdown

Before we dive into the preparation, let’s explore the ingredients that make this orange pumpkin bread so special. Below is a detailed list of what you’ll need and some suggestions for substitutions:

  • 1 3/4 cups all-purpose flour: Provides the structure for the bread. You can substitute with whole wheat flour for a heartier texture.
  • 1/2 cup packed brown sugar: Adds depth of flavor. Feel free to use coconut sugar for a lower glycemic index option.
  • 1 tsp baking soda and 1/2 tsp baking powder: These leavening agents ensure your bread rises beautifully.
  • 3/4 tsp ground cinnamon: A warm spice that enhances the autumn flavor profile.
  • 1/4 tsp salt: Balances the sweetness of the bread.
  • 1/8 tsp ground nutmeg and 1/8 tsp allspice: These spices add a warm, cozy aroma.
  • 1 large O Organics® egg: Binds the ingredients together. You can use a flax egg for a vegan option.
  • 3/4 cup O Organics® pumpkin puree: The star ingredient that brings moisture and flavor.
  • 1/4 cup vegetable oil: Keeps the bread tender. You can substitute with melted coconut oil.
  • 1 TBSP O Organics® Honey: Adds natural sweetness. Maple syrup is a great alternative.
  • 1-2 tsp orange zest: Provides a burst of citrus flavor. Use fresh zest for the best results.
  • 1 TBSP orange juice: Enhances the orange flavor in the bread.
  • 1/3 or 1/2 cup fresh cranberries sliced in half: These tart berries give the bread a delightful zing.
  • 1-2 cups powdered sugar: For the icing that finishes off your bread.
  • 1-2 tsp milk: Adjust as needed for icing consistency.
  • 2 TBSP dried cranberries: For topping and added texture.

Step-by-Step Instructions

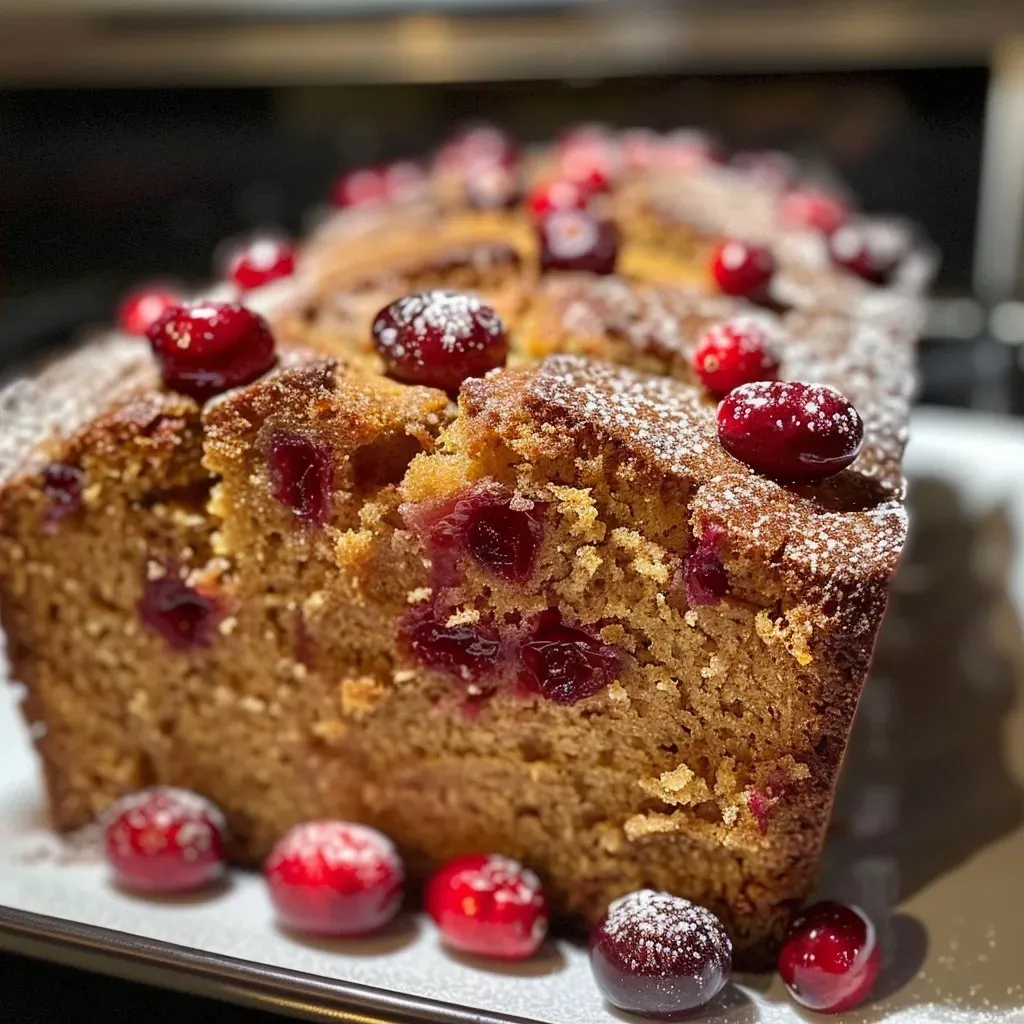
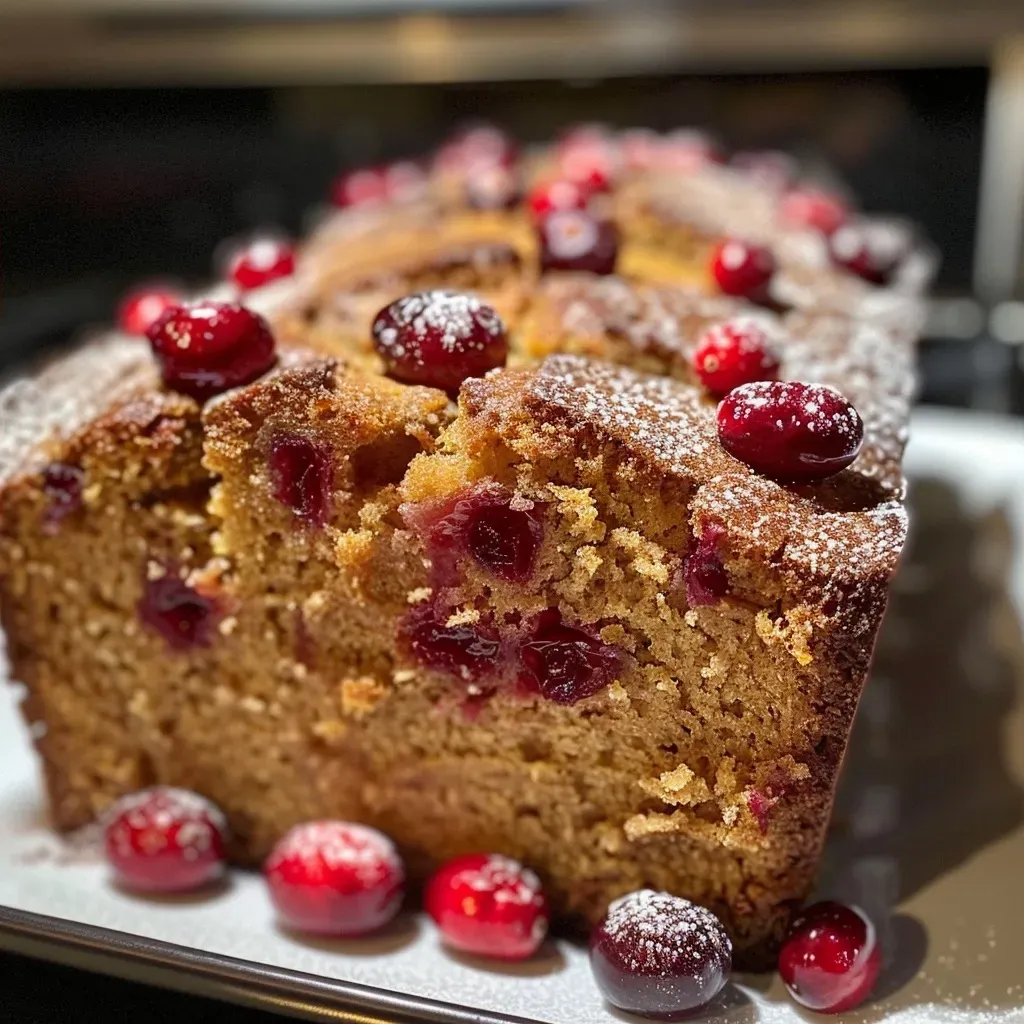
Close-up side view of a slice of cranberry-orange pumpkin bread showcasing its texture and ingredients.

Now that we have our ingredients ready, let’s get into the steps to create this mouthwatering pumpkin cranberry bread.


Digital Kitchen Scale

★ Recommended Kitchen Tool

Digital Kitchen Scale

Make this recipe even easier with a quality Digital Kitchen Scale — a must-have kitchen staple!


🛒 Shop This Tool →

As an Amazon Associate, we earn from qualifying purchases.
  1. Preheat and Prep: Preheat your oven to 350 degrees F. Grease an 8×4 inch loaf pan with oil and set aside.
  2. Mix Dry Ingredients: In a medium bowl, whisk together the flour, brown sugar, baking soda, baking powder, cinnamon, salt, nutmeg, and allspice.
  3. Combine Wet Ingredients: In a large bowl, combine the egg, pumpkin puree, oil, honey, orange zest, and orange juice. Mix until well combined.
  4. Combine Mixtures: Gradually sprinkle the dry mixture into the wet ingredients, stirring with a fork until just moistened. The batter will be sticky.
  5. Fold in Cranberries: Gently fold in the sliced cranberries and transfer the batter to your greased loaf pan.
  6. Bake: Bake on the center rack for 45-50 minutes, or until a toothpick inserted into the center comes out clean.
  7. Cool and Ice: Once baked, transfer the bread to a cooling rack. Whisk together your icing while the loaf cools, combining powdered sugar with a small amount of milk until thickened.

Pro Tips for Perfect Pumpkin Bread

  • Use Fresh Ingredients: Fresh cranberries and newly opened spices make a significant difference in flavor.
  • Don’t Overmix: When combining wet and dry ingredients, mix just until moistened to keep the bread tender.
  • Let It Cool: Allow the bread to cool in the pan for a few minutes before transferring to a rack to prevent it from becoming soggy.
  • Store Properly: Keep the bread wrapped in foil or in an airtight container at room temperature for up to three days.
  • Freeze for Later: You can freeze the bread for up to three months. Just wrap it tightly in plastic wrap and foil.
  • Add Nuts or Chocolate: For a delightful twist, add 1/2 cup of walnuts or chocolate chips to the batter.
  • Adjust Sweetness: If you prefer a sweeter bread, increase the brown sugar by 1/4 cup.
  • Experiment with Spices: Feel free to add additional spices like cardamom or ginger for a personalized touch.

Common Mistakes and Troubleshooting

Even the most seasoned bakers can run into a few hiccups. Here are some common mistakes and how to avoid them:

  • Too Dense: This may be due to overmixing the batter. Remember, mix until just combined!
  • Dry Bread: Overbaking can lead to dryness. Keep an eye on your loaf and check for doneness a few minutes early.
  • Flavorless Bread: Ensure your spices are fresh, and don’t be shy with the orange zest and juice for brightness.
  • Burnt Edges: If the edges brown too quickly, cover the loaf loosely with foil during the last 15-20 minutes of baking.

Variations on This Classic Recipe

Looking to mix things up? Here are some variations you can try:

  • Chocolate Chip Cranberry Bread: Add 1/2 cup of chocolate chips for a sweet twist.
  • Nuts Galore: Incorporate chopped walnuts or pecans for added crunch.
  • Spiced Pumpkin Bread: Include 1/2 tsp of ginger or allspice for a spicier flavor profile.
  • Orange Glaze: Top the bread with an orange juice glaze made from powdered sugar and fresh orange juice for an extra citrus kick.

Storage and Make-Ahead Instructions

If you’re planning ahead, here’s how to store and make your cranberry-orange pumpkin bread:

  • Room Temperature: Store the bread at room temperature in an airtight container for up to 3 days.
  • Refrigeration: If you need it to last longer, refrigerate for up to a week.
  • Freezing: Wrap the cooled bread tightly in plastic wrap, then foil. It can be frozen for up to 3 months.
  • Make-Ahead: You can prepare the batter a day in advance and store it in the fridge until you’re ready to bake.

Frequently Asked Questions (FAQ)

  • Can I use canned pumpkin instead of fresh? Yes, canned pumpkin works beautifully in this recipe!
  • How do I know when the bread is done? Insert a toothpick into the center; if it comes out clean, the bread is ready!
  • Can I substitute the egg? Absolutely! A flax egg is a great vegan alternative.
  • Is this bread gluten-free? You can use a gluten-free flour blend to make it gluten-free.
  • What can I serve with this bread? It pairs wonderfully with cream cheese, butter, or even a drizzle of honey.
  • How long does this bread last? At room temperature, it lasts about 3 days; refrigeration extends it to a week.
  • Can I add more cranberries? Yes, feel free to add more cranberries for extra tartness!
  • What’s the best way to store leftovers? Store in an airtight container at room temperature or refrigerate.

Nutritional Tips and Dietary Adaptations

This cranberry-orange pumpkin bread is versatile and can easily fit into various dietary needs:

  • Lower Sugar: Reduce the brown sugar or use a sugar substitute to lower the sweetness.
  • Dairy-Free: Use almond milk or coconut milk instead of regular milk in the icing.
  • Nut-Free: Omit nuts in case of allergies and still enjoy the rich flavors.
  • Vegan Option: Replace the egg with a flax egg and use plant-based milk for the icing.

Equipment Recommendations

To make your baking experience smooth and enjoyable, here are some essential tools:

  • 8×4 inch Loaf Pan: A sturdy loaf pan ensures even baking.
  • Mixing Bowls: A set of mixing bowls in various sizes for dry and wet ingredients.
  • Whisk: For combining dry ingredients and making the icing.
  • Rubber Spatula: Perfect for folding in ingredients gently.
  • Cooling Rack: Essential for cooling the bread evenly.

Serving Suggestions

Finally, let’s talk about how to serve your delicious bread:

  • With a Spread: Serve warm with a generous smear of cream cheese or butter.
  • As a Dessert: Top with a scoop of vanilla ice cream for a scrumptious dessert.
  • With a Drink: Pair with a hot cup of spiced chai or apple cider for a cozy experience.
  • For Gifting: Wrap it in parchment and twine for a lovely homemade gift.

Conclusion

As we wrap up this flavorful journey, I hope you feel inspired to create your own cranberry-orange pumpkin bread. This recipe not only fills your home with the comforting aromas of fall but also offers a delicious way to connect with family and friends. So, put on your apron, gather your ingredients, and let’s bake something magical together. Happy baking and enjoy every slice of this delightful adventure!

Cranberry-Orange Pumpkin Bread

Prep Time 15 minutes
Cook Time 50 minutes
Total Time 1 hour 5 minutes
Servings 8 slices
Calories 250
A moist and flavorful pumpkin bread infused with cranberries and orange zest, perfect for fall treats or holiday gatherings.

Ingredients

Dry ingredients

  • 1 3/4 cups all-purpose flour
  • 1/2 cup packed brown sugar
  • 1 tsp baking soda
  • 1/2 tsp baking powder
  • 3/4 tsp ground cinnamon
  • 1/4 tsp salt
  • 1/8 tsp ground nutmeg
  • 1/8 tsp allspice

Wet ingredients

  • 1 large O Organics® egg
  • 3/4 cup O Organics® pumpkin puree
  • 1/4 cup vegetable oil
  • 1 TBSP O Organics® Honey
  • 1-2 tsp orange zest
  • 1 TBSP orange juice (from the same orange you zested)
  • 1/3 or 1/2 cup fresh cranberries sliced in half
  • 1-2 cups powdered sugar
  • 1-2 tsp milk (plus extra as needed)
  • 2 TBSP dried cranberries (for topping)

Instructions 

  • Preheat oven to 350°F (175°C). Grease an 8×4 inch loaf pan.
  • Mix dry ingredients in a bowl. In a separate bowl, combine wet ingredients.
  • Gradually add dry mixture to wet, stirring until just combined. Fold in cranberries.
  • Pour batter into prepared pan and bake for 45-50 minutes. Cool on a rack.
  • Whisk powdered sugar with milk to make glaze. Drizzle over cooled bread.

Notes

For best results, use fresh cranberries and adjust glaze thickness as desired.
Calories: 250kcal
Cost: $15
Course: Dessert
Cuisine: American
Keyword: cranberries, Orange, pumpkin

Dive into the World of Pumpkin Marble Cake

Welcome, culinary adventurers! Today, we embark on a delightful journey to create a stunning Pumpkin Marble Cake—a dessert that marries the heartwarming flavors of spiced pumpkin with the rich allure of chocolate. Imagine slicing into this beautifully marbled cake, revealing a swirl of golden pumpkin batter intertwined with deep, dark chocolate. It’s not just a cake; it’s a celebration of flavor and tradition, perfect for gatherings, especially as autumn leaves begin to fall. Let’s get started on this enchanting recipe that promises to add a touch of magic to your kitchen!

Why You’ll Love This Recipe

  • Sweet & Spicy Harmony: The combination of pumpkin and chocolate not only creates a visual masterpiece but also a flavor experience that balances sweetness with warm spices.
  • Perfect for Any Occasion: Whether it’s a cozy family dinner or a festive fall gathering, this cake fits right in, making it a versatile dessert.
  • Moist & Tender Texture: Thanks to the pumpkin puree, this cake stays moist for days, ensuring that every slice is as delicious as the first.
  • Simple Ingredients: With common pantry staples and a few special touches, you can whip up this cake without a fuss!
  • Easy to Customize: From adding nuts to swapping flavors, the variations of this recipe allow you to make it your own!

Ingredients for Pumpkin Marble Cake

Gather these essential ingredients to create your masterpiece:

  • 14 oz pumpkin puree: Preferably homemade for a fresher taste.
  • 1 cup plus 2 tbsp unsalted butter: Softened, plus a bit for greasing the pan.
  • A pinch of salt: To enhance the flavors.
  • 1 cup brown sugar: For that deep caramel-like sweetness.
  • 1 tsp vanilla paste: For an aromatic boost.
  • 6 large eggs: Room temperature for better incorporation.
  • 4 cups all-purpose flour: Plus a bit for dusting the pan.
  • 3 tsp pumpkin spice: A blend of cinnamon, nutmeg, and ginger.
  • 1 packet of baking powder (4 tsp): To help the cake rise.
  • 1.4 oz cocoa powder: For the chocolate layer.
  • 8 tbsp milk: To achieve the right consistency.
  • 2.8 oz dark chocolate: For drizzling on top.
  • 1.4 oz butter: For the chocolate drizzle.

Preparing Pumpkin Marble Cake

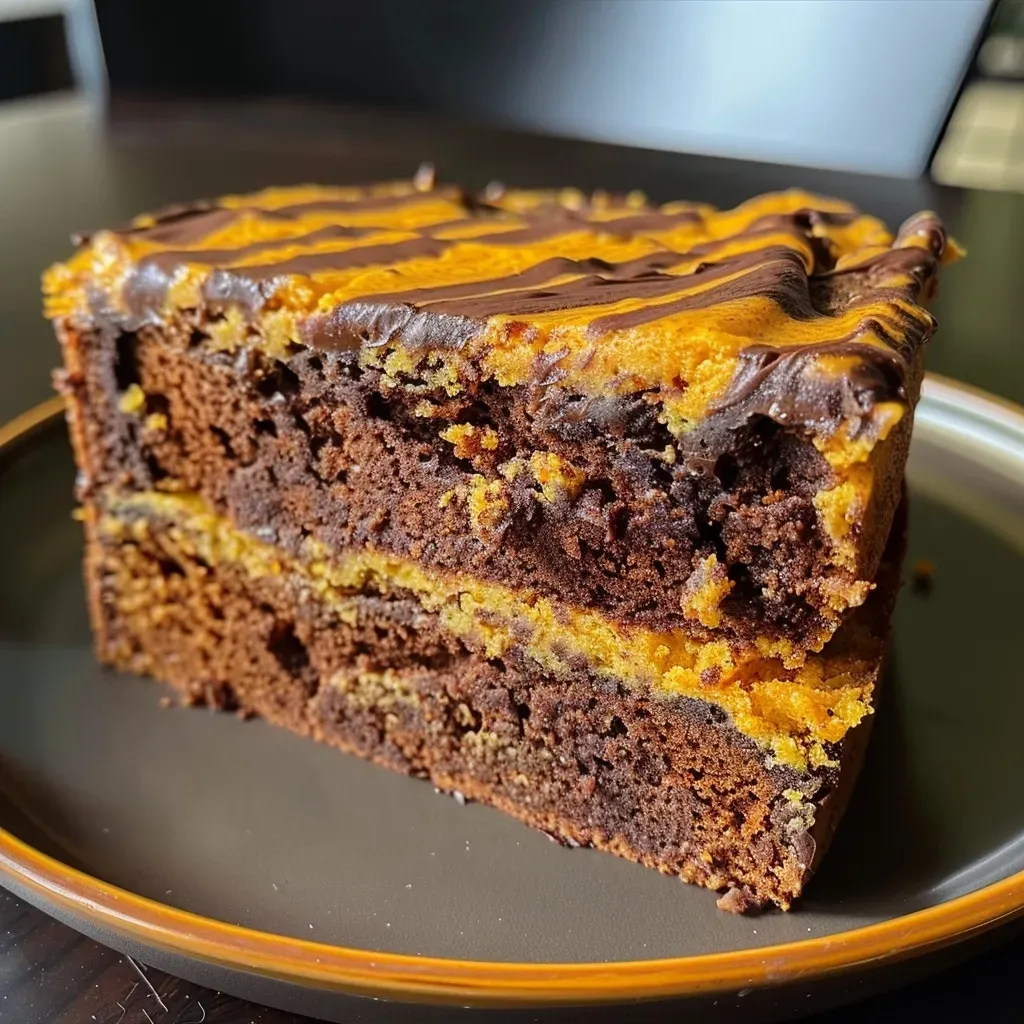
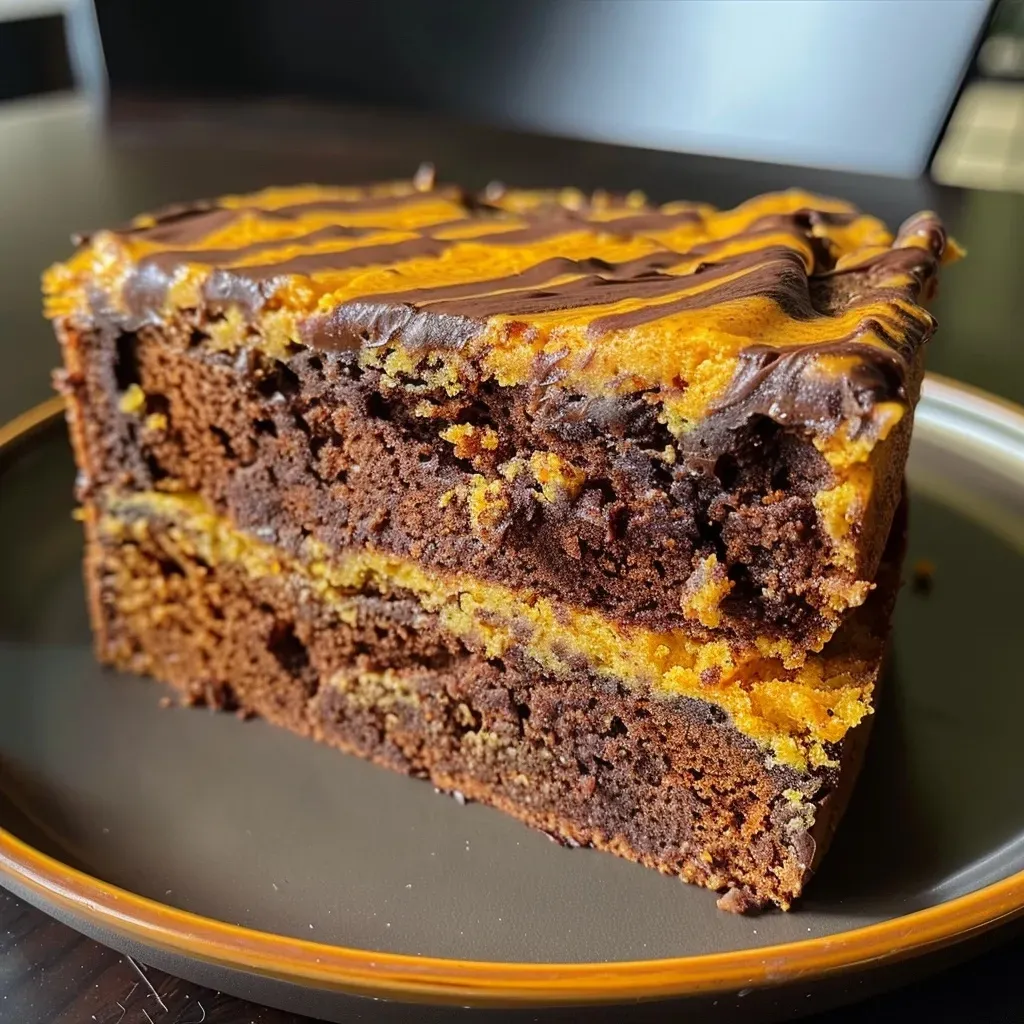
Close-up view of a moist Pumpkin Marble Cake, showcasing swirls of pumpkin and chocolate.

Follow these steps for a flawless bake:


Cake Decorating Set

★ Recommended Kitchen Tool

Cake Decorating Set

Make this recipe even easier with a quality Cake Decorating Set — a must-have kitchen staple!


🛒 Check Price on Amazon →

As an Amazon Associate, we earn from qualifying purchases.
  • Preheat your oven: Set to 356 degrees Fahrenheit (180 degrees Celsius) to prepare for baking.
  • Prepare the Bundt pan: Lightly grease it with butter and dust with flour to prevent sticking.
  • Cream the butter and sugar: In a large bowl, combine the softened butter, brown sugar, and salt, mixing until light and fluffy.
  • Add eggs one by one: Incorporate each egg into the mixture, beating for about half a minute after each addition.
  • Stir in pumpkin and vanilla: Add the pumpkin puree and vanilla paste, mixing well.
  • Combine dry ingredients: In a separate bowl, whisk together the flour, baking powder, and pumpkin spice, then gently fold them into the wet mixture.
  • Create the chocolate mix: In another bowl, stir the cocoa powder with milk until smooth.
  • Marble the batters: Divide the batter in half, mixing one part with the cocoa mixture. Alternately spoon the batters into the Bundt pan and use a long spoon to create swirls.
  • Bake the cake: Place in the oven for approximately 55 to 65 minutes. Use the toothpick test to check for doneness.
  • Prepare the chocolate drizzle: Once cooled, melt chopped chocolate with butter over a double boiler, then drizzle over the cake before serving.

Pro Tips for Perfecting Your Cake

  • Room Temperature Ingredients: Ensure all ingredients, especially eggs and butter, are at room temperature for better mixing and texture.
  • Don’t Overmix: When combining the dry ingredients with the wet, mix just until combined to keep the cake tender.
  • Use Quality Cocoa: A high-quality cocoa powder will enhance the chocolate flavor significantly.
  • Check Oven Temperature: Always use an oven thermometer to ensure your oven is at the correct temperature for baking.
  • Cool Completely: Allow the cake to cool in the pan before inverting it to prevent breaking.
  • Storage: Store the cake in an airtight container at room temperature for up to 3 days or in the fridge for up to a week.
  • Make Ahead: The cake can be baked a day in advance; just keep it wrapped tightly.
  • Flavor Boosts: Consider adding chocolate chips or nuts to the batter for extra texture and flavor.

Common Mistakes and Troubleshooting

Here are some pitfalls to avoid:

  • Dense Cake: This usually happens from overmixing the batter. Mix just until the ingredients are combined.
  • Dry Cake: Ensure you measure the flour correctly; too much can lead to dryness. Use the spoon-and-level method.
  • Sticking Cake: Properly greasing and flouring the Bundt pan is crucial to prevent the cake from sticking.
  • Uneven Baking: Rotate the cake halfway through baking for even heat distribution.

Variations to Try

Feel free to experiment with these ideas:

  • Chocolate Chip Pumpkin Marble Cake: Add a cup of chocolate chips into the batter for a delightful surprise in every slice.
  • Nuts & Spices: Stir in chopped walnuts or pecans for crunch, and adjust the spices to suit your taste.
  • Gluten-Free Option: Substitute all-purpose flour with a gluten-free blend, ensuring it contains xanthan gum for structure.
  • Vegan Version: Use flax eggs (1 tbsp ground flaxseed with 3 tbsp water per egg) and replace butter with coconut oil.

Storage and Make-Ahead Instructions

To keep your cake fresh and flavorful:

  • Room Temperature: Store in an airtight container for up to 3 days.
  • Refrigeration: Keeps well in the fridge for about a week.
  • Freezing: Wrap individual slices tightly in plastic wrap, then foil, and freeze for up to 3 months. Thaw in the fridge before serving.

Comprehensive FAQ

Here are some common questions about making Pumpkin Marble Cake:

  • Can I use fresh pumpkin instead of canned? Absolutely! Just ensure it’s pureed smoothly.
  • What if my cake sinks in the middle? This can be due to underbaking or too much moisture; make sure to bake until a toothpick comes out clean.
  • How can I enhance the chocolate flavor? Use dark chocolate cocoa powder or add chocolate chips.
  • Is there a dairy-free alternative? Yes, use almond milk and coconut oil instead of butter.
  • Can I make this cake in advance? Yes! It can be made a day ahead and stored wrapped to maintain moisture.
  • What should I serve with this cake? It pairs wonderfully with whipped cream or a scoop of vanilla ice cream.
  • Can I decorate the cake? Absolutely! Decorate with nuts, chocolate curls, or a sprinkle of powdered sugar for visual appeal.
  • What’s the best way to slice a Bundt cake? Use a sharp, serrated knife for clean slices.

Nutrition Tips and Dietary Adaptations

For those mindful of nutrition:

  • Lower Sugar: Substitute some brown sugar with a sugar alternative like coconut sugar or stevia.
  • Healthy Fats: Replace butter with applesauce for a lower-fat version.
  • Extra Fiber: Consider adding ground flaxseeds or chia seeds to boost nutrition.

Equipment Recommendations

To successfully create your cake, you’ll need:

  • Mixing Bowls: A set of various sizes for ingredient mixing.
  • Electric Mixer: For effortless creaming and mixing.
  • Bundt Pan: Essential for the cake’s beautiful shape.
  • Measuring Cups and Spoons: To ensure accurate measurements for your ingredients.
  • Cooling Rack: To allow your cake to cool evenly.

Serving Suggestions

Make your Pumpkin Marble Cake even more delightful with these serving ideas:

  • Whipped Cream: A dollop on top adds a lovely creaminess.
  • Ice Cream: Pair with vanilla or cinnamon ice cream for a comforting treat.
  • Fresh Fruit: Serve with a side of spiced apples or pears for extra flavor.
  • Garnish: Sprinkling with toasted nuts or a dusting of powdered sugar adds elegance.

Now that you have the complete guide to making a sensational Pumpkin Marble Cake, it’s time to roll up your sleeves and start baking! Each slice tells a story of warmth, tradition, and a sprinkle of adventure. Happy baking, my friends, and may your kitchen be filled with delightful aromas and joyous memories!

Pumpkin Marble Cake

Prep Time 20 minutes
Cook Time 1 hour
Total Time 1 hour 20 minutes
Servings 8 pieces
Calories 420
A moist and flavorful cake with a beautiful marbled appearance, perfect for fall celebrations.

Ingredients

Pumpkin Puree

  • 14 oz pumpkin puree (preferably homemade)

Butter

  • 1 cup soft butter (plus a bit for the pan)
  • 2 tbsp soft butter (additional for pan)

Salt

  • a pinch salt

Sugar

  • 1 cup brown sugar

Vanilla

  • 1 tsp vanilla paste

Eggs

  • 6 large large eggs

Flour

  • 4 cups all-purpose flour (plus a bit for the pan)

Pumpkin Spice

  • 3 tsp Pumpkin Spice

Baking Powder

  • 1 packet baking powder (4 tsp)

Cocoa Powder

  • 1.4 oz cocoa powder

Milk

  • 8 tbsp milk

Dark Chocolate

  • 2.8 oz dark chocolate

Butter

  • 1.4 oz butter

Instructions 

  • Preheat oven to 356°F (180°C). Grease and flour the Bundt pan.
  • Cream butter, sugar, and salt. Add eggs one at a time, then mix in pumpkin and vanilla.
  • Mix flour, baking powder, and Pumpkin Spice; fold into batter. Prepare cocoa mixture with milk.
  • Divide batter, mix one part with cocoa, then marble into the pan. Bake for 55-65 minutes.
  • Melt chocolate with butter, drizzle over cooled cake.

Notes

Ensure not to overmix the batter to keep the cake light and airy.
Calories: 420kcal
Cost: $15
Course: Dessert
Cuisine: American
Keyword: pumpkin

Unlock the Flavor: A Journey into Maple Cinnamon Pecan Granola

Welcome, fellow culinary adventurers! Today, we’re diving into a recipe that is not just about nourishment, but a delightful experience that intertwines rich flavors and joyous memories. This Maple Cinnamon Pecan Granola is your passport to a world of taste, perfect for breakfast or as a snack. With every bite, you’ll savor the warmth of maple, the crunch of pecans, and the comforting embrace of cinnamon.

In this comprehensive guide, we’ll explore everything from the ingredients to expert tips, variations, and even common pitfalls to avoid. Grab your apron, and let’s embark on this flavorful journey!

Why You’ll Love This Recipe

  • Wholesome ingredients: Packed with oats and nuts, this granola is a nutritious start to your day.
  • Easy to make: With simple steps, you’ll have your granola ready in no time!
  • Customizable: Personalize it with your favorite add-ins like dried fruits or seeds.
  • Perfect for meal prep: Make a big batch and store it for quick breakfasts all week long.
  • Vegan and gluten-free: This recipe caters to various dietary needs, ensuring everyone can enjoy it!

Ingredients Breakdown

Let’s explore the key ingredients in our Maple Cinnamon Pecan Granola, along with some delicious substitutions.


Glass Mason Jars for Oats

★ Recommended Kitchen Tool

Glass Mason Jars for Oats

Make this recipe even easier with a quality Glass Mason Jars for Oats — a must-have kitchen staple!


🛒 View on Amazon →

As an Amazon Associate, we earn from qualifying purchases.
  • Oats: 2 cups of rolled oats form the base of this recipe. You can use certified gluten-free oats if needed.
  • Pecans: 3/4 cup of pecans add crunch and nutritional benefits. Feel free to swap with walnuts or almonds if you prefer.
  • Coconut Oil: 1/4 cup of refined coconut oil holds the granola together while providing healthy fats. Use olive oil as a substitute for a different flavor.
  • Pure Maple Syrup: 3 tablespoons sweeten our granola naturally. Agave nectar or honey can work as alternatives.
  • Vanilla Extract: 1 teaspoon enhances the flavor profile. Use almond extract for a unique twist!
  • Cinnamon: 1 1/2 teaspoons of cinnamon evoke warmth and comfort. Experiment with pumpkin spice for a seasonal touch.
  • Salt: Just a pinch (1/8 teaspoon) to balance the sweetness.

Step-by-Step Instructions

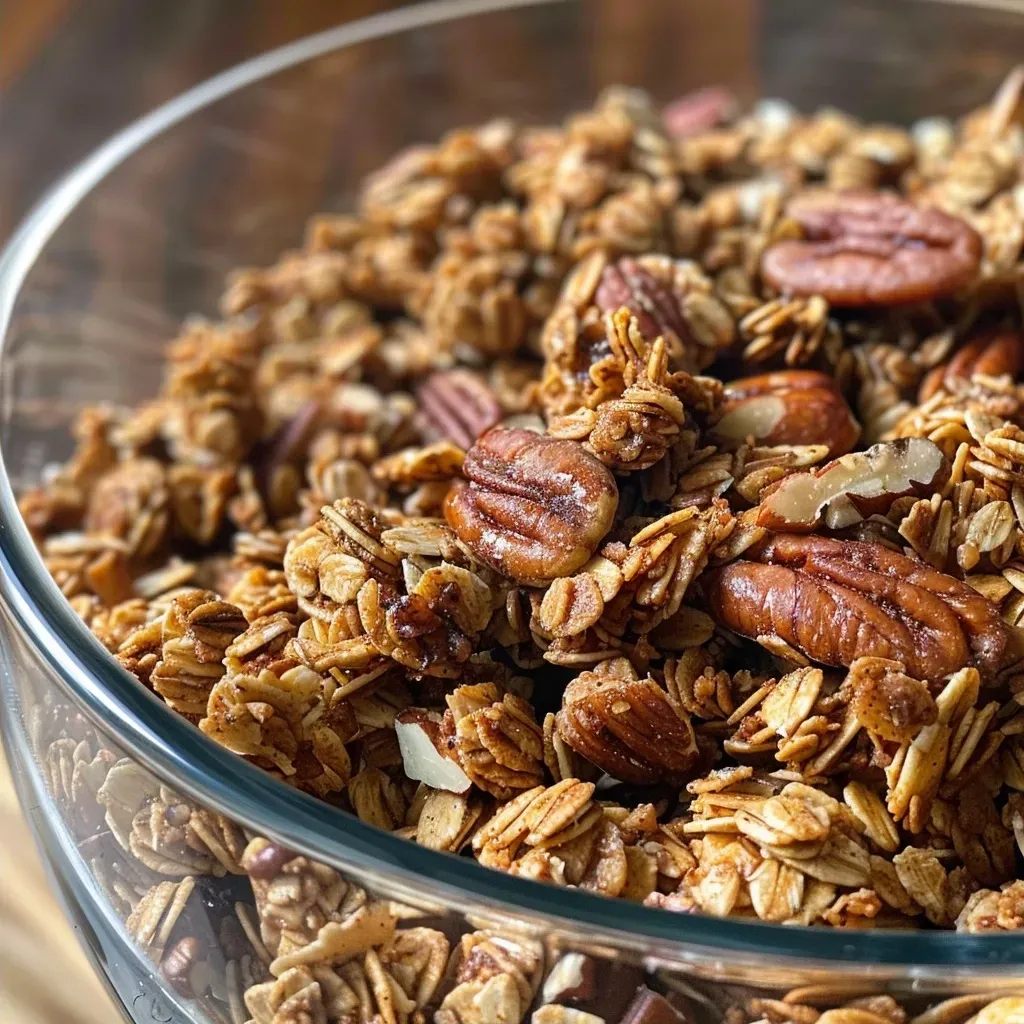
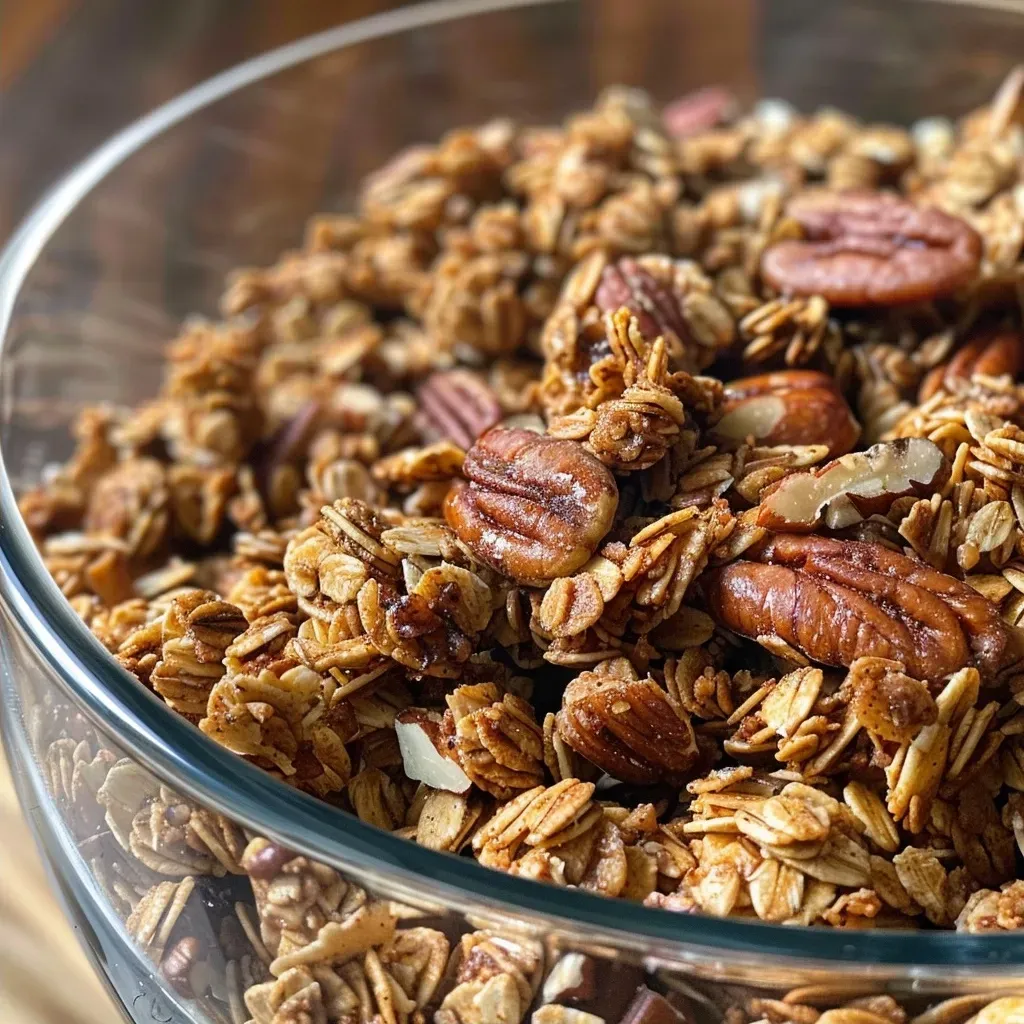
Close-up of Maple Cinnamon Pecan Granola with a golden-brown texture.

Now that we have our ingredients ready, let’s make some Maple Cinnamon Pecan Granola!

  1. Preheat the Oven: Set your oven to 325°F (165°C) to prepare for baking.
  2. Melt the Mixture: In a small saucepan, combine the coconut oil, pure maple syrup, vanilla, cinnamon, and salt over low heat until fully melted and mixed.
  3. Combine Dry Ingredients: In a large bowl, mix together the oats and chopped pecans. You can keep some pecans whole for added texture.
  4. Mix Wet and Dry: Pour the melted mixture over the dry ingredients and stir well until everything is evenly coated.
  5. Prepare to Bake: Line a baking sheet with parchment paper and spread the granola mixture as thinly as possible.
  6. Bake to Perfection: Bake for 20 minutes, stirring halfway through to ensure even browning.
  7. Cool and Enjoy: Let it cool completely on the baking sheet to achieve crunchy clusters before breaking into pieces.

Pro Tips for Perfect Granola

  • Don’t Rush Cooling: Allowing the granola to cool completely will help form those desirable crunchy clusters.
  • Thin Layer for Crunchiness: The thinner you spread the granola, the crunchier it will be—aim for an even layer!
  • Mix Add-Ins After Baking: If adding dried fruits or chocolate, mix them in after baking to prevent burning.
  • Store in an Airtight Container: Keep your granola fresh by storing it in a cool, dry place.
  • Experiment with Spices: Don’t hesitate to play with spices like nutmeg or cardamom to create your own flavor profile.
  • Use Fresh Ingredients: Ensure your spices and nuts are fresh for the best flavor.
  • Batch Size: This recipe can easily be doubled for weekly meal prep!
  • Monitor Baking Time: Ovens vary, so keep an eye on your granola during the last few minutes of baking.

Common Mistakes and Troubleshooting

Even the most seasoned chefs can encounter hiccups. Here’s how to navigate common issues:

  • Granola Too Soft: If your granola lacks crunch, it may need more baking time or wasn’t spread thin enough.
  • Burnt Granola: Keep a close watch during the last few minutes of baking to avoid over-browning.
  • Uneven Clumping: Stirring too often can disrupt clumping. Let it sit undisturbed while baking for better clusters.
  • Flavors Too Mild: If the flavor is lacking, consider adjusting the amount of cinnamon or maple syrup.

Delicious Variations to Try

Once you master this basic recipe, feel free to experiment with these variations:

  • Coconut Delight: Add 1/2 cup of shredded coconut for a tropical twist.
  • Berry Blast: Mix in 1/2 cup of dried cranberries or blueberries after baking.
  • Chocolate Lover: Stir in 1/2 cup of dark chocolate chips once the granola has cooled.
  • Nutty Crunch: Combine with a mix of your favorite nuts such as almonds, walnuts, and pistachios.

Storage and Make-Ahead Instructions

This granola is perfect for meal prep! Here’s how to store it:

  • Airtight Container: Store granola in an airtight container at room temperature for up to 2 weeks.
  • Freezing: For longer storage, freeze in a resealable bag for up to 3 months. Just thaw before enjoying!

Frequently Asked Questions

Let’s tackle some common questions about Maple Cinnamon Pecan Granola:

  • Can I make this granola nut-free? Yes! Substitute nuts with seeds like sunflower or pumpkin seeds.
  • Is this recipe gluten-free? Absolutely! Make sure to use certified gluten-free oats.
  • Can I use other sweeteners? Yes! Honey or agave syrup can be used instead of maple syrup.
  • How do I make it less sweet? Reduce the amount of maple syrup to suit your taste.
  • What can I serve granola with? Enjoy it over yogurt, oatmeal, or as a snack on its own.
  • Can I add protein powder? Yes! Stir in a scoop of protein powder with the dry ingredients for a protein boost.
  • Is it safe to eat granola raw? Yes, the oats are safe to eat raw, but baking improves flavor and texture!
  • How can I make it more crunchy? Bake it longer or try using more coconut oil to enhance crunchiness.

Nutritional Tips and Dietary Adaptations

This recipe is versatile and can accommodate various dietary needs:

  • Vegan: The recipe is naturally vegan, made with plant-based ingredients.
  • Dairy-Free: No dairy products are used, making it suitable for those with lactose intolerance.
  • Low Sugar: Adjust the sweetener to control sugar levels while still enjoying a delicious snack.
  • High Fiber: Oats and nuts provide a great source of dietary fiber, aiding digestion.

Essential Equipment Recommendations

Here’s what you’ll need to create your granola masterpiece:

  • Mixing Bowls: A large bowl to mix dry ingredients and a smaller one for wet ingredients.
  • Baking Sheet: A rimmed baking sheet lined with parchment paper for easy cleanup.
  • Spatula: A sturdy spatula helps to spread the granola evenly.
  • Measuring Cups and Spoons: Accurate measurements are key for perfect results!

Serving Suggestions

The versatility of this granola means it can be enjoyed in numerous ways:

  • As a Breakfast Cereal: Serve it with almond milk or your favorite plant-based milk.
  • Yogurt Parfait: Layer granola with yogurt and fresh fruits for a delightful breakfast or snack.
  • On Top of Oatmeal: Sprinkle granola over warm oatmeal for added texture.
  • Snack on Its Own: Perfect for on-the-go snacking or a mid-afternoon energy boost!

Conclusion: Your Culinary Adventure Awaits!

Congratulations on embarking on this culinary journey! Your Maple Cinnamon Pecan Granola not only nourishes but also connects you to the stories and flavors from around the globe. Remember, cooking is about exploration, so don’t hesitate to adapt this recipe to suit your taste. Each batch carries a piece of your culinary adventure, and I can’t wait to hear about your unique creations. Happy cooking, and may your kitchen always be filled with joy and flavor!

Maple Cinnamon Pecan Granola

Prep Time 10 minutes
Cook Time 20 minutes
Total Time 30 minutes
Servings 8 cups
Calories 350
A crunchy, sweet, and spicy homemade granola with pecans and maple syrup, perfect for breakfast or snacking.

Ingredients

Dry ingredients

  • 2 cups oats
  • 3/4 cup pecans (chopped half into smaller pieces)

Wet ingredients

  • 1/4 cup refined coconut oil
  • 3 tbsp pure maple syrup
  • 1 tsp vanilla
  • 1 1/2 tsp cinnamon
  • 1/8 tsp salt

Instructions 

  • Preheat oven to 325°F (160°C).
  • Mix melted coconut oil, maple syrup, vanilla, cinnamon, and salt in a saucepan.
  • Combine oats and pecans in a bowl, then add the liquid mixture and coat evenly.
  • Spread mixture on a parchment-lined baking sheet thinly.
  • Bake for 20 minutes, cool, then break into clusters.

Notes

Cooling completely helps achieve crunchy clusters.
Calories: 350kcal
Cost: $15
Course: Breakfast
Cuisine: American
Keyword: Granola

Embark on a Flavorful Journey with Apple Oatmeal Protein Muffins

Imagine the enticing aroma of freshly baked muffins wafting through your kitchen, inviting you to indulge in a delicious and nutritious treat. These Apple Oatmeal Protein Muffins are not just any ordinary muffins; they’re a delightful fusion of wholesome ingredients that not only satisfy your taste buds but also fuel your body with essential nutrients. Perfect for breakfast or as a snack on the go, this recipe is designed for adventurers and food lovers alike. Let’s dive into the world of flavors and nutrition with this comprehensive guide!

Why You’ll Love This Recipe

  • Nutritious Powerhouse: Packed with protein from collagen peptides and vanilla protein powder, these muffins help keep you full and energized throughout your day.
  • Wholesome Ingredients: Made with oats, unsweetened applesauce, and almond butter, they’re a healthy choice that caters to your dietary needs.
  • Versatile Snack: Whether you enjoy them warm with a cup of coffee or as a quick breakfast, these muffins adapt to your lifestyle.
  • Easy to Make: With simple steps and minimal prep time, you can whip up a batch of these muffins in less than 30 minutes!
  • Customizable: Feel free to experiment with add-ins and toppings to make each muffin batch uniquely yours!

Ingredients Breakdown

Let’s explore the ingredients that make these muffins a delightful treat, along with some handy substitutions:

  • Oats: 1 cup of rolled oats provides fiber and texture. For a gluten-free version, use certified gluten-free oats.
  • Collagen Peptides: 1/4 cup adds protein and supports healthy skin and joints. For a dairy-free option, swap with a plant-based protein powder.
  • Vanilla Protein Powder: 1/4 cup for a sweet flavor boost. You can substitute with chocolate protein powder for a different taste.
  • Ground Flaxseed: 2 tbsp for added fiber and omega-3 fatty acids. Chia seeds can be used as an alternative.
  • Cinnamon: 1 tsp adds warmth and flavor. You can also use nutmeg or pumpkin spice for a different twist.
  • Baking Soda: 1/2 tsp helps muffins rise. Ensure it’s fresh for the best results.
  • Salt: 1/4 tsp enhances flavors.
  • Almond Butter: 1/4 cup for creaminess and healthy fats. Peanut butter works well too!
  • Unsweetened Applesauce: 1/2 cup replaces oil and adds moisture. Use mashed banana for a different flavor profile.
  • Honey: 3 tbsp for sweetness. Maple syrup is a great vegan alternative.
  • Egg: 1 large egg binds the ingredients. For a vegan version, use 1/4 cup of unsweetened applesauce or a flax egg (1 tbsp flaxseed mixed with 2.5 tbsp water).
  • Apple: 1 finely diced apple brings natural sweetness and moisture. Opt for Granny Smith or Honeycrisp for a punchy flavor.
  • Chopped Walnuts: For topping, providing crunch and healthy fats. Feel free to leave them out or substitute with pecans.

Step-by-Step Instructions

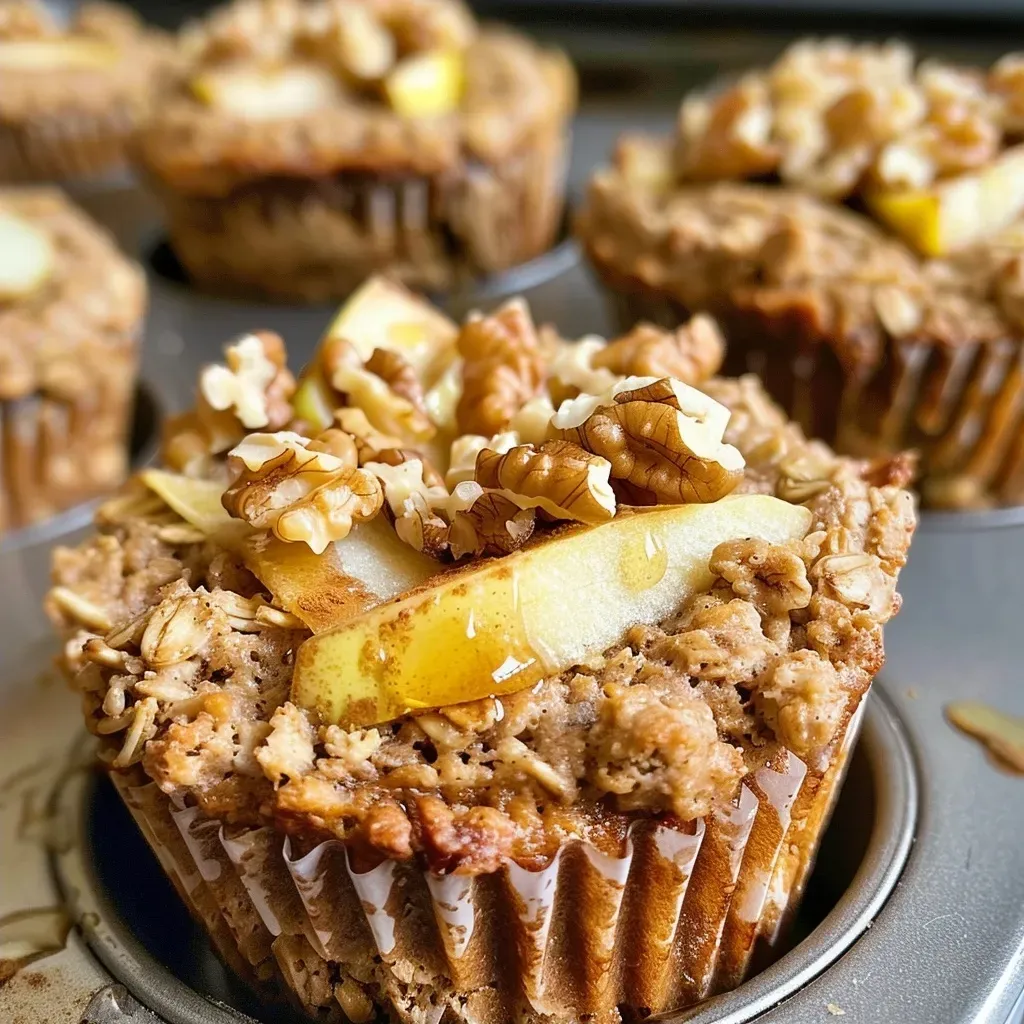
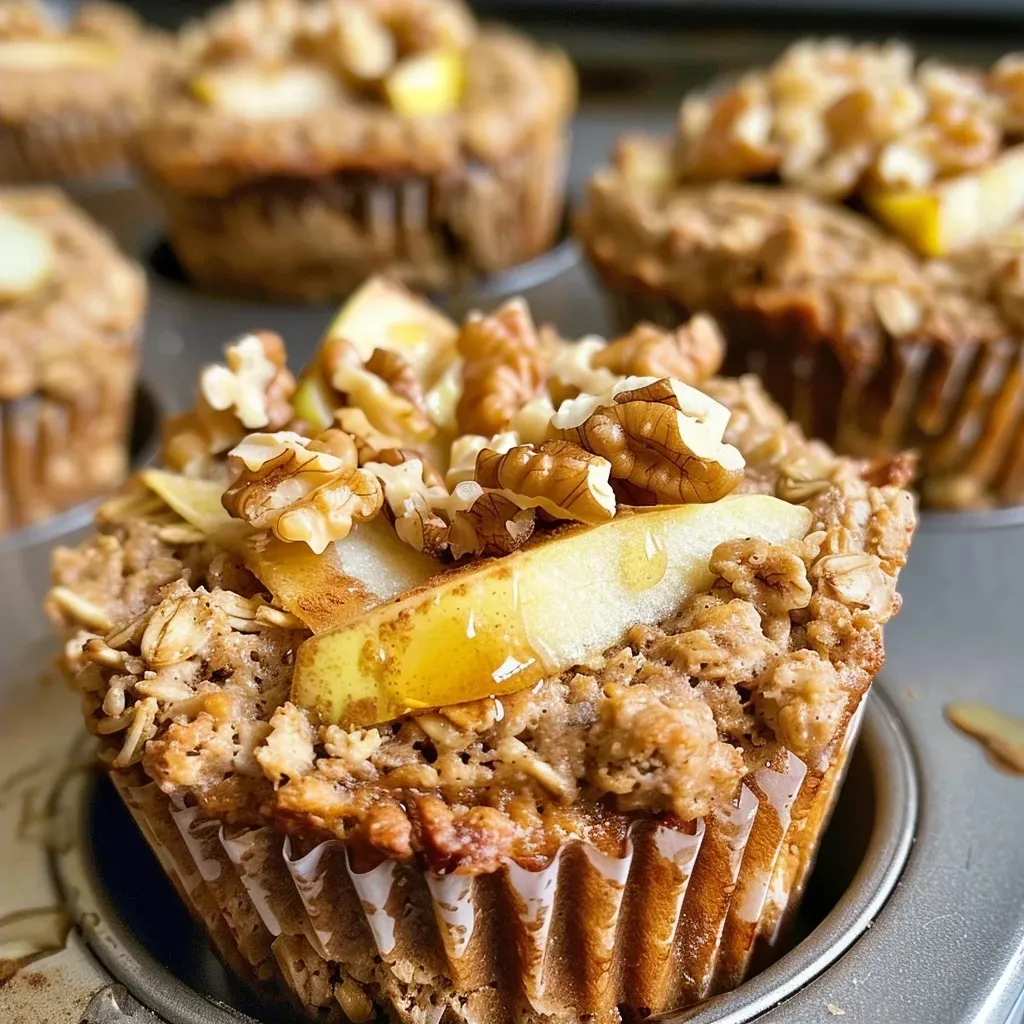
Close-up of a golden-brown Apple Oatmeal Protein Muffin with diced apple pieces on top.

Now that you have all the ingredients ready, let’s get started with the preparation:


Cake Decorating Set

★ Recommended Kitchen Tool

Cake Decorating Set

Make this recipe even easier with a quality Cake Decorating Set — a must-have kitchen staple!


🛒 View on Amazon →

As an Amazon Associate, we earn from qualifying purchases.
  • Finely dice the apple and set aside.
  • Add the dry ingredients to a blender: oats, ground flaxseed, vanilla protein powder, collagen peptides, cinnamon, baking soda, and salt.
  • Blend the dry ingredients until they form a fine flour.
  • Next, add the wet ingredients: unsweetened applesauce, honey, egg, and vanilla extract into the blender.
  • Blend until combined, ensuring a smooth batter.
  • Stir in the diced apple by hand for added texture and flavor.
  • Divide the muffin batter evenly into 9 greased muffin tins.
  • Top each muffin with chopped walnuts for an extra crunch.
  • Bake at 350°F (175°C) for 20-22 minutes or until a toothpick comes out clean.

Pro Tips for Perfect Muffins

To ensure your muffins turn out perfectly every time, consider these expert tips:

  • Don’t Overmix: Gently fold in the wet and dry ingredients to avoid dense muffins.
  • Use Fresh Ingredients: Ensure your baking soda and spices are fresh for optimal flavor and rise.
  • Adjust Sweetness: Depending on the sweetness of your apples, you might want to modify the amount of honey used.
  • Check for Doneness: Use a toothpick to test for doneness; it should come out clean when muffins are baked through.
  • Let Them Cool: Allow muffins to cool in the pan for 5 minutes before transferring them to a wire rack to cool completely.
  • Experiment with Flavors: Add chocolate chips, dried fruits, or spices to customize your muffins.
  • Batch Prep: Double the recipe and freeze extras to enjoy later for quick snacks or breakfasts.
  • Store Properly: Keep muffins in an airtight container to maintain freshness, or freeze them for longer storage.

Common Mistakes and Troubleshooting

Even the most seasoned bakers can run into hiccups. Here are some common mistakes and how to fix them:

  • Dense Muffins: This may happen if the batter is overmixed or if too much flour was added. Measure flour accurately and mix gently.
  • Dry Muffins: Overbaking can lead to dryness. Keep an eye on your muffins and check for doneness a few minutes before the recommended time.
  • Not Rising: Ensure your baking soda is fresh and you’re not overpacking the muffin tins.
  • Lack of Flavor: Always taste your batter before baking. Adjust sweetness or spices to your preference.

Variations to Try

Mix things up with these creative variations:

  • Chocolate Chip Apple Muffins: Add 1/2 cup of dark chocolate chips for a decadent treat.
  • Vegan Apple Muffins: Substitute the egg with a flax egg and use maple syrup instead of honey.
  • Spiced Apple Muffins: Incorporate nutmeg or ginger for a warm twist.
  • Berry Oatmeal Muffins: Swap diced apples for mixed berries for a fruity explosion.

Storage and Make-Ahead Instructions

These muffins are perfect for meal prep! Here’s how to store and reheat:

  • Room Temperature: Store in an airtight container for up to 3 days.
  • Refrigerator: Keep for up to a week in a sealed container.
  • Freezer: Freeze muffins individually wrapped in plastic wrap for up to 3 months. Thaw overnight in the refrigerator or microwave for a quick snack.

Frequently Asked Questions

Here are some common questions about these apple oatmeal protein muffins:

  • Can I use rolled oats instead of quick oats? Yes, but you may need to blend them longer to achieve a finer texture.
  • Are these muffins gluten-free? If you use gluten-free oats and protein powder, they can be made gluten-free.
  • Can I replace the applesauce? Yes, mashed bananas or yogurt can be used as alternatives.
  • How do I know when the muffins are done? Insert a toothpick into the center; if it comes out clean, they’re ready!
  • Can I add nuts or seeds? Absolutely! Feel free to add your favorite mix-ins for extra crunch.
  • How do I store leftover muffins? Keep them in an airtight container at room temperature or refrigerate for longer freshness.
  • Can I use other fruits? Yes! Try substituting with berries, pears, or peaches for a different flavor.
  • What if my batter is too dry? Add a splash of milk or applesauce to adjust the consistency.

Nutrition Tips and Dietary Adaptations

These muffins are not only delicious but also nutritious. Here’s how to adapt them:

  • Protein Boost: Add additional protein powder or incorporate seeds like chia or hemp.
  • Lower Sugar: Reduce honey or use a sugar substitute like stevia for a lower-calorie option.
  • Nut-Free: Use sunflower seed butter in place of almond butter for a nut-free version.

Equipment Recommendations

For best results, here’s what you’ll need:

  • Blender or Food Processor: To blend your dry ingredients into a fine flour.
  • Muffin Tins: Non-stick or lined with paper cups for easy removal.
  • Mixing Bowls: For combining ingredients before blending.
  • Measuring Cups and Spoons: Accurate measurements are key to baking success.

Serving Suggestions

These muffins can be enjoyed in various ways:

  • Breakfast on the Go: Perfect with a cup of coffee or tea for a quick morning meal.
  • Snack Time Treat: Great for an afternoon pick-me-up or post-workout snack.
  • Brunch Delight: Serve warm with a drizzle of honey or maple syrup at your next brunch gathering.

So there you have it! A comprehensive guide to making Apple Oatmeal Protein Muffins that will not only satisfy your cravings but also fuel your adventures. Grab your ingredients, preheat that oven, and let your culinary journey begin. Remember, every muffin is a bite of exploration in the world of flavors. Happy baking!

Apple Oatmeal Protein Muffins

Prep Time 10 minutes
Cook Time 20 minutes
Total Time 30 minutes
Servings 12 muffins
Calories 180
These healthy apple oatmeal muffins are packed with protein and fiber, perfect for a nutritious breakfast or snack.

Ingredients

Dry ingredients

  • 1 cup oats
  • 1/4 cup collagen peptides
  • 1/4 cup vanilla protein
  • 2 tbsp ground flaxseed
  • 1 tsp cinnamon
  • 1/2 tsp baking soda
  • 1/4 tsp salt

Wet ingredients

  • 1/4 cup almond butter
  • 1/2 cup unsweetened applesauce
  • 3 tbsp honey
  • 1 egg egg
  • 1/2 tsp vanilla extract

Add-ins

  • 1 apple apple (finely diced)
  • chopped walnuts chopped walnuts (for topping)

Instructions 

  • Dice the apple finely.
  • Blend dry ingredients into a fine flour.
  • Add wet ingredients and blend to combine.
  • Stir in diced apple by hand, then fill muffin tins and top with walnuts.
  • Bake at 350°F (175°C) for 20-22 minutes.

Notes

For extra flavor, add a dash of nutmeg or ginger.
Calories: 180kcal
Cost: $12
Course: Breakfast
Cuisine: American
Keyword: healthy, Muffins, Protein

Embrace the Warmth of Autumn with Maple Roasted Squash Wedges

As the air turns crisp and the leaves begin to fall, there’s something truly magical about the flavors of autumn. One of my absolute favorite dishes to celebrate this season is none other than Maple Roasted Squash Wedges. This delightful recipe, infused with the natural sweetness of maple syrup and the earthy aroma of thyme, showcases the beauty of seasonal ingredients. It’s not just a dish; it’s a celebration of flavors, a connection to the harvest, and a reminder of the joy of sharing meals with loved ones. Ready to dive into the world of squash? Let’s get started!

Why You’ll Love This Recipe

This recipe isn’t just about deliciousness; it’s about ease and versatility. Here are just a few reasons why this dish will quickly become a staple in your autumn repertoire:

  • Simple Ingredients: You probably already have the essentials like maple syrup and olive oil in your pantry. It’s a breeze to prepare!
  • Quick Prep Time: From start to finish, you can have these delicious wedges ready in under an hour. Perfect for busy weeknights or last-minute gatherings!
  • Health Benefits: Packed with vitamins and fiber, acorn squash is not only tasty but also nutritious. It’s a great way to add more veggies to your plate.
  • Visual Appeal: These roasted wedges are as beautiful as they are delicious, making them an impressive side dish for any holiday table.
  • Endless Variations: Whether you want to experiment with different squash varieties or add your favorite spices, this recipe is incredibly adaptable!

Ingredients and Substitutions

Let’s break down the ingredients to ensure you have everything you need to create these scrumptious squash wedges:


Meal Prep Container Set

★ Recommended Kitchen Tool

Meal Prep Container Set

Make this recipe even easier with a quality Meal Prep Container Set — a must-have kitchen staple!


🛒 Check Price on Amazon →

As an Amazon Associate, we earn from qualifying purchases.
  • 1 large winter squash (about 2-3 pounds): You can use acorn squash, butternut, delicata, or even sugar pumpkin—feel free to experiment!
  • 1 tablespoon olive oil: This adds a lovely richness. You can substitute with melted coconut oil for a different flavor profile.
  • 1 tablespoon maple syrup: The star ingredient! For a lower-sugar option, consider using agave syrup or honey.
  • 1 tablespoon thyme: Fresh thyme is ideal, but dried thyme works just as well. You can also try rosemary for a different twist!
  • 1/2 teaspoon salt: Adjust to your taste preferences.
  • 1/2 cup chopped walnuts: These add a delightful crunch. Feel free to substitute with pecans or omit altogether if nut-free.

Step-by-Step Instructions

Close-up of roasted squash wedges drizzled with maple syrup and garnished with thyme.

Now, let’s get into the nitty-gritty of preparing these delectable Maple Roasted Squash Wedges. Follow these simple steps:

  1. Preheat your oven to 400 degrees Fahrenheit. This is the perfect temperature to achieve that golden caramelization.
  2. Cut the squash into wedges. Start by cutting off both ends of the squash, then slice it in half. Scoop out the seeds using a spoon before cutting each half into wedges (as illustrated above).
  3. In a large bowl, toss the squash wedges with olive oil, maple syrup, thyme, and salt until they are well coated.
  4. Line a large baking sheet with parchment paper and spread the wedges evenly. This helps them roast without sticking.
  5. Roast in the oven for 20 minutes. After that, carefully flip the wedges over and continue roasting for another 20 minutes.
  6. For an extra touch, move the baking sheet to the top rack and broil the squash on high for 1-2 minutes to get those lovely caramelized tops.
  7. Once done, remove from the oven and sprinkle with chopped walnuts and additional thyme, if desired.

Pro Tips for Perfect Squash Wedges

To elevate your cooking game even further, here are some expert insights to keep in mind:

  • Uniform Cutting: Make sure your wedges are of similar size to ensure even cooking. Aim for about 1-inch thick pieces.
  • Don’t Overcrowd the Pan: Give the squash space on the baking sheet so they roast instead of steam.
  • Experiment with Spices: Try adding a pinch of cinnamon or nutmeg for a warm, spicy flavor.
  • Use Fresh Herbs: Fresh herbs not only enhance the flavor but also add a fragrant aroma to your kitchen.
  • Make Ahead: You can prep the squash and toss it with the seasoning a few hours in advance. Store it in the fridge until you’re ready to roast!
  • Check for Doneness: The wedges should be tender and easily pierced with a fork when done.
  • Garnish for Flavor: Adding crumbled goat cheese or feta before serving can introduce a creamy contrast to the sweetness of the squash.
  • Adjust for Your Family: If you have picky eaters, keep the seasoning simple or serve the maple syrup on the side for those who prefer a sweeter flavor.

Common Mistakes and Troubleshooting

Even the best of us make mistakes in the kitchen. Here are some common pitfalls and how to avoid them:

  • Overcooking: Keep an eye on the oven, especially during the broiling stage, as squash can go from perfectly caramelized to burnt in seconds.
  • Not Enough Flavor: Ensure you season well! If your squash tastes bland, it might need more salt or seasoning.
  • Squash Sticking to the Pan: Always use parchment paper or a silicone baking mat to prevent sticking.

Variations on Maple Roasted Squash Wedges

While this recipe is fantastic as is, don’t hesitate to make it your own! Here are some variations to inspire your creativity:

  • Sweet and Savory: Add a drizzle of balsamic glaze after roasting for a tangy contrast.
  • Spicy Twist: Sprinkle cayenne pepper or chili flakes before roasting for a kick.
  • Herb-Infused: Try using a blend of herbs, like sage and rosemary, to complement the sweetness of the squash.
  • Nut-Free Option: Omit the nuts and replace them with crispy breadcrumbs for added texture.

Storage and Make-Ahead Instructions

Want to enjoy your Maple Roasted Squash Wedges over several days? Here’s how to store and reheat:

  • Storing Leftovers: Place any leftover wedges in an airtight container in the refrigerator for up to 4 days.
  • Reheating: To retain their crispness, reheat in the oven at 350 degrees Fahrenheit for about 10 minutes.
  • Make-Ahead: You can prepare the squash and seasoning a day in advance. Just store them separately and combine when you’re ready to roast!

Frequently Asked Questions

Got questions? Here are some common inquiries about Maple Roasted Squash Wedges:

  • Can I use other types of squash? Absolutely! Butternut, delicata, or honeynut squash all work beautifully.
  • Is there a vegan option for this recipe? Yes! The ingredients are already vegan-friendly, just ensure the syrup you use is vegan.
  • Can I add other vegetables? You can toss in Brussels sprouts or carrots for a colorful medley!
  • How do I know when the squash is done? The squash should be fork-tender and caramelized on the edges.
  • Can I freeze the roasted squash? Yes, but it may alter the texture. Store in a freezer-safe container for up to 3 months.
  • What should I serve with these wedges? They pair wonderfully with roasted meats, grain bowls, or as part of a fall salad.
  • Can I use other sweeteners? Yes! Feel free to substitute with honey or agave syrup.
  • How do I make this recipe gluten-free? This recipe is naturally gluten-free, making it a perfect choice for gluten-sensitive diets!

Nutritional Tips and Dietary Adaptations

For those watching their dietary intake, here are some tips:

  • Low-Calorie Option: Reduce the amount of maple syrup or use a sugar-free alternative.
  • For Keto Diets: Opt for acorn squash, as it is lower in carbs compared to other varieties.
  • High-Fiber Choice: Pair with a side of quinoa or farro for a fiber-packed meal.

Equipment Recommendations

To make your cooking experience seamless, here are a few tools that can help:

  • Sharp Chef Knife: For easy cutting of the squash.
  • Cutting Board: A sturdy board will help you slice safely and efficiently.
  • Baking Sheet: A large, rimmed baking sheet lined with parchment paper ensures even roasting.
  • Mixing Bowl: Use a large bowl to toss the squash with seasonings.

Serving Suggestions

When it comes to serving, consider these delightful pairings:

  • As a Side Dish: Serve alongside roasted chicken or turkey for a seasonal feast.
  • In a Salad: Toss the roasted wedges into a mixed green salad with cranberries and goat cheese for a delicious crunch.
  • Grain Bowls: Add to bowls with quinoa, kale, and a tahini dressing for a wholesome meal.

Conclusion

As you can see, Maple Roasted Squash Wedges are not just a side dish; they are a wonderful way to embrace the flavors of the season and create lasting memories around the dinner table. With their natural sweetness, versatility, and ease of preparation, they are sure to become a favorite in your household. So, gather your loved ones, share stories of your culinary adventures, and enjoy the warmth of autumn with every delicious bite!

Maple Roasted Squash Wedges

Prep Time 10 minutes
Cook Time 40 minutes
Total Time 50 minutes
Servings 4 servings
Calories 250
Enjoy these sweet and savory roasted squash wedges glazed with maple syrup and topped with crunchy walnuts for a delightful fall-inspired dish.

Ingredients

Main

  • 1 large winter squash (about 2-3 pounds)
  • 1 tablespoon olive oil
  • 1 tablespoon maple syrup
  • 1 tablespoon thyme or dried thyme (plus more for garnish)
  • 1/2 teaspoon salt
  • 1/2 cup chopped walnuts

Instructions 

  • Preheat oven to 400°F (200°C). Cut squash into wedges and toss with olive oil, maple syrup, thyme, and salt.
  • Arrange wedges on a parchment-lined baking sheet and roast for 20 minutes.
  • Flip wedges and roast for another 20 minutes, then broil on high for 1-2 minutes to caramelize.
  • Remove from oven, sprinkle with chopped walnuts and extra thyme if desired.

Notes

For extra flavor, garnish with fresh thyme or a drizzle of additional maple syrup.
Calories: 250kcal
Cost: $15
Course: Side Dish
Cuisine: American
Keyword: squash

Experience the Essence of Autumn with Pumpkin Streusel Muffins

As the leaves turn and the air grows crisp, there’s nothing quite like the warm, inviting aroma of freshly baked muffins wafting through your kitchen. Join me, Jack, as we dive into the world of Pumpkin Streusel Muffins, a delightful blend of rich pumpkin puree and warm spices that encapsulate the very essence of fall. Perfect for breakfast or a sweet afternoon snack, these muffins are not only a treat for your taste buds but also a way to connect with the comforting traditions of the season.

Why You’ll Love This Recipe

Here are five compelling reasons why these muffins will become a staple in your autumn repertoire:

  • Flavor Explosion: The combination of pumpkin, cinnamon, and a buttery streusel topping creates a mouthwatering flavor profile that is both comforting and exciting.
  • Moist and Tender: Thanks to the pumpkin puree and oil, these muffins are incredibly moist and tender, making every bite a delight.
  • Easy to Make: With straightforward steps, these muffins are perfect for both seasoned bakers and those new to the kitchen.
  • Perfect for Sharing: Whether it’s a family gathering or a cozy brunch with friends, these muffins are sure to impress and spread joy.
  • Versatile Treat: Enjoy them warm from the oven, or top them with a drizzle of glaze for an extra touch of sweetness.

Ingredient Breakdown and Substitutions

Let’s explore the star ingredients that make these muffins a seasonal favorite, along with possible substitutions to suit your pantry!


Silicone Baking Cups Set

★ Recommended Kitchen Tool

Silicone Baking Cups Set

Make this recipe even easier with a quality Silicone Baking Cups Set — a must-have kitchen staple!


🛒 View on Amazon →

As an Amazon Associate, we earn from qualifying purchases.
  • All-Purpose Flour: Essential for structure. You can substitute with whole wheat flour for a nuttier flavor.
  • Pumpkin Puree: The heart of the recipe. You can use homemade puree or canned for convenience.
  • Brown Sugar: Adds moisture and depth. Coconut sugar is a great alternative for a less refined option.
  • Spices: A blend of cinnamon, ginger, nutmeg, and cloves brings warmth. Feel free to adjust based on your taste preferences.
  • Vegetable Oil: Keeps muffins moist. You can use melted coconut oil or applesauce for a lighter option.

Pro Tips for Baking Success

Side view of a freshly baked Pumpkin Streusel Muffin topped with a crumbly streusel.

Before you preheat that oven, here are some expert insights to ensure your muffins turn out perfectly!

  • Room Temperature Ingredients: Ensure eggs and other ingredients are at room temperature for even mixing and better rise.
  • Don’t Overmix: Mix until just combined to maintain a tender crumb—overmixing can lead to dense muffins.
  • Use a Cookie Scoop: For uniform muffins, a cookie scoop is your best friend—ensuring even baking.
  • Check for Doneness: Insert a toothpick in the center; it should come out clean or with a few crumbs, not wet batter.
  • Cool Properly: Let muffins cool in the pan for a few minutes before transferring to a wire rack to avoid sogginess.

Common Mistakes and Troubleshooting

Even the best bakers can make mistakes! Here’s how to avoid common pitfalls:

  • Too Dense: If your muffins are dense, it might be due to overmixing or using too much flour. Measure flour accurately and mix gently.
  • Streusel Doesn’t Stick: If your streusel topping falls off, try pressing it gently into the batter before baking.
  • Burnt Tops: If the tops are browning too quickly, cover with aluminum foil midway through baking.

Delicious Variations to Try

Feel free to experiment with these variations to make the recipe your own!

  • Chocolate Chip Pumpkin Muffins: Add 1 cup of chocolate chips to the batter for a sweet twist.
  • Nutty Crunch: Incorporate 1/2 cup of chopped walnuts or pecans into the batter or streusel for added texture.
  • Maple Glazed Muffins: Drizzle a maple syrup glaze over cooled muffins for a sweet finish.
  • Vegan Option: Substitute eggs with flaxseed meal and use plant-based milk for a vegan-friendly treat.

Storage and Make-Ahead Instructions

These muffins can be made ahead of time for busy mornings or gatherings.

  • Room Temperature: Store in an airtight container for up to 3 days.
  • Refrigeration: They can be refrigerated for up to a week. Just warm them up before serving.
  • Freezing: Freeze muffins in a single layer, then transfer to a freezer bag. They’ll last up to 3 months!

Frequently Asked Questions

Got questions? Here are some common inquiries regarding Pumpkin Streusel Muffins:

  • Can I use pumpkin pie filling instead of pumpkin puree? No, pumpkin pie filling contains added spices and sugars that will alter the recipe.
  • Can I make these muffins gluten-free? Yes, swap all-purpose flour for a gluten-free blend to enjoy a gluten-free version.
  • What if I want to add fruit? Feel free to add dried cranberries or raisins for a fruity kick!
  • How do I know when they’re done baking? Use a toothpick; it should come out clean when muffins are fully baked.
  • Can I double the recipe? Absolutely! Just ensure that your mixing bowl is large enough to accommodate the extra ingredients.
  • What’s the best way to reheat muffins? Microwave for 10-15 seconds or pop them in a preheated oven for a few minutes.
  • How can I make the streusel topping extra crunchy? Use cold butter and avoid overmixing to keep it crumbly.
  • Are these muffins suitable for breakfast? Yes! They are a delicious and wholesome breakfast option, especially paired with coffee or tea.

Nutritional Tips and Dietary Adaptations

Looking to make your muffins healthier? Here are some tips:

  • Whole Wheat Flour: Swap half of the all-purpose flour for whole wheat flour for added fiber.
  • Reduced Sugar: Cut the sugar by 1/4 cup for a less sweet muffin that still packs flavor.
  • Low-Fat Options: Use low-fat yogurt instead of oil for a lighter version.

Essential Equipment for Perfect Muffins

Here’s a quick list of tools that will make your baking experience smooth and enjoyable:

  • Muffin Tins: Standard 12-cup muffin pans are perfect for this recipe.
  • Mixing Bowls: A set of various sizes will help in separating wet and dry ingredients.
  • Whisk and Spatula: Essential for mixing ingredients thoroughly without overworking the batter.
  • Cooling Rack: Allows muffins to cool evenly after baking, preventing soggy bottoms.

Serving Suggestions

To elevate your muffin experience, consider these serving ideas:

  • With Butter: Serve warm with a pat of butter for a classic touch.
  • Accompanied by Coffee: Pair with a hot cup of coffee or chai tea for a cozy morning ritual.
  • On a Brunch Table: Present these muffins alongside other seasonal treats for a stunning brunch spread.

Now that you have the ultimate guide to creating Pumpkin Streusel Muffins, it’s time to gather your ingredients and embark on this delightful baking adventure. Remember, every muffin has a story of comfort and connection, just waiting to be shared. Happy baking, my friends!

Pumpkin Streusel Muffins

Prep Time 15 minutes
Cook Time 20 minutes
Total Time 35 minutes
Servings 14 muffins
Calories 250
Delight in these moist pumpkin muffins topped with a crunchy streusel and drizzled with sweet glaze, perfect for fall mornings or cozy afternoons.

Ingredients

Streusel

  • 3/4 cup all-purpose flour
  • 1/2 cup light brown sugar
  • 1 teaspoon cinnamon
  • 1/2 teaspoon salt
  • 1/3 cup unsalted butter, melted

Muffin Batter

  • 2 cups all-purpose flour
  • 1 teaspoon baking soda
  • 1/2 teaspoon baking powder
  • 1/2 teaspoon salt
  • 2 teaspoons cinnamon
  • 1/2 teaspoon ground ginger
  • 1/4 teaspoon ground nutmeg
  • 1/8 teaspoon ground cloves
  • 2 large eggs, at room temperature
  • 1/2 cup granulated sugar
  • 1/2 cup light brown sugar
  • 1/3 cup vegetable oil
  • 1 15-ounce can pumpkin puree
  • 1 teaspoon vanilla extract
  • 1/4 cup milk

Glaze

  • 1 cup powdered sugar
  • 2 tablespoons pure maple syrup
  • 1/2 teaspoon cinnamon
  • 1/2 teaspoon vanilla extract
  • 1-2 tablespoons milk (adjust for desired consistency)

Instructions 

  • Preheat oven to 425°F (220°C). Line muffin tins with liners.
  • Make streusel: Mix flour, sugar, cinnamon, salt; stir in melted butter until clumpy. Chill.
  • Combine dry ingredients; whisk eggs and sugars, then add oil, pumpkin, vanilla, milk. Mix wet and dry just until combined.
  • Fill muffin liners halfway, add streusel topping, press down gently. Bake at 425°F for 5 min, then reduce to 350°F and bake 12-15 min.
  • Cool muffins 10 min, then drizzle with glaze made from powdered sugar, maple syrup, cinnamon, vanilla, and milk.

Notes

For best results, do not overmix the batter to keep muffins light and tender.
Calories: 250kcal
Cost: $15
Course: Breakfast, Snack
Cuisine: American
Keyword: pumpkin