Author

Jack

Browsing

Embark on a Flavorful Journey with Maple Almond Butter Granola

Welcome to a culinary adventure that marries rich flavors and wholesome ingredients! This Maple Almond Butter Granola recipe is not just a delicious snack; it’s a heartfelt blend of creamy almond butter and luscious maple syrup that invites you to explore cultures and comfort through food. Whether you’re enjoying it in a bowl with milk, on top of yogurt, or simply by the handful, this homemade granola is sure to become your go-to favorite.

Why You’ll Love This Recipe

There’s no shortage of reasons to adore this granola! Here are just a few:

  • Easy to Make: With just a handful of ingredients and simple steps, you can whip up a batch in no time.
  • Customizable: Feel free to personalize your granola with your favorite nuts, seeds, or dried fruits.
  • Healthy Snack: Packed with wholesome oats and healthy fats from almond butter, it’s a nutritious choice for any time of day.
  • Vegan-Friendly: This recipe is entirely plant-based, making it perfect for those following a vegan lifestyle.
  • Great for Meal Prep: Make a big batch and store it for a week’s worth of snacks or breakfasts!

Ingredients Breakdown

Let’s dive into the heart of our recipe—the ingredients! Here’s what you’ll need:


Cake Decorating Set

★ Recommended Kitchen Tool

Cake Decorating Set

Make this recipe even easier with a quality Cake Decorating Set — a must-have kitchen staple!


🛒 Check Price on Amazon →

As an Amazon Associate, we earn from qualifying purchases.
  • 1/2 cup creamy almond butter: Choose a creamy variety for better mixing. If you prefer a nuttier flavor, feel free to substitute with crunchy almond butter.
  • 1/2 cup coconut oil: Melted coconut oil helps bind the granola together while adding a subtle tropical flavor.
  • 1/2-3/4 cup maple syrup: Adjust the sweetness to your liking—start with 1/2 cup and add more if you want a sweeter treat.
  • 2 teaspoons vanilla bean paste: This adds a delicious depth of flavor. If unavailable, vanilla extract works just fine.
  • 3 cups gluten-free oats: Ensure they are certified gluten-free for those with sensitivities.
  • 1 cup sliced almonds: If you prefer, chopped or slivered almonds can also be used.
  • 1 teaspoon cinnamon: Adds warmth and a comforting aroma.
  • 1/2 teaspoon salt: A touch of salt enhances all the flavors.

How to Craft Your Granola Masterpiece

Close-up view of Maple Almond Butter Granola with visible almonds and oats.

Making this granola is as easy as pie! Follow these steps:

  1. Preheat your oven: Set it to 350°F (175°C) to get it nice and hot.
  2. Melt the coconut oil: In a microwave-safe bowl, heat the coconut oil for about 30 seconds until melted.
  3. Mix wet ingredients: In a large mixing bowl, combine the melted coconut oil with maple syrup, vanilla, and almond butter. Mix until smooth.
  4. Add the dry ingredients: Toss in the oats, cinnamon, sliced almonds, and salt. Stir until everything is evenly coated without soaking the oats.
  5. Spread on a baking sheet: Line a large baking sheet with parchment paper and pour the granola mixture onto it, spreading it out evenly.
  6. Bake to perfection: Bake for 25-35 minutes, checking at the 20-minute mark. Stir halfway through for even browning.
  7. Cool and enjoy: Once golden brown, remove from the oven and let cool for at least 10 minutes before breaking into clusters.

Pro Tips for Granola Success

To elevate your granola game, consider these expert insights:

  • Let it cool: Cooling the granola completely will help it clump together nicely.
  • Stir gently: When mixing the dry ingredients, be gentle to avoid crushing the oats.
  • Store properly: Keep your granola in an airtight container to maintain freshness for up to a week.
  • Experiment with flavors: Add spices like nutmeg or ginger for a unique twist.
  • Mix in seeds: Pumpkin seeds or sunflower seeds are great additions for extra crunch!
  • Go nuts: Feel free to swap in your favorite nuts for a personal touch.
  • Try different sweeteners: Honey or agave syrup can also be used instead of maple syrup.
  • Add dried fruits: Mix in raisins, cranberries, or apricots after baking for added sweetness.

Common Mistakes and Troubleshooting

Even the best of us can make mistakes in the kitchen! Here are some troubleshooting tips:

  • Granola is too soft: If your granola doesn’t crisp up, try baking it a little longer and make sure it’s spread evenly on the sheet.
  • Burnt edges: If the edges are browning too quickly, lower the oven temperature slightly and bake longer.
  • Granola clumped too much: If clusters are too large, break them apart while they’re still warm.

Delicious Variations to Try

Don’t hesitate to mix things up! Here are some creative variations:

  • Chocolate Lover’s: Add cocoa powder and dark chocolate chips for a decadent treat.
  • Fruit and Nut Medley: Incorporate dried fruits and a variety of nuts for a colorful mix.
  • Spiced Pumpkin: Stir in pumpkin spice and roasted pumpkin seeds for a fall-inspired version.
  • Coconut Bliss: Toss in shredded coconut for a tropical twist.

Storage and Make-Ahead Instructions

Great news! This granola is perfect for meal prep:

  • Store in an airtight container: Keep your granola fresh at room temperature for up to a week.
  • Make-ahead friendly: Prepare a large batch ahead of time and store it for quick breakfasts or snacks throughout the week.

Comprehensive FAQ

Here are some common questions about making granola:

  • Can I use other nut butters? Yes! Peanut butter or cashew butter can also work well in this recipe.
  • Is this granola gluten-free? Absolutely! Just be sure to use certified gluten-free oats.
  • How can I make it sugar-free? Substitute maple syrup with a sugar-free syrup or use mashed bananas for sweetness.
  • Can I add protein powder? Yes, you can mix in a scoop of your favorite protein powder for an added boost.
  • How long does it take to prepare? The total time is about 45 minutes, including baking and cooling.
  • What can I serve it with? Enjoy it over yogurt, in smoothies, or simply as a snack!
  • Can I double the recipe? Yes, just use two baking sheets and bake in batches if necessary.
  • Is it safe to eat raw oats? Yes, rolled oats are safe to eat raw, but toasting them enhances their flavor.

Nutrition Tips and Dietary Adaptations

This granola is not only delicious but also nutritious! Here are some tips:

  • Healthy Fats: Almond butter provides healthy monounsaturated fats.
  • Fiber-Rich: Oats are a great source of dietary fiber, promoting digestive health.
  • Protein Boost: Add chia seeds or hemp seeds for extra protein.

Essential Equipment

Before you start, gather these tools:

  • Baking Sheet: A large, rimmed sheet is ideal for spreading the granola.
  • Parchment Paper: This helps prevent sticking and makes cleanup a breeze.
  • Mixing Bowls: Use a large bowl for mixing your wet and dry ingredients.
  • Spatula: A silicone spatula is perfect for mixing and spreading the granola.

Serving Suggestions

Now that your granola is ready, how should you enjoy it? Here are some ideas:

  • As a Breakfast Cereal: Serve it with milk or a dairy-free alternative for a hearty start to your day.
  • Topped on Yogurt: Sprinkle it over Greek yogurt with fresh fruit for a delightful parfait.
  • In Smoothie Bowls: Add a handful on top of your favorite smoothie bowl for added crunch.
  • Snack Time: Keep a jar of granola handy for a quick, nutritious snack on the go!

Conclusion

Your journey into the world of homemade granola starts here! With its delightful flavors and healthy ingredients, this Maple Almond Butter Granola recipe is sure to become a cherished staple in your kitchen. So grab your apron and get ready to savor the joy of creating a dish that not only nourishes but also tells a story of exploration and connection. Happy cooking!

Maple Almond Butter Granola

Prep Time 10 minutes
Cook Time 30 minutes
Total Time 40 minutes
Servings 8 servings
Calories 350
A crunchy, sweet, and nutty granola perfect for breakfast or snacking, made with almond butter, maple syrup, and almonds.

Ingredients

Wet ingredients

  • 1/2 cup creamy almond butter (need creamy to evenly mix into granola)
  • 1/2 cup coconut oil
  • 1/2-3/4 cup maple syrup (start with 1/2 cup, add up to 3/4 cup for sweetness)
  • 2 teaspoons vanilla bean paste (or vanilla extract)

Dry ingredients

  • 3 cups gluten free oats
  • 1 cup sliced almonds (chopped/slivered also works)
  • 1 teaspoon cinnamon
  • 1/2 teaspoon salt

Instructions 

  • Preheat oven to 350F (175C). Melt coconut oil and mix with maple syrup, vanilla, and almond butter.
  • Combine oats, cinnamon, almonds, and salt in the same bowl. Mix until lightly coated.
  • Spread mixture on parchment-lined baking sheet. Bake for 25-35 minutes, stirring halfway.
  • Let cool for 10 minutes, then break into clusters and serve.

Notes

Store in an airtight container for up to two weeks.
Calories: 350kcal
Cost: $15
Course: Breakfast
Cuisine: American
Keyword: Granola

Embark on a Chocolate Adventure

Welcome to the delectable world of cookies, where each bite is a journey into rich flavors and textures. Today, we’re diving deep into the realm of salted double dark chocolate cookies. These cookies are not just a treat; they are an experience, a celebration of chocolate that transports you to dessert paradise with every chunky bite. Get ready to explore the intricacies of this recipe that promises to enchant your taste buds and fill your kitchen with the irresistible aroma of baking chocolate.

Why You’ll Love This Recipe

This double dark chocolate cookie recipe is designed to not only satisfy your sweet tooth but also to elevate your baking game. Here are five reasons why you’ll fall in love with these cookies:

  • Intense Chocolate Flavor: Utilizing Dutch-process cocoa and rich bittersweet chocolate, these cookies deliver an unparalleled chocolate experience.
  • Perfectly Balanced Sweetness: The combination of brown and granulated sugars creates a well-rounded sweetness that complements the dark chocolate beautifully.
  • Textural Contrast: Enjoy the delightful crunch of the flaky sea salt juxtaposed with the soft, chewy center of the cookies.
  • Easy to Make: With straightforward steps and common ingredients, you can whip up a batch of these cookies in no time.
  • Customizable Treat: Whether you prefer them with nuts, different chocolates, or even a hint of spice, this recipe is a great base for your creativity.

Ingredient Breakdown

Let’s explore the key ingredients that make these cookies a true delight:


Silicone Baking Cups Set

★ Recommended Kitchen Tool

Silicone Baking Cups Set

Make this recipe even easier with a quality Silicone Baking Cups Set — a must-have kitchen staple!


🛒 View on Amazon →

As an Amazon Associate, we earn from qualifying purchases.
  • All-Purpose Flour: The foundation of any cookie, providing structure. You can substitute with gluten-free flour if needed.
  • Dutch-Process Cocoa: For the richest flavor, I recommend Cacao Barry Extra Brute. It gives these cookies a deep chocolate color and taste.
  • Kosher Salt: Enhances the chocolate flavor. You can use sea salt in its place for a different texture.
  • Baking Powder & Baking Soda: These leavening agents ensure your cookies rise perfectly.
  • Unsalted Butter: Room temperature butter is key for the right texture. You can substitute with coconut oil for a dairy-free option.
  • Dark Brown Sugar: Adds moisture and a subtle caramel flavor. Light brown sugar can be used as an alternative.
  • Granulated Sugar: Balances the richness of the chocolate.
  • Egg: Provides moisture and binds the ingredients together. If you need a vegan option, use a flax egg.
  • Pure Vanilla Extract: A must-have for depth of flavor.
  • Bittersweet Chocolate: Chopped into chunks for that chocolatey goodness. You can also mix in white chocolate for contrast.
  • Flaky Sea Salt: Finishing touch that elevates the taste and presentation of the cookies.

Step-by-Step Instructions

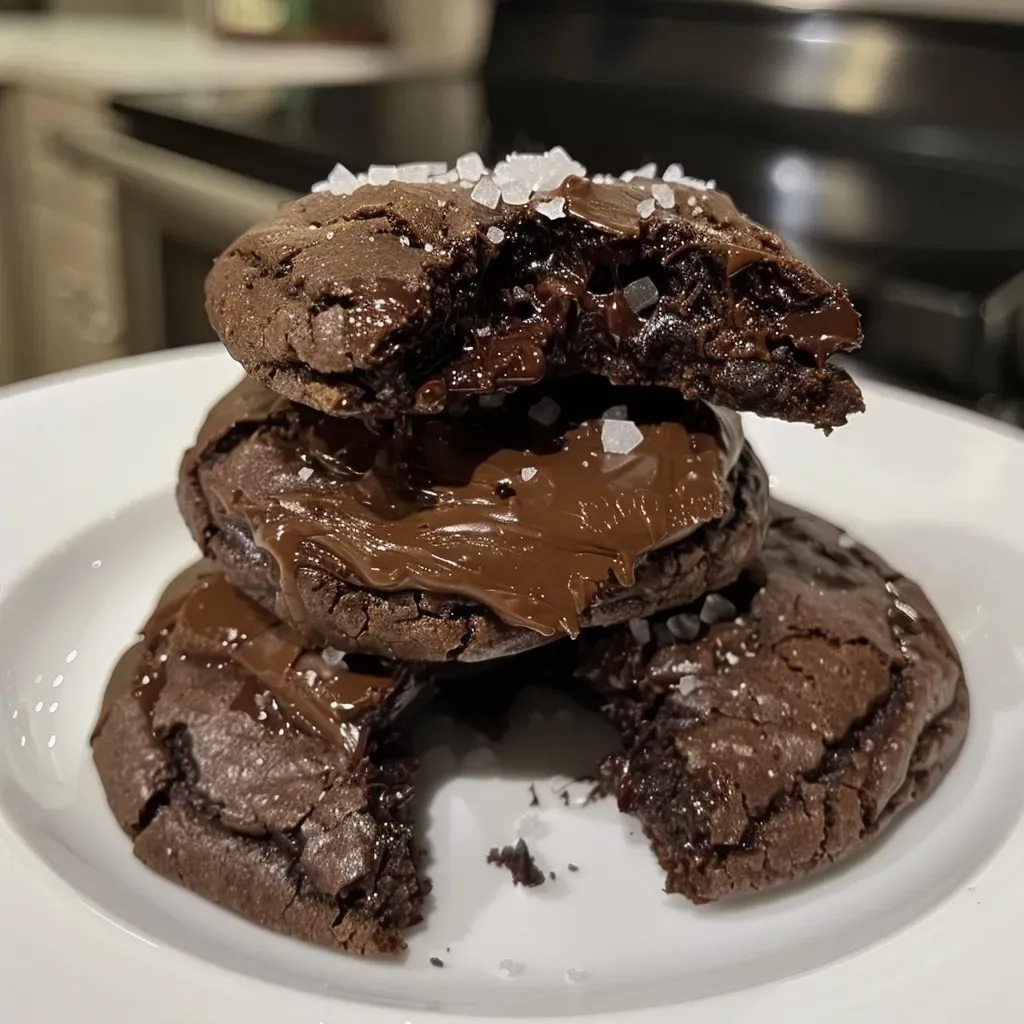
Close-up shot of a salted double dark chocolate cookie with glossy chocolate chunks.

Ready to bake? Follow these simple steps to create your own batch of salted double dark chocolate cookies:

  1. Prepare the Dry Ingredients: In a bowl, whisk together flour, cocoa powder, salt, baking powder, and baking soda. Set aside.
  2. Cream the Butter and Sugars: Using a stand mixer, cream butter, brown sugar, and granulated sugar until light and fluffy, about 5 minutes. Add the egg and vanilla and mix until combined.
  3. Combine Dry and Wet Ingredients: Gradually add the dry mixture to the wet mixture, mixing until just combined. Fold in the chocolate chunks until evenly distributed.
  4. Scoop the Dough: Use a cookie scoop to form 3 1/2 tbsp balls of dough and place them on a parchment-lined baking sheet. Sprinkle with flaky salt.
  5. Rest the Dough: If you prefer a deeper flavor, cover and chill the dough for 24 hours. If you’re baking right away, preheat your oven to 350°F and place the baking sheet in the freezer while the oven heats up.
  6. Bake the Cookies: Bake for 15-18 minutes or until the edges are set but the centers remain soft. Remove from the oven and let cool on a wire rack.

Expert Tips for Perfect Cookies

Here are some additional tips to ensure your cookies turn out perfectly every time:

  • Chill the Dough: Chilling enhances the flavor and prevents spreading. Aim for at least 30 minutes.
  • Use Quality Chocolate: The better the chocolate, the better the cookie. Invest in high-quality chocolate for the best results.
  • Don’t Overmix: When adding dry ingredients, mix until just combined to keep the cookies tender.
  • Watch the Baking Time: Every oven is different. Keep an eye on your cookies—they should look slightly underbaked in the center when you take them out.
  • Experiment with Toppings: Feel free to add nuts, dried fruit, or even a drizzle of melted chocolate for an extra touch.
  • Store Properly: Keep cookies in an airtight container at room temperature to maintain freshness.
  • Try Different Flours: If you’re adventurous, experiment with alternative flours like almond or oat for unique flavors and textures.
  • Pair with Beverages: Enjoy these cookies with a glass of cold milk, coffee, or even dessert wine for an indulgent experience.

Common Mistakes and Troubleshooting

Even the best bakers face challenges. Here are common pitfalls and how to avoid them:

  • Cookies Spread Too Much: This can happen if the dough is too warm. Chilling the dough helps control spread.
  • Overbaked Cookies: If your cookies are hard or dry, try reducing the baking time by a couple of minutes next time.
  • Flavor is Too Mild: Always use high-quality cocoa and chocolate. Adjust your ingredients for a more intense chocolate flavor.
  • Texture is Off: If the cookies are too cakey, reduce the baking soda slightly. For chewier cookies, add a bit more brown sugar.

Variations to Try

Get creative with these delicious variations on the classic salted double dark chocolate cookie:

  • Nutty Delight: Add chopped walnuts or pecans for a crunchy texture.
  • Spicy Chocolate: Incorporate a pinch of cayenne or chili powder for a spicy kick.
  • Mint Chocolate: Mix in peppermint extract and dark chocolate chips for a refreshing twist.
  • White Chocolate Raspberry: Add white chocolate chunks and freeze-dried raspberry powder for a fruity flavor.

Storage and Make-Ahead Instructions

To enjoy your cookies longer, here are some storage and make-ahead tips:

  • Room Temperature Storage: Store cookies in an airtight container at room temperature for up to 5 days.
  • Freezing Cookies: Freeze baked cookies for up to 3 months. Thaw before serving.
  • Make-Ahead Dough: You can prepare the dough and freeze it in balls. Just bake from frozen, adding a couple of extra minutes to the baking time.
  • Chill Before Baking: For enhanced flavor, chill the dough overnight before baking.

Comprehensive FAQ

Here are some common questions about making salted double dark chocolate cookies:

  • Can I use milk chocolate instead of dark chocolate? Yes, but it will result in a sweeter cookie.
  • How can I make these cookies gluten-free? Substitute all-purpose flour with a 1:1 gluten-free flour blend.
  • What’s the best way to store leftover cookies? Keep them in an airtight container at room temperature or freeze for extended freshness.
  • Can I add more chocolate chunks? Absolutely! Feel free to add extra chunks for a more decadent treat.
  • Why did my cookies turn out flat? This can occur if the butter was too warm or if the dough wasn’t chilled enough.
  • How do I know when the cookies are done? The edges should be firm, while the center remains soft. They will continue to cook slightly after being removed from the oven.
  • Can I use margarine instead of butter? While you can, it may alter the flavor and texture slightly.
  • What’s the secret to chewy cookies? Using a higher ratio of brown sugar to granulated sugar helps achieve a chewy texture.

Nutritional Tips and Dietary Adaptations

If you’re looking to enjoy these cookies while being mindful of nutrition, consider these adaptations:

  • Use Whole Wheat Flour: For added fiber and nutrients, substitute part of the all-purpose flour with whole wheat flour.
  • Lower Sugar Options: Use less sugar or replace some with natural sweeteners like maple syrup or honey.
  • Dairy-Free Substitute: Replace butter with coconut oil and use dairy-free chocolate.
  • Portion Control: Bake smaller cookies to enjoy the same rich flavor with fewer calories.

Essential Equipment Recommendations

To ensure your baking experience is smooth and enjoyable, here’s a list of equipment you might need:

  • Stand Mixer: Essential for creaming butter and sugars to the perfect fluffy texture.
  • Baking Sheets: Use heavy-duty, non-stick baking sheets for even baking.
  • Parchment Paper: Lining your baking sheets helps prevent sticking and makes cleanup easier.
  • Cookie Scoop: A cookie scoop ensures uniform size for even baking.

Serving Suggestions

These cookies are delicious on their own, but here are some serving ideas to elevate your dessert experience:

  • À la Mode: Serve warm cookies with a scoop of vanilla ice cream for a decadent treat.
  • With Fresh Berries: Pair with fresh raspberries or strawberries for a refreshing contrast.
  • As a Gift: Package these cookies in a decorative box for a thoughtful homemade gift.
  • With Coffee or Tea: Enjoy with a cup of your favorite brew for a delightful afternoon treat.

As we conclude our cookie expedition, remember that baking is about exploration and creativity. With this salted double dark chocolate cookie recipe, you’re not just creating a dessert; you’re crafting memories with every bite. So gather your ingredients, don your apron, and let the adventure begin!

salted double dark chocolate cookies

Prep Time 15 minutes
Cook Time 18 minutes
Total Time 33 minutes
Servings 12 cookies
Calories 220
Indulge in these intensely chocolatey cookies with a perfect balance of sweetness and sea salt for a delightful treat.

Ingredients

dry ingredients

  • 1 cup all-purpose flour
  • 3/4 cup Dutch-process cocoa (use Cacao Barry Extra Brute for the most insanely chocolatey cookies ever)
  • 3/4 tsp kosher salt
  • 1/2 tsp baking powder
  • 1/2 tsp baking soda
  • 10 tbsp unsalted butter (room temperature)
  • 3/4 cup dark brown sugar
  • 2/3 cup granulated sugar
  • 1 large egg
  • 2 tsp pure vanilla extract
  • 2 cups bittersweet chocolate (chopped into 1/2” chunks)
  • flaky sea salt for finishing (such as Maldon)

Instructions 

  • Whisk together flour, cocoa powder, salt, baking powder, and baking soda; set aside.
  • Cream butter, sugars, then add egg and vanilla until combined.
  • Mix in dry ingredients, then fold in chocolate chunks. Scoop dough into balls, sprinkle with flaky salt.
  • If resting dough, cover and chill; otherwise, preheat oven to 350°F and freeze until ready.
  • Bake until set, 15-18 minutes, then cool on a rack.

Notes

For extra flavor, sprinkle with flaky sea salt immediately after baking.
Calories: 220kcal
Cost: $15
Course: Dessert
Cuisine: American
Keyword: chocolate

Welcome to a Culinary Adventure

If you’re on a quest for a delightful baking experience that marries the sweetness of apples with the subtle earthiness of zucchini, look no further! Our Apple Cinnamon Zucchini Bread is not just a treat for the taste buds; it’s a journey into the heart of comfort baking. Whether enjoyed warm from the oven or toasted with a pat of butter, this loaf is sure to become a favorite in your kitchen. In this guide, we’ll explore everything from the ingredients to expert tips, ensuring your baking experience is both successful and enjoyable.

Why You’ll Love This Recipe

This Apple Cinnamon Zucchini Bread is packed with benefits that make it a must-try:

  • Moist and Flavorful: The combination of zucchini and apples creates a moist, flavorful loaf that stays fresh for days.
  • Perfect for Breakfast or Snack: This bread is versatile enough to be enjoyed at breakfast, as an afternoon snack, or even as a dessert.
  • Healthy Twist: Packed with zucchini, this recipe adds a nutritious element to your baking while keeping flavors rich.
  • Easy to Make: With simple steps and common ingredients, even novice bakers can create this delicious bread.
  • Customizable: This recipe allows for numerous variations, making it suitable for different dietary preferences and tastes.

Ingredients Breakdown

Let’s dive into what you’ll need to whip up this delightful loaf:


Meal Prep Container Set

★ Recommended Kitchen Tool

Meal Prep Container Set

Make this recipe even easier with a quality Meal Prep Container Set — a must-have kitchen staple!


🛒 View on Amazon →

As an Amazon Associate, we earn from qualifying purchases.
  • 1.75 cups all-purpose flour: Spooned and leveled for accuracy.
  • 1 tsp baking powder: Helps the bread rise to perfection.
  • 0.5 tsp baking soda: Works alongside the baking powder for a fluffy texture.
  • 1.5 tsp ground cinnamon: The star spice that brings warmth to the recipe.
  • 0.5 tsp fine sea salt: Enhances overall flavor.
  • 0.5 cup neutral oil: You can use vegetable or avocado oil for a light texture.
  • 0.75 cup light brown sugar: Adds moisture and a hint of caramel flavor.
  • 0.25 cup granulated sugar: Balances the sweetness of the brown sugar.
  • 2 large eggs: Room temperature for better incorporation.
  • 2 tsp vanilla extract: A touch of sweetness and depth of flavor.
  • 1 cup zucchini: Grated, packed, and not squeezed; this adds moisture without overwhelming flavor.
  • 1 cup tart apple: Peeled, cored, and diced small (about 1 medium Granny Smith), for that delightful tartness.

Pro Tips for Baking Success

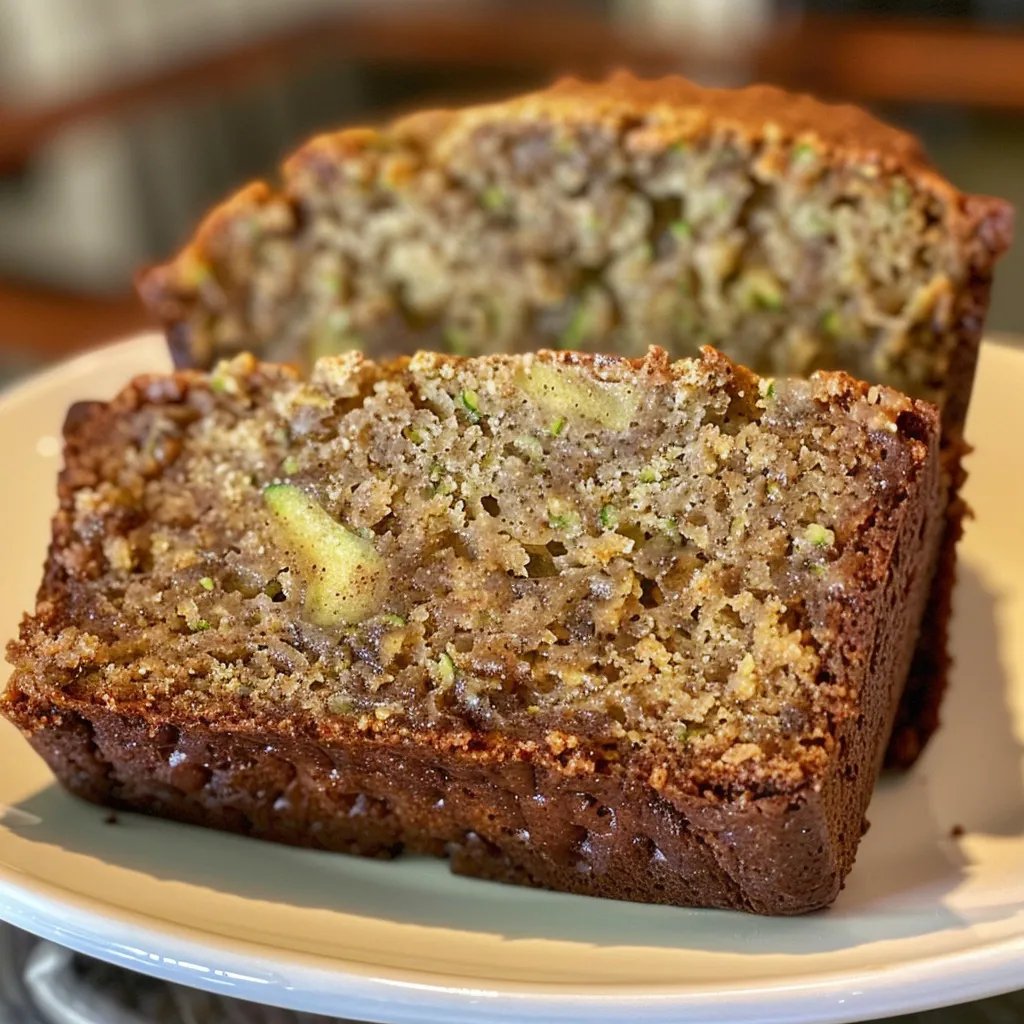
A close-up side view of a slice of apple cinnamon zucchini bread, showcasing its moist texture and apple chunks.

To ensure your Apple Cinnamon Zucchini Bread turns out perfectly, consider these expert insights:

  • Ingredient Temperature: Make sure your eggs are at room temperature; this helps create a smoother batter.
  • Proper Zucchini Preparation: Grate the zucchini and pack it into the measuring cup without squeezing out excess moisture.
  • Mixing Technique: Mix the wet and dry ingredients separately before combining to avoid over-mixing.
  • Oven Temperature: Preheat your oven fully; an uneven temperature can lead to uneven baking.
  • Testing for Doneness: Insert a toothpick into the center of the loaf; it should come out clean or with a few moist crumbs.
  • Cooling Time: Allow the bread to cool in the pan for 10 minutes before transferring to a wire rack to cool completely.
  • Flavor Development: For the best flavor, let the bread rest overnight; the flavors deepen as it sits.
  • Storing Tips: Store in an airtight container at room temperature for up to three days, or refrigerate for up to a week.

Common Mistakes and Troubleshooting

Even the best bakers can run into issues. Here are some common mistakes and how to avoid them:

  • Overmixing: This can lead to dense bread. Mix just until combined.
  • Too Much Zucchini: Adding too much can make the bread soggy. Stick to the recommended amount.
  • Underbaking: If the bread is too soft in the center, it needs more time. Always check doneness with a toothpick.
  • Incorrect Oven Temperature: An oven thermometer can help ensure your oven is at the right temperature.

Variations to Try

Feel free to get creative with your Apple Cinnamon Zucchini Bread! Here are some variations to consider:

  • Nuts and Seeds: Add chopped walnuts or pecans for crunch and flavor.
  • Dried Fruits: Mix in raisins or dried cranberries for a sweet, chewy addition.
  • Spices: Experiment with nutmeg or allspice for added warmth.
  • Gluten-Free Option: Substitute all-purpose flour with a 1:1 gluten-free flour blend.

Storage and Make-Ahead Instructions

Want to enjoy this bread later? Here’s how to store it properly:

  • Room Temperature: Wrap the cooled loaf tightly in plastic wrap and store at room temperature for up to 3 days.
  • Refrigeration: For longer freshness, store in an airtight container in the fridge for up to a week.
  • Freezing: Wrap slices in plastic, then foil, and place in a freezer bag. It keeps well for 3 months!

Frequently Asked Questions

Here are some common questions about making Apple Cinnamon Zucchini Bread:

  • Do I need to peel the zucchini? No, the skin adds color and nutrition, but you can peel it if you prefer a smoother texture.
  • Can I use applesauce instead of fresh apples? Yes, you can substitute 1 cup of applesauce for the diced apples.
  • Why did my bread sink in the middle? This could be due to underbaking or overmixing the batter. Ensure proper mixing and baking time.
  • Can I make this into muffins? Absolutely! Adjust the baking time to about 20-25 minutes.
  • What type of apples work best? Tart apples like Granny Smith are ideal for balance, but feel free to experiment!
  • Can I add chocolate chips? Yes! Chocolate pairs wonderfully with the flavors of this bread.
  • What if I don’t have ground cinnamon? You could use allspice, nutmeg, or pumpkin spice as alternatives.
  • Is it possible to make this vegan? Yes, replace the eggs with flax eggs and use plant-based oil.

Nutritional Tips and Dietary Adaptations

This bread isn’t just delicious; it’s also adaptable to various dietary needs:

  • Low Sugar: Reduce the sugars by half; the natural sweetness of apples and zucchini still shines through.
  • Vegan: Substitute eggs with flaxseed meal (1 tbsp flaxseed + 2.5 tbsp water per egg).
  • Gluten-Free: Use a gluten-free flour blend for a celiac-friendly version.
  • Low-Calorie Option: Use unsweetened applesauce to replace oil and reduce sugar.

Equipment Recommendations

To make your baking experience smoother, here’s a list of essential equipment:

  • Mixing Bowls: A set of various sizes for mixing ingredients efficiently.
  • Measuring Cups and Spoons: Accurate measurements are crucial for baking success.
  • Grater: A box grater or food processor works well for zucchini.
  • Loaf Pan: A standard 9×5 inch loaf pan is ideal for this recipe.
  • Cooling Rack: Essential for cooling the bread evenly and preventing sogginess.

Serving Suggestions

This Apple Cinnamon Zucchini Bread can be served in various delightful ways:

  • Warm Slices: Serve warm with a smear of butter or cream cheese.
  • Toast: Toast slices for a delightful crunch and serve with jam.
  • Pair with Coffee: This bread pairs beautifully with your morning coffee or afternoon tea.
  • Dress It Up: Top with a light drizzle of icing for a sweet treat.

Conclusion

In wrapping up our journey through the wonderful world of Apple Cinnamon Zucchini Bread, it’s clear that this recipe is not just about satisfying your taste buds—it’s about embracing the joy of baking. With its moist texture, rich flavors, and endless adaptability, this loaf is set to become a staple in your baking repertoire. So grab your ingredients, preheat that oven, and get ready to share a slice of happiness with friends and family. Happy baking!

Apple Cinnamon Zucchini Bread

Prep Time 15 minutes
Cook Time 50 minutes
Total Time 1 hour 5 minutes
Servings 8 slices
Calories 250
A moist and flavorful zucchini bread infused with cinnamon and fresh apple chunks, perfect for a cozy snack or breakfast.

Ingredients

Flours and Leavening

  • 1.75 cups all-purpose flour (spooned and leveled)
  • 1 tsp baking powder
  • 0.5 tsp baking soda

Spices

  • 1.5 tsp ground cinnamon
  • 0.5 tsp fine sea salt

Wet Ingredients

  • 0.5 cup neutral oil (vegetable or avocado oil)
  • 0.75 cup light brown sugar (packed)
  • 0.25 cup granulated sugar
  • 2 large eggs (room temperature)
  • 2 tsp vanilla extract

Fruits and Vegetables

  • 1 cup zucchini (grated, packed, not squeezed)
  • 1 cup tart apple (peeled, cored, diced small (about 1 medium Granny Smith))

Instructions 

  • Preheat oven to 350°F (175°C) and prepare a loaf pan.
  • Mix dry ingredients: flour, baking powder, baking soda, cinnamon, and salt.
  • In a separate bowl, whisk together wet ingredients: oil, sugars, eggs, and vanilla.
  • Combine wet and dry ingredients, then fold in zucchini and apple.
  • Pour batter into the prepared loaf pan and bake for 50 minutes until golden and a toothpick comes out clean.

Notes

For extra flavor, sprinkle with a little cinnamon sugar before baking.
Calories: 250kcal
Cost: $15
Course: Breakfast, Snack
Cuisine: American
Keyword: Apple, Cinnamon, zucchini

Embrace the Flavors of Fall with Pumpkin Delight

As the leaves turn golden and the air cools, there’s no better way to celebrate the season than with a slice of Perfect Pumpkin Layer Cake. This delightful dessert captures the warmth of autumn with its rich pumpkin flavor and warm spices, topped with a luscious cream cheese frosting. Join me on this culinary journey, where each layer tells a story of comfort, connection, and the joy of baking.

Why You’ll Love This Recipe!

This pumpkin layer cake is not just a treat; it’s an experience. Here’s why you’ll want to make it:

  • Irresistible Flavor: The combination of pumpkin and warm spices creates a mouthwatering flavor that truly embodies fall.
  • Moist and Tender: Made with cake flour and buttermilk, this cake has an incredibly soft and moist texture that melts in your mouth.
  • Versatile for Celebrations: Whether it’s Thanksgiving, a fall birthday, or just a cozy gathering, this cake fits any occasion.
  • Simple Yet Elegant: The layered design and creamy frosting make it a showstopper dessert that impresses without complicated techniques.
  • Customizable Options: With suggested variations, you can make this cake your own!

Perfect Pumpkin Layer Cake Ingredients

To create this delightful layer cake, you’ll need the following ingredients:


5-Speed Electric Hand Mixer

★ Recommended Kitchen Tool

5-Speed Electric Hand Mixer

Make this recipe even easier with a quality 5-Speed Electric Hand Mixer — a must-have kitchen staple!


🛒 Shop This Tool →

As an Amazon Associate, we earn from qualifying purchases.
  • 2 3/4 Cups (290g) sifted cake flour: This gives the cake its delicate crumb. (See DIY notes for making your own.)
  • 2 1/2 tsp baking powder: Essential for leavening the cake.
  • 1 tsp baking soda: Helps with the rise and texture.
  • 1 tsp salt: Enhances the flavors of the other ingredients.
  • 2 tsp ground cinnamon: For that warm, spicy flavor.
  • 1 tsp allspice: Adds depth to the spice blend.
  • 1 tsp nutmeg: A must-have for that classic pumpkin flavor.
  • 1/2 tsp ground ginger: Provides a hint of warmth.
  • 1 Cup (226g) unsalted butter: Must be at room temperature for the best texture.
  • 3/4 Cup (150g) packed brown sugar: For moisture and depth of flavor.
  • 1 Cup (200g) white granulated sugar: Balances sweetness.
  • 3 large eggs: Room temperature for a smoother batter.
  • 2 tsp pure vanilla extract: Enhances the cake’s flavor.
  • 1 1/2 Cups (12 oz, 378g) canned pumpkin puree: The star ingredient!
  • 1 Cup (240ml) buttermilk: Adds moisture and tang. (See DIY notes for making your own.)
  • 16 Oz (226g) cream cheese: For the frosting, use brick-style, not spreadable.
  • 8 Cups (960g) powdered sugar: Sweetens the frosting to perfection.
  • 1 Tbsp pure vanilla extract: For flavor in the frosting.
  • 1/2 tsp salt: To balance out the sweetness.

Expert Tips for Baking Success

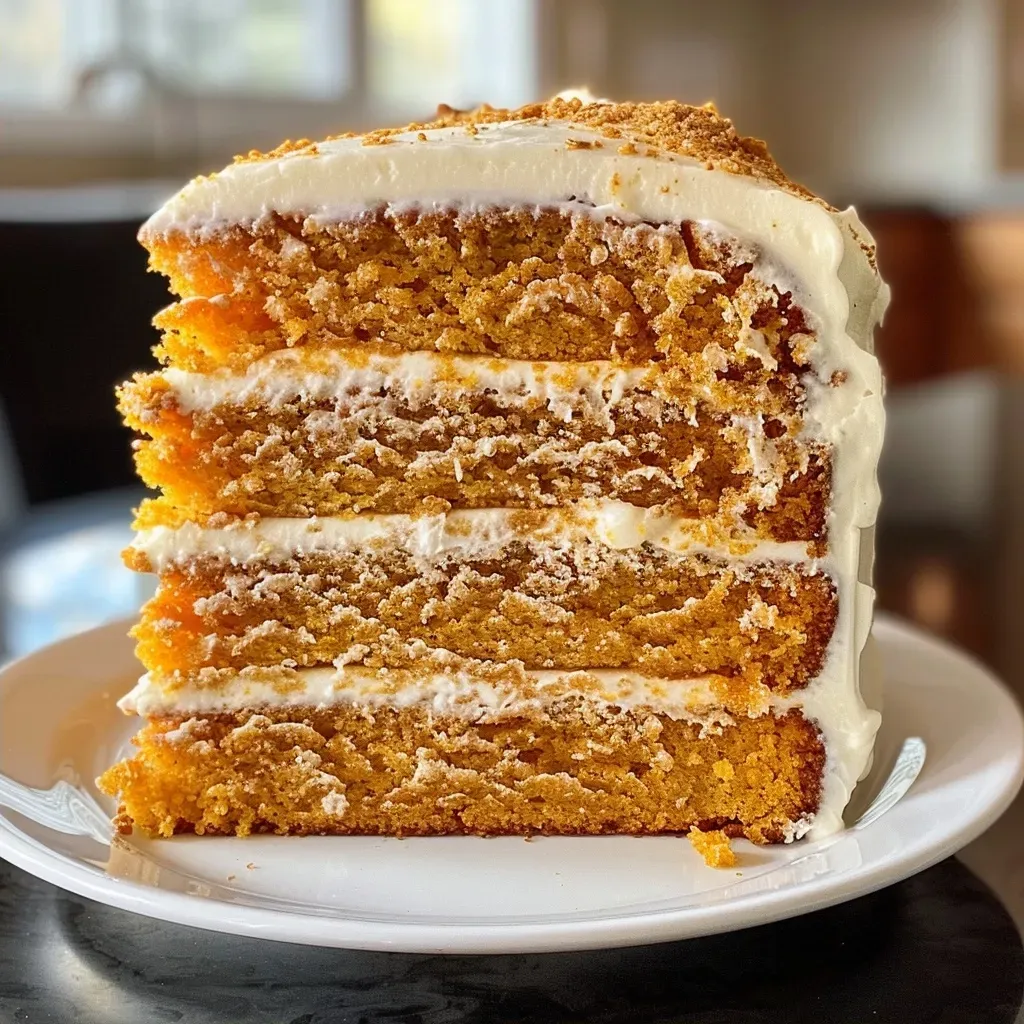
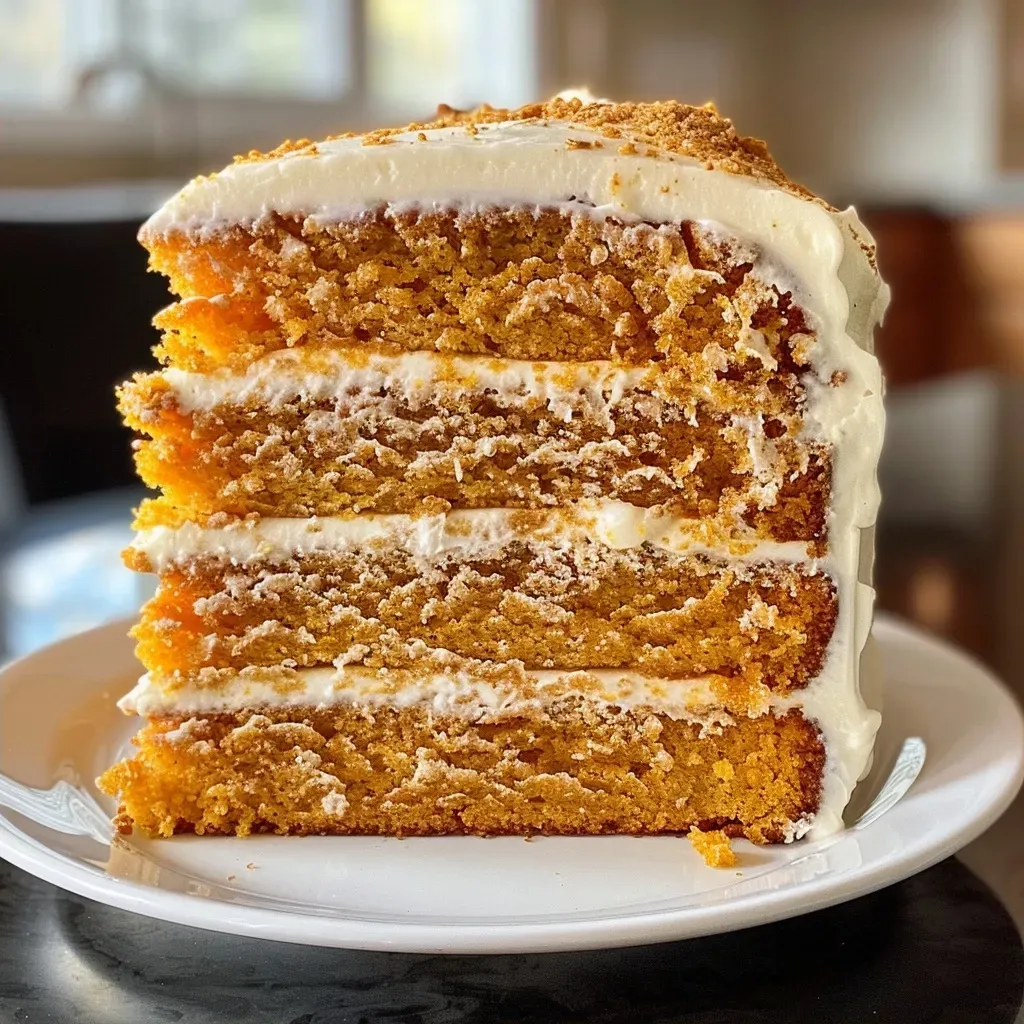
Close-up view of a multi-layered pumpkin cake with cream cheese frosting.

To ensure your cake turns out perfectly every time, consider these expert tips:

  • Ingredient Temperature: Ensure all your ingredients are at room temperature for an even batter and better texture.
  • Measure Flour Properly: Use the spoon-and-level method to avoid dense cakes. Spoon flour into your measuring cup and level off with a knife.
  • Don’t Overmix: Mix just until combined to avoid a tough cake.
  • Use a Toothpick: Insert a toothpick into the center of the cake to check for doneness. It should come out clean or with a few crumbs.
  • Cool Layers Completely: Allow the cake layers to cool in the pans for 10 minutes before transferring them to a wire rack to cool completely.
  • Make Ahead: You can bake the cake layers a day in advance and store them in the fridge, wrapped tightly in plastic wrap.
  • Frosting Tips: Beat the cream cheese and butter together until smooth before adding sugar to prevent lumps in your frosting.
  • Decorating: Use a cake turntable and offset spatula for a professional finish when frosting your cake.

Common Mistakes and Troubleshooting

Even the best bakers can run into issues. Here are common mistakes and how to troubleshoot them:

  • Dense Cake: This can happen if you overmix the batter or use too much flour. Remember to measure accurately!
  • Dry Cake: Ensure you’re using the right amount of liquid, and don’t overbake your cake.
  • Frosting Too Runny: If your frosting is too thin, add more powdered sugar until you reach the desired consistency.
  • Crumbly Cake Layers: This can occur if the cake is not adequately cooled before frosting. Allow layers to cool completely.

Variations to Try

Make this recipe your own with these fun variations:

  • Biscoff Pumpkin Layer Cake: Add crushed Biscoff cookies into the batter for a delightful crunch.
  • Chocolate Chip Pumpkin Cake: Fold in semi-sweet chocolate chips for a sweet surprise.
  • Naked Pumpkin Cake: Omit the frosting and serve with a dusting of powdered sugar for a rustic look.
  • Spiced Pumpkin Bundt Cake: Bake in a bundt pan and drizzle with a simple glaze instead of frosting.

Storage and Make-Ahead Instructions

Want to enjoy this cake later? Here’s how to store and make it ahead of time:

  • Storing: Keep the cake in an airtight container at room temperature for up to 3 days, or refrigerate for up to a week.
  • Freezing: Wrap each layer tightly in plastic wrap and aluminum foil; freeze for up to 3 months. Thaw overnight in the fridge before frosting.
  • Make-Ahead: Bake the cake layers 1-2 days in advance. Frost just before serving for the best texture.

Frequently Asked Questions

Here are some common questions about making the Perfect Pumpkin Layer Cake:

  • Can I use pumpkin pie filling instead of pumpkin puree? No, pumpkin pie filling contains added spices and sugars, which will alter the recipe.
  • What can I substitute for buttermilk? You can use a mixture of milk and vinegar or lemon juice (1 cup of milk + 1 tbsp vinegar/lemon juice).
  • How can I make this cake gluten-free? Substitute the cake flour with a gluten-free all-purpose flour blend.
  • How do I know when the cake is done? Use a toothpick. It should come out clean or with a few crumbs.
  • Can I make this cake vegan? Yes, substitute eggs with flax eggs and butter with a vegan butter alternative.
  • What frosting pairs best with this cake? Cream cheese frosting is traditional, but you could also try a maple or vanilla buttercream.
  • Can I add nuts to the batter? Absolutely! Chopped pecans or walnuts can add a nice texture.
  • How long does this cake last? At room temperature, it lasts about 3 days; in the fridge, it can last up to a week.

Nutrition Tips and Dietary Adaptations

For those mindful of nutrition, here are some tips:

  • Reduce Sugar: You can cut the sugar in the cake or frosting by 25% without sacrificing flavor.
  • Healthier Fat Options: Substitute half of the butter with applesauce for a lower-fat option.
  • Increase Fiber: Add oats or flaxseeds to the batter for added nutrients.

Essential Equipment Recommendations

To make your baking experience smoother, consider these essential tools:

  • Stand Mixer: Makes mixing the batter easier and faster.
  • Cake Pans: Use 9-inch round pans for even layers.
  • Offset Spatula: Perfect for frosting and smoothing out the cake.
  • Wire Rack: To cool the cake layers evenly.

Serving Suggestions

When it’s time to serve, consider these suggestions:

  • Fresh Whipped Cream: A dollop on top enhances the flavors beautifully.
  • Caramel Drizzle: A drizzle of salted caramel sauce adds an indulgent touch.
  • Spiced Nuts: Top with candied pecans or walnuts for added texture and crunch.
  • Seasonal Fruits: Serve with slices of apples or pears for a fresh contrast.

Conclusion

And there you have it! The Perfect Pumpkin Layer Cake is not just a dessert; it’s a celebration of autumn flavors and cherished moments. I hope you’re inspired to try this recipe and share it with your loved ones. Remember, every slice carries a story, and with each bite, you’re not just tasting a cake; you’re savoring the essence of the season. Happy baking!

Perfect Pumpkin Layer Cake

Prep Time 30 minutes
Cook Time 35 minutes
Total Time 1 hour 5 minutes
Servings 12 slices
Calories 450
A moist and flavorful pumpkin layer cake perfect for fall celebrations, topped with creamy frosting.

Ingredients

Cake Flour

  • 2 3/4 cups sifted cake flour (DIY recipe in notes)

Baking Powder

  • 2 1/2 tsp baking powder

Baking Soda

  • 1 tsp baking soda

Salt

  • 1 tsp salt

Ground Spices

  • 2 tsp ground cinnamon
  • 1 tsp allspice
  • 1 tsp nutmeg
  • 1/2 tsp ground ginger

Unsalted Butter

  • 226 g unsalted butter, room temperature

Brown Sugar

  • 3/4 cup packed brown sugar

Granulated Sugar

  • 1 cup white granulated sugar

Eggs

  • 3 large eggs, room temperature

Vanilla Extract

  • 2 tsp pure vanilla extract

Pumpkin Puree

  • 1 1/2 cups canned pumpkin puree

Buttermilk

  • 1 cup buttermilk (DIY recipe in notes)

Cream Cheese

  • 16 oz cream cheese, room temperature (brick-style, not the spreadable kind)

Powdered Sugar

  • 8 cup powdered sugar

Vanilla Extract (Frosting)

  • 1 Tbsp pure vanilla extract

Salt (Frosting)

  • 1/2 tsp salt

Instructions 

  • Preheat oven to 350°F (175°C). Grease and flour two 9-inch round cake pans.
  • Mix dry ingredients: flour, baking powder, baking soda, salt, and spices.
  • Cream butter and sugars, then add eggs and vanilla. Mix in pumpkin and buttermilk.
  • Gradually add dry ingredients to wet, then divide batter between pans and bake for 35 minutes.
  • Let cakes cool, then prepare frosting by beating cream cheese, powdered sugar, vanilla, and salt until smooth. Frost the cake.

Notes

Ensure all ingredients are at room temperature for best results.
Calories: 450kcal
Cost: $15
Course: Dessert
Cuisine: American
Keyword: pumpkin

Discover the Essence of Fall with Healthy Apple Butter

As the leaves turn and the air crisps, there’s a certain magic that envelops the season. A delightful way to embrace this autumn ambiance is by making Healthy Apple Butter. This recipe captures the warmth and nostalgia of cozy evenings, transforming simple apples into a luscious spread that can elevate your breakfasts and desserts. Whether you’re spreading it on toast, dolloping it on pancakes, or savoring it straight from the jar, this homemade apple butter is a celebration of fall’s bounty.

Why You’ll Love This Recipe

There are countless reasons to fall in love with this Healthy Apple Butter. Here are just a few:

  • Sweet and Spicy Flavor: The combination of sweet apples and warm spices creates a perfect balance that tantalizes your taste buds.
  • Easy to Make: With just a few ingredients and a slow cooker, you can effortlessly whip up a batch of this delicious spread.
  • No Added Sugar: This recipe uses the natural sweetness of apples, ensuring a wholesome treat without any added sugars.
  • Versatile Usage: Perfect for spreading on toast, adding to oatmeal, or using in baking, healthy apple butter is a versatile ingredient.
  • Long Shelf Life: Store it in the fridge or freeze it, and enjoy the flavors of fall all year round!

Ingredients Breakdown

Let’s take a closer look at the ingredients you’ll need to make this delightful apple butter:


Professional Chef Knife Set

★ Recommended Kitchen Tool

Professional Chef Knife Set

Make this recipe even easier with a quality Professional Chef Knife Set — a must-have kitchen staple!


🛒 View on Amazon →

As an Amazon Associate, we earn from qualifying purchases.
  • 6 medium apples: Choose a sweet variety like Gala or Honeycrisp for the best flavor.
  • 1/4 cup apple cider vinegar or water: This adds a lovely tang; however, if you prefer a milder flavor, water works just fine.
  • 1/2 tablespoon ground cinnamon: A warm spice that enhances the apple flavor.
  • 1/2 teaspoon vanilla: For a hint of sweetness and depth.
  • 1/8 teaspoon ground cloves: Adds a rich, aromatic flavor.
  • 1/8 teaspoon ground nutmeg: Another warming spice that complements the apples.
  • Pinch of sea salt: Balances the sweetness and enhances overall flavor.

Step-by-Step Instructions

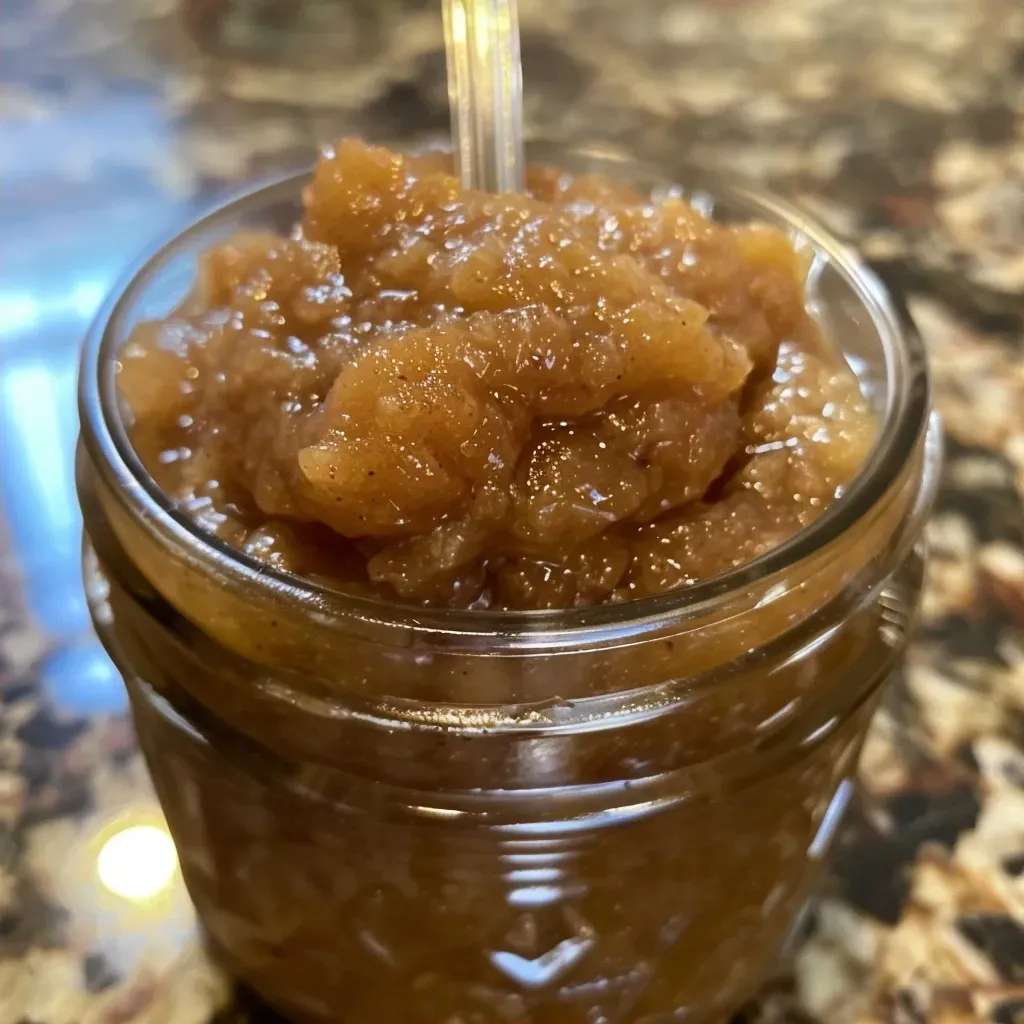
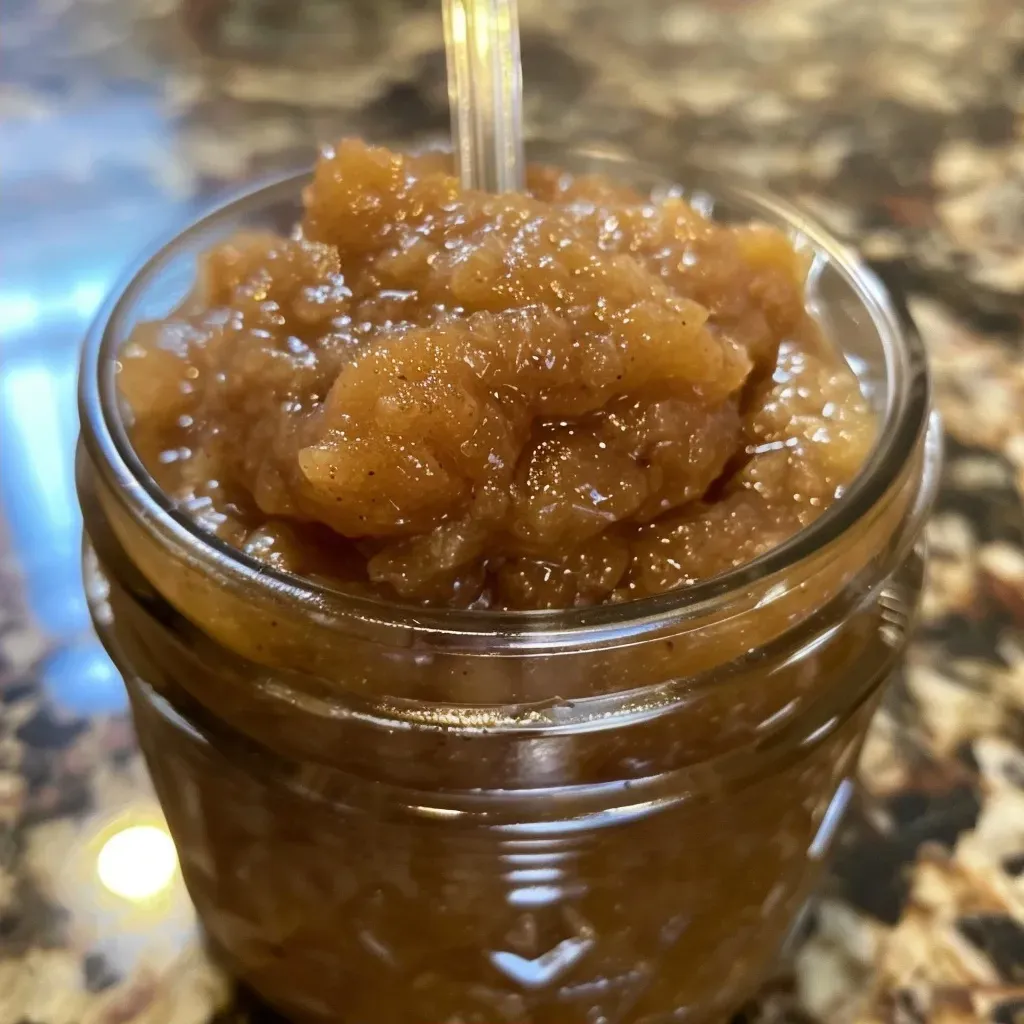
Close-up view of healthy apple butter in a jar with a spoon beside it.

Ready to create your own batch of healthy apple butter? Follow these simple steps:

  • Prepare the Apples: Core and slice your apples (leaving the peels on for added flavor and nutrients) and place them into a large slow cooker or crock-pot.
  • Add Ingredients: Pour in the apple cider vinegar (or water) and sprinkle the spices over the apples. Stir to combine the mixture well.
  • Cook: Cover and let it cook on low for 5-6 hours. The apples will become soft, dark, and fragrant.
  • Blend: Once cooked, turn off the slow cooker. Use an immersion blender to puree the apples until smooth. Alternatively, carefully transfer the apples into a blender to achieve a smooth consistency.
  • Thicken: Turn the slow cooker to high and cook the apple butter uncovered for another 1-2 hours. This helps the mixture thicken and caramelize.
  • Cool and Store: Allow the apple butter to cool for 30 minutes before transferring it to airtight containers. Let it cool completely before refrigerating.

Pro Tips for Perfect Apple Butter

To ensure your apple butter turns out perfectly, consider these expert insights:

  • Choose the Right Apples: For the best flavor, opt for a mix of sweet and tart apples, such as a combination of Gala and Granny Smith.
  • Don’t Skip the Peels: Leaving the peels on not only adds flavor but also increases the nutritional value of the apple butter.
  • Adjust Sweetness by Tasting: If you prefer a sweeter apple butter, consider adding a touch of maple syrup or honey after blending.
  • Experiment with Spices: Feel free to tweak the spices according to your preference; adding a pinch of ginger or cardamom can elevate the flavor.
  • Check for Consistency: If your apple butter seems too runny, continue cooking it uncovered on high until it reaches your desired thickness.
  • Make It Ahead: Apple butter is perfect for meal prep. Make a large batch and store it in jars for up to 3 weeks in the refrigerator or freeze for up to a year.
  • Use Quality Equipment: A good slow cooker and an immersion blender will make the process easier and more efficient, resulting in a smoother texture.
  • Label and Date Your Jars: If you’re freezing apple butter, make sure to label your jars with the date for easy tracking.

Common Mistakes to Avoid

Even the best chefs can make mistakes! Here are some pitfalls to avoid:

  • Overcooking: While slow cooking is forgiving, overcooking can lead to a burnt taste. Monitor the process closely.
  • Skipping the Blending Step: For a smooth texture, blending is essential—don’t skip this step!
  • Using Too Many Tart Apples: While a mix is great, too many tart apples can result in an overly sour butter.
  • Not Checking for Thickness: Taste and texture are crucial. Always check for thickness before storing.

Delicious Variations

Want to switch things up? Here are some variations to try:

  • Spiced Apple Butter: Add a teaspoon of ginger for a spicier kick.
  • Maple Apple Butter: Substitute half the apple cider vinegar with pure maple syrup for a sweet twist.
  • Berry-Infused Apple Butter: Stir in a cup of mashed raspberries or blueberries after blending for a fruity version.
  • Pumpkin Spice Apple Butter: Add 1/2 teaspoon of pumpkin pie spice to capture the essence of fall.

Storage and Make-Ahead Instructions

Proper storage ensures your apple butter remains fresh and flavorful:

  • Refrigeration: Store in airtight containers for up to 3 weeks.
  • Freezing: Freeze in jars or freezer-safe bags for up to 1 year. Just remember to leave some space for expansion!
  • Thawing: To use frozen apple butter, thaw in the refrigerator overnight before enjoying.

Frequently Asked Questions

Got questions? We’ve got answers!

  • Can I use any type of apple? Yes, but sweeter varieties like Gala or Honeycrisp yield the best flavor.
  • Do I need to peel the apples? No, the peels add flavor and nutrients.
  • How long does apple butter last? In the fridge, it lasts up to 3 weeks, and you can freeze it for up to 1 year.
  • What can I use apple butter for? It’s fantastic on toast, pancakes, in oatmeal, or even as a filling for pastries!
  • Can I can apple butter? Yes, you can can it following proper canning procedures for long-term storage.
  • What if my apple butter is too thick? If it’s too thick, add a splash of water and stir while heating on low.
  • Can I add sugar? Absolutely! If you prefer it sweeter, add sugar or your favorite sweetener after blending.
  • Is apple butter healthy? Yes, it’s a healthier alternative to many spreads, as it uses natural apple sweetness without added sugars.

Nutritional Tips and Dietary Adaptations

This Healthy Apple Butter not only delights your palate but also provides some nutritional benefits:

  • Low in Calories: A great option for those watching their calorie intake.
  • High in Fiber: The peels provide extra fiber, contributing to digestive health.
  • Vegan-Friendly: Naturally vegan, this recipe is suitable for various dietary preferences.

Equipment Recommendations

To make your apple butter experience seamless, consider using:

  • Slow Cooker: Essential for hands-off cooking, allowing flavors to meld beautifully.
  • Immersion Blender: Perfect for achieving a smooth consistency without transferring to a blender.
  • Airtight Containers: For optimal storage and freshness.

Serving Suggestions

Now that you have your healthy apple butter ready, here are some delightful ways to serve it:

  • Spread on Toast: A classic choice for breakfast or a snack.
  • Layer in Parfaits: Combine with yogurt and granola for a delicious layered treat.
  • Incorporate into Baked Goods: Use it in muffins or cakes for added moisture and flavor.
  • Pair with Cheese: Serve alongside cheese for a sweet and savory appetizer.

As you embark on this journey of making Healthy Apple Butter, remember that cooking is not just about the food; it’s about the stories you create and the memories you share. So gather your ingredients, invite a friend or family member into the kitchen, and relish the experience. Let this apple butter be a warm embrace of flavors that connects you to the heart of autumn. Enjoy every spoonful, and happy cooking!

Healthy Apple Butter

Prep Time 10 minutes
Cook Time 6 hours
Total Time 6 hours 10 minutes
Servings 8 tablespoons
Calories 50
A delicious and natural apple butter made with simple ingredients, perfect for spreading or snacking.

Ingredients

Fruits

  • 6 medium apples (Gala or Honeycrisp) (choose a sweet variety)
  • 1/4 cup apple cider vinegar (or water)
  • 1/2 Tablespoon ground cinnamon
  • 1/2 teaspoon vanilla
  • 1/8 teaspoon ground cloves
  • 1/8 teaspoon ground nutmeg
  • pinch sea salt

Instructions 

  • Place cored and sliced apples into a slow cooker with vinegar and spices. Cover and cook on low for 5-6 hours.
  • Puree the softened apples using an immersion blender or transfer to a blender until smooth.
  • Turn the slow cooker to high and cook uncovered for 1-2 hours to thicken.
  • Let the apple butter cool for 30 minutes before transferring to containers. Store in the fridge for up to 3 weeks or freeze for up to a year.

Notes

Adjust spices to taste for a personalized flavor.
Calories: 50kcal
Cost: $10
Course: spread
Cuisine: American
Keyword: Apple

Embark on a Flavorful Journey with Cranberry Orange Biscotti

If you’re looking for a delightful treat that combines the zing of citrus with the sweetness of dried fruit, you’ve stumbled upon the right recipe! This Orange Cranberry Biscotti is not just a delicious snack; it’s a celebration of flavors that transports you to sun-kissed orchards and cozy kitchens. Perfect for any occasion, from festive gatherings to quiet afternoons with tea, these biscotti are sure to impress. Let’s dive into the world of baking and discover why this recipe is a must-try!

Why You’ll Love This Recipe

  • Unique Flavor Combination: The pairing of tart cranberries and zesty orange creates a perfect balance that excites your palate.
  • Texture Perfection: Enjoy a delightful crunch on the outside while the inside remains slightly chewy, making every bite an experience.
  • Versatility: These biscotti are perfect for dunking in coffee, tea, or even hot chocolate, enhancing your beverage of choice.
  • Make-Ahead Magic: Prepare a batch ahead of time and store them for a quick treat whenever you need a sweet pick-me-up.
  • Customizable Recipe: Whether you want to add nuts, swap in different fruits, or experiment with spices, the possibilities are endless!

Ingredients Breakdown

Before we get into the baking process, let’s explore the key ingredients that make this Orange Cranberry Biscotti so special:

  • All-purpose flour (2 ½ cups / 300 grams): This forms the base of your biscotti. For a gluten-free option, consider using almond flour or a gluten-free baking blend.
  • Granulated sugar (1 cup / 200 grams): Sweetens the biscotti and contributes to that delightful crunch.
  • Dried sweetened cranberries (¾ cup): Adds a burst of sweetness and tang. Feel free to substitute with dried cherries or raisins if you prefer.
  • Almonds (½ cup): Toasted to enhance their flavor, they add a nice crunch. You can replace them with pecans or walnuts for a different twist.
  • Melted unsalted butter (⅓ cup / 75 grams): Provides richness. For a dairy-free option, try coconut oil.
  • Eggs (2): Binds the ingredients together. Vegans can use flax eggs as a substitute.
  • Orange zest (from 1 orange): Infuses the biscotti with a refreshing citrus aroma.
  • Baking powder (1 teaspoon): Ensures the biscotti rise properly.
  • Fine salt (¼ teaspoon): Balances the sweetness and enhances all the flavors.

Step-by-Step Instructions

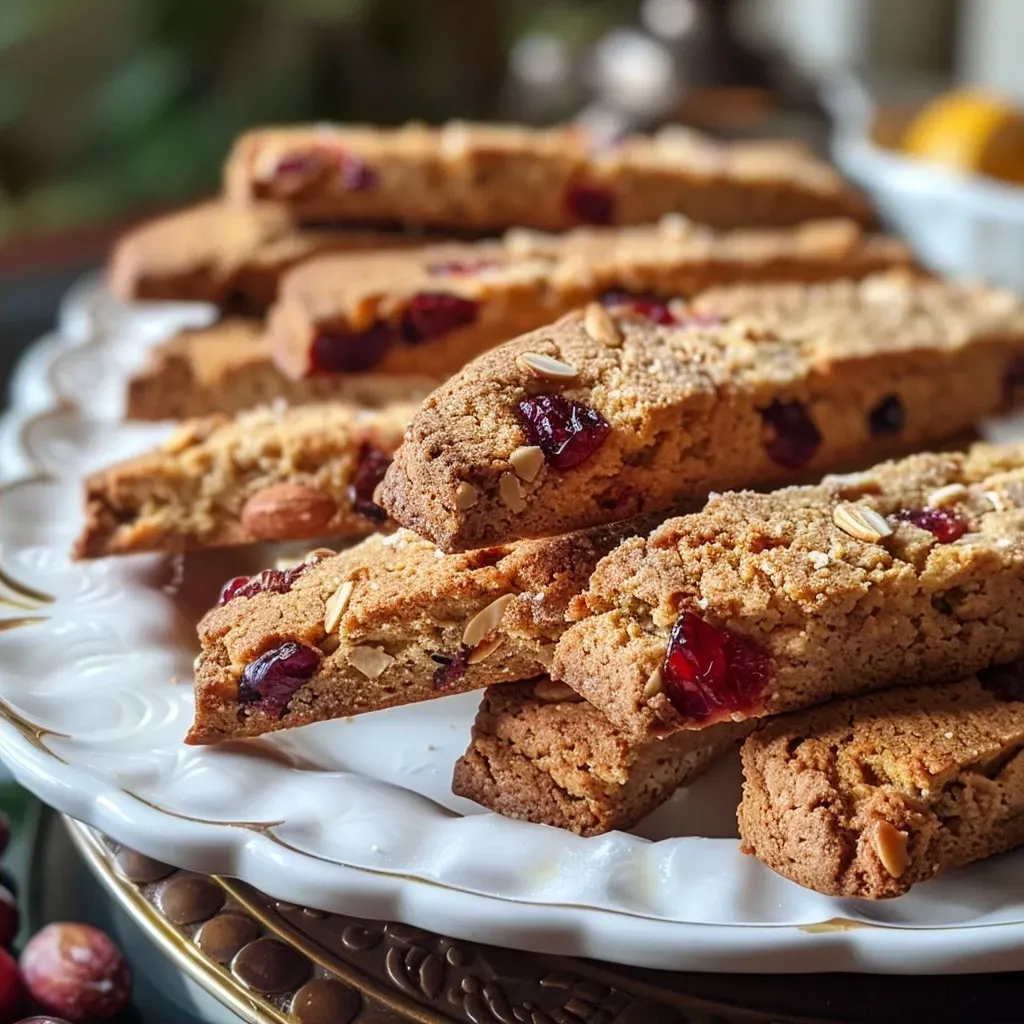
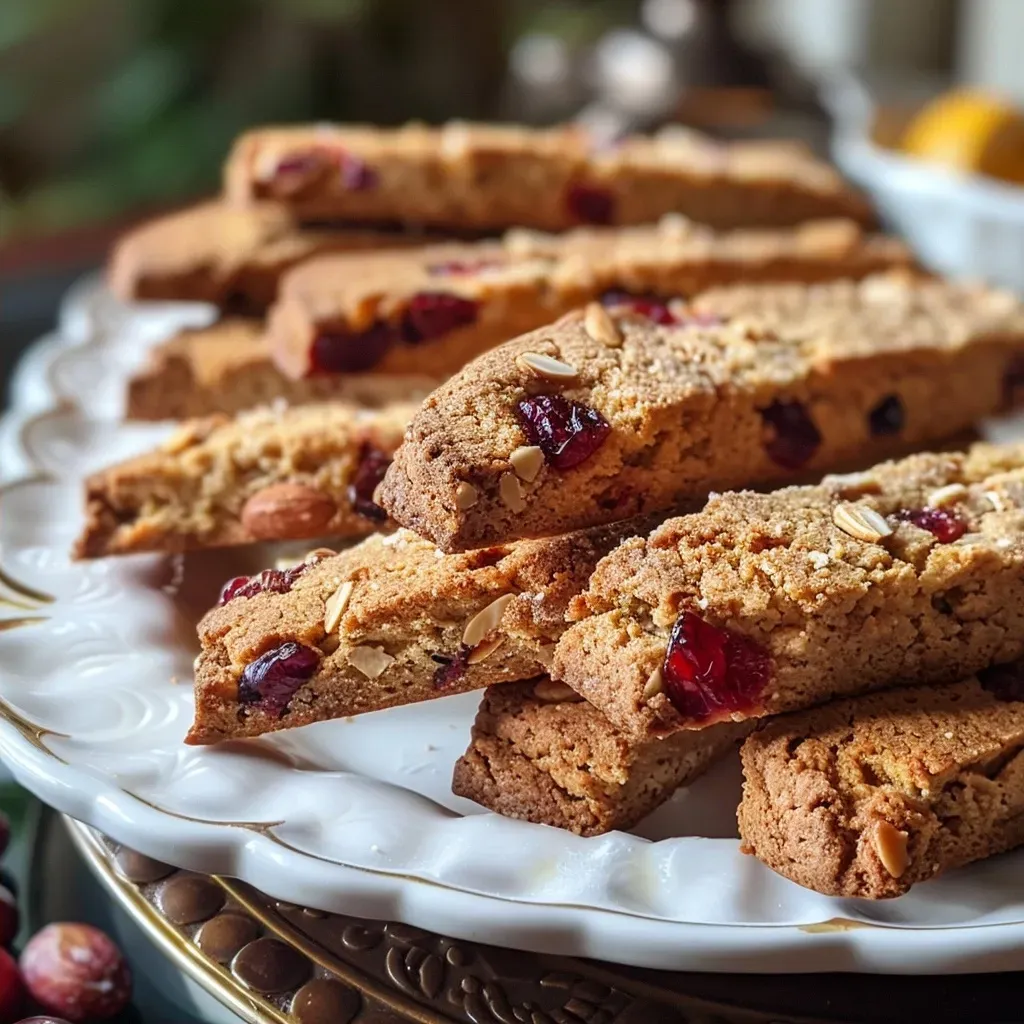
Close-up of golden-orange biscotti with cranberries and almonds.

Now, let’s roll up our sleeves and get baking! Follow these easy steps to create your Cranberry Orange Biscotti:


5-Speed Electric Hand Mixer

★ Recommended Kitchen Tool

5-Speed Electric Hand Mixer

Make this recipe even easier with a quality 5-Speed Electric Hand Mixer — a must-have kitchen staple!


🛒 View on Amazon →

As an Amazon Associate, we earn from qualifying purchases.
  1. Preheat the oven to 350°F (180°C). This will ensure your biscotti bake evenly.
  2. Toast the almonds: Spread almonds on a baking sheet and toast in the oven for 8-10 minutes until golden. Let them cool.
  3. Prepare the baking sheet: Line a large baking sheet or two smaller sheets with parchment paper.
  4. Flavor the sugar: In a large mixing bowl, combine granulated sugar and orange zest. Use your fingertips to rub the zest into the sugar until fragrant and colored.
  5. Mix dry ingredients: Add flour, baking powder, and salt to the sugar mixture. Whisk to combine.
  6. Create a well: Make a well in the center of the dry ingredients.
  7. Add wet ingredients: Crack the eggs into the well and pour in the melted butter. Mix gently with a fork, gradually incorporating the dry ingredients.
  8. Add cranberries and almonds: Once the dough starts to come together, fold in the toasted almonds and cranberries.
  9. Knead lightly: Turn the dough onto a floured surface, knead just enough to form a ball. If sticky, refrigerate for 30 minutes for easier handling.
  10. Shape the logs: Divide the dough into three equal portions. Roll each into a 12-inch log and place on the prepared baking sheet. Optionally, smooth the surface with wet hands.
  11. Bake: Bake for 25-30 minutes until golden brown and firm. Let cool on the baking sheet for 10 minutes.
  12. Slice and bake again: Reduce the oven to 300°F (150°C). Slice each log into 20 pieces and return to the oven cut-side up. Bake for another 10-15 minutes until crisp.
  13. Cool completely: Allow biscotti to cool on a wire rack, becoming even crunchier as they cool.

Pro Tips for Perfect Biscotti

  • Use room temperature ingredients: This helps create a smoother dough and ensures even baking.
  • Don’t overmix the dough: Mix just until combined to keep your biscotti light and airy.
  • Slice with a serrated knife: This prevents the biscotti from crumbling as you cut.
  • Store in an airtight container: Keep your biscotti fresh for weeks; they only get better with time!
  • Experiment with spices: Add a pinch of cinnamon or nutmeg for an extra flavor twist.
  • Dunk in chocolate: Melt some dark chocolate and dip half the biscotti for an indulgent treat.
  • Try different fruits: Get creative by swapping cranberries for dried figs or apricots.
  • Adjust sweetness: If you prefer a less sweet biscotti, reduce the sugar slightly without affecting the texture.

Common Mistakes and Troubleshooting

Everyone makes mistakes in the kitchen! Here are common pitfalls and how to avoid them:

  • Dough too sticky: If your dough is sticky, chilling it for 30 minutes can make it easier to handle.
  • Uneven baking: Make sure your oven is preheated and consider rotating the baking sheet halfway through baking.
  • Biscotti too hard: If baked too long, they can become overly hard. Keep an eye on them during the second bake.
  • Overmixing: Avoid overmixing the dough to prevent tough biscotti. Mix just until combined.

Variations to Try

Once you master the classic recipe, here are some delicious variations to consider:

  • Chocolate Chip Biscotti: Add semi-sweet chocolate chips for a richer flavor.
  • Pistachio and Cranberry: Replace almonds with pistachios for a nutty twist.
  • Spiced Biscotti: Add pumpkin spice or ginger for a fall-inspired treat.
  • Herb-Infused Biscotti: Incorporate fresh rosemary or thyme for a savory option.

Storage and Make-Ahead Instructions

These biscotti are perfect for making ahead:

  • Room Temperature: Store in an airtight container for up to 2 weeks. They actually get better with age!
  • Freezing: Freeze the unbaked logs wrapped tightly in plastic wrap for up to 3 months. Thaw and bake as usual.
  • Post-Baking Storage: Once baked, they can be stored in an airtight container for up to a month without losing their crunch.

Frequently Asked Questions

Here are some common questions about making biscotti:

  • Can I use whole wheat flour?: Yes, you can substitute some of the all-purpose flour for whole wheat flour for a nuttier flavor.
  • What can I dip them in?: Enjoy your biscotti with coffee, espresso, tea, or even dessert wine.
  • How do I know when they’re done?: They should be golden brown and firm to the touch. They’ll crisp up as they cool.
  • Can I add fresh fruit?: Fresh fruit can add moisture, so it’s best to stick with dried fruit in this recipe.
  • Is this recipe vegan-friendly?: For a vegan version, replace eggs with flax eggs and use plant-based butter.
  • What’s the best way to cut the logs?: Use a serrated knife and let the logs cool slightly to avoid crumbling.
  • Why do they taste better the next day?: The flavors deepen as they sit, making the biscotti even more delicious!
  • Can I add spices?: Absolutely! Adding spices can elevate the flavor profile of your biscotti.

Nutritional Tips and Dietary Adaptations

Making healthy choices is important, even with treats. Here’s how you can adapt this recipe:

  • Lower Sugar: Reduce the sugar by up to 25% without compromising texture.
  • Gluten-Free: Use almond flour or a gluten-free blend for a gluten-free option.
  • Nut-Free: Replace nuts with seeds, like sunflower or pumpkin seeds, for a crunchy texture.
  • Dairy-Free: Use coconut oil or a dairy-free butter substitute for a vegan-friendly option.

Recommended Equipment

To ensure your baking process goes smoothly, here are some essential tools:

  • Mixing Bowls: A variety of sizes for mixing dry and wet ingredients.
  • Silicone Spatula: Perfect for folding and scraping down the sides of your bowls.
  • Parchment Paper: Helps prevent sticking and makes for easy cleanup.
  • Serrated Knife: Ideal for slicing through the baked logs without crumbling.
  • Baking Sheets: Heavy-duty baking sheets ensure even cooking and browning.

Serving Suggestions

These biscotti can be enjoyed in various ways:

  • With Coffee or Tea: Perfect for dunking and enhancing your beverage experience.
  • Gift Them!: Wrap them up with a ribbon for a lovely homemade gift.
  • As a Dessert: Serve them alongside ice cream or yogurt for a delightful dessert.
  • Pair with Cheese: A savory cheese platter is enhanced by the sweetness of biscotti.

Conclusion

Creating your own Orange Cranberry Biscotti is not just about baking—it’s about bringing joy to your kitchen and sharing delicious moments with loved ones. With this comprehensive guide, you have all the tools you need to make your biscotti unique and delightful. So gather your ingredients, embrace the process, and let your culinary adventure begin! Remember, food is a passport to culture and connection, so let these biscotti be a bridge to new flavors and experiences. Happy baking!

Orange Cranberry Biscotti Recipe

Prep Time 20 minutes
Cook Time 40 minutes
Total Time 1 hour
Servings 20 pieces
Calories 150
Enjoy these crunchy, citrus-infused biscotti with dried cranberries and almonds, perfect for a delightful snack or coffee accompaniment.

Ingredients

Dry ingredients

  • 2 ½ cups cups all purpose plain flour (See note 1)
  • 1 cup cups granulated sugar
  • ¾ cup cups dried sweetened cranberries
  • ½ cup cups almonds
  • 1 teaspoon teaspoon baking powder
  • ¼ teaspoon teaspoon fine salt

Wet ingredients

  • 2 eggs eggs (See note 2)
  • ⅓ cup cups melted unsalted butter
  • 1 orange orange (zest only)

Instructions 

  • Preheat oven to 350°F/180°C. Toast almonds for 8-10 minutes and set aside.
  • Mix sugar with orange zest, then add flour, baking powder, and salt. Make a well, add eggs and melted butter, and combine.
  • Add toasted almonds and cranberries, knead lightly into a dough, then divide into three logs.
  • Bake logs for 25-30 minutes, cool slightly, then cut into slices. Bake slices for 10-15 minutes until crisp.
  • Cool completely on wire racks before serving.

Notes

Refrigerate dough for easier handling if desired.
Calories: 150kcal
Cost: $15
Course: Dessert
Cuisine: Italian
Keyword: biscotti

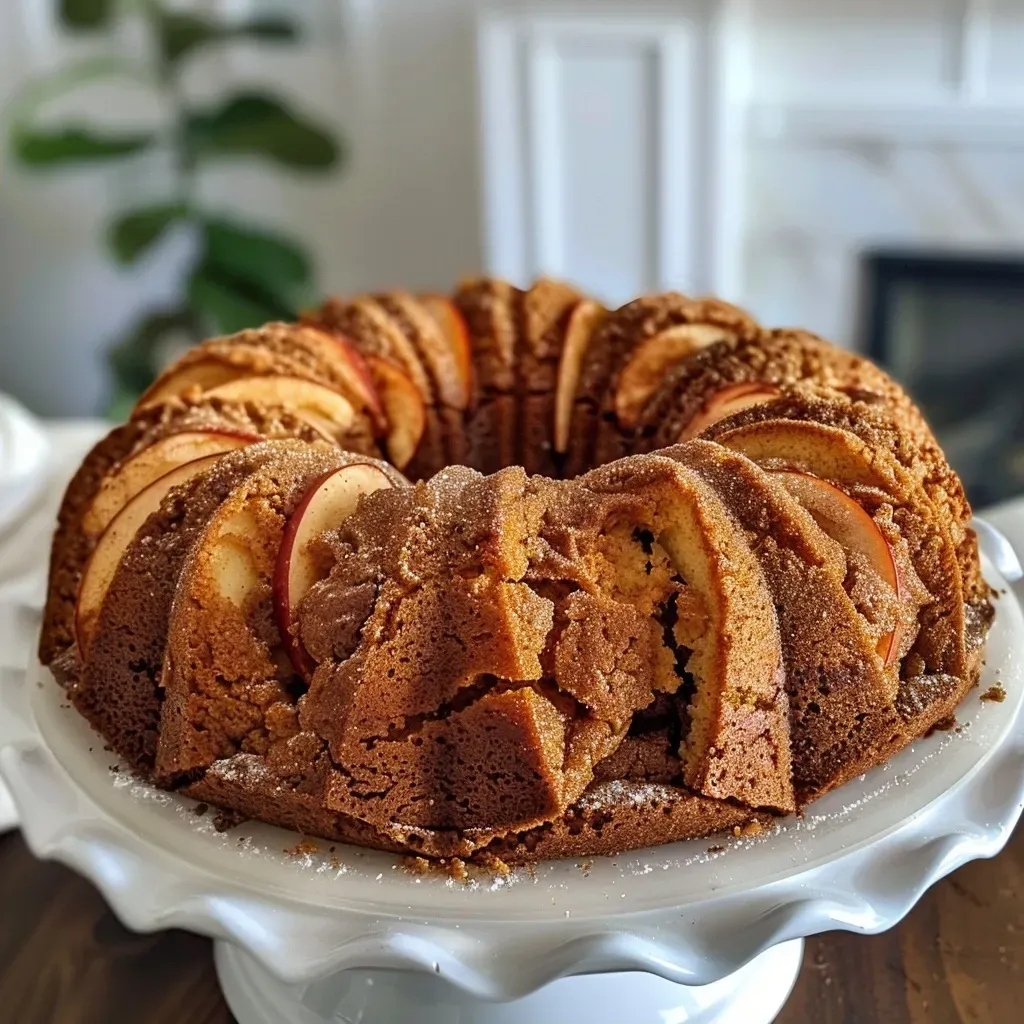
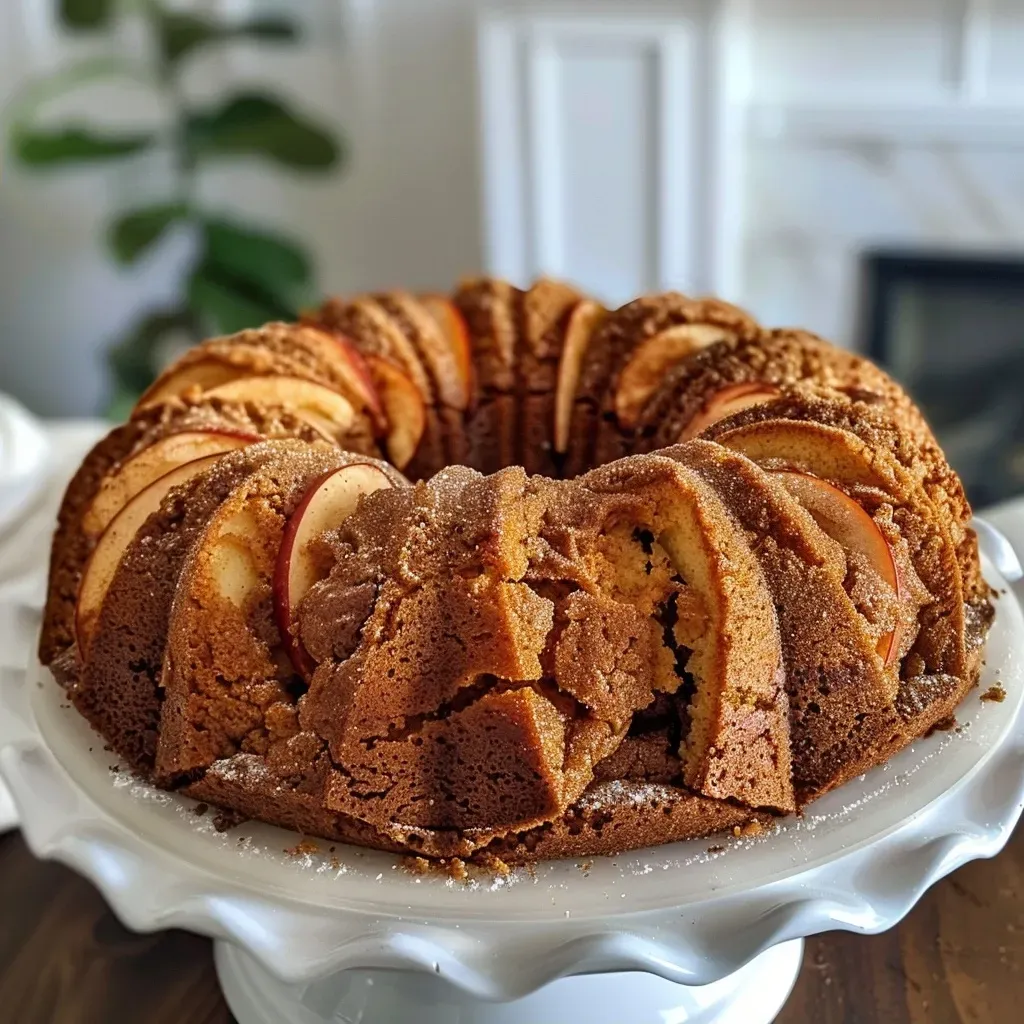
Unveiling the Enchantment of Apple Spice Bundt Cake

Welcome to a world where the essence of fall is captured in every slice! This Apple Spice Bundt Cake is more than just a dessert; it’s a celebration of autumn’s flavors, a comforting embrace of spices, and a sweet invitation to gather around the table with loved ones. Today, let’s embark on a delightful culinary journey, exploring the magic of this beloved cake, topped with a luscious vanilla glaze that will leave your taste buds dancing. Whether you’re a seasoned baker or a curious novice, this recipe promises to enchant and inspire!

In this comprehensive guide, we’ll dive into the heart of what makes this cake so special. From ingredient insights to expert tips, you’ll discover everything you need to know to create the ultimate Apple Spice Bundt Cake. So, grab your apron, and let’s get started!

Why You’ll Love This Recipe

  • Perfect for Fall Gatherings: This cake embodies the spirit of autumn, making it a delightful centerpiece for Thanksgiving or any festive gathering.
  • Moist and Flavorful: With fresh apples and an aromatic blend of spices, each bite is a taste of cozy comfort.
  • Easy to Make: The straightforward steps and minimal fuss make it ideal for bakers of all skill levels.
  • Versatile Variations: Customize your bundt cake with different fruits, nuts, or glazes to suit your palate and occasion.
  • Great for Sharing: This cake can easily serve a crowd, making it perfect for potlucks or family get-togethers.

Ingredients Breakdown

Let’s gather our ingredients! Here’s what you’ll need to create this delightful Apple Spice Bundt Cake:


5-Speed Electric Hand Mixer

★ Recommended Kitchen Tool

5-Speed Electric Hand Mixer

Make this recipe even easier with a quality 5-Speed Electric Hand Mixer — a must-have kitchen staple!


🛒 Shop This Tool →

As an Amazon Associate, we earn from qualifying purchases.
  • 3 1/2 cups all-purpose flour: The base for our cake, providing structure and a light texture.
  • 1 cup brown sugar: Adds a rich, caramel-like flavor and moisture.
  • 1/2 cup granulated sugar: Balances the sweetness and enhances the cake’s overall flavor.
  • 2 tsp ground cinnamon: A warm spice that evokes the essence of fall.
  • 1/4 tsp ground ginger: Adds a lovely zing and warmth to the flavor profile.
  • 1/4 tsp ground nutmeg: A hint of nutmeg brings a cozy, aromatic touch.
  • 1/4 tsp ground allspice: Enhances the spice blend with its unique flavor.
  • 1 tsp salt: A key ingredient that balances sweetness and enhances flavors.
  • 1 tsp baking soda: The leavening agent that helps the cake rise.
  • 3 eggs, lightly beaten: Provides moisture and helps bind the ingredients together.
  • 1 cup canola oil: Keeps the cake moist and tender.
  • 6 oz vanilla yogurt or sour cream: Adds moisture and tanginess, contributing to the cake’s rich texture.
  • 1 1/2 tsp vanilla extract: A fragrant addition that enhances the sweetness.
  • 2 tsp orange zest: Brightens the flavors with a citrusy note.
  • 1 Tbsp orange juice, freshly squeezed: Adds a touch of acidity that balances the sweetness.
  • 1 1/2 cups shredded apple: Fresh apples bring moisture and flavor; use a variety like Granny Smith or Fuji for the best results.
  • 1 1/2 cups chopped apple: Adds texture and bursts of flavor throughout the cake.
  • For the Vanilla Glaze:
  • 1 1/2 cups powdered sugar: Provides sweetness and a smooth texture for the glaze.
  • 1/2 tsp ground cinnamon: A sprinkle to tie in the flavors of the cake.
  • 2 tsp vanilla extract: Enhances the sweetness and flavor of the glaze.
  • 3-4 Tbsp heavy whipping cream or milk: Adjust to achieve the desired glaze consistency.

Pro Tips for the Perfect Bundt Cake

Close-up side view of a moist Apple Spice Bundt Cake topped with a creamy vanilla glaze.
  • Measure Accurately: Use a kitchen scale for precise measurements, especially for flour, to ensure the perfect texture.
  • Room Temperature Ingredients: Bring eggs, yogurt, and other refrigerated ingredients to room temperature for better mixing.
  • Grease Your Pan Well: Use a generous amount of oil or butter to prevent sticking. Consider using a flour-based baking spray for extra protection.
  • Don’t Overmix: Mix until just combined to keep the cake light and fluffy; overmixing can lead to a dense texture.
  • Test for Doneness: Use a toothpick to check; it should come out clean or with a few moist crumbs, not wet batter.
  • Cool Completely: Allow the cake to cool in the pan for about 10-15 minutes before inverting onto a cooling rack to prevent breakage.
  • Store Properly: Once cooled, store the cake in an airtight container to keep it fresh and moist.
  • Experiment with Flavors: Don’t hesitate to add nuts, dried fruits, or even a splash of bourbon for a personalized twist!

Common Mistakes and Troubleshooting

Even the best bakers can encounter hiccups. Here are some common mistakes and how to avoid them:

  • Dense Cake: This can occur from overmixing or too much flour; be gentle when mixing your batter.
  • Sticking to the Pan: Ensure your bundt pan is well-greased and floured, and cool the cake adequately before removing it.
  • Uneven Baking: Make sure your oven is properly calibrated; an oven thermometer can help maintain the correct temperature.
  • Too Little Flavor: Always taste your batter before baking; adjust spices and sweetness as needed.

Delicious Variations to Try

While the classic Apple Spice Bundt Cake is divine, why not switch things up? Here are some fun variations:

  • Apple Walnut Bundt Cake: Add 1 cup of chopped walnuts for a delightful crunch and nutty flavor.
  • Cranberry Apple Bundt Cake: Incorporate 1 cup of fresh or frozen cranberries for a tart twist that balances the sweetness.
  • Caramel Drizzle: Drizzle warm caramel sauce over the glaze for an indulgent treat.
  • Spiced Rum Glaze: Mix in a splash of spiced rum into your glaze for an adult twist on the classic flavor.

Storage and Make-Ahead Instructions

Your Apple Spice Bundt Cake can be made ahead and stored easily! Here’s how:

  • Room Temperature: Store in an airtight container at room temperature for up to 3 days.
  • Refrigeration: For longer freshness, keep it in the fridge, where it can last up to a week.
  • Freezing: Wrap tightly in plastic wrap and foil before freezing. It can last up to 3 months. Thaw overnight in the refrigerator before serving.

Frequently Asked Questions (FAQs)

  • Can I use different types of apples?: Absolutely! Mixing sweet and tart apples adds depth to the flavor. Try a combination of Granny Smith and Honeycrisp!
  • How can I make this cake gluten-free?: Substitute all-purpose flour with a 1:1 gluten-free flour blend. Ensure your baking powder is gluten-free as well.
  • Can I use unsweetened applesauce instead of oil?: Yes, but be aware that it may affect the cake’s moisture and texture; consider using half applesauce and half oil for best results.
  • What’s the best way to serve this cake?: Serve it warm with a scoop of vanilla ice cream or alongside a cup of coffee for a perfect afternoon treat.
  • Can I add frosting instead of glaze?: Definitely! A cream cheese frosting would be delicious, but keep in mind that it will alter the flavor profile.
  • How do I know when the cake is done baking?: A toothpick inserted into the center should come out clean or with a few moist crumbs attached.
  • Is this cake suitable for vegan diets?: You can make it vegan by substituting eggs with flax eggs and using plant-based yogurt and milk.
  • Can I make cupcakes instead?: Yes! This batter works well for cupcakes; just adjust the baking time to about 18-20 minutes.

Nutritional Tips and Dietary Adaptations

If you’re looking to enjoy this Apple Spice Bundt Cake with a healthier twist, consider these options:

  • Reduce Sugar: Cut the granulated sugar in half and use a natural sweetener like honey or maple syrup.
  • Whole Wheat Flour: Substitute half of the all-purpose flour with whole wheat flour for added fiber.
  • Low-Fat Options: Use low-fat yogurt or sour cream to reduce calories without sacrificing moisture.

Essential Equipment for Your Baking Adventure

Before you start baking, gather these essential tools:

  • Bundt Pan: A high-quality nonstick bundt pan ensures easy release and even baking.
  • Mixing Bowls: Use at least two bowls—one for dry ingredients and one for wet—to streamline the process.
  • Whisk and Spatula: For mixing and folding ingredients seamlessly.
  • Measuring Cups and Spoons: Accurate measurements are vital for baking success.
  • Cooling Rack: This allows your cake to cool evenly, preventing sogginess.

Serving Suggestions

To elevate your cake experience, consider these serving ideas:

  • With Ice Cream: A scoop of vanilla or caramel ice cream pairs wonderfully with the warm cake.
  • Garnished with Nuts: Sprinkle toasted pecans or walnuts on top for a textural contrast.
  • Accompanied by Coffee: Serve it alongside a warm cup of coffee or spiced chai for a cozy afternoon treat.

As we wrap up our delicious journey, remember that this Apple Spice Bundt Cake isn’t just a recipe; it’s a way to connect, share stories, and savor the season. So, gather your ingredients, invite friends over, and let the baking begin! Happy baking, and don’t forget to savor every slice and every moment around the table!

Apple Spice Bundt Cake with a Vanilla Glaze

Prep Time 20 minutes
Cook Time 1 hour
Total Time 1 hour 20 minutes
Servings 12 pieces
Calories 420
A moist and flavorful bundt cake infused with warm spices and fresh apples, topped with a sweet vanilla glaze.

Ingredients

Dry Ingredients

  • 3 1/2 cups all purpose flour
  • 1 cup brown sugar
  • 1/2 cup granulated sugar
  • 2 tsp ground cinnamon
  • 1/4 tsp ground ginger
  • 1/4 tsp ground nutmeg
  • 1/4 tsp ground allspice
  • 1 tsp salt
  • 1 tsp baking soda

Wet Ingredients

  • 3 eggs, lightly beaten
  • 1 cup canola oil
  • 6 oz vanilla yogurt or sour cream
  • 1 1/2 tsp vanilla extract
  • 2 tsp orange zest
  • 1 Tbsp orange juice, freshly squeezed

Fruits

  • 1 1/2 cups shredded apple
  • 1 1/2 cups chopped apple

Glaze

  • 1 1/2 cups powdered sugar
  • 1/2 tsp ground cinnamon
  • 2 tsp vanilla extract
  • 3-4 Tbsp heavy whipping cream or milk

Instructions 

  • Preheat oven to 350°F (175°C). Grease and flour a bundt pan.
  • Mix dry ingredients in a bowl. In another bowl, whisk wet ingredients and fold in apples.
  • Combine wet and dry mixtures, pour into prepared pan, and bake for 60 minutes.
  • Allow cake to cool, then prepare glaze by mixing powdered sugar, cinnamon, vanilla, and cream. Drizzle over cooled cake.

Notes

For best results, use fresh apples and ensure the cake is fully cooled before glazing.
Calories: 420kcal
Cost: $15
Course: Dessert
Cuisine: American
Keyword: Apple

Unveiling the Magic of Cranberry Walnut Bread

Welcome to a culinary journey where each bite of cranberry walnut bread tells a story of flavor and tradition. This delightful loaf perfectly marries the tangy sweetness of fresh cranberries with the rich, nutty crunch of walnuts. It’s not just a recipe; it’s an exploration of culture and connection, inviting you to taste the world through the art of baking. As we dive into this recipe, you’ll discover how to create a loaf that not only nourishes the body but also warms the heart.

Why You’ll Love This Recipe

This cranberry walnut bread brings a plethora of benefits that will make it a staple in your kitchen:

  • Healthful Ingredients: Made primarily with almond flour, this recipe is low in carbs and gluten-free, making it suitable for a variety of dietary needs.
  • Rich Flavor: The combination of sweet cranberries and crunchy walnuts creates a mouthwatering flavor profile that will keep you coming back for more.
  • Easy to Make: With simple steps and common ingredients, this bread is accessible for both novice and experienced bakers.
  • Versatile Enjoyment: Enjoy it sliced for breakfast, as a snack, or even paired with cheese for a delightful appetizer.
  • Perfect for Gifting: This beautiful loaf makes for an excellent homemade gift, showcasing your culinary skills.

Ingredients You’ll Need

Gather the following ingredients to create your delicious cranberry walnut bread:


Digital Kitchen Scale

★ Recommended Kitchen Tool

Digital Kitchen Scale

Make this recipe even easier with a quality Digital Kitchen Scale — a must-have kitchen staple!


🛒 Check Price on Amazon →

As an Amazon Associate, we earn from qualifying purchases.
  • 3 cups almond flour: A great gluten-free alternative that provides a moist texture.
  • 4 tablespoons ground golden flaxseed: Adds fiber and healthy fats, enhancing the bread’s nutritional profile.
  • 2 tablespoons psyllium husk powder: Helps bind the ingredients and contributes to the bread’s structure.
  • 3 large eggs: Acts as a binder and provides moisture.
  • 3/4 cups cranberries, chopped: Fresh or dried, these add a burst of sweetness and tartness.
  • 3/4 cups walnuts, chopped: For a crunchy texture and nutty flavor.
  • 1/4 cup coconut oil: Provides healthy fats and moisture, enhancing the overall richness.
  • 1 tablespoon orange rind/zest, finely chopped: Adds a citrus note that complements the cranberries beautifully.
  • 1 tablespoon baking powder: Essential for leavening the bread.
  • 1 tablespoon apple cider vinegar: Reacts with baking powder to boost the rise.
  • 1/2 teaspoon salt: Balances the flavors.
  • 1 cup hot water: Activates the dry ingredients and brings the dough together.

How to Make Cranberry Walnut Bread

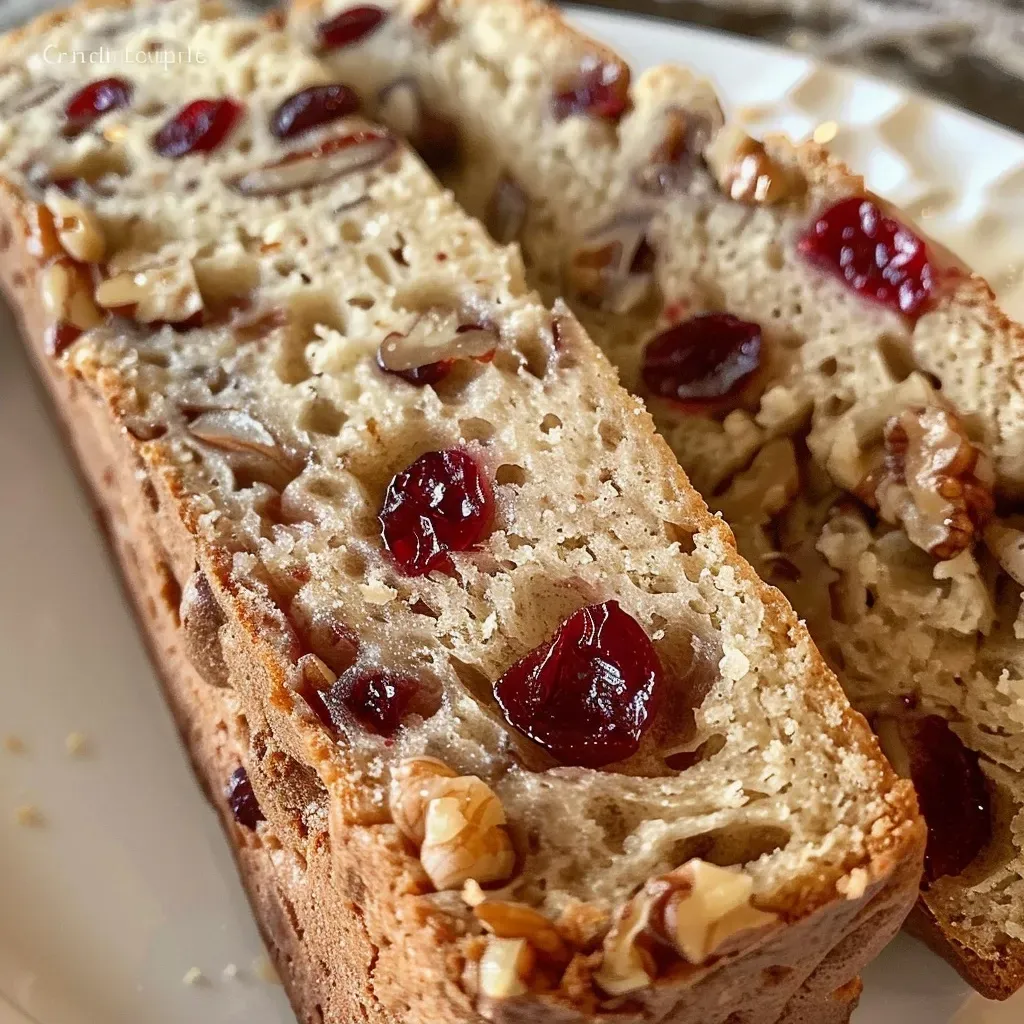
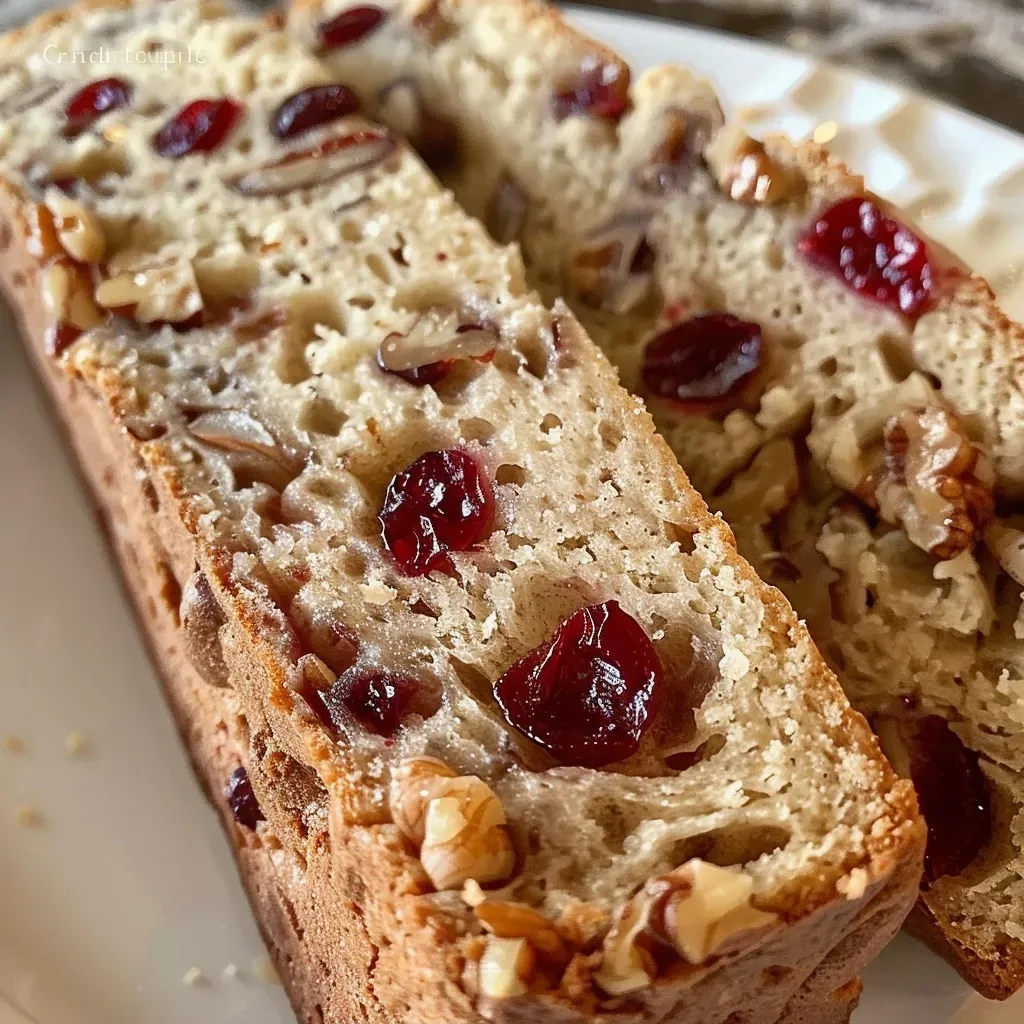
Close-up of sliced cranberry walnut bread with visible cranberries and walnuts.

Follow these easy steps to create your loaf:

  1. Preheat your oven to 180°C (350°F) and line a baking sheet with parchment paper or line a 1lb bread tin with parchment.
  2. In a bowl, combine the almond flour, ground flaxseed, baking powder, psyllium husk powder, and salt. Mix thoroughly.
  3. Add the coconut oil and eggs to the dry mixture and blend until it resembles breadcrumbs.
  4. Incorporate the apple cider vinegar and mix well.
  5. Gradually add hot water, a little at a time, stirring until the mixture is combined (you may not need all the water). Let it sit for 10 minutes.
  6. Fold in the chopped walnuts, cranberries, and orange zest evenly throughout the dough.
  7. Shape the dough into a large ball (keeping your hands wet can help with stickiness) and place it on the prepared baking tray.
  8. Bake for 35-40 minutes until golden and firm to the touch.
  9. Allow to cool, slice, serve, and enjoy!

Tips for Perfecting Your Bread

Here are some expert tips to ensure your cranberry walnut bread turns out perfectly each time:

  • Perfect Texture: Ensure your wet ingredients are at room temperature for a better mixture.
  • Moisture Control: If your dough feels too dry, add a little more water, but be careful not to overdo it.
  • Storage Tip: Store in an airtight container at room temperature for up to 3 days or refrigerate for a week.
  • Freezing Option: This bread freezes well! Wrap it tightly in plastic wrap and then in aluminum foil for up to 3 months.
  • Customizable Add-ins: Feel free to add spices like cinnamon or nutmeg for extra warmth or even chocolate chips for a sweet twist!

Common Mistakes and Troubleshooting

Here are some common pitfalls to avoid when making cranberry walnut bread:

  • Overmixing: Mixing too much can lead to dense bread. Mix just until combined.
  • Underbaking: Ensure the bread is fully baked. A toothpick inserted should come out clean.
  • Not weighing ingredients: For the best results, use a kitchen scale to measure your flour and other dry ingredients.

Variations on Cranberry Walnut Bread

Switch things up with these fun variations:

  • Chocolate Chip Cranberry Walnut Bread: Add 1/2 cup of dark chocolate chips to the batter for a sweet twist.
  • Spiced Cranberry Walnut Bread: Incorporate 1 teaspoon of cinnamon or nutmeg for a warm, spiced flavor profile.
  • Coconut Cranberry Walnut Bread: Add 1/2 cup of shredded coconut for added texture and flavor.
  • Herbed Cranberry Walnut Bread: Mix in fresh herbs like rosemary or thyme for an unexpected savory touch.

Storage and Make-Ahead Instructions

Here’s how to store your cranberry walnut bread:

  • Room Temperature: Keep in an airtight container for up to 3 days.
  • Refrigeration: Extend freshness by refrigerating for up to a week.
  • Freezing: Wrap tightly in plastic wrap and foil, then freeze for up to 3 months. Thaw at room temperature before serving.

Frequently Asked Questions

Here are some questions you might have about cranberry walnut bread:

  • Can I use dried cranberries instead of fresh? Yes, dried cranberries work well but may alter the moisture level slightly.
  • Is this bread gluten-free? Absolutely! The use of almond flour makes it gluten-free.
  • How can I make this recipe lower in calories? Consider reducing the amount of coconut oil or using a sugar substitute.
  • Can I make this bread without eggs? Yes, you can use flax eggs (1 tablespoon flaxseed meal + 2.5 tablespoons water = 1 egg).
  • What can I serve with cranberry walnut bread? It pairs beautifully with cream cheese, butter, or even a cheese platter.
  • How do I know when the bread is done baking? A toothpick inserted into the center should come out clean.
  • Can I use other nuts instead of walnuts? Yes, pecans or almonds are great alternatives!
  • What’s the best way to slice the bread? Use a serrated knife for clean cuts without squishing the loaf.

Nutritional Tips and Dietary Adaptations

This cranberry walnut bread is not only delicious but also packed with nutrition:

  • Low Carb: Almond flour and flaxseed make this bread a low carb option, ideal for those following a ketogenic diet.
  • Rich in Fiber: The addition of flaxseed and whole cranberries boosts fiber content, aiding digestion.
  • Healthy Fats: Coconut oil and walnuts provide essential fatty acids, contributing to heart health.

Equipment Recommendations

For the best results, consider the following tools:

  • Mixing Bowls: A set of mixing bowls in various sizes will help you easily combine ingredients.
  • Baking Sheets or Loaf Pans: Use a non-stick loaf pan for easy release or parchment-lined baking sheets for freeform loaves.
  • Measuring Cups and Spoons: Accurate measurements are key to perfect baking.
  • Kitchen Scale: For the best precision, especially when measuring flour and other dry ingredients.

Serving Suggestions

Here are some delicious ways to enjoy your cranberry walnut bread:

  • Breakfast Treat: Toast slices and spread with butter or cream cheese.
  • Snack Pairing: Serve with tea or coffee for an afternoon pick-me-up.
  • Cheese Board Addition: Pair with soft cheeses like Brie or goat cheese for a sophisticated appetizer.

Conclusion

Embarking on the adventure of making cranberry walnut bread is not just about baking; it’s about creating connections through food. Each loaf carries a story and a taste of home that invites us to gather around the table. So gather your ingredients, roll up your sleeves, and dive into this delightful recipe that’s sure to become a cherished favorite for years to come. Happy baking!

Cranberry Walnut Bread

Prep Time 15 minutes
Cook Time 40 minutes
Total Time 55 minutes
Servings 8 slices
Calories 250
A delicious gluten-free bread combining tart cranberries and crunchy walnuts, perfect for a healthy snack or breakfast.

Ingredients

dry ingredients

  • 3 cups almond flour
  • 4 tablespoons ground golden flaxseed
  • 1 tablespoon baking powder
  • 2 tablespoons psyllium husk powder
  • 1/2 teaspoon salt

wet ingredients

  • 3 large eggs
  • 1/4 cup coconut oil
  • 1 tablespoon orange rind/zest (finely chopped)
  • 1 tablespoon apple cider vinegar
  • 1 cup hot water

add-ins

  • 3/4 cups cranberries, chopped
  • 3/4 cups walnuts, chopped

Instructions 

  • Preheat oven to 180°C (350°F) and line a baking sheet or bread tin with parchment paper.
  • Mix dry ingredients: almond flour, flaxseed, baking powder, psyllium husk, and salt.
  • Add eggs, coconut oil, and vinegar; blend until crumbly. Add water gradually, let sit 10 mins.
  • Fold in cranberries, walnuts, and orange zest. Form into a ball with wet hands.
  • Shape dough on parchment, bake for 35-40 mins until golden. Slice and serve.

Notes

Keep dough moist with wet hands for easier shaping.
Calories: 250kcal
Cost: $15
Course: Bread
Cuisine: American
Keyword: almond flour

Embark on a Culinary Journey with High Protein Pumpkin Pie

Welcome to a delightful exploration of flavors with our High Protein Crustless Pumpkin Pie. This recipe is not just about satisfying your dessert cravings; it’s a celebration of autumn’s bounty and a healthy twist on a classic favorite. Made with wholesome ingredients like pumpkin puree and Greek yogurt, this pie is rich in flavor yet light on calories, making it the perfect indulgence for family gatherings or quiet evenings at home.

As you dive into this recipe, prepare to discover a world where nutrition meets deliciousness. This high-protein dessert is not only easy to make but also packed with benefits that will leave you feeling satisfied and energized. Let’s get started!

Why You’ll Love This Recipe

  • Protein Power: With a blend of Greek yogurt and vanilla protein powder, each slice provides a satisfying source of protein, perfect for post-workout recovery.
  • Low-Calorie Indulgence: This crustless pie is a guilt-free dessert option, allowing you to enjoy the flavors of pumpkin without the added calories of a traditional pie crust.
  • Easy to Make: Simple ingredients and straightforward steps make this pie an ideal choice for both experienced bakers and beginners alike.
  • Versatile Flavor Profile: The combination of spices like cinnamon, ginger, and nutmeg creates a warm, comforting flavor that is perfect for autumn.
  • Healthy Substitutions: The recipe allows for easy ingredient swaps, letting you cater to dietary preferences without sacrificing taste.

Ingredients Breakdown

Let’s take a closer look at the ingredients that make this pie so special:


Digital Kitchen Scale

★ Recommended Kitchen Tool

Digital Kitchen Scale

Make this recipe even easier with a quality Digital Kitchen Scale — a must-have kitchen staple!


🛒 View on Amazon →

As an Amazon Associate, we earn from qualifying purchases.
  • Pumpkin puree: A key ingredient, full of vitamins A and C. You can use canned puree or make your own by roasting fresh pumpkins.
  • Greek yogurt: This adds creaminess and boosts protein content. If you’re vegan, try using a plant-based yogurt.
  • Eggs: They bind the ingredients together, providing structure to the pie. If you’re looking for an egg-free option, consider using flaxseed meal as a substitute.
  • Vanilla protein powder: Enhances the protein content and adds a subtle sweetness. Choose a brand that fits your dietary needs.
  • Brown sugar: This sweetens the pie while adding a hint of caramel flavor. You can substitute with coconut sugar or a sugar alternative if desired.
  • Spices: Ground cinnamon, ginger, nutmeg, and salt bring warmth and depth to the flavor profile. Feel free to adjust according to your taste preferences.
  • Vanilla extract: A splash enhances the overall flavor, making each bite a little more indulgent.

Instructions: Crafting the Perfect Pie

Close-up side view of a crustless pumpkin pie with a smooth, creamy texture and rich color.

Now, let’s walk through the steps to create this delicious pie:

  1. Preheat your oven to 350°F (175°C). Lightly grease a 9-inch (23 cm) pie dish and set it aside.
  2. In a large mixing bowl, combine the pumpkin puree, Greek yogurt, and eggs. Whisk together until smooth and well combined.
  3. Add the vanilla protein powder and brown sugar to the mixture, stirring thoroughly until fully incorporated.
  4. Sprinkle in the cinnamon, ginger, nutmeg, and salt. Mix well to ensure the spices are evenly distributed throughout the batter.
  5. Stir in the vanilla extract, giving the mixture one final whisk to ensure all ingredients are blended seamlessly.
  6. Pour the pumpkin mixture into the prepared pie dish, smoothing the top with a spatula.
  7. Place the dish in the preheated oven and bake for 50 minutes, or until the pie is set and a toothpick inserted into the center comes out clean.
  8. Allow the pie to cool at room temperature, then transfer to the refrigerator to chill for at least 2 hours before serving.
  9. Once chilled, slice and enjoy your high-protein crustless pumpkin pie!

Pro Tips for Success

  • Ingredient Quality: Use fresh, high-quality ingredients for the best flavor. Organic pumpkin puree can enhance the taste.
  • Whisking Technique: Ensure all ingredients are fully combined before baking to prevent a lumpy texture.
  • Cooling Time: Allow the pie to cool completely before refrigerating; this helps in achieving the perfect texture.
  • Serving Suggestions: Pair with a dollop of whipped cream or a sprinkle of cinnamon for a beautiful presentation.
  • Storage Tips: Store any leftovers in an airtight container in the refrigerator for up to 5 days.
  • Freezing Option: This pie can be frozen for up to 2 months. Thaw overnight in the fridge before serving.
  • Personal Touch: Experiment with different spices such as allspice or cardamom for a unique twist.
  • Taste Testing: Before serving, taste the mixture for sweetness and spice levels and adjust as needed.

Common Mistakes and Troubleshooting

Even the best chefs can run into issues. Here are some common pitfalls and how to avoid them:

  • Underbaking: Ensure the pie is baked until set; if the center is wobbly, it needs more time.
  • Overmixing: Avoid overmixing the batter, as this can lead to a dense pie.
  • Not Cooling Properly: Skipping the cooling step can affect the texture and flavor.
  • Ingredient Substitutions: Be cautious when substituting ingredients, as they may alter the final result.

Delicious Variations

Feel free to get creative! Here are some variations to try:

  • Chocolate Chip Pumpkin Pie: Add semi-sweet chocolate chips for a rich twist.
  • Nutty Pumpkin Pie: Stir in chopped walnuts or pecans for added crunch and flavor.
  • Spiced Pumpkin Pie: Increase the spice levels for a more robust flavor—consider adding a pinch of cayenne for heat!
  • Vegan Pumpkin Pie: Swap eggs with flaxseed meal and use a plant-based yogurt for a completely vegan dessert.

Storage and Make-Ahead Instructions

This pie is perfect for making ahead of time. Here’s how to store it:

  • Refrigeration: Keep the pie covered in the fridge for up to 5 days.
  • Freezing: Wrap the pie tightly in plastic wrap and foil to freeze for up to 2 months. Thaw in the fridge overnight before serving.
  • Make-Ahead: You can prepare the batter a day in advance. Just store it in the refrigerator until ready to bake.

Frequently Asked Questions

Here are common questions about this recipe:

  • Can I use other types of protein powder? Yes, any flavored or unflavored protein powder can work; just be mindful of the sweetness.
  • What if I don’t have Greek yogurt? You can substitute with regular yogurt, but the texture may be slightly different.
  • How can I make this recipe gluten-free? This recipe is naturally gluten-free since it doesn’t use any flour.
  • Is the pie suitable for a low-carb diet? While it’s lower in carbs than traditional pies, it still contains some sugar. Consider using a sugar substitute if needed.
  • What’s the best way to serve the pie? Serve chilled with a dollop of whipped cream or a scoop of vanilla ice cream.
  • Can I add a crust to this recipe? While it’s designed to be crustless, a pre-baked crust can be used if you prefer.
  • How do I know when the pie is done? The pie is ready when the edges are set and a toothpick comes out clean.
  • Is it necessary to chill the pie? Chilling enhances the flavor and texture, making it more enjoyable to eat.

Nutrition Tips and Dietary Adaptations

This pie is not just delicious; it’s also packed with nutrition:

  • High Protein: Ideal for muscle recovery and satiety, thanks to the yogurt and protein powder.
  • Low in Fat: The use of yogurt instead of cream keeps the fat content down without sacrificing flavor.
  • Rich in Fiber: Pumpkin is a great source of dietary fiber, which aids digestion and keeps you full.
  • Vitamins A & C: Pumpkin is rich in these essential vitamins, supporting immune health and skin vitality.

Essential Equipment for Success

Here’s what you’ll need:

  • Mixing Bowls: A large bowl for combining ingredients and a smaller one for whisking.
  • Whisk: Essential for blending ingredients smoothly.
  • 9-inch Pie Dish: A standard size for this recipe.
  • Spatula: For smoothing the batter into the pie dish.
  • Oven Mitts: Safety first when handling hot dishes!

Serving Suggestions

Enhance your pumpkin pie experience with these serving ideas:

  • Cinnamon Whipped Cream: A dollop adds creaminess and flair.
  • Caramel Drizzle: For a sweet touch, drizzle caramel sauce on top.
  • Nutmeg Sprinkle: A light dusting of nutmeg adds visual appeal and flavor.
  • Fresh Fruit: Serve with slices of apple or pear for a contrasting texture.

Conclusion: Taste the Adventure

Your journey into the world of flavors has just begun with this High Protein Crustless Pumpkin Pie. Each slice tells a story of autumn’s warmth, nutritious ingredients, and culinary exploration. Remember, cooking is not just about recipes—it’s about connecting with flavors, cultures, and each other. So, gather your loved ones, share this pie, and continue to explore the delicious tapestry of our world!

High Protein Crustless Pumpkin Pie

Prep Time 10 minutes
Cook Time 50 minutes
Total Time 1 hour
Servings 8 pieces
Calories 180
A delicious, protein-packed pumpkin pie without a crust, perfect for a healthy dessert or snack.

Ingredients

Main ingredients

  • 425 grams Pumpkin puree
  • 240 grams Plain Greek yogurt
  • 3 large Eggs
  • 60 grams Vanilla protein powder
  • 100 grams Brown sugar
  • 1 teaspoon Ground cinnamon
  • 0.5 teaspoon Ground ginger
  • 0.25 teaspoon Ground nutmeg
  • 0.25 teaspoon Salt
  • 1 teaspoon Vanilla extract

Instructions 

  • Preheat oven to 350°F (175°C). Grease a 9-inch pie dish.
  • Mix pumpkin, Greek yogurt, and eggs until smooth.
  • Add protein powder and sugar; stir well.
  • Mix in spices, salt, and vanilla extract.
  • Pour into dish and bake for 50 minutes until set.
  • Cool, chill for 2 hours, then serve.

Notes

This pie is a healthy, high-protein dessert perfect for fall or anytime you crave pumpkin.
Calories: 180kcal
Cost: $12
Course: Dessert
Cuisine: American
Keyword: healthy, Protein, pumpkin

Discover the Magic of Autumn with Our Roasted Sweet Potato and Apple Salad

As the leaves turn golden and the air carries a crisp chill, there’s nothing quite like the comforting embrace of a warm salad featuring roasted sweet potatoes and apples. This dish isn’t just a recipe; it’s a celebration of the season, a vibrant mix of flavors and textures that tells the story of harvest time. Whether you’re preparing for a cozy dinner or looking for the perfect Thanksgiving side dish, this Roasted Sweet Potato and Apple Salad is your savory passport to fall’s bounty.

Why You’ll Love This Recipe

Our Roasted Sweet Potato and Apple Salad isn’t just delicious; it’s a perfect blend of nutrition, flavor, and seasonal celebration. Here are a few reasons why this dish will become a staple in your kitchen:

  • Flavor Harmony: The sweet and earthy notes of roasted sweet potatoes pair beautifully with tart Granny Smith apples, creating an irresistible combination.
  • Nutritious Ingredients: This salad is packed with vitamins, minerals, and fiber, making it a healthy choice for any meal.
  • Easy to Prepare: With simple steps and minimal prep time, this recipe is perfect for both novice and seasoned cooks.
  • Versatile Dish: Serve it warm as a main dish or chilled as a side, making it a flexible option for any table.
  • Make-Ahead Friendly: You can prep most of the ingredients in advance, making it a fantastic choice for busy schedules.

Ingredients Breakdown

Gathering the right ingredients is key to the success of this salad. Below is a detailed list of what you need, along with some suggested substitutions.


Meal Prep Containers

★ Recommended Kitchen Tool

Meal Prep Containers

Make this recipe even easier with a quality Meal Prep Containers — a must-have kitchen staple!


🛒 See Deals on Amazon →

As an Amazon Associate, we earn from qualifying purchases.
  • Sweet Potatoes: 3 sweet potatoes, peeled and cubed into 1/2″ pieces (approx. 2 3/4 cups). You can substitute with butternut squash for a different flavor.
  • Granny Smith Apple: 1 large apple, chopped (about 1 cup). Feel free to use Honeycrisp or Fuji apples if you prefer a sweeter profile.
  • Rosemary Walnuts: 1/2 cup, adding a delightful crunch. Pecans or almonds can work as alternatives.
  • Dried Cranberries: 1/2 cup, providing a sweet-tart contrast. Consider using raisins or chopped dates as substitutes.
  • Vinaigrette Ingredients: 1 tablespoon each of Dijon mustard, maple syrup, vegan mayo (or vegetable oil), and apple cider vinegar. This dressing enhances the flavors beautifully.
  • Olive Oil: 1 tablespoon for roasting the sweet potatoes. You can replace it with avocado oil for a different taste.
  • Salt and Pepper: To taste, enhancing the overall flavor of the dish.

Preparation Steps

Close-up of a vibrant Roasted Sweet Potato and Apple Salad featuring colorful ingredients.

Creating this salad is a straightforward process that can be accomplished in a few easy steps:

Step 1: Roast the Sweet Potatoes

Preheat your oven to 400°F (200°C). Toss the cubed sweet potatoes in olive oil and season with salt and pepper. Spread them on a baking sheet in a single layer. Roast for 25-30 minutes or until they are tender and golden brown, stirring halfway through for even cooking.

Step 2: Prepare the Dressing

In a small bowl, whisk together the Dijon mustard, maple syrup, vegan mayo, and apple cider vinegar until smooth. Adjust seasoning with salt and pepper to taste. This dressing adds a creamy tang that ties the salad together.

Step 3: Combine the Ingredients

In a large mixing bowl, combine the roasted sweet potatoes, chopped apple, rosemary walnuts, and dried cranberries. Drizzle the dressing over the top and toss gently to combine, ensuring everything is well coated.

Step 4: Serve and Enjoy!

Serve the salad warm for a comforting dish or chill it in the refrigerator for a refreshing side. It pairs wonderfully with roasted meats or as part of a vegetarian feast.

Pro Tips for Perfecting Your Salad

Here are some expert insights to elevate your Roasted Sweet Potato and Apple Salad:

  • Roasting Technique: For optimal caramelization, avoid overcrowding the sweet potatoes on the baking sheet.
  • Flavor Infusion: Consider adding spices like cinnamon or nutmeg to the sweet potatoes for a warm, holiday-inspired touch.
  • Texture Balance: For added crunch, toss in some sunflower seeds or pumpkin seeds just before serving.
  • Fresh Herbs: Chopped parsley or cilantro can brighten up the dish and add a fresh note.
  • Make It Heartier: Add cooked quinoa or farro for a more filling meal.
  • Experiment with Dressings: Try using tahini dressing or a balsamic reduction for a different flavor profile.
  • Storage Tips: Store leftovers in an airtight container in the fridge for up to 3 days. The flavors will continue to meld!
  • Serving Temperature: Enjoy it warm, at room temperature, or chilled—each way offers a unique experience.

Common Mistakes to Avoid

Even the best recipes can go awry. Here are some common pitfalls to watch out for:

  • Underseasoning: Don’t forget to season the sweet potatoes before roasting; it enhances their natural sweetness.
  • Overcooking the Apples: Add the apples at the end or just before serving to maintain their crunch.
  • Ignoring Texture: Ensure a good mix of textures by including crunchy nuts and dried fruits.

Variations to Try

Get creative with this base recipe! Here are some fun variations:

  • Spicy Kick: Add a pinch of cayenne pepper to the dressing for a heat boost.
  • Cheesy Delight: Incorporate crumbled feta or goat cheese for a tangy flavor.
  • Vegan Delight: Keep it vegan-friendly by ensuring your dressing and nuts are plant-based.
  • Seasonal Swaps: Use seasonal fruits like pears or pomegranate seeds instead of apples.

Storage and Make-Ahead Instructions

This salad can be made ahead of time, making it perfect for meal prep or gatherings. Here’s how:

  • Make Ahead: Roast sweet potatoes and prepare the dressing a day in advance. Mix just before serving for maximum freshness.
  • Storage: Store in an airtight container in the fridge for up to 3 days. The flavors will meld beautifully, enhancing the taste.

Frequently Asked Questions

  • Can I make this salad gluten-free? Yes, all ingredients are naturally gluten-free, making it a safe choice for gluten-sensitive individuals.
  • Is this salad suitable for meal prep? Absolutely! It holds well in the fridge and can be enjoyed over several days.
  • How can I add protein to this salad? Consider adding chickpeas, grilled chicken, or tofu to make it a complete meal.
  • What can I serve with this salad? It pairs well with roasted meats, sandwiches, or can be enjoyed on its own as a light meal.
  • Can I use other nuts? Yes! Feel free to substitute walnuts with pecans, almonds, or even hazelnuts.
  • What’s the best way to roast sweet potatoes? Cut them evenly for uniform cooking and toss them with oil and seasonings for the best flavor.
  • How can I make this salad more filling? Add grains like quinoa, farro, or even cooked lentils for a heartier dish.
  • Is this salad good for Thanksgiving? Definitely! It’s a colorful addition to your holiday table and complements traditional dishes beautifully.

Nutritional Benefits and Dietary Adaptations

This salad is not only delicious but also packed with health benefits:

  • Rich in Vitamins: Sweet potatoes are high in vitamins A and C, while apples provide fiber and antioxidants.
  • Heart-Healthy Fats: Olive oil and walnuts contribute healthy fats, promoting cardiovascular health.
  • Low in Calories: A satisfying dish that won’t break your calorie bank, making it a great choice for weight management.

Essential Equipment

Before diving into this culinary adventure, make sure you have the necessary tools:

  • Baking Sheet: For roasting sweet potatoes evenly.
  • Mixing Bowls: To combine ingredients and dressings effortlessly.
  • Whisk: For blending your dressing smoothly.
  • Sharp Knife and Cutting Board: Essential for chopping ingredients safely and efficiently.

Serving Suggestions

Now that you’ve created this delightful salad, here are some serving ideas:

  • As a Main Dish: Serve it warm topped with grilled chicken or chickpeas for a satisfying meal.
  • As a Side Dish: Pair with roasted turkey, pork, or as part of a vegetarian platter.
  • Garnish: Finish with fresh herbs or a sprinkle of feta cheese for added flavor.

Conclusion

Incorporating the warmth of roasted sweet potatoes and the crispness of apples, this Roasted Sweet Potato and Apple Salad is more than just a recipe; it’s a journey through the flavors of fall. Its vibrant ingredients and delightful textures make it a versatile dish for any occasion. So grab your apron, gather your ingredients, and let’s create a meal that not only nourishes but also tells a beautiful story of harvest and celebration. Bon appétit!

Roasted Sweet Potato and Apple Salad

Prep Time 15 minutes
Cook Time 30 minutes
Total Time 45 minutes
Servings 4 servings
Calories 350
A vibrant and hearty salad combining roasted sweet potatoes, crisp apples, and crunchy walnuts, perfect for a nutritious meal or side dish.

Ingredients

Dressing

  • 1 tablespoon Dijon mustard
  • 1 tablespoon maple syrup
  • 1 tablespoon vegan mayo (or vegetable oil)
  • 1 tablespoon apple cider vinegar

Sweet Potatoes

  • 3 sweet potatoes sweet potatoes, peeled and cubed into 1/2″ pieces (Approximately 2 3/4 cups)
  • 1 tablespoon olive oil
  • to taste Salt and pepper

Fruits & Nuts

  • 1 cup Granny Smith apple, chopped
  • 1/2 cup rosemary walnuts
  • 1/2 cup dried cranberries

Instructions 

  • Preheat oven to 400°F (200°C). Toss sweet potatoes with olive oil, salt, and pepper, then roast for 30 minutes.
  • In a small bowl, whisk together Dijon mustard, maple syrup, vegan mayo, and apple cider vinegar to make the dressing.
  • Allow roasted sweet potatoes to cool slightly, then combine with chopped apple, walnuts, and cranberries in a large bowl.
  • Drizzle the dressing over the salad and toss gently to combine.

Notes

For extra flavor, sprinkle with fresh herbs or a squeeze of lemon before serving.
Calories: 350kcal
Cost: $15
Course: Salad
Keyword: Apple, Sweet Potato, Vegan