Author

Jack

Browsing

Welcome to the World of Greek Yogurt Fruit Bowls

Bright mornings call for a refreshing start, and what better way to embrace the day than with a delightful Greek Yogurt Fruit Bowl? This vibrant dish is not just a feast for the eyes but a nourishing blend of flavors that whispers the essence of summer in every bite. Imagine creamy Greek yogurt topped with fresh, juicy fruits, crunchy almonds, and a drizzle of golden honey—a perfect combination that elevates your breakfast experience. Whether you’re a busy professional or a leisurely weekend bruncher, this Greek yogurt bowl is your ticket to a delicious, balanced breakfast that sets a positive tone for the day ahead.

Why You’ll Love This Recipe

Crafting the perfect Greek yogurt fruit bowl goes beyond just taste; it’s about the experience and the benefits that come with it. Here are five reasons why you’ll adore this recipe:

  • Nutritious & Wholesome: Packed with protein from Greek yogurt, this bowl offers a satisfying start to your day.
  • Vibrant Flavors: The combination of fruits like strawberries, blueberries, and peaches creates a symphony of sweetness that dances on your palate.
  • Quick & Easy: With minimal preparation, you can whip up this bowl in under 10 minutes, making it ideal for busy mornings.
  • Customizable: This recipe is versatile—you can easily swap fruits, nuts, or toppings according to your preferences or what’s in season.
  • Great for Meal Prep: Prepare several bowls in advance and store them in the refrigerator for easy breakfasts throughout the week.

Ingredients Breakdown

Let’s dive into the ingredients that make this Greek Yogurt Fruit Bowl a true delight. Here’s what you’ll need:

  • 2 cups full-fat Greek yogurt (unsweetened): This creamy base provides protein and healthy fats. For a lighter option, consider using low-fat yogurt.
  • 1 cup fresh strawberries, hulled and sliced: These berries add natural sweetness and vibrant color. Substitute with raspberries for a tangy twist.
  • 1 cup blueberries, rinsed: Rich in antioxidants, blueberries enhance the nutritional profile. Blackberries are a great alternative.
  • 1 ripe peach, thinly sliced: Peaches bring a juicy sweetness; feel free to use nectarines if you prefer.
  • 2 tablespoons raw honey (optional): This adds a touch of sweetness and depth; maple syrup can be a vegan substitute.
  • 1/4 cup toasted almonds, roughly chopped: Almonds provide crunch and healthy fats. Try walnuts or pecans for a different flavor.
  • 2 teaspoons chia seeds: These tiny seeds are packed with fiber and omega-3s, making your bowl even more nutritious.
  • Fresh mint leaves, for garnish: Mint adds a refreshing touch. You can also use basil for an unexpected flavor profile.
  • Edible flowers (optional): They make for a stunning presentation, perfect for serving guests.

Pro Tips for the Perfect Greek Yogurt Bowl

A luscious Greek yogurt bowl topped with fresh fruit, almonds, and mint leaves, photographed from the side.

To ensure your Greek Yogurt Fruit Bowl is a hit every time, here are some expert insights:

  • Use chilled yogurt: Starting with cold yogurt enhances the freshness of your bowl.
  • Layer strategically: Create visual appeal by layering yogurt and fruits, making each spoonful a surprise.
  • Experiment with textures: Mix in granola for crunch or shredded coconut for tropical flair.
  • Balance flavors: Combine sweet fruits with a hint of salt from nuts to create a delightful flavor contrast.
  • Keep it seasonal: Use seasonal fruits to enjoy the freshest flavors and best prices.
  • Store properly: If making ahead, keep toppings separate until serving to maintain their crunch.
  • Include protein boosters: Mix in a scoop of protein powder or nut butter for an extra energy boost.
  • Perfect the honey drizzle: Warm the honey slightly for easier drizzling over your bowl.

Common Mistakes and Troubleshooting

Even the most seasoned home cooks can make mistakes! Here’s how to troubleshoot common issues:

  • Too watery yogurt: Choose a thicker Greek yogurt or strain regular yogurt using cheesecloth to achieve the desired consistency.
  • Overripe fruits: Opt for firm, ripe fruits to avoid mushiness. If they’re too soft, consider blending them into a smoothie instead.
  • Unbalanced flavors: If your bowl tastes bland, add a pinch of salt or a splash of citrus juice to brighten the flavors.
  • Missing crunch: If your bowl feels too soft, consider adding a handful of granola or seeds for texture.

Variations to Try

Here are some fun variations to keep your Greek Yogurt Fruit Bowl exciting:

  • Tropical Delight: Substitute tropical fruits like mango, pineapple, and coconut for a sunny twist.
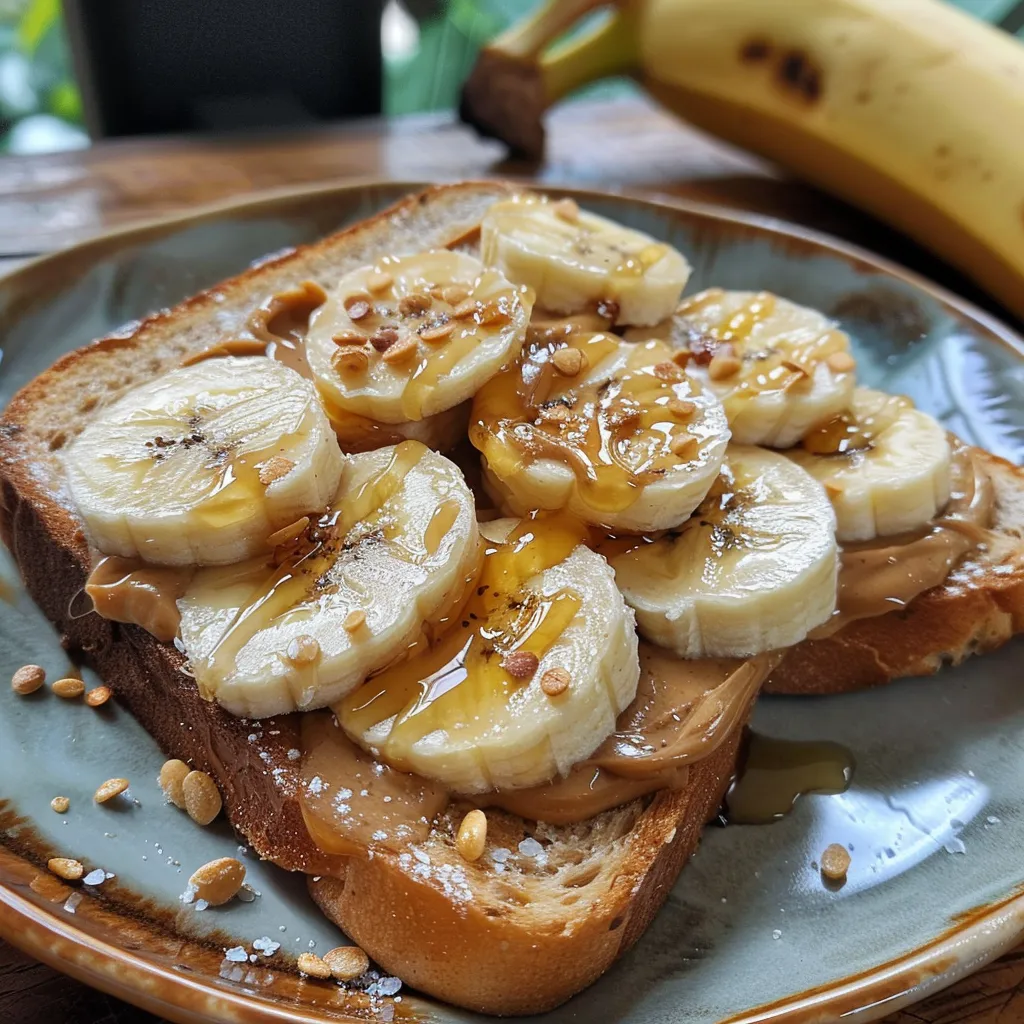
  • Nutty Banana Bowl: Add sliced bananas and a sprinkle of peanut butter or almond butter for a rich flavor.
  • Berry Medley: Combine strawberries, raspberries, and blackberries for a mixed berry explosion.
  • Chocolate Indulgence: Stir in cocoa powder into yogurt and top with dark chocolate shavings for a delicious treat.

Storage and Make-Ahead Instructions

If you’re planning to prepare your Greek Yogurt Fruit Bowl in advance, here’s how to store it for optimal freshness:

  • Refrigerate: Store assembled bowls in airtight containers in the fridge for up to 2 days. Keep toppings separate to prevent sogginess.
  • Make-ahead preparations: Pre-slice fruits and store them in separate containers to save time in the mornings.
  • Freezing options: While yogurt doesn’t freeze well, you can freeze fruits like bananas and berries for smoothies later.

Frequently Asked Questions

Here are some common questions regarding Greek Yogurt Fruit Bowls:

  • 1. Can I use flavored yogurt? Yes, flavored yogurt can add sweetness, but be mindful of added sugars.
  • 2. Are there dairy-free options? Absolutely! Use coconut yogurt or almond yogurt as a substitute for a dairy-free version.
  • 3. How can I make my bowl more filling? Add oats or a scoop of protein powder to boost satiety.
  • 4. What other toppings can I use? Consider seeds, dried fruits, or nut butters for additional flavor and nutrition.
  • 5. Is this recipe suitable for kids? Definitely! Kids love the colorful presentation and can help assemble their bowls.
  • 6. Can I serve this as dessert? Yes! With a drizzle of chocolate or a sprinkle of granola, it makes a delightful dessert option.
  • 7. How do I prevent fruits from browning? Toss fruits like apples and bananas with a little lemon juice to keep them fresh.
  • 8. What type of Greek yogurt is best? Choose plain, unsweetened Greek yogurt for the healthiest option and control over sweetness.

Nutritional Tips and Dietary Adaptations

Crafting a Greek Yogurt Fruit Bowl can be tailored to specific dietary needs:

  • Vegan: Use plant-based yogurt alternatives and sweeten with maple syrup.
  • Low-carb: Choose berries as your fruit option and skip the honey to keep sugar intake low.
  • High-protein: Add nuts and seeds for an extra protein punch without compromising flavor.

Equipment Recommendations

To create your own Greek Yogurt Fruit Bowl, here’s what you’ll need:

  • Mixing bowls: For easy preparation and presentation.
  • Sharp knife: For slicing fruits safely and efficiently.
  • Measuring cups and spoons: To ensure accurate ingredient measurements.
  • Spoon: For layering your bowl beautifully.
  • Glass parfait cups: Optional, but a great way to showcase your colorful layers.

Serving Suggestions

Serve your Greek Yogurt Fruit Bowl as a standalone breakfast or alongside:

  • Whole grain toast: A slice of whole grain bread with avocado makes a perfect pairing.
  • Smoothie: Blend your favorite greens and fruits for a refreshing drink.
  • Hard-boiled eggs: Adding a protein source keeps you satiated until lunch.

Conclusion

In the realm of breakfast options, the Greek Yogurt Fruit Bowl stands out as a beacon of flavor, nutrition, and versatility. By following this comprehensive guide, you’ll not only master the art of crafting the perfect bowl but also embrace the joy of exploring new flavors and textures. So gather your ingredients, unleash your creativity, and savor the delightful experience of this vibrant dish. Remember, every bowl you create tells a story, and each bite is a journey through the colorful world of culinary exploration. Happy cooking!

Greek Yogurt Fruit Bowl

Prep Time 10 minutes
Total Time 10 minutes
Servings 2 servings
Calories 250
A vibrant and healthy Greek Yogurt Fruit Bowl perfect for a quick breakfast or snack, combining creamy yogurt with fresh fruits and crunchy toppings.

Ingredients

Dairy

  • 2 cups full-fat Greek yogurt unsweetened
  • 1 cup fresh strawberries, hulled and sliced
  • 1 cup blueberries, rinsed
  • 1 piece ripe peach, thinly sliced
  • 2 tablespoons raw honey (optional)
  • 0.25 cup toasted almonds, roughly chopped
  • 2 teaspoons chia seeds

Garnish

  • Fresh mint leaves (for garnish)
  • Edible flowers (optional) (for decoration)

Instructions 

  • Rinse and dry all fresh fruits. Slice strawberries and peach thinly.
  • Divide half of the Greek yogurt into two bowls and spread evenly.
  • Layer fruits over the yogurt and drizzle with half the honey if desired.
  • Add the remaining yogurt over the fruit layer and smooth the surface.
  • Decorate with remaining fruits, scatter almonds and chia seeds, and garnish with mint and edible flowers.

Notes

Use fresh, ripe fruits for the best flavor and presentation.
Calories: 250kcal
Cost: $10
Course: Breakfast
Cuisine: Greek
Keyword: Fruits, Yogurt

Embark on a Culinary Adventure with One-Pot Zesty Steak Pasta

Welcome, fellow food explorers! Today, we’re diving into a delightful dish that perfectly marries the richness of steak with the creamy goodness of pasta. This One-Pot Zesty Steak Pasta is not just a meal; it’s a passport to comfort and connection, ideal for sharing with friends and family. Whether you’re a busy parent or a culinary enthusiast, this recipe simplifies your cooking experience without compromising on flavor.

Imagine savoring tender slices of steak enveloped in a creamy sauce, all while enjoying the vibrant flavors of tomatoes and Italian herbs. This dish captures the essence of home-cooked goodness, making it an instant favorite at your dinner table. Now, let’s explore why you’ll love this recipe!

Why You’ll Love This Recipe

  • Quick and Easy Preparation: With minimal prep time and just one pot needed, you can whip up this satisfying meal in under 30 minutes.
  • Rich and Creamy Flavor: The combination of beef broth, heavy cream, and tomatoes creates a deliciously creamy sauce that perfectly coats the pasta.
  • Customizable Ingredients: Use your choice of steak cuts and pasta varieties, allowing you to adapt the dish to your preferences.
  • Minimal Cleanup: Cooking everything in one pot means less time spent washing dishes and more time enjoying your meal.
  • Great for Leftovers: This dish stores well, making it perfect for meal prep or enjoying as leftovers the next day.

Ingredient Breakdown

Here’s what you’ll need to create this amazing dish:

  • 1 lb steak: Choose your favorite cut—Sirloin, flank, or ribeye work beautifully.
  • 12 oz pasta: Penne or rigatoni are great options, but feel free to experiment with your preferred pasta shape.
  • 2 cups beef broth: This adds depth and richness to the sauce.
  • 1 cup heavy cream: For that luscious, creamy texture.
  • 1 cup diced tomatoes: Use canned or fresh to bring vibrancy and acidity.
  • 1 tbsp olive oil: Essential for browning the steak and sautéing the aromatics.
  • 1 small onion, chopped: Adds sweetness and flavor.
  • 2 cloves garlic, minced: For that aromatic kick.
  • 1 tsp Italian seasoning: A blend of herbs that elevates the dish.
  • Salt and pepper, to taste: Essential for seasoning.
  • ½ cup grated Parmesan cheese: Adds a savory, cheesy finish.
  • Fresh basil or parsley (optional): For garnish, enhancing both flavor and presentation.

Now, if you need to make substitutions, consider these:

  • Steak alternatives: Chicken or shrimp can be a lighter option.
  • Pasta alternatives: Gluten-free pasta works well for dietary restrictions.
  • Vegetable broth: For a vegetarian version, replace beef broth with vegetable broth.
  • Non-dairy cream: Use coconut cream or cashew cream for a dairy-free option.

Step-by-Step Cooking Instructions

Ready to cook? Follow these simple steps to create your One-Pot Zesty Steak Pasta:

  1. Heat 1 tbsp of olive oil in a large pot over medium heat.
  2. Add the sliced steak, season with salt and pepper, and cook until browned on both sides, about 3-4 minutes. Remove the steak from the pot and set it aside.
  3. In the same pot, add the chopped onion and minced garlic. Sauté for 3-4 minutes until softened and fragrant.
  4. Pour in the beef broth, heavy cream, and diced tomatoes. Stir in the uncooked pasta, Italian seasoning, salt, and pepper.
  5. Bring to a boil, then reduce heat and simmer for 10-12 minutes, stirring occasionally until the pasta is tender and has absorbed most of the liquid.
  6. Return the cooked steak to the pot and stir well. Add the grated Parmesan cheese and mix until melted and combined.
  7. Taste and adjust seasoning if needed. Garnish with fresh basil or parsley if desired. Serve warm and enjoy!

Pro Tips for Perfecting Your Dish

  • Cut steak thinly: This ensures quick cooking and maximum tenderness.
  • Don’t overcook the pasta: Aim for al dente to prevent mushy noodles.
  • Experiment with spices: Add red pepper flakes for a spicy kick or fresh herbs for extra flavor.
  • Use high-quality ingredients: They make a noticeable difference in taste.
  • Adjust creaminess: Add more heavy cream for a richer sauce if desired.
  • Let it rest: Allow the dish to sit for a few minutes before serving to enhance the flavors.
  • Use a non-stick pot: This makes cleanup a breeze.
  • Save leftover broth: Use it to make soups or sauces later.

Common Mistakes and Troubleshooting

Even seasoned cooks can run into issues. Here are some common pitfalls and how to avoid them:

  • Pasta sticking together: Stir occasionally while cooking and ensure there’s enough liquid.
  • Overcooked steak: Remove the steak from the pot as soon as it’s browned to keep it tender.
  • Sauce too thick: Add a splash of beef broth or water to loosen it up.
  • Flavor lacking: Always taste and adjust seasoning as you go.

Delicious Variations

Make this dish your own with these tempting variations:

  • Vegetarian option: Replace steak with mushrooms and add more vegetables like bell peppers or spinach.
  • Spicy twist: Incorporate jalapeños or cayenne pepper for an extra kick.
  • Cheesy delight: Stir in more cheeses like mozzarella or goat cheese for added creaminess.
  • Herbaceous infusion: Use fresh herbs like thyme or oregano to elevate the flavor profile.

Storage and Make-Ahead Instructions

This dish is perfect for meal prep! Here’s how to store and reheat it:

  • Refrigeration: Store leftovers in an airtight container for up to 3 days.
  • Freezing: Freeze in a freezer-safe container for up to 2 months. Thaw in the fridge before reheating.
  • Reheating: Warm in a pot over low heat, adding a splash of broth or cream to restore creaminess.

Frequently Asked Questions

Here are some common questions about this amazing dish:

  • Can I use a different type of pasta? Absolutely! Any pasta shape you prefer will work well.
  • Is this dish spicy? It’s not inherently spicy, but you can add red pepper flakes for heat.
  • Can I use leftover steak? Yes! Just add it when you combine the other ingredients to heat through.
  • What can I serve with this pasta? A simple green salad or garlic bread pairs beautifully.
  • Is it gluten-free? You can make it gluten-free by using gluten-free pasta.
  • How can I make it dairy-free? Substitute heavy cream with coconut cream and omit cheese.
  • How long does it take to make? This dish takes about 30 minutes from start to finish.
  • Can I add vegetables? Absolutely! Peas, spinach, or bell peppers can enhance the dish.

Nutritional Tips and Dietary Adaptations

Looking to make this dish healthier? Consider these adaptations:

  • Lean beef: Opt for lean cuts to reduce fat content.
  • Low-fat dairy: Use low-fat cream or Greek yogurt for a lighter sauce.
  • Whole grain pasta: Choose whole grain or legume-based pasta for added fiber.

Equipment Recommendations

To make your cooking experience smoother, here are some essential tools:

  • Large pot: A sturdy pot is crucial for even cooking.
  • Wooden spoon: Perfect for stirring and scraping the bottom of the pot.
  • Measuring cups and spoons: Essential for accuracy in your ingredients.

Serving Suggestions

To elevate your dining experience, consider these serving ideas:

  • Fresh herbs: Garnish with basil or parsley for a pop of color.
  • Extra cheese: Serve with additional Parmesan for cheese lovers.
  • Side dishes: Pair with a fresh salad or crusty bread to complete the meal.

Now, you have everything you need to create this mouthwatering One-Pot Zesty Steak Pasta. Let your culinary journey begin, and may every bite inspire you to explore the world of flavors even further. Happy cooking!

One-Pot Zesty Steak Pasta

Prep Time 10 minutes
Cook Time 15 minutes
Total Time 25 minutes
Servings 4 servings
Calories 650
A quick and flavorful one-pot meal combining tender steak, pasta, and a creamy tomato sauce, perfect for a satisfying dinner.

Ingredients

Meat

  • 1 lb steak, sliced thin (sirloin, flank, or ribeye)
  • 12 oz pasta (penne or rigatoni)
  • 2 cups beef broth
  • 1 cup heavy cream
  • 1 cup diced tomatoes (canned or fresh)
  • 1 tbsp olive oil
  • 1 small onion, chopped
  • 2 cloves garlic, minced
  • 1 tsp Italian seasoning
  • to taste Salt and pepper
  • ½ cup grated Parmesan cheese

Garnish

  • optional Fresh basil or parsley (for garnish)

Instructions 

  • Heat olive oil in a large pot over medium heat. Cook sliced steak until browned, then set aside.
  • Sauté chopped onion and minced garlic until softened. Add beef broth, heavy cream, diced tomatoes, pasta, Italian seasoning, salt, and pepper. Bring to a boil.
  • Reduce heat and simmer for 10-12 minutes until pasta is tender and liquid is absorbed. Return steak to the pot and stir in Parmesan cheese until melted.
  • Adjust seasoning if needed, garnish with herbs if desired, and serve warm.

Notes

For extra flavor, add a squeeze of lemon or a dash of hot sauce before serving.
Calories: 650kcal
Cost: $15
Course: Main Course
Cuisine: American
Keyword: creamy, Pasta, Steak

Welcome to a culinary journey that promises to transport your taste buds straight to the heart of Italy! This Beef Pasta in Tomato Sauce recipe is not just a meal; it’s a celebration of flavors, culture, and the comforting warmth of home-cooked food. Imagine twirling forkfuls of perfectly cooked pasta, enveloped in a rich and savory sauce, all while savoring the aromatic herbs that dance in harmony with the hearty ground beef. This dish is perfect for family gatherings, cozy dinners, or any occasion where comfort food is welcome. Let’s dive deep into the world of Italian cuisine and uncover the secrets behind this beloved dish!

Why You’ll Love This Recipe

This Beef Pasta in Tomato Sauce is more than just delicious; it’s an experience full of flavor and warmth. Here are five reasons why you’ll adore this recipe:

  • Comforting and Satisfying: The combination of pasta and a rich meat sauce is the epitome of comfort food, perfect for any occasion.
  • Customizable Ingredients: You can easily swap out ingredients, like using ground turkey for a lighter dish or adjusting the herbs to suit your palate.
  • One-Pot Wonder: This recipe minimizes cleanup time without sacrificing flavor, allowing you to enjoy your meal without the hassle.
  • Family-Friendly: With its rich flavors and delightful textures, this dish is sure to please even the pickiest of eaters.
  • Quick and Easy: In about 30 minutes, you can have a hearty meal ready, making it a great option for busy weeknights.

Ingredients: A Closer Look

To create this delightful Beef Pasta in Tomato Sauce, you’ll need a variety of ingredients that each contribute to its unique flavor profile. Here’s a detailed breakdown:

  • Pasta: Opt for your favorite shape—penne, rigatoni, or fusilli work beautifully, holding the sauce well. You can also use spaghetti or linguine for a more traditional take.
  • Lean Ground Beef: This provides a rich, meaty heartiness to the sauce. You can substitute with ground turkey or chicken for a lighter option.
  • Onion: Aromatic and slightly sweet, onion builds a flavorful foundation for the sauce.
  • Garlic: A must-have in any ragu, garlic enhances the savory depth of the sauce with its pungent aroma and flavor.
  • Dried Herbs: A classic blend of oregano, basil, and thyme ties all the flavors together.
  • Marinara Sauce: Opt for a high-quality canned marinara sauce for a robust, tangy base. You can also make your own if time allows.
  • Instant Bouillon Cube: This secret ingredient packs a punch of umami, amplifying the savory notes of the beef and sauce.
  • Parmesan Cheese: This adds creaminess and a salty umami kick that pairs perfectly with the beef and tomato sauce.
  • Fresh Parsley: Bright and herbaceous, parsley adds a fresh finishing touch that balances the richness of the dish.
  • Seasonings: Salt and pepper to taste are essential to enhance the flavors without overpowering them.

Instructions: How to Make Beef Pasta in Tomato Sauce

Now that we have everything ready, let’s walk through the steps to create this delicious dish:

  1. In a large pot, bring salted water to a boil. Add the pasta and cook according to package instructions until al dente. Drain and set aside, reserving ½ cup of pasta water.
  2. In the same pot, heat a tablespoon of olive oil over medium heat. Add the chopped onion and sauté until translucent, about 5 minutes.
  3. Add minced garlic and cook for an additional minute until fragrant.
  4. Increase the heat to medium-high and add the ground beef. Cook until browned, breaking it apart with a spoon, about 6-8 minutes.
  5. Stir in the marinara sauce, instant bouillon cube, and dried herbs. Reduce the heat to low and let simmer for 10 minutes, allowing the flavors to meld.
  6. Mix in the cooked pasta, adding reserved pasta water as needed to reach your desired sauce consistency.
  7. Serve hot, garnished with freshly chopped parsley and grated Parmesan cheese.

Pro Tips for Perfect Beef Pasta

Side profile of a dish featuring beef pasta, richly coated in a bright red tomato sauce.

Enhance your cooking skills with these expert insights to take your Beef Pasta in Tomato Sauce to the next level:

  • Choose Quality Ingredients: The flavor of your sauce largely depends on the quality of your ingredients, especially the marinara sauce.
  • Don’t Overcook the Pasta: Al dente pasta holds up better in the sauce and provides a pleasant texture.
  • Let the Sauce Simmer: Allowing the sauce to simmer enhances its flavors, making for a more robust dish.
  • Adjust Seasonings: Taste as you go! Adjust the salt, pepper, and herbs to your liking.
  • Fresh Herbs Matter: Adding fresh herbs at the end brightens the dish and adds a beautiful finish.
  • Experiment with Cheeses: Mix different cheeses like mozzarella or pecorino for varied flavors.
  • Add a Splash of Wine: A little red wine added to the sauce while simmering can deepen the flavor considerably.
  • Use the Right Pot: A heavy-bottomed pot is best for even heat distribution when cooking the meat and sauce.

Common Mistakes and Troubleshooting

Even the best chefs make mistakes! Here are common pitfalls to avoid:

  • Overcooked Beef: Keep the heat medium-high to brown the beef quickly without overcooking.
  • Too Watery Sauce: If the sauce is too thin, let it simmer uncovered for a few extra minutes to thicken.
  • Undercooked Pasta: Always check the pasta a minute before the package time to ensure it’s perfectly al dente.
  • Not Enough Flavor: If the dish tastes bland, consider adding more seasoning or a splash of vinegar for acidity.

Variations: Spice Up Your Beef Pasta

Feeling adventurous? Here are some creative variations to try:

  • Spicy Beef Pasta: Add red pepper flakes or diced jalapeños to the sauce for a spicy kick.
  • Vegetable-Rich Pasta: Stir in diced bell peppers, zucchini, or mushrooms for added nutrition and flavor.
  • Cheesy Beef Pasta Bake: Transfer the cooked pasta and sauce to a baking dish, top with mozzarella, and bake until bubbly.
  • One-Pot Enchilada Pasta: Incorporate taco seasoning and black beans for a Mexican-inspired twist!

Storage and Make-Ahead Instructions

This dish is perfect for meal prep! Here’s how to store it:

  • Refrigeration: Store leftovers in an airtight container in the fridge for up to 3 days.
  • Freezing: Freeze in a freezer-safe container for up to 3 months. Thaw overnight in the refrigerator before reheating.
  • Reheating: Warm gently on the stovetop with a splash of water or broth to loosen the sauce.

Frequently Asked Questions (FAQ)

Here are some common questions to help you along the way:

  • Can I use a different type of meat? Yes! Ground turkey, chicken, or even sausage work well.
  • How can I make this dish gluten-free? Substitute traditional pasta with gluten-free pasta alternatives.
  • What type of cheese pairs best? Parmesan is classic, but mozzarella or ricotta can also add a delightful touch.
  • Can I use fresh tomatoes instead of marinara? Absolutely! Just cook down fresh tomatoes with herbs for a homemade sauce.
  • How spicy can I make it? Adjust the heat level by adding more or less chili flakes or hot sauce.
  • Is this dish kid-friendly? Yes, it’s a hit with kids! You can adjust the seasoning to suit their taste.
  • How do I know when the beef is cooked? Ground beef should be browned and no longer pink inside.
  • Can I add other vegetables? Certainly! Spinach, kale, or peas can add color and nutrients.

Nutrition Tips and Dietary Adaptations

This dish can be adapted to various dietary needs:

  • Low-Carb Option: Swap pasta for zucchini noodles or spaghetti squash to make it keto-friendly.
  • Dairy-Free Option: Omit cheese or use a dairy-free alternative to fit vegan diets.
  • High-Protein Variation: Add chickpeas or lentils for an additional protein boost.

Essential Equipment

To make this dish, you’ll need:

  • Large Pot: For boiling pasta and preparing the sauce.
  • Wooden Spoon: Ideal for stirring and breaking up the meat.
  • Measuring Cups and Spoons: Essential for accurate ingredient measurements.
  • Colander: For draining the pasta once cooked.

Serving Suggestions

To elevate your dining experience, consider the following:

  • Pair with a Salad: A fresh arugula or Caesar salad can complement the richness of the pasta.
  • Garlic Bread: Serve with crusty garlic bread for a delightful crunch.
  • Wine Pairing: A robust red wine like Chianti or Merlot pairs beautifully with the flavors of the dish.

In conclusion, this Beef Pasta in Tomato Sauce is a delightful fusion of flavors that reflects the heart of Italian cooking. It’s not just a recipe; it’s a way to connect with loved ones over a meal that tells a story. So gather your ingredients, embrace the cooking process, and enjoy a delicious, hearty dish that brings a taste of Italy to your table!

Beef Pasta in Tomato Sauce

Prep Time 10 minutes
Cook Time 20 minutes
Total Time 30 minutes
Servings 4 servings
Calories 650
A hearty and flavorful pasta dish featuring a rich tomato sauce with ground beef, aromatic herbs, and fresh parsley. Perfect for a satisfying meal any day of the week.

Ingredients

Pasta

  • 400 grams pasta (penne, rigatoni, fusilli, spaghetti, or linguine) (Choose your favorite pasta shape)

Cooking Oil

  • 2 tablespoons olive oil (For sautéing aromatics)

Meat

  • 500 grams lean ground beef (Substitute with ground turkey or chicken for a lighter option)

Aromatics

  • 1 medium onion (Builds a flavorful foundation)
  • 3 cloves garlic (Enhances savory depth)

Herbs

  • 1 teaspoon oregano (Dried herbs blend)
  • 1 teaspoon basil (Dried herbs blend)
  • 1 teaspoon thyme (Dried herbs blend)

Umami enhancer

  • 1 tablespoon soy sauce (Adds umami flavor)

Sauce

  • 1 can marinara sauce (Use high-quality canned or homemade)

Seasoning

  • to taste salt and pepper (Adjust to enhance flavors)

Cream

  • 1/4 cup heavy cream (Adds creaminess and umami kick)

Fresh Herbs

  • 2 tablespoons parsley (Bright, herbaceous finishing touch)

Instructions 

  • Cook the pasta according to package instructions until al dente. Drain and set aside.
  • Heat olive oil in a large skillet over medium heat. Sauté chopped onion and minced garlic until fragrant.
  • Add ground beef and cook until browned. Stir in dried herbs and soy sauce, cook for another 2 minutes.
  • Pour in marinara sauce, season with salt and pepper, and simmer for 10 minutes. Stir in heavy cream and cook for 2 more minutes.
  • Combine cooked pasta with the sauce, garnish with chopped parsley, and serve hot.

Notes

For a lighter version, substitute ground turkey or chicken and reduce cream.
Calories: 650kcal
Cost: $15
Course: Main Course
Cuisine: Italian
Keyword: beef, Pasta, Tomato Sauce

Dive into the aromatic world of freshly baked Apple Cinnamon Streusel Muffins! This delightful recipe captures the essence of autumn with warm spices, sweet apples, and a crumbly topping that will transport you to a cozy kitchen filled with love and laughter. Whether you’re enjoying them with a cup of coffee on a crisp morning or serving them at a brunch gathering, these muffins are sure to enchant your taste buds and warm your heart.

In this guide, we’ll explore everything you need to know to create the **best apple cinnamon streusel muffins**. From essential ingredients to expert tips, we’ve got you covered. Let’s embark on this delicious journey together!

Why You’ll Love This Recipe

These muffins are more than just a treat; they’re a celebration of flavors and a testament to the comfort of home baking. Here are five reasons why you’ll adore these **apple cinnamon streusel muffins**:

  • Comforting flavors: The combination of sweet apples and warm cinnamon evokes feelings of cozy autumn days.
  • Easy to make: This straightforward recipe is perfect for bakers of all skill levels, ensuring everyone can enjoy the magic of homemade muffins.
  • Perfect for sharing: With a yield of 12 muffins, they’re ideal for gatherings, picnics, or simply enjoying with family.
  • Versatile delights: Enjoy these muffins for breakfast, as a snack, or even as a dessert with a drizzle of glaze!
  • Customizable recipe: Easily adapt the recipe to include your favorite ingredients or substitute to suit dietary preferences.

Essential Ingredients for Apple Cinnamon Streusel Muffins

To create these delightful muffins, gather the following ingredients:

  • Flour: 1 ½ cups all-purpose flour for structure.
  • Sugar: ½ cup granulated sugar to sweeten the batter.
  • Baking Powder: 1 ½ teaspoons for that perfect rise.
  • Cinnamon: ½ teaspoon ground cinnamon adds warmth and flavor.
  • Salt: ¼ teaspoon enhances the sweetness.
  • Egg: 1 large egg binds the ingredients together.
  • Milk: ½ cup milk adds moisture.
  • Butter: ¼ cup unsalted butter, melted, for richness.
  • Vanilla extract: 1 teaspoon for aromatic flavor.
  • Apples: 1 cup chopped apples (about 1 medium apple) adds moisture and sweetness.

Streusel Topping Ingredients

  • Flour: ½ cup all-purpose flour.
  • Brown sugar: ¼ cup packed light brown sugar for a caramel-like flavor.
  • Cinnamon: ¼ teaspoon ground cinnamon for that delightful streusel flavor.
  • Butter: ¼ cup unsalted butter, cold and cut into small pieces, for the perfect crumbly texture.

How to Bake Perfect Apple Cinnamon Streusel Muffins

Now that we have our ingredients ready, let’s dive into the step-by-step process:

  1. Preheat your oven to **375°F (190°C)**. Line a 12-cup muffin pan with paper liners.
  2. In a large bowl, whisk together the **flour**, **granulated sugar**, **baking powder**, **cinnamon**, and **salt** until well combined.
  3. In a separate medium bowl, whisk the **egg**, **milk**, **melted butter**, and **vanilla extract** until smooth.
  4. Pour the wet ingredients into the dry ingredients. Stir just until moistened; **do not overmix**—a few lumps are perfectly fine!
  5. Gently fold in the chopped **apples** to distribute them throughout the batter.

Making the Streusel Topping

For the irresistible streusel topping:

  1. In a small bowl, combine the **flour**, **brown sugar**, and **cinnamon**.
  2. Cut in the **cold butter** using a pastry blender or your fingertips until the mixture resembles coarse crumbs.

Combining and Baking

  1. Divide the muffin batter evenly among the 12 muffin cups, filling each about 2/3 full.
  2. Sprinkle a generous amount of streusel topping over each muffin.
  3. Bake for **18-22 minutes**, or until a wooden skewer inserted into the center of a muffin comes out clean.
  4. Let the muffins cool in the pan for a few minutes before transferring them to a wire rack to cool completely.

Pro Tips for Superb Apple Cinnamon Streusel Muffins

To ensure your muffins turn out perfectly every time, consider these expert insights:

  • Choose the right apples: Opt for firm apples like Honeycrisp, Granny Smith, or Fuji for the best flavor and texture.
  • Don’t overmix: When you combine your wet and dry ingredients, mix just until moistened to avoid dense muffins.
  • Cool your butter: Let melted butter cool slightly before adding it to the wet mixture to prevent cooking the egg.
  • Room temperature ingredients: Using room temperature eggs and milk helps create a smoother batter and leads to a better rise.
  • Check for doneness: Every oven is different; start checking for doneness a couple of minutes before the suggested baking time.
  • Store properly: Allow muffins to cool completely before storing to prevent sogginess.
  • Experiment with flavors: Don’t hesitate to add nuts, raisins, or spices to enhance your muffins.
  • Make a glaze: Drizzle a simple icing over the cooled muffins for an extra touch of sweetness.

Common Mistakes and Troubleshooting

Even the best bakers can run into issues. Here are common mistakes and how to avoid them:

  • Muffins are dense: Overmixing the batter or using too much flour can lead to dense muffins. Always measure flour correctly.
  • Streusel falls off: Ensure the streusel is clumped together and press it lightly into the batter before baking.
  • Uneven baking: Make sure your oven is preheated and rotate the muffin pan halfway through baking for even results.
  • Muffins stick to liners: Use quality liners and ensure the muffins are completely cooled before removing them.

Delicious Variations to Try

Feel free to get creative with your apple cinnamon streusel muffins! Here are a few variations to consider:

  • Caramel Apple: Add a swirl of caramel sauce to the batter for a delicious twist.
  • Pecan Crumble: Mix chopped pecans into the streusel for added crunch.
  • Chocolate Chip: Fold in chocolate chips for a sweet surprise in every bite.
  • Spiced Pumpkin: Substitute half the flour with pumpkin puree and add pumpkin spice for a seasonal variation.

Storage and Make-Ahead Instructions

To keep your muffins fresh and delicious:

  • Room temperature: Store in an airtight container for up to 3 days.
  • Refrigerator: For longer storage, keep in the fridge for up to a week.
  • Freezing: Freeze muffins in a single layer, then transfer to a freezer-safe bag for up to 3 months. Reheat in the oven or microwave before serving.

Comprehensive FAQ About Apple Cinnamon Streusel Muffins

Got questions? We have answers! Here are some frequently asked questions about these delightful muffins:

  • Can I make these muffins ahead of time? Absolutely! You can prepare the batter and store it in the fridge overnight before baking.
  • What are the best apples for these muffins? Firm varieties like Honeycrisp, Granny Smith, or Fuji work best.
  • Can I substitute whole wheat flour? Yes, but for best results, use half whole wheat and half all-purpose flour.
  • How can I make these muffins gluten-free? Substitute all-purpose flour with a gluten-free blend.
  • Can I add nuts or raisins? Yes, feel free to add your favorite mix-ins!
  • How can I store leftover muffins? Store in an airtight container at room temperature for up to 3 days.
  • What can I serve with these muffins? They pair wonderfully with coffee, tea, or a warm glass of cider.
  • How do I know when they’re done baking? Insert a toothpick into the center; it should come out clean when they’re done.

Nutritional Insights and Dietary Adaptations

These muffins can be a part of a balanced diet. Here are some nutritional insights:

  • Moderate calories: Each muffin contains around 150 calories, making them a satisfying treat without overindulging.
  • Dietary adaptations: Substitute almond milk for dairy-free options and use coconut oil instead of butter for vegan adaptations.
  • Fiber boost: Adding oats or using whole grain flour can increase the fiber content.

Equipment Recommendations

Having the right tools can make all the difference in your baking experience. Consider the following equipment:

  • Muffin pan: A quality non-stick muffin pan ensures easy removal and even baking.
  • Mixing bowls: Use a large mixing bowl for the dry ingredients and a medium one for the wet ingredients.
  • Whisk and spatula: A whisk for mixing and a spatula for folding in ingredients are essential tools.
  • Pastry blender: Handy for making the streusel topping quickly and efficiently.

Serving Suggestions

Enhance your muffin experience with these serving ideas:

  • With a drizzle: Top your muffins with a simple glaze or honey for added sweetness.
  • Pair with coffee: They make an excellent accompaniment to a hot cup of coffee or tea.
  • As a dessert: Serve warm with a scoop of vanilla ice cream for a delightful dessert experience.

In conclusion, baking **apple cinnamon streusel muffins** is not just about the end result; it’s about the joy of creating something delicious and sharing it with others. With this comprehensive guide, you’re fully equipped to embark on your baking adventure. So, roll up those sleeves, preheat that oven, and let’s fill your kitchen with the warm, inviting aroma of freshly baked muffins. Happy baking!

Unleash 12 Divine Apple Cinnamon Streusel Muffins From Your Oven Today

Prep Time 15 minutes
Cook Time 20 minutes
Total Time 35 minutes
Servings 12 muffins
Calories 250
Enjoy warm, freshly baked apple cinnamon muffins with a crunchy streusel topping, perfect for breakfast or a snack.

Ingredients

Batter

  • 1.5 cups all-purpose flour
  • 0.5 cup granulated sugar
  • 1.5 teaspoons baking powder
  • 0.5 teaspoon ground cinnamon
  • 0.25 teaspoon salt
  • 1 large egg
  • 0.5 cup milk
  • 0.25 cup unsalted butter, melted
  • 1 teaspoon vanilla extract

Apple Filling

  • 1 medium apple, chopped
  • 0.5 cup all-purpose flour
  • 0.25 cup light brown sugar, packed
  • 0.25 teaspoon ground cinnamon
  • 0.25 cup unsalted butter, cold and cut into small pieces

Instructions 

  • Preheat oven to 375°F (190°C). Line a 12-cup muffin pan with paper liners.
  • Mix dry ingredients in a large bowl. Whisk wet ingredients in a separate bowl. Combine both, then fold in chopped apples.
  • Prepare streusel topping by combining flour, brown sugar, cinnamon, and cutting in cold butter until coarse crumbs.
  • Divide batter among muffin cups, sprinkle with streusel, and bake for 18-22 minutes until golden and a skewer comes out clean.
  • Cool muffins in pan briefly, then transfer to wire rack to cool completely.

Notes

For best results, use fresh apples and avoid overmixing the batter.
Calories: 250kcal
Cost: $10
Course: Breakfast
Cuisine: American
Keyword: Apple, Cinnamon, Muffins

Discover the Joy of Peanut Butter Banana Toast

Welcome to the world of quick culinary delights! If you’ve ever found yourself in search of a simple yet satisfying breakfast, look no further than the classic Peanut Butter Banana Toast. In just 8 minutes, you can experience a delicious fusion of flavors that celebrates simplicity, nutrition, and the joy of everyday meals. This recipe is not just a meal; it’s an adventure waiting to happen on your plate.

Why You’ll Love This Recipe

  • Quick and Easy: In under 10 minutes, you can whip up a nutritious breakfast or snack that will keep you energized throughout your day.
  • Nutrient-Dense: Packed with protein from the peanut butter and fiber from the banana, this toast is a powerhouse of nutrition, perfect for fueling workouts or busy mornings.
  • Customizable: Make it your own! Adjust the toppings to suit your taste preferences—add honey, nuts, or even a sprinkle of chia seeds for extra crunch.
  • Budget-Friendly: All ingredients are affordable and commonly found in most kitchens, making this a budget-friendly meal option.
  • Deliciously Satisfying: The creamy peanut butter perfectly complements the sweetness of the banana, creating a delightful balance that’s hard to resist.

Ingredient Breakdown

Let’s dive into the ingredients that make this peanut butter banana toast a true delight:

  • 2 slices thick-cut sourdough bread (80g): A robust and chewy base that holds up well under the toppings. You can substitute with whole grain or gluten-free bread if desired.
  • 3 tbsp natural peanut butter (45g): Opt for creamy or crunchy, depending on your texture preference. Almond butter is a great alternative for those allergic to peanuts.
  • 1 medium ripe banana (120g): The star of the show! Choose bananas with a few brown spots for optimal sweetness.
  • 1 tsp raw honey (7g): Adds a touch of sweetness. Maple syrup or agave can be used as vegan alternatives.
  • 1/8 tsp ground cinnamon: A warm spice that enhances the flavor profile of the toast.
  • 1 pinch flaky sea salt: Essential for balancing the sweetness and enhancing the peanut butter’s flavor.
  • 1 tsp hemp hearts (5g): For added crunch and a boost of healthy fats.

Step-by-Step Guide to the Perfect Toast

Slices of sourdough bread spread with peanut butter and adorned with banana slices.

Now that we have our ingredients ready, let’s get to the fun part—making the toast!

  1. Prepare the bread: Take your 2 slices of thick-cut sourdough bread (80g) and place them in the toaster. Set to a high setting to achieve a golden, crispy exterior while keeping the inside chewy.
  2. Toast the slices: Cook for approximately 3 minutes until the edges are dark brown and the surface feels rigid. The perfect toast should have a satisfying crunch!
  3. Warm the spread: Measure out 3 tbsp of natural peanut butter (45g). If your peanut butter is cold, a quick 10-second microwave zap will make it easy to spread.
  4. Apply the base layer: Spread the peanut butter evenly across both slices, going right to the edges. Listen for that delightful scraping sound against the crust to ensure complete coverage.
  5. Slice the fruit: Peel 1 medium ripe banana (120g) and cut it into 1/4-inch thick coins on a slight diagonal. This technique adds a lovely visual appeal!
  6. Shingle the bananas: Lay the banana slices over the peanut butter in an overlapping pattern. This not only looks beautiful but also helps keep the bananas from sliding off.
  7. Drizzle the sweetener: Take 1 tsp of raw honey (7g) and drizzle it over the bananas in a thin, zigzagging stream. Let the honey settle into the crevices for that perfect touch of sweetness.
  8. Add the aromatics: Sprinkle 1/8 tsp of ground cinnamon and a pinch of flaky sea salt over the top. The salt is non-negotiable—it makes the peanut butter pop!
  9. Finish with texture: Top with 1 tsp of hemp hearts (5g). Watch them stick to the honey to create a beautiful, crunchy garnish.
  10. Serve immediately: Enjoy while the bread is still warm and the peanut butter is slightly melted—pure bliss!

Pro Tips for Perfection

  • Use fresh ingredients: Freshly baked bread and ripe bananas make all the difference in flavor and texture.
  • Experiment with nut butters: Don’t limit yourself to peanut butter! Almond, cashew, or sunflower seed butters are fantastic alternatives.
  • Layer creatively: Add other toppings like chia seeds, sliced strawberries, or a dollop of Greek yogurt for even more flavor.
  • Check the toast: Keep an eye on your bread while toasting; every toaster is different and you don’t want burnt toast!
  • Make it a meal: Pair this toast with a smoothie or yogurt for a more filling breakfast.
  • Try different spices: Experiment with nutmeg or cardamom for a unique twist on the classic cinnamon flavor.
  • Mind the portion sizes: Adjust the quantity of peanut butter and banana based on your hunger levels—this meal is quite filling!
  • Store properly: If you have leftover toast, store it in an airtight container to maintain freshness.
  • Dress it up: For special occasions, add edible flowers or microgreens for a gourmet touch.

Common Mistakes and Troubleshooting

  • Toast too soft: If your toast is soggy, it’s likely due to not toasting it long enough. Aim for a golden-brown color.
  • Too much peanut butter: While delicious, too much can make it hard to eat. Stick to 3 tablespoons for the best balance.
  • Bananas slide off: Ensure you shingle the banana slices for better stability. You can also press down gently.
  • Flavor imbalance: If it tastes too sweet, add a pinch of sea salt to balance the flavors.

Variations to Explore

  • Chocolate Delight: Drizzle melted dark chocolate over the banana slices for a decadent treat.
  • Berry Blast: Top with fresh strawberries or blueberries for added vitamins and a burst of freshness.
  • Nutty Crunch: Add a sprinkle of granola or chopped nuts for an extra crunch and texture.
  • Spicy Kick: For the adventurous, add a dash of cayenne pepper to the cinnamon for a surprising flavor boost.

Storage and Make-Ahead Instructions

This peanut butter banana toast is best enjoyed fresh, but if you want to prepare ingredients ahead of time, here’s how:

  • Pre-slice the bananas: You can slice the bananas a few hours ahead and store them in an airtight container to prevent browning.
  • Prepare your nut butter: If you like, you can portion out peanut butter into small containers for easy spreading later.
  • Toast the bread: If you’re short on time in the morning, consider toasting the bread right before serving, as it’s best served warm.

Frequently Asked Questions

  • Can I use frozen bananas? Yes, but make sure to thaw them first. They’ll be softer and may not hold their shape as well.
  • What if I can’t find natural peanut butter? You can substitute with any nut butter of your choice; just ensure it’s spreadable.
  • How many calories are in this peanut butter banana toast? Approximately 350 calories per serving, depending on portion sizes.
  • Is this peanut butter banana toast beginner-friendly? Absolutely! This recipe is perfect for all skill levels.
  • Can I make this ahead of time? While the toast is best fresh, you can prep the ingredients in advance.
  • What bread works best? Sourdough is recommended for its texture, but feel free to use your favorite type of bread.
  • Can I add other toppings? Definitely! Get creative with your toppings—fruits, seeds, or even yogurt work well.
  • Is it suitable for kids? Yes! This toast is a great way to introduce kids to healthy eating habits.

Nutritional Tips and Dietary Adaptations

Looking to adapt this recipe for specific dietary needs? Here are some tips:

  • Vegan: Substitute honey with maple syrup or agave nectar.
  • Gluten-Free: Use gluten-free bread to accommodate dietary restrictions.
  • Low-Fat: Use a light peanut butter or almond butter to reduce fat content.

Essential Equipment Recommendations

  • Toaster: A reliable toaster is key for achieving the perfect crunch.
  • Knife: A sharp knife for slicing bananas and spreading peanut butter smoothly.
  • Bowl: Use a small bowl for warming the peanut butter if needed.

Serving Suggestions

This peanut butter banana toast pairs beautifully with:

  • A smoothie: Blend your favorite fruits with yogurt or milk for a refreshing drink.
  • Greek yogurt: A side of yogurt adds a creamy texture and additional protein.
  • Fresh fruit: Serve with a side of seasonal fruits for a colorful plate.

Conclusion

In conclusion, this Peanut Butter Banana Toast is not just a meal; it’s an experience, a delightful way to start your day or enjoy a quick snack. With its blend of flavors, textures, and nutritional benefits, it’s a passport to culinary adventure right in your kitchen. So grab your ingredients, toast some bread, and indulge in the joy of this simple yet extraordinary dish!

Peanut Butter Banana Toast 8-Minute Fuel

Prep Time 2 minutes
Cook Time 3 minutes
Total Time 5 minutes
Servings 2 slices
Calories 350
A quick and nutritious toast topped with peanut butter and bananas, perfect for a fast energy boost.

Ingredients

Bread

  • 80 g thick-cut sourdough bread

Peanut Butter

  • 45 g natural peanut butter

Banana

  • 120 g medium ripe banana, sliced

Honey

  • 7 g raw honey

Ground Cinnamon

  • 1/8 tsp ground cinnamon

Sea Salt

  • pinch flaky sea salt

Hemp Hearts

  • 5 g hemp hearts

Instructions 

  • Toast the bread slices in a toaster until golden and slightly chewy, about 3 minutes.
  • Spread peanut butter evenly on each slice of toast.
  • Peel and slice the banana into 1/4 inch coins, then layer over the peanut butter.
  • Drizzle honey over the bananas, then sprinkle cinnamon and sea salt on top.
  • Finish by sprinkling hemp hearts over the top and serve immediately.

Notes

Use ripe bananas for best flavor and texture.
Calories: 350kcal
Cost: $8
Course: Breakfast
Cuisine: American
Keyword: banana, peanut butter, Toast

Embark on a Flavorful Journey with the Balanced Chicken Veggie Power Bowl

Welcome to a culinary adventure where vibrant flavors meet wholesome ingredients! The Balanced Chicken Veggie Power Bowl is not just a dish; it’s a passport to a world of taste and energy. Perfect for a nutritious meal, this recipe is designed to delight your senses while ensuring you get the nutrients your body craves. Imagine colorful vegetables and tender chicken mingling with fluffy rice, creating a beautiful balance of flavors and textures. Join me as we explore the depths of this fantastic recipe!

Why You’ll Love This Recipe

This dish not only satisfies your taste buds but also nourishes your body. Here are five compelling reasons to dive into this recipe:

  • Quick and Easy: With minimal prep and cook time, you can whip up this nutritious meal in under 30 minutes.
  • Customizable: Make it your own by swapping out ingredients based on your preferences or what you have on hand.
  • Gluten-Free Option: Easily adapt this recipe to be gluten-free by choosing the right rice or quinoa.
  • Packed with Nutrients: Enjoy a healthy balance of protein, vitamins, and minerals from chicken and fresh veggies.
  • Meal Prep Friendly: Perfect for batch cooking; prepare ahead for stress-free weeknight dinners.

Ingredient Breakdown

Let’s dive into the ingredients that make this power bowl so delightful. Here’s what you’ll need, along with some handy substitutions:

  • 1 chicken breast: Cut into strips. You can substitute with tofu or chickpeas for a vegetarian option.
  • 1 tbsp olive oil: A heart-healthy fat; feel free to use avocado oil if you prefer.
  • 1 1/2 tsp smoked paprika: For that depth of flavor. If you want to spice it up, try chipotle powder.
  • 1/4 tsp garlic powder: Enhances flavor; fresh minced garlic can be used instead for a stronger taste.
  • Salt and pepper: To taste; try seasoned salt for an added flavor kick.
  • Juice of 1/2 lemon: Brightens up the dish; lime juice can also work wonderfully.
  • 1/2 cup broccoli florets: Rich in vitamins; substitute with green beans or asparagus if desired.
  • 1/4 red bell pepper, sliced: Adds color and sweetness; yellow or orange bell peppers are great alternatives.
  • 1/4 yellow bell pepper, sliced: For additional crunch; swap in any seasonal vegetable you enjoy.
  • 1 medium carrot, sliced: Provides sweetness; you can use zucchini or cucumber for a different texture.
  • 1/2 cup jasmine or basmati rice: The base of the bowl; quinoa or cauliflower rice works as a low-carb option.
  • 1 cup water: For cooking the rice.
  • Pinch of salt: To enhance flavors.

How to Make Your Power Bowl

Follow these simple steps to create your Balanced Chicken Veggie Power Bowl:

  1. Toss the chicken: In a bowl, mix chicken strips with olive oil, smoked paprika, garlic powder, lemon juice, salt, and pepper. Let sit for 10 minutes to absorb the flavors.
  2. Sear the chicken: Heat a skillet over medium heat. Cook the chicken for 6-8 minutes, until golden brown and cooked through.
  3. Steam the veggies: In a steamer basket, cook broccoli and carrot slices for 3-5 minutes until just tender. For bell peppers, you can leave them raw or lightly steam them for 1 minute.
  4. Cook the rice: Rinse the rice under cold water. In a small pot, combine rice, water, and a pinch of salt. Bring to a boil, then cover and simmer on low for 12-15 minutes until the water is absorbed. Let sit for 5 minutes, then fluff with a fork.
  5. Assemble your bowl: On a plate or in a bowl, arrange the rice, chicken, and vegetables side by side. Serve warm and enjoy!

Pro Tips for Success

To elevate your cooking experience, consider these expert insights:

  • Prep Ahead: Chop your veggies and marinate your chicken the night before for a quicker cooking process.
  • Use a Meat Thermometer: Ensure your chicken is cooked to the perfect internal temperature of 165°F (75°C).
  • Experiment with Seasonings: Add your favorite herbs or spices to customize the flavor profile.
  • Don’t Overcrowd the Skillet: Cook the chicken in batches if necessary to achieve a nice sear.
  • Let the Rice Sit: Allowing the rice to sit after cooking improves its texture and prevents it from becoming mushy.
  • Use Fresh Ingredients: The fresher your veggies, the better the flavor and nutritional value of your dish.
  • Make It Colorful: Use a variety of colored vegetables for a visually appealing dish.
  • Try Different Grains: Mix it up with farro, barley, or quinoa for a different texture and taste.

Common Mistakes and Troubleshooting

Here are a few pitfalls to avoid when making your power bowl:

  • Overcooking the Chicken: This can lead to a dry texture. Use a timer and check for doneness regularly.
  • Skipping the Marinade: Don’t rush this step; allowing the chicken to marinate enhances the flavor.
  • Not Rinsing the Rice: Failing to rinse can result in sticky rice. Always rinse to remove excess starch.
  • Overcooking the Veggies: Keep an eye on your steaming time to maintain their vibrant color and crunch.

Variations to Explore

This recipe is incredibly versatile! Try these delicious variations:

  • Mexican Twist: Swap chicken for taco-seasoned ground beef or black beans and top with avocado and salsa.
  • Asian Flair: Use soy sauce, sesame oil, and bok choy instead of broccoli for an Asian-inspired bowl.
  • Vegan Delight: Replace chicken with crispy tofu, use coconut oil, and add edamame for protein.
  • Southwestern Style: Incorporate corn, black beans, and a chipotle dressing for a spicy kick.

Storage and Make-Ahead Instructions

Planning to make this dish ahead of time? Here’s how to store it:

  • Refrigeration: Store leftovers in an airtight container in the fridge for up to 3 days.
  • Freezing: You can freeze the cooked chicken and veggies separately for up to 2 months. Reheat before serving.
  • Meal Prep: Prepare all components ahead of time and assemble fresh when ready to eat.

Nutritional Tips and Dietary Adaptations

This recipe can easily cater to various dietary needs:

  • Low-Carb: Substitute rice with cauliflower rice for a low-carb alternative.
  • Paleo-Friendly: Use sweet potatoes instead of rice and eliminate grains entirely.
  • High-Protein: Add chickpeas or lentils for an extra protein boost if you’re vegetarian.

Equipment Recommendations

To make this dish efficiently, here’s a list of useful kitchen tools:

  • Sharp Chef’s Knife: For easy chopping of veggies.
  • Cutting Board: A sturdy surface for all your prep work.
  • Skillet: A non-stick skillet is ideal for searing chicken.
  • Steamer Basket: Perfect for cooking your broccoli and carrots with minimal fuss.
  • Measuring Cups and Spoons: Ensure accurate ingredient quantities for best results.

Serving Suggestions

Make your meal even more delightful with these serving ideas:

  • Add a Sauce: Drizzle with your favorite sauce like teriyaki, tahini, or a simple vinaigrette.
  • Garnish: Top with fresh herbs like cilantro or parsley for a burst of flavor.
  • Serve with a Side: Pair with a fresh salad or a slice of whole-grain bread for a complete meal.

Frequently Asked Questions

Here are some common questions about the Balanced Chicken Veggie Power Bowl:

  • Can I use frozen vegetables? Yes! Just ensure they are thawed and drained before cooking.
  • How can I make this dish spicier? Add chili flakes or fresh jalapeños to the chicken marinade.
  • Is this recipe suitable for meal prep? Absolutely! Store ingredients separately until ready to serve.
  • Can I substitute chicken with fish? Yes, salmon or tilapia would work beautifully in this bowl.
  • What type of rice should I use? Jasmine or basmati rice are excellent choices, but feel free to experiment.
  • How long can I store leftovers? Store in the fridge for up to 3 days in an airtight container.
  • Can I make this vegetarian? Certainly! Substitute chicken with tofu or chickpeas.
  • What sauces pair well with this bowl? A lemon-tahini dressing or a yogurt sauce complements the flavors perfectly.

As you can see, the Balanced Chicken Veggie Power Bowl is more than just a meal—it’s an experience that invites exploration and enjoyment. I hope you feel inspired to create your own version, mixing flavors and colors that excite you. Bon appétit!

Balanced Chicken Veggie Power Bowl

Prep Time 10 minutes
Cook Time 20 minutes
Total Time 30 minutes
Servings 2 servings
Calories 450
A colorful and nutritious meal combining tender chicken, fresh vegetables, and flavorful rice for a balanced and satisfying bowl.

Ingredients

Protein

  • 1 piece chicken breast (cut into strips)
  • 1 tbsp olive oil
  • 2 tsp smoked paprika
  • 4 tsp garlic powder
  • to taste Salt and pepper
  • 0.5 lemon juice of 1/2 lemon

Vegetables

  • 0.5 cup broccoli florets
  • 0.25 red bell pepper sliced red bell pepper
  • 0.25 yellow bell pepper sliced yellow bell pepper
  • 1 medium carrot (sliced)

Rice

  • 0.5 cup jasmine or basmati rice
  • 1 cup water
  • Pinch salt

Instructions 

  • Toss chicken strips in olive oil, paprika, garlic powder, lemon juice, salt, and pepper. Let sit for 10 minutes.
  • Cook chicken in a hot skillet or grill until golden and cooked through, about 6-8 minutes.
  • Steam broccoli and carrots until tender, 3-5 minutes. Lightly steam or keep raw bell peppers.
  • Rinse rice, then cook with water and salt in a small pot until water is absorbed, about 12-15 minutes. Fluff and set aside.
  • Assemble rice, chicken, and vegetables in a bowl. Serve warm.

Notes

Feel free to customize vegetables or add your favorite herbs for extra flavor.
Calories: 450kcal
Cost: $12
Course: Main Course
Cuisine: Healthy
Keyword: Chicken, rice, Vegetables

Embark on a Culinary Journey with Rosemary Olive Oil Bread

Welcome to a world where the aroma of fresh rosemary meets the richness of olive oil, creating a bread that is not just a dish, but an experience. This Homemade Rosemary Olive Oil Bread invites you to explore the simple joys of baking, all while connecting with the cultures that cherish this beloved loaf. In this article, you will learn the ins and outs of making this delightful bread, from the ingredients to troubleshooting tips, all while weaving in stories and insights that make cooking an adventure.

Why You’ll Love This Recipe

This recipe for Rosemary Olive Oil Bread is not just about the ingredients; it’s about creating something special that tells a story. Here are five reasons to fall in love with this recipe:

  • Irresistible Flavor: The combination of fresh rosemary and high-quality olive oil infuses the bread with aromatic flavors that transport you to a sun-drenched Italian villa.
  • Simple Ingredients: With just a handful of pantry staples, you can create a gourmet bread that impresses family and friends without requiring advanced baking skills.
  • Versatile Pairing: This bread pairs beautifully with soups, salads, or as a base for your favorite sandwiches, making it a versatile addition to any meal.
  • Perfect for Sharing: Whether it’s a family dinner or a cozy gathering with friends, this bread serves as a great centerpiece that brings people together.
  • Health Benefits: Made with olive oil and fresh herbs, this bread not only satisfies your taste buds but also offers heart-healthy benefits.

Ingredient Breakdown and Substitutions

To create this delightful Rosemary Olive Oil Bread, you will need the following ingredients:

  • 4 cups all-purpose flour: Provides the structure for the bread. You can substitute with whole wheat flour for a nuttier flavor.
  • 1 packet active dry yeast (7 g): Essential for leavening. If you prefer, you can use instant yeast, just follow the package instructions.
  • 1.5 cups warm water (38°C): Activates the yeast. Ensure the water is warm, not hot, to avoid killing the yeast.
  • 2 tablespoons fresh rosemary, finely chopped: Adds a fragrant herbal note. Dried rosemary works as a substitute but use half the amount.
  • 1 teaspoon salt: Enhances flavor. Sea salt is a great choice for a bit of crunch.
  • 1 tablespoon olive oil: Adds moisture and flavor. Consider using infused oils for an extra kick.

Step-by-Step Instructions

Side view of freshly baked rosemary bread, highlighting its golden crust and green herb flecks.

Now that you have your ingredients, let’s get baking!

  1. In a bowl, combine the warm water and yeast. Let it sit for 5 minutes until frothy.
  2. Add in the flour, salt, chopped rosemary, and olive oil. Mix until a coarse dough forms.
  3. Knead on a floured surface for about 10 minutes until the dough becomes smooth and elastic.
  4. Place the dough in a greased bowl, cover with a cloth, and let it rise in a warm spot for 1 hour.
  5. Once risen, deflate the dough, shape it into a round loaf, and place it on a baking tray.
  6. Let it rise again for 30 minutes while preheating your oven to 200°C.
  7. Just before baking, slash the top of the loaf with a sharp knife.
  8. Bake for 30-35 minutes until golden brown and the crust is crispy.
  9. Cool on a wire rack before slicing.

Expert Tips for Perfect Bread

Here are some expert insights to elevate your baking game:

  • Check your yeast: If your yeast doesn’t foam up in the warm water, it may be expired. Fresh yeast is key for a good rise.
  • Don’t rush the rising times: Allowing the dough to rise properly enhances flavor and texture.
  • Knead thoroughly: Kneading develops gluten, giving your bread that perfect chewy texture.
  • Use a baking stone: For an artisan crust, bake your bread on a preheated baking stone.
  • Experiment with flavors: Add garlic, olives, or cheese to the dough for unique variations.
  • Cool completely: Let the bread cool before slicing to maintain its structure.
  • Brush with olive oil: For a glossy finish, brush the top of the loaf with olive oil before baking.
  • Store properly: Keep your bread in a bread box or wrapped in a cloth to maintain freshness.

Common Mistakes and Troubleshooting

Baking can be an adventure, but sometimes things don’t go as planned. Here’s how to troubleshoot:

  • Dense bread: This could be due to not enough kneading or old yeast. Ensure proper activation and knead until elastic.
  • Flat bread: If the dough doesn’t rise, check the yeast activation and ensure your dough is warm enough for rising.
  • Dry crust: If the crust becomes too hard, cover the bread with foil halfway through baking.
  • Uneven baking: Rotate your baking tray halfway through for even cooking.

Delicious Variations to Try

Once you master the classic recipe, feel free to explore these variations:

  • Garlic Rosemary Bread: Add 3-4 cloves of minced garlic to the dough for a robust flavor.
  • Cheesy Olive Oil Bread: Incorporate shredded Parmesan or mozzarella into the dough for a cheesy delight.
  • Olive and Rosemary Focaccia: Shape your dough into a flat focaccia, dimple the surface, and add olives before baking.
  • Sun-Dried Tomato Rosemary Bread: Mix in chopped sun-dried tomatoes for a Mediterranean twist.

Storage and Make-Ahead Instructions

To enjoy your Rosemary Olive Oil Bread beyond the baking day, follow these storage tips:

  • Room Temperature: Store in a bread box or wrapped in a cloth for up to 3 days.
  • Freezing: Slice the bread and freeze in an airtight container for up to 3 months. Thaw at room temperature before enjoying.
  • Make-Ahead Dough: Prepare the dough, let it rise, then shape and refrigerate for up to 24 hours before baking.

Frequently Asked Questions

Here are some common questions and answers to help you on your baking journey:

  • Can I use whole wheat flour? Yes! Whole wheat flour adds a nutty flavor; however, you may need to adjust the water amount.
  • What can I serve with Rosemary Olive Oil Bread? This bread pairs excellently with soups, salads, or can be enjoyed with dips.
  • Can I use dried rosemary instead of fresh? Absolutely! Just use half the quantity to avoid overpowering the bread.
  • How do I know when the bread is done baking? The bread should sound hollow when tapped on the bottom and have a golden-brown crust.
  • Can I add other herbs? Yes! Feel free to experiment with thyme, oregano, or basil for different flavor profiles.
  • What is the best way to slice the bread? Use a serrated knife to achieve clean cuts without squishing the loaf.
  • How can I make this recipe vegan? Substitute olive oil with a vegan butter alternative and ensure no dairy is used in serving.
  • Can I make this bread gluten-free? Absolutely! Use a gluten-free flour blend designed for bread-making.

Nutritional Tips and Dietary Adaptations

This Rosemary Olive Oil Bread can be adapted to suit various dietary needs:

  • Gluten-Free: Use gluten-free all-purpose flour and follow the instructions for gluten-free baking.
  • Low-Carb: Consider using almond flour mixed with vital wheat gluten for a lower-carb version.
  • Whole Foods: Incorporate seeds like flax or chia for added nutrition and texture.

Essential Equipment Recommendations

To ensure your baking experience is seamless, consider having the following equipment on hand:

  • Mixing Bowls: Sturdy bowls for mixing dough.
  • Baking Tray: A good quality baking tray ensures even cooking.
  • Kitchen Scale: For precise measurements, especially if experimenting with different flours.
  • Silicone Baking Mat: Prevents sticking and makes cleanup easier.
  • Serrated Knife: Ideal for slicing your freshly baked bread.

Serving Suggestions

Now that your Rosemary Olive Oil Bread is baked to perfection, here are some delightful ways to serve it:

  • With Olive Oil and Balsamic Vinegar: Serve warm with a drizzle of quality olive oil and balsamic vinegar for dipping.
  • As a Sandwich Base: Use slices as a base for gourmet sandwiches, filled with fresh ingredients.
  • To Accompany Soups: Pair the bread with a hearty soup for a comforting meal.
  • With Cheese and Meats: Create a charcuterie board featuring this bread alongside cheeses and cured meats.

Conclusion

Baking Rosemary Olive Oil Bread is not just about the end product; it’s about the journey of creating something delicious from simple ingredients. With every slice, you’re not just tasting bread, but savoring a story of culture, adventure, and connection. So gather your ingredients, embrace the adventure, and let the aroma of fresh rosemary and olive oil fill your kitchen. Happy baking!

Homemade Rosemary Bread Olive

Prep Time 15 minutes
Cook Time 35 minutes
Total Time 50 minutes
Servings 8 slices
Calories 180
Enjoy a fragrant, homemade rosemary bread with a hint of olive oil, perfect for any meal or snack.

Ingredients

Dough

  • 4 cups all-purpose flour
  • 1 packet active dry yeast (7 g)
  • 1.5 cups warm water (38 C)
  • 2 tablespoons fresh rosemary (finely chopped)
  • 1 teaspoon salt
  • 1 tablespoon olive oil

Instructions 

  • Combine warm water and yeast, let stand 5 minutes until frothy.
  • Mix in flour, salt, chopped rosemary, and olive oil to form a coarse dough.
  • Knead on a floured surface for 10 minutes until smooth.
  • Let rise in a greased bowl for 1 hour in a warm spot.
  • Shape into a loaf, let rise 30 minutes, then slash top and bake at 200°C for 30-35 minutes.
  • Cool on wire rack before slicing.

Notes

For a stronger rosemary flavor, increase the amount of chopped rosemary.
Calories: 180kcal
Cost: $10
Course: Bread
Cuisine: homemade
Keyword: bread, Olive, Rosemary

Embark on a Flavorful Journey with Spicy Shrimp Ramen

Welcome to your culinary adventure! In this post, we’ll dive into the world of Spicy Shrimp Ramen, a dish that not only tantalizes your taste buds but also takes you on a journey through vibrant markets and bustling kitchens. This recipe is not just about food; it’s about the stories behind each ingredient and the joy of sharing a meal with loved ones. Ready to make it? Let’s get started!

Why You’ll Love This Recipe

This Spicy Shrimp Ramen is more than just a comforting bowl of noodles; it’s a delightful fusion of flavors and textures that you’ll absolutely adore. Here are five reasons why this dish deserves a spot in your kitchen:

  • Quick and Easy: With just a few simple steps, you can whip up a delicious meal in under 30 minutes, perfect for busy weeknights.
  • Flavor Packed: The combination of fresh shrimp, vibrant vegetables, and a spicy broth creates a symphony of flavors that will make your taste buds dance.
  • Customizable: Tailor the recipe to your liking by adjusting the spice level or adding your favorite vegetables.
  • Healthy and Nutritious: Loaded with fresh veggies and protein-rich shrimp, this ramen is a wholesome meal that satisfies your cravings.
  • Perfect for Meal Prep: Make a big batch and store it for quick lunches or dinners throughout the week.

Ingredients Breakdown

Here’s what you’ll need to create your own Spicy Shrimp Ramen. Let’s explore the ingredients and some possible substitutions:

  • Ramen Noodles: Use 3 packages of instant ramen (discard the seasoning) or fresh ramen for a richer flavor.
  • Shrimp: 1.5 lbs of medium to large shrimp, peeled and deveined. If you prefer, use tofu or chicken for a different protein.
  • Broth: 6 cups of chicken, vegetable, or seafood stock. Homemade stock can elevate the dish, but store-bought works too.
  • Oil: 2 tablespoons of olive oil for sautéing, or use sesame oil for an Asian twist.
  • Spice it Up: Sriracha is key—adjust 1-2 tablespoons based on your heat preference.
  • Seasoning: 3 tablespoons of soy sauce, 1.5 tablespoons of brown sugar for sweetness, and a splash of lime juice for brightness.
  • Fresh Veggies: 2 cups of shredded cabbage, 3/4 cup of thinly sliced carrots, 3/4 cup of sweet peppers, and 1/2 cup of onion. Feel free to mix in any veggies you enjoy, like bok choy or snap peas.
  • Garnish: Fresh cilantro to brighten up the dish. You can also add green onions or sesame seeds.

Instructions to Make Spicy Shrimp Ramen

Let’s journey together through the steps to create this mouthwatering ramen:

Step 1: Build the Flavorful Broth

In a large pot over medium-high heat, add 1 tablespoon of olive oil. Toss in the carrots, onions, cabbage, and sweet peppers. Sauté for 2-3 minutes until they begin to soften. Add garlic and ginger, cooking for an additional minute to release their aromas.

Step 2: Add the Liquid Gold

Pour in the broth and bring it to a rapid boil. Stir in the soy sauce, brown sugar, lime juice, and sriracha, mixing well until combined. Reduce the heat and let it simmer for about 8 minutes to develop flavor.

Step 3: Cook the Noodles

Add the dry ramen noodles to the pot and cook them according to the package instructions, usually about 2-3 minutes. Be sure to stir occasionally to prevent sticking.

Step 4: Prepare the Shrimp

In a skillet, heat 1 tablespoon of olive oil over medium heat. Add the shrimp, seasoning with salt and pepper. Cook for 1-2 minutes on each side or until they turn firm and pink. Set aside.

Step 5: Assemble the Bowls

Once the noodles are cooked, remove the pot from heat. Serve the ramen in bowls, topping each with shrimp and garnishing with fresh cilantro.

Step 6: Enjoy Your Dish Hot and Fresh

Grab your chopsticks or a fork, and dive in! Each bite should be a perfect blend of spicy broth, tender shrimp, and crunchy veggies.

Pro Tips for the Best Spicy Shrimp Ramen

Elevate your ramen game with these expert insights:

  • Don’t Overcook the Shrimp: They cook quickly and can turn rubbery if overdone. Aim for a firm, pink texture.
  • Adjust the Spice Gradually: Start with less sriracha and increase to your preferred heat level to suit all palates.
  • Use Fresh Ingredients: Fresh veggies not only enhance flavor but also add vibrant color to your dish.
  • Experiment with Broth: Feel free to use bone broth for a richer flavor or add miso for extra depth.
  • Garnish Generously: Fresh herbs or a sprinkle of sesame seeds can elevate the presentation and taste.
  • Make it a Feast: Pair with side dishes like spring rolls or edamame for a complete Asian-inspired meal.
  • Store Leftovers Properly: Keep the broth and noodles separate if you plan to store leftovers; this keeps the noodles from becoming mushy.
  • Make Ahead: Prepare the broth and veggies in advance, then quickly cook noodles and shrimp when ready to serve.
  • Try Other Proteins: Substitute shrimp with chicken, beef, or tofu for different flavor profiles.
  • Get Creative with Toppings: Add soft boiled eggs, mushrooms, or seaweed for unique textures and flavors.

Common Mistakes and Troubleshooting

Even the best chefs make mistakes! Here are common pitfalls and ways to avoid them:

  • Overcooked Noodles: Follow package instructions closely; undercooked noodles are better than mushy ones.
  • Too Much Spice: If the broth becomes too spicy, add more broth or a splash of coconut milk to mellow it out.
  • Missing the Umami: If your broth lacks depth, consider adding a splash of fish sauce or a spoonful of miso.
  • Gummy Shrimp: Make sure to cook shrimp at a high enough temperature to sear them properly.
  • Forgotten Seasoning: Always taste your broth before serving; adjust seasoning as needed!

Variations to Try

If you’re feeling adventurous, here are some exciting variations to switch things up:

  • Vegetarian Version: Replace shrimp with tofu and use vegetable broth for a completely plant-based dish.
  • Spicy Miso Ramen: Add a tablespoon of miso paste to the broth for a rich, umami flavor.
  • Seafood Medley: Mix shrimp with scallops and mussels for a seafood extravaganza.
  • Curry Ramen: Stir in some curry powder or paste for a unique flavor profile that blends Asian and Indian cuisines.

Storage and Make-Ahead Instructions

Want to enjoy this dish later? Here’s how to store it:

  • Refrigeration: Store leftover ramen in an airtight container for up to 3 days. Keep broth and noodles separate to maintain texture.
  • Freezing: You can freeze the broth for up to a month; just reheat when you’re ready to enjoy.
  • Reheating: To reheat, warm the broth on the stove and briefly cook fresh noodles to add texture.

Frequently Asked Questions

Got questions? I’ve got answers! Here are some common inquiries about Spicy Shrimp Ramen:

  • Can I use frozen shrimp? Yes, just thaw them before cooking. They work great in this recipe!
  • Is this recipe gluten-free? Use gluten-free ramen noodles and ensure your soy sauce is gluten-free.
  • How can I make this dish spicier? Add extra sriracha or include sliced jalapeños for an added kick.
  • Can I add more vegetables? Absolutely! Feel free to toss in any vegetables you enjoy.
  • What if I don’t have sriracha? You can substitute with chili paste or even hot sauce in a pinch.
  • How do I make it less salty? Use low-sodium broth and soy sauce to control the saltiness.
  • Can I use a different type of noodle? Yes, udon or soba noodles are great alternatives!
  • Is this recipe suitable for meal prep? Yes! Prepare the broth and veggies ahead of time, then quickly add noodles and shrimp when serving.

Nutrition Tips and Dietary Adaptations

Looking to make your ramen healthier? Here are some tips:

  • Increase Fiber: Add more vegetables and consider whole-grain noodles for added fiber.
  • Lower the Fat: Use less oil or switch to a cooking spray for sautéing.
  • Protein Boost: Incorporate edamame or chickpeas as an additional protein source.
  • Low-Carb Option: Substitute noodles with zucchini noodles for a low-carb twist.

Equipment Recommendations

Make sure you have these essentials for a successful cooking experience:

  • Large Pot: For boiling and simmering your broth and noodles.
  • Skillet: For cooking the shrimp and sautéing vegetables.
  • Measuring Cups and Spoons: For precise ingredient measurements.
  • Chopsticks or Tongs: To help you serve and enjoy your ramen.

Serving Suggestions

Enhance your ramen experience with these serving ideas:

  • Side Dishes: Pair your ramen with spring rolls or dumplings for a complete meal.
  • Fresh Salads: A light cucumber salad can balance the spiciness of the ramen.
  • Drinks: Enjoy your ramen with a chilled sake or iced green tea for a refreshing combination.

Conclusion: Your Culinary Adventure Awaits!

Now that you have the ultimate guide to making Spicy Shrimp Ramen, it’s time to bring a taste of adventure to your dining table. Remember, cooking is not just about the food—it’s about the stories, the flavors, and the memories created along the way. So gather your ingredients, invite some friends, and let the flavors transport you to a world of culinary delight. Happy cooking! 🌏🍜

Spicy Shrimp Ramen Bowls

Prep Time 10 minutes
Cook Time 20 minutes
Total Time 30 minutes
Servings 4 servings
Calories 450
Enjoy a flavorful bowl of spicy shrimp ramen, packed with fresh vegetables and a savory broth for a satisfying meal.

Ingredients

seasoning

  • 3 packets ramen seasoning packet (discard after use)
  • 1.5 lbs medium-large shrimp, peeled and deveined
  • 6 cups chicken, vegetable or seafood stock
  • 2 tablespoons olive oil
  • 1-2 tablespoons sriracha (depending on heat preference)
  • 3 tablespoons soy sauce
  • 3 cloves garlic, minced
  • 1 teaspoon grated fresh ginger
  • 1.5 tablespoons brown sugar
  • 2 cups shredded green cabbage
  • 0.75 cup carrots, thinly sliced
  • 0.75 cup sweet peppers, thinly sliced
  • 0.5 cup onion, thinly sliced
  • 1 lime juice of 1 lime

cilantro

Instructions 

  • In a skillet, heat 1 tablespoon olive oil and cook shrimp 1-2 minutes per side until pink. Set aside.
  • In a large pot, heat 1 tablespoon olive oil and sauté carrots, onions, cabbage, and peppers for 2-3 minutes. Add garlic and ginger, cook for 1 minute.
  • Add stock, soy sauce, brown sugar, lime juice, and sriracha; bring to a boil, then simmer 8 minutes.
  • Add ramen noodles to the broth and cook 2-3 minutes. Remove from heat.
  • Divide soup into bowls, add shrimp, and garnish with cilantro. Serve hot.

Notes

Adjust sriracha for desired spice level and garnish with fresh cilantro for added flavor.
Calories: 450kcal
Cost: $15
Course: Main Course
Cuisine: Asian
Keyword: Ramen, shrimp, spicy

Embark on a Culinary Adventure with Homemade Soft Flatbreads

Welcome, fellow food explorers! Today, we’re diving into the world of homemade soft flatbreads—a simple yet versatile dough that can transport your meals to new heights. Picture this: warm, fluffy flatbreads, perfect for wrapping around spicy meats, fresh veggies, or simply enjoying with a bowl of soup. This recipe is not just about cooking; it’s about connecting with cultures and flavors that tell stories of tradition and innovation. Let’s roll up our sleeves and discover how to create these delightful creations at home!

Why You’ll Love This Recipe

Crafting your own soft flatbreads comes with a myriad of benefits that will not only satisfy your taste buds but also elevate your culinary skills. Here’s why this recipe is a must-try:

  • Quick and Easy: With just a handful of ingredients, this flatbread recipe is straightforward, making it perfect for both novice and experienced cooks.
  • Versatile Use: These flatbreads are perfect for wrapping, dipping, or serving alongside your favorite dishes. Use them for tacos, sandwiches, or as a side with soups and stews.
  • Customizable Flavors: Add herbs, spices, or even cheese to the dough for a unique twist that suits your palate.
  • Freshness Guaranteed: Homemade flatbreads can be made fresh and enjoyed warm, providing a taste that is far superior to store-bought options.
  • Healthy Ingredients: Control what goes into your flatbreads. You can opt for whole grain flour or add nutritional seeds for an extra health boost.

Essential Ingredients for Soft Flatbreads

Before we begin our culinary journey, let’s gather our ingredients. This recipe requires only five basic items, which you might already have in your pantry!

  • All-Purpose Flour: 3 cups (375 grams) – This forms the base of our dough. Feel free to substitute with whole wheat flour for a healthier option.
  • Baking Powder: 1 teaspoon – This helps the flatbreads rise slightly, making them soft and fluffy.
  • Salt: 1 teaspoon – Enhances flavor and balances the sweetness of the dough.
  • Vegetable Oil: 1/3 cup (80 ml) – Adds moisture and tenderness to the flatbreads.
  • Warm Water: 1 cup (235 ml) – Activates the baking powder and helps in forming a smooth dough.

Step-by-Step Instructions to Make Soft Flatbreads

Side view of freshly made flatbread, emphasizing its smooth surface and soft interior.

Now, let’s roll up our sleeves and get started! Follow these simple steps to create your own soft flatbreads.

  1. Mix the Ingredients: In a mixing bowl, combine the flour, baking powder, and salt. Gradually add the vegetable oil and warm water, mixing until you form a cohesive dough.
  2. Knead the Dough: Transfer the dough to a floured surface and knead it for about 5-10 minutes until you achieve a smooth, elastic dough ball.
  3. Divide and Rest: Using a dough scraper, divide the dough into 16 equal portions. Shape each portion into a ball and flatten slightly. Cover with a towel and let them rest for 15 minutes.
  4. Roll into Disks: Using a rolling pin, roll each dough ball into 7-inch disks. Aim for even thickness to ensure they cook uniformly.
  5. Cook the Flatbreads: Heat a griddle or non-stick pan over medium heat. Cook each flatbread for about 1-2 minutes on each side, or until they puff up and develop golden spots. Remember, the first one might not be perfect; consider it a test run!
  6. Serve and Enjoy: Serve your flatbreads warm. They can be enjoyed immediately or stored for later use. If you have leftovers, keep them covered for up to 2 days.

Pro Tips for Perfect Flatbreads

To help you achieve the best results, here are some expert insights to keep in mind:

  • Keep the Dough Moist: If your dough feels too dry, add a little more water. A moist dough is key to soft flatbreads.
  • Resting is Crucial: Allowing the dough to rest helps relax the gluten, making rolling easier and resulting in a better texture.
  • Monitor Heat Carefully: Too high heat can burn the flatbreads. Medium heat works best for cooking them evenly.
  • Experiment with Thickness: If you want thicker flatbreads, adjust the rolling technique. Just remember they will take longer to cook.
  • Keep it Covered: Once cooked, keep the flatbreads covered with a clean kitchen towel to maintain their softness.
  • Use a Pizza Stone: For an even better cooking surface, consider using a pizza stone to achieve a lovely char.
  • Try Different Flours: Explore using spelt or chickpea flour for a unique flavor profile.
  • Flavor Infusion: Add herbs like rosemary or spices such as cumin to the dough for an aromatic twist.

Common Mistakes and Troubleshooting

Even the best chefs face challenges! Here are some common pitfalls and how to avoid them:

  • Flatbreads Won’t Puff Up: Ensure your pan is hot enough. Also, check that your dough is not too thick.
  • Dough is Sticky: If this happens, gradually add more flour while kneading until it reaches a manageable consistency.
  • Too Tough to Roll: If the dough is too elastic, it might need more resting time to relax the gluten.
  • Burnt Flatbreads: Adjust the heat down; medium heat is key to even cooking without burning.

Variations on Soft Flatbreads

Let’s get creative! Here are some variations you can try:

  • Herbed Flatbreads: Incorporate fresh or dried herbs like oregano or basil into the dough.
  • Garlic Flatbreads: Mix minced garlic into the dough for a flavorful twist.
  • Cheese-Stuffed Flatbreads: Add shredded cheese in the center before sealing and rolling for cheesy goodness.
  • Sweet Flatbreads: Sprinkle a little sugar and cinnamon into the dough for a sweet treat, perfect with honey or jam.

Storage and Make-Ahead Instructions

Making flatbreads ahead of time? Here’s how to store them:

  • Storing: Keep cooked flatbreads in an airtight container at room temperature for up to 2 days.
  • Freezing: For long-term storage, freeze the flatbreads layered with parchment paper. Thaw at room temperature before reheating.
  • Reheating: Warm flatbreads on a skillet for a few seconds on each side to regain their softness.

Nutrition Tips and Dietary Adaptations

Flatbreads can be part of a balanced diet. Here are some nutrition tips:

  • Whole Grain Option: Substitute all-purpose flour with whole wheat flour for added fiber.
  • Low-Calorie Version: Reduce the oil to make a lighter flatbread without compromising on taste.
  • Gluten-Free Alternative: Use gluten-free flour blends to accommodate dietary restrictions.

Equipment Recommendations

To make your flatbread-making experience seamless, here’s a list of essential tools:

  • Mixing Bowl: A large bowl for mixing your ingredients.
  • Dough Scraper: Useful for dividing the dough easily.
  • Rolling Pin: Essential for rolling out the dough into thin disks.
  • Griddle or Non-Stick Pan: Ideal for cooking the flatbreads evenly.

Serving Suggestions for Your Soft Flatbreads

Now that your flatbreads are ready, how can you enjoy them? Here are some serving ideas:

  • Wraps: Fill them with grilled chicken, fresh veggies, and tahini for a delicious wrap.
  • Dips: Serve with hummus, tzatziki, or guacamole for a delightful appetizer.
  • Accompaniments: Pair with soups or stews for a comforting meal.

Frequently Asked Questions (FAQ)

Got questions? Here are some common FAQs about soft flatbreads:

  • Can I use whole wheat flour instead of all-purpose flour? Yes, whole wheat flour is a great substitute, giving a nuttier flavor.
  • How do I ensure my flatbreads are soft? Knead the dough well and avoid overcooking them.
  • What can I use instead of vegetable oil? Olive oil or melted butter can also be used for a richer taste.
  • Can I make these flatbreads ahead of time? Yes, they can be stored for up to 2 days or frozen for later use.
  • What if my flatbreads don’t puff up? Ensure the cooking surface is adequately heated and check the thickness of the dough.
  • Can I add spices to the dough? Absolutely! Feel free to add spices to customize the flavor.
  • How long do these flatbreads last? They last up to 2 days at room temperature when stored properly.
  • Can I cook these flatbreads on a barbecue? Yes, grilling them can add a delicious smoky flavor!

So there you have it, friends! A comprehensive guide to crafting soft flatbreads at home. Not just a recipe, but an opportunity to connect with the culinary traditions of cultures around the globe. Now, grab your apron, gather your ingredients, and let’s embark on this flavorful journey together. Happy cooking!

Homemade Soft Flatbread

Prep Time 20 minutes
Cook Time 15 minutes
Total Time 35 minutes
Servings 16 pieces
Calories 150
Enjoy soft, warm flatbreads made from simple ingredients, perfect for any meal or snack.

Ingredients

Dough

  • 375 grams all purpose flour
  • 1 teaspoon baking powder
  • 1 teaspoon salt
  • 80 ml vegetable oil
  • 235 ml warm water

Instructions 

  • Mix all ingredients and knead into an elastic dough ball.
  • Divide dough into 16 balls, flatten slightly, cover, and rest for 15 minutes.
  • Roll each ball into 7-inch disks.
  • Heat a griddle on medium heat and cook flatbreads one by one without oil, flipping with tongs until puffed and golden.
  • Serve immediately or store covered for up to 2 days.

Notes

Ensure the griddle is properly heated for best results and watch the flatbreads closely to prevent burning.
Calories: 150kcal
Cost: $3
Course: Bread
Cuisine: homemade
Keyword: Flatbread

Embarking on a Flavorful Journey with Apple and Cinnamon Pancakes

As the crispness of autumn fills the air, there’s something utterly heartwarming about indulging in a stack of fluffy apple cinnamon pancakes. These pancakes are not just breakfast; they are a passport to cozy mornings spent with family, surrounded by the aroma of sweet apples and warm spices. In this definitive guide, we’ll explore how to create these delightful pancakes, ensuring your mornings are filled with flavor and joy. Join me, Jack, as we embark on this culinary adventure!

Why You’ll Love This Recipe

These apple cinnamon pancakes are an excellent choice for several reasons:

  • Autumnal Delight: The combination of apples and cinnamon captures the essence of fall, making every bite a celebration of the season.
  • Easy to Make: With straightforward instructions and minimal prep time, these pancakes are perfect for both novice and experienced cooks.
  • Versatile Serving Options: Enjoy them with maple syrup, yogurt, or a dollop of whipped cream for extra decadence.
  • Nutritious Ingredients: Packed with fresh apples and yogurt, these pancakes are a healthier alternative to traditional recipes.
  • Family Favorite: The delightful flavors and textures will make them a staple in your household, cherished by kids and adults alike.

Ingredient Breakdown and Substitutions

Creating the perfect pancake batter is crucial for achieving fluffy, flavorful apple cinnamon pancakes. Here’s what you’ll need:

  • 1 large egg: Adds richness and binds the ingredients.
  • 2 tbsp salted butter (melted): For flavor and moisture; can be substituted with coconut oil for a dairy-free option.
  • 2 tbsp granulated sugar: Sweetens the batter; brown sugar can be used for a deeper flavor.
  • 1 tsp vanilla extract: Enhances the overall taste.
  • 2 tbsp Greek yogurt or sour cream: For tanginess and moisture; can be replaced with dairy-free yogurt.
  • 1 cup milk (regular or almond): The liquid base that creates the batter; any plant-based milk works.
  • 1 1/4 cup all-purpose flour or gluten-free flour: Forms the bulk of the pancakes; choose gluten-free options for a gluten-free diet.
  • 2 tsp ground cinnamon: The star spice that adds warmth and flavor.
  • 1/2 tsp baking powder: Provides lift.
  • 1/2 tsp baking soda: Helps the pancakes rise and become fluffy.
  • 2 small apples (or 1 medium, peeled and diced): Adds natural sweetness and texture; try different apple varieties for varied flavors.
  • Maple syrup (optional): Perfect for drizzling on top!

How to Make Apple and Cinnamon Pancakes

Now that we have our ingredients, let’s dive into the steps to create these delectable pancakes:

  1. First, let’s prepare the apple pie filling that will top our pancakes. In a sauté pan, combine butter, diced apples, brown sugar, and ground cinnamon.
  2. Turn the stovetop to medium heat and cook, stirring frequently until the mixture starts to boil.
  3. If the mixture begins to splatter, reduce the heat to low while maintaining a gentle bubble.
  4. Cook until the liquid reduces slightly and the apples have softened, about 5 minutes.
  5. In a separate small bowl, mix together cornstarch and water. Once combined, pour this into the apple mixture and stir continuously until thickened. Transfer to a heat-safe bowl and set aside.
  6. Now, let’s make the pancake batter. In a large bowl, combine the egg, butter, sugar, vanilla extract, and yogurt. Mix until well combined.
  7. Gradually fold in the flour, baking powder, and baking soda.
  8. Next, gently fold in the diced apples. Let the batter rest for 30 minutes at room temperature.
  9. While the batter rests, heat your skillet over medium heat and add a bit of butter or nonstick spray.
  10. Using a ⅓ cup or 2 tbsp cookie scoop, pour the pancake batter onto the skillet. Flip when bubbles form on the surface.
  11. Repeat until all the batter is used. Serve warm, topped with the apple filling and a drizzle of maple syrup!

Expert Tips for Perfect Pancakes

To ensure your pancakes turn out perfectly, here are some expert insights:

  • Let the batter rest: This helps the gluten relax, resulting in lighter pancakes.
  • Adjust the heat: If pancakes are browning too quickly, lower the heat to allow for a better cook.
  • Use a nonstick skillet: It makes flipping easier and helps prevent sticking.
  • Don’t overmix the batter: A few lumps are okay; overmixing can lead to dense pancakes.
  • Try different toppings: Beyond maple syrup, consider whipped cream or a sprinkle of powdered sugar.
  • Use fresh apples: They add a burst of flavor and texture that complements the pancakes beautifully.
  • Substitute spices: Experiment with nutmeg or allspice for a unique twist.
  • Make mini pancakes: Perfect for kids and easier to manage!

Common Mistakes and Troubleshooting

Even the best chefs can encounter hiccups in the kitchen. Here are common mistakes and how to fix them:

  • Too thick batter: If your batter is too thick, add a splash of milk to loosen it up.
  • Burnt pancakes: Ensure your skillet is not too hot; cooking on medium is ideal.
  • Pancakes not fluffing up: Check that your baking soda and powder are fresh; expired leavening agents won’t work.
  • Uneven cooking: Flip pancakes only when bubbles form for an even cook.

Variations to Try

Feeling adventurous? Here are some variations to elevate your apple cinnamon pancakes:

  • Caramelized Banana Pancakes: Add sliced bananas to the batter for a tropical twist.
  • Nutty Apple Cinnamon Pancakes: Mix in chopped walnuts or pecans for added crunch.
  • Vegan Apple Pancakes: Substitute the egg with a flax egg and use non-dairy yogurt.
  • Spiced Pumpkin Pancakes: Add pumpkin purée and pumpkin spice for a seasonal favorite.

Storage and Make-Ahead Instructions

Want to enjoy your pancakes later? Here’s how to store and reheat:

  • Refrigerate: Store leftover pancakes in an airtight container for up to 3 days.
  • Freeze: Place pancakes in a single layer on a baking sheet, freeze until solid, then transfer to a freezer bag for up to 2 months.
  • Reheat: Warm pancakes in the microwave for 30 seconds or in a skillet over low heat, flipping until heated through.

FAQ About Apple and Cinnamon Pancakes

Here’s the scoop on common questions people have about this recipe:

  • Can I use different types of apples? Absolutely! Different apples offer varying levels of sweetness and tartness.
  • What can I use instead of eggs? A flax egg or applesauce can be a great substitute for a vegan option.
  • How do I make pancakes dairy-free? Use almond milk and a dairy-free yogurt or sour cream alternative.
  • Can I make the batter ahead of time? Yes, but it’s best to use it within a few hours for optimal fluffiness.
  • What toppings work best? Maple syrup, whipped cream, or even a dusting of powdered sugar are all delightful.
  • How can I make these pancakes healthier? Use whole wheat flour and reduce the sugar for a healthier twist.
  • Can I add chocolate chips? Definitely! Chocolate chips can be folded into the batter for a sweet surprise.
  • What if I don’t have baking powder? You can use a mix of baking soda and cream of tartar as a substitute.

Nutritional Insights and Dietary Adaptations

When made with wholesome ingredients, these apple cinnamon pancakes can be a nutritious breakfast option. They offer:

  • Fiber: Apples provide dietary fiber that aids digestion.
  • Protein: Greek yogurt adds a protein boost, keeping you full longer.
  • Vitamins: Apples are rich in Vitamin C and antioxidants, beneficial for overall health.
  • Customizable Nutrition: Adjust the flour type and sweeteners to fit dietary needs.

Equipment Recommendations

For the best pancake-making experience, having the right tools is essential:

  • Nonstick Skillet: Ensure easy flipping and even cooking.
  • Mixing Bowls: A set of various sizes helps with prep efficiency.
  • Measuring Cups and Spoons: Accurate measurements lead to consistent results.
  • Spatula: A flexible spatula makes it easy to flip pancakes without breaking them.

Serving Suggestions

Elevate your pancake experience with these serving ideas:

  • Maple Syrup: Classic and delicious, a drizzle of maple syrup is a must.
  • Whipped Cream: Add a dollop for a touch of indulgence.
  • Fresh Fruits: Top with berries or sliced bananas for added freshness.
  • Nuts: Sprinkle with toasted nuts for a satisfying crunch.

In conclusion, these apple and cinnamon pancakes are not just a recipe; they are an invitation to savor the beauty of autumn mornings. Whether enjoyed on a quiet Sunday or shared with loved ones, each bite is a reminder of the warmth and comfort that food brings. So grab your apron and start your culinary adventure today—your taste buds will thank you!

Apple and Cinnamon Pancakes

Prep Time 10 minutes
Cook Time 20 minutes
Total Time 30 minutes
Servings 4 servings
Calories 350
Delight in fluffy pancakes topped with warm apple cinnamon filling, perfect for a cozy breakfast.

Ingredients

Batter

  • 1 large egg
  • 2 tbsp salted butter, melted
  • 2 tbsp granulated sugar
  • 1 tsp vanilla extract
  • 2 tbsp greek yogurt or sour cream
  • 1 cup milk (regular or almond)
  • 1 1/4 cup all purpose flour or gluten free flour
  • 2 tsp ground cinnamon
  • 1/2 tsp baking powder
  • 1/2 tsp baking soda
  • 2 small apples, peeled and diced

Apple topping

  • 1 small apple, peeled and diced
  • 2 tbsp salted butter
  • 2 tbsp dark brown sugar
  • 1 tsp ground cinnamon
  • 1/2 tbsp cornstarch
  • 1/2 tbsp water

Instructions 

  • Make apple pie filling: cook diced apples with butter, brown sugar, and cinnamon until softened and thickened, then set aside.
  • Prepare pancake batter: mix egg, melted butter, sugar, vanilla, and yogurt; fold in flour, baking powder, baking soda, and diced apples; let rest 30 minutes.
  • Heat skillet over medium, add butter, then pour ⅓ cup batter; cook until bubbles form, flip, and cook until golden.
  • Repeat until all batter is used, stacking pancakes as cooked.
  • Top pancakes with apple filling and optional maple syrup before serving.

Notes

For extra flavor, add a sprinkle of powdered sugar or a dollop of whipped cream.
Calories: 350kcal
Cost: $12
Course: Breakfast
Cuisine: American
Keyword: Apple, Cinnamon, Pancakes