Author

Jack

Browsing

Embark on a Flavorful Journey with Grilled BBQ Boneless Chicken Thighs

Welcome to a culinary adventure that guarantees to tantalize your taste buds! Grilled BBQ boneless chicken thighs serve not just as a meal but as a passport to explore the rich tapestry of flavors that grilling brings to the table. In just a few simple steps, you can create a dish that’s juicy, smoky, and bursting with flavor—perfect for a summer barbecue or a cozy weeknight dinner. Let’s dive into this ultimate juicy recipe that promises to be a family favorite!

Why You’ll Love This Recipe

This dish isn’t just about taste; it’s about creating memories around the grill. Here are some compelling reasons why this recipe will become a staple in your kitchen:

  • Incredibly Juicy: Boneless, skinless chicken thighs are naturally more tender than breasts, ensuring a moist and flavorful result with every bite.
  • Quick & Easy: With no bones to slow you down, these thighs marinate quickly and cook in under 20 minutes, making them perfect for busy weeknights.
  • Smoky & Flavorful: The marinade and BBQ sauce create layers of delicious, smoky-sweet flavor that will have everyone coming back for seconds.
  • Versatile Cooking Methods: Whether you prefer grilling or baking, this recipe adapts beautifully to any cooking method, giving you options based on your preferences.
  • Great for Meal Prep: These chicken thighs are perfect for batch cooking. Make a larger batch and enjoy them throughout the week in salads, wraps, or on their own!

Ingredients Breakdown

Here’s what you’ll need to whip up this mouthwatering dish:

Main Ingredients

  • 2 lbs boneless, skinless chicken thighs: These are the stars of the show! Their rich flavor and tender texture make them perfect for grilling.
  • 2 tbsp olive oil: Helps in marinating the chicken while adding healthy fats.
  • 1 tbsp apple cider vinegar: This adds a touch of acidity that balances the richness of the chicken.
  • 1 tsp smoked paprika: Provides that smoky flavor that’s essential for BBQ.
  • 1 tsp garlic powder: Adds depth and aroma to the dish.
  • 1/2 tsp onion powder: Enhances the overall flavor profile.
  • 1/2 tsp salt: Adjust to taste to ensure the chicken is well-seasoned.
  • 1/4 tsp black pepper: Freshly ground for a kick of flavor.
  • 1 cup your favorite BBQ sauce: Use your go-to brand or homemade sauce for a personal touch!

Substitutions

  • For a different flavor profile, substitute apple cider vinegar with white wine vinegar or lemon juice.
  • Use honey instead of BBQ sauce for a sweet glaze.
  • For a spice kick, add cayenne pepper or chili powder to the marinade.
  • If you’re avoiding gluten, ensure your BBQ sauce is gluten-free.

Step-by-Step Instructions
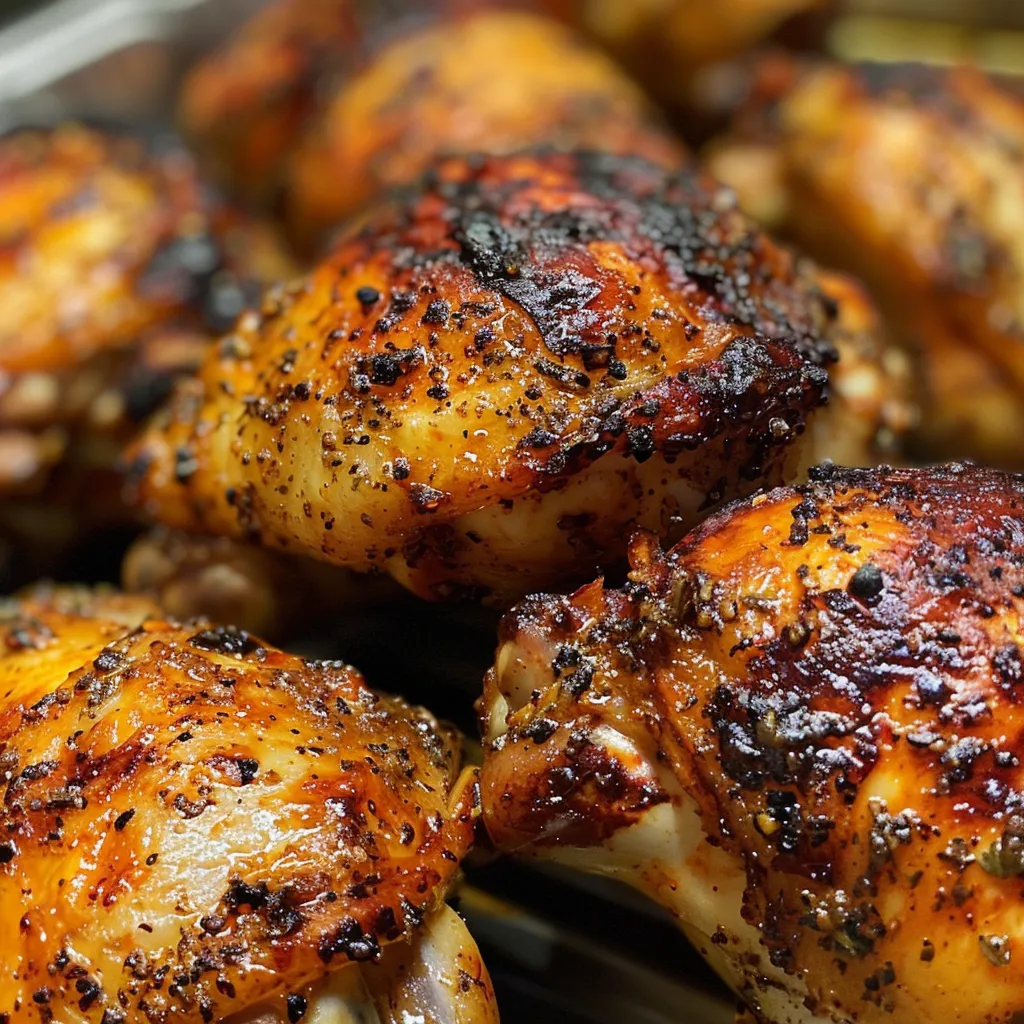
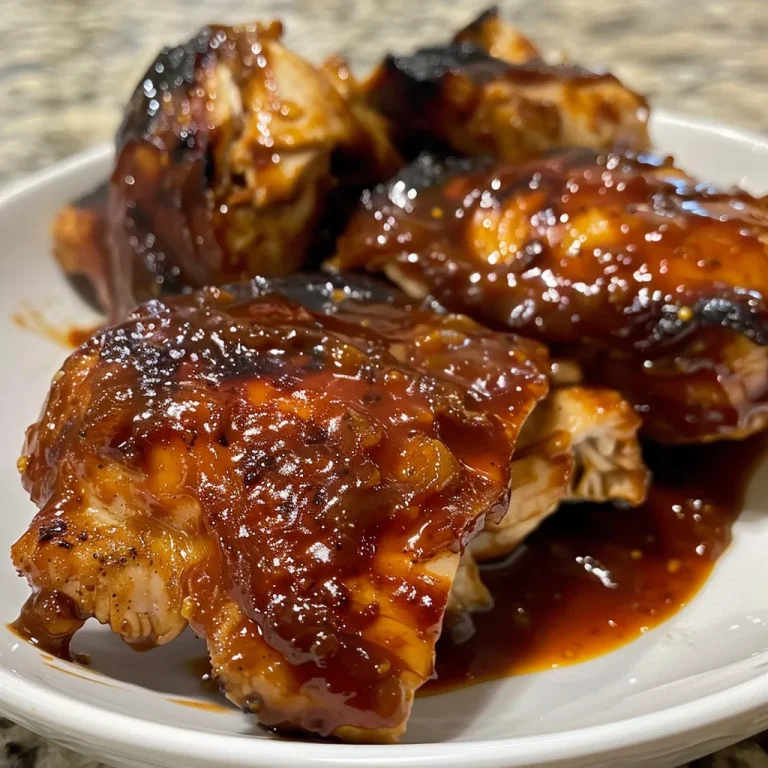
Detailed shot of succulent grilled chicken thighs, highlighting the juicy meat and seasoning.

Ready to grill? Let’s get started with these easy-to-follow steps:

  • Marinate the Chicken: In a large bowl, combine the chicken thighs, olive oil, apple cider vinegar, smoked paprika, garlic powder, onion powder, salt, and pepper. Mix until the chicken is evenly coated. Let it marinate for at least 15 minutes for the flavors to develop.
  • Preheat the Grill: Set your grill to medium-high heat (400-450°F) and create a two-zone cooking area with both direct and indirect heat.
  • Grill the Chicken: Place the chicken on the direct heat side of the grill. Cook for 5-7 minutes per side, until grill marks appear and the chicken is almost cooked through.
  • Apply the BBQ Sauce: Move the chicken to the indirect heat side. Brush with BBQ sauce, close the lid, and cook for 1-2 minutes. Flip, sauce the other side, and cook for another 1-2 minutes until the sauce is tacky.
  • Final Char: Move the chicken back to direct heat for 30 seconds per side for a final char. Ensure the internal temperature reaches 165°F. Transfer to a plate and let it rest for 5-10 minutes before serving.

Pro Tips for Perfect Grilled Chicken

To ensure your grilled BBQ boneless chicken thighs turn out perfectly every time, consider these expert tips:

  • Use an Instant-Read Thermometer: This tool is invaluable for checking the internal temperature of the chicken, ensuring it’s cooked perfectly.
  • Let the Chicken Rest: After grilling, allowing the chicken to rest helps the juices redistribute, resulting in moist meat.
  • Don’t Skip the Marinade: Even a short marination time adds flavor and tenderness; aim for at least 15-30 minutes.
  • Experiment with BBQ Sauces: Try different BBQ sauces to find your favorite flavor combination. From sweet to spicy, the options are limitless!
  • Keep the Grill Clean: Ensure your grill grates are clean to prevent sticking and achieve those beautiful grill marks.

Avoid These Common Mistakes

Even the best chefs make mistakes! Here are some common pitfalls and how to avoid them:

  • Overcooking the Chicken: Keep an eye on cooking times and use a thermometer to prevent dry, overcooked chicken.
  • Skipping the Resting Period: Cutting into the chicken too soon will result in lost juices. Always let it rest!
  • Using Cold Chicken: For even cooking, bring your chicken to room temperature before grilling.
  • Not Using Enough Sauce: Don’t be shy with the BBQ sauce! Generously apply for maximum flavor.

Delicious Variations

While this recipe is fantastic as is, feel free to get creative! Here are some variations to try:

  • Spicy BBQ Chicken: Add chopped jalapeños or cayenne pepper to the marinade for some heat.
  • Herb-Infused Chicken: Incorporate fresh herbs like rosemary or thyme into the marinade for an aromatic twist.
  • Honey Mustard Glaze: Substitute BBQ sauce with a honey mustard sauce for a tangy and sweet flavor.
  • Teriyaki Chicken Thighs: Use teriyaki sauce instead of BBQ for a delicious Asian-inspired twist.

Storage and Make-Ahead Instructions

Meal prepping? Here’s how to store your grilled chicken thighs:

  • Refrigerate: Store leftover chicken in an airtight container in the fridge for up to 4 days.
  • Freeze: For longer storage, freeze cooked chicken in a freezer-safe bag for up to 3 months.
  • Reheat: To reheat, thaw in the fridge overnight and warm in the oven or microwave until heated through.

FAQs

Curious about grilled BBQ boneless chicken thighs? Here are some frequently asked questions:

  • Can I use bone-in chicken thighs? Yes! Just adjust the cooking time, as bone-in chicken takes longer to cook.
  • What should I serve with BBQ chicken? Classic sides include coleslaw, cornbread, or grilled vegetables.
  • Can I marinate the chicken overnight? Absolutely! Marinating overnight intensifies the flavors.
  • Is this recipe suitable for meal prep? Yes! These thighs are perfect for meal prepping and taste great throughout the week.
  • How do I know when the chicken is done? Use an instant-read thermometer to check for an internal temperature of 165°F.
  • Can I bake instead of grill? Yes! Bake at 400°F for about 25-30 minutes, or until cooked through.
  • What is the best BBQ sauce to use? Use your favorite store-bought brand or a homemade recipe for a personal touch!
  • Can I add veggies to the grill? Yes! Bell peppers, zucchini, and corn make great accompaniments.

Nutritional Information and Dietary Adaptations

This dish is not only delicious but can be adapted to fit various dietary needs:

  • Low-Carb Option: Skip the BBQ sauce or use a low-sugar version to keep carbs in check.
  • Paleo-Friendly: Ensure your BBQ sauce is compliant or make your own using natural ingredients.
  • Gluten-Free: Use gluten-free BBQ sauce to keep it safe for those with gluten sensitivity.

Essential Equipment Recommendations

To make this recipe a breeze, here are some handy tools:

  • Grill: A reliable grill (gas or charcoal) is essential for achieving that perfect char.
  • Instant-Read Thermometer: This tool helps ensure your chicken is cooked perfectly every time.
  • Grill Tongs: Long tongs are necessary for flipping the chicken without losing those grill marks.
  • Mixing Bowl: A large bowl for marinating the chicken.

Serving Suggestions

Ready to serve? Here are some ideas to elevate your meal:

  • Side of Coleslaw: A refreshing coleslaw pairs perfectly with the smoky flavors of the chicken.
  • Grilled Corn on the Cob: Sweet corn brushed with butter complements the BBQ beautifully.
  • Garlic Bread: Toasted garlic bread is a delightful addition for a hearty meal.
  • Fresh Salad: A light salad with a tangy vinaigrette balances the richness of the chicken.

Conclusion

Grilled BBQ boneless chicken thighs are more than just a meal; they’re a celebration of flavor and a way to connect with friends and family around the grill. With this comprehensive guide, you have everything you need to create a dish that’s not only delicious but also steeped in storytelling and adventure. So fire up that grill, gather your loved ones, and embark on a culinary journey that promises to ignite your taste buds and create lasting memories. Happy grilling!

Grilled BBQ Boneless Chicken Thighs (The Ultimate Juicy Recipe)

Prep Time 15 minutes
Cook Time 15 minutes
Total Time 30 minutes
Servings 4 servings
Calories 350
Juicy, flavorful grilled chicken thighs coated in smoky spices and topped with BBQ sauce, perfect for a quick and satisfying meal.

Ingredients

Meat

  • 2 lbs boneless, skinless chicken thighs (about 8 thighs)
  • 2 tbsp olive oil
  • 1 tbsp apple cider vinegar
  • 1 tsp smoked paprika
  • 1 tsp garlic powder
  • 0.5 tsp onion powder
  • 0.5 tsp salt (or to taste)
  • 0.25 tsp black pepper (freshly ground)
  • 1 cup your favorite BBQ sauce

Instructions 

  • Combine chicken, olive oil, vinegar, spices, salt, and pepper. Marinate for 15 minutes.
  • Preheat grill to medium-high (400-450°F).
  • Grill chicken 5-7 minutes per side until nearly cooked.
  • Brush with BBQ sauce, cook 1-2 minutes per side until tacky.
  • Char for 30 seconds per side, check internal temp (165°F), rest 5-10 minutes before serving.

Notes

Ensure chicken reaches 165°F for safety.
Calories: 350kcal
Cost: $15
Course: Main Course
Cuisine: American
Keyword: BBQ, Chicken

Welcome to my culinary journey where we explore the irresistible flavors of oven baked chicken tenders. These delightful bites bring comfort and excitement to your dining table, making them a perfect choice for any occasion. Whether it’s a busy weeknight dinner or a weekend gathering, this chicken tender recipe will surely become a family favorite. So, grab your apron and let’s dive into the world of deliciousness!

Why You’ll Love This Recipe

  • Quick and Easy: Ready in under 30 minutes, these chicken tenders are perfect for busy evenings.
  • Healthier Option: Baked instead of fried, they offer a lighter alternative without sacrificing flavor.
  • Kid-Friendly: Everyone loves chicken tenders, especially kids, making it an ideal family meal.
  • Customizable Flavors: With various spices and seasonings, you can easily adjust the flavor profile to suit your taste.
  • Meal Prep Friendly: Make a batch ahead of time and store them for quick lunches or snacks throughout the week.

Ingredients Breakdown

Understanding the ingredients is crucial to making the best chicken tenders. Here’s what you’ll need:

  • 3/4 cup butter: I prefer using Kerrygold unsalted butter for its rich flavor.
  • 1 lb chicken tenders: Fresh or frozen, ensure they’re properly thawed if using frozen.
  • 1 tbsp paprika: Adds a warm, smoky flavor.
  • 2.5 tsp garlic powder: Enhances the overall taste with a hint of garlic.
  • 1.5 tsp onion powder: Complements the garlic for a savory depth.
  • 2 tbsp parsley: Fresh or dried, this herb brings a vibrant color and freshness.
  • 1 tsp oregano: Adds an earthy flavor that pairs well with chicken.
  • 1/2 tsp cayenne pepper: For those who enjoy a spicy kick.
  • 1.5 tsp brown sugar: Balances the spices and adds a touch of sweetness.
  • Pinch salt and pepper: Essential for seasoning to taste.

Substitutions for Ingredients

If you find yourself missing some ingredients, don’t worry! Here are some substitutions:

  • Butter: Can be replaced with olive oil or coconut oil for a dairy-free option.
  • Chicken: Chicken breasts can be cut into strips if tenders aren’t available.
  • Spices: Feel free to experiment with your favorite spices like cumin or chili powder.
  • Herbs: Dried herbs can be used instead of fresh, just reduce the amount by a third.

Pro Tips for Perfect Chicken Tenders

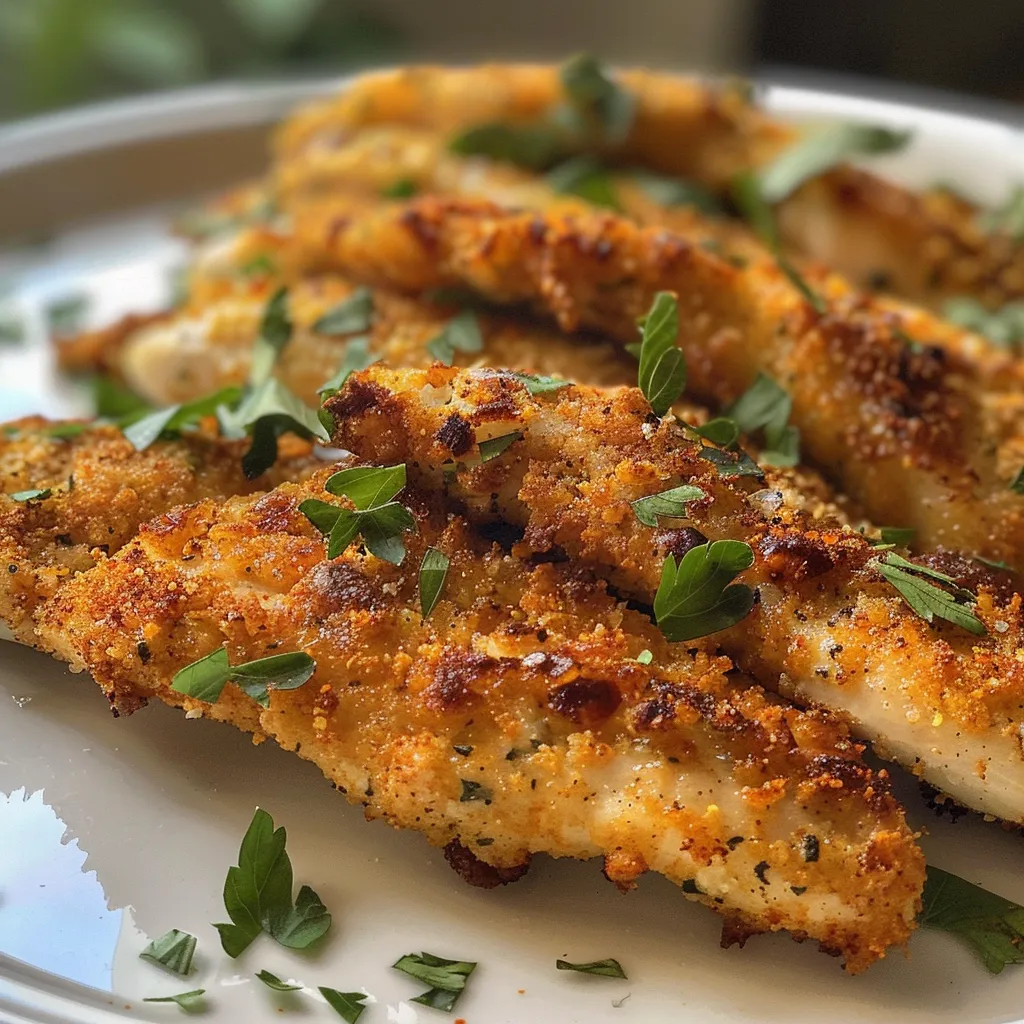
Delicious, glistening chicken tenders arranged neatly with a hint of herbs.

To elevate your chicken tender game, consider these expert tips:

  • Choose Quality Chicken: Opt for organic or free-range chicken for the best flavor and texture.
  • Marinate for Flavor: Letting the chicken marinate in spices for 30 minutes can enhance the flavor.
  • Preheat the Oven: Ensure your oven is fully preheated for even cooking.
  • Use a Baking Sheet: Line your baking sheet with parchment paper for easy cleanup and to prevent sticking.
  • Space Out Tenders: Arrange tenders so they are not touching; this ensures even baking.
  • Check Temperature: Cook chicken until it reaches an internal temperature of 165°F (75°C).
  • Let Rest: Allow chicken to rest for a few minutes post-baking for juicier tenders.
  • Serve with Dipping Sauces: Consider pairing these tenders with honey mustard or barbecue sauce for an extra flavor punch.

Common Mistakes and Troubleshooting

Even the best chefs make mistakes! Here are some common pitfalls and how to avoid them:

  • Too Much Butter: While butter adds flavor, excess can lead to soggy tenders. Stick to the recommended amount.
  • Underseasoning: Don’t be shy with your spices; they are crucial for flavor. Taste before baking!
  • Overcrowding the Pan: Baking too many tenders at once can lead to uneven cooking. Bake in batches if necessary.
  • Cutting Too Soon: Cutting into the chicken right after baking can release juices. Let them rest first!

Variations to Explore

Get creative with these variations to suit your palate:

  • Buffalo Style: Toss baked tenders in buffalo sauce for a spicy twist.
  • BBQ Glazed: Brush with your favorite barbecue sauce during the last few minutes of baking.
  • Herb-Crusted: Add fresh herbs like thyme or rosemary to the seasoning for a garden-fresh flavor.
  • Parmesan Crusted: Mix grated parmesan cheese into the breadcrumb coating for a cheesy bite.

Storage and Make-Ahead Instructions

Planning ahead? Here’s how to store your chicken tenders:

  • Refrigerator: Store cooked chicken tenders in an airtight container for up to 3-4 days.
  • Freezer: Freeze cooled tenders in a single layer before transferring to a freezer-safe bag. They can last up to 3 months.
  • Reheating: Reheat in the oven to maintain crispiness, about 10-15 minutes at 350°F (175°C).

FAQs About Oven Baked Chicken Tenders

Here are some questions I frequently get about making chicken tenders:

  • Can I use chicken breasts instead of tenders? Yes, just slice them into strips.
  • Is there a gluten-free option for this recipe? Use gluten-free breadcrumbs or omit them for a low-carb option.
  • How can I make these tenders spicier? Increase the cayenne pepper or add hot sauce to the marinade.
  • Can I bake these in an air fryer? Absolutely! Adjust cooking time to about 10-12 minutes at 400°F (200°C).
  • What sides pair well with chicken tenders? Consider serving with fries, salad, or coleslaw.
  • How do I know when they are done? Use a meat thermometer to check for an internal temperature of 165°F (75°C).
  • Can I marinate the chicken overnight? Yes, this can enhance the flavor significantly.
  • What dipping sauces do you recommend? Honey mustard, ranch, and barbecue sauce are popular choices.

Nutritional Tips and Dietary Adaptations

These chicken tenders are not just delicious but can be adapted to fit various dietary needs:

  • Low-Carb: Skip the breadcrumbs for a protein-rich option.
  • High-Protein: Serve with a protein-rich side like quinoa or Greek yogurt dip.
  • Dairy-Free: Use olive oil instead of butter for a dairy-free version.

Essential Equipment for Making Chicken Tenders

Having the right tools can make a big difference:

  • Baking Sheet: A sturdy, non-stick baking sheet is essential for even cooking.
  • Meat Thermometer: This ensures your chicken is cooked to perfection without drying out.
  • Mixing Bowls: For easy preparation of your seasoning and marinade.
  • Cooking Spray: To lightly coat your baking sheet for easier cleanup.

Serving Suggestions

To make your meal even more special, consider these serving ideas:

  • Fresh Salad: A crisp salad can balance the richness of the chicken.
  • Vegetable Sides: Roasted or steamed vegetables add color and nutrients.
  • Fun Dipping Station: Set up a variety of dipping sauces for a fun, interactive meal.

With this comprehensive guide, you’re now equipped to create the most delicious oven baked chicken tenders that will impress your family and friends. Remember, cooking is not just about the recipe; it’s about the stories you create and the memories you make. So, gather around the table, share the joy of food, and let these chicken tenders take you on a flavorful adventure!

Irresistible Oven Baked Chicken Tenders - Homefoodkitchen

Prep Time 10 minutes
Cook Time 25 minutes
Total Time 35 minutes
Servings 4 servings
Calories 350
Enjoy crispy, flavorful oven-baked chicken tenders with a perfect blend of spices and herbs, making for a delicious and healthier meal.

Ingredients

Dairy

  • 0.75 cup butter (Kerrygold unsalted)

Protein

  • 1 lb chicken tenders

Spices & Herbs

  • 1 tbsp paprika
  • 2.5 tsp garlic powder
  • 1.5 tsp onion powder
  • 2 tbsp parsley
  • 1 tsp oregano
  • 0.5 tsp cayenne pepper
  • 1.5 tsp brown sugar (light)
  • pinch pinch salt
  • pinch pinch pepper

Instructions 

  • Preheat oven to 400°F (200°C). Melt butter and toss chicken tenders in it.
  • Mix spices and herbs, then coat chicken tenders evenly.
  • Arrange tenders on a baking sheet lined with parchment paper.
  • Bake for 20-25 minutes until golden and cooked through.
  • Serve hot with your favorite sides.

Notes

For extra crispiness, broil for an additional 2 minutes at the end.
Calories: 350kcal
Cost: $15
Course: Main Course
Cuisine: American
Keyword: chicken tenders

Indulge in a Classic: Why Vanilla Pudding is the Ultimate Comfort Food

As a culinary explorer, I’ve traveled far and wide, tasting the world’s flavors, but there’s something about homemade vanilla pudding that tugs at my heartstrings. In this article, we’ll dive deep into the art of making the perfect vanilla pudding from scratch, a delightful dessert that transcends generations and brings comfort to any table. This creamy, dreamy pudding is not just a treat; it’s a nostalgic journey that carries the essence of home, warmth, and love. Join me as we whisk together memories in this simple yet exquisite recipe that will surely become a staple in your kitchen.

Why You’ll Love This Recipe

  • Timeless Tradition: Vanilla pudding is a classic dessert that evokes childhood memories for many, connecting generations through its creamy goodness.
  • Customizable Delight: With simple ingredient substitutions, you can make this pudding your own, whether you prefer it with chocolate, fruit, or even a splash of liqueur.
  • Quick and Easy: This recipe takes less than 30 minutes of active preparation time, making it perfect for busy weeknights or last-minute gatherings.
  • Healthier Option: By using natural sweeteners and whole ingredients, you can indulge without the guilt, adapting it to various dietary preferences.
  • Versatile Base: Use this vanilla pudding as a base for other desserts like trifles, parfaits, or even a filling for pastries, expanding its culinary potential.

Ingredients You’ll Need

To create this delightful vanilla pudding, gather the following ingredients:

  • 4 large egg yolks: The foundation of our pudding, providing richness and a silky texture.
  • ½ cup granulated sugar: Sweetness that balances the flavors—feel free to adjust based on your taste.
  • ½ cup brown sugar, packed: For added depth and a hint of caramel flavor.
  • ½ teaspoon kosher salt: Enhances the overall flavor profile.
  • 3 tablespoons cornstarch: This is our thickening agent that gives the pudding its creamy consistency.
  • 1 cup whole milk, cold: Essential for a smooth mixture.
  • 2 cups whole milk, warm: Adds to the cooking process without shocking the egg yolks.
  • 1 vanilla bean (or 1 tablespoon vanilla extract): For that unmistakable vanilla flavor that truly elevates the pudding.
  • 2 tablespoons butter: Adds richness and a luxurious mouthfeel.

Step-by-Step Directions

Side view of homemade vanilla pudding, showcasing its glossy texture and a hint of vanilla bean.

Let’s whisk our way to pudding perfection!

  • Step 1: Off the heat, add the egg yolks to a 3-quart saucepan along with granulated sugar, brown sugar, salt, and cornstarch.
  • Step 2: Pour in 1 cup of cold milk and beat with a hand mixer for about 1 minute until completely smooth.
  • Step 3: Heat the remaining 2 cups of milk. If using a vanilla bean, scrape the seeds into the milk and add the pod. Heat until just beginning to bubble, then remove from heat and discard the pod.
  • Step 4: With the mixer running on medium speed, slowly pour the hot milk into the egg mixture to temper the eggs, preventing them from scrambling.
  • Step 5: Place the saucepan over medium heat and whisk constantly, scraping corners and edges.
  • Step 6: Once the mixture bubbles and thickens, whisk vigorously for 15–45 seconds, ensuring it reaches the perfect consistency.
  • Step 7: Remove from heat and beat again with the mixer until the mixture is smooth and airy.
  • Step 8: Stir in the butter and vanilla extract if you’re not using a vanilla bean.
  • Step 9: Optional: Strain through a fine sieve for an ultra-smooth texture.
  • Step 10: Cover the pudding with plastic wrap pressed directly onto the surface to prevent a skin from forming.
  • Step 11: Refrigerate for at least 2 hours until chilled. Whisk briefly before serving.

Pro Tips for Perfect Pudding

  • Temperature Matters: Always use warm milk when adding to the egg yolks to prevent curdling.
  • Whisk Constantly: To avoid lumps, keep whisking as you heat the mixture; this will ensure a smooth pudding.
  • Strain for Smoothness: For an ultra-smooth texture, strain the pudding before chilling.
  • Flavor Enhancements: Consider adding a pinch of cinnamon or nutmeg for a warm, spiced touch.
  • Make It Chocolate: Add melted chocolate to the pudding mixture for a rich chocolate variation.
  • Fruits Galore: Fold in fresh berries or banana slices before serving for a fruity twist.
  • Nutty Surprise: Incorporate crushed nuts or a drizzle of caramel for added texture and flavor.
  • Serve It Right: Garnish with whipped cream and a sprinkle of chocolate shavings for an elegant presentation.

Common Mistakes and Troubleshooting

Even the best chefs can encounter issues. Here are some common mistakes to avoid:

  • Scrambled Eggs: If you pour hot milk too quickly into the egg mixture, you risk scrambling the eggs. Always temper gradually.
  • Too Runny: If your pudding doesn’t thicken, it may need more heat. Cook it longer while whisking continuously.
  • Skin Formation: Covering the pudding with plastic wrap is essential to prevent a skin from forming—don’t skip this step!
  • Overcooked Pudding: If the pudding thickens too much, remove it from heat immediately to avoid a grainy texture.

Delicious Variations

Once you master the basic vanilla pudding, the possibilities are endless! Here are a few variations to explore:

  • Chocolate Pudding: Replace half of the milk with melted chocolate for a decadent treat.
  • Fruit-Infused Pudding: Add pureed fruits like strawberries or mango to the mixture before chilling.
  • Matcha Green Tea Pudding: Mix in matcha powder for a vibrant green tea twist.
  • Coconut Cream Pudding: Substitute coconut milk for part of the milk for a tropical flavor.

How to Store Vanilla Pudding

Proper storage is key to maintaining the freshness of your pudding. Here’s how:

  • Refrigeration: Store in an airtight container in the fridge for up to 3-5 days.
  • Freezing: While not recommended for best texture, you can freeze pudding for up to 2 months. Thaw in the fridge before serving.
  • Make-Ahead Tips: Prepare the pudding a day in advance for a convenient dessert option. Just whisk before serving.

Frequently Asked Questions

  • Can I use 2% milk instead of whole milk?: Yes, but the pudding will be less creamy.
  • How can I prevent lumps?: Whisk constantly while heating and temper the eggs slowly.
  • Can I substitute granulated sugar with honey?: Yes, but adjust the quantity as honey is sweeter than sugar.
  • How long does vanilla pudding last?: It can be stored in the refrigerator for 3-5 days.
  • Can I make this vegan?: Yes! Use a plant-based milk and a thickener like arrowroot instead of egg yolks.
  • What’s the best way to reheat pudding?: Gently warm it on the stovetop, whisking continually to restore its creamy texture.
  • Can I add flavor extracts?: Absolutely! Almond or coconut extracts can introduce delightful new flavors.
  • How can I make it more visually appealing?: Top with fresh fruit, whipped cream, or chocolate curls for a beautiful presentation!

Nutritional Insights and Dietary Adaptations

This vanilla pudding can be adapted to fit various dietary needs:

  • Low-Sugar Option: Substitute with a natural sweetener like stevia or erythritol.
  • Gluten-Free: This recipe is naturally gluten-free, making it suitable for those with gluten sensitivities.
  • Dairy Alternatives: Use almond milk, oat milk, or coconut milk for lactose-free versions.

Essential Equipment for Pudding Perfection

To create this delightful dessert, you’ll need:

  • 3-quart saucepan: Ideal for cooking the pudding evenly.
  • Hand mixer: For achieving a smooth and airy texture.
  • Fine sieve: Optional, for straining the pudding for a silky finish.
  • Whisk: Essential for mixing and ensuring a lump-free pudding.

Serving Suggestions

Now that your vanilla pudding is ready, here’s how to serve it:

  • Chilled Delight: Serve in individual cups or bowls, topped with whipped cream.
  • Layered Treats: Create parfaits with layers of pudding, fresh fruit, and granola.
  • Garnish: Finish with a sprinkle of cinnamon or shaved chocolate for a touch of elegance.

Conclusion: A Sweet Journey Awaits

Vanilla pudding from scratch is more than just a dessert; it’s a journey through flavors, memories, and connections. Whether you enjoy it on its own, as part of a layered treat, or as a base for other desserts, this creamy delight is bound to bring smiles to your table. So grab your apron, gather your ingredients, and prepare to whisk together not just a pudding, but a sweet memory that will last a lifetime!

Vanilla Pudding from Scratch

Prep Time 10 minutes
Cook Time 15 minutes
Total Time 25 minutes
Servings 4 servings
Calories 250
This homemade vanilla pudding is rich, creamy, and easy to make from scratch, perfect for a comforting dessert.

Ingredients

Eggs

  • 4 large egg yolks
  • 0.5 cup granulated sugar
  • 0.5 cup brown sugar, packed ((or substitute granulated sugar))
  • 0.5 teaspoon kosher salt
  • 3 tablespoons cornstarch
  • 1 cup whole milk, cold
  • 2 cups whole milk, warm
  • 1 vanilla bean vanilla bean (or vanilla extract)
  • 2 tablespoons butter

Instructions 

  • In a saucepan, combine egg yolks, sugars, salt, and cornstarch.
  • Whisk in cold milk until smooth, then heat remaining milk with vanilla bean seeds and pod until bubbling.
  • Temper hot milk into egg mixture, then cook over medium heat, whisking until thickened.
  • Remove from heat, stir in butter and vanilla extract if using a vanilla bean.
  • Cover with plastic wrap, chill for at least 2 hours, then whisk before serving.

Notes

For an ultra-smooth texture, strain the pudding before chilling.
Calories: 250kcal
Cost: $10
Course: Dessert
Cuisine: American
Keyword: homemade, pudding, vanilla

Welcome to a culinary journey that transcends borders and brings comfort to the table! In this article, we’re diving into the heartwarming world of Chicken Vegetable Soup, a delightful blend of flavors and nostalgia that not only nourishes the body but also warms the soul. With every spoonful, you’re not just tasting a meal; you’re savoring a story, a connection, and a moment of joy. Let’s explore the beauty of this dish, why you’ll love it, and how to make it a staple in your kitchen.

Why You’ll Love This Recipe

This Chicken Vegetable Soup is more than just a recipe; it’s an experience. Here are five compelling reasons to make it:

  • Comfort in a Bowl: This soup encapsulates warmth and familiarity, making it perfect for chilly nights or when you need a little extra love.
  • Loaded with Nutrients: Packed with veggies and lean protein, it’s a healthy option that satisfies your hunger without compromising on flavor.
  • Quick and Easy: With simple ingredients and straightforward steps, you can have a delicious meal ready in under an hour.
  • Versatile and Customizable: Feel free to play with the ingredients—add your favorite vegetables, spices, or even grains like rice or pasta.
  • Meal Prep Friendly: This soup stores well, making it a fantastic option for meal prepping or enjoying leftovers throughout the week.

Ingredient Breakdown and Substitutions

Let’s take a closer look at the ingredients that make this soup a standout:

  • Olive oil: This is used for sautéing, but you can substitute with canola or avocado oil for a different flavor profile.
  • Chicken: We recommend using boneless, skinless chicken breasts or thighs for tenderness. If you’re short on time, rotisserie chicken is a great shortcut.
  • Vegetables: The classic trio of onion, carrots, and celery (also known as mirepoix) forms the base. Feel free to add bell peppers, green beans, or even zucchini.
  • Frozen mixed vegetables: Convenient and quick, but fresh vegetables can also be used for a more vibrant taste.
  • Spices: Dried herbs like parsley, basil, and oregano enhance the flavor. Fresh herbs can be used for a brighter taste—just add them at the end.

How to Make Chicken Vegetable Soup

Ready to dive into the cooking process? Follow these easy steps:

  1. Pat the chicken dry and season with salt and pepper. Heat olive oil in a 4.5-quart soup pot over medium-high heat. Add the chicken and sear on each side for about 3 minutes, until a golden crust develops.
  2. Remove the chicken and set it aside. Let it rest for 10 minutes, then dice or shred.
  3. Melt butter in the same pot over medium heat. Use a silicone spatula to “clean” the bottom and sides of the pot—this adds incredible flavor.
  4. Add the onions, carrots, and celery, and soften for 5 minutes until they start to become tender.
  5. Add the garlic, hot sauce, Worcestershire sauce, and seasonings. Stir to combine and cook for an additional minute.
  6. Pour in the chicken broth. Bring to a boil, then reduce to a simmer. Add the chicken back to the soup along with any juices from the plate and simmer uncovered for 15 minutes.
  7. Stir in the frozen vegetables. Cover partially and simmer for an additional 10-15 minutes until everything is heated through and the flavors meld perfectly.
  8. Serve hot and enjoy! Pair it with crusty bread or a fresh salad for a complete meal.

Pro Tips for the Perfect Soup

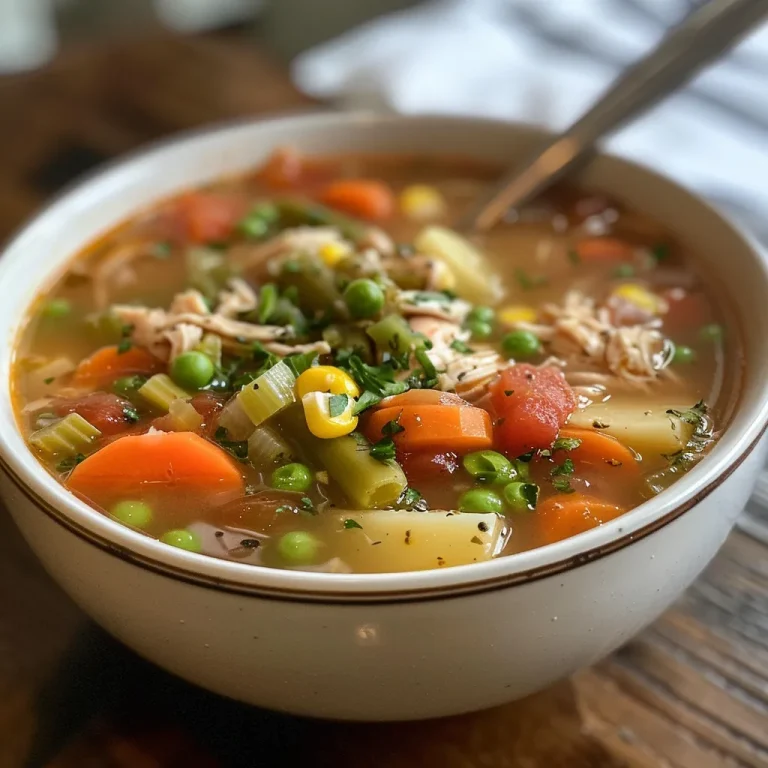
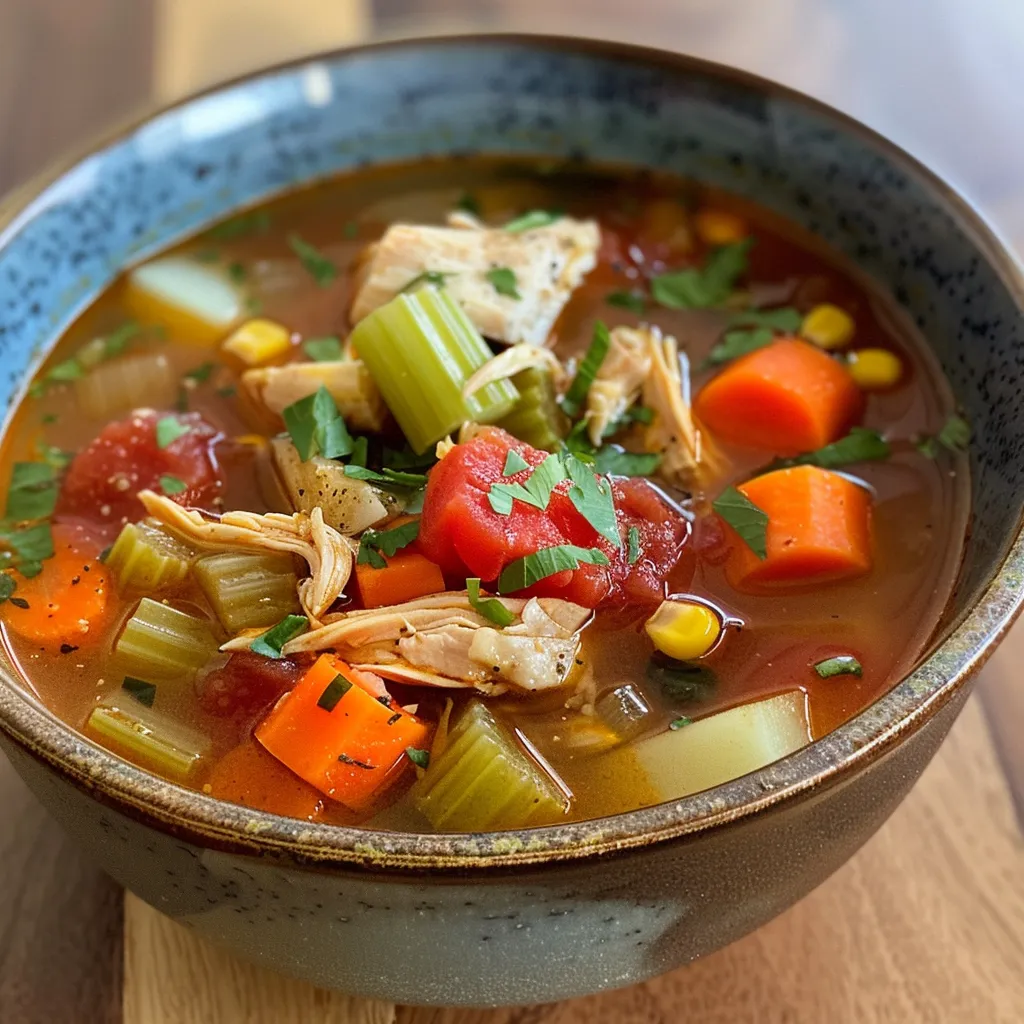
Delicious Chicken Vegetable Soup, highlighting chunks of chicken and mixed vegetables in a clear broth.

Want to elevate your soup game? Keep these expert insights in mind:

  • Use Fresh Herbs: For a burst of flavor, add fresh herbs like dill or thyme at the end of cooking.
  • Don’t Skip the Browning: Searing the chicken creates a depth of flavor that enhances the entire soup.
  • Adjust Seasoning: Taste as you go! Adjust salt, pepper, and spices according to your preference.
  • Experiment with Grains: Add cooked pasta, rice, or quinoa for a heartier soup.
  • Make it Creamy: For a richer texture, stir in a splash of cream or a dollop of sour cream before serving.
  • Store Properly: Let the soup cool completely before transferring it to airtight containers for storage.
  • Freeze for Later: This soup freezes beautifully! Portion it out and store it in freezer-safe containers.
  • Garnish for Visual Appeal: A sprinkle of fresh parsley or a squeeze of lemon juice adds a lovely finishing touch.

Common Mistakes and Troubleshooting

Even the best chefs can encounter hiccups. Here’s how to avoid common pitfalls:

  • Overcrowding the Pot: If you add too many ingredients at once, the soup may not cook evenly. Stick to the recipe proportions for best results.
  • Underseasoning: Don’t be shy with the salt and spices! Taste frequently to find that perfect balance.
  • Using Low-Quality Chicken: Opt for fresh, high-quality chicken for the best flavor. Frozen chicken may result in a less desirable texture.
  • Cooking Too Long: Be mindful to avoid overcooking the vegetables, as they can become mushy. Aim for tender but still vibrant ingredients.

Variations on a Classic

Feeling adventurous? Here are some delightful twists on the classic Chicken Vegetable Soup:

  • Asian-Inspired: Add ginger, soy sauce, and bok choy for a flavorful twist.
  • Spicy Southwest: Incorporate chili powder, corn, and black beans for a zesty kick.
  • Italian Style: Toss in diced tomatoes, Italian seasoning, and some spinach for a deliciously different flavor.
  • Creamy Chicken Vegetable Soup: Stir in heavy cream or coconut milk for a rich and creamy version.

Storage and Make-Ahead Instructions

This soup is perfect for meal prepping! Here’s how to store and reheat:

  • Refrigerate: Store in airtight containers in the fridge for up to 4 days.
  • Freeze: Freeze portions in freezer-safe containers for up to 3 months. Thaw overnight in the fridge before reheating.
  • Reheat: Gently reheat on the stove over low heat, adding a splash of broth if needed.

Comprehensive FAQ

If you have questions, I’ve got answers! Here are some frequently asked questions about Chicken Vegetable Soup:

  • Can I use frozen chicken? Yes, but make sure to adjust cooking time accordingly.
  • What can I add for extra protein? Consider adding beans, lentils, or chickpeas for a protein boost.
  • Can I use vegetable broth instead of chicken broth? Absolutely! This will make the soup vegetarian-friendly.
  • How can I make it gluten-free? Use gluten-free pasta or omit grains entirely.
  • Is this soup good for meal prep? Yes! It stores and reheats beautifully.
  • What’s the best way to add flavor? Experiment with different herbs and spices to customize your flavor.
  • Can I add more vegetables? Definitely! Feel free to add any veggies you love.
  • How do I thicken the soup? You can mash some of the vegetables or add a cornstarch slurry to thicken it up.

Nutritional Tips and Dietary Adaptations

This Chicken Vegetable Soup is not just comforting; it can also be tailored to fit various dietary needs:

  • Low-Carb: Skip the grains and add extra vegetables for a satisfying meal.
  • High-Protein: Incorporate beans or extra chicken for added protein without too many carbs.
  • Dairy-Free: Use coconut milk instead of cream for a rich, dairy-free alternative.
  • Low-Sodium: Opt for low-sodium broth and limit added salt for a heart-healthy option.

Equipment Recommendations

To make your cooking experience seamless, consider using the following equipment:

  • Soup Pot: A sturdy 4.5-quart soup pot is perfect for this recipe.
  • Silicone Spatula: Great for scraping down the pot and preventing scratches.
  • Chopping Board: A good cutting board is essential for prepping your veggies.
  • Sharp Knife: Invest in a quality chef’s knife for efficient chopping.

Serving Suggestions

Enhance your Chicken Vegetable Soup experience with these serving ideas:

  • Crusty Bread: Serve with a side of fresh, crusty bread for dipping.
  • Salad: A light green salad pairs perfectly for a balanced meal.
  • Cheese: A sprinkle of grated Parmesan cheese adds a lovely finishing touch.
  • Herbs: Garnish with fresh herbs like parsley or cilantro for added flavor.

As you embark on this culinary adventure, remember that cooking is not just about following a recipe; it’s about creating memories, sharing stories, and connecting with those you love. This Chicken Vegetable Soup is a canvas for your creativity—let it inspire you to explore flavors and ingredients from your own journey. So grab your apron, gather your ingredients, and let’s make some magic in the kitchen!

Chicken Vegetable Soup

Prep Time 15 minutes
Cook Time 30 minutes
Total Time 45 minutes
Servings 6 servings
Calories 250
A hearty and flavorful chicken vegetable soup perfect for a comforting meal.

Ingredients

Main ingredients

  • 1-2 tablespoons olive oil
  • 1.25 lbs chicken (see notes)
  • Salt/Pepper Salt and pepper
  • 2 tablespoons butter
  • 1 small yellow onion (diced)
  • ¾ cup carrots (diced)
  • 2 ribs celery (diced)
  • 3 cloves garlic (minced)
  • 1 teaspoon hot sauce
  • 1 teaspoon Worcestershire sauce
  • 7 cups chicken broth
  • 1.5 cups frozen mixed vegetables (corn/green beans)
  • 1 teaspoon dried parsley
  • ½ teaspoon dried basil
  • ½ teaspoon oregano
  • ½ teaspoon mustard powder
  • ¼ teaspoon pepper

Instructions 

  • Pat chicken dry, season with salt/pepper, and sear in olive oil until golden. Rest and dice/shred.
  • Melt butter, then cook onions, carrots, and celery for 5 minutes.
  • Add garlic, hot sauce, Worcestershire, and seasonings; stir well.
  • Pour in chicken broth, bring to boil, then simmer with chicken for 15 minutes.
  • Add frozen vegetables, cover partially, and simmer for 10-15 minutes. Serve hot.

Notes

Use fresh or frozen vegetables as preferred for best flavor.
Calories: 250kcal
Cost: $15
Course: Soup
Keyword: Chicken, Vegetables

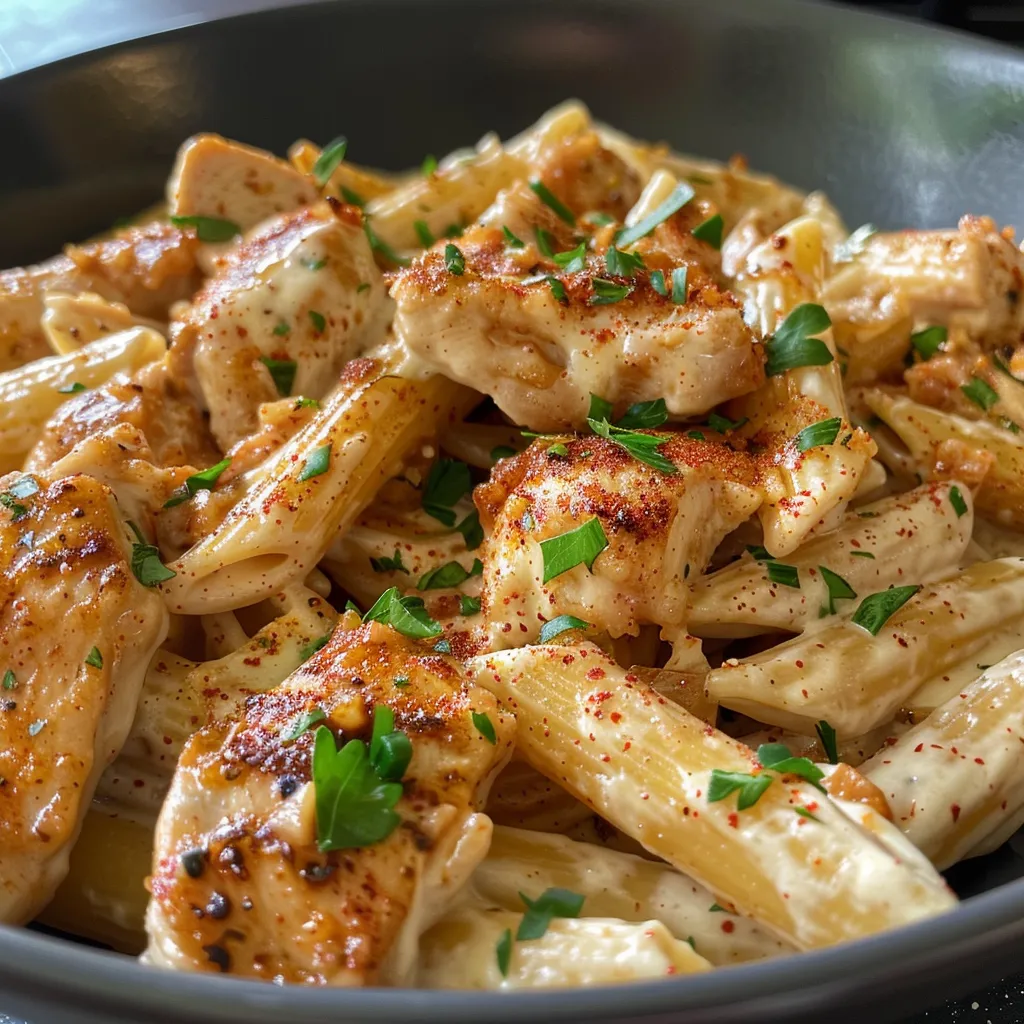
Embark on a Flavor Journey: Discovering Creamy Cajun Chicken Pasta

Welcome to a culinary adventure that takes your taste buds straight to the heart of Cajun cuisine! Today, we’re crafting a dish that’s not just a recipe but a journey—my Creamy Cajun Chicken Pasta. This dish is a vibrant blend of succulent chicken, bold spices, and a rich, creamy sauce that promises to tantalize your palate and warm your soul. Within these 1500+ words, I’ll share the secrets behind this flavorful creation, guide you through each step, and sprinkle in some insightful tips and variations to make this dish your own. Ready to dive in?

Why You’ll Love This Recipe

This isn’t just another pasta dish; it’s a celebration of flavor and comfort. Here are five compelling reasons why you’ll adore this Creamy Cajun Chicken Pasta:

  • Bold and Spicy Flavor: Infused with Cajun seasoning, this dish packs a punch that will awaken your taste buds and leave you craving more.
  • Creamy Comfort: The luscious cream sauce envelops the pasta and chicken, creating a satisfying meal that feels like a warm hug on a plate.
  • Quick and Easy: Perfect for busy weeknights, this recipe comes together in under 30 minutes without sacrificing flavor.
  • Customizable Creations: Whether you want to add shrimp, vegetables, or even a hint of lemon for brightness, this recipe allows you to tailor it to your tastes.
  • Impressive Presentation: Serve it up with a sprinkle of fresh parsley and a dash of red pepper flakes, and you’ll have a dish that looks as good as it tastes!

Ingredients: A Flavorful Breakdown

Let’s gather our ingredients and set the stage for this culinary masterpiece. Here’s everything you need to create the most delightful Cajun chicken pasta:

  • 2 boneless, skinless chicken breasts: Quick to cook and perfect for absorbing the bold flavors of Cajun spices.
  • 1 tablespoon olive oil: Essential for searing the chicken evenly and adding a mild flavor.
  • 1 tablespoon Cajun seasoning: The star of the show that brings the heat and flavor.
  • Salt and pepper, to taste: Simple but crucial for enhancing the overall flavor of the dish.
  • 12 oz penne, fettuccine, or spaghetti: Choose your favorite pasta shape that will hold onto the creamy sauce beautifully.
  • Salt for the pasta water: This is key to ensure your pasta is flavorful from the inside out.
  • 2 tablespoons unsalted butter: Adds richness and depth to your sauce.
  • 4 cloves garlic, minced: Fresh garlic provides aromatic depth that elevates the dish.
  • 1 teaspoon smoked paprika: For that extra smoky flavor that complements the Cajun seasoning.
  • 1 cup heavy cream: The secret to a velvety and rich sauce.
  • ½ cup chicken broth: Adds a savory base and helps thin out the sauce.
  • ¼ cup grated Parmesan cheese: For an umami kick that enhances the creaminess.
  • Fresh parsley, chopped (optional): A touch of color and freshness to finish.
  • Red pepper flakes: Optional, but if you love heat, sprinkle some on top!
  • Fresh lemon juice: A squeeze just before serving brightens the flavors beautifully.
  • Sautéed vegetables: Bell peppers, onions, or mushrooms can add nutritional value and flavor.
  • Shrimp: Swap out the chicken for shrimp for a delicious seafood variation.

Crafting Your Creamy Cajun Chicken Pasta: Step-by-Step Guide

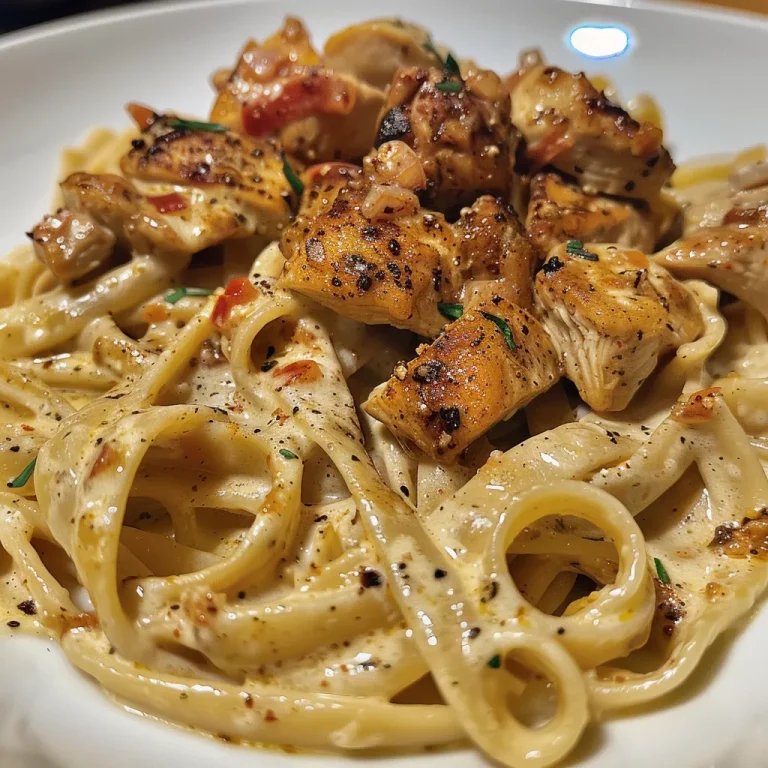
Appetizing dish of creamy Cajun chicken pasta showcasing its rich texture.

Now that we have our ingredients ready, it’s time to dive into the cooking process! Follow these simple steps to create your masterpiece:

Step 1: Prepare the Chicken

Start by slicing your chicken breasts into uniform strips, about 2 inches long. This ensures even cooking. Season them generously with Cajun seasoning, salt, and pepper.

Step 2: Cook the Chicken

In a large skillet, heat the olive oil over medium heat. Add the chicken strips and cook for about 5-7 minutes until golden brown and cooked through. Remove the chicken from the skillet and set aside.

Step 3: Sauté the Garlic

In the same skillet, add the butter. Once melted, add the minced garlic and sauté for about 30 seconds until fragrant. Be careful not to burn it!

Step 4: Make the Sauce

Stir in the remaining Cajun seasoning and smoked paprika. Pour in the heavy cream and chicken broth, mixing well. Bring the sauce to a gentle simmer.

Step 5: Combine It All

Add the cooked pasta and chicken back to the skillet. Toss everything together, allowing the pasta to soak up the creamy sauce. Add the grated Parmesan cheese and mix until melted and well incorporated. Adjust seasoning with salt and pepper as needed.

Expert Tips for Perfect Cajun Chicken Pasta

To elevate your dish and impress your guests (or yourself!), consider these expert tips:

  • Ingredient Quality: Use fresh ingredients whenever possible, especially for the garlic and herbs, for maximum flavor.
  • Customize the Spice Level: If you prefer a milder dish, reduce the amount of Cajun seasoning or add just a pinch of red pepper flakes.
  • Cooking Time: Avoid overcooking the chicken; it should be juicy and tender. Use a meat thermometer to ensure it reaches 165°F.
  • Let it Rest: After cooking, let the dish sit for a few minutes before serving to allow flavors to meld.
  • Use Pasta Water: Save a cup of pasta cooking water to add to the sauce, which helps it cling to the pasta better.
  • Fresh Herbs for Garnish: Always finish with fresh parsley or basil for a delightful aroma and visual appeal.
  • Make it Ahead: Prepare the sauce and chicken ahead of time, then just toss in the pasta when ready to serve.
  • Experiment with Cheeses: Try different cheeses like Gouda or a spicy Pepper Jack for a unique twist.

Recipe Variations: Spice Up Your Dish

Feeling adventurous? Here are some variations to explore:

  • Seafood Cajun Pasta: Replace the chicken with shrimp or a mix of seafood for a delightful twist.
  • Vegetarian Cajun Pasta: Swap the chicken for sautéed vegetables like zucchini, bell peppers, or mushrooms.
  • Cajun Chicken Alfredo: Add a bit of cream cheese to the sauce for an even creamier texture.
  • Cajun Chicken Pasta Bake: Transfer the completed dish to a baking dish, sprinkle with cheese, and bake until bubbly for a cheesy casserole version.

Storage and Make-Ahead Instructions

Planning ahead? Here’s how to store and prepare this dish for later:

  • Refrigeration: Store leftovers in an airtight container in the fridge for up to 3 days.
  • Freezing: You can freeze the cooked pasta and sauce separately for up to 2 months. Thaw overnight in the fridge before reheating.
  • Reheating: Warm the dish gently on the stove over low heat, adding a splash of chicken broth or cream to loosen the sauce as needed.

Frequently Asked Questions

Here are some common questions and answers about Creamy Cajun Chicken Pasta:

  • Can I use different pasta shapes? Yes! While penne and fettuccine work well, feel free to use your favorite pasta shape.
  • Is this dish spicy? The spice level can be adjusted by varying the amount of Cajun seasoning and red pepper flakes.
  • Can I make this dish vegetarian? Absolutely! Substitute the chicken with sautéed vegetables or tofu.
  • How can I make it gluten-free? Use gluten-free pasta and ensure all other ingredients are gluten-free.
  • Can I add more vegetables? Yes! Bell peppers, spinach, or mushrooms can be added for extra flavor and nutrition.
  • What can I serve with this dish? A simple side salad or garlic bread pairs wonderfully with this pasta.
  • How long does it take to make? The entire dish can be prepared in under 30 minutes, making it perfect for busy nights.
  • Can I use frozen chicken? Yes, but ensure it’s fully thawed before cooking for even results.

Nutritional Insights and Dietary Adaptations

For those watching their nutrition, here are some tips to adapt the recipe:

  • Healthier Chicken Options: Use skinless chicken thighs for added flavor while keeping it lean.
  • Low-Fat Cream Options: Substitute heavy cream with half-and-half or a plant-based cream for a lighter version.
  • Whole Grain Pasta: Opt for whole grain or legume-based pasta for added fiber and nutrients.

Equipment Recommendations

Gather the right tools to ensure a smooth cooking experience:

  • Large Skillet: A non-stick skillet is ideal for searing the chicken and making the sauce.
  • Pot for Boiling Pasta: Use a large pot to ensure even cooking of your pasta.
  • Meat Thermometer: Ensures your chicken is cooked perfectly without drying it out.

Serving Suggestions: Elevate Your Presentation

Finally, let’s talk about how to serve this delightful dish:

  • Garnish with Fresh Herbs: A sprinkle of chopped parsley or basil enhances flavor and adds color.
  • Pair with Wine: A glass of chilled Chardonnay or a light Pinot Noir complements the creamy sauce beautifully.
  • Accompany with Bread: Serve with crusty garlic bread or a fresh baguette for a complete meal experience.

As we wrap up this flavor-packed journey, I hope you feel inspired to create this Creamy Cajun Chicken Pasta in your own kitchen. Every bite tells a story, and every ingredient is a thread in the tapestry of flavors that defines Cajun cuisine. So gather your ingredients, put on your apron, and let’s make some culinary magic happen!

Creamy Cajun Chicken Pasta: A Bold, Flavor-Packed Dinner

Prep Time 10 minutes
Cook Time 20 minutes
Total Time 30 minutes
Servings 4 servings
Calories 650
This creamy Cajun chicken pasta combines bold spices, rich sauce, and tender chicken for a satisfying meal. Perfect for a quick, flavorful dinner.

Ingredients

Protein

  • 2 pieces boneless, skinless chicken breasts (Quick to cook and absorb Cajun seasoning)
  • 1 tablespoon olive oil (For cooking the chicken)
  • 1 tablespoon Cajun seasoning (Key flavor enhancer)
  • Salt and pepper to taste Salt and pepper (Seasoning for chicken)
  • 340 grams pasta (penne, fettuccine, or spaghetti) (Any long or short pasta)
  • 2 tablespoons unsalted butter (Base of the creamy sauce)
  • 4 cloves garlic, minced (Aromatic depth)
  • 1 tablespoon Cajun seasoning (Adds flavor to the sauce)
  • 1 teaspoon smoked paprika (Adds smoky depth)
  • 1 cup heavy cream (Creates velvety sauce)
  • 0.5 cup chicken broth (Adds savory base)
  • 0.25 cup grated Parmesan cheese (Adds umami flavor)
  • to taste Salt, pepper, red pepper flakes, lemon juice, optional vegetables, shrimp (For seasoning and garnish)

Instructions 

  • Season and cook the chicken in olive oil until browned, then set aside.
  • Cook pasta in salted boiling water until al dente, then drain.
  • In the same pan, melt butter and sauté garlic, Cajun seasoning, and smoked paprika.
  • Pour in heavy cream and chicken broth, simmer until slightly thickened, then stir in Parmesan cheese.
  • Add cooked chicken and pasta to the sauce, toss to combine, then finish with lemon juice and red pepper flakes.

Notes

For extra flavor, add sautéed vegetables or substitute shrimp for chicken.
Calories: 650kcal
Cost: $15
Course: Main Course
Cuisine: American
Keyword: Cajun, Chicken, Pasta

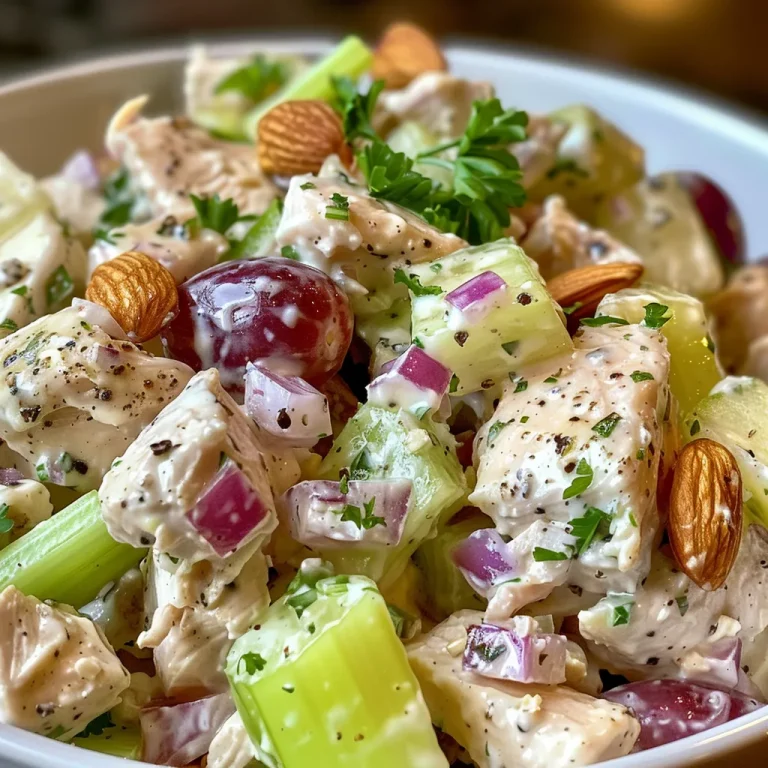
Embark on a Flavorful Journey with High Protein Greek Yogurt Chicken Salad

Are you ready to indulge in a culinary adventure that brings together health and taste? This High Protein Greek Yogurt Chicken Salad is not just a meal; it’s a celebration of flavors and textures that will transport your taste buds to the Mediterranean. Packed with protein and vibrant ingredients, this salad is the perfect companion for lunch or dinner, whether you’re at home or on the go. Let’s dive into the world of this delightful dish, where every bite tells a story of health, culture, and connection.

Why You’ll Love This Recipe

This salad isn’t just another recipe; it’s a treasure trove of benefits that will make you fall in love with healthy eating:

  • High Protein Content: Combining shredded chicken with Greek yogurt creates a protein-packed meal that keeps you full and satisfied.
  • Quick and Easy Preparation: Utilizing rotisserie chicken cuts down prep time, making it perfect for busy weeknights.
  • Versatile and Customizable: You can easily adapt the ingredients based on your preferences or what you have on hand.
  • Delicious Flavor Profile: The creaminess of Greek yogurt paired with the crunch of fresh veggies and the sweetness of fruit creates a symphony of flavors.
  • Healthy Alternative: This salad is a lighter option compared to traditional mayo-based salads, making it a guilt-free indulgence.

Ingredient Breakdown

Let’s explore the key ingredients that come together to create this salad, along with suggestions for substitutions:

  • Cooked Shredded Chicken: Use rotisserie chicken for convenience or poach your own for freshness.
  • Plain Greek Yogurt: Opt for full-fat or 2% for creaminess; non-fat can be used if you prefer a lower calorie option.
  • Dijon Mustard: Adds a tangy flavor; feel free to swap with honey mustard for a sweeter twist.
  • Chopped Celery: Provides crunch; cucumber can be an excellent alternative.
  • Diced Red Onion: Adds a sharp bite; green onions or shallots work well too.
  • Halved Grapes or Chopped Apples: Sweetness balances the flavors; dried cranberries or peaches can also be delicious.
  • Chopped Almonds or Pecans: For added crunch; walnuts or sunflower seeds are great substitutes.
  • Chopped Parsley: Fresh herbs brighten the salad; cilantro or dill can add a unique flair.

Step-by-Step Instructions

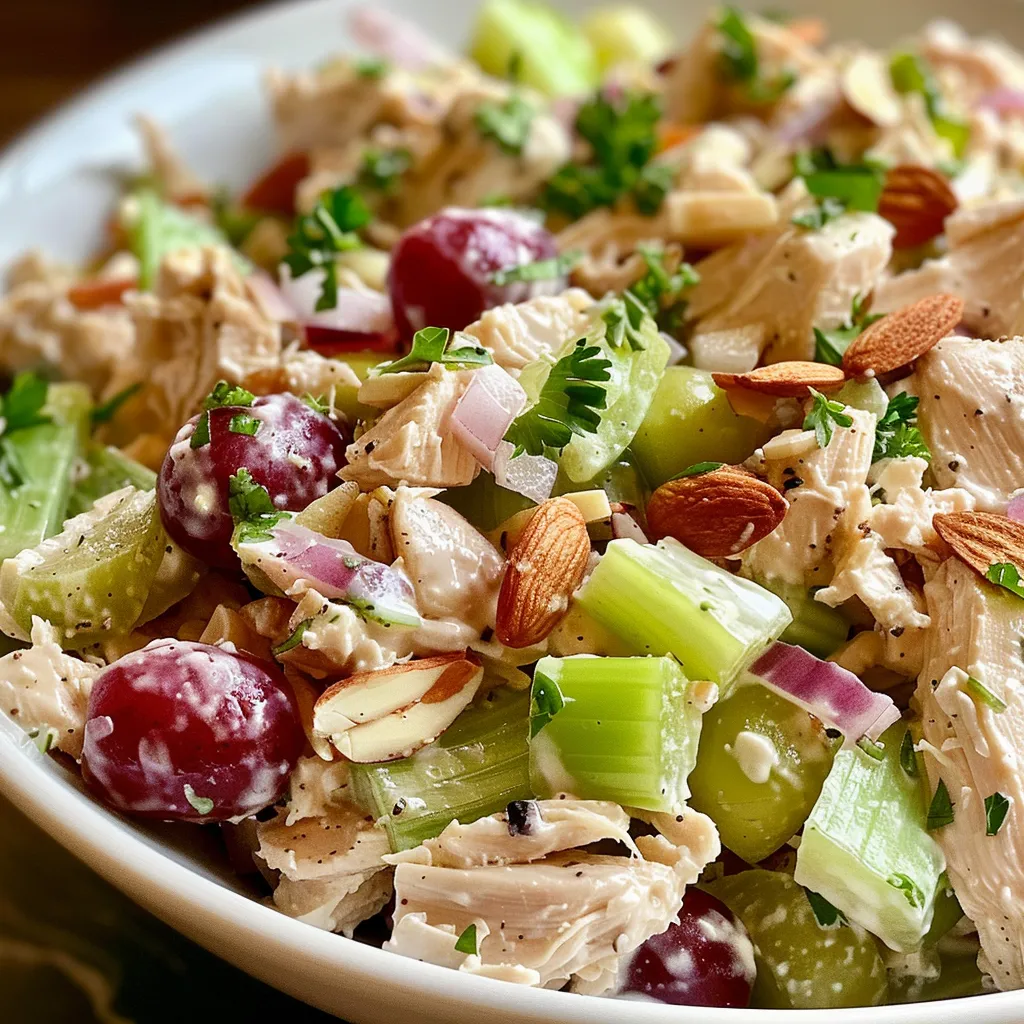
Colorful salad with shredded chicken, Greek yogurt, and crunchy almonds.

Ready to create this culinary masterpiece? Follow these simple steps:

  • Step 1: Shred the Chicken: Rotisserie chicken makes it effortless—pull the meat off while warm for easy shredding. If cooking from scratch, simmer chicken breasts in lightly salted water for 12–14 minutes or bake at 400°F for 15–18 minutes. Leave some larger chunks for texture.
  • Step 2: Chop the Veggies, Fruit & Nuts: Thinly slice the celery, finely dice the red onion, and halve the grapes or chop apples. Roughly chop your nuts to maintain some texture. The mix of crunch, sweetness, and bite is what makes this salad bright.
  • Step 3: Make the Creamy Yogurt Dressing: In a bowl, whisk Greek yogurt, Dijon, salt, pepper, and a squeeze of lemon. Aim for a thick, glossy consistency. Add garlic powder or fresh dill for an extra cozy touch.
  • Step 4: Fold Everything Together: Combine chicken, veggies, nuts, and fruit with the dressing. Gently fold to avoid mushiness. Taste and adjust seasoning with salt, pepper, or lemon.
  • Step 5: Chill: Let the salad rest in the fridge for 10 minutes to meld the flavors. Serve immediately if you’re hungry—it’ll still be delicious!

Pro Tips for the Best Chicken Salad

To elevate your salad, consider these expert insights:

  • Texture is Key: Ensure a mix of crunch and creaminess for a delightful mouthfeel.
  • Chill Before Serving: Allowing the salad to chill enhances the flavor integration.
  • Don’t Overmix: Gentle folding preserves the integrity of the chicken and veggies.
  • Season Gradually: Taste as you go to find the perfect balance of flavors.
  • Choose Quality Ingredients: Fresh, high-quality ingredients make a world of difference in taste.
  • Make It Ahead: This salad keeps well in the fridge, making it a perfect make-ahead option for lunches.
  • Experiment with Fruits: Try seasonal fruits for a twist—berries or citrus can be refreshing!
  • Herb Variations: Mix up the herbs based on your preference; fresh basil or mint can add a unique flavor.
  • Dress Sparingly: Start with less dressing; you can always add more if needed.
  • Lighten Up: For a lighter version, reduce the amount of yogurt and add more veggies.

Common Mistakes and Troubleshooting

Here are some pitfalls to avoid when making your chicken salad:

  • Overcooked Chicken: This can result in dry, tough pieces. Cook just until no longer pink.
  • Too Much Dressing: Avoid a soggy salad—start with a small amount and add to taste.
  • Neglecting Seasoning: A pinch of salt and pepper can elevate the entire dish.
  • Skipping Chilling Time: Serving too soon might lead to a lack of flavor depth.
  • Using Old Ingredients: Always check for freshness, especially with fruits and veggies.

Delicious Variations

Want to switch things up? Try these tasty variations:

  • Spicy Greek Yogurt Chicken Salad: Add a dash of cayenne or diced jalapeños for a kick.
  • Curried Chicken Salad: Mix in curry powder and raisins for a sweet and savory flavor.
  • Avocado Chicken Salad: Incorporate diced avocado for extra creaminess.
  • Mediterranean Chicken Salad: Add olives, sun-dried tomatoes, and feta cheese for a Mediterranean twist.

Storage and Make-Ahead Instructions

This salad is perfect for meal prep! Here’s how to store it:

  • Refrigeration: Store in an airtight container for up to 3 days. The flavors will continue to develop.
  • Make-Ahead: Prepare the salad a day in advance for best results.
  • Freezing: Not recommended, as the texture may change upon thawing.

Frequently Asked Questions

Got questions? Here are some common queries about this salad:

  • Can I use canned chicken?: Yes, canned chicken can be a quick alternative, but fresh is always best.
  • How long does the salad last?: It can last up to three days in the fridge when stored properly.
  • Can I make it vegan?: Substitute chicken with chickpeas or tofu and use a plant-based yogurt.
  • What can I serve with it?: It pairs wonderfully with whole-grain bread, pita, or a fresh garden salad.
  • Is it gluten-free?: Yes, all ingredients are naturally gluten-free if no gluten-containing additives are used.
  • Can I add more veggies?: Absolutely! Feel free to include bell peppers, carrots, or any favorite vegetables.
  • Is this salad suitable for kids?: Yes, the mild flavors and sweetness from fruit make it kid-friendly.
  • Can I use flavored yogurt?: Yes, but it may alter the overall flavor profile of the salad.

Nutrition Tips and Dietary Adaptations

This salad is not only delicious but also packed with nutrients:

  • Protein Boost: Greek yogurt adds protein, perfect for muscle recovery.
  • Fiber-Rich: The addition of fruits and veggies provides essential fiber.
  • Low-Calorie Option: Compared to traditional salads, this version is lighter in calories.
  • Healthy Fats: Nuts add healthy fats, promoting heart health.

Equipment Recommendations

Here’s what you’ll need to make this salad:

  • Sharp Knife: For efficient chopping of vegetables and fruits.
  • Mixing Bowls: A medium bowl for dressing and a large one for the salad mix.
  • Whisk: For combining the dressing ingredients smoothly.
  • Spatula or Wooden Spoon: For gentle mixing of the salad without breaking down the ingredients.

Serving Suggestions

Looking for ideas on how to serve your High Protein Greek Yogurt Chicken Salad? Here are some great options:

  • Over Greens: Serve atop a bed of mixed greens for an extra nutrient boost.
  • In a Wrap: Use whole grain or lettuce wraps for a portable meal.
  • With Crackers: Pair it with whole grain crackers for a crunchy contrast.
  • On Toast: Spread it on whole grain toast for a satisfying open-faced sandwich.

Conclusion: A Delicious Journey Awaits

Now that you have the complete guide to crafting the perfect High Protein Greek Yogurt Chicken Salad, it’s time to embark on your culinary adventure! With its vibrant flavors, wholesome ingredients, and endless customization options, this salad is sure to become a staple in your kitchen. So grab your apron, gather your ingredients, and let the cooking begin. Remember, every dish you create is a story waiting to be shared—enjoy the journey!

High Protein Greek Yogurt Chicken Salad

Prep Time 15 minutes
Cook Time 15 minutes
Total Time 30 minutes
Servings 4 servings
Calories 350
A nutritious and flavorful chicken salad packed with protein, fresh fruits, and crunchy nuts, perfect for a quick lunch or light dinner.

Ingredients

Protein

  • 2 cups cooked shredded chicken
  • 0.5 cup plain Greek yogurt
  • 0.5 Tbsp Dijon mustard
  • 0.5 cup chopped celery
  • 0.25 cup diced red onion
  • 0.5 cup halved grapes or chopped apple
  • 2 Tbsp chopped almonds or pecans
  • 2-3 Tbsp chopped parsley

Instructions 

  • Shred the cooked chicken, leaving some larger chunks for texture.
  • Chop the celery, red onion, grapes (or apple), and nuts; set aside.
  • Whisk Greek yogurt, Dijon mustard, salt, pepper, and lemon (if using) to make the dressing.
  • Gently fold chicken, chopped ingredients, and parsley into the dressing.
  • Chill for 10 minutes or serve immediately for a fresh taste.

Notes

Pat grapes or apples dry to prevent excess moisture in the salad.
Calories: 350kcal
Cost: $15
Course: Salad
Cuisine: American
Keyword: Chicken, Greek Yogurt, healthy

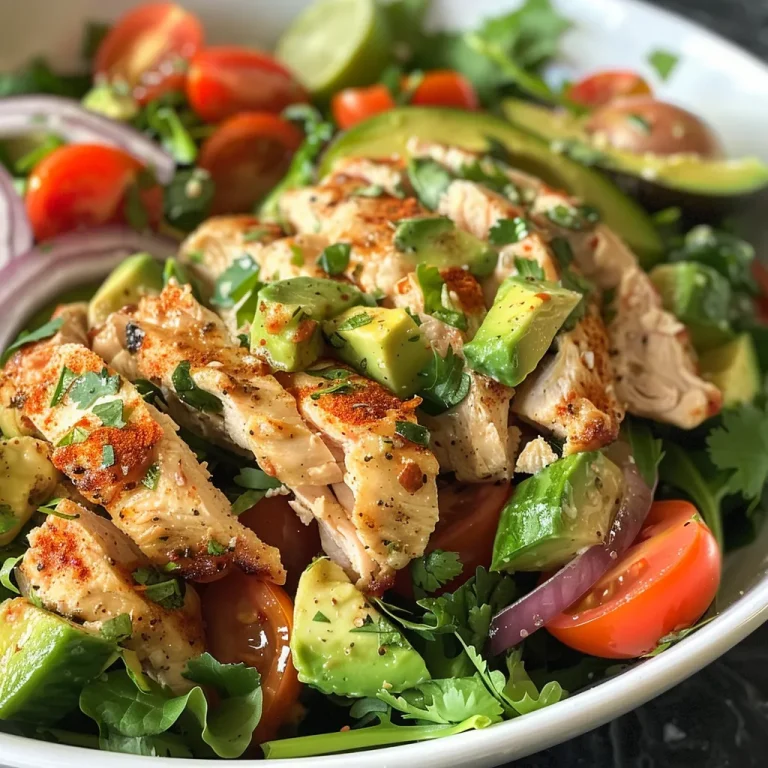
Welcome, fellow food explorers! Today, we’re diving into a vibrant plate of flavor that embodies the spirit of culinary adventure: the **Healthy Avocado Chicken Salad**. This dish is not just a salad; it’s a celebration of freshness, nutrition, and the rich stories behind each ingredient. Packed with wholesome components, this salad serves as your passport to a healthier lifestyle while tantalizing your taste buds. With the first bite, you’ll feel transported to sun-soaked markets filled with the aroma of ripe avocados and zesty lime. Let’s embark on this flavorful journey together!

Why You’ll Love This Recipe

Here are five irresistible reasons why this salad should be on your plate:

  • Nutrient-Rich Powerhouse: This salad is a nutritional goldmine, featuring lean chicken, creamy avocado, and a variety of colorful vegetables. It’s not just delicious; it’s packed with essential vitamins, minerals, and healthy fats.
  • Fresh and Flavorful: The vibrant combination of creamy avocado, zesty lime, and aromatic herbs creates a flavor explosion that makes every bite a delight. Say goodbye to boring meals!
  • Quick and Easy to Prepare: With minimal cooking required, this recipe is perfect for busy weeknights or a quick lunch. You can whip it up in under 30 minutes!
  • Versatile and Customizable: Whether you’re following a specific diet or just love to experiment with flavors, this salad can easily be tailored to your taste. Add your favorite ingredients or swap out any that don’t suit your palate.
  • Family-Friendly Delight: This avocado chicken salad is a hit with both adults and kids. It’s a fun and interactive meal that encourages everyone to dig in and enjoy!

Ingredients Breakdown

Let’s take a closer look at the ingredients that make this salad special. Here’s what you’ll need:

  • 2 large boneless, skinless chicken breasts: A lean source of protein that keeps the dish hearty.
  • 1 tablespoon olive oil (for cooking): Adds healthy fats and enhances flavor.
  • ½ teaspoon garlic powder: Infuses a delicious depth of flavor.
  • ½ teaspoon onion powder: Complements the garlic perfectly.
  • ½ teaspoon smoked paprika: Adds a subtle smokiness to the chicken.
  • ½ teaspoon salt: Essential for enhancing all the flavors.
  • ¼ teaspoon black pepper: Introduces a gentle kick.
  • 1 large ripe avocado, peeled, pitted, and diced: The star of the dish, bringing creaminess and healthy fats.
  • 1 cup cherry tomatoes, halved: Adds sweetness and color.
  • 1 cup cucumber, diced: Provides a refreshing crunch.
  • 1 small red onion, finely chopped: Brings a sharp flavor that balances the creaminess.
  • 1 cup mixed greens (e.g., spinach, arugula, or kale): A nutritious base filled with vitamins.
  • ¼ cup fresh cilantro, chopped: Adds a burst of freshness.
  • 1 tablespoon lime juice (freshly squeezed): Brightens up the flavors.
  • 2 tablespoons olive oil: For the dressing, ensuring a silky finish.
  • 1 teaspoon Dijon mustard: Adds a tangy depth to the dressing.
  • ½ teaspoon honey (optional, for sweetness): Balances out the acidity of the lime.
  • ¼ teaspoon garlic powder: Enhances the dressing’s flavor.
  • ¼ teaspoon salt: To taste in the dressing.
  • ¼ teaspoon black pepper: For an extra touch of flavor.

Step-by-Step Instructions

Ready to create your masterpiece? Follow these simple steps:

  • Cook the Chicken: In a skillet over medium heat, add the olive oil. Season the chicken breasts with garlic powder, onion powder, smoked paprika, salt, and pepper. Cook for about 6-7 minutes on each side until cooked through. Let it rest, then dice into bite-sized pieces.
  • Prepare the Salad Ingredients: While the chicken cools, chop the avocado, cherry tomatoes, cucumber, red onion, and cilantro. Toss them into a large salad bowl.
  • Make the Dressing: In a small bowl, whisk together olive oil, lime juice, Dijon mustard, honey, garlic powder, salt, and pepper until smooth.
  • Assemble the Salad: Add the diced chicken and mixed greens to the bowl with the vegetables. Drizzle the dressing over the top and gently toss everything together.
  • Serve: Enjoy immediately or refrigerate for later. This salad is best served fresh but can be stored in the fridge for up to 2 days.

Pro Tips for Perfection

Close-up image of a nutritious avocado chicken salad ready to be served.

Here are some expert insights to elevate your avocado chicken salad:

  • Use Fresh Ingredients: The quality of your ingredients directly impacts the flavor. Opt for ripe avocados and fresh herbs.
  • Don’t Overcook the Chicken: Use a meat thermometer to ensure your chicken reaches 165°F for perfect juiciness.
  • Add Texture: Include nuts like almonds or walnuts for a satisfying crunch.
  • Make Ahead: For meal prep, store the salad ingredients and dressing separately until ready to serve.
  • Experiment with Greens: Feel free to mix and match greens for different textures and flavors.
  • Customize the Dressing: Adjust the acidity with more lime or sweetness with honey according to your taste preference.
  • Garnish Creatively: Top with seeds, additional herbs, or even crumbled feta for added flavor.
  • Stay Seasonally Inspired: Incorporate seasonal vegetables to keep the salad fresh and exciting year-round.

Common Mistakes & Troubleshooting

Even the best chefs make mistakes! Here’s how to avoid common pitfalls:

  • Overripe Avocado: Choose avocados that yield slightly when pressed, indicating they’re ripe but not mushy.
  • Too Much Dressing: Start with a small amount of dressing; you can always add more, but you can’t take it away!
  • Dry Chicken: Ensure to marinate or season well to keep the chicken moist during cooking.
  • Too Many Ingredients: Keep it simple. Fewer, high-quality ingredients often yield the most delicious results.

Variations to Try

Mix things up with these exciting variations:

  • Spicy Avocado Chicken Salad: Add diced jalapeños or a dash of hot sauce for some heat.
  • Greek Style: Incorporate feta cheese, olives, and oregano for a Mediterranean twist.
  • Tropical Chicken Salad: Include diced mango and coconut for a refreshing tropical flavor.
  • Keto-Friendly Version: Replace honey with a sugar-free sweetener and serve over a bed of leafy greens.

Storage and Make-Ahead Instructions

This salad is perfect for meal prep! Here’s how to store it properly:

  • Refrigeration: Keep the salad in an airtight container. It will stay fresh for up to 2 days.
  • Make-Ahead: Prepare the chicken, chop the veggies, and mix the dressing ahead of time. Store separately until ready to assemble.

Frequently Asked Questions

Here are answers to some common questions about the Healthy Avocado Chicken Salad:

  • Can I use canned chicken? Yes, canned chicken works in a pinch. Just drain and rinse before using.
  • What if I don’t like cilantro? Feel free to substitute with parsley or omit it altogether.
  • Can I make this salad vegan? Yes! Substitute the chicken with chickpeas or tofu and use a plant-based dressing.
  • Is this salad gluten-free? Absolutely! All ingredients are naturally gluten-free.
  • How can I make it dairy-free? This recipe is dairy-free as is, no additional substitutions needed!
  • What’s the best way to ripe an avocado quickly? Place it in a brown paper bag with an apple or banana for 1-3 days.
  • Can I freeze this salad? It’s best enjoyed fresh, but you can freeze the chicken beforehand and thaw it to use later.
  • How do I know if an avocado is ripe? Gently squeeze; it should yield just slightly without being mushy.

Nutrition Tips and Dietary Adaptations

This salad is designed to be not only delicious but also nutritious:

  • Low-Carb Option: Perfect for those on ketogenic diets, focusing on healthy fats and protein.
  • High-Protein Meal: Loaded with chicken, this salad is ideal for muscle recovery.
  • Vegetable Boost: Feel free to add even more veggies like bell peppers or carrots for added nutrients.

Equipment Recommendations

For the best results, consider having these tools on hand:

  • Skillet: A good non-stick skillet for cooking the chicken.
  • Sharp Knife: Essential for chopping ingredients with precision.
  • Cutting Board: A durable cutting surface for food prep.
  • Mixing Bowl: For combining the salad ingredients and dressing.
  • Whisk: To mix the dressing smoothly.

Serving Suggestions

Want to make your meal even more exciting? Try these serving ideas:

  • Serve with Whole Grain Bread: Pair your salad with crusty bread or wraps for a satisfying meal.
  • Accompany with Soup: A warm bowl of soup complements the salad beautifully.
  • Add a Side of Fruit: Fresh fruit salad or sliced melons can provide a refreshing contrast.

Conclusion

And there you have it, my adventurous friends! The **Healthy Avocado Chicken Salad** is more than just a meal; it’s an experience that brings together flavors, colors, and stories from around the globe. Whether it’s a casual lunch or a dinner party star, this salad is sure to impress. So gather your ingredients, don your apron, and let the culinary journey begin. Remember, every dish tells a story, and with each bite, you’re not just tasting food—you’re savoring a piece of the world. Happy cooking!

Healthy Avocado Chicken Salad Recipe

Prep Time 15 minutes
Cook Time 20 minutes
Total Time 35 minutes
Servings 4 servings
Calories 450
A fresh and nutritious chicken salad featuring creamy avocado and crisp vegetables, perfect for a light lunch or dinner.

Ingredients

Protein

  • 2 pieces boneless, skinless chicken breasts
  • 1 tablespoon olive oil (for cooking)
  • ½ teaspoon garlic powder
  • ½ teaspoon onion powder
  • ½ teaspoon smoked paprika
  • ½ teaspoon salt
  • ¼ teaspoon black pepper

Vegetables & Fruits

  • 1 large ripe avocado, peeled, pitted, and diced
  • 1 cup cherry tomatoes, halved
  • 1 cup cucumber, diced
  • 1 small red onion, finely chopped
  • 1 cup mixed greens (e.g., spinach, arugula, or kale)
  • ¼ cup fresh cilantro, chopped
  • 1 tablespoon lime juice (freshly squeezed)
  • 2 tablespoons olive oil
  • 1 tablespoon lime juice (freshly squeezed)
  • 1 teaspoon Dijon mustard
  • ½ teaspoon honey (optional, for sweetness)
  • ¼ teaspoon garlic powder
  • ¼ teaspoon salt
  • ¼ teaspoon black pepper

Instructions 

  • Season chicken breasts with garlic powder, onion powder, smoked paprika, salt, and black pepper. Cook in olive oil until fully cooked, then let cool and dice.
  • In a large bowl, combine diced chicken, avocado, cherry tomatoes, cucumber, red onion, and mixed greens.
  • In a small bowl, whisk together lime juice, olive oil, Dijon mustard, honey (if using), garlic powder, salt, and black pepper to make the dressing.
  • Pour the dressing over the salad and toss gently to combine.
  • Garnish with chopped cilantro and serve immediately.

Notes

For extra flavor, marinate the chicken with spices before cooking.
Calories: 450kcal
Cost: $15
Course: Salad
Cuisine: American
Keyword: Avocado, Chicken, healthy

A Culinary Adventure Awaits

Welcome to a vibrant culinary journey where we explore the zesty charm of lemon garlic roasted chicken. This dish embodies the essence of home-cooked comfort while inviting adventurous flavors to the table. Picture the tantalizing aroma of roasted garlic mingling with the bright, invigorating scent of fresh lemons wafting through your kitchen. In just a few simple steps, you’ll create a meal that’s not only delicious but also deeply rooted in cultural significance.

The fusion of citrus and herbs transforms a simple chicken into a show-stopper for any gathering. Whether you’re planning a family dinner or a casual get-together with friends, this recipe is your ticket to a memorable meal. So, roll up your sleeves and let’s dive into the world of flavors, techniques, and stories that this recipe holds.

Why You’ll Love This Recipe

Here are just a few reasons this lemon garlic roasted chicken will become a staple in your kitchen:

  • Flavor explosion: The balance of tangy lemon and rich garlic creates a complex flavor profile that tantalizes the taste buds.
  • Perfect for any occasion: Whether it’s a weeknight dinner or a festive gathering, this dish adapts effortlessly.
  • Easy preparation: With minimal ingredients and straightforward steps, even novice cooks will find success.
  • Impressive presentation: The golden-brown skin and fresh herb garnish make for a stunning centerpiece on any table.
  • Health benefits: Packed with protein and the goodness of garlic and lemon, this dish contributes to a balanced diet.

Ingredient Breakdown

Let’s dive into the ingredients that make this dish sing:

  • Chicken: Opt for a whole chicken for an impressive presentation, or use parts like thighs and breasts for convenience.
  • Lemons: Freshly squeezed lemon juice elevates the flavor. If you have Meyer lemons, they add a lovely sweetness.
  • Garlic: Fresh garlic cloves are a must for the best flavor. Roasted garlic also works beautifully.
  • Extra virgin olive oil: This adds richness and helps to achieve that beautiful golden color.
  • Thyme or rosemary (optional): These herbs enhance the aromatics, but feel free to use your favorite herbs.
  • Salt and pepper (to taste): Essential for seasoning and enhancing the flavors.

Pro Tips for Perfect Lemon Garlic Roasted Chicken

Mouthwatering Lemon Garlic Roasted Chicken served on a rustic plate, showcasing the crispy skin.

To help you master this culinary delight, here are some expert tips:

  • Marination magic: Marinating the chicken in lemon juice and garlic for at least 30 minutes (or up to overnight) ensures maximum flavor infusion.
  • Oven temp matters: Start roasting at a high temperature (around 425°F) to crisp the skin, then lower it to cook through without drying out.
  • Use a meat thermometer: The internal temperature should reach 165°F for safe consumption; this ensures juicy meat without overcooking.
  • Baste for moisture: Basting the chicken with its own juices during roasting keeps it moist and flavorful.
  • Let it rest: Resting the chicken for 10-15 minutes before carving allows the juices to redistribute, resulting in tender meat.
  • Garnish generously: Fresh herbs and lemon wedges add a pop of color and freshness to your finished dish.
  • Experiment with flavors: Feel free to add spices like paprika or cumin to the marinade for an extra kick.
  • Pair wisely: Consider side dishes that complement the dish, such as roasted vegetables or a light salad.

Common Mistakes and Troubleshooting

Avoid these common pitfalls to ensure your chicken turns out perfectly every time:

  • Skipping the marinade: If you skip marinating, you might miss out on the full flavor potential of the dish.
  • Not preheating the oven: A hot oven is crucial for achieving that crispy skin; don’t skip this step!
  • Overcrowding the pan: Ensure there’s enough space around the chicken for even cooking; too tight, and it steams instead of roasts.
  • Using old garlic: Fresh garlic is key; older garlic can taste bitter and less aromatic.
  • Not checking the temperature: Always use a meat thermometer to avoid dry, overcooked chicken.

Delicious Variations to Try

Feel free to switch things up with these exciting variations:

  • Herb-infused butter: Mix softened butter with herbs to spread under the chicken skin for added richness.
  • Citrus blend: Combine lemons with oranges or limes for a more complex citrus flavor.
  • Spicy twist: Add red pepper flakes or cayenne pepper to the marinade for a spicy kick.
  • Garlic and herb paste: Blend garlic, herbs, and olive oil into a paste for a flavorful rub.

Storage and Make-Ahead Instructions

If you’re planning ahead, here’s how to store and prepare your chicken:

  • Refrigeration: Store leftover chicken in an airtight container for up to 4 days.
  • Freezing: For longer storage, freeze cooked chicken in freezer-safe bags for up to 3 months.
  • Reheating: Reheat in the oven at 350°F until warmed through; this helps retain moisture.
  • Make-ahead marination: Marinate the chicken the night before for even deeper flavor.

Comprehensive FAQ

Here are some common questions about this recipe:

  • Can I use chicken parts instead of a whole chicken? Yes, chicken thighs and breasts work perfectly in this recipe.
  • How do I know when the chicken is done? Use a meat thermometer; the internal temperature should be 165°F.
  • Can I make this recipe without garlic? While garlic adds flavor, you can omit it or use garlic powder as an alternative.
  • What sides pair well with lemon garlic chicken? Consider pairing with roasted vegetables, rice, or a fresh salad.
  • Can I use dried herbs instead of fresh? Yes, but use about one-third the amount of dried herbs compared to fresh.
  • How long should I marinate the chicken? At least 30 minutes, but overnight is best for maximum flavor.
  • Can I add vegetables to the roasting pan? Absolutely! Root vegetables like carrots and potatoes are fantastic additions.
  • Is this recipe gluten-free? Yes, all ingredients are naturally gluten-free.

Nutritional Tips and Dietary Adaptations

This recipe can be adapted to fit various dietary needs:

  • Low-carb diet: Enjoy the chicken with low-carb vegetables like zucchini or cauliflower.
  • Gluten-free: All ingredients are gluten-free, making this a safe choice.
  • Paleo-friendly: Use fresh, whole ingredients for a delicious paleo meal.
  • Whole30 compliant: This recipe fits perfectly into a Whole30 framework when paired with compliant sides.

Essential Equipment Recommendations

To make this recipe, you’ll need some basic kitchen tools:

  • Roasting pan: A sturdy roasting pan helps achieve even cooking and browning.
  • Meat thermometer: Essential for ensuring the chicken is safely cooked.
  • Mixing bowl: Use a large bowl for marinating the chicken.
  • Basting brush: Helpful for applying marinade or juices during roasting.

Serving Suggestions

When it’s time to serve, consider these delightful pairings:

  • Fresh salad: A light, citrusy salad pairs beautifully with the rich flavors of the chicken.
  • Roasted potatoes: Crispy potatoes seasoned with herbs complement the meal perfectly.
  • Grilled vegetables: Seasonal vegetables grilled to perfection add color and nutrition.
  • Crusty bread: Serve with warm, crusty bread to soak up the juices.

Time to Create Your Masterpiece!

Now that you’re armed with all the knowledge and tips to make a stunning lemon garlic roasted chicken, it’s time to get cooking! Remember, every dish you create tells a story—let this one be about flavor, warmth, and connection at your table. Happy cooking, and enjoy the delicious adventure ahead!

Best Lemon Garlic Roasted Chicken

Prep Time 40 minutes
Cook Time 1 hour
Total Time 1 hour 40 minutes
Servings 4 servings
Calories 250
This flavorful roasted chicken is infused with lemon and garlic, resulting in a juicy and crispy dish perfect for any occasion.

Ingredients

Main

  • 1.5 kg Chicken (Whole chicken)
  • 2 lemons Lemons (Juiced and sliced for serving)
  • 4 cloves Garlic (Minced)
  • 3 tablespoons Extra virgin olive oil
  • 1 teaspoon Thyme or rosemary (optional)
  • to taste Salt and pepper

Instructions 

  • Marinate the chicken with lemon juice, minced garlic, olive oil, salt, and pepper for at least 30 minutes.
  • Preheat the oven to a high temperature (around 220°C / 425°F).
  • Place the marinated chicken in a roasting pan and roast until skin is crispy and meat is cooked through, about 60 minutes.
  • Baste occasionally during roasting to keep it moist.
  • Let the chicken rest for 10-15 minutes before slicing. Serve with lemon wedges and fresh herbs.

Notes

For extra flavor, add fresh herbs during roasting or garnish before serving.
Calories: 250kcal
Cost: $15
Course: Main Course
Cuisine: International
Keyword: Chicken

Discover the Joy of Crockpot BBQ Chicken Thighs

Welcome to an adventure in flavor! If you’ve ever dreamt of tender, juicy chicken thighs bathed in rich, smoky BBQ sauce, you’re in for a treat. These crockpot BBQ chicken thighs are not just a dish; they’re a celebration of summer cookouts and cozy family dinners. Using the slow cooker, we’ll transform simple ingredients into a meal that transports you to sun-soaked days, where the aroma of grilling fills the air. Let’s dive into why this recipe is a must-try!

Why You’ll Love This Recipe

  • Effortless Cooking: Just toss the ingredients into your slow cooker, set it, and forget it. Perfect for busy weeknights!
  • Flavorful and Juicy: Bone-in chicken thighs deliver maximum flavor and retain moisture, ensuring every bite is succulent.
  • Versatile Serving Options: Serve on a bun for sandwiches, alongside rice, or atop a fresh salad.
  • Family-Friendly: This dish is a hit with both kids and adults, making it ideal for gatherings.
  • Make Ahead with Ease: Prepare in advance and store in the fridge or freezer for quick weeknight dinners.

Gather Your Ingredients

Before we get our hands dirty, let’s gather everything you need to create these mouthwatering BBQ chicken thighs.

  • 4-6 pieces chicken thighs (bone-in or boneless): Bone-in thighs add depth of flavor and moisture. Boneless is also an option for quicker cooking.
  • 1 cup BBQ sauce: Choose your favorite variety—sweet, spicy, or tangy—for personalized flavor.
  • 1 tablespoon smoked paprika: This adds a delightful smokiness. If you don’t have it, substitute with regular paprika and a pinch of liquid smoke.
  • 1 teaspoon garlic powder: For that savory depth that complements the BBQ sauce.
  • 1 teaspoon onion powder: Enhances the flavor profile without overwhelming the dish.
  • Salt and pepper: To taste, elevating the overall flavor.

Step-by-Step Instructions

Side view of flavorful crockpot BBQ chicken thighs on a wooden table.

Ready to cook? Here’s how to make these delectable crockpot BBQ chicken thighs:

  • Step 1: Season the Chicken – Pat the chicken thighs dry and season generously with salt, pepper, garlic powder, and onion powder.
  • Step 2: Layer Ingredients – Place the seasoned chicken thighs in the slow cooker. Pour the BBQ sauce over the chicken, ensuring they are well coated.
  • Step 3: Slow Cook – Cover and cook on low for 6-8 hours, or on high for 3-4 hours. The longer, the better for tender chicken!
  • Step 4: Finish with BBQ Sauce – About 30 minutes before serving, add an additional layer of BBQ sauce for rich flavor.
  • Step 5: Serve and Enjoy – Shred the chicken for pulled BBQ sandwiches, or serve the thighs whole with sides of your choice.

Pro Tips for Perfect BBQ Chicken

To elevate your cooking game, here are some expert insights:

  • Chicken Choice: For the best flavor and moisture, opt for bone-in, skin-on thighs. If you prefer skinless, keep an eye on cooking time.
  • BBQ Sauce Selection: Experiment with different BBQ sauces to find your favorite flavor profile—try a spicy sauce for a kick!
  • Layering Flavors: Consider adding sliced onions or bell peppers at the bottom of the slow cooker for added depth and sweetness.
  • Shredding Technique: Use two forks to shred the chicken easily. This technique helps incorporate more sauce.
  • Leftover Magic: Use leftovers in tacos, quesadillas, or salads for quick meals throughout the week.
  • Cooking Time Variability: Keep in mind that slow cooker times can vary based on the model and size, so check for doneness as you go.
  • Meal Prep: Prepare and freeze the chicken with BBQ sauce for a ready-to-cook meal on busy days.
  • Garnish: Add fresh herbs or slaw before serving for a pop of color and flavor.

Common Mistakes and Troubleshooting

Even the best of us can hit a snag! Here are some common pitfalls and how to avoid them:

  • Overcooking: Be mindful of cooking times. Overcooked chicken can become dry. Check for doneness at the lower end of the time range.
  • Too Much Sauce: If the sauce is too thick, add a splash of chicken broth or water to achieve your desired consistency.
  • Undercooked Chicken: Always ensure the internal temperature reaches 165°F (75°C) for safe consumption.
  • Flavor Imbalance: If the dish is too sweet, add a dash of vinegar or hot sauce for acidity and balance.

Variations to Try

Feeling adventurous? Here are some creative twists on the classic:

  • Asian-Inspired BBQ: Use hoisin sauce and sesame oil for an Asian twist. Serve with rice and steamed vegetables.
  • Spicy Chipotle BBQ: Mix chipotle peppers in adobo sauce with your BBQ sauce for a smoky, spicy kick.
  • Honey Mustard Glaze: Combine honey, mustard, and BBQ sauce for a sweet and tangy flavor profile.
  • Herbed Lemon Chicken: Replace BBQ sauce with lemon juice, olive oil, and fresh herbs for a lighter option.

Storage and Make-Ahead Instructions

Planning ahead? Here’s how to store and reheat your delicious chicken:

  • Refrigerator: Store leftovers in an airtight container for up to 4 days.
  • Freezer: Freeze cooked chicken in a sealed bag for up to 3 months. Thaw in the fridge before reheating.
  • Reheating: Reheat in the microwave or on the stovetop. Add a splash of BBQ sauce to maintain moisture.
  • Make-Ahead: Assemble everything in the slow cooker insert and refrigerate overnight. In the morning, just plug it in!

Frequently Asked Questions

Got questions? Here are answers to some common queries:

  • Can I use chicken breasts instead? Yes, but adjust the cooking time as breasts cook faster and can dry out.
  • What’s the best BBQ sauce? It’s subjective! Try different brands and flavors to find your favorite.
  • Can I cook this on high? Absolutely! Cooking on high will take about 3-4 hours.
  • How do I know when the chicken is done? Use a meat thermometer; chicken should reach 165°F (75°C).
  • Can I double the recipe? Yes, just make sure your slow cooker can accommodate the extra chicken without overcrowding.
  • What sides pair well? Coleslaw, cornbread, or roasted vegetables are excellent accompaniments.
  • Can I add vegetables? Sure! Try adding potatoes, carrots, or corn for a complete meal.
  • How do I make it spicier? Add cayenne pepper or hot sauce to the BBQ sauce before cooking.

Nutrition Tips and Dietary Adaptations

For those seeking healthier eating options or dietary adaptations:

  • Low-Carb: Serve over cauliflower rice or with a side of steamed vegetables.
  • Gluten-Free: Ensure your BBQ sauce is gluten-free, or make your own using gluten-free ingredients.
  • Low-Sodium: Use low-sodium chicken broth and BBQ sauce for a heart-healthy option.

Essential Equipment Recommendations

To create this mouthwatering dish, here’s what you’ll need:

  • Slow Cooker: A reliable slow cooker is the heart of this recipe. Choose one that has a locking lid for easy transport.
  • Meat Thermometer: Ensures your chicken is cooked to perfection every time.
  • Cutting Board: Useful for prepping your chicken and chopping any additional ingredients.
  • Mixing Bowls: Handy for mixing spices and sauces before adding them to the slow cooker.

Serving Suggestions

When it’s time to serve, consider these delicious options:

  • BBQ Chicken Sandwiches: Serve shredded chicken on a bun with extra BBQ sauce and pickles.
  • Over Rice: Spoon the chicken and sauce over steamed rice for a comforting meal.
  • With Salads: Serve alongside a fresh garden salad or coleslaw for a light meal.

With the right ingredients, tools, and a dash of culinary adventure, these crockpot BBQ chicken thighs will become a cherished recipe for years to come. Dive into the flavors, embrace the process, and most importantly, enjoy every bite! Remember, every dish tells a story—let this one be a delicious chapter in your culinary journey.

Crockpot BBQ Chicken Thighs

Prep Time 10 minutes
Cook Time 4 hours
Total Time 4 hours 10 minutes
Servings 4 servings
Calories 350
Enjoy tender and flavorful BBQ chicken thighs cooked effortlessly in the crockpot, perfect for a quick weeknight dinner or weekend gathering.

Ingredients

Chicken Thighs

  • 4-6 pieces chicken thighs (bone-in or boneless) (Bone-in adds flavor and retains moisture)
  • 1 cup BBQ sauce (Choose your favorite — sweet, spicy, or Kansas-style)
  • 1 tablespoon smoked paprika (Substitute with regular paprika + a pinch of liquid smoke if needed)
  • 1 teaspoon garlic powder
  • 1 teaspoon onion powder
  • to taste Salt and pepper

Instructions 

  • Season the chicken thighs with salt, pepper, paprika, garlic powder, and onion powder.
  • Place the seasoned chicken thighs into the crockpot.
  • Pour BBQ sauce over the chicken, ensuring they are well coated.
  • Cook on low for 6-8 hours or on high for 3-4 hours until chicken is tender and cooked through.
  • Shred the chicken slightly if desired and serve with additional BBQ sauce if preferred.

Notes

For extra flavor, marinate the chicken with spices overnight before cooking.
Calories: 350kcal
Cost: $15
Course: Main Course
Cuisine: American
Keyword: BBQ, Chicken

Discover the Refreshing World of Mint Lemonade

Welcome, fellow culinary explorers! Today, let’s embark on a flavor-packed journey to create the ultimate mint lemonade that brings sunny days and refreshing moments right to your pitcher. This delightful concoction is not only a thirst-quencher but also a celebration of summer’s vibrant flavors. With zesty lemons and aromatic mint leaves, this drink is your passport to a world of taste, making it a must-have for gatherings, picnics, or simply enjoying a quiet afternoon at home. Let’s dive into this mint lemonade recipe that captures the essence of sunny days and the joy of connection through food.

Why You’ll Love This Recipe

  • Refreshing Flavor: The combination of tart lemons and cool mint creates a refreshing drink perfect for hot days.
  • Customizable Sweetness: Adjust the sugar based on your preference, making it as sweet or tangy as you like.
  • Easy to Prepare: With just a few simple steps, you can whip up this delightful drink in no time!
  • Healthy Hydration: This lemonade is a healthier alternative to sugary sodas, keeping you refreshed without the guilt.
  • Perfect for Any Occasion: Whether you’re hosting a barbecue, a picnic, or just lounging at home, this mint lemonade is a crowd-pleaser.

Ingredients Breakdown

Let’s gather our ingredients! Here’s what you’ll need to create this delightful mint lemonade:

  • 1 cup freshly squeezed lemon juice (about 4-6 lemons): Fresh juice is key to achieving that vibrant lemon flavor.
  • 3/4 cup granulated sugar: Feel free to adjust this based on your sweetness preference.
  • 4 cups cold water: Essential for diluting the mixture and creating that refreshing drink.
  • 1/2 cup mint leaves: Fresh mint brings an aromatic quality that elevates the drink.
  • Ice cubes: For chilling your lemonade to perfection.
  • Lemon slices for garnish: A beautiful and zesty garnish to enhance the presentation.

Step-by-Step Preparation

Side angle of a vibrant mint lemonade in a clear glass, surrounded by ingredients.

Follow these simple steps to create your mint lemonade:

  • In your pitcher, combine the freshly squeezed lemon juice and sugar. Stir until the sugar fully dissolves.
  • Add the mint leaves to the pitcher. Use the back of a spoon to gently muddle the mint, releasing its aromatic oils.
  • Pour in the cold water and stir all the ingredients together until well combined.
  • Add ice cubes to the pitcher and stir again to chill the lemonade.
  • Serve the mint lemonade in glasses garnished with extra mint leaves and slices of lemon.

Pro Tips for Perfect Mint Lemonade

  • Fresh Ingredients: Always use fresh mint and lemons for the best flavor.
  • Chill Your Ingredients: For an extra refreshing drink, chill your water and glasses in advance.
  • Adjust Sweetness: Start with less sugar and add more to taste, ensuring it aligns with your sweetness preference.
  • Muddle Gently: When muddling the mint, be gentle to avoid bitterness from the leaves.
  • Experiment with Flavors: Try adding other herbs like basil or fruits like strawberries for unique twists.
  • Make it Sparkling: Substitute some water with sparkling water for a fizzy version of this mint lemonade.
  • Storage: Store leftover lemonade in the fridge for up to 3 days, but enjoy it fresh for the best taste.
  • Presentation Matters: Serve in clear glasses to showcase the beautiful colors of your drink!

Common Mistakes and Troubleshooting

Even the best chefs make mistakes! Here’s how to avoid common pitfalls:

  • **Too Sweet or Too Sour**: If your lemonade is too sweet, add more lemon juice; if it’s too sour, stir in a little more sugar.
  • **Mint Overpowering**: If the mint flavor is too strong, add more water to dilute it.
  • **Cloudy Lemonade**: This can happen if the pulp from the lemons is included; use a fine strainer for a clearer drink.

Variations to Explore

Get creative! Here are some fun variations of this mint lemonade recipe:

  • Berry Mint Lemonade: Add muddled strawberries or raspberries for a fruity twist.
  • Spicy Mint Lemonade: Incorporate a few slices of jalapeño for a spicy kick.
  • Coconut Mint Lemonade: Use coconut water instead of regular water for a tropical flavor.
  • Lavender Mint Lemonade: Infuse the lemonade with dried lavender for a floral touch.

Storage and Make-Ahead Instructions

Planning ahead? Here’s how to store your mint lemonade:

  • Refrigerator Storage: Keep it in an airtight container in the fridge for up to 3 days.
  • Freezing: Pour into ice cube trays and freeze for a refreshing addition to future drinks.
  • Make-Ahead: Mix the lemon juice and sugar the night before; add water and mint in the morning.

Frequently Asked Questions

Curious minds want to know! Here are some FAQs about mint lemonade:

  • Can I use bottled lemon juice? While fresh is best, bottled lemon juice works in a pinch but may lack depth of flavor.
  • How long can I store mint lemonade? Fresh mint lemonade can last in the fridge for about 3 days.
  • Is mint lemonade healthy? Yes! It’s a refreshing alternative to sugary drinks and can be made with less sugar.
  • Can I freeze mint lemonade? Yes! Freeze it in ice cube trays for refreshing lemonade ice cubes.
  • What if I don’t have fresh mint? You can use mint extract, but reduce the amount since it’s more concentrated.
  • Can I make this mint lemonade alcoholic? Absolutely! Add rum or vodka for a delightful cocktail.
  • Can I use other herbs? Yes! Try basil or thyme for unique flavor profiles.
  • What’s the best way to serve mint lemonade? Serve it chilled in clear glasses garnished with mint leaves and lemon slices for a beautiful presentation.

Nutrition Tips and Dietary Adaptations

This mint lemonade can easily cater to various dietary needs:

  • Low-Calorie Option: Use a sugar substitute like stevia or erythritol to lower calories.
  • Vegan-Friendly: This recipe is naturally vegan, as it contains no animal products.
  • Gluten-Free: Mint lemonade is gluten-free, making it suitable for all diets.

Equipment Recommendations

Here’s what you’ll need to create this refreshing drink:

  • Pitcher: A large pitcher is essential for mixing and serving.
  • Juicer: A manual or electric juicer helps extract the most juice from your lemons.
  • Wooden Spoon: Perfect for muddling mint leaves and stirring the mixture.
  • Measuring Cups: Accurate measurements ensure the correct balance of flavors.

Serving Suggestions

Now that you’ve made your mint lemonade, let’s talk about how to serve it:

  • Chill Your Glasses: Serve in chilled glasses for an extra refreshing experience.
  • Garnish Creatively: Use lemon slices, fresh mint sprigs, or even edible flowers for a pop of color.
  • Pair with Snacks: This lemonade pairs beautifully with light snacks like fresh fruits, salads, or grilled items.

Conclusion

There you have it—a comprehensive guide to creating your very own mint lemonade! With its refreshing flavor, health benefits, and endless variations, this drink is sure to become a summer staple in your home. So gather your ingredients, invite some friends over, and enjoy this delightful taste of summer. Remember, every sip carries a story, just like every dish we create. Cheers to culinary adventures and the joy of sharing food with loved ones!

Mint Lemonade Recipe

Prep Time 10 minutes
Total Time 10 minutes
Servings 4 glasses
Calories 120
A refreshing and cooling mint lemonade perfect for hot days, combining tangy lemon juice with fresh mint leaves.

Ingredients

Main

  • 0.25 cup freshly squeezed lemon juice (about 4-6 lemons)
  • 0.75 cup granulated sugar (adjust to taste)
  • 4 cups cold water
  • 0.5 cup mint leaves (more for garnish)
  • ice cubes Ice cubes
  • Lemon slices Lemon slices for garnish

Instructions 

  • Combine lemon juice and sugar in a pitcher and stir until dissolved.
  • Add mint leaves and gently muddle to release aroma.
  • Pour in cold water and mix well.
  • Add ice cubes and stir to chill.
  • Serve in glasses garnished with mint and lemon slices.

Notes

Adjust sweetness by adding more or less sugar as desired.
Calories: 120kcal
Cost: $10
Course: Beverage
Cuisine: International
Keyword: lemon, Mint